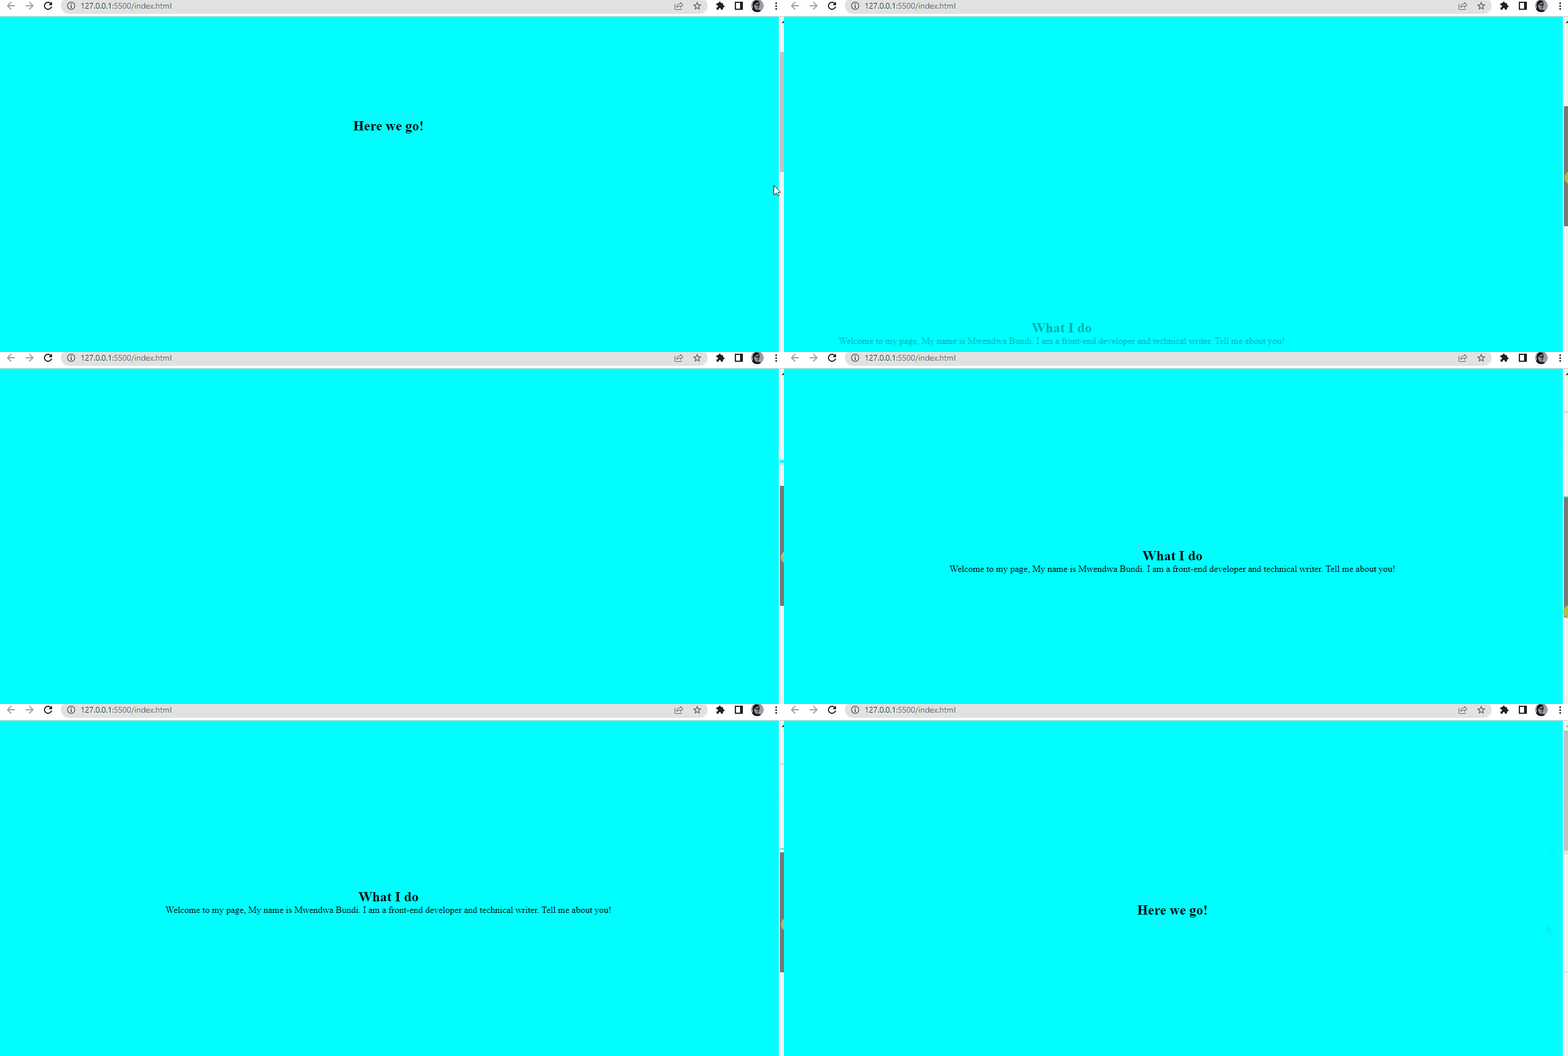
Sometimes, when you visit a website, you'll notice that certain elements or a particular section gets revealed dynamically as you scroll.
It's like the contents of that particular section weren't available to view until you scrolled into the section – but now, because you're there, the website decides to reveal these contents.
Sometimes this might happen in a matter of milliseconds, and other times it might load lazily. All these phenomena are made possible by JavaScript's Intersection Observer API.
What is the Intersection Observer API?
The Intersection Observer API is a browser API which watches for changes that intersect with the viewport and then executes a callback function in the code.
It works by allowing you to define an observer function that runs when the target element intersects another element or the browser's default viewport.
The intersection observer API lets code register a call back function that is executed whenever an element they wish to monitor enters or exits another element or the amount by which the two intersect changes by a requested amount. - MDN web docs.
Pre-requisites:
- Basic knowledge of HTML, CSS and JavaScript. You've probably built a simple project with them before.
- An IDE, preferably VS Code.
- A browser, like Chrome.
In this article, you'll learn how to build a simple web page with HTML, CSS and JavaScript. Then you'll use the Intersection Observer API to implement a simple scroll animation.
How the Intersection Observer API Works
So you might be wondering, what happens when you define an observer call-back function? What happens is that you pass in an entries parameter as an argument which then executes intersection command once the user scrolls to the target element.
For example:
Const observer = new IntersectionObserver(entries => {
    // your set of conditions goes here
})
Once you have defined your observer function, you are thus able to set out the conditions you wish to be met once the intersection happens.
To make such changes, there are different options that the API allows you to pass into your call-back function. These options are the second parameters you can pass in as arguments. They are:
Threshold
The threshold option ranges from 0-1, and you can specify the threshold to mean the required percentage of the target element that should be on sight for isIntersecting to be true. Remember that the default is 0, so that when the target element is just slightly visible your call-back function implements as needed.
Root Margin
The root margin is quite important in that you can add it to the container viewport and thus define each side of the viewport. It also allows you to define your own nested area for the API. The same way you define margins in custom CSS is just how you do it for root margin in Intersection Observer API.
Root
When defining the root, keep in mind that it must be an ancestor of the target element. Depending on what you're working on you might or might not have to define the root, as it always defaults to the browser's viewport when not defined.
Now that you are acquainted with the basics of how the Intersection Observer API works, it's time to see it in action.
How to Build a Page with HTML and CSS
Here, you'll build a basic static page with HTML and CSS. This page works just fine as it is, but there are no scroll animations at the moment.
We'll use this page to demonstrate the changes that happen once we add the Intersection Observer API JS part.
You are also going to add an animation class which will be called in JS using the DOM.
Don't forget to link your style file to your JS file as well.
HTML
<!DOCTYPE html>
<html lang="en">
<head>
    <meta charset="UTF-8">
    <meta http-equiv="X-UA-Compatible" content="IE=edge">
    <meta name="viewport" content="width=device-width, initial-scale=1.0">
    <link rel="stylesheet" href="style.css">
    <script src="app.js" defer></script>
    <title>Intersection observer</title>
</head>
<body>

    <section>
        <h1>
            Here we go!
        </h1>

    </section>
    <section>
        <h2 class="animation">What I do</h2>
        <p class="animation">Welcome to my page, My name is Mwendwa Bundi. I am a front-end developer and technical writer. Tell me about you!
        </p>

        </section>
        <section>
        <h1 class="animation">
            Here we go. Again!
        </h1>

    </section>

</body>
</html>
CSS
Now we'll add some styling to the page and also a center section defined in the HTML. This will help in showing the scroll animations as they ease in.
* {
    margin: 0;
    padding: 0;
    box-sizing: border-box;

}

body {
    background-color: aqua;
    color: white;
}

section {
    display: flex;
    flex-direction: column;
    justify-content: center;
    align-items: center;
    height: 100vh;
}
This is how the page looks as of now:

How to Update the CSS
Before adding the JavaScript, you have to update your custom CSS with the required animation you wish to see. As it is right now, our basic page is static. Here's the code to add to your CSS:
.animation {
    opacity: 0;
    transform: translateX(-300px);
    transition: all 0.7s ease-out;
    transition-delay: 0.4s;

}

.scroll-animation {
    opacity: 1;
    transform: translateX(0);
}
The opacity before the scroll is set to 0 so that once the user scrolls into the target element, the items can appear. This is why the opacity changes to 1 as shown above.
How to Add the JavaScript Functionality
The idea is that once the p tag with the class animation is in view, the call-back function will successfully run.
Go ahead and use the DOM to select the animation class from the HTML page.
const the_animation = document.querySelectorAll('.animation')Now, it's time to create an observer function:
const observer = new IntersectionObserver((entries) => {
    entries.forEach((entry) => {
        if (entry.isIntersecting) {
            entry.target.classList.add('scroll-animations')
        }
            else {
                entry.target.classList.remove('scroll-animation')
            }

    })
},
Here, you have used the if/else conditional statements to specify what should happen if isIntersecting is true and afterward.
For each entry, if the entry parameter is intersecting, you use the DOM to select the animations property that you defined in your custom CSS – else, it's removed. This means that no matter how many times the user scrolls back and forth, the animation will still occur. In other words, the call-back function will still run.
To make sure that the callback function does not run immediately when the target element is in view, define a threshold of 0.5 inside the function.
{ threshold: 0.5
   });
To get your observer in motion, define a for loop. This for loop will iterate through all the classes termed animation and observe the conditions in your intersection observer API.
  for (let i = 0; i < the_animation.length; i++) {
   const elements = the_animation[i];

    observer.observe(elements);
  }
This is how the page looks now:

Complete JavaScript Code
const the_animation = document.querySelectorAll('.animation')

const observer = new IntersectionObserver((entries) => {
    entries.forEach((entry) => {
        if (entry.isIntersecting) {
            entry.target.classList.add('scroll-animation')
        }
            else {
                entry.target.classList.remove('scroll-animation')
            }

    })
},
   { threshold: 0.5
   });
//
  for (let i = 0; i < the_animation.length; i++) {
   const elements = the_animation[i];

    observer.observe(elements);
  }
Conclusion
In this article, you have learnt about one of JavaScript's observer-based APIs, the Intersection Observer API. You have also successfully built a simple webpage to showcase scroll animations with the API.

