
By Jared Nutt
Front Matter
Serverless is one of those terms that has been increasing in popularity lately. In fact, when I wrote an article about my AWS architecture, several people mentioned to go serverless.
Serverless doesn't actually mean there are no servers, but as Paul Biggar put it:
"..there are servers in serverless...you just don’t have to think about it."
Serverless is a buzzword that doesn't refer to a specific framework, however, I've found that the Serverless Framework is the easiest method to getting started.
Note: For the sake of brevity, "sls" is synonymous with the Serverless Framework.
Prerequisites
Honestly, the documentation for the Serverless Framework is so good, it would be a disservice to recreate them here. So, to keep this article super focused, I'm going to be focusing on stuff outside of the quick start guides. I've included the AWS specific ones below:
Serverless AWS Quickstart Guide
Getting Started with the Serverless Framework and AWS
I'd suggest reading over those first, if you've never done anything with serverless.
Alternatively, you can code along with me in my Getting Started video below:
Vocabulary
There are a lot of terms that surround sls that can obfuscate what is being referred to. Here’s a couple key terms:
Service: The way I think of a service is that it’s a collection of code that is all served from a single place. Can contain one or more functions.
Stage: This is what "type" of the environment you are running. Usually it would be divided up into "dev" and "prod". The stage is a variable of service.
Function: A piece of code that executes when called. Wow, what a great description. This isn’t new to anyone who has programmed anything, however it’s important to know the relationship between a function and a service. There can be one or more functions that are part of a Service.
Provider: Simply put, the place where your service is deployed, e.g. AWS, GCP, etc.
A Deeper Dive
I found this fantastic article that deeply explains what Serverless is, if you want more info:
https://dev.to/sosnowski/anatomy-of-aws-lambda-1i1e
What We’re Building
We're going to make a function that grabs a joke from the internet, and e-mails it to ourselves.
It does this
- Pulls data from API.
- Creates a e-mail template.
- Sends e-mail template.
- Profit.
Tools
- Serverless Framework
- AWS Account (Optional)
- AWS CLI
- NPM
- nodemailer
If you like to learn via video, check out the video version of this article here:
Building the thing
Tooling
The tooling for sls is pretty simple. All I used was the serverless and npm CLIs. If you don’t have npm installed, install it first. Then run:
npm i -g serverless
Init
It’s usually a good idea to start with a template. There are a bunch on the serverless aws example page.
For this project I used the aws-nodejs template by running the following command in the terminal:
serverless create --template aws-nodejs --path my-service
Note: if you don’t provide a path flag, it will init the project in whatever folder you are current in.
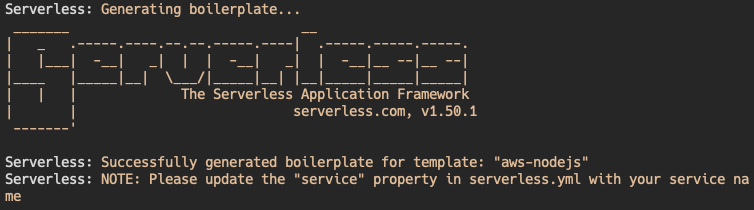 ASCII Art is the Best Art
If you checkout the directory, there should be three files in it:
handler.jsserverless.yml.gitignore
If you run sls invoke local -f hello , you should get a response back with a success message.

Deployment
Usually deployment of an application is left for the end of the tutorial, but not for sls. In the case of the Serverless Quickstart guide, it’s step 2.
I really appreciate this approach because I prefer to start the deployment portion as early into development as possible. Personally, I think it’s much easier to get a deployment working when you have a couple routes.
Providers
So, now comes the big question...where are we going to deploy this thing? For this tutorial, I'm going to be using AWS, but you can use whatever service you prefer.
Here is the quick-start for getting AWS setup as a provider: Serverless AWS Quickstart Guide.
Serverless Enterprise
It’s not immediately apparent on their website what the pricing is for their Enterprise edition. However, once you sign up they will send you an e-mail that says this:
The Serverless Framework Free tier includes everything you need to develop and troubleshoot serverless applications more efficiently. You get full access to the Serverless Framework Enterprise console, but you are limited to 1,000 function invocations per month. If you are interested in expanding your usage of the Serverless Framework Enterprise beyond the free tier contact us for details regarding available plans and pricing.
Deploy the thing
After you've gotten your credentials setup, simply run the sls deploy command in the terminal.
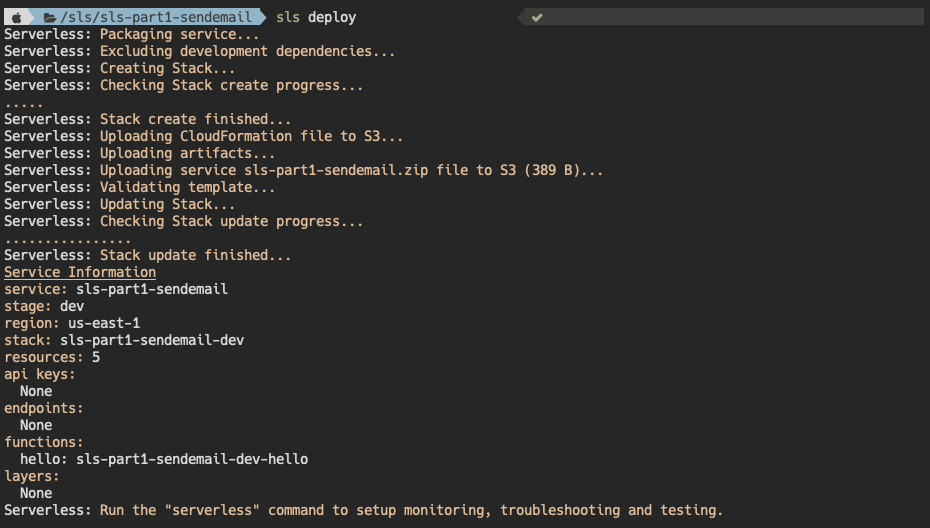 This screen gives a lot of info (much appreciated), but what does it mean?
The most confusing thing for me after typing that command was wondering…where did it go?
In the case of AWS, it creates a CloudFormation stack that manages this Service for you. AWS refers to it is as an Application. To see what just happened, check out your Lambda Console on AWS. You should see the function you just deployed.
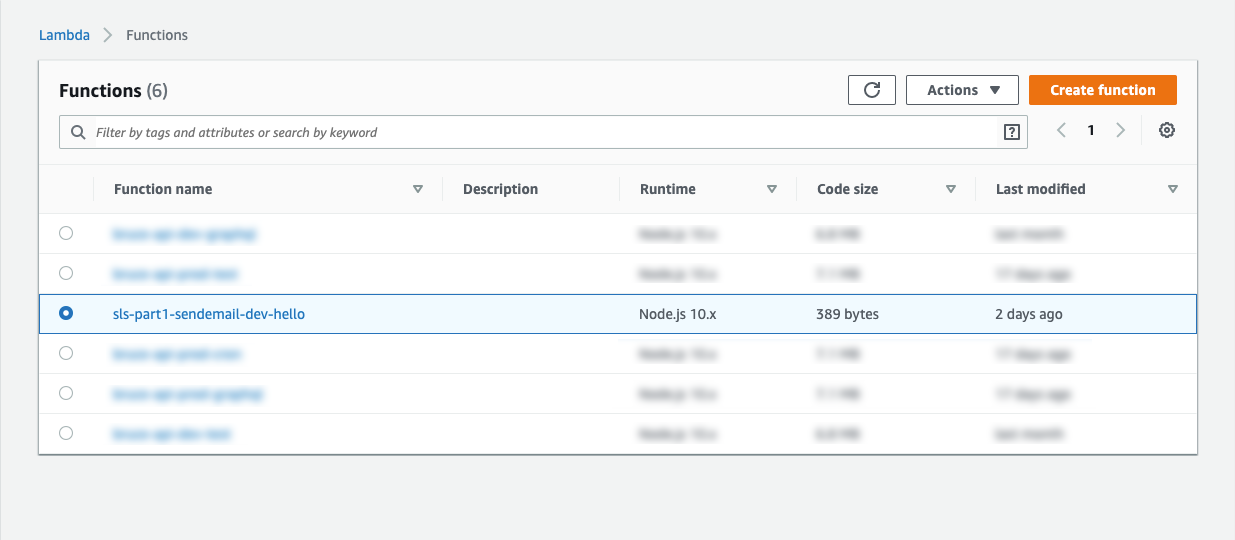
If not's showing up, check to make sure you are in the right region. The default region is us-east-1 (North Virginia). It can be changed via the dropdown in the upper right:

Test it
To make sure it worked, simply run sls invoke -f hello in your terminal. You should get the same response as before, but this time from the cloud!

Local Development
We already tested locally once with sls invoke local -f hello. If you are doing something more complicated and would like a nodemon style code refresher, check out Serverless Offline.
Start Writing!
Now that we have our project setup, let's start writing some actual code!
Open up the serverless.yml file again and let's make some changes.
functions:
  sendEmail:
    handler:
     emailHandler.sendEmail
  hello:
    handler: handler.hello
First thing, we added a new function and a new handler. the handler is referring to a file in the root directory called emailHandler (which doesn't exist yet). Let's go create it!
// emailHandler.js
module.exports.sendEmail = async event => {
  return {
    statusCode: 400,
    body: JSON.stringify(
      {
        message: 'Email sent!',
      },
      null,
      2,
    ),
  };
};
If you invoke the function via sls invoke local -f sendEmail you should get this:
{
    "statusCode": 400,
    "body": "{\n  \"message\": \"Email sent!\"\n}"
}
Alrighty, let's do something a bit more useful. I ran across this API that serves Chuck Norris jokes, which is a perfect fit for this little tutorial.
// emailHandler.js
module.exports.sendEmail = async event => {
  // grab the joke from the API
  const response = await fetch('https://api.chucknorris.io/jokes/random');
  //  grab the JSON
  const joke = await response.json();
  return {
    statusCode: 400,
    body: JSON.stringify(
      {
        message: joke.value,
      },
      null,
      2,
    ),
  };
};
Sweet! Now we're getting jokes! Let's build out the e-mail portion.
Environment Variables
Before we get too far into this thing, you probably realized we're going to need to pull in some secrets. Assuming we don't want the world to have our API Keys, that is.
Stages
Normally, whenever working with a node app, the Node environment will dictate wether it is “dev” or “production”. In sls, that is decided by the “stage” tag, that is attached to the provider.
A great explanation from Serverless Stack:
Serverless Framework allows you to create stages for your project to deploy to. Stages are useful for creating environments for testing and development. Typically you create a staging environment that is an independent clone of your production environment. This allows you to test and ensure that the version of code that you are about to deploy is good to go.
Queue Up the Secrets
Create env.yml in the root directory.
Make sure to add it to .gitignore
Add our variables.
# Add the environment variables for the various stages
prod:
  MAIL_HOST: ""
  MAIL_PORT: 2525
  MAIL_USER: ""
  MAIL_PASS: ""
dev:
  MAIL_HOST: ""
  MAIL_PORT: 2525
  MAIL_USER: ""
  MAIL_PASS: ""
Reference the variables in serverless.yml
provider:
  name: aws
  runtime: nodejs10.x
  stage: dev
  environment:
    MAIL_HOST: ${file(env.yml):${self:provider.stage}.MAIL_HOST}
    MAIL_PORT: ${file(env.yml):${self:provider.stage}.MAIL_PORT}
    MAIL_USER: ${file(env.yml):${self:provider.stage}.MAIL_USER}
    MAIL_PASS: ${file(env.yml):${self:provider.stage}.MAIL_PASS}
Yeah, that is a pretty crazy long line, but basically its just saying:
Read file (env.yml) ->Use the stage we are running (dev) -> Use the variable associated with that stage
For further reading on the subject of loading in secrets: check out this article: Load Secrets from env.yml
Send the E-mail
To make it simple, I am going to use Mailtrap. It's a fantastic tool for testing e-mails, that doesn't require you to setup an e-mail server.
Install nodemailer
In order to install nodemailer, you need to init an npm project. Go ahead and do that via the command line:
npm init -y
Then install nodemailer
npm i nodemailer
Add your API keys
Grab your API keys from the Demo inbox of Mailtrap and add to your env.yml
To send the mail, we are going to use nodemailer. Here's the code for Mailtrap + nodemailer:
const nodemailer = require('nodemailer');
// grab the variables from the process
const { MAIL_HOST, MAIL_PORT, MAIL_USER, MAIL_PASS } = process.env;

// create the transport
const transport = nodemailer.createTransport({
  host: MAIL_HOST,
  port: MAIL_PORT,
  auth: {
    user: MAIL_USER,
    pass: MAIL_PASS,
  },
});

module.exports.sendEmail = async event => {
  // grab the joke from the API
  const response = await fetch('https://api.chucknorris.io/jokes/random');
  //  grab the JSON
  const joke = await response.json();
  // create HTML template
  const html = `
    <h1>Joke of the Day</h1>
    <p>${joke.value}</p>
    `;

  // send mail with our transport object
  let info = await transport.sendMail({
    from: '"Chuck Norris" <noreply@chuck.com>', // sender address
    to: 'name@email.com', // list of receivers
    subject: 'Daily Joke', // Subject line
    html, // html body
  });

  return {
    statusCode: 400,
    body: JSON.stringify(
      {
        message: joke.value,
      },
      null,
      2,
    ),
  };
};
If all went well, invoke local and check your mailtrap.
sls invoke local -f sendEmail
{
    "statusCode": 400,
    "body": "{\n  \"message\": \"Chuck Norris' favorite chewing gum are bullets.\"\n}"
}
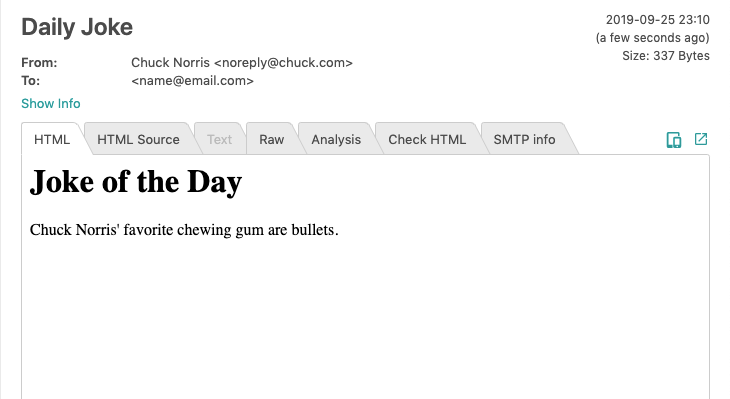 View in Mailtrap
What's Next
This article has gotten a bit long, so I'm going to stop here. However, in the next edition of Practical Serverless, I'm going to include connecting to a DB (not as easy as it should be) and setting up automatic function runs via a cron (much easier than it sounds!).
Final Thoughts
I'll let you decide on the practicality of sending yourself jokes, but I think it's use extends beyond Mr. Norris. This is part 1 of a series called Practical Serverless. If you have suggestions you'd like to add, please do!
As always, happy coding!
Code Repo
https://github.com/DarthOstrich/sls-part1-sendemail
Resources
https://serverless.com/learn/use-cases/