
In today's highly competitive mobile app landscape, effectively engaging your app's users and delivering timely information is key.
Firebase Cloud Messaging (FCM) is a powerful push notification service provided by Firebase. It offers a seamless way to connect with your app's users and keep them engaged.
In this tutorial, we will delve into the integration of FCM in Flutter. We'll explore its benefits and showcase real-world examples of how it can enhance user engagement and improve app performance.
What is Firebase Cloud Messaging?
Firebase Cloud Messaging (FCM) provides a reliable and battery-efficient connection between your server and devices. It allows you to deliver and receive messages and notifications on iOS, Android, and the web at no cost.
In this tutorial, we will explore the process of setting up and using Firebase Cloud Messaging (FCM) in Flutter using Firebase as the backend service. While the main focus will be on Android implementation, it's worth noting that the process is similar for iOS and Android (with a few configuration differences).
Here is what we'll cover:
- How to create an app in Firebase
- How to set up Firebase in Flutter
- How to implement push notifications using FCM tokens
In this tutorial, you'll learn how to send a simple notification using Firebase to the app running in Flutter. Let's get started.
How to Create an App in Firebase
I'll create a new project in the Firebase console to get started. I'll walk through the necessary steps, including project setup, how to configure Firebase Cloud Messaging, and how to get the required credentials and configuration files for our Flutter app.
Before creating the app you need to signup for the Firebase console if you don't have an account. After sign up, try to create a project.
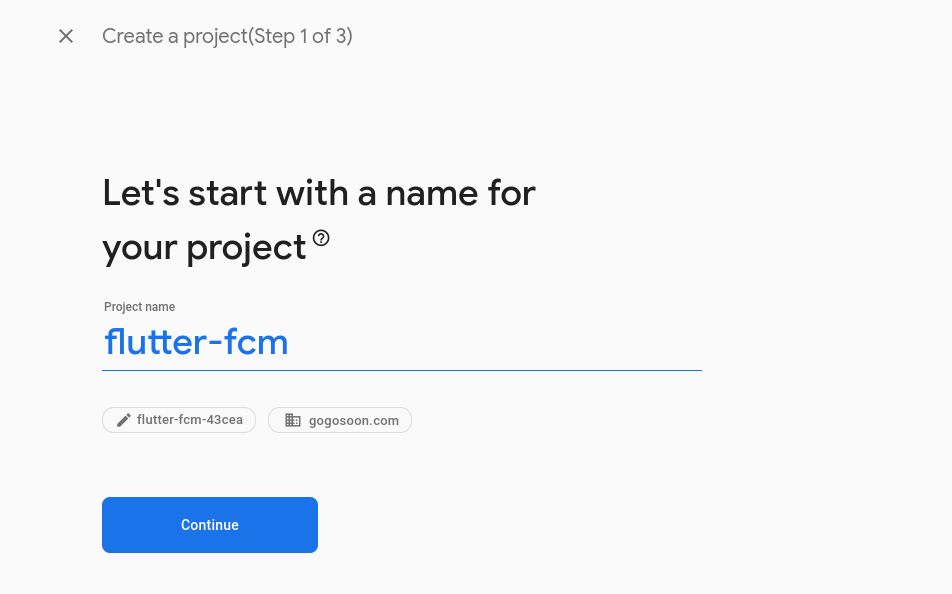 Create a Project in Firebase
It will take a little time to create a project.
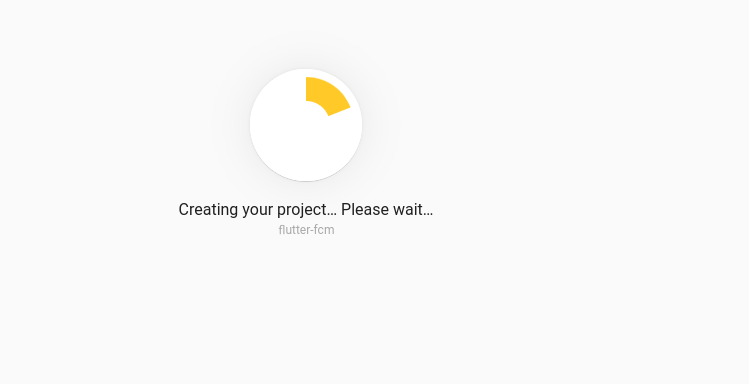 Creating project in Firebase
After creating the project, it will redirect you to the project dashboard.
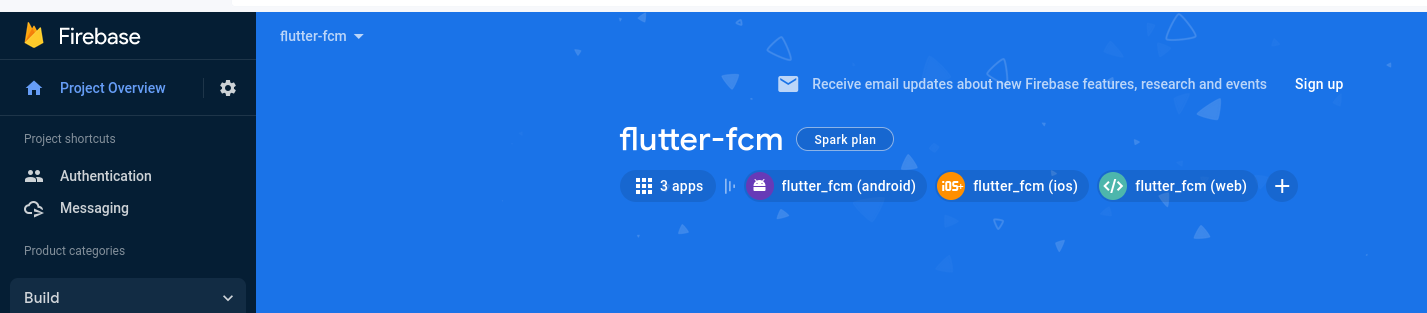 Project Overview in Firebase Console
Once you've created the project in Firebase console, it's time to get started with our Flutter app.
How to Set Up Firebase in Flutter
I have created a simple Flutter project using Visual Studio Code. If you are unfamiliar with building a Flutter project, you can refer to my previous tutorial. (If you are already familiar, you can skip this step.)
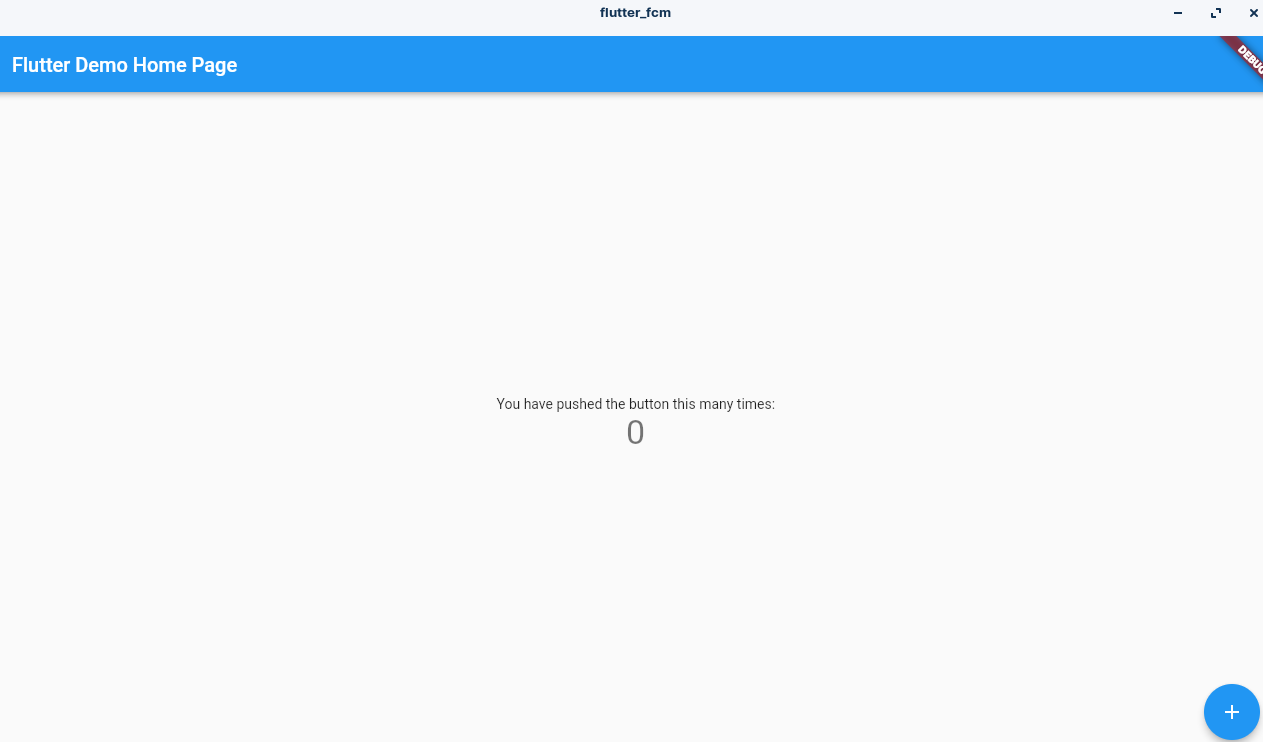 Simple Flutter Application running on Android Device
Let's integrate Firebase into our Flutter project. To do this, we need a Firebase CLI command line tool. I have already installed the Firebase CLI. If you haven't done this, you can refer to the official documentation.
Then we need to log in to Firebase using Firebase CLI.
firebase login
 Login to Firebase using FirebaseCLI
This will navigate you to the browser to log in to Firebase. You'll be navigated back once the authentication is successfully completed.
After successful login, we need to install FlutterFire CLI. We can use the FlutterFire CLI to configure our Flutter apps to connect to Firebase. Run the following command to activate the FlutterFire CLI:
dart pub global activate flutterfire_cli
The FlutterFire CLI is a command-line interface tool that simplifies the integration of Firebase services into Flutter applications. It provides a convenient way to add, configure, and manage Firebase plugins in our Flutter project.
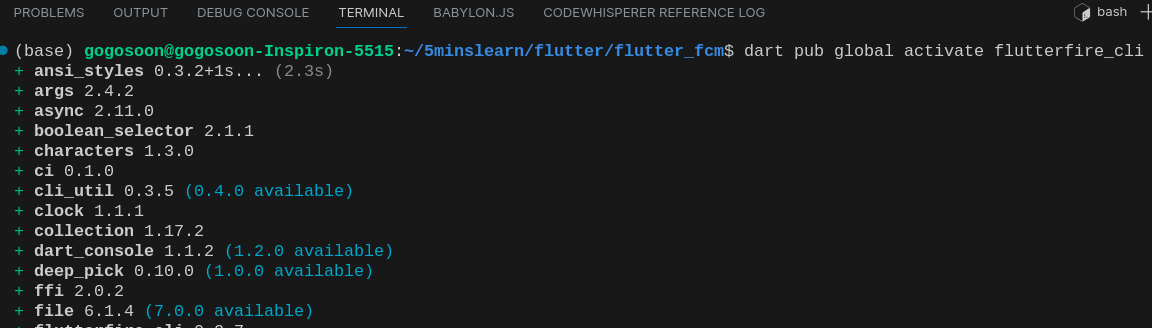 Installing FlutterFireCLI
The next step is to add firebase_core library to our Flutter project.
The following command will automatically add the firebase_core package as a dependency in your project's pubspec.yaml file and fetch the latest version of the package from pub.dev. After running this command, you can import the firebase_core package into the Dart files and use Firebase services in our Flutter app.
flutter pub add firebase_core
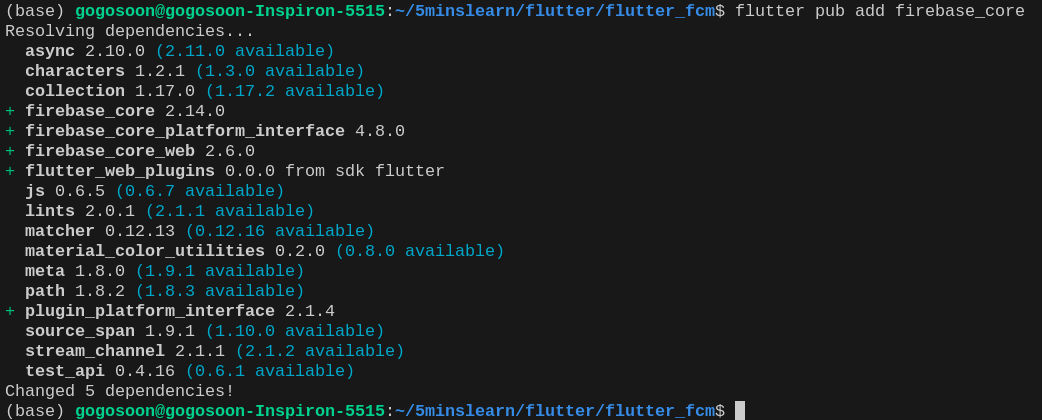 Installing Firebase Core package
The flutterfire configure command is used to configure Firebase services in our Flutter project using the FlutterFire CLI. This command helps us set up Firebase authentication, Firestore, Cloud Messaging, and other Firebase services easily and efficiently.
flutterfire configure
The first step is to choose the project,
 Connect Flutter App with Firebase app
The next is to choose the platform. I am using it for Android here, so I choose Android.
 Choosing platform
After the successful configuration, the Firebase App Id will be displayed.
Finally, we need to add some code changes to our main.dart file.
Import the following packages:
import 'package:firebase_core/firebase_core.dart';
import 'firebase_options.dart';
Add the following configuration to initialize the Firebase config inside the main function of the main.dart file.
await Firebase.initializeApp(
  options: DefaultFirebaseOptions.currentPlatform,
);
Alright, we have successfully completed the Firebase configuration in our Flutter app! Let's take a moment to celebrate this milestone. Configuring Firebase services is a crucial step in building powerful and feature-rich applications.
How to Implement Push Notification using FCM Tokens
We'll implement the process of registering devices for push notifications and retrieving the unique FCM tokens assigned to each device. This step is crucial for sending targeted notifications to specific devices.
We'll dive into the implementation of sending push notifications to devices using Firebase Cloud Messaging. We'll explore how to structure and send notification messages from the Firebase console and demonstrate how to handle these messages within our Flutter app.
flutter pub add firebase_messaging
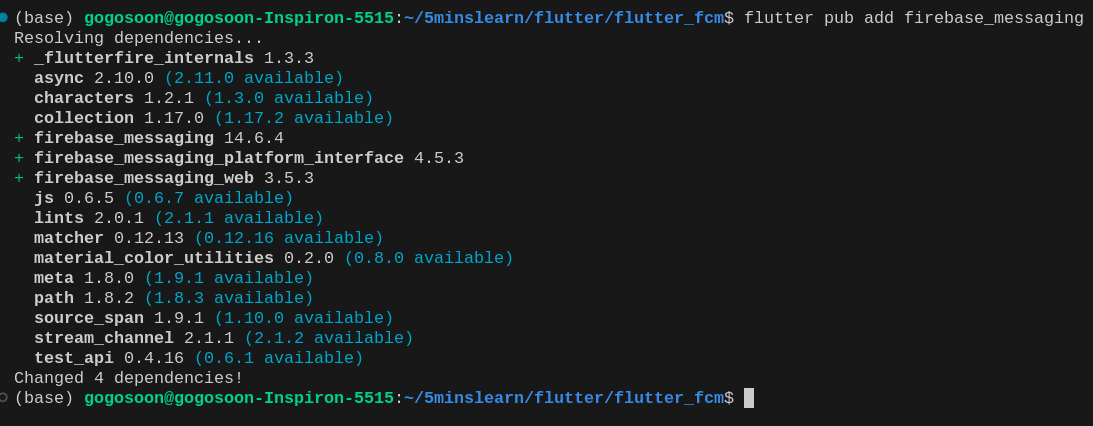 Installing firebse messaging Package
Next, we need to trigger the setAutoInitEnabled function to enable automatic initialization of Firebase Cloud Messaging (FCM) in our Flutter app. This means that FCM will automatically initialize and retrieve a device token when the app starts.
Add the following function call in the main method:
import 'package:firebase_messaging/firebase_messaging.dart';
...
...
await FirebaseMessaging.instance.setAutoInitEnabled(true);
Let's run our Flutter app and verify if we receive the notification.
Navigate to the Firebase messaging console. As it is our first message, we need to select "Create your first campaign". Select "Firebase Notification messages" and click "Create".
 Sample test messaging template
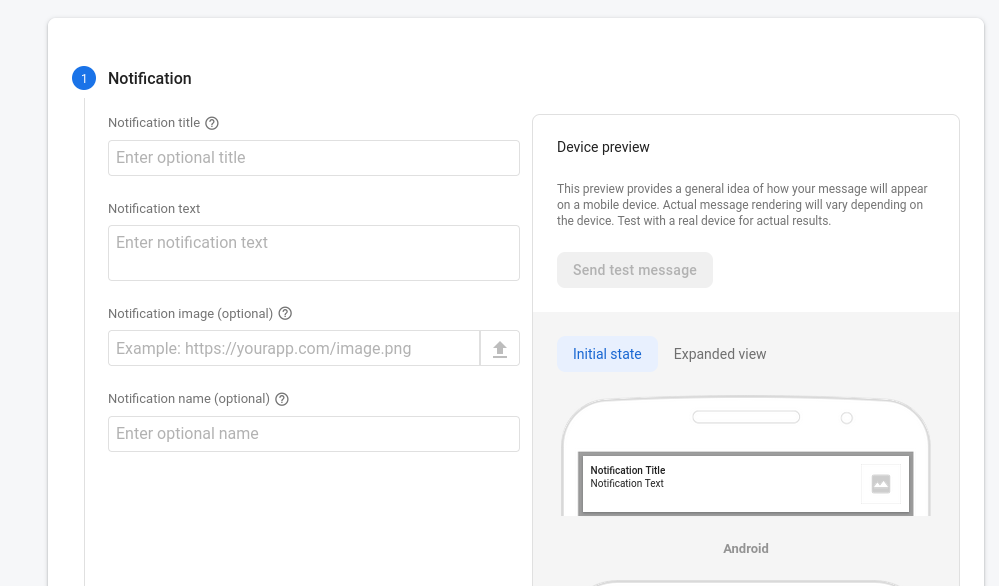
Now we need to enter the notification title, text, and name for the message.
Then we can get the FCM token manually for testing purposes using the code below. To retrieve the current registration token for an app instance, call getToken() in the main() method. This method will ask the user for notification permissions if notification permission has not been granted. Otherwise, it returns a token or rejects if there's any error.
final fcmToken = await FirebaseMessaging.instance.getToken();
log("FCMToken $fcmToken");
Copy the FCM token printed on the console and paste it into the "Add an FCM registration token" input box.
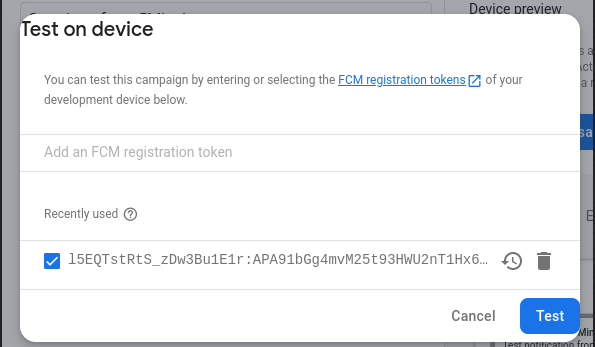 Sent test message using FCM Token
Click on the Test button. The targeted client device (with the app in the background) should receive the notification.
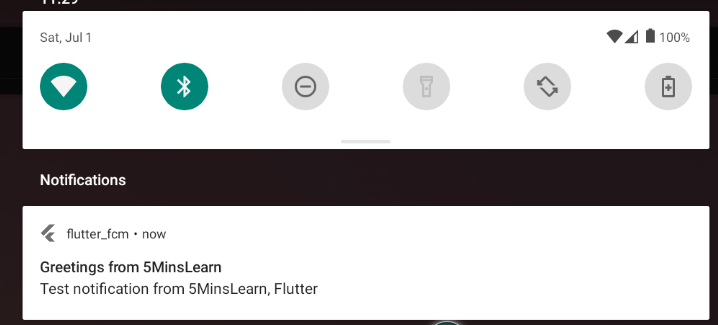 Received push notification in android device
Hurray! We got the notification on our Android device. If we click on the notification it will open the app by default.
When we tap a notification, the default behavior on both Android and iOS is to open the application. If the application is terminated, it will be started. If it is in the background, it will be brought to the foreground.
Here, we can see the basic configuration to initialize Firebase messaging.
main.dart
import 'package:flutter/material.dart';
import 'package:firebase_core/firebase_core.dart';
import 'package:firebase_messaging/firebase_messaging.dart';
import 'firebase_options.dart';

void main() async {
  runApp(const MyApp());
  await Firebase.initializeApp(
    options: DefaultFirebaseOptions.currentPlatform,
  );
  final fcmToken = await FirebaseMessaging.instance.getToken();
  await FirebaseMessaging.instance.setAutoInitEnabled(true);
  log("FCMToken $fcmToken");
}
Conclusion
In this tutorial we have covered the essential steps for implementing push notifications in Flutter using Firebase Cloud Messaging (FCM).
By following the outlined steps, you can set up Firebase, integrate it into your Flutter project, and implement push notification functionality.
With the ability to send and receive notifications seamlessly, you can enhance the user experience and engage with your app's users effectively. Stay tuned for more advanced topics and features in future tutorials.
If you wish to learn more about Flutter, subscribe to my email newsletter (https://5minslearn.gogosoon.com/) and follow me on social media.