
By Diogo Spínola
Have you ever wondered - can we make Node.js check to see if what we say is positive or negative?
I got a newsletter which discussed tone detection. The program can check what we write and then tells us if it might be seen as aggressive, confident, or a variety of other feelings.
That got me wondering how could I build a simplified version using the browser and Node.js that would be initiated by speaking.
As a result, I ended up with a small project that detects if what was spoken has positive, neutral, or negative valence.
Here's how I did it.
The plan
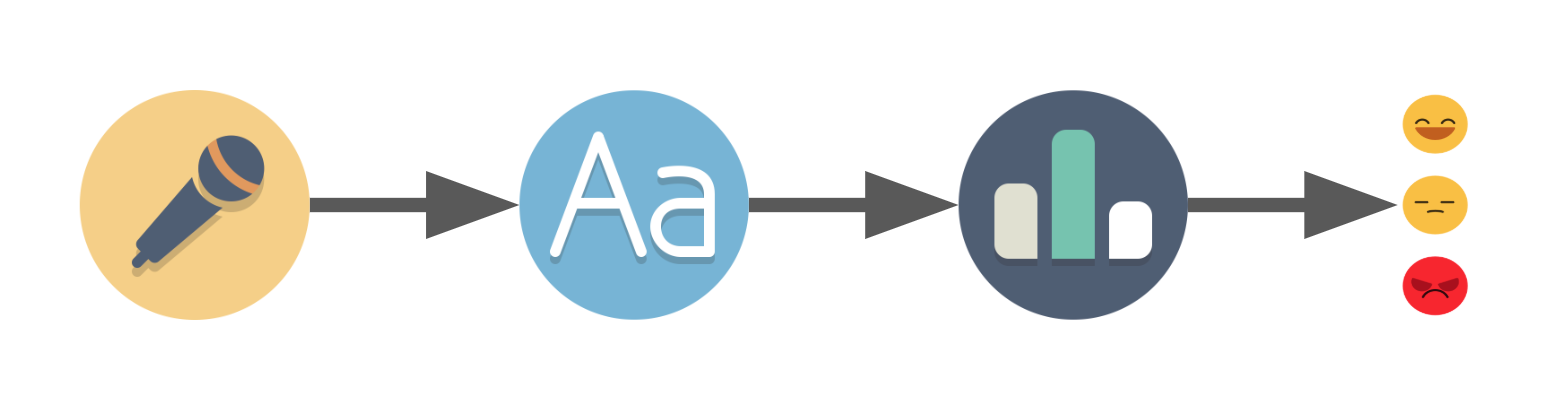 Voice detection -> Voice to text -> Text scoring -> Result
When you're starting a project, you should sketch out - at least vaguely - your goal and how to reach it. Before starting my search I noted down that I needed:
- Voice recording
- A way to translate the recording to text
- A way to give the text a score
- A way to show the result to the user that just spoke
After researching for a while, I discovered that the voice recording and translation to text parts were already done by the Web Speech API that's available in Google Chrome. It has exactly what we need in the SpeechRecognition interface.
As for text scoring, I found AFINN which is a list of words that are already scored. It has a limited scope with "only" 2477 words but it's more than enough for our project.
Since we're already using the browser we can show a different emoji with HTML, JavaScript and CSS depending on the result. So that handles our last step.
Now that we know what we're going to use, we can sum it up:
- The browser listens to the user and returns some text using the Web Speech API
- It makes a request to our Node.js server with the text
- The server evaluates the text using AFINN's list and returns the score
- The browser shows a different emoji depending on the score
Note: If you're familiar with project setup you can mostly skip the "project files and setup" section below.
Project files and setup
Our project folder and files structure will be as follows:
src/
  |-public // folder with the content that we will feed to the browser
    |-style // folder for our css and emojis
      |-css // optional folder, we have only one obvious file
        |-emojis.css
      |-images // folder for the emojis
    |-index.html
    |-recognition.js
  package.json
  server.js // our Node.js server
On the front end side of things, our index.html file will include the JS and CSS:
<html>
  <head>
    <title>
      Speech to emotion
    </title>
    <link rel="stylesheet" href="style/css/emojis.css">
  </head>
  <body>

    nothing for now

    <script src="recognition.js"></script>
  </body>
</html>
The recognition.js file will be wrapped in the DOMContentLoaded event so we make sure that the page has loaded before executing our JS:
document.addEventListener('DOMContentLoaded', speechToEmotion, false);

function speechToEmotion() {
  // Web Speech API section code will be added here
}
We leave our emojis.css empty for now.
On our folder, we will run npm run init which will create package.json.
For now, we will need to install two packages to make our life easier. So just npm install both:
- expressjs - to have an HTTP server quickly running
- nodemon - so we don't constantly type node server.js whenever we make a change in our server.js file.
package.json will end up looking something like this:
{
  "name": "speech-to-emotion",
  "version": "1.0.0",
  "description": "We speak and it feels us :o",
  "main": "index.js",
  "scripts": {
    "server": "node server.js",
    "server-debug": "nodemon --inspect server.js"
  },
  "author": "daspinola",
  "license": "MIT",
  "dependencies": {
    "express": "^4.17.1"
  },
  "devDependencies": {
    "nodemon": "^2.0.2"
  }
}
server.js starts like this:
const express = require('express')
const path = require('path')

const port = 3000
const app = express()

app.use(express.static(path.join(__dirname, 'public')))

app.get('/', function(req, res) {
  res.sendFile(path.join(__dirname, 'index.html'))
})

app.get('/emotion', function(req, res) {
  // Valence of emotion section code will be here for not it returns nothing
  res.send({})
})

app.listen(port, function () {
  console.log(`Listening on port ${port}!`)
})
And with this, we can run npm run server-debug in the command line and open the browser on localhost:3000. Then we'll see our "nothing for now" message that's in the HTML file.
Web Speech API
This API comes out of the box in Chrome and contains SpeechRecognition. This is what will allow us to turn on the microphone, speak, and get the result back as text.
It works with events that can detect, for example, when audio is first and last captured.
For now, we will need the onresult and onend events so we can check what the microphone captured and when it stops working, respectively.
To make our first sound to text capture we just need a dozen lines or so of code in our recognition.js file.
const recognition = new webkitSpeechRecognition()
recognition.lang = 'en-US'

recognition.onresult = function(event) {
  const results = event.results;
  const transcript = results[0][0].transcript

  console.log('text ->', transcript)
}

recognition.onend = function() {
  console.log('disconnected')
}

recognition.start()
We can find a list of available languages in the Google docs here.
If we want it to stay connected for more than a few seconds (or for when we speak more than once) there is a property called continuous. It can be changed the same as the lang property by just assigning it true. This will make the microphone listen for audio indefinitely.
const recognition = new webkitSpeechRecognition()
recognition.lang = 'en-US'
recognition.continuous = true

recognition.onresult = function(event) {
  const results = event.results;
  const transcript = results[results.length-1][0].transcript

  console.log('text ->', transcript)
}

recognition.onend = function() {
  console.log('disconnected')
}

recognition.start()
If we refresh our page, at first it should ask whether we want to allow the usage of the microphone. After replying yes we can speak and check on the Chrome DevTools console the result of our speech.
Profanity is shown censored and there doesn't seem to be a way to remove the censorship. What this means is that we can't rely on profanity for scoring even though AFINN is uncensored.
Note: At the moment of writing, this API can be found only in Chrome and Android with expected support for Edge in the near future. There are probably polyfills or other tools that give better browser compatibility but I didn't test them out. You can check the compatibility in Can I use.
Making the request
For the request, a simple fetch is enough. We send the transcript as a query parameter which we will call text.
Our onresult function should now look like this:
  recognition.onresult = function(event) {
    const results = event.results;
    const transcript = results[results.length-1][0].transcript

    // making a request to our /emotion endpoint that we defined on the project start and setup section
    fetch(`/emotion?text=${transcript}`)
      .then((response) => response.json())
      .then((result) => {
        console.log('result ->', result) // should be undefined
      })
      .catch((e) => {
        console.error('Request error -> ', e)
      })
  }
Valence of emotion
Valence can be seen as a way to measure if our emotions are positive or negative and if they create low or high arousal.
For this project, we will use two emotions: happy on the positive side for any score above zero, and upset on the negative side for scores below zero. Scores of zero will be seen as indifferent. Any score of 0 will be treated as "what?!"
The AFINN list is scored from -5 to 5 and the file contains words organised like this:
hope 2
hopeful 2
hopefully 2
hopeless -2
hopelessness -2
hopes 2
hoping 2
horrendous -3
horrible -3
horrific -3
As an example, let's say we spoke to the microphone and said "I hope this is not horrendous". That would be 2 points for "hope" and -3 points for "horrendous" which would make our sentence negative with -1 points. All the other words that are not on the list we would ignore for scoring.
We could parse the file and convert it into a JSON file that looks similar to this:
{
  <word>: <score>,
  <word1>: <score1>,
  ..
}
And then we could check each word in the text and sum up the scores. But this is something that Andrew Sliwinski has already done with sentiment. So we're going to use that instead of coding everything from scratch.
To install we use npm install sentiment and open server.js so we can import the library with:
const Sentiment = require('sentiment');
Followed by changing the route "/emotion" to:
app.get('/emotion', function(req, res) {
  const sentiment = new Sentiment()
  const text = req.query.text // this returns our request query "text"
  const score = sentiment.analyze(text);

  res.send(score)
})
_sentiment.analyze()_ does the steps described before: it checks each word of our text against AFINN's list and gives us a score at the end.
The variable score will have an object similar to this:
{
  score: 7,
  comparative: 2.3333333333333335,
  calculation: [ { awesome: 4 }, { good: 3 } ],
  tokens: [ 'good', 'awesome', 'film' ],
  words: [ 'awesome', 'good' ],
  positive: [ 'awesome', 'good' ],
  negative: []
}
Now that we have the score returned, we just have to make it show in our browser.
Note: AFINN is in English. While we can select other languages in the Web Speech API we would have to find a scored list similar to AFINN in our desired language to make the matching work.
Making it smile
For our last step, we will update our index.html to display an area where we can show the emoji. So we change it to the following:
<html>
  <head>
    <title>
      Speech to emotion
    </title>
    <link rel="stylesheet" href="style/css/emojis.css">
  </head>
  <body>
    <!-- We replace the "nothing for now" -->
    <div class="emoji">
      <img class="idle">
    </div>
    <!-- And leave the rest alone -->
    <script src="recognition.js"></script>
  </body>
</html>
The emoji used in this project are free for commercial use and can be found here. Kudos to the artist.
We download the icons we like and add them to the images folder. We will be needing emoji for:
- error - When an error occurs
- idle - Whenever the microphone is not active
- listening - When the microphone is connected and waiting for input
- negative - For positive scores
- neutral - For when the score is zero
- positive - For negative scores
- searching - For when our server request is being done
And in our emojis.css we simply add:
.emoji img {
  width: 100px;
  width: 100px;
}

.emoji .error {
  content:url("../images/error.png");
}

.emoji .idle {
  content:url("../images/idle.png");
}

.emoji .listening {
  content:url("../images/listening.png");
}

.emoji .negative {
  content:url("../images/negative.png");
}

.emoji .neutral {
  content:url("../images/neutral.png");
}

.emoji .positive {
  content:url("../images/positive.png");
}

.emoji .searching {
  content:url("../images/searching.png");
}
When we reload the page after these changes it'll show the idle emoji. It never changes, though, since we haven't replaced our idle class in the element depending on the scenario.
To fix that we go one last time to our recognition.js file. There, we're going to add a function to change the emoji:
/**
 * @param {string} type - could be any of the following:
 *   error|idle|listening|negative|positive|searching
 */
function setEmoji(type) {
  const emojiElem = document.querySelector('.emoji img')
  emojiElem.classList = type
}
On the response of our server request, we add the check for positive, negative or neutral score and call our setEmoji function accordingly:
console.log(transcript) // So we know what it understood when we spoke

setEmoji('searching')

fetch(`/emotion?text=${transcript}`)
  .then((response) => response.json())
  .then((result) => {
    if (result.score > 0) {
      setEmoji('positive')
    } else if (result.score < 0) {
      setEmoji('negative')
    } else {
      setEmoji('listening')
    }
  })
  .catch((e) => {
    console.error('Request error -> ', e)
    recognition.abort()
  })
Finally, we add the events onerror and onaudiostart and change the event onend so we have them set with the proper emoji.
  recognition.onerror = function(event) {
    console.error('Recognition error -> ', event.error)
    setEmoji('error')
  }

  recognition.onaudiostart = function() {
    setEmoji('listening')
  }

  recognition.onend = function() {
    setEmoji('idle')
  }
Our final recognition.js file should look something like this:
document.addEventListener('DOMContentLoaded', speechToEmotion, false);

function speechToEmotion() {
  const recognition = new webkitSpeechRecognition()
  recognition.lang = 'en-US'
  recognition.continuous = true

  recognition.onresult = function(event) {
    const results = event.results;
    const transcript = results[results.length-1][0].transcript

    console.log(transcript)

    setEmoji('searching')

    fetch(`/emotion?text=${transcript}`)
      .then((response) => response.json())
      .then((result) => {
        if (result.score > 0) {
          setEmoji('positive')
        } else if (result.score < 0) {
          setEmoji('negative')
        } else {
          setEmoji('listening')
        }
      })
      .catch((e) => {
        console.error('Request error -> ', e)
        recognition.abort()
      })
  }

  recognition.onerror = function(event) {
    console.error('Recognition error -> ', event.error)
    setEmoji('error')
  }

  recognition.onaudiostart = function() {
    setEmoji('listening')
  }

  recognition.onend = function() {
    setEmoji('idle')
  }

  recognition.start();

  /**
   * @param {string} type - could be any of the following:
   *   error|idle|listening|negative|positive|searching
   */
  function setEmoji(type) {
    const emojiElem = document.querySelector('.emoji img')
    emojiElem.classList = type
  }
}
And by testing our project we can now see the final results:

Note: Instead of a console.log to check what the recognition understood, we can add an element on our html and replace the console.log. That way we always have access to what it understood.
Final remarks
There are some areas where this project can be vastly improved:
- it can't detect sarcasm
- there is no way to check if you're enraged due to the censorship of the speech to text API
- there's probably a way to do it with just voice without conversion to text.
From what I saw while researching this project, there are implementations that check if your tone and mood will lead to a sale in a call centre. And the newsletter I got was from Grammarly, which is using it to check the tone of what you write. So as you can see there are interesting applications.
Hopefully, this content has helped out in some way. If anybody builds anything using this stack let me know – it's always fun to see what people build.
The code can be found in my github here.
See you in the next one, in the meantime, go code something!