

In this article you'll learn how to create a text input field in HTML. You'll also learn about web forms and get an overview of how they work, since text boxes are a common feature of every form.
Let's get started!
What are Web Forms?
Forms are an efficient way of gathering information.
There are many cases where you would need to fill out a physical form, a printed physical document, and give out personal details.
For example, you may fill out a form and hand it to someone when you're starting a new job, or when you're going for a medical checkup, or when you are in the process of renting/buying a house – or any other time when paperwork is necessary.
Just like physical forms, online digital web forms are a way to receive and collect input, information, and important data from users and visitors, using a combination of web technologies.
A web form mimics a physical form by containing spaces for users to fill out their information.
Web forms use a variety of tools, or form controls, to collect user input.
A website can have a search box, or a text input field, for entering a single line of text. This enables users to search for something specific.
A website can also contain a registration form that lets users sign up for a newsletter or other updates.
That would typically contain a text input field for entering the user's first name, last name, and email address.
Many websites also have sign-up / sign-in forms when making an online purchase, for example, where users enter their username in a text field and their password in a separate field. Although password fields are also text fields, each text character is covered up by a black dot to hide what is being typed.
A website can also have a larger textarea for users to enter longer passages of text, which is useaful for leaving a comment underneath a blog post.
Many forms also allow the user to choose a particular option from a number of options by selecting a radio button. They can allow the user to choose more than one option by checking/unchecking a checkbox.
Lastly, all forms have a submit button, to submit the data to a server where it will be stored or processed.
How Web Forms Work
The Internet is a large global network that connects millions of computers all around the world.
Computers that are part of the network communicate with each other by sending and receiving information.
The way this is achieved is thanks to the web's client/server request/response architecture.
The client, which is typically a web browser such as Google Chrome, sends a request to a web server.
A web server is a piece of computer hardware or software that stores files that make up websites and distributes them whenever it receives a request to do so.
The request could be to view a form that's part of a webpage.
The server sends back the files that make up the web form as a response. The web browser then assembles the files together and the user views the form in the web browser.
This request/response cycle is structured by a protocol, called HTTP (which stands for HyperText Transfer Protocol).
So, when using a web form, a user enters the necessary data. Then after the client-side validation that checks if all required fields are filled out and whether the data is of the right format, the user clicks the submit button.
The data is then sent to the server in name-value pairs in an HTTP request. This method of organizing information in name-value pairs makes sure that the correct data corresponds to the correct form element.
Then a server-side language such as PHP, Ruby, or Python is used to process the information and store it in a database for later use or retrieval.
How to Create Web Forms in HTML
To create a form in HTML, you need to use the <form> element which is used for collecting information.
The <form> element has an opening <form> and closing </form> tag.
<!DOCTYPE html>
<html lang="en">
<head>
    <meta charset="UTF-8">
    <meta http-equiv="X-UA-Compatible" content="IE=edge">
    <meta name="viewport" content="width=device-width, initial-scale=1.0">
    <title>Web form</title>
</head>
<body>
    <form>

    </form>
</body>
</html>
The <form> element takes two attributes:
- The
actionattribute, which specifies the URL where you want the data to be sent and processed. - The
methodattribute that accepts as a value one of two HTTP verbs, eitherGETorPOST. If nomethodattribute is included, theGETmethod is used by default.
<!DOCTYPE html>
<html lang="en">
<head>
    <meta charset="UTF-8">
    <meta http-equiv="X-UA-Compatible" content="IE=edge">
    <meta name="viewport" content="width=device-width, initial-scale=1.0">
    <title>Web form</title>
</head>
<body>
    <form action="/url" method="GET">

    </form>
</body>
</html>
However, this alone does not collect any user input.
What is the HTML input element?
The <input> element is most commonly used for collecting and retrieving user data from a web form.
It's where users enter their data.
It's nested inside the <form> element and it's a self closing element. This means it does not require a closing tag. (Closing tags have a forward slash, </>.)
You use it to create different styles of input fields, or form input controls, for users to enter a variety of different kinds of information.
It creates textfields, email fields, password fields, checkboxes, radio buttons, drop-down menus, submit buttons, the ability to select and upload files and images from the user's computer, and much more.
The way to determine the type of input field, or form input control, is to set the type attribute and assign it a value.
The general syntax of <input> looks something like this:
<input type="value"> <!-- the value of the type attribute determines the style of input field -->
For example, to create a field that allows users to upload a file, the <input> element would look like this:
<!DOCTYPE html>
<html lang="en">
<head>
    <meta charset="UTF-8">
    <meta http-equiv="X-UA-Compatible" content="IE=edge">
    <meta name="viewport" content="width=device-width, initial-scale=1.0">
    <title>Web form</title>
</head>
<body>
    <form action="/url" method="GET">
        <input type="file">
    </form>
</body>
</html>
The type attribute determines what kind of data the input element can accept.
How to Create an HTML Text Box Input Field
The default value of input's type attribute when not specified is text. So text input is the most common style of input.
The line <input type="text"> creates a single line text input field, where the user can type any text input.
<!DOCTYPE html>
<html lang="en">
<head>
<meta charset="UTF-8">
<meta http-equiv="X-UA-Compatible" content="IE=edge">
<meta name="viewport" content="width=device-width, initial-scale=1.0">
<title>Web form</title>
</head>
<body>
<form action="/url" method="GET">
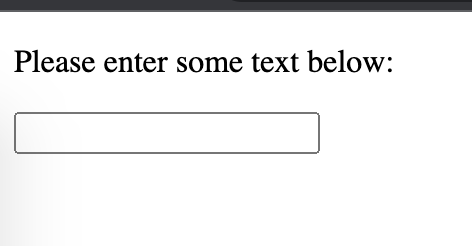
<p>Please enter some text below:</p>
<input type="text">
</form>
</body>
</html>
When you view the page in the browser, you can see that a single line text input field has been created:
How to Add Placeholder Text to a Text Field
Placeholder text, also called filler text, is a way to prompt and give a hint to users as to what kind of information they need to fill out in the form. It can also offer a default value before they start typing.
<!DOCTYPE html>
<html lang="en">
<head>
    <meta charset="UTF-8">
    <meta http-equiv="X-UA-Compatible" content="IE=edge">
    <meta name="viewport" content="width=device-width, initial-scale=1.0">
    <title>Web form</title>
</head>
<body>
    <form action="/url" method="GET">
        <p>Please enter your first and last name:</p>
        <input type="text" placeholder="John">
        <input type="text" placeholder="Doe">
    </form>
</body>
</html>
The code from above would result in the following:

The Importance of the name attribute in Text Fields
When submitting the form and sending it to the server, the server needs to distinguish and differentiate between the different kinds of submitted data it gathers.
For example, it needs to know which is the username, which is the password, and which is the email address.
This means that each text field needs a name attribute and a value to make the type of data submitted clearer.
For example, you could use the following to prompt someone to enter their full name in a text field:
<!DOCTYPE html>
<html lang="en">
<head>
    <meta charset="UTF-8">
    <meta http-equiv="X-UA-Compatible" content="IE=edge">
    <meta name="viewport" content="width=device-width, initial-scale=1.0">
    <title>Web form</title>
</head>
<body>
    <form action="/url" method="GET">
        <p>Please enter your full name:</p>
        <input type="text" name="name" placeholder="John Doe">
    </form>
</body>
</html>
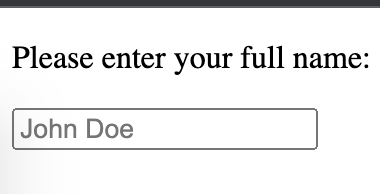
Say the user enters the name "John Bexley" in the text field. This will then become the value of the name attribute.
As mentioned earlier, the data in forms is sent in name-value pairs. In this case, the server would know that the name of the user is John Bexley, specifically it would look like name=John Bexley.
To give another example:
<!DOCTYPE html>
<html lang="en">
<head>
    <meta charset="UTF-8">
    <meta http-equiv="X-UA-Compatible" content="IE=edge">
    <meta name="viewport" content="width=device-width, initial-scale=1.0">
    <title>Web form</title>
</head>
<body>
    <form action="/url" method="GET">
        <p>Please enter your first  name:</p>
        <input type="text" name="first_name" placeholder="John">
        <p>Please enter your last  name:</p>
        <input type="text" name="last_name" placeholder="Doe">
    </form>
</body>
</html>
The code above has two separate text fields for the user to enter their first name and last names separately.
If they entered "John" as the first name, the name-value pair sent to the server would be first_name=John".
If they entered "Bexley" as the last name, the name-value pair sent to the server would be last_name=Bexley.
How to Make Text Information Required
You can make it so certain fields are required and need to be filled in by users.
HTML5 introduced client-side validation.
This is a feature where a message is displayed if the user has not filled in the required fields or has not entered information correctly. It also means that they won't be able to submit the form.
All you need to do to enable this is to add the required attribute to the <input> element. This attribute does not need to have a value.
Keep in mind that when adding multiple attributes to the <input> element, you don't have to add elements in a certain order.
<!DOCTYPE html>
<html lang="en">
<head>
    <meta charset="UTF-8">
    <meta http-equiv="X-UA-Compatible" content="IE=edge">
    <meta name="viewport" content="width=device-width, initial-scale=1.0">
    <title>Web form</title>
</head>
<body>
    <form action="/url" method="GET">
        <p>Please enter your first  and last name:</p>
        <input type="text" name="first_name" placeholder="John" required>
        <input type="text" name="last_name" placeholder="Doe" required>
        <button type="submit">Submit</button>
    </form>
</body>
</html>
Look at what happens if a user does not fill in one of the fields:

A message will appear and the user won't be able to submit the form if the required fields have not been completed.
How to Set a Minimum and Maximum Number of Characters in a Text Box
You can specify the minimum and maximum number of characters that a user can enter in a text field.
To create a minimum number of characters, use the minlength attribute.
For example, you can have it so a user's username is at least three characters long:
<!DOCTYPE html>
<html lang="en">
<head>
    <meta charset="UTF-8">
    <meta http-equiv="X-UA-Compatible" content="IE=edge">
    <meta name="viewport" content="width=device-width, initial-scale=1.0">
    <title>Web form</title>
</head>
<body>
    <form action="/url" method="GET">
        <p>Please enter your username</p>
        <input type="text" name="username" minlength="3" required>
        <button type="submit">Submit</button>
    </form>
</body>
</html>
The user will not be able to submit the form if the username is shorter than three characters:

To limit the number of characters a user enters in a text field, use the maxlength attribute.
An example of combining both the minlength and maxlength attributes could look like this:
<!DOCTYPE html>
<html lang="en">
<head>
    <meta charset="UTF-8">
    <meta http-equiv="X-UA-Compatible" content="IE=edge">
    <meta name="viewport" content="width=device-width, initial-scale=1.0">
    <title>Web form</title>
</head>
<body>
    <form action="/url" method="GET">
        <p>Please enter your username</p>
        <input type="text" name="username" minlength="3" maxlength="20" required>
        <button type="submit">Submit</button>
    </form>
</body>
</html>
In the example above, a user's username has to be at least 3 characters long and no longer than 20 characters.
How to label Form Controls
So far I've been using a <p> element to write some text before the text box, in this way prompting the user and letting them know what they need to enter.
But this is not a best practice and is not accessible.
Each form control, in this case each text field, should have its own <label> element.
This makes the form accessible for visually impaired users that use assistive technologies such as screen readers.
One way to use it is to nest any introductory text and the <input type="text"> in a <label> element like so:
<!DOCTYPE html>
<html lang="en">
<head>
    <meta charset="UTF-8">
    <meta http-equiv="X-UA-Compatible" content="IE=edge">
    <meta name="viewport" content="width=device-width, initial-scale=1.0">
    <title>Web form</title>
</head>
<body>
    <form action="/url" method="GET">
        <label>
            Please enter your username
            <input type="text" name="username" minlength="3" maxlength="20" required>
        </label>
        <button type="submit">Submit</button>
    </form>
</body>
</html>

Another way to use the <label> element and to have the same result is to separate it from the <input> element.
In this case, the for attribute needs to be added to <label>, and the id attribute added to <input>, in order to associate both with one another.
The value of for will be the same with id.
<!DOCTYPE html>
<html lang="en">
<head>
    <meta charset="UTF-8">
    <meta http-equiv="X-UA-Compatible" content="IE=edge">
    <meta name="viewport" content="width=device-width, initial-scale=1.0">
    <title>Web form</title>
</head>
<body>
    <form action="/url" method="GET">
        <label for="username"> Please enter your username:</label>
            <input type="text" id="username" name="username" minlength="3" maxlength="20" required>
        <button type="submit">Submit</button>
    </form>
</body>
</html>
Conclusion
To sum up, to create a text input field in HTML, you need at least:
- An
<input>element, which typically goes inside a<form>element. - To set the
typeattribute to have a value oftext. This will create a single line text input field. - Don't forget to add a
nameattribute. This identifies information for each form control that gets created and makes things clearer for the server.
To learn more about HTML and CSS, check out the Responsive Web Design Certification by freeCodeCamp, where you'll learn in an interactive way while building fun projects along the way.
Thanks for reading and happy coding!