Functional components weren't always the preferred method for declaring components in React.
Before React version 16.8 was introduced, functional components were treated much like second-class citizens. They couldn't handle state, logic, and lots of other React features, and we only used them for rendering very simple components to the UI.
React version 16.8 solved these problems by introducing React Hooks, which let developers use these react features in functional components.
In this article you will learn:
- What React hooks are
- Four common React Hooks with examples of how to write them in your applications
- Lastly we'll take a look at how to write your own custom React Hooks
What are React Hooks?
Hooks are built-in React functions introduced in React version 16.8. They allow you to use features of the React library like lifecycle methods, state, and context in functional components without having to worry about rewriting it to a class.
Each React Hook name is prefixed with the word "use". For example, useState or useEffect. This format was chosen because Hooks let developers use the special features of the React library. So you're useing that special feature of the React library.
Why Use React Hooks?
Many developers are skeptical about learning React Hooks. But you shouldn't be. Here are a few reasons you should start using React Hooks:
Classes in React can be quite confusing
Classes are a hindrance to learning React properly. To use them, you need to understand how the this keyword works. You also need to constantly remember to bind the event handlers, as well as other redundant methods encountered when working with classes in React.
Classes components are complex and can be difficult to understand
Class components are usually large and try to carry out many operations. In the long run, they become difficult to understand.
Hooks solve this by allowing you to separate large components into various smaller functions, rather than having to force all the logic into a single component.
Hooks have shorter components and better readability
Class components come with a lot of boilerplate code. Consider the counter component below:
class Counter extends Component {
    constructor(props) {
        super(props)
        this.state = {
        	count: 1,
        }
    }
    render() {
        return (
            <div>
                The Current Count: {this.state.count}
                <div>
                <button onClick={this.setState({ count: this.state.count - 1 })}>
                add
                </button>
                <button onClick={this.setState({ count: this.state.count + 1 })}>
                subtract
                </button>
                </div>
            </div>
    );
    }
}
Here’s equivalent code using functional component and React Hooks:
function Counter  ()  {
    const [count, setCount] = useState(1);
    return (
        <div>
            The Current Count: {this.state.count}
            <div>
                <button onClick={() => setCount(count + 1)}>add</button>
                <button onClick={() => setCount(count - 1)}>subtract</button>
            </div>
        </div>
    );
};
Notice how the class component is way more complex. You need a class to extend React, a constructor to initialize state, and you need to reference the this keyword everywhere.
Using functional components removes a lot of this, so our code becomes shorter and easier to read and maintain.
Rules of Using React Hooks
When using React Hooks there are a few rules to adhere to:
- Only call hooks at the top level of a component: You shouldn’t use Hooks inside loops, conditions, or nested functions. Instead, always use Hooks at the top level of your React function, before any return keyword.
- Only call hooks from React Functions: Never call Hooks from regular JavaScript functions. You can:
✅ Call Hooks from React functional components.
✅ Call Hooks from custom Hooks.
Most Common React Hooks
To date, React has 10 built-in hooks. Let's look at the four most common ones:
useStateuseEffectuseContextuseReducer
useState Hook
The useState Hook allows you to create, update, and manipulate state inside functional components.
React has this concept of state, which are variables that hold data that our components depend on and may change over time. Whenever these variables change, React updates the UI by re-rendering the component in the DOM with the current values of the state variables.
The hook takes a single optional argument: an initial value for the state. Then it returns an array of two values:
- The state variable
- A function to update the state
Let's take a look at a counter component as an example:
To use a Hook, the first step is to import the Hook at the top of the file:
import { useState } from "react";Then, initialize the Hook with a value. Due to the fact it returns an array, you can use array destructuring to access individual items in the array, like so:
const [count, setCount] = useState(0);With that, the component's code will be:
import { useState } from "react";

function Counter() {
    // Declare a new state variable, which we'll call "count"
    const [count, setCount] = useState(0);
    return (
        <div>
        Current Cart Count: {count}
            <div>
            <button onClick={() => setCount(count - 1)}>Add to cart</button>
            <button onClick={() => setCount(count + 1)}>Remove from cart</button>
            </div>
        </div>
    );
}
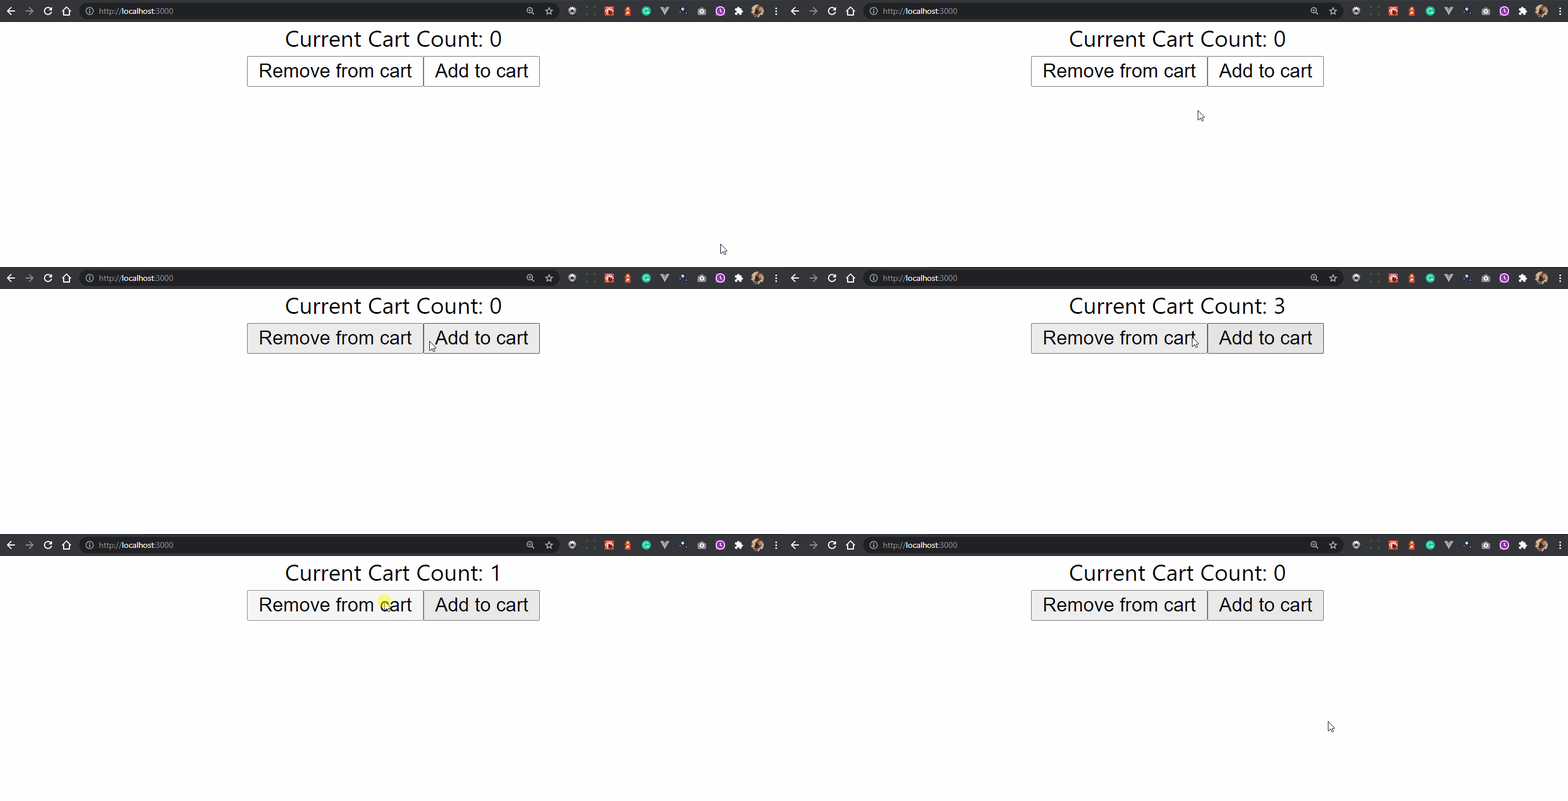
Here’s how the component will look when rendered.

By clicking on either the Add to cart or Remove from cart button, the value of the state variable count will change and the component would be re-rendered with the updated value of the state.
useEffect Hook
If you’re familiar with React class lifecycle methods, you can think of the useEffect Hook as the componentDidMount, componentDidUpdate, and componentWillUnmount lifecycle methods all combined in one function. It lets you replicate React's lifecycle methods in functional components.
The useEffect Hook lets you perform side effects in function components. Side effects are actions that can run alongside the main operations of a component, such as external API interactions, modifying state variables, and data fetching.
The useEffect hook accepts 2 arguments:
- A function with the code to run
- An array that contains a list of values from the component scope (props, context, and state variables), known as a dependency array, which tells the Hook to run every time its value is updated. If not supplied, the Hook will run after every render.
Here’s an example of using the Hook:
import { useState, useEffect } from "react";
function Counter() {
    // Declare state variables
    const [count, setCount] = useState(0);
    const [product, setProduct] = useState("Eggs");
    useEffect(() => {
    	console.log(`${product} will rule the world!`);
    });
    return (
        <div>
        Current {product}'s count: {count}
            <div>
                <button onClick={() => setCount(count + 1)}>Add to cart</button>
                <button onClick={() => setCount(count - 1)}>Remove from cart</button>
                Change Product:{" "}
                <input type="text" onChange={(e) => setProduct(e.target.value)} />
            </div>
        </div>
    );
}
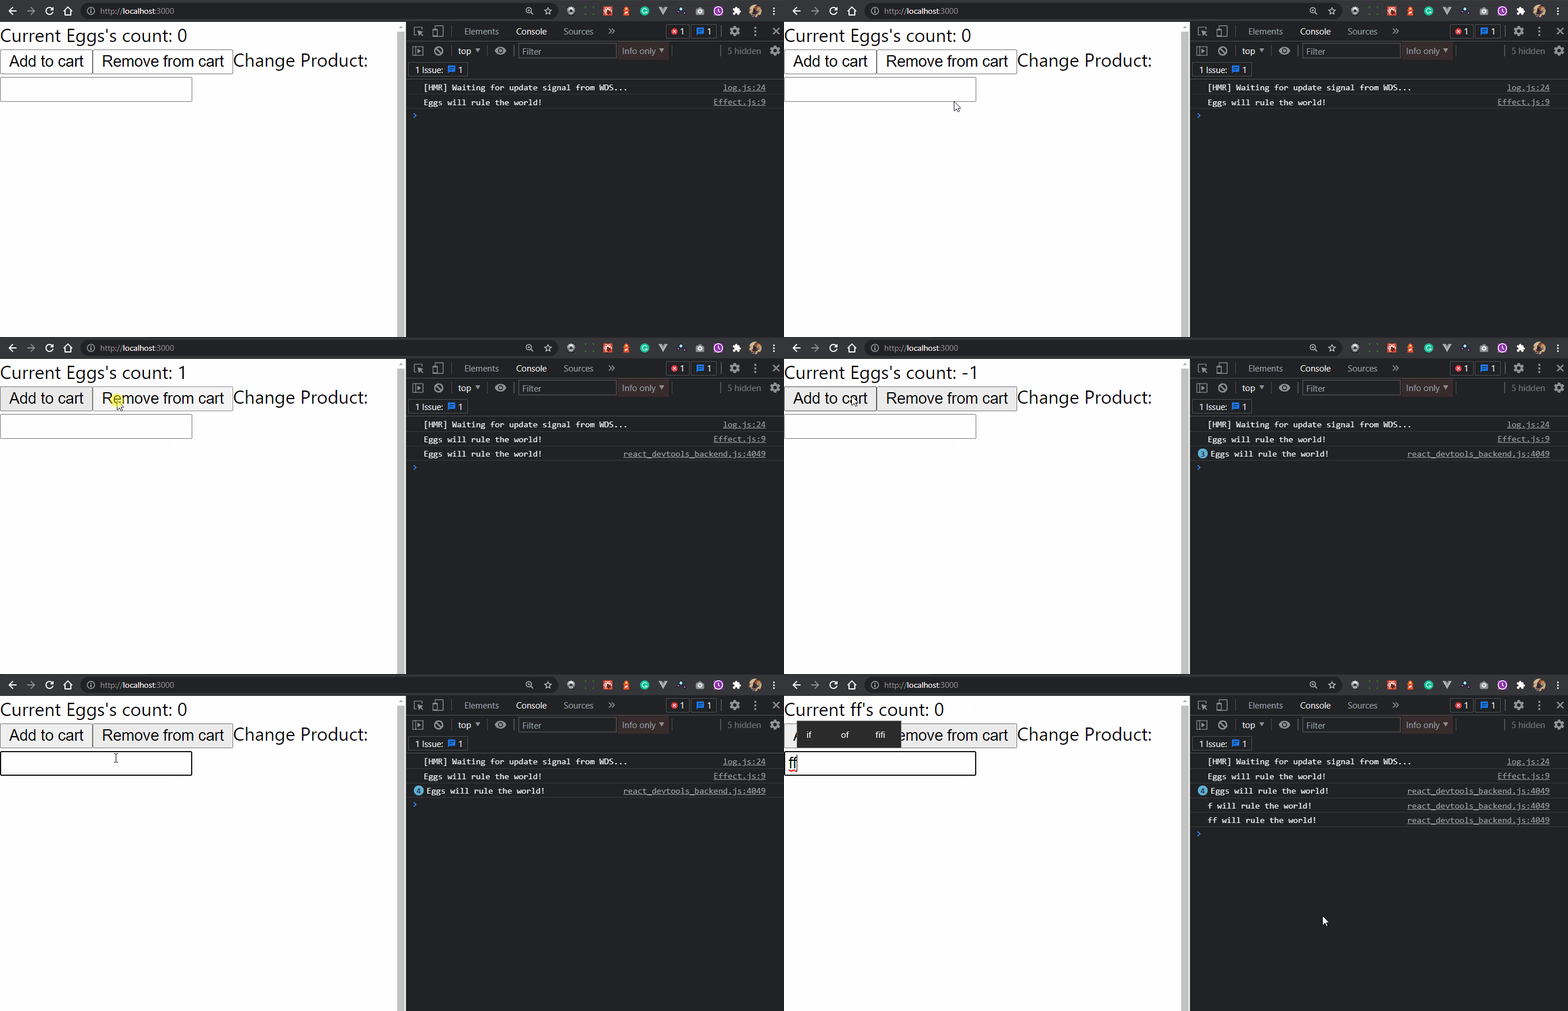
In the example, the effect will run after every state update.

How to Conditionally Fire an Effect
To run the Hook only when certain values have changed, pass the variables as a dependency into the array:
useEffect(() => {
	console.log(`${product} will rule the world!`);
}, [product]); // Only re-run the effect if the value of product changes
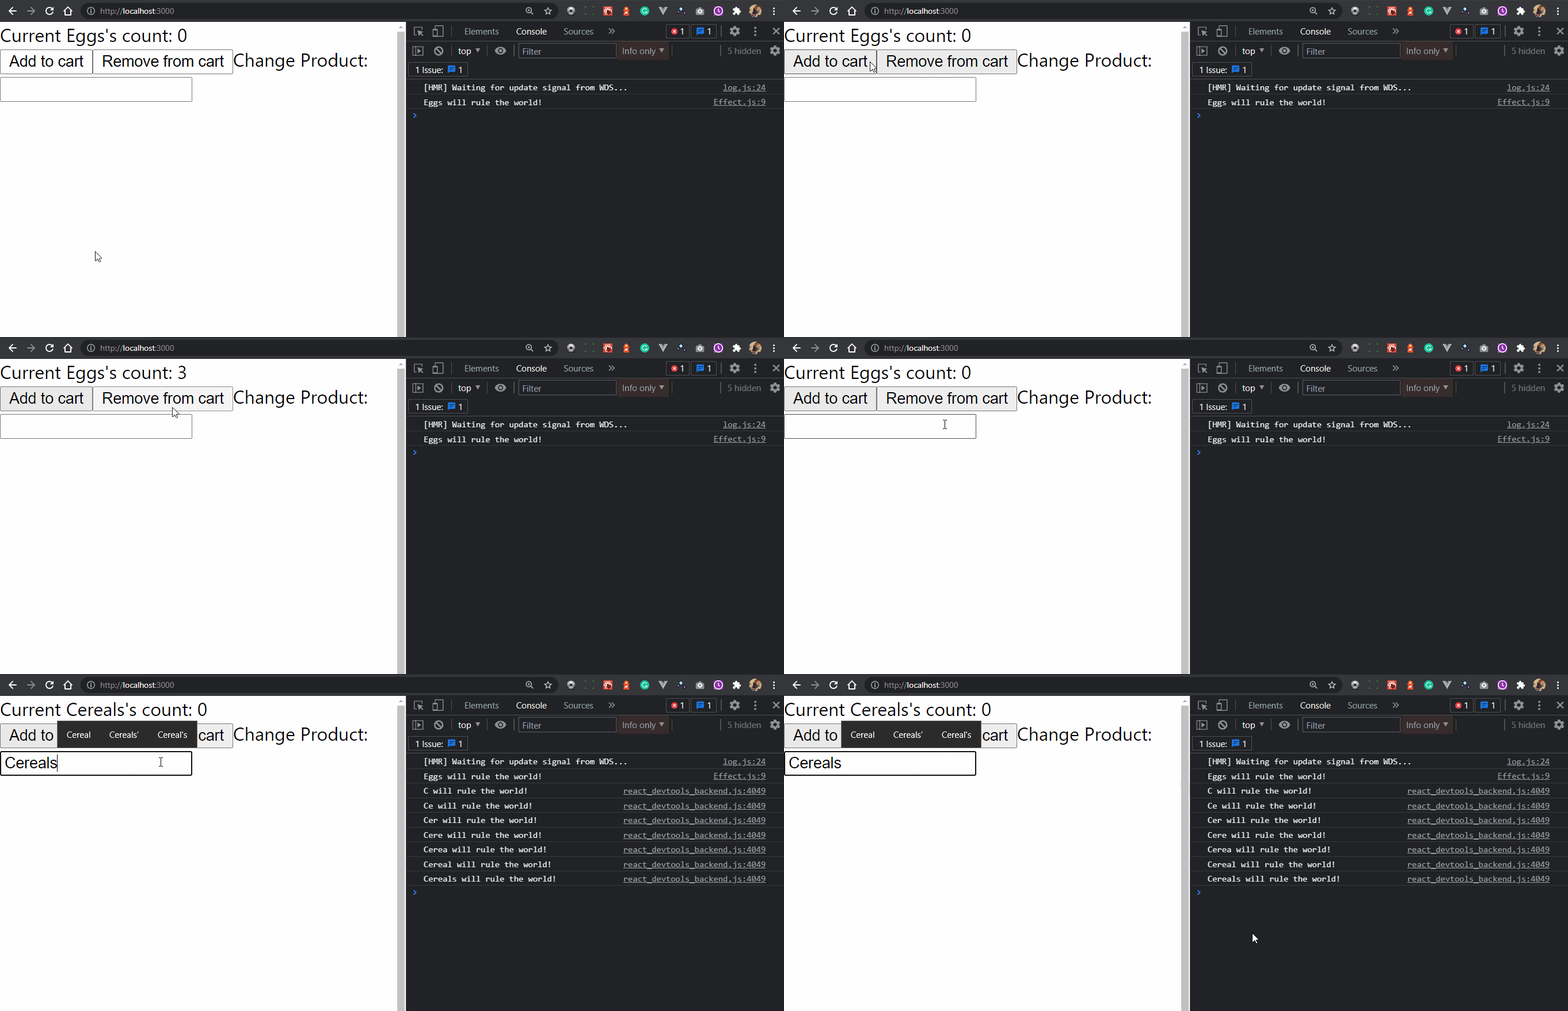
With this change, the Hook will only run on first render, and when the value of product is changed.

How to Run Once on First Render
If you want an effect to run only once on first render, like making API calls when the component is first rendered, you can pass an empty array as its dependency like so:
useEffect(() => {
	console.log("This runs once on first render");
}, []);
By supplying an empty array, it tells the Hook to listen for zero state changes, so it will only run once.
useContext Hook
The useContext Hook works with the React Context API. It provides a way for you to make particular data accessible to all components throughout the application no matter how deeply nested they are.
React has a unidirectional data flow, where data can only be passed from parent to child. To pass data (like state) down from a parent to a child component, you'll need to manually pass it as a prop down through various levels depending on how deeply nested they child component is.
For data such as the user's preferred language, theme, or authenticated user's properties, it is tedious to have to pass them manually down the component tree.
React's Context API and the useContext Hook makes it easy to pass data across all components in the app.
It accepts a context object created using React.createContext and returns the current context like so:
const value = useContext(SomeContext);Let's look at an example of how the Hook works:
First, create a context to use the Hook. For example, here's a UserContext to get the value of the current users:
import React from "react";
// some mock context values
const users = [
{
    name: "Harry Potter",
    occupation: "Wizard",
},
{
    name: "Kent Clark",
    occupation: "Super hero",
},
];

export const UserContext = React.createContext(users);
Every context has a Provider wrapper, which allows its children components to subscribe to changes in the context and passes down the value of the context through a value prop.
If the value prop of the provider is updated, its consuming children components will re-render with the new context value.
function Users() {
return (
    <UserContext.Provider value={users}>
    <UserProfile />
    </UserContext.Provider>
);
}
In the example, UserProfile is made the consuming component of the context.
import React, { useContext } from "react";
import { UserContext } from "./App";

export function UserProfile() {
    const users = useContext(UserContext);
    return (
        <div>
            {users.map((user) => (
            <li>
            I am {user.name} and I am a {user.occupation}!
            </li>
            ))}
        </div>
    );
}
This will display the current users’ properties:
useReducer Hook
The useReducer Hook is an alternative to the useState Hook. The difference is that it allows for more complex logic and state updates that involve multiple sub-values.
Similar to useState, useReducer lets you create state-like variables that cause the UI to be updated whenever they change.
This Hook accepts 2 arguments: a reducer function and an initial state.
useReducer(reducer, initialState);
It returns an array of two values which can be destructured to the current value of the state and a dispatch function.
const [state, dispatch] = useReducer(reducer, initialState);Let's learn about its arguments and returned values:
- state: This is the current value of the initialState passed to the Hook.
- reducer: The reducer is a function that accepts the state and an action. Based on these arguments it determines how the value of state will change.
- dispatch: The dispatch function is how we pass an action to the reducer function. It dispatches the action to be used to update the state.
Typically, we iterate over the type of actions we made in our app through a switch statement to determine how the value of state will change. This is how the Hook updates the values of its state.
function reducer(state, action) {
    switch (action.type) {
        case "CASE_1":
        return {
        	updatedState,
        };
        case "CASE_2":
        return {
        	updatedState,
        };
        default:
        	return state;
    }
}
The dispatch function usually dispatches an object in the format:
dispatch({ type: "ACTION_TYPE", payload: optionalArguments });Where type is the description of the action and payload is the arguments you want to pass to the reducer.
How to Create Custom Hooks
A Custom Hook is the idea of extracting commonly used component logic from the UI into JavaScript functions by making use of the already available React Hooks. This helps you prevent code duplication and lets you make such logic re-usable within multiple components.
Let's look at an example of a custom hook that will return a response from any valid API URL we pass to it.
//useFetch.js
import { useState, useEffect } from "react";

export function useFetch(url) {
	//values
    const [data, setData] = useState(null);
    const [error, setError] = useState("");
    useEffect(() => {
        fetch(url)
        .then(res => {
            if (!res.ok) {
            throw Error("something wrong, çould not connect to resource");
        }
        setData(res.json());
        })
        .then(() => {
        	setError("");
        })
        .catch( error => {
            console.warn(`sorry an error occurred, due to ${error.message} `);
            setData(null);
            setError(error.message);
        });
    }, [url]);
    return [data, error];
}
Now you can use this logic anywhere in your app simply by importing the function and passing an API path as an argument, rather than writing it all from scratch.
Wrapping Up
I hope you got to see how useful React Hooks are. They let you create effective components on the fly without worrying about the hassles that come with class components.
From letting you focus on writing your main code to allowing you to create your own custom Hooks...React Hooks are so cool! I’m excited for you to try them out for yourself.
If you found this article helpful, do share it with your friends and network. Also, feel free to connect with me on Twitter and my blog where I share a wide range of free educational articles and resources.
Thanks for reading, and happy coding!

