
By Nicholas Kramer
A primer to creating timeline based animations without knowing JavaScript

Introduction
The GreenSock Animation Platform (GSAP for short) is a powerful JavaScript library that enables front-end developers and designers to create robust timeline based animations. This allows for precise control for more involved animation sequences rather than the sometimes constraining keyframe and animation properties that CSS offers.
The best part about this library is that it’s lightweight and easy to use.
With GSAP, you can start creating engaging animations with little to no knowledge of JavaScript.
This guide will show how to set up and use GSAP’s TweenMax feature and also dive into a bit of Club GreenSock’s DrawSVG plugin. Each of the examples below has a corresponding CodePen link so you can follow along in another tab.
Getting Started
Before coding, we first need to add the GSAP library to our HTML file. To do this, you will need to grab the CDN link to the TweenMax library. You can find links to TweenMax and other GSAP CDNs here.
Note: CDN stands for Content Delivery Network. This means that instead of hosting the JavaScript files on your site, an outside source like CloudFlare can host them for you.
Once you have the CDN link, insert it in a <script> tag at the bottom of your HTML file like so:
<script src=“https://cdnjs.cloudflare.com/ajax/libs/gsap/1.20.3/TweenMax.min.js"></script>
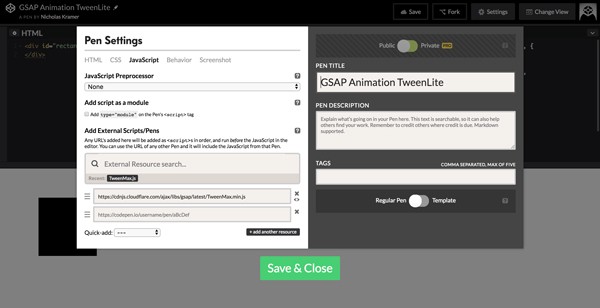
That’s all you need to get started! If you’re using an online development environment like CodePen, you can install GSAP by editing the Pen Settings.
Understanding Tweens
Tweens are the basic animation functions from within GSAP. To animate any HTML object, we must call the object, define the properties that we are going to animate, the duration of the animation, the animation’s easing, and any other parameters like delay timing.
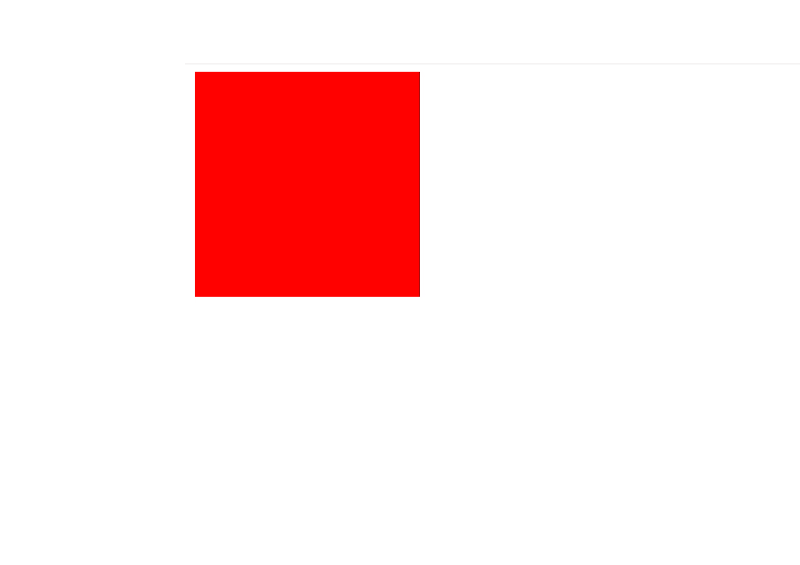
For example, if we were to change a red rectangle’s color to black while also moving it down and to the right, the Tween would look like this in JavaScript:
TweenLite.to(“#rectangle”, 2, { left:100, top: 75, backgroundColor:"#000000", ease: Power4.easeIn});

Let’s break this down:
**TweenLite** lets our JavaScript file know that we want to animate using GSAP. The .to method immediately after signifies that we want our object to animate from its original static state defined by our HTML and CSS to the final animated state defined by our JavaScript.
You can use the .from method instead to reverse this. We’ll cover this a little later on in this article.
Next, we define the object that we want to animate. In our case, it’s an HTML object with the ID of rectangle. This looks like “#rectangle”, in our code. We must make sure that we have our object wrapped in quotes and that we use the # to denote that we’re calling an ID. Any ID could go here as long as it’s an element defined in your HTML. Also, note that the comma following the end quote is important as well. Without it, the animation will not run.
The 2, after the element’s ID defines the duration of the animation in seconds. So in this instance, we’re defining the animation’s duration as 2 seconds long. If we wanted it to be a half-second long, we would change the value to 0.5, instead.
The parameters inside the brackets represent any of the properties you’d like to animate. In this example, we’re animating the left top and background-color CSS properties. Notice how each of these different properties use camelCase to call them instead of the typical hyphen notation used with CSS. You can add as many different properties here as you’d like as long as you separate them with commas after their value.
The last property called is the animation's ease. GSAP comes packaged with a bunch of different easing options that you can add to your animations.
In our animation above, we call the Power4 ease and have it set to easeIn to the animation. You can see the full range of easing options in the documentation here. If you’re unfamiliar with easing, be sure to check out a previous article that explains different easing functions in depth.
Finally, you must close the parenthesis and the brackets of the Tween to prevent any errors and allow the animation to run. Don’t forget to include the semicolon to end the JavaScript function.
The Tween is the basic foundation for GSAP animations. You can experiment with an example of this Tween in CodePen here.
Tweens are great if you want to do one-off animations but if you’d like to create multi-step sequences, timelines are the best alternative.
Timeline Animations
If you’ve ever used an animation or prototyping software like After Effects or Principle, you’re already familiar with timeline animations. Traditional timelines are usually a series of animations that occur one at a time or concurrently. Timelines in GSAP are not any different.
To call a timeline, you must first define a variable at the top of your JavaScript file as a new TimelineLite:
var tl = new TimelineLite;
To break this line of code down piece by piece, know that var is short for variable. If you’re unfamiliar with what a variable is, think of it as shorthand for a larger piece of code. In this case, we defined a new variable as tl and set it equal to new TimelineLite. This means that every time that we input tl in our code, it will stand for a new TimelineLite.
Note that we can substitute tl for any shorthand text we’d like. I’m using tl because it’s short for timeline. This is useful because if we have multiple timelines in our file, we can give each one a unique variable to prevent confusion.
Let’s now recreate our first animation using TimelineLite instead of TweenLite to see how this works.
var tl = new TimelineLite;
tl.to(“#rectangle”, 2, { x:100, y:75, backgroundColor: “#000000”, ease: Power4.easeIn})
You’ll notice that this is not much different than our TweenLite animation from above. The only real difference is that instead of stating TweenLite.to we are using tl.to instead. You’ll also notice that we are now using x and y coordinates instead of left and top CSS properties. These more or less behave the same way.
Also, notice how there is no semicolon at the end of the parenthesis. This is because we are going to add a second animation to this timeline, tethering them together.
For this second animation, let’s make the rectangle scale up 150% and turn gray after the first animation is complete. To do this, we will add another block of code under our first animation. Altogether it will look like this:
var tl = new TimelineLite;
tl.to(“#rectangle”, 2, { x:100, y: 75, backgroundColor: “#000000”, ease: Power4.easeIn})
.to(“#rectangle”, 1, { scaleX: 1.5, scaleY: 1.5, backgroundColor: “#454545”, ease: Back.easeOut.config(1.7)});

You can see that this second block of code doesn’t have the tl.to at the beginning of the timeline. Instead, it only has .to.
This is because multiple animations in one timeline can be tethered together as long as there’s no semicolon separating them.
A semicolon signifies the end of a timeline and should only be used at the end of the last animation within a timeline.
You’ll also notice that we’re using two new properties, scaleX and scaleY. These properties behave exactly how they sound, they increase an object’s size by a percent amount. In this case, 1.5 is equivalent to 150%.
Finally, we’re using a unique easing function here called Back.easeOut.config(1.7). This ease gives a natural rhythm to our animation by overshooting the intended value and then coming back down to the final value. We can see in this animation’s case how the rectangle grows slightly bigger than 150% and then scales itself back down afterward.
Animating Multiple Objects with TimelineLite
Timelines are not limited to animating one object. You can animate multiple objects in a timeline by adding their corresponding IDs in different functions.
For example, if we were to create an HTML object of a circle and have it fade in after our rectangle scales larger, our code would look like this:
var tl = new TimelineLite;
tl.to(“#rectangle”, 2, { x:100, y: 75, backgroundColor: “#000000”, ease: Power4.easeIn})
.to(“#rectangle”, 1, { scaleX: 1.5, scaleY: 1.5, backgroundColor: “#454545”, ease: Back.easeOut.config(1.7)})
.from(“#circle”, 1, { opacity: 0,});

We’ve added a third code block to our animation that calls the circle.
Also note how we’re now using the .from method. This means that our circle animation starts at 0% opacity and then goes to 100% opacity.
You can see this in action when our animation has the circle hidden because it starts at 0% opacity. After the rectangle changes color and scales up, the circle fades in at 100% opacity, just as intended.
You can see how TimelineLite works in this CodePen example here. I encourage you to try and add new elements to the HTML and try to create more complicated and unique sequences with the provided tools. You can also take a look at the full GSAP TimelineLite documentation here to learn about other methods and properties.
DrawSVG
Along with the free TweenLite and TimelineLite features, GSAP also offers premium content that allows you to manipulate SVGs with ease. Luckily, these plugins are available to play around with for free on CodePen by searching for them in the pen settings (the gear icon next to the JS text editor).
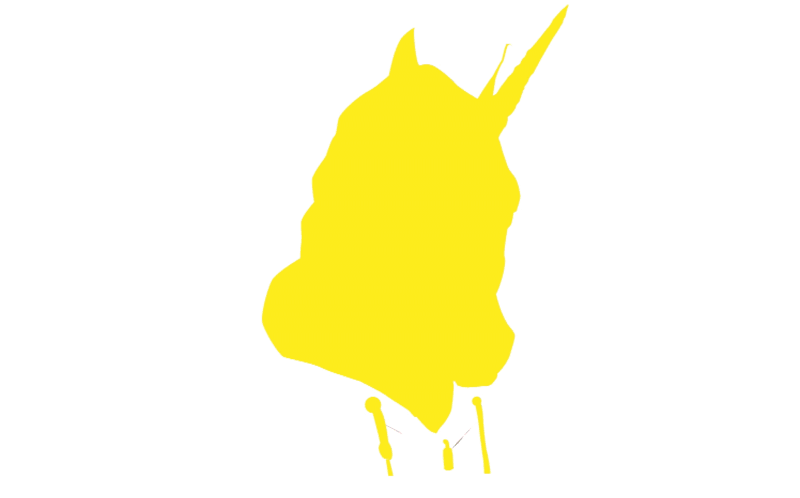
The DrawSVG plugin makes it easy to animate the lines of an SVG. To show this, we’re going to have an SVG of a unicorn in a hoodie draw itself. You can follow along with the corresponding CodePen here.
First, we need to export our SVG and import it into our text editor.
For a comprehensive breakdown on how to properly export SVGs, check out a previous article here.
Next, we need to give each of our individual paths an ID so that we can call each one in our timeline. This may take some time if you have a complicated SVG with a series of different animating lines. For the sake of simplicity, I’m going to name the first path #unicorn1 and name the next path #unicorn2 and so on until they all have a unique ID.
<!––An example of a path with an ID--><path id=”unicorn1" class=”st0" d=”M371.8,252.4c0,0,2.8,1.8,5,1.2"/>
Now that all our paths have an ID, we can jump in and begin developing our timeline animation. Like before, we need to create a variable will function as our TimelineLite variable:
var unicorndraw = new TimelineLite();
In this case, we’re going to be using the variable unicorndraw.
The last step we need to do is to create a TimelineLite animation that calls each of the individual paths:
unicorndraw.from(“#unicorn1, #unicorn2, #unicorn3, #unicorn4, #unicorn5, #unicorn6, #unicorn7, #unicorn8, #unicorn9, #unicorn10, #unicorn11, #unicorn12, #unicorn13, #unicorn14, #unicorn15, #unicorn16, #unicorn17, #unicorn18, #unicorn19, #unicorn20, #unicorn21, #unicorn22, #unicorn23, #unicorn24, #unicorn25, #unicorn26, #unicorn27, #unicorn28, #unicorn29, #unicorn30, #unicorn31, #unicorn32, #unicorn33, #unicorn34, #unicorn35, #unicorn36, #unicorn37, #unicorn38, #unicorn39, #unicorn40, #unicorn41, #unicorn42, #unicorn43, #unicorn44, #unicorn45, #unicorn46, #unicorn47, #unicorn48, #unicorn49, #unicorn50, #unicorn51, #unicorn52, #unicorn53, #unicorn54, #unicorn55, #unicorn56, #unicorn57, #unicorn58, #unicorn59, #unicorn60, #unicorn61, #unicorn62, #unicorn63”, 3, {drawSVG:”0", delay:”1"})
You can see how this is like our previous .from TimelineLite animation from before. We’re calling our individual objects (in this case, we’re calling more than one at a time so that they all animate at once) and we define the duration of the animation as 3 seconds.
The only difference is that inside the brackets, we’re now using drawSVG: “0”. This calls the drawSVG plugin and defines each path to have a value of 0. Because we’re using a .from method, the paths start with a value of 0 and then animate to 100% in 3 seconds.
The other piece of code inside the brackets is delay: “1”. This determines how long the animation will wait to execute in seconds. In this case, we’re stating that the animation will wait 1 second before executing.
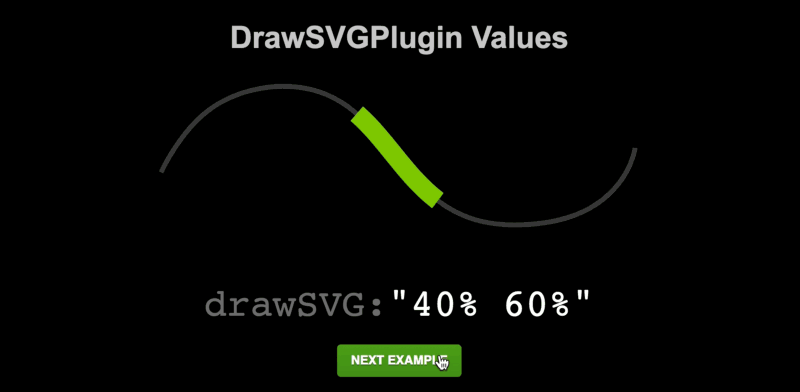
This is the fastest way to get started with the drawSVG plugin but you can manipulate the values in many different ways to get some interesting effects. To learn more about this plugin, check out GSAP’s site.
Final Thoughts
GSAP makes it easy to create and manipulate your own timeline animations even if you have little to no understanding of JavaScript. This was a small amount of the different animations you can do with GSAP. Check out Greensock’s site to learn more about the library and experiment with different animation techniques.
Nicholas Kramer is a designer currently working at Barrel in New York City. He solves design problems for businesses by helping them simplify ideas and communicate their value to customers.