
By Moshe Vilner
Everybody who has used Angular CLI knows that it is a powerful tool which can take a front-end development job to a completely different level. It has all the common tasks like live reload, typescript transpiling, minification, and more. And it’s all preconfigured and ready to use with one simple command:
ng build, ng serve, ng test.
But there is one (and a very important one) task that needs to be configured once the application is ready to start showing some data from the server…
Yes, no matter how great the Angular framework is, and how quickly and performant its components — at the end the purpose of SPA (single page application) is to interact with the server through HTTP requests.
And here is the first obstacle that appears before every Angular CLI newbie: the Angular project runs on its own server (which runs by default at http://localhost:4200)). Therefore, the requests to the API server are cross-domain, and, as you might know, the security of the web browser disallows the making of cross domain requests.
Approach #1: proxy
Of course, the people at Angular CLI foresaw this issue and even built a special option for running an Angular project using a proxy configuration:
ng serve —-proxy-config proxy.conf.json
What is a proxy, you might ask? Well, browsers don’t allow you to make cross domain requests, but servers do. Using the proxy option means that you’re telling Angular CLI’s server to handle the request sent from Angular and resend it from the development server. This way, the one who “talks” with the API’s server is Angular CLI’s server.
The proxy configuration requires the proxy.conf.json file to be added to the project. This is a JSON file with some basic settings. Here is an example of the contents of proxy.conf:
{ "/api/*": { "target": "http://localhost:3000", "secure": false, "pathRewrite": {"^/api" : ""} }}
This code means that all requests that start with api/ will be resent to http://localhost:3000 (which is the API server’s address)
Approach #2: CORS
Browser security doesn’t allow you to make cross domain requests unless the Control-Allow-Origin header exists at the server’s response. Once you configured your API server to ‘‘answer’’ with this header, you can fetch and post data from a different domain.
This technique is called Cross Origin Resource Sharing, or CORS. Most of the common servers and server frameworks like Node.js’ Express, or Java Spring Boot can be easily configured to make CORS available.
Here is some example code which sets the Node.js Express server to use CORS:
const cors = require('cors'); //<-- required installing 'cors' (npm i cors --save)const express = require('express');const app = express();app.use(cors()); //<-- That`s it, no more code needed!
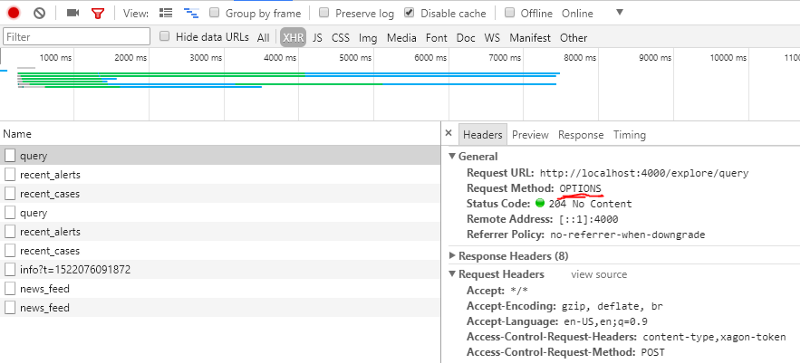
Note that when using CORS, before each of the HTTP requests are sent, it will follow after the OPTIONS request (at the same URL) that checks to see if the CORS protocol is understood. This “double request” may affect your performance.
Production Approach
Ok, your Angular project is “talking” smoothly with server, getting and sending data in the developer environment. But the time of deployment has finally come, and you need your beautiful and preformant Angular app to be hosted somewhere (far away from Papa Angular CLI). So again you face the same problem: how to make it to connect to server.
Only now there is a big difference: in the production environment (after running ng build command), the Angular app is no more than a bunch of HTML and JavaScript files.
Actually the decision on how to host the application on the production server is an architectural decision, and architecture is far beyond the scope of this article. But there is one option I recommend that you consider.
Serve Static Files From the API’s Server
Yes, you can host your Angular project (once it has only HTML and JavaScript files) on the same server where data (APIs) is served from.
One of the advantages of this strategy is that now you do not face any “cross-domain” issues, since the client and API are actually on the same server!
Of course, this approach requires the API’s server to be configured properly.
Here is the code that exposes the “public” directory where Angular files can be hosted when using the Node Express server:
app.use(express.static('public')); //<-- public directory that contains all angular files
Note that in this case, the way your app accesses the API in the development environment will be different from the way the API accessed it at production. Thus you may need to use different HTTP URLs in different environments (Like api/users/1 at dev and users/1 at production). You can use Angular CLI’s environment option to achieve this:
// users.service.ts
const URL = 'users';return this.http.get(`${environment.baseUrl}/${URL}`);...
// example of environment.ts file:export const environment = { production: false, baseUrl: 'api',//<-- 'API/' prefix needed for proxy configuration };
// example of environment.prod.ts file:export const environment = { production: true, baseUrl: '', //<-- no 'API/' prefix needed};
Conclusion
Angular CLI is without doubt a very powerful and robust tool . It makes our lives as front end developers easier in many ways. But it also requires you to make an architectural decision about the connection to the API’s server. Therefore, you need a clear understanding of the various ways client-server communication may be established.
This article lists two approaches of handling this issue in the developer environment and also one recommendation about production architecture.
Try to play with various compilations and see which one feels more convenient for you and your team.
Have fun and let me know how it goes!