

This article will teach you an alternative approach to testing client APIs using Thunder Client, an open-source extension available on VS Code marketplace.
You will not need to download any tools to do this, since you can get it done right within VS Code.
The article covers the following:
- Intro to VS Code IDE and marketplace
- Why use Thunder Client?
- Advantages of Thunder Client
- How Thunder Client works
- How to download and install Thunder Client
- How to launch Thunder Client
- Collections and environment variables
- How to make a client request
- Preview of a sample request and response
Intro to VS Code IDE and Marketplace
VS Code is more than a code editor or IDE for so many developers. It doesn't just let you write code in your preferred language(s) – it also lets you fast track the whole development process.
VS Code provides a marketplace of extensions that lets you easily search and download your favorite ones from the pool of many open-source options.
Why Thunder Client?
Thunder Client is an alternative to the famous Postman tool used for testing client APIs. The Thunder Client VS Code extension is lightweight and lets you test APIs on the fly within the editor.
You might not want to download another tool to test the APIs you're building. Instead, how about downloading an extension in VSCode that offers a wide range of functionalities like:
- collections,
- environment variables,
- support for standard HTTP verbs,
- navigation tabs (Query, Headers, Auth, Body, Test), and
- Support for JSON Responses
Thunder Client vs Postman
Thunder Client is lightweight and is suitable for users who want a simple user interface and fantastic user experience with zero complexity. It also runs flawlessly offline and provides documentation with markdown support 🤯.
Keep in mind that Postman is more robust and has a broader range of features built to industry standards. It allows a community of developers to explore the largest network of APIs, workspace, and collections all over the world. It also has features like creating teams, reporting, monitors (periodically checking for APIs performance and response), and mock servers (leverages mock servers that help simulate endpoints and their corresponding responses without a backend).
It's easy to create APIs because it offers support for versioning, schema types (OpenAPI 3.0- 1.0, RAML, GraphQL), and schema format (JSON, YAML).
Like every great tool, Postman has an up-to-date learning centre where you can find documentation to get started with the tool. Sounds interesting too, right? Well yeah 😁 both are unique and perfect for their use cases.
Advantages of Thunder Client
First, it's a super fast API client extension. It creates requests to retrieve responses quickly and seamlessly. It also does not require internet access when testing APIs on your local machine.
It also has an intuitive and easy to use user interface. The interface is friendly and a lot easier to use as there are relatively few features on the extension compared to a tool like Postman.
Thunder Client has extensive API request handling. It's efficient for processing large requests at a time and does not slow down the VS Code application.
It also supports Visual Studio Code themes and adopts your currently configured VS Code theme.
Finally, Thunder Client supports collections, environment variables, GraphQL, and test scripts. It also has popular features that robust tools like Postman have.
In general, Thunder Client makes an excellent alternative for a small team who only need access to basic features like collections, an environment variable, and testing.
How Thunder Client Works
If you want to use Thunder Client, you'll need to go to the VS Code marketplace to download the extension and then launch it. Once you've done that, here are a few basic things you can use the extension to do:
Track Activity: Thunder Client keeps track of recent API requests a user has made in the past. You can also filter the activity to narrow it down to a preferred activity search. It is also called History.
Use Collections: You can organise APIs so it's easier to access them. Collections are a group of APIs, so you can create a User collection to include APIs like create user, edit user, delete user, and so on.
Environment Variables: With Envs, you can store credentials like tokens, base URLs, and public and private keys and then use the variables within the request body.
Make Requests: You can specify your preferred HTTP verb to go along with the request, like POST, then the endpoint. With the request Thunder Client, there is also support for Query Parameters, HTTP Headers (Raw or Not), Authentication (None, Basic, Bearer, OAuth 2, AWS and NTLM Authentication), Body (Payload attached to individual request) and Test (you select the test type which can be a response code and set a value to assert).
Responses: Thunder Client offers a well-crafted response section with the response body, response status, and size and time it took for the request. It also lets users add markdown supported documentation, making it even more enjoyable.
How to Download and Install Thunder Client
To download Thunder Client, you can find it on VS Code marketplace. Just search for "Thunder Client" when you're prompted and then install it.
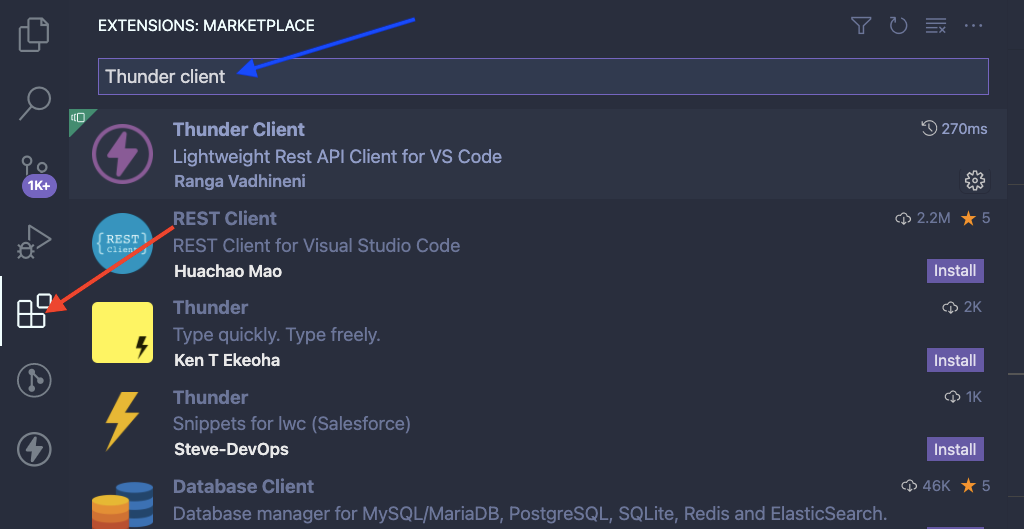 Search Thunder Client On Marketplace
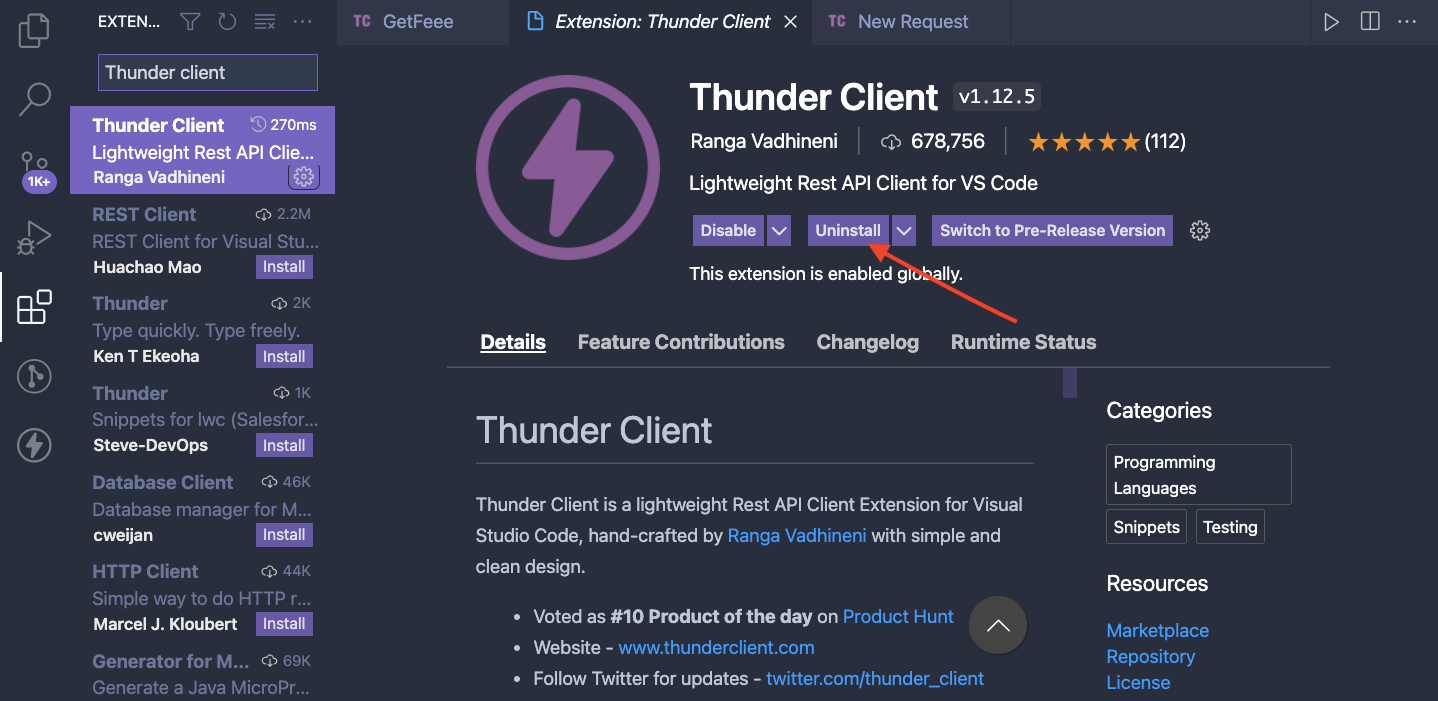
NOTE: I have mine installed already, so the uninstall option is showing in the image.
Install the Thunder Client extension by clicking on the install button.
 Install Thunder Client
How to Launch Thunder Client
Click on the new icon that's been added in VS Code to launch Thunder Client.
 Launch Thunder Client
Then you can start using Thunder Client.
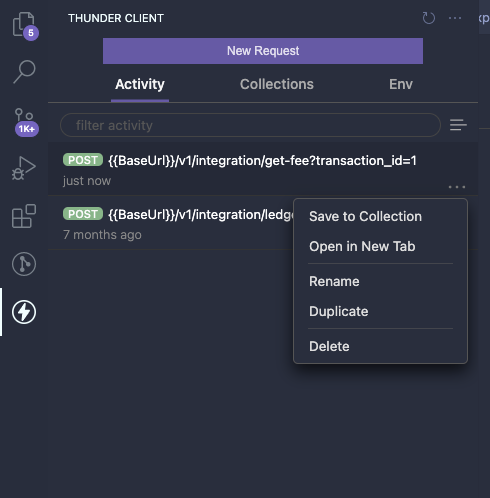
How to Use the Activity Tab
The activity tab shows the history of your API request in recent times. You are also free to perform operations such as saving to a collection, renaming, duplicating, and more as shown in the image.
How to Use Collections and Environment Variables
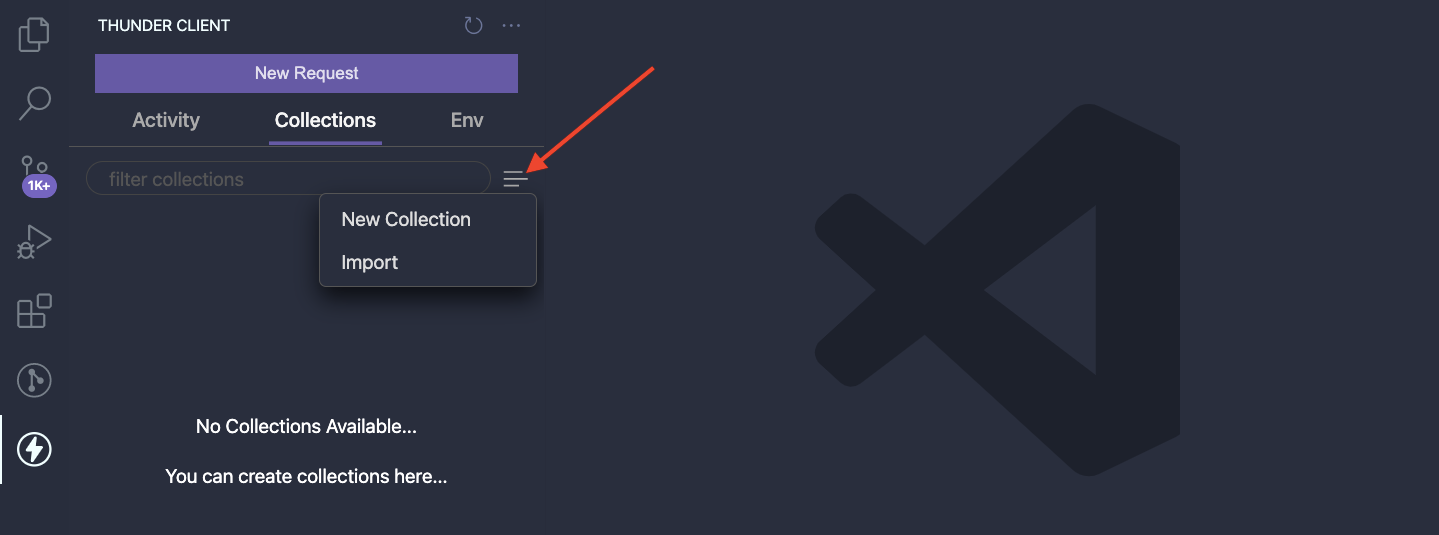
Collections are a group of API Requests. Thunder Client lets you work with collections or create a single individual request like the "New Request" button.
To work with collections, click on the "Collections tab", then click on the icon the arrow points to in the image below. This shows a dropdown where you select if you want a "New collection" or have an existing collection for import.
 Create & Import collection
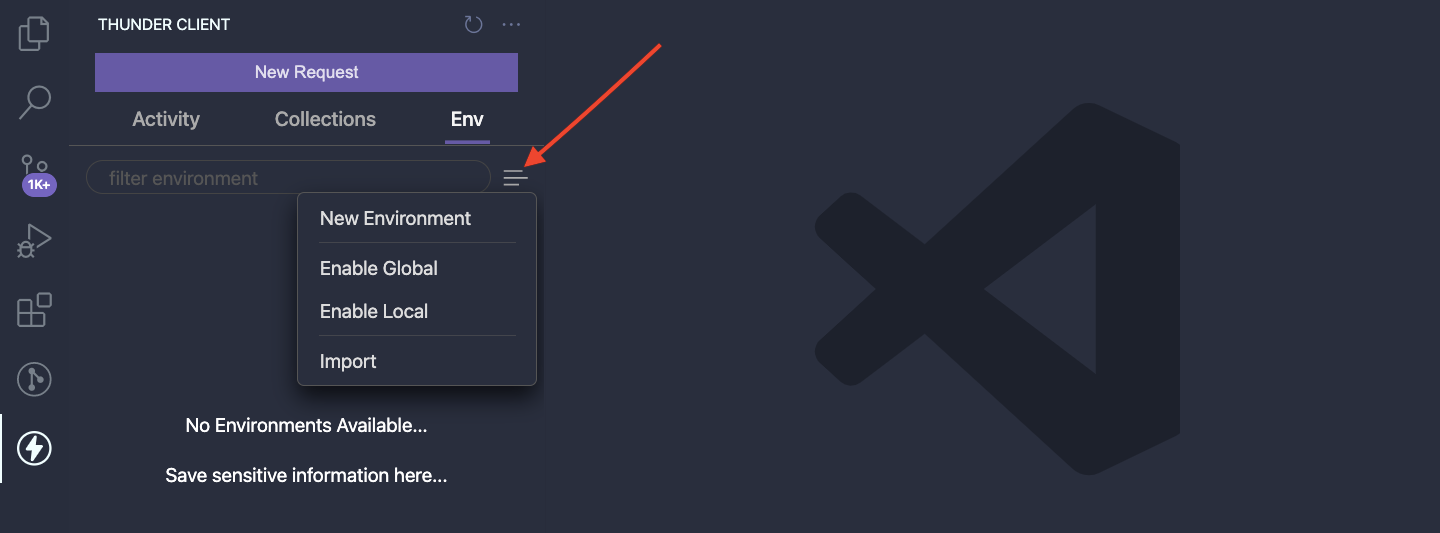
You can add environment variables by clicking the "Env" tab, then clicking on the icon the arrow points to in the image below. This shows a dropdown to set up the env variables for requests. You also get to import existing variables.
How to Make a Client Request
Depending on the type of Request, Thunder Client offers a list of HTTP VERBS for requests such as GET, POST, PUT, DELETE, and PATCH.
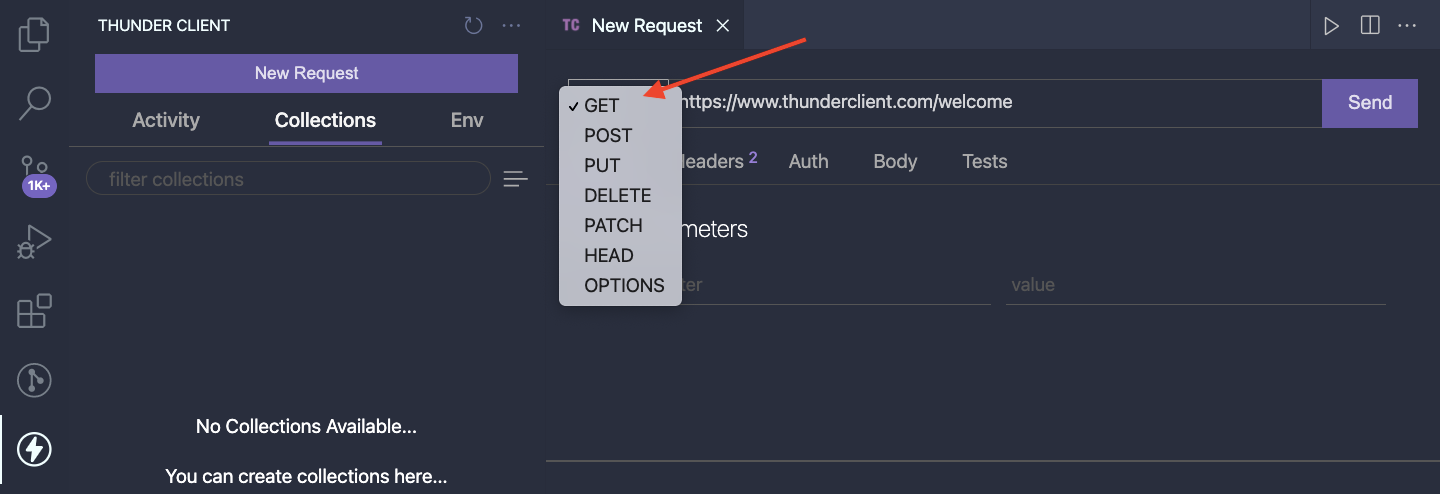 HTTP Verbs in Thunder Client
There is also support for Query parameters, Headers, Authorization, Body and Tests. At the time of writing, there is no support for file attachments for requests yet. You can check the upcoming release notes here.
Query Parameters allow you to append query parameters to the request.
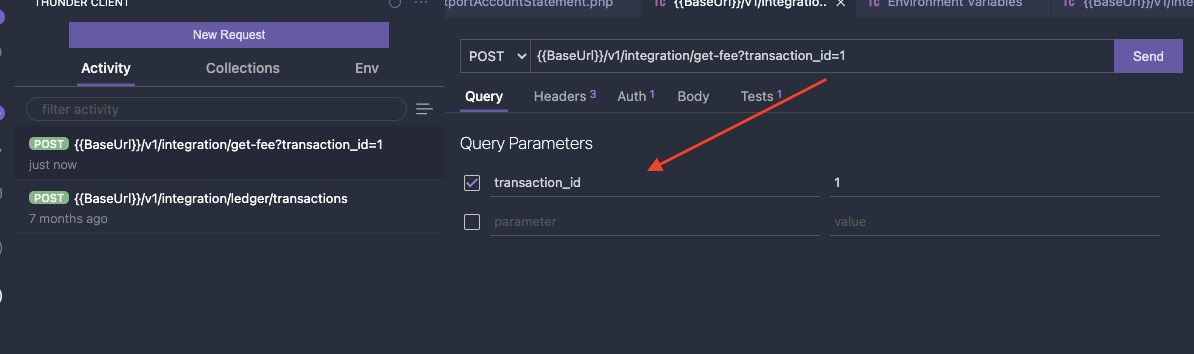 Query Params
Headers let you set HTTP headers like authorization, content-type, origin, user-agent, accept-language, referrer, and so on.
If you want any headers to be optional, just make sure to leave them unchecked for the request. There is also an autocomplete suggestion enabled for your preferred type of header.
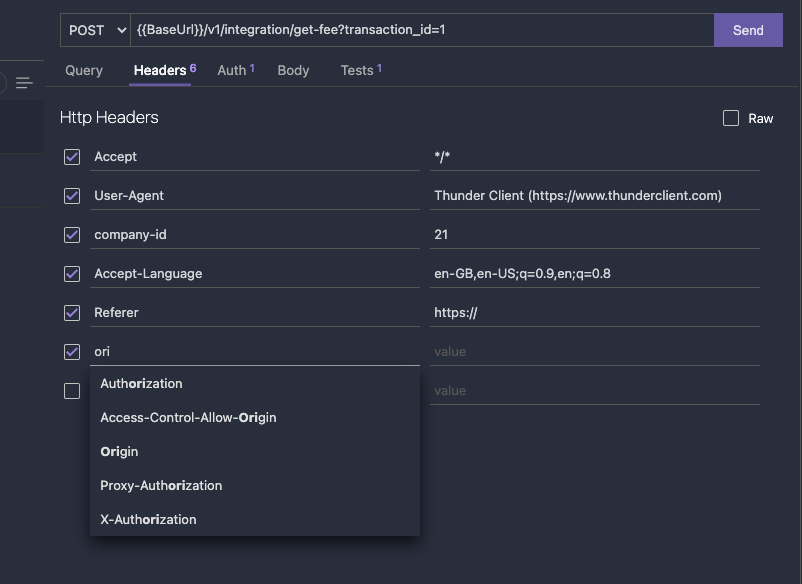 Http Headers
To access resources, you need to have tokens that authenticate them. With Thunder Client, the Auth tab lets you select your preferred type of Auth and add credentials.
In my case, I choose Bearer; then, I have a token pasted into the text area and an auto-generated token prefix for the request.
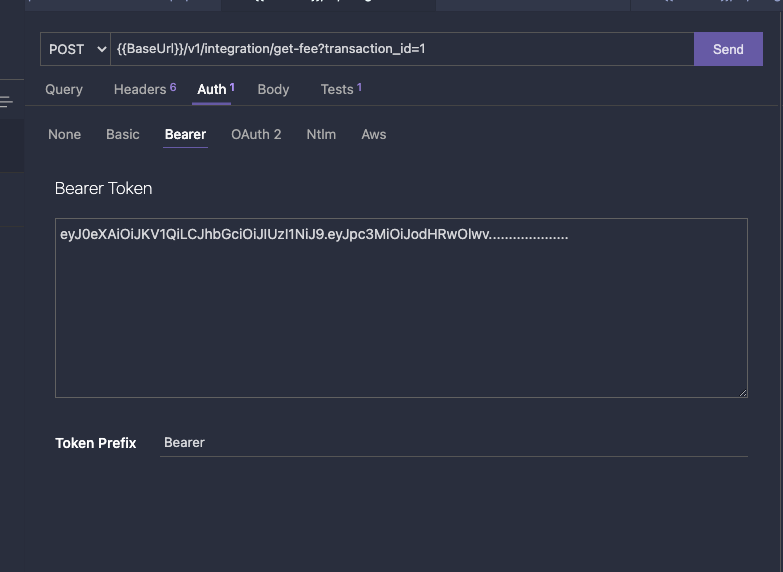 Authentication
You can include a payload when making a request. To add the payload, select the Body tab, and you will see different data formats supported by the extension.
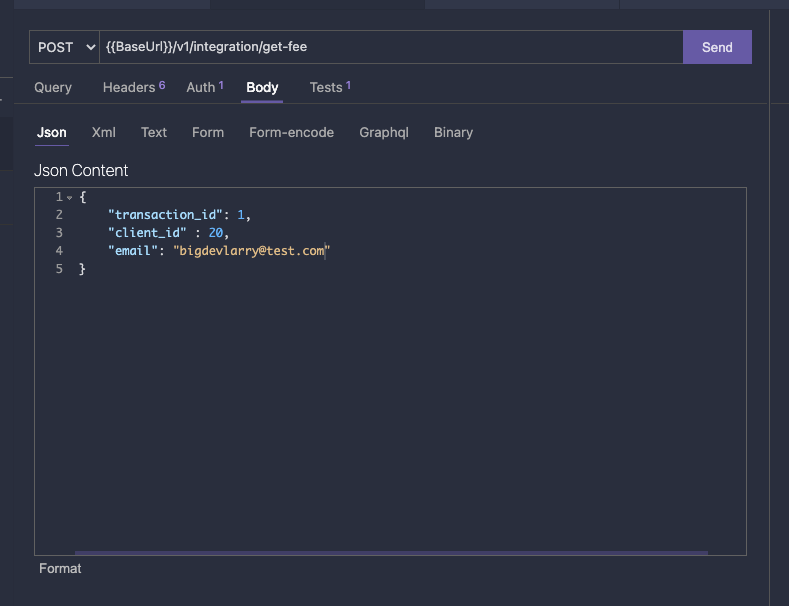 Request Payload
Sample Request and Response
The image below shows a sample request with query parameters and a sample JSON response.
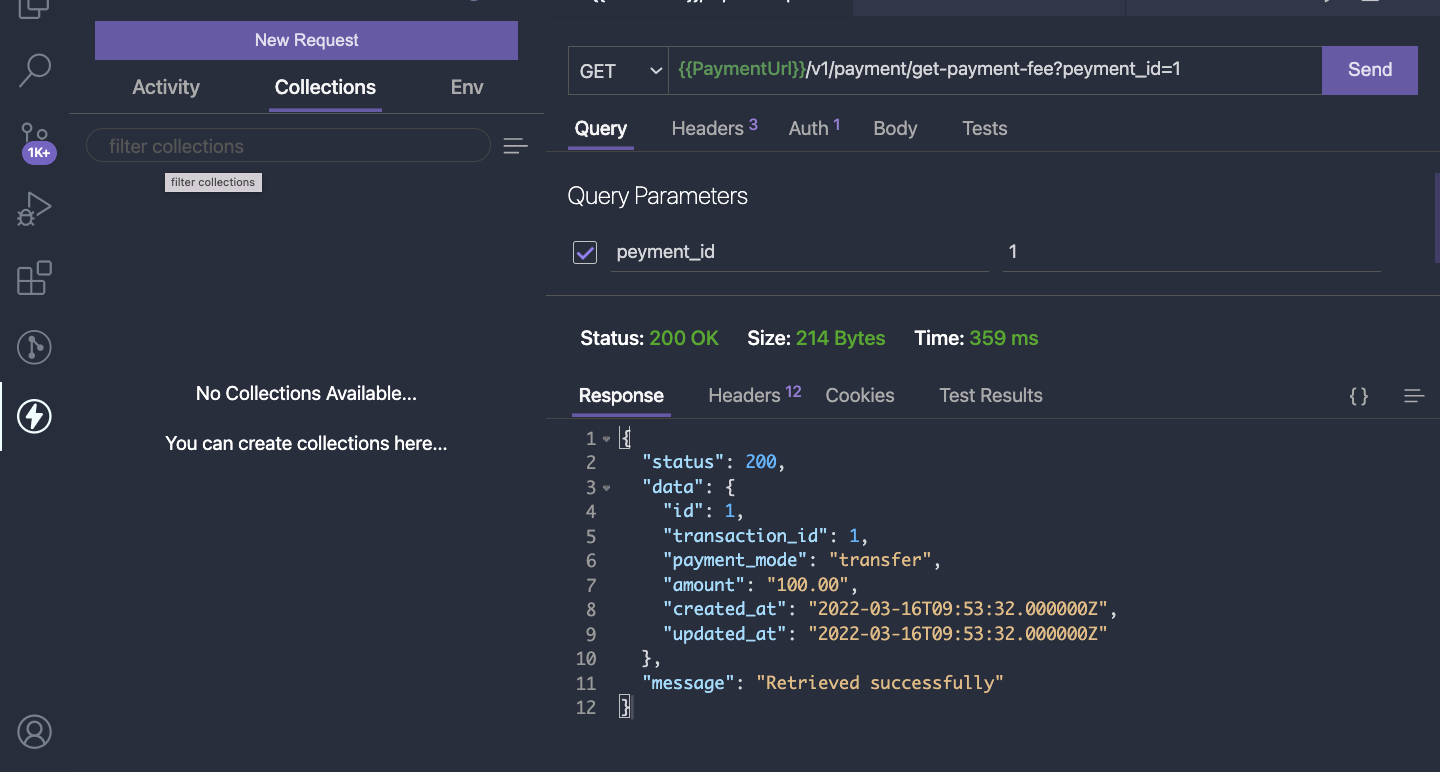 Sample Request & Response
Conclusion
Yaaay, excited to have you hooked till the end. I hope you have learned how to search the VS Code marketplace for extensions and can start making API Requests with Thunder Client.
Massive shout out to the creator @Rangav on Twitter for the superb extension.
Follow me on twitter and also share if you find it useful.