

Google Apps Script allows you to write code in your spreadsheet. It functions like Visual Basic for Applications (VBA) does in Excel. They're both incredibly useful for executing more complicated actions or for automating repetitive tasks.
In this article, I'll give you a brief overview of Google Apps Script by showing you how to do something very simple: clearing a bunch of data in your spreadsheet.
 gif of Homer Simpson saying, of course, it's so simple.
What is Apps Script?
Good question. Though you may be familiar with the square grid that makes up the interface of most spreadsheets, you may not know that behind the scenes, there is a powerful cloud-based JavaScript platform.
Apps Script lets you write custom functions, automations, add-ons and more. The screenshot below is from Google Workspace Docs:
 Google Workspace docs
Open Apps Script
Here is the link to the demo sheet if you'd like to follow along and/or make a copy.
You can also build one with me by opening a new sheet: https://sheets.new.
And here's a video walkthrough detailing everything we're about to do:
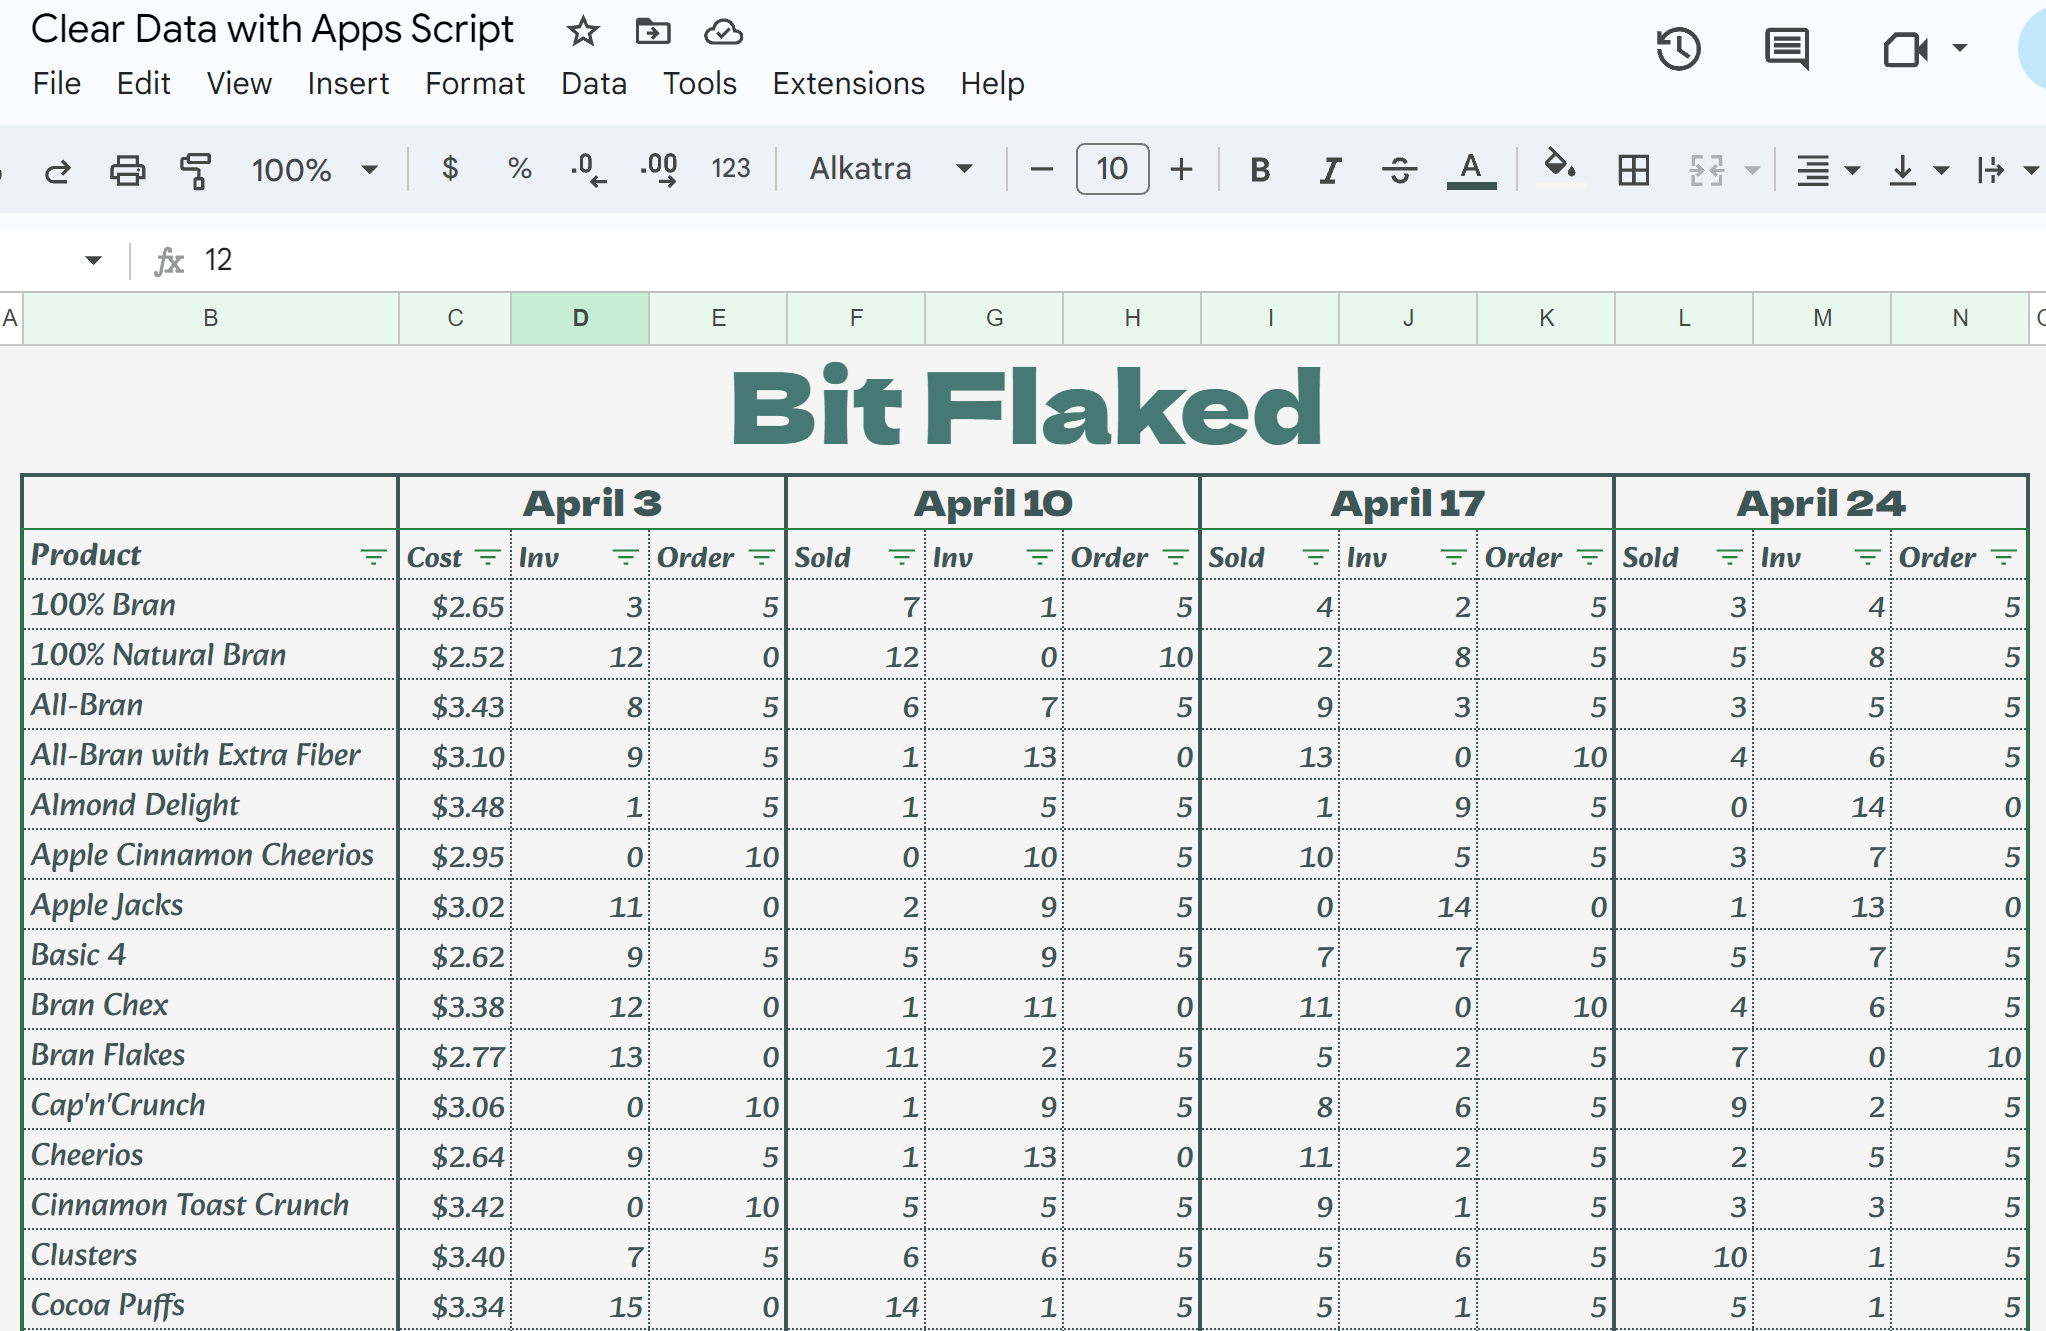
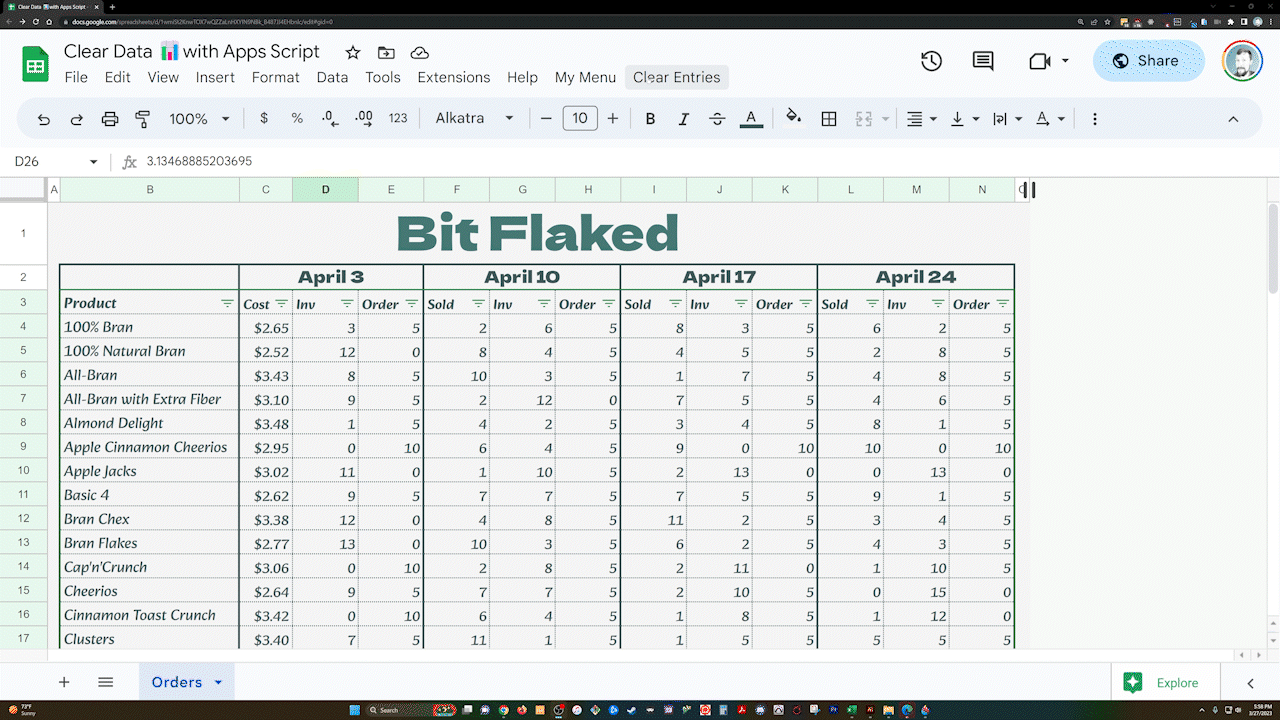
For our example, we just need some data to clear. In my business we use this apps script to clear out templates once a month that we use weekly for inventory purposes.
We'll build a miniature version of this to practice with, but the principles we go over can be used on much larger scales where apps script can save a ton of time and effort.
Here's what our sheet will look like: four weeks worth of inventory and order amounts.
 screenshot of order form in Google Sheets
We want an automated way to clear the data in the inventory and order columns.
Yes, you could simply select that range and hit delete or backspace. But if your spreadsheet is larger and more nuanced, there may be tens or hundreds of ranges to select.
And this is where Apps Script comes in super handy.
 gif of Bill Murray
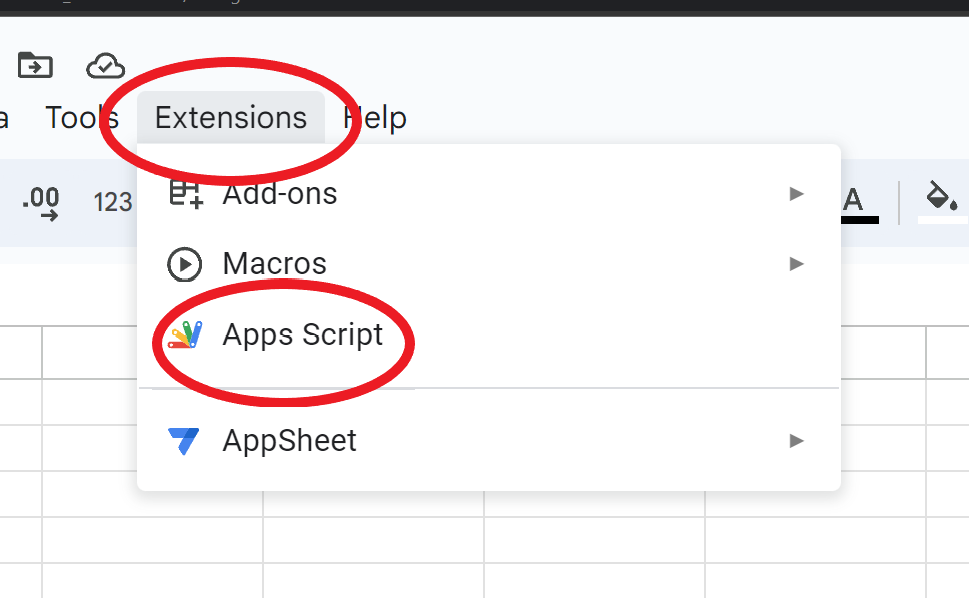
To open Apps Script, go to Extensions -> Apps Script.
 Screenshot of Extensions Toolbar
🤔Now, what's better than working in a dapper spreadsheet?
Being able to write custom code for it!
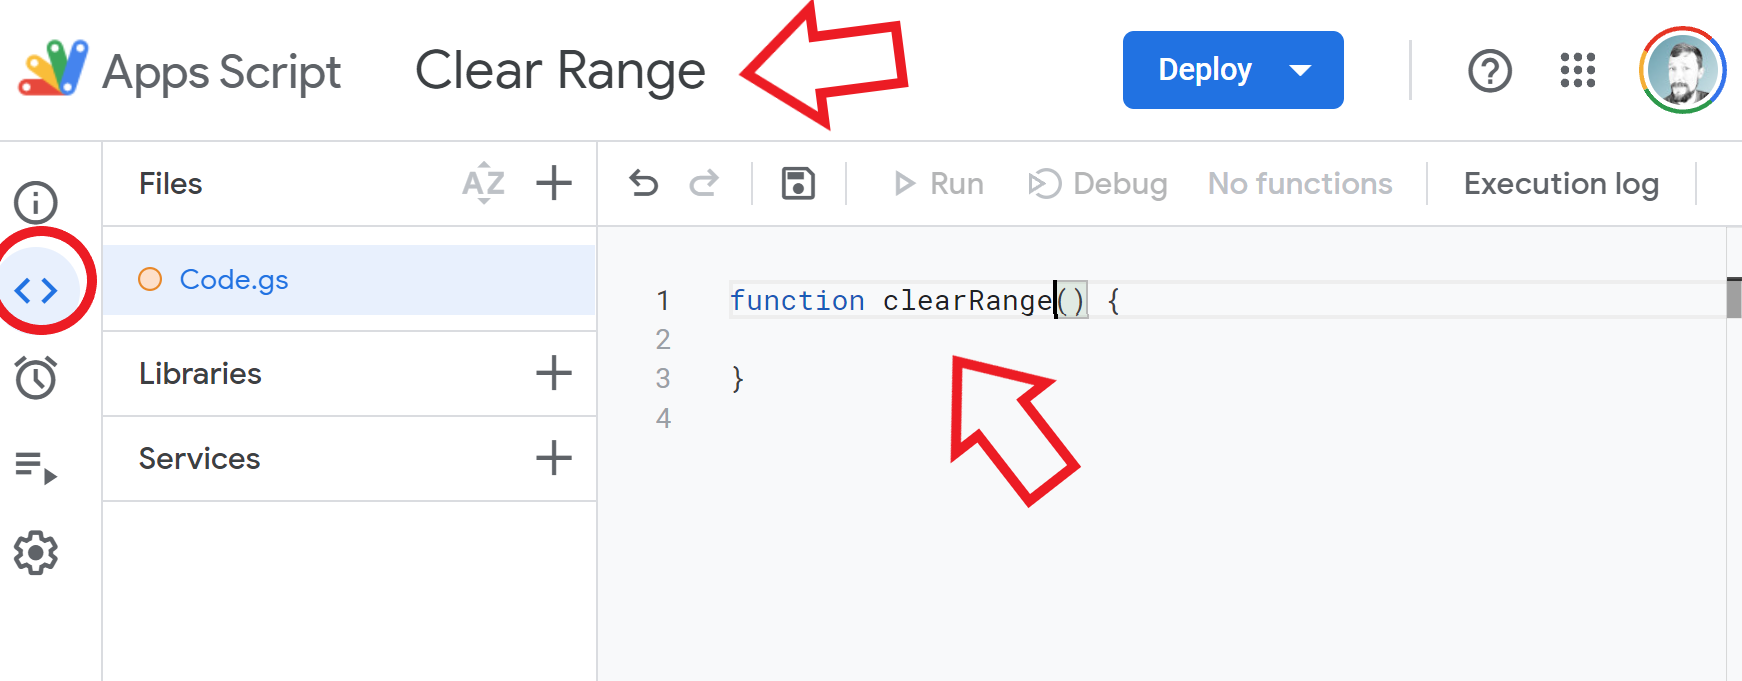
From here, we're greeted with our old friend, the code editor.
We'll give this project a name of Clear Range at the top, and then making sure the code editor is selected on the left side-bar, we'll begin writing our first function, also named clearRange:
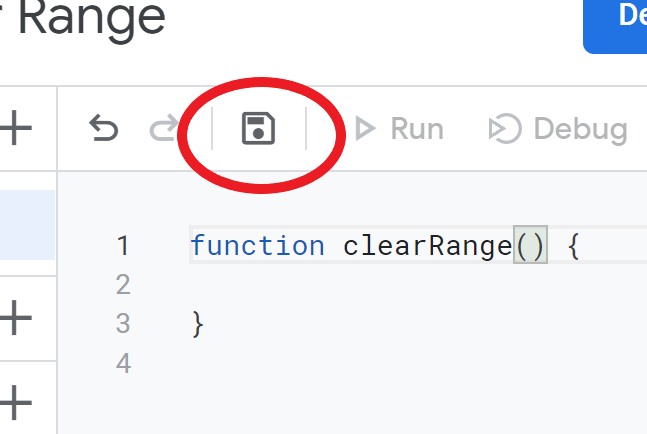
We can save our progress as we write by either pressing CTRL + S or clicking the save disk in the toolbar.
 screenshot of apps script code editor
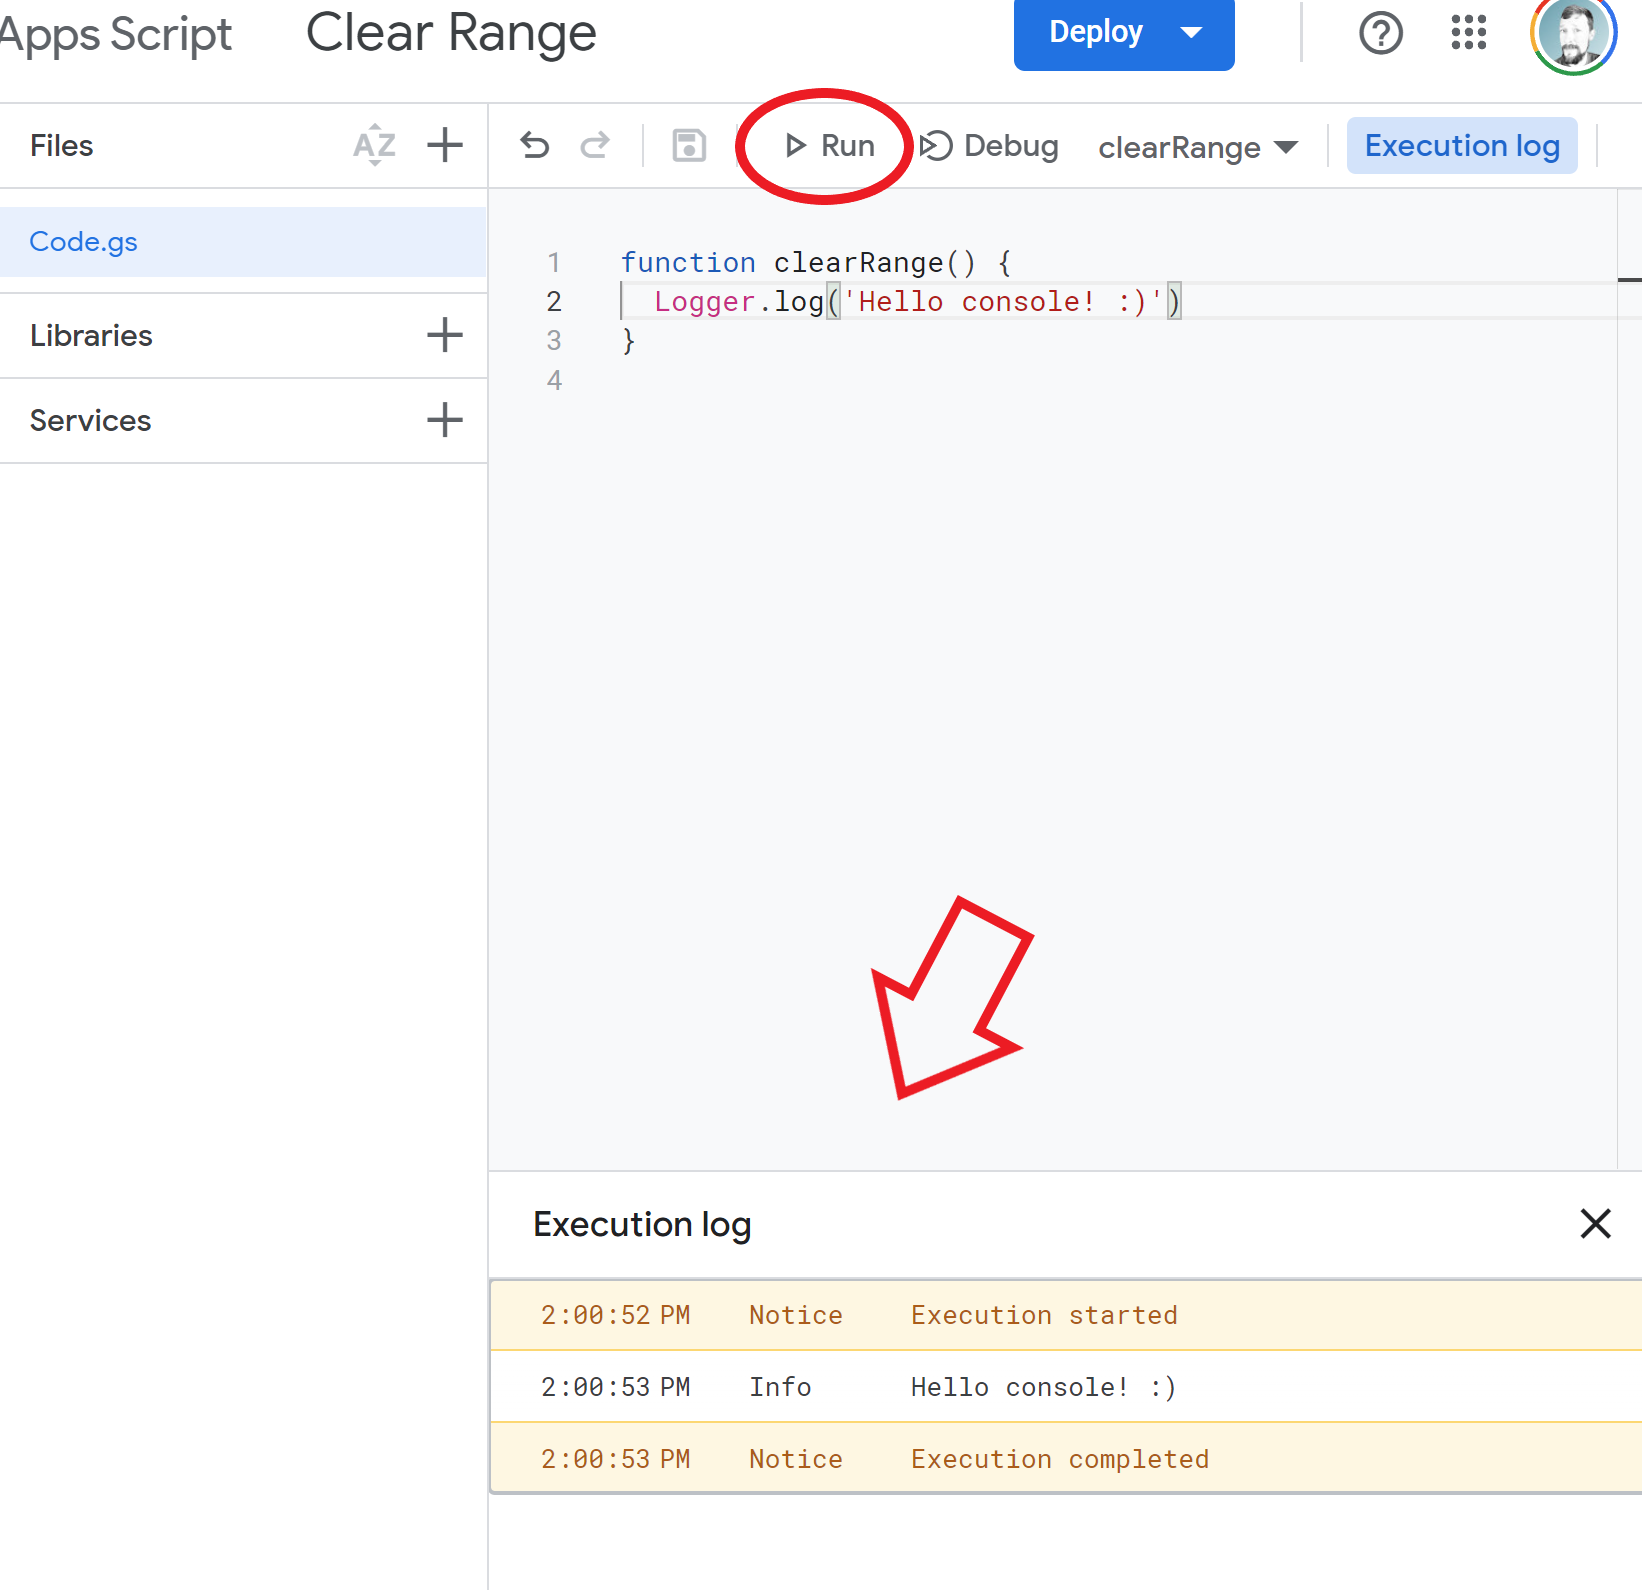
It wouldn't be coding with a console to debug ourselves, and sure enough, there is a Logger.log() method built in to Apps Script. Let's write our first Apps Script...script 😀 to log the message, Hello console! :):
function clearRange() {
  Logger.log('Hello console! :)')
}
And here's what you should see when you hit the Run button in the toolbar:
 Screenshot of Logger.log() in Apps Script
Okay, so things are indeed working. Let's get to business with our actual script...
How to Add a Custom Menu
We can execute our code within the code editor by clicking Run, but we don't want to open this up every time we use the code. So, let's add a custom menu to the toolbar inside our spreadsheet.
We've got two options here: creating a custom menu or creating an addon menu. The custom menu will function as a dropdown menu directly on the Toolbar to the right of the Help menu. The addon menu will display within the regular Extensions dropdown menu.
Let's add the custom menu. It can be helpful to copy methods from the Apps Script Docs and then fit them to our purposes. That's what I've done below from the createMenu() method here:
function onOpen(e) {
  SpreadsheetApp.getUi()
      .createMenu('Clear Entries')
      .addItem('Clear \'em all!', 'clearRange')
      .addSeparator()
      .addToUi();
}
This creates a menu when the spreadsheet is opened named Clear Entries. Within the menu, there's a clickable item named Clear 'em all! that calls the clearRange function.
How to Add the Function
Now, we need the function to do more than log a message to the console.
We can clear the contents of a range or ranges in a few ways. We'll do it here by naming the ranges that we will want to clear. This will prevent us from having to hard code cell references in case those change down the road as we modify the spreadsheet.
I've named each week's inventory and order columns as named ranges:
 screenshot of named ranges
Then, in our function we make a variable to hold an array of all the named ranges, iterate over each one in a forEach() loop, and clear each range's contents using the clearContent() method.
Very simple, and only it takes a few lines of code:
function clearRange(){
  var ss = SpreadsheetApp.getActive();
  var ranges = ss.getNamedRanges();
  ranges.forEach(range => range.getRange().clearContent());
}
In the demo Google Sheet, I included the alternative way to write this with A1 notation if you needed to not use the named ranges.
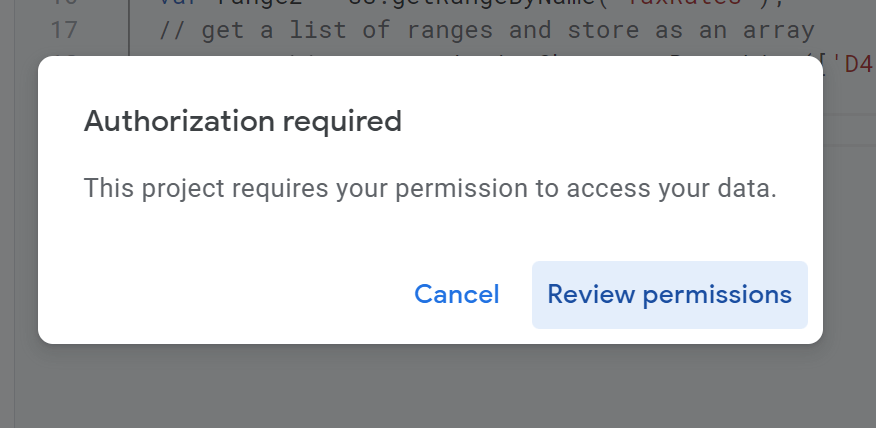
How to Execute the Function
When you first execute a function that requires access to your data, you'll be greeted by this Authorization screen.
 authorization screenshot
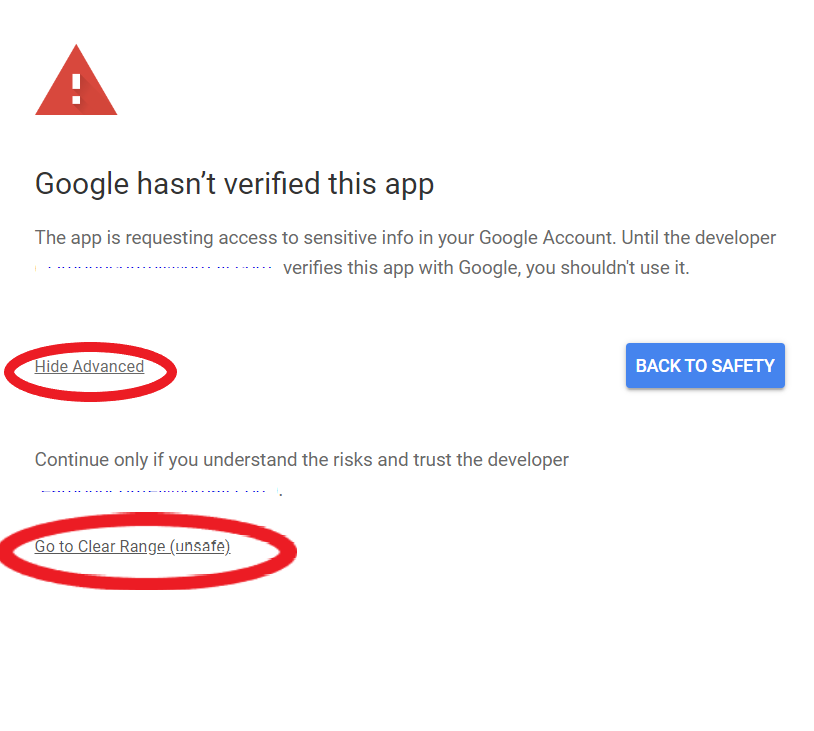
Choose your Google account, click Advanced when you see the "Google hasn't verified this app" screen:
 Google verification screen
It will describe what the function trying to execute is going to have permission to access. Click Allow:
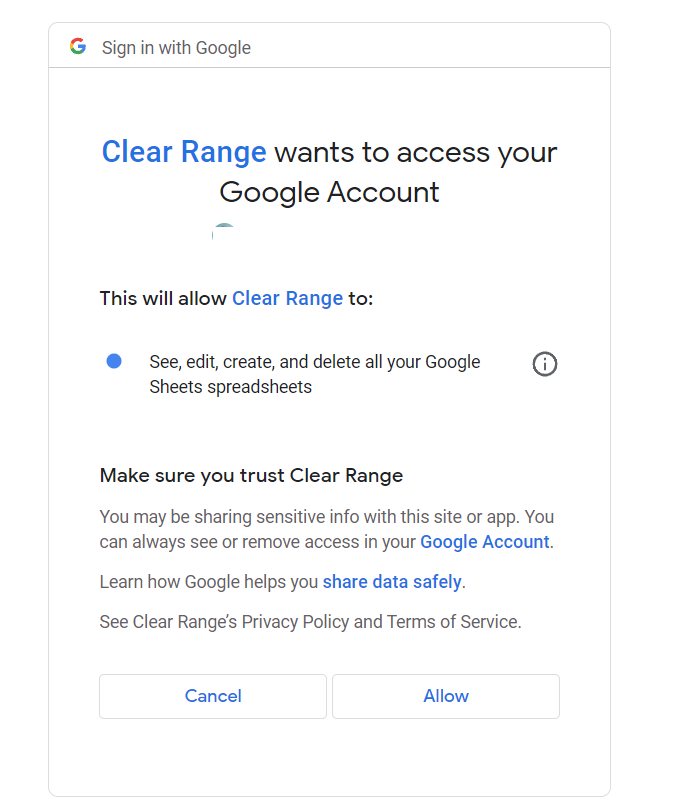 screenshot allowing permission to use our new function
Once you've allowed the permissions, you'll need to execute the function again for it to actually run this time. You'll see this running script dialog pop up at the top:
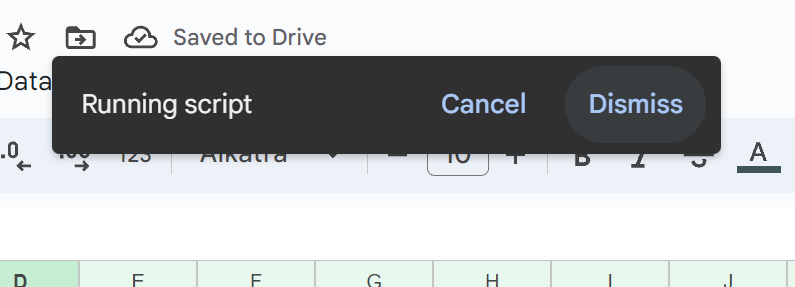 screenshot of running script dialog box
And, voilà!
We've cleared our range :)
 gif of the spreadsheet range clearing
Summary
I hope this has been a useful walkthrough for you, and that you learned something new. I use a version of this very script in the real world on a regular basis. It's an example of a pretty small thing that saves a ton of time and errors.
Come say hey and subscribe to my YouTube channel over here. I create walkthroughs and tech content weekly.
Have a great one! 👋