
When you're working with .NET, interacting with databases – particularly SQL databases – is inevitable. The common approaches involve ORM (Object Relational Mapping) tools like Entity Framework (EF Core) or Dapper.
Dapper excels in speed and control for CRUD operations. This article explores Dapper's suitability for performance-critical .NET projects with simpler database relationships, utilising raw SQL queries.
Due to Dapper's reliance on raw SQL, this also makes it perfect for integration with existing databases (unlike its biggest competitor EF Core, which predominantly works on a code-first approach).
Dapper stands out as a lightweight and high-performance ORM with numerous advantages. The article guides you in building a lightweight .NET Web API with basic Dapper-utilising endpoints for SQLite, an ideal tool for local development or POC (Proof of Concept) applications.
Pre-Requisites
- Latest .NET SDK and runtime (at time of writing this article was .NET 8). If you don't already have this installed, you can find the installers here.
- Your preferred code editor or IDE (Integrated Development Environment) – for example Visual Studio / VS Code / JetBrains Rider.
- Knowledge of the C# programming language and Dependency Injection
- Windows Command Prompt / Mac OS Terminal
In this tutorial you will learn the following:
- What is Dapper?
- How to setup a .NET Web Api backed by SQLite database
- Usage of Dapper for basic CRUD actions and basic integration into a .Net Web Api project using the Repository Pattern
- Install and configure Dapper to Read and Write from/to an Sqlite Database
Note: the material learnt in this tutorial, can be applied to any .Net application which requires database interaction.
Table of Contents:
- What is Dapper?
- Benefits of Dapper
- Challenges of Dapper
- Getting Started
- How to Add Project Dependencies
- How to Remove BoilerPlate Code
- How to Run the App for the First Time
- How to Create the SQLite Database and Seed the Customer Table
- CRUD - Create, Read, Update, Delete
- Dependency Injection - Registering the Interfaces
- How to Connect the Repository to the Web API Endpoints
- How to Test the API
- Final Words
What is Dapper?
Dapper is a "micro ORM", providing lightweight, high-performance data access with minimal abstraction. It relies on SQL queries (these are the queries you use when interacting with an SQL database) for example: SELECT * FROM CUSTOMERS WHERE ID = 1, mapping the results to objects directly.
Here's how Dapper's README describes what it does:
This [Dapper] provides a simple and efficient API for invoking SQL, with support for both synchronous and asynchronous data access, and allows both buffered and non-buffered queries. – Dapper github repository README
Let's look at an example to see how it works.
Say we have an object like so:
public class Customer {

    public int ID {get;set;}
    public string FirstName {get;set;}
    public string LastName {get;set}
    public string Email {get;set;}
    public DateTime DOB {get;set;}

    public Customer(){

    }
}
An ORM (Object-Relational Mapping) is like a translator between a programming language and a database, allowing software to interact with databases using familiar programming objects instead of direct SQL queries, making it easier to manage and manipulate data in applications.
As Dapper is a "Micro-ORM", it acts a middle-ground between direct SQL and a full fledged ORM like that of Entity Framework (EF). It has a lot of the basic features, but doesn't come with all the "bloat" making it a secure and faster database tool.
Benefits of Dapper
Performance:
Dapper is known for its lightweight and fast performance, especially when dealing with large datasets or read-heavy operations. It has less overhead compared to the more feature-rich Entity Framework.
Control Over SQL Queries:
Dapper allows you to write and control your SQL queries explicitly. This can be beneficial when you need fine-grained control over the generated SQL or when dealing with complex queries.
The downside of this is that you have to find your own methods of management and structure within your code base.
Mapping Flexibility:
Dapper provides more flexibility in mapping database results to objects. It doesn't impose as many conventions as Entity Framework, allowing you to map query results to custom object structures easily.
Example: Say you'd like to map the SQL object instantly to a ViewModel applying some custom logic rather than the DTO object.
var result = connection.QueryAsync<User>("SELECT * FROM Users");var result = connection.QueryAsync("SELECT FirstName, LastName FROM Users")
.Select(row => new { FirstName = row.FirstName.ToUpper(), LastName = row.LastName.ToLower() });Minimal Abstraction:
Dapper is a micro ORM with minimal abstraction. If you prefer working closer to the metal and want more control over the SQL and data access code, Dapper might be a better fit.
Suitability for Read-Heavy Scenarios:
In scenarios where read performance is critical, and you want to optimise queries for specific use cases, Dapper's simplicity and direct control can be advantageous.
Challenges of Dapper
Manual SQL Query Writing:
Dapper requires you to write raw SQL queries. While this provides flexibility, it also means you have to handle query construction and parameterisation manually, potentially exposing you to SQL injection risks (we'll talk about this later) on to avoid this using Dapper.
Limited High-Level Abstractions:
Dapper provides a lower-level API compared to full-fledged ORMs like Entity Framework. This means you have to write more code for common CRUD operations and lack certain high-level abstractions, such as automatic change tracking and migrations.
No Built-in LINQ Support
Those familiar with LINQ will know how useful it can be when querying datasets, and data repositories.
Dapper does not provide built-in LINQ support. While LINQ can be used in conjunction with Dapper, it doesn't have the same level of integration and expressiveness as an ORM like Entity Framework.
Limited Conventions:
Dapper doesn't have as many conventions and defaults as some other ORMs. This means you may need to provide more explicit mappings and configurations in certain scenarios (but as stated previously, this can be both a downfall and an advantage depending on your needs).
Fewer Features for Complex Data Models:
Dapper may not be the ideal choice for applications with complex data models that involve intricate relationships between entities, as managing such relationships may require more manual effort.
No Lazy Loading:
Dapper does not support lazy loading out of the box. If you need lazy loading for related entities, you might need to implement it yourself or consider other ORMs such as Entity Framework that provide this feature.
Getting Started
I am going to teach you how to setup the project and all required dependencies using the CLI in this tutorial, rather than the code editor / IDE. I am doing this because:
- You'll see how easy it is to do this kind of thing within the terminal
- It'll help build your confidence with using the CLI vs relying on context menus and tools
- It'll show you how much faster using the terminal can be than utilising the GUI (Graphic User Interface).
So open up your editor to the root directory of your personal projects.
Now open the terminal and navigate to that folder within your terminal. I tend to keep my projects folder close to my root for easy access. For example I have:
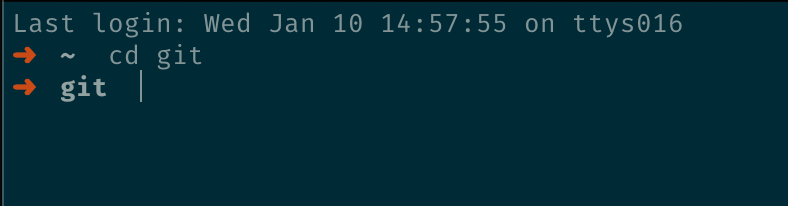
If you didn't already know, you can navigate to folders using the cd (change directory) command.
Once within your projects folder, write the following command:
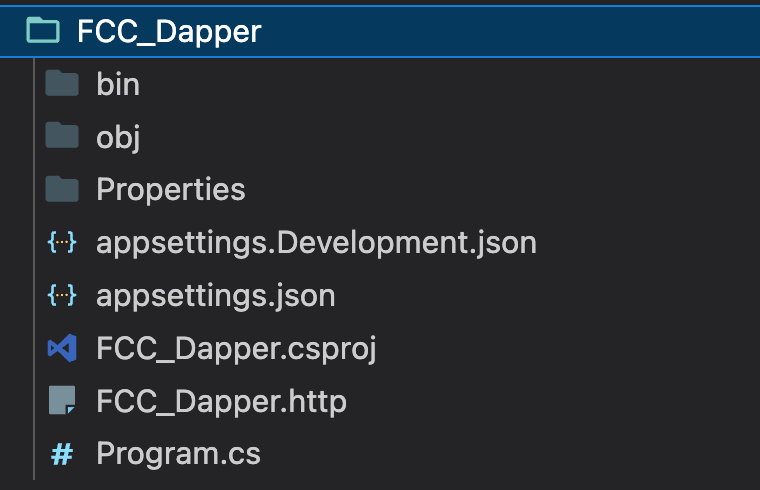
dotnet new webapi -n FCC_Dapper
So what is this doing?
- Creates a new folder called FCC_Dapper within your projects directory
- Creates a new .Net 8 WebApi project called FCC_Dapper
Navigate to the project folder using the cd FCC_Dapper command.
Tip: When using the terminal, simply type cd F and press Tab. This will automatically complete as much of the file path as it can (until it finds multiple matches). If only 1 match is found, auto-complete will finish the full path, leaving you with cd FCC_Dapper. If multiple are found, press Tab again and it will show you the multiple options.
How to Add Project Dependencies
Run the following command to add all the dependencies we'll need:
dotnet add package Dapper && dotnet add package Microsoft.Data.Sqlite && dotnet add package Microsoft.Extensions.Configuration && dotnet add package Microsoft.Extensions.DependencyInjection.AbstractionsTip: With terminal commands, you can combine them into one big terminal command using either the ; or && characters.
Here's an example:
dotnet add package Dapper; dotnet add package Microsoft.Data.SQLiteor:
dotnet add package Dapper && dotnet add package Microsoft.Data.SQLiteThe && character works like a boolean check, in that the second command will only run if the first does not fail / error.
You should now see the following files and folders within your code editor / IDE:
How to Remove the Boilerplate Code
Open the Program.cs file and delete all the boilerplate code which has been pre-populated. You can safely remove the following code from Program.cs:
var summaries = new[]
{
    "Freezing", "Bracing", "Chilly", "Cool", "Mild", "Warm", "Balmy", "Hot", "Sweltering", "Scorching"
};

app.MapGet("/weatherforecast", () =>
{
    var forecast =  Enumerable.Range(1, 5).Select(index =>
        new WeatherForecast
        (
            DateOnly.FromDateTime(DateTime.Now.AddDays(index)),
            Random.Shared.Next(-20, 55),
            summaries[Random.Shared.Next(summaries.Length)]
        ))
        .ToArray();
    return forecast;
})
.WithName("GetWeatherForecast")
.WithOpenApi();
How to Run the App for the First Time
Now run:
dotnet dev-certs https --trustThis will prompt you to accept the development certificates, allowing you to run the web api using the https protocol. So if you now run:
dotnetrun --launch-profile httpsYou should see the following in your console:
...
info: Microsoft.Hosting.Lifetime[14]
      Now listening on: https://localhost:{port}
...
At first you'll see a 404 Page like below:

However, if you add /swagger to the URL, you will now see the Swagger UI informing us we have no endpoints defined (which is to be expected at this stage)
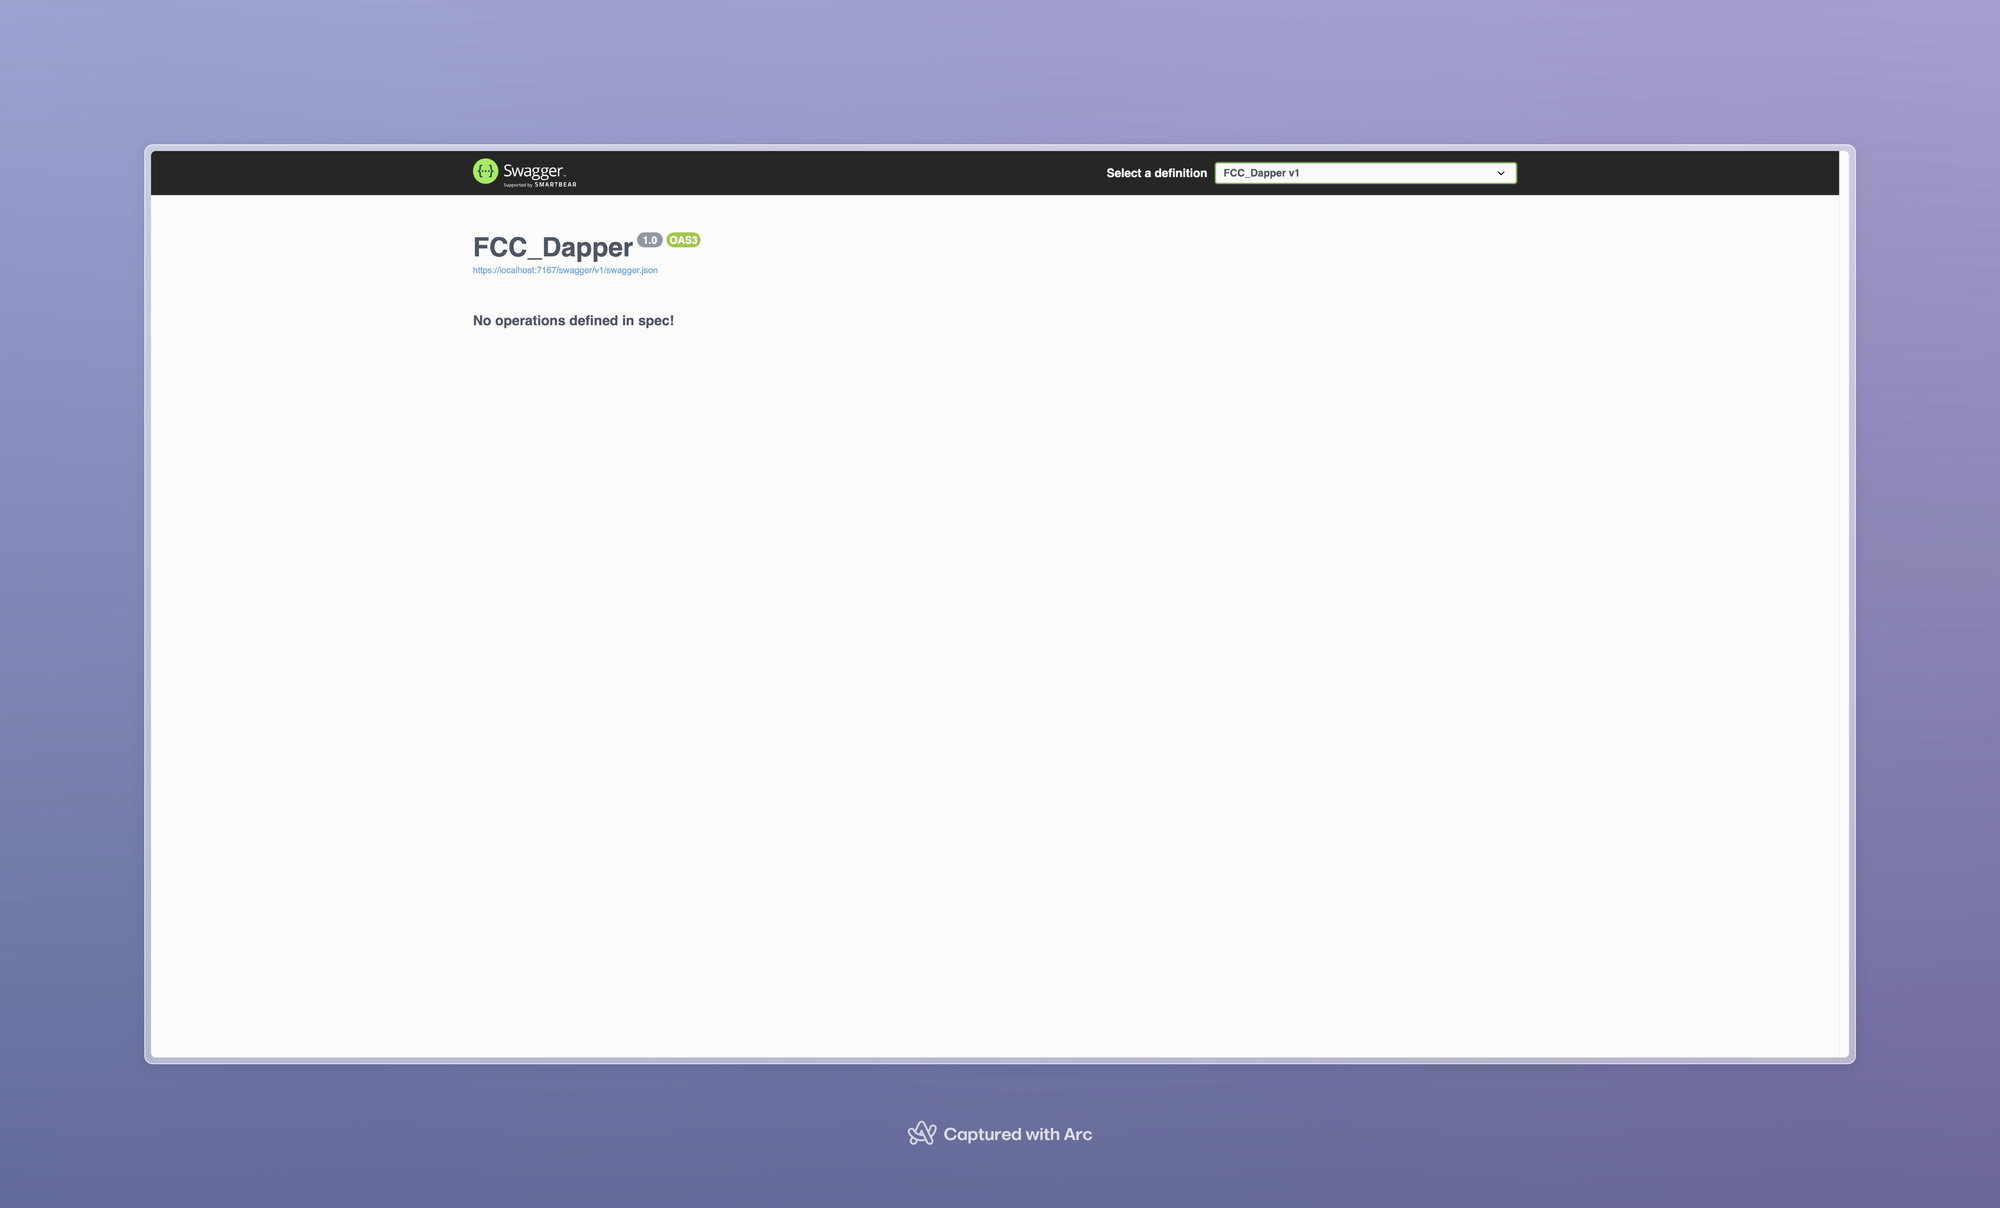
Swagger is a set of tools which allows developers to design, view, test and document their API endpoints. The Swagger UI is the UI element of the toolset which allows you to interact and view your endpoints via a web interface.
The OpenAPI is the official name of the specification. The development of the specification is fostered by the OpenAPI Initiative, which involves more the 30 organizations from different areas of the tech world — including Microsoft, Google, IBM, and CapitalOne. Smartbear Software, which is the company that leads the development of the Swagger tools, is also a member of the OpenAPI Initiative, helping lead the evolution of the specification – Swagger, Smartbear
How to Create the SQLite Database and Seed the Customer Table
Creating the SQLite database file.
There's two ways you can do this:
- Option 1: In the terminal / command prompt run
sqlite3 customers.db - Option 2: In your code editor / IDE create a file called
customers.db
If choosing Option 1, you will see an output in your terminal, as below:
SQLite version 3.32.2 2021-07-12 15:00:17
Enter ".help" for usage hints.
Running the .database command in your command prompt / terminal and it will list names and files of attached databases.
Connecting the Web API to the database
Add a Default Connection String to the appsettings.json file by opening the file. Add the following code to the top of the file, within the first {. So your appsettings.json file should look now look like this:
{
  "ConnectionStrings": {
    "DefaultConnection": "Data Source=customers.db"
  },
  "Logging": {
    "LogLevel": {
      "Default": "Information",
      "Microsoft.AspNetCore": "Warning"
    }
  },
  "AllowedHosts": "*"
}
How to Create the Customer Table & Initially Seed the Data
Step 1: Create a database folder and a DatabaseUtilities.cs file.
There are two main ways to do this:
- Option 1: Create a folder called 'Database' and within the folder a file called
DatabaseUtilities.cs. - Option 2: Use the CLI
Windows Command Prompt:
mkdir Database && cd Database && echo. > DatabaseUtilities.csMac OS Terminal:
mkdir Database && cd Database && touch DatabaseUtilities.csStep 2: Add the following code to the DatabaseUtilities.cs file:
using Dapper;
using Microsoft.Data.Sqlite;

public static class DBUtilities
{
  public static async Task<bool> InitializeDBAsync(this IWebApplication app)
  {
    var connectionString = app.Configuration.GetConnectionString("DefaultConnection");

    var createSQL = @"CREATE TABLE IF NOT EXISTS Customer (
            ID INTEGER PRIMARY KEY AUTOINCREMENT,
            FirstName TEXT,
            LastName TEXT,
            DOB DATE,
            Email TEXT
        );";

    var insertSQL = @"
           INSERT INTO Customer (FirstName, LastName, DOB, Email)
           VALUES
                ('Tony', 'Stark', '1970-05-29', 'tony.stark@example.com'),
                ('Bruce', 'Wayne', '1972-11-11', 'bruce.wayne@example.com'),
                ('Peter', 'Parker', '1995-08-10', 'peter.parker@example.com'),
                ('Diana', 'Prince', '1985-04-02', 'diana.prince@example.com'),
                ('Clark', 'Kent', '1980-07-18', 'clark.kent@example.com'),
                ('Natasha', 'Romanoff', '1983-06-25', 'natasha.romanoff@example.com'),
                ('Wade', 'Wilson', '1977-02-19', 'wade.wilson@example.com'),
                ('Hal', 'Jordan', '1988-09-05', 'hal.jordan@example.com'),
                ('Steve', 'Rogers', '1920-07-04', 'steve.rogers@example.com'),
                ('Selina', 'Kyle', '1982-12-08', 'selina.kyle@example.com');";

    using var connection = new SqliteConnection(connectionString);
    connection.Open();

    using var transaction = connection.BeginTransaction();

    try
    {
      await connection.ExecuteAsync(createSQL, transaction: transaction);

      // Check if the Customer table exists
      var tableExists = await connection.QueryFirstOrDefaultAsync<int>(
          "SELECT COUNT(*) FROM sqlite_master WHERE type='table' AND name='Customer';", transaction: transaction);

      if (tableExists > 0)
      {
        // Table exists and populated, no need to seed database again
        return true;
      }

      await connection.ExecuteAsync(insertSQL, transaction: transaction);

      // Commit the transaction if everything is successful
      transaction.Commit();
      connection.Close();
      return true;
    }
    catch (Exception ex)
    {
      Console.WriteLine(ex.Message);

      // An error occurred, rollback the transaction
      transaction.Rollback();
      connection.Close();
      return false;
    }
  }
}
Let's break down this code bit by bit:
- First, it creates an extension method onto the
WebApplicationclass - Then it creates the SQL needed to create a database
- Then we create a connection to the SQLite database using the
SqliteConnectiontype passing a connection string, informing the application to use thecustomers.dbfile as the data source. - Finally, it executes the SQL commands asynchronously, wrapped in a
try/catchblock utilising powerful Dapper extension methods on theconnectionobject.
SQL Transactions
This code makes use of the BeginTransaction API within the SQLite package. Transaction syntax is a much safer way of handling SQL commands when wanting to carry out multiple commands, or large instructions.
 using var connection = new SqliteConnection(connectionString);
using var transaction = connection.BeginTransaction();Again, as before, we use the using statement and create a connection – but this time we're adding an additional (nested) using statement and creating a transaction object.
You can read more about SQL transactions here, but in essence it can prevent future commands being ran if a previous command errors / or fails to run. Perfect in a scenario where the second command has a dependency on the previous command running successfully.
Running the commands and rollbacks
Now let's talk Rollbacks. Rollbacks aren't just something you find in the Supermarket, but one of the great features within SQL Transactions.
In SQL, think of a ROLLBACK like an undo button. So, if you're in the middle of doing tasks / commands in the database (like adding, updating, or deleting things), and oops! Something goes wrong or you change your mind, you can hit ROLLBACK. It takes you back to the start of your previous state before any of the commands within the TRANSACTION were begun, erasing all the changes you made in that transaction.
Think of it being like Git: you've made all of your database changes, and now you want to commit them to your branch (in our case a database). Or, you can choose to "revert" your changes by discarding them (in our case by calling .Rollback()).
try
    {
      await connection.ExecuteAsync(createSQL, transaction: transaction);

      // Check if the Customer table exists
      var tableExists = await connection.QueryFirstOrDefaultAsync<int>(
          "SELECT COUNT(*) FROM sqlite_master WHERE type='table' AND name='Customer';", transaction: transaction);

      if (tableExists > 0)
      {
        // Table exists and populated, no need to seed database again
        return true;
      }

      await connection.ExecuteAsync(insertSQL, transaction: transaction);

      // Commit the transaction if everything is successful
      transaction.Commit();
      connection.Close();
      return true;
    }
    catch (Exception ex)
    {
      Console.WriteLine(ex.Message);

      // An error occurred, rollback the transaction
      transaction.Rollback();
      connection.Close();
      return false;
    }
  }
Wrapping the command logic inside a try/catch block allows us to control when the transaction's roll back occurs. While SQLite automatically rolls back transactions if it is not informed to Commit and has incurred an exception, some database systems may or may not automatically roll back a transaction in the event of an error – it's not universally guaranteed.
I personally prefer to explicitly handle my own committing and rolling back of transaction, to have that control over what is and isn't happening.
The transaction.Commit() code informs the Database to commit the transaction – that is, all changes that have been made to the database.
Step 3: add the InitializeDBAsync Method to the Program.cs file
Return to your Program.cs file and call the InitializeDBAsync method, before app.Run():
// Initialise the Db
await app.InitializeDBAsync();
app.Run();
Run the application...again
Once again in your terminal run within the FCC_Dapper folder:
dotnetrun --launch-profile https This will now build your app and run, initialising the customer table within your customers.db file and seed the data.
CRUD – Create, Read, Update, Delete
Before we delve into how to write the CRUD methods, let's briefly explore some useful and common Dapper extension methods.
QueryAsync<T>()– Executes a query and maps the result set to a strongly-typed list of objects of type T.QueryFirstOrDefaultAsync<T>– Similar toQuery<T>, but returns the first result or a default value if no results are found.ExecuteAsync()– Executes a non-query SQL statement (for example, INSERT, UPDATE, DELETE) and returns the number of affected rows.QueryMultiple()– Executes a query that returns multiple result sets, allowing you to read multiple sets of results from a single query.
using (var multi = connection.QueryMultiple("SELECT * FROM Table1; SELECT * FROM Table2"))
{
    var result1 = multi.Read<MyClass1>().ToList();
    var result2 = multi.Read<MyClass2>().ToList();
}QuerySingle<T>:– Executes a query and expects exactly one result. Throws an exception if there are zero or more than one results.
How to Build a Repository For Crud Methods
For this demo, I've whipped up a quick repository using the Repository Pattern which you can learn more about in this article.
Option 1: Create all files and folders manually within the IDE / Code Editor
- ICustomerRepository.cs
- IGenericRepository.cs
- IUnitOfWork.cs
- UnitOfWork.cs
- CustomerRepsository.cs
Option 2 (Recommended): Create files using the CLI start within your FCC_Dapper folder within terminal.
Windows Command Prompt:
cd Database && type nul > ICustomerRepository.cs && type nul > CustomerRepository.cs && type nul > IGenericRepository.cs && type nul > IUnitOfWork.cs && type nul > UnitOfWork.csMacOS:
cd Database; touch IGenericRepository.cs ICustomerRepository.cs CustomerRepository.cs IUnitOfWork.cs UnitOfWork.csI hope at this point you're beginning to see the value and efficiency of using the CLI.
Once these files are created, paste the following code in each of them:
public interface IUnitOfWork
{
  ICustomerRepository Customers { get; }
}using System;
using System.Collections.Generic;
using System.Linq;
using System.Threading.Tasks;
namespace FCC_Dapper;
public interface IGenericRepository<T> where T : class
{
Task<T?> GetByIdAsync(int id);
Task<IReadOnlyList<T>> GetAllAsync();
Task<int> AddAsync(T entity);
Task<int> UpdateAsync(T entity);
Task<int> DeleteAsync(int id);
}
using FCC_Dapper;

public interface ICustomerRepository : IGenericRepository<Customer>
{


}This next one is the most important, as this is the class with all the actual logic:
using Dapper;
using FCC_Dapper;
using Microsoft.Data.Sqlite;

public class CustomerRepository : ICustomerRepository
{
  public CustomerRepository(IConfiguration configuration)
  {
    this._configuration = configuration;
  }

  private readonly IConfiguration _configuration;

  public async Task<int> AddAsync(Customer customer)
  {
    var sql = "INSERT INTO Customer (firstName, lastName, email, dob) VALUES (@FirstName, @LastName, @Email, @DOB)";
    using var connection = new SqliteConnection(_configuration.GetConnectionString("DefaultConnection"));

    return await connection.ExecuteAsync(sql, customer);
  }

  public async Task<int> DeleteAsync(int id)
  {
    var sql = "DELETE FROM Customer WHERE ID = @ID";
    using var connection = new SqliteConnection(_configuration.GetConnectionString("DefaultConnection"));

    var result = await connection.ExecuteAsync(sql, new { ID = id });
    return result;

  }

  public async Task<IReadOnlyList<Customer>> GetAllAsync()
  {
    var sql = "SELECT * FROM Customer";
    using var connection = new SqliteConnection(_configuration.GetConnectionString("DefaultConnection"));
    var result = await connection.QueryAsync<Customer>(sql);
    return result.ToList();

  }

  public async Task<Customer?> GetByIdAsync(int id)
  {
    var sql = "SELECT * FROM Customer WHERE ID = @ID";
    using var connection = new SqliteConnection(_configuration.GetConnectionString("DefaultConnection"));
    var result = await connection.QuerySingleOrDefaultAsync<Customer>(sql, new { ID = id });
    return result ?? null;
  }

  public async Task<int> UpdateAsync(Customer entity)
  {
    var sql = "UPDATE Customer SET FirstName = @FirstName, LastName = @LastName, DOB = @DOB, Email = @Email WHERE ID = @ID";
    using var connection = new SqliteConnection(_configuration.GetConnectionString("DefaultConnection"));
    var result = await connection.ExecuteAsync(sql, entity);
    return result;
  }

}
Within this CustomerRepository class, we're setting up several different methods which can be called anywhere within in the WebApi.
By abstracting the logic for actioning commands on a datasource, the rest of the app would still work if we were to change from Dapper to EF (Entity Framework), another well known .Net ORM.
Each method is very simple, carrying out the following actions:
- Retrieves the connection string
- Builds a SQLiteConnection
- Builds an SQL string
- Executes the SQL using the connection object.
There are a few slight differentiations. You may have noticed some syntax has @ symbols in front of variable names. These are placeholders for parameterised queries.
Brief look at SQL Injection
Dapper offers built-in parameterisation of queries, meaning that it can protect you from SQL Injection attacks.
As explained in the above linked article, you could define a string variable building your SQL like so:
var rawSqlString = $"SELECT * FROM CUSTOMER WHERE FirstName={searchString}";
//output:
//SELECT * FROM CUSTOMER WHRE FIRSTNAME=Grant; DROP TABLE CustomerWhat has happened here, though, is that a user may have maliciously entered a name and an SQL command into a form input for FirstName to test your web app's SQL injection protection.
If you simply take the value without any form of sanitisation, you would be injecting their SQL command into your SQL query string, and as we know the ; character separates SQL commands.
Meaning what will actually happen is this:
SELECT * FROM Customer
WHERE FirstName = Grant;

// then it will run
DROP TABLE CustomerDapper favours parameterised queries, meaning you can pass parameter placeholders into your SQL string, and these will then be replaced by the actual variable assigned to it from either an entity or anonymous object.
Let's look at our above example using a parameterised query:
var userInput = "GWeaths; Drop Table User";
string sql = "SELECT * FROM Users WHERE Username = @Username";
var user = connection.ExecuteAysnc<User>(sql, new { Username = userInput});By using an anonymous object and assigning the property Username to the value of userInput, we've parameterised the query.
Meaning the output of the SQL query will be this:
SELECT * FROM Users WHERE Username = "GWeaths; Drop Table User";The major difference here is that the search criteria of username has now been treated like the column search value, rather than a SQL Command. This offers that extra level of protection. There are many other methods of protecting against SQL Injection, but these are not for this tutorial.
Parameter Matching
As you may have seen from the code we're using, we're not using an anonymous object – we're passing our customer entity in directly. Dapper will then map the parameters and their placeholder (@ values) to the property names of the entity.
 public async Task<int> AddAsync(Customer customer)
  {
    var sql = "INSERT INTO Customer (id, firstName, lastName, email, dob) VALUES (@ID, @FirstName, @LastName, @Email, @DOB)";
    using var connection = new SqliteConnection(_configuration.GetConnectionString("DefaultConnection"));
    return await connection.ExecuteAsync(sql, customer);
}Dependency Injection – Registering The Interfaces
Create a file called ServiceRegistration.cs in the root directory of the project, and add the following code:
public static class ServiceRegistration
{
  public static void AddInfrastructure(this IServiceCollection services)
  {
    services.AddScoped<ICustomerRepository, CustomerRepository>();
    services.AddScoped<IUnitOfWork, UnitOfWork>();
  }
}
This class adds an extension method to the IServiceCollection called AddInfrastructure(), allowing us to easily add our Repository and UnitOfWork classes for Dependency Injection.
We can then call this within our Program.cs file like so:
using Dapper;
using FCC_Dapper;
using Microsoft.Data.Sqlite;

var builder = WebApplication.CreateBuilder(args);

builder.Services.AddEndpointsApiExplorer();
builder.Services.AddSwaggerGen();

//Add the line here
builder.Services.AddInfrastructure();

var app = builder.Build();
Connecting the Repository to the Web API Endpoints
We will utilise the following API endpoints:
/get/get/{id}/create/update/delete
Step 1: Add endpoints to the Program.cs using minimal APIs.
So your Program.cs file should now look like so:
using Dapper;
using FCC_Dapper;
using Microsoft.Data.Sqlite;

var builder = WebApplication.CreateBuilder(args);

// Add services to the container.
// Learn more about configuring Swagger/OpenAPI at https://aka.ms/aspnetcore/swashbuckle
builder.Services.AddEndpointsApiExplorer();
builder.Services.AddSwaggerGen();
builder.Services.AddInfrastructure();

var app = builder.Build();

// Configure the HTTP request pipeline.
if (app.Environment.IsDevelopment())
{
    app.UseSwagger();
    app.UseSwaggerUI();
}

app.UseHttpsRedirection();

// initialize the database here
await app.InitializeDBAsync();
app.Run();


app.MapGet("/get", async (IUnitOfWork unitOfWork) =>
{
    var customers = await unitOfWork.Customers.GetAllAsync();
    return Results.Ok(customers);
});

app.MapGet("/get/{id}", async (IUnitOfWork unitOfWork, int id) =>
{
    var data = await unitOfWork.Customers.GetByIdAsync(id);
    return data != null ? Results.Ok(data) : Results.Problem("Failed to locate customer");
});

app.MapPost("/create", async (IUnitOfWork unitOfWork) =>
{
    var count = await unitOfWork.Customers.AddAsync(new Customer
    {
        FirstName = "Stan",
        LastName = "Lee",
        DOB = new DateTime(1945, 1, 1),
        Email = "stan.lee@test.com"
    });


    return count > 0
        ? Results.Ok("Customer created successfully")
        : Results.Problem("Unable to create customer");
});

app.MapPut("/update", async (IUnitOfWork unitOfWork, Customer customer) =>
{
    var count = await unitOfWork.Customers.UpdateAsync(customer);
    return count > 0 ? Results.Ok("Customer updated successfully") : Results.Problem("Customer failed to update");
});

app.MapPost("/delete", async (IUnitOfWork unitOfWork, int id) =>
{
    var count = await unitOfWork.Customers.DeleteAsync(id);
    return count > 0 ? Results.Ok("Customer deleted successfully") : Results.Problem("Customer failed to delete");
});
The above code is:
- Setting up each of the endpoints using minimal APIs
- Dependency Injecting a
UnitOfWorkclass into each endpoint - Calling the relevant method on the
CustomerRepository - Returning a HTTP Response based on particular criteria returned from the repository.
This is where you can see the real power of abstracting the CustomerRepository away from the the business logic of the application via the UnitOfWork. The Program.cs file is agnostic to which database tool we're using, all it cares about is handling the call to relevant handler, and handling the response back to the client.
How to Test the API
You can test the API by running the same command as before:
dotnet run --launch-profile https Then when your browser opens, navigate to /swagger, and you will now see:
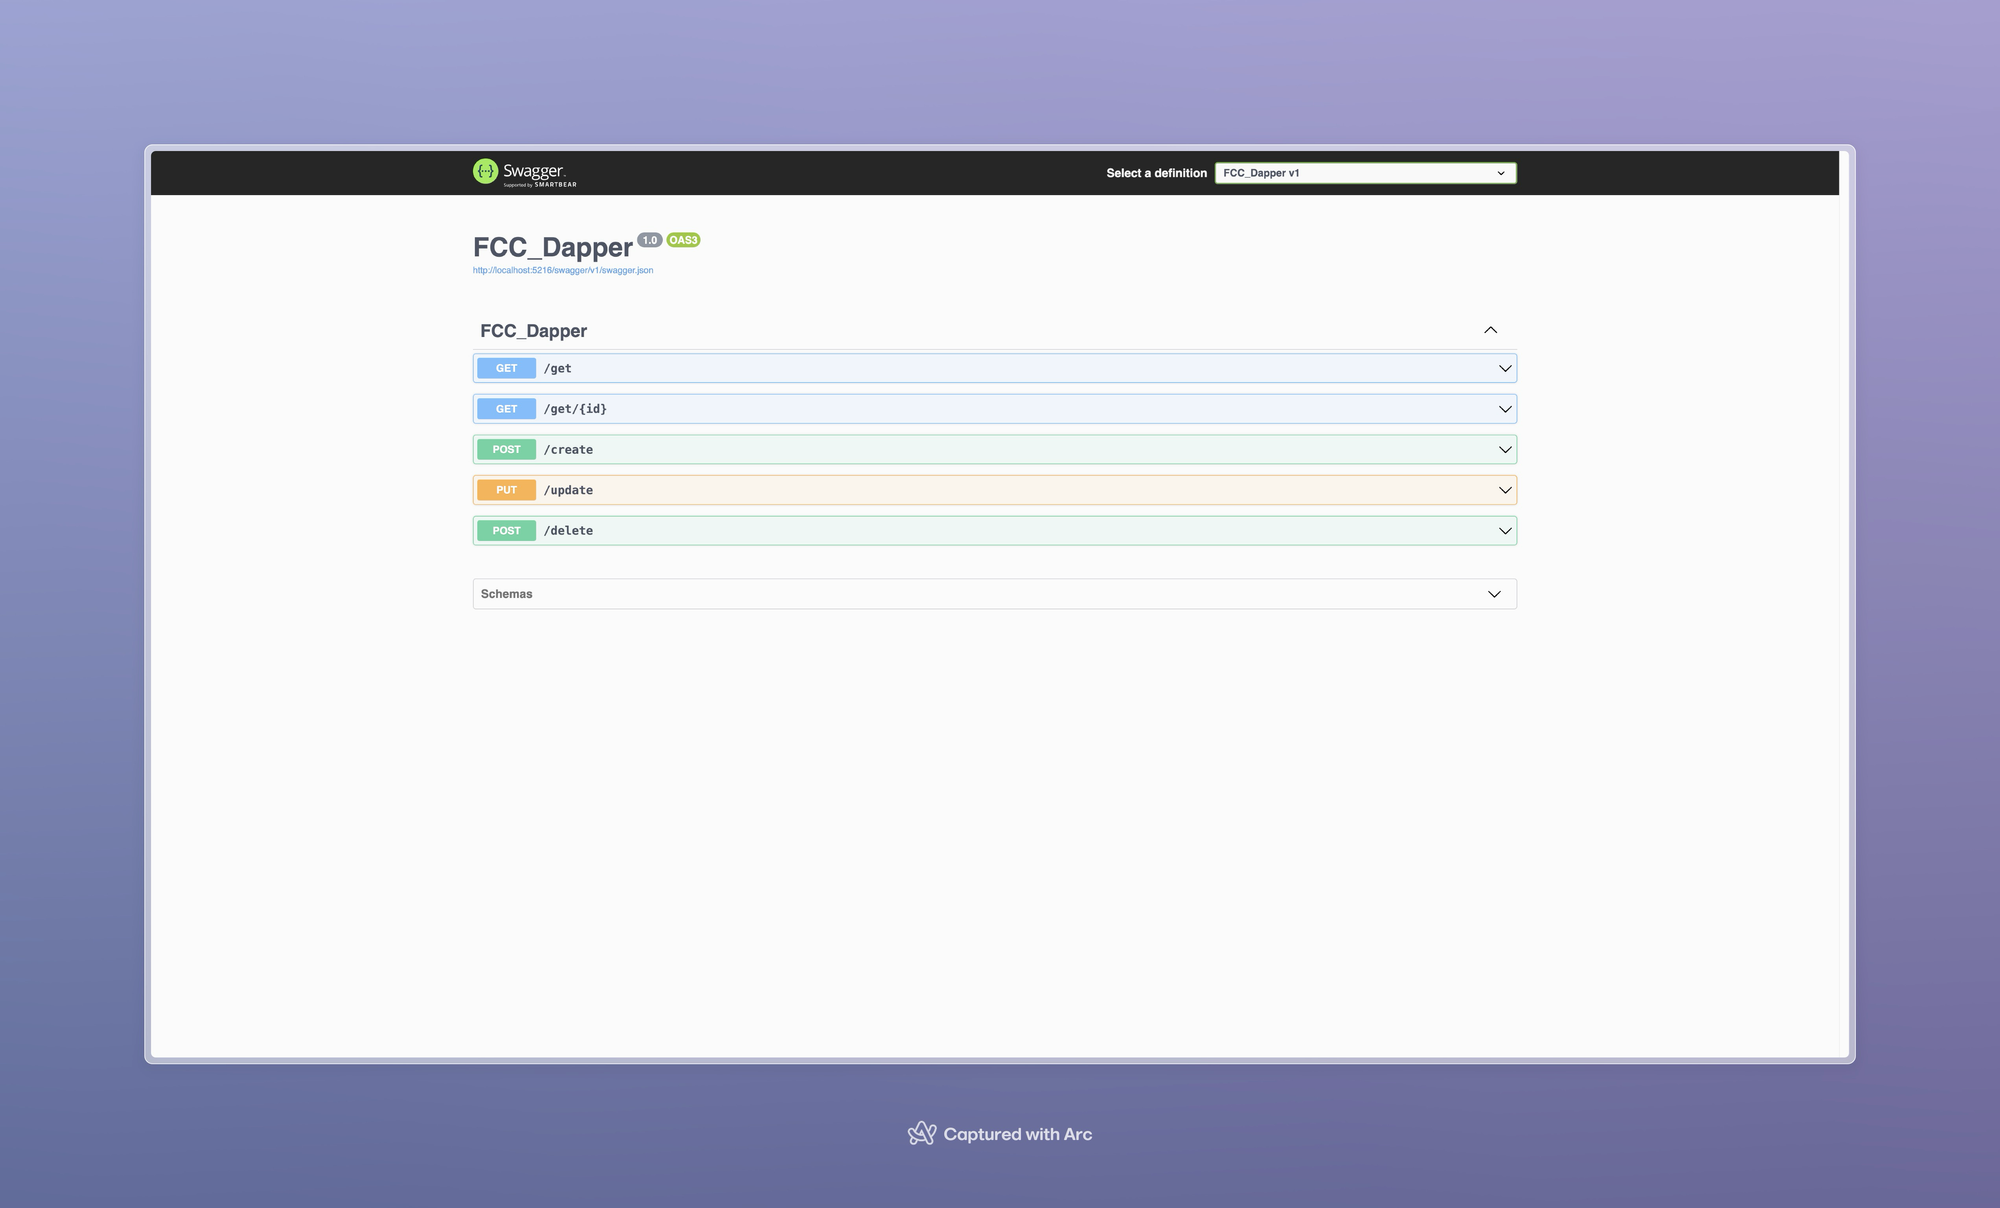
Go on, play around with the API. Try hitting all of the endpoints within the Swagger UI.
Try, for example:
- Hit the create endpoint
- Hit the
/getendpoint and check your newly created "Stan Lee" customer is listed at the bottom - Hit the
/updateendpoint, perhaps updating his name or email - Hit the
/deleteendpoint passing in the ID of the newly created Stan Lee customer, followed by/getByIdendpoint with the same ID and see what happens.
Final Words
There you have it – a fully functioning .NET Web Api, backed by Dapper and a SQLite local database file, utilising a basic implementation of the Repository Pattern.
In this tutorial you've learnt:
- How to add Dapper to a project
- The pros and cons of Dapper compared to its competitors
- Basic Dapper methods and extensions
- Knowledge of SQL Transactions and SQL Injection Prevention
- Parameterised Queries
I hope you found this course useful, and as always any questions please reach out to me or drop me a follow on Twitter / X.