

On a traditional website, when a user clicks on a URL, the browser makes a full-page request from the server and directs the user to a new page. This is referred to as static routing.
This is very useful if you just need to navigate the user to a new page. But with the development of web apps, there's more need for pages to render on the client or load dynamically.
This involves updating particular parts of the URL called segments, as well as rendering new content or updating the content on the same page without making a request from the server or reloading the entire page.
This is very common and useful in modern web apps. It enables client-side rendering, improves website navigation, and enables smooth transitions and animations (since the browser doesn't need to reload the page from external servers).
This can overall improve website performance and enable a good user experience.
In this tutorial, you'll learn about Dynamic Segments in React Router.
We'll go over what Dynamic Routing is and how it’s different from Static Routing. We'll also cover how to use useParams to enable Dynamic Segments, and how to set your path when getting data from an API.
Lastly, we’ll build a new project that dynamically renders new content to the same page when the user clicks on the sidebar.
By the end of this guide, you should be able to implement dynamic segments on your own in your React app.
Table of Contents
- Prerequisites
- Project Setup
- Installations
- Client-Side Routing
- Dynamic Segments
- Nested Routing
- Project: Build an Art Gallery
- Summary
Prerequisites
To follow along, you'll need a basic knowledge of the following:
- React
- React-Router
- Tailwind CSS (optional)
Project Setup
To get started, create a folder called dynamic-segment and open it in VS Code (or your code editor of choice):
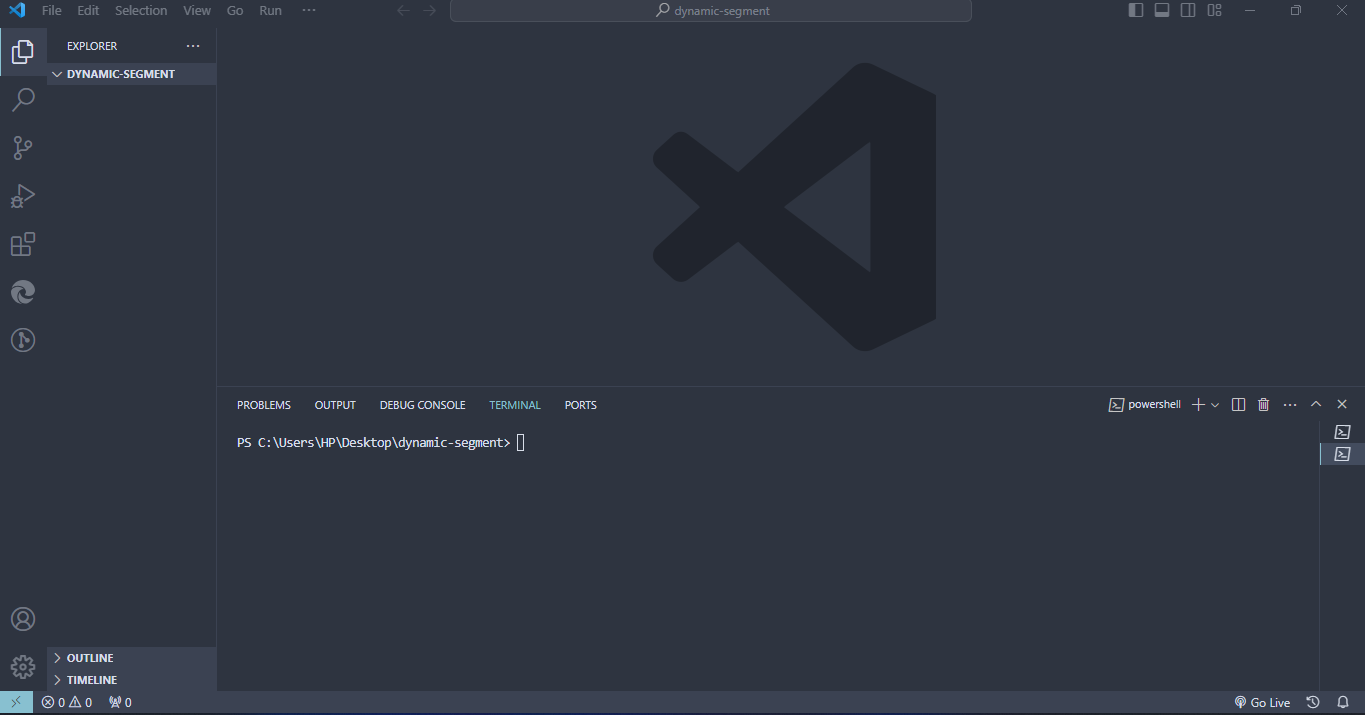
Next, click on Ctrl + (backtick) to launch the terminal as indicated above. This will enable us to install the npm packages we’ll be using in this project.
Installations
Now that we have our project set up, let’s install the npm packages that we need to get our project up and running.
Install React
React is a JavaScript library for building reusable and interactive components. To install it, copy and paste the command provided by vite.js below.
npm create vite@latest
Then just follow the installing guide to finish the process. Once the installation is complete, the node_modules folder should be present in your project folder.
Install React Router
This is a React routing library for creating client-side routing applications. To install it, copy and paste the command below and press enter.
npm i react-router-dom
Install Feather Icon
Feather icon is a small yet beautiful collection of 24 x 24 grid open-source icons. It's built for adding flat icons on web applications.
To install it, paste the command below and press enter.
npm i react-feather
Install Tailwind CSS
Tailwind is a utility-first CSS framework for building beautiful and compact website designs. To install it, run the command on the terminal below.
npm install -D tailwindcss postcss autoprefixer
This will create a tailwind.config.js file. Next, generate your postcss.config.js files with the command below:
npx tailwindcss init -p
Next, configure your template paths and add the paths to all of your template files in your tailwind.config.js file. Then click ctrl + s to save.
/** @type {import('tailwindcss').Config} */
export default {
  content: [
    "./index.html",
    "./src/**/*.{js,ts,jsx,tsx}",
  ],
  theme: {
    extend: {},
  },
  plugins: [],
}
Next, delete all CSS styles in the ./src/index.css file and add the Tailwind directives @tailwind for each of Tailwind’s layers.
@tailwind base;
@tailwind components;
@tailwind utilities;
Next, delete the assets folder, the App.css and App.jsx files from the /src folder. Once you’ve done that, configure the main.jsx files as the route component as indicated below:
import React from 'react'
import ReactDOM from 'react-dom/client'
import './index.css';

import {
  RouterProvider,
  createBrowserRouter,
  createRoutesFromElements,
  Route
} from 'react-router-dom';

const router = createBrowserRouter(
  createRoutesFromElements(
    <Route>
      <Route path='/' element={<p className='text-blue-700'>Hello, world</p>}></Route>
    </Route>
  )
)

ReactDOM.createRoot(document.getElementById('root')).render(
  <React.StrictMode>
    <RouterProvider router={router} />
  </React.StrictMode>,
)
Next, run the below command in the terminal to launch your app:
npm run dev
Your app should look like this in your browser:
Client-Side Routing
In React Router, navigation is relative between the path attribute and the to property. When a user clicks using the <Link> component (<a> tag), it navigates to the specified path within the route component and renders the component when it matches.
This type of navigation is called client-side routing because we are not rendering the pages from the server, but rather navigating from one component to another within the app.
The example below explains how client siding routing works:
⚠️ //main.jsx

import React from 'react'
import ReactDOM from 'react-dom/client'
import './index.css';
nt
import
{
  RouterProvider,
  createBrowserRouter,
  createRoutesFromElements,
  Route
} from 'react-router-dom';
import Book from './book';
import Bookshop from './bookshop';

const router = createBrowserRouter(
  createRoutesFromElements(
    <Route>
     👉 <Route path='/' element={<Book />}></Route>
     👉 <Route path='bookshop' element={<Bookshop />}></Route>
    </Route>
  )
)

ReactDOM.createRoot(document.getElementById('root')).render(
  <React.StrictMode>
    <RouterProvider router={router} />
  </React.StrictMode>,
)
From the code example above, we imported two components, Book and Bookshop, and link them via the <a> tag and the Route component on the ./src/main.jsx component.
⚠️ //book.jsx

export default function Book() {
return (
    <>
        <main className="px-4">
            <ul>
                <ol>77 Ways get to more customers By: <i>Ubuy</i></ol>
                <ol>Authenticity By: <i>Emanuel Rose</i> </ol>
                <ol> Change Your thinking change your life By: <i>Brian Tracy</i></ol>

            👉 <a href="bookshop" className="text-blue-600 inline-block px-4 underline">see bookshop</a>
                {/* <a href="publisher/itemId" className="text-blue-600 underline">Publisher</a> */}
            </ul>
        </main>
    </>
)
}
The href attribute accepts the bookshop component as a relative path. So clicking the link should navigate you to the bookshop component.
⚠️ //bookshop.jsx

export default function Bookshop() {
  return (
    <div className="px-4">
    <h1>list of book shops</h1>
    <ul>
        <li>Book Shop & Stationery</li>
        <li>Simon books</li>
        <li>Dynamic Book home</li>
    </ul>

  👉 <a href="/" className="text-blue-600 inline-block px-4 underline">Names of Books</a>
</div>
  )
}
The href=”/” in the bookshop component specifies the index route and should navigate you back to the home components.
Your app should look like this on your browser – click to navigate to the bookshop component.
From the browser output above, you'll notice how the URL is updated from the address bar and a new component is rendered.
The type of routing is called client-side routing and only updates the URL path once with the new route.
In the next section, I'll explain how you can update a particular segment and render content dynamically.
Dynamic Segments
A Dynamic Segment, as the name suggests, is a way of rendering a new component (UI) by updating a particular segment in the URL called params. You use the useParams hook from react-router-dom to do this.
This is very useful in situations where content needs to render dynamically from a particular component or third-party API.
Continuing from where we stopped in the code, go to the ./src/main.jsx component. Edit the Route and add :itemId to the path as indicated below:
⚠️ //main.jsx

<Route>
      <Route path='/' element={<Book />}></Route>
      <Route path='bookshop' element={<Bookshop />} />
 👉  <Route path='publisher/:itemId' element={<Publisher />} />
    </Route>
Note that the : in the :itemId URL segment means Dynamic Segment.
Next, create a new component as ./src/publisher.jsx and add the code below:
⚠️ //publisher.jsx

import { useParams } from "react-router-dom"

export default function Publisher() {
    const { itemId } = useParams();

return (
    <>
    {
        itemId ? (
            <div>
                <h1>Book publishing companies</h1>
                <ul>
                    <ol>Penguin Random House</ol>
                    <ol>Scholastic</ol>
                    <ol>LPI Media</ol>
                </ul>
            </div>
        ) : (
            <p>Page item is not present</p>
        )
    }
    </>
)
}
Let's talk about what this code is doing:
const { itemId } = useParams(): here we apply destructuring to get the params from the URL in the address bar. With this, we can render the return content.itemId?():: here we conditionally render a list of bookshop companies when a clicked link matches the params.
Next, in the ./src/book component, include the publisher/itemId as indicated in the <a> tag below:
⚠️ //book.jsx

export default function Book() {
return (
    <>
        <main className="px-4">
            <ul>
                <ol>77 Ways get to more customers By: <i>Ubuy</i></ol>
                <ol>Authenticity By: <i>Emanuel Rose</i> </ol>
                <ol> Change Your thinking change your life By: <i>Brian Tracy</i></ol>

                <a href="bookshop" className="text-blue-600 inline-block px-4 underline">see bookshop</a>
            👉  <a href="publisher/itemId" className="text-blue-600 underline">Publisher</a>
            </ul>
        </main>
    </>
)
}
Your app should look like this in your browser:
Notice the update in the URL at the browser address bar.
Let's look at another example.
In a real-world application, Dynamic Segments are mostly used to render content dynamically when the segment :itemId matches the id of the returned APIs.
Let’s see how this works. First, we need to decide where we will be fetching our data from. In this case, create an external JavaScript object ./scr/books.js and copy and paste the code below:
⚠️ //books.js

export default [
    {   id: "1",
        title: "The Great Gatsby",
        author: "F. Scott Fitzgerald",
        year: "1925",
        description: "The Great Gatsby is a 1925 novel by American writer F. Scott Fitzgerald. Set in the Jazz Age on Long Island, near New York City, the novel depicts first-person narrator Nick Carraway's interactions with mysterious millionaire Jay Gatsby and Gatsby's obsession to reunite with his former lover, Daisy Buchanan."
    },

    {   id: "2",
        title: "Pride and Prejudice",
        author: "Jane Austen",
        year: "1813",
        description: "Pride and Prejudice is the second novel by English author Jane Austen, published in 1813. A novel of manners, it follows the character development of Elizabeth Bennet, the protagonist of the book"
    },

    {   id: "3",
        title: "To Kill a Mockingbird",
        author: "Harper Lee",
        year: "1960",
        description: "To Kill a Mockingbird is a novel by the American author Harper Lee. It was published in June 1960 and became instantly successful. In the United States"
    },

    {   id:"4",
        title: "Beloved",
        author: "Toni Morrison",
        year: "1987",
        description: "Beloved is a 1987 novel by American novelist Toni Morrison. Set in the period after the American Civil War, the novel tells the story of a dysfunctional family of formerly enslaved people whose Cincinnati home is haunted by a malevolent spirit"
    }
]
Next, create a new component called ./src/FavBooks.jsx and write in the code below:
⚠️ //FavBooks.js

import { useParams } from 'react-router-dom';
import book from './book';

export default function FavBooks() {
  const {bookId} =  useParams()

👉 const newFavBook = book.find((book) => book.id === bookId)

  if(!newFavBook){
    return <p>{`This page doesn't contain fav Books`}</p>
  }
  return (
    <>
      <main>
          {newFavBook && (
            <>
              <main>
                <p>{`Title: ${newFavBook.title}`}</p>
                <p>{`By: ${newFavBook.author}`}</p>
                <p>{`Year: ${newFavBook.year}`}</p>
                <p>{`Description: ${newFavBook.description}`}</p>
              </main>
            </>
          )}
      </main>
    </>
  )
}
Next, go to the ./src/book.jsx component and update the code as follows:
import { Link } from 'react-router-dom';
import books from './book.js';

export default function Books() {

  return (
    <>
      <div className='m-4'>
        <p className="text-3xl">{`List of my favourite books`}</p>
      </div>

      <div className='m-4'>
        {
          books && books.map((book)=> (
            <>
            <ul>
              <li>
                <Link to={`newbooks/${book.id}`} className='text-blue-600 underline'>{book.title}</Link>
              </li>
            </ul>
          </>
          ))
        }
      </div>
    </>
  )
}
Next, configure the path to dynamic segment on the route component:
import Book from '../src/books';
import Bookshop from './bookshop';
import Publisher from './publisher';
👉 import FavBooks from './FavBooks';

const router = createBrowserRouter(
  createRoutesFromElements(
    <Route>
      <Route path='/' element={<Book />}></Route>
          <Route path='bookshop' element={<Bookshop />} />
            <Route path='publisher/:itemId' element={<Publisher />} />
     👉 <Route path='newbooks/:bookId' element={<FavBooks />} />
    </Route>
  )
)
Your app should look like this in your browser:
From the browser output, the URL params are being updated with the path segment and the id values from the books.js object.
Try clicking on each of the titles and notice how the id of the books.js object is present in the URL.
When a user clicks the link, it renders a new UI on a new page. But there are cases where you might want to render the content of the API on the same page as list items, so the content doesn’t have to open on a new page. To do this, we have to implement nested routing.
Nested Routing
Nested routing makes it possible to nest routes to render new components on the same page for easy navigation and quick interactivity of the element. Nested routes make listed items function as a tab. As soon as any tab is clicked, the content that matches the corresponding tab gets displayed.
Now let’s see how to convert our little application to a nested route.
To go the ./src/main component and create a nested route as follows:
const router = createBrowserRouter(
  createRoutesFromElements(
    <Route>

      <Route path='/' element={<Book />} >
   👉  <Route path='newbooks/:bookId' element={<FavBooks />} />
      </Route>

      <Route path='bookshop' element={<Bookshop />} />
      <Route path='publisher/:itemId' element={<Publisher />}>
    </Route>
    </Route>
  )
)
Essentially, we are nesting the FavBook component to the Book component as its direct child, so the content will display below it.
Next, create a div tag and render an outlet component. This is us telling react-router where to render the newly nested route.
return (
    <>
      <div className='m-4'>
        <p className="text-3xl">{`List of my favourite books`}</p>
      </div>

    👉 <section className='flex'>
        <div className='m-4'>
          {
            books && books.map((book)=> (
              <>
              <ul>
                <li>
                  <Link to={`newbooks/${book.id}`} className='text-blue-600 underline'>{book.title}</Link>
                </li>
              </ul>
            </>
            ))
          }
        </div>
        <div className='w-[70%]'>
       👉  <Outlet />
        </div>
      </section>
    </>
  )
Note that to render the nested FavBook component side by side, both the outlet and the book list tag are nested in a section tag, and a style of display flex is applied.
Your code should look like this in your browser:
From the browser output, you can see that each listed item functions as a tab, and clicking them renders out the content of the API.
You've learned how to create a dynamic segment. In the next section, we'll build a project to help cement what we’ve learned even further.
Project: Build an Art Gallery
In this project, we are going to build an art gallery app that contains a list of sculpture and art from different countries. This will help you solidify the concepts you've previously learned.
We are going to implement the following features:
- Client Side Routing
- Active Links
- Dynamic Segments
- Nested Routes
Below is a quick overview of what the project will look like.
Project Overview
Here is a complete preview of our project after completion. You can download the source code on 👉 GitHub here.

Folder Structure
This is what the project's folder structure should look like:
📂src
        📂apis
            ├──data.js
        📂components
            ├──AsideBar.jsx
            ├──Content.jsx
            ├──Navbar.jsx
        📂pages
            ├──home.jsx
    ├──index.css
    ├──main.jsx
├──index.html
How to Set Up the Home Page
To set up the home page, create a home component ./src/pages/home.jsx and add the code below:
├──home.jsx

export default function Home() {
return (
    <>
        <main className="">
            <section>
                <p className="text-orange-600">Hello World</p>
            </section>
        </main>
    </>
)
}
Next, go to the main.jsx component. If you don’t have one yet, create it as ./src/main.jsx. then configure the route as follows:
├──main.jsx

import React from 'react'
import ReactDOM from 'react-dom/client'
import './index.css';

import {
  RouterProvider,
  createBrowserRouter,
  createRoutesFromElements,
  Route
} from 'react-router-dom';

import Home from './pages/home';

const router = createBrowserRouter(
  createRoutesFromElements(
    <Route  path='/' element={<Home />}>

    </Route>
  )
)

ReactDOM.createRoot(document.getElementById('root')).render(
  <React.StrictMode>
    <RouterProvider router={router} />
  </React.StrictMode>,
)
Next, type npm run dev to launch your app.
Your app should look like this in your browser:

How to Create and Style the Navbar
Now that we have the home and route component set up, let’s create the navbar component, which is the top component in our app.
Create a component ./src/components/navbar.jsx and add the code below:
├──navbar.jsx

import { Activity, Search } from "react-feather";

export default function Navbar() {
  return (
   <>
    <main className="">
        <header>
            <nav className="flex justify-between bg-slate-200 rounded-3xl py-2">
                {/* logo */}
                <div className="">
                    <Activity className="inline-block ml-10 mr-2 text-orange-500" />
                    <p className="inline-block text-xl">{`Arts & Culture`}</p>
                </div>

                {/* Navlinks */}
                <div className="bg-white rounded-3xl py-1 px-2 mr-5">
                    <Search className="inline-block mr-1 text-slate-500"/>
                    <input type="search" id="site-search" name="q" placeholder="Search anything" className="bg-transparent outline-none text-slate-800"/>
                </div>
            </nav>
        </header>
    </main>
   </>
  )
}
From the code above, the navbar is divided between the logo and the search bar.
- The logo: we import the Activity Icons as a component from the feather icons and apply some Tailwind CSS classes to style it. The icon is set to
inline-blockso that we can apply space to it. We applyml-10andmr-2, which is margin-left of2.5remand right0.5remwith a color of orange (text-orange-500). - The search: for the search bar, we also imported it from feather icons as a component and applied the following styling:
inline-block mr-1 text-slate-500. If you are having a hard time understanding Tailwind CSS classes you can read more about them from the docs here.
To position the logo and search bar side by side, we set the parent header to display flex and justify-content of space-between to apply space in between the logo and search bar.
Next, add the navbar to the route as follows:
├──main.jsx

import React from 'react'
import ReactDOM from 'react-dom/client'
import './index.css'

import {
  RouterProvider,
  createBrowserRouter,
  createRoutesFromElements,
  Route
} from "react-router-dom"

👉  import Navbar from './components/Navbar'
        import Home from './pages/home'

const router = createBrowserRouter(
  createRoutesFromElements(
   <Route  path='/' element={<Home />}>
    👉   <Route path='/' element={<Navbar />} />
    </Route>
  )
)

ReactDOM.createRoot(document.getElementById('root')).render(
  <React.StrictMode>
    <RouterProvider router={router} />
  </React.StrictMode>,
)
From the code above, the Navbar component is nested inside the Home components. This means we have to use an Outlet component to render the Navbar component.
Next, go to the ./src/page/home component, import, and replace the <p> with the Outlet component as indicated below:
├──home.jsx

👉 import { Outlet } from "react-router-dom";

export default function Home() {
return (
    <>
        <main className="">
            <section>
           👉 <Outlet />
            </section>
        </main>
    </>
)
}
Your app should look like this on your browser:
How to Create the AsideBar
The AsideBar is one of the most important components of our app. This is where the names of the cultures will be displayed. This component functions as a tab, and when a user clicks on it, it renders out more details about the culture that was clicked on.
Create a new component as ./src/components/AsideBar.jsx and write in the code below:
├──AsideBar.jsx

import { NavLink } from "react-router-dom"
import data from "../apis/data"

export default function AsideBar() {

    const activeStyle = ({isActive}) =>  {
            return {
                backgroundColor : isActive ? "rgb(154 52 18)" : "",
                color : isActive ? "rgb(255 247 237)" : "",
            }
        }

return (
    <>
        <main className="w-[100%] mt-[2em]">
            <section className="w-[100%]">
                <aside className="w-[fit-content] bg-slate-200 rounded-xl">
                    {
                        data.map((data)=>(
                            <ul key={data.id}>
                                <li className="">
                                    <NavLink className="w-[100%] py-3 px-2 inline-block text-slate-800 hover:bg-orange-200 transition-all whitespace-nowrap border-y-4 " to={`content/${data.id}`} style={activeStyle}>
                                        {data.type}
                                    </NavLink>
                                </li>
                            </ul>
                        ))
                    }
                </aside>
            </section>
        </main>
    </>
)
}
From the code example above, we have our code split into two sections: the data and the NavLink component.
- The data: we imported the data from
./src/apis/data.jsand we are mapping each array of objects and returning thedata.typeas the names of theAsideBar. - The NavLink: the data returned from
data.jsis rendered directly on theNavLinkcomponent. TheNavLinkcomponent has two props specified, thestyleandtoprops. Thestyleprop received theactiveStyleobject that indicated what style should be applied toNavLinkwhen its active. Thetopropto={content/${data.id}}we pass thedata.idas a segment to match with thepathof the content components (more on this in the next section). This enables the content to dynamically render when theNavLinkis clicked on.
Next, go to the home component and render the AsideBar as indicated below:
├──home.jsx

      import { Outlet } from "react-router-dom";
👉 import AsideBar from "../components/AsideBar";

export default function Home() {
return (
    <>
      👉  <main className="w-[80%] mt-[2em] mx-auto">
            <section>
                <Outlet />
            </section>
            <section>
                <aside>
                 👉 <AsideBar />
                </aside>
            </section>
        </main>
    </>
)
}
Your app should look like this in your browser:
From interacting with the Asidebar, you may have noticed that the page breaks any time you click on the links. This is because the content component is not defined yet. So let’s create it.
How to Create the Content Component
The content component renders the content that is related to a particular link that was clicked.
Create a new component called ./src/components/Content.jsx and add the code below:
├──Content.jsx

import { Link, useParams } from "react-router-dom";
import data from "../apis/data.js";
import { WifiOff } from "react-feather";

export default function Content() {
    const {contentId} = useParams()

    const newData = data.find((data)=> data.id.toString() === contentId)

    if(!contentId){
        return (
            <main className="translate-x-44 translate-y-44">
                <div className="">
                    <WifiOff className="text-slate-400 text-center translate-x-48"/>
                    <p className="text-slate-400">{`Content can't be accessed! click the left nav to reload`}</p>
                </div>
            </main>
        )
    }

return (
    <>
        <main className="w-[80%] mx-auto mt-8">
            <section >
                {
                    newData && (
                        <>
                            {/* Image Over */}
                            <aside className="h-[6em] w-[100%]">
                                <div className="h-[100%]  w-[100%]">
                                    <img src={newData.imgHeaders} alt="" className="h-[100%]  w-[100%] object-cover rounded-xl"/>
                                </div>
                            </aside>

                            {/* Details */}
                           <section className="flex gap-6">
                           <aside className="w-[50%]">
                                <div>
                                    <p className="bg-orange-500 w-[fit-content] rounded-xl mt-4 py-1 px-2 font-bold">{newData.catagories}</p>
                                    <h1 className="font-light text-4xl my-7">{newData.type}</h1>
                                    <p className="font-bold mb-4 text-2xl">{newData.region}</p>
                                </div>
                                <div>
                                    <p className="font-light">{newData.history}</p>
                                </div>

                                <div className="mt-4">
                                    <span>{`Learn more from`}</span>
                                    <Link to={newData.britannicaLink} target="_blank" className="text-orange-500 py-2 px-2 rounded-md inline mt-4 hover:underline hover:text-black">britannica</Link>
                                </div>
                            </aside>

                            {/* Image Cover */}
                            <aside className="w-[50%]">
                                <div>
                                    <img src={newData.imgCover} alt="" className="rounded-3xl mt-10"/>
                                </div>
                            </aside>
                            </section>

                        </>
                    )
                }
            </section>
        </main>
    </>
  )
}
The code above is doing the following:
- useParams: we use the useParams() hook to return the key and value pairs of the dynamic segment
content/:contentIdspecified on the route. - newData: using the find() array method, the first element of the object array is returned if the condition is true, otherwise it returns
undefined. - if(!contentId): here, we are checking to see if the
contentIddoesn’t match or is not rendered yet – then the provided element within the function should run. This is very useful for checking errors and in situations where the content is not available. - newData &&: here we are mapping through the return data object and rendering the content of the API as soon as the content is loaded. Each object property is parsed into an element to render as content.
Next, go to the home component and render the content component as indicated below.
├──home.jsx

        import { Outlet } from "react-router-dom";
        import AsideBar from "../components/AsideBar";
👉 import Content from "../components/Content";

export default function Home() {
return (
    <>
        <main className="w-[80%] mt-[2em] mx-auto">
            <section>
                <Outlet />
            </section>

            <section className="flex">
                <aside>
                    <AsideBar />
                </aside>

                <aside>
              👉 <Content />
                </aside>
            </section>
        </main>
    </>
)
}
Next, configure the route to a dynamic segment:
├──home.jsx

     import Home from './pages/home';
     import Navbar from './components/navbar';
👉 import Content from './components/Content';

const router = createBrowserRouter(
  createRoutesFromElements(
    <Route  path='/' element={<Home />}>
       <Route path='/' element={<Navbar />}>
       👉 <Route path='content/:contentId' element={<Content />} />
      </Route>
    </Route>
  )
)

ReactDOM.createRoot(document.getElementById('root')).render(
  <React.StrictMode>
    <RouterProvider router={router} />
  </React.StrictMode>,
)
Your app should look just like this on your browser:
Clicking on the Asidebar will load the content from the API and render it on the same page as the Asidebar.
Summary
In this tutorial, we learned about Dynamic Segments in React Router. We talked about what Dynamic Router is and how it’s different from static routing. You also learned how to use the useParams hook to enable Dynamic Segments, as well as how to set your path when getting data from an API
Then we built a new project that dynamically rendered new content to the same page when the user clicks on the sidebar.
You can take this project further and make it your own by implementing more features.