

There are many repetitive tasks that we have to do every day. And they can be a bit boring, difficult, and monotonous.
But instead of laboring away at those daily tasks, you can delegate them so someone or something else does them for you. That way, you can have more time to do things you want to do. You can have time to relax.
If you've ever developed an Android application, you know how tedious some tasks can get:
- Running tests
- Making sure the application compiles when merging new code
- Building and publishing the application.
So to whom should we pass along these tasks? Another coworker? They can just pass it along to someone else and it won’t free up anyone’s time. Plus, we don’t want to bum out our colleagues. The solution?
Say hello to GitHub Actions. 👐
What Are GitHub Actions?
GitHub Actions are commands we can trigger when something happens in our repository. At its core, an action is a configuration file that has a list of commands that describe:
- What needs to happen
- When it should happen
This configuration file is in YAML format (.yml) and an example looks like this:
name: My GitHub Action

on: pull_request

jobs:
  build:

    runs-on: ubuntu-latest

    steps:
      - uses: actions/checkout@v1
Let’s break down the example above:
- We give a name to our action (My GitHub Action) [Optional]
- We signify when this action should run (when a pull request is opened)
- We start a list of tasks (jobs) that should happen once this action is triggered
- The first one is a build action
- The runs-on command tells GitHub which runner will execute this job (this is a virtual server and you can choose between Windows/Mac/Linux)
- Each job can have many phases which are grouped together by the steps keyword
- The uses keyword tells the script what action to enact
This is a very short example which does not showcase all of the features of GitHub Actions, but it provides a peek into the structure of the configuration file.
In the next sections, we will create actions that will help keep our development cycle efficient and effective.
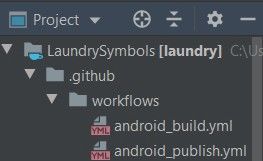
Note that all GitHub Actions files need to reside under your project’s main folder in the path .github/workflows:
How to Create a GitHub Action For Pull Requests
Whether you are working on a project alone or part of a team, making sure that your application is stable is crucial. So it makes total sense to ensure that your application is compiling properly and all tests are passing whenever you consider merging a pull request.
We’ve already shown in our example how we can checkout the code in our repository. In this action, we will include the following steps:
- Setting up the JDK version
- Changing permissions for the virtual environment
- Running tests (if we have any)
- Building the application
name: Android Build

on: pull_request

jobs:
  build:

    runs-on: ubuntu-latest

    steps:
      - uses: actions/checkout@v1

      - name: Set Up JDK              // 1
        uses: actions/setup-java@v1
        with:
          java-version: 1.8

      - name: Change wrapper permissions  // 2
        run: chmod +x ./gradlew

      - name: Run Tests                   // 3
        run: ./gradlew test

      - name: Build Project               // 4
        run: ./gradlew assemble
You can see that above, each step has its own properties and attributes that are specific to it.
I won’t go into each one of them, since you can do that on your own through the documentation. What is common for most of the steps is the run keyword. This attribute states what command to execute.
✋ We need the second step so that the virtual environment can run the gradle commands. Without it, it won’t be able to.
How to make a GitHub Action For Publishing an Application
Once you have published your application for the first time, republishing it becomes sort of like a chore.
You have to make sure the version is upgraded, build the APK, submit it via the Google Play Console and other tedious tasks.
We can automate this process with another GitHub action. This action is a little more complicated than the previous once since it requires the use of GitHub Secrets.
In a nutshell, GitHub Secrets are a way to store sensitive information as environment variables of your repository. We will be needing to use them because:
- We will need to sign our application
- We are going to give this action permission to submit our built application to the Google Play Store
Let’s find out how we can create GitHub Secrets first.
- Inside the main page of your repository, click on the Settings tab

- On the left hand side menu, there will be an option titled Secrets
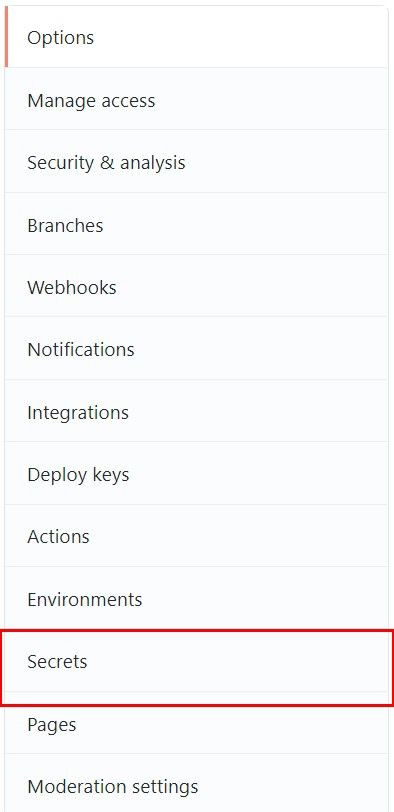
- To create a secret, press the New repository secret button

Now that we got that out of the way, let’s look at the script for publishing an application:
name: Android Publish

on:
  workflow_dispatch:

jobs:
  build:

    runs-on: ubuntu-latest

    steps:
      - uses: actions/checkout@v1

      - name: Set Up JDK
        uses: actions/setup-java@v1
        with:
          java-version: 1.8

      - name: Change wrapper permissions
        run: chmod +x ./gradlew

      - name: Run Tests
        run: ./gradlew test

      - name: Build Project
        run: ./gradlew build

      - name: Build Release AAB      // 1
        run: ./gradlew bundleRelease

      - name: Sign AAB               // 2
        uses: r0adkll/sign-android-release@v1
        with:
          releaseDirectory: app/build/outputs/bundle/release
          signingKeyBase64: ${{ secrets.SIGN_KEY }}
          alias: ${{ secrets.ALIAS }}
          keyStorePassword: ${{ secrets.STORE_KEY_PASSWORD }}
          keyPassword: ${{ secrets.KEY_PASSWORD }}

      - name: Deploy to Play Store   // 3
        uses: r0adkll/upload-google-play@v1
        with:
          serviceAccountJsonPlainText: ${{secrets.SERVICE_ACCOUNT}}
          packageName: com.tomerpacific.laundry
          releaseFiles: app/build/outputs/bundle/release/app-release.aab
          track: production
You may have noticed that this action will run on workflow_dispatch. What does that mean? Basically it allows this action to be triggered manually from GitHub itself.
You can of course decide you would rather run this action when a push happens on the main branch (for example).
The step marked with 1 in the snippet above triggers building an .aab of our application. Then, like we would do if we were building it inside Android Studio, we have to sign this .aab file.
This is the first time GitHub Secrets come into play. We need to create secrets for:
- The Signing Key (secrets.SIGN_KEY)
- The Key Alias (secrets.ALIAS)
- The Store Key Password (secrets.STORE_KEY_PASSWORD)
- The Key Password (secrets.KEY_PASSWORD)
Once we have signed the .aab file we can deploy it to the Google Play Store. At this step there is a little bit more work to do since we need to allow this GitHub Action the permission to deploy applications for us on Google Play. But, wait, how do we do that? We use a Service Account.
How to Create a Service Account
A service account is an entity that you create that tells services or applications it interacts with that it is operating on your behalf.
In our case, our GitHub Action is going to interact with the Google Play Store so it can upload a new version of our application.
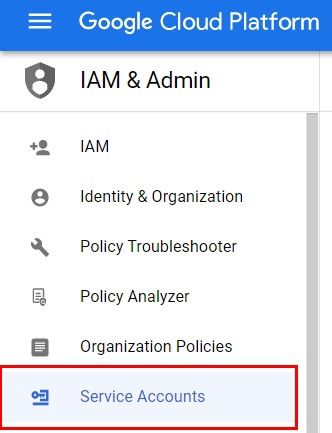
To create a service account, go to the Google Cloud Console. If you have no account there, make sure to create one. Then, on the main page, in the left hand side menu, there will be a list item titled Service Accounts.
Once you've clicked it, on the right hand side of the window you will see any service accounts you already have.
We want to create a new one and in the top part of the window there is a button to do just that.

In the window that opens, you will have to enter in the service’s name and you can also enter a description.
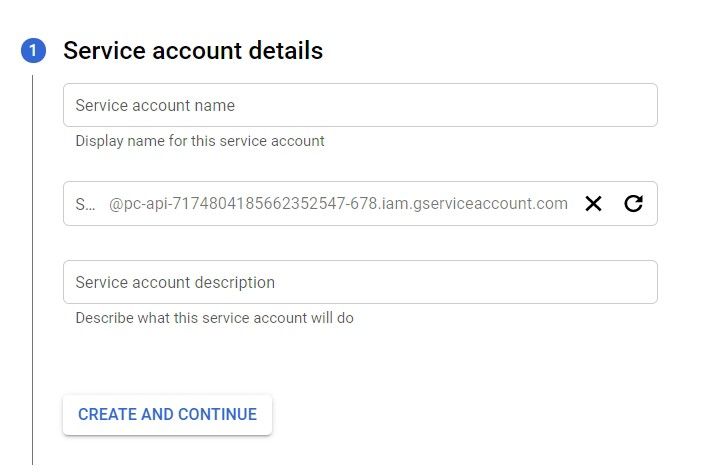
The name given here will be the unique identifier of this service account.
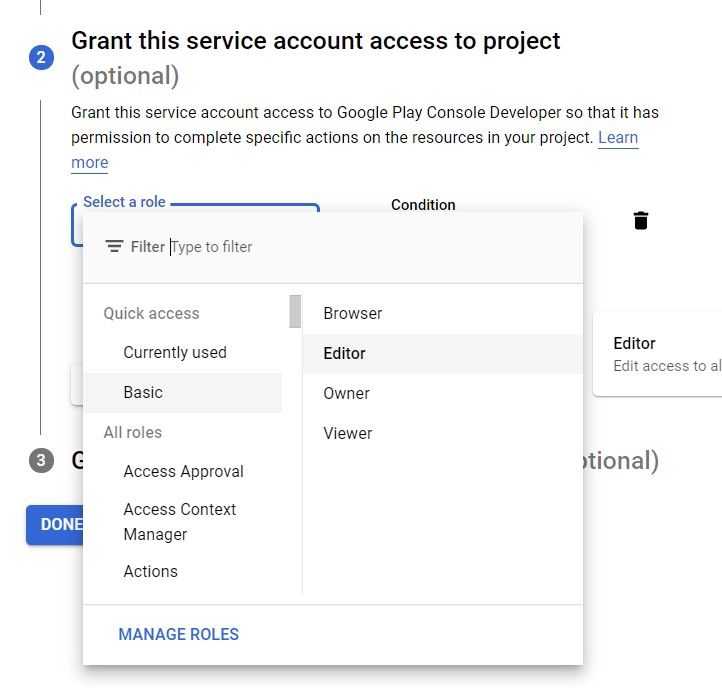
In the second step you will be asked to give this service account a role. From the Select A Role dropdown, choose Basic → Editor.
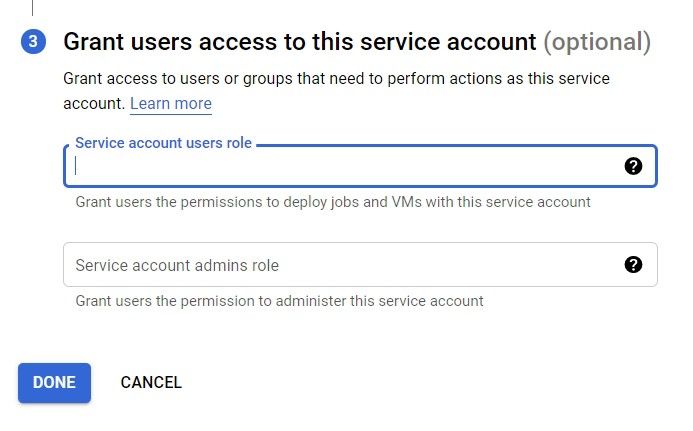
Finally, in the third step, fill out your email in both places under the "Grant users access to this service account" section:
After pressing the done button, you will need to create a key for this service account. The action will use this key to be identified by Google Play.
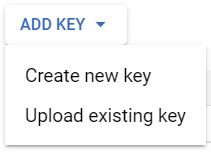
To create the key, click the three horizontal dots under the Actions label in the main service account screen. In the menu that appears, select Manage keys.

In this window, we will create a key by selecting the New Key button and choosing "Create new key" from the menu that appears.
Now we have the option of choosing the format of our new key – the default is JSON and we will leave it selected. Click create.
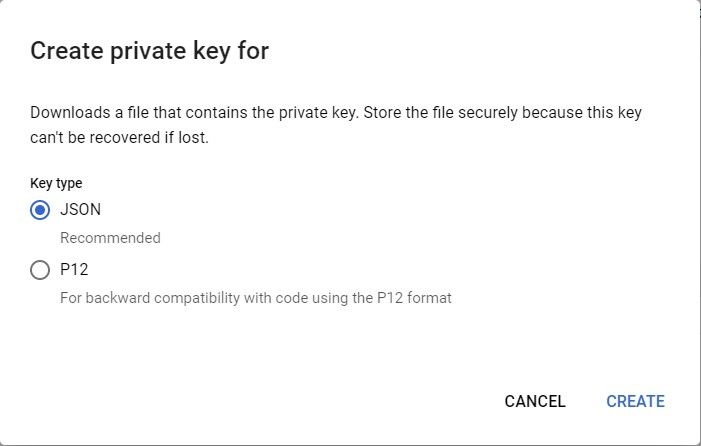
Once you have done so, a file will be downloaded to your computer. Make sure to keep this file as it has all the data relevant for your service account and you won’t be able to download it again.
We will take the contents of this file and then create a GitHub secret with it (secrets.SERVICE_ACCOUNT).
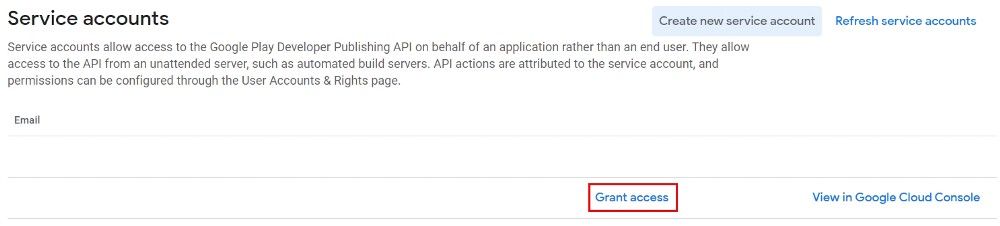
Last but not least, we need to make Google Play aware of this service account. Doing so requires us to login to our Google Play Console account and heading over to Setup →API Access.
If you scroll down the page, you will see a section titled Service Accounts. You should be able to see the service account you created previously. Click the Grant Access link
In the settings that open, head over to App permissions. Here you will choose which application this service account interacts with.
Under Account permissions, everything under the releases section should be checked. I highly advise you to look at all the other settings and decide for yourself what you want to leave checked or what you want to check off.
Once you are done, click the Invite user button located in the bottom right corner.
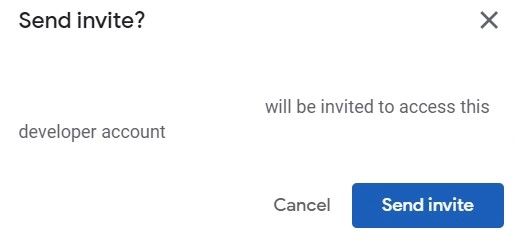
After the invitation is sent, we can run the publishing to store action.
How to Monitor Our Actions in GitHub
To see what actions are defined for your repository, click on the Actions tab. This tab showcases all workflows defined and those that have already run.
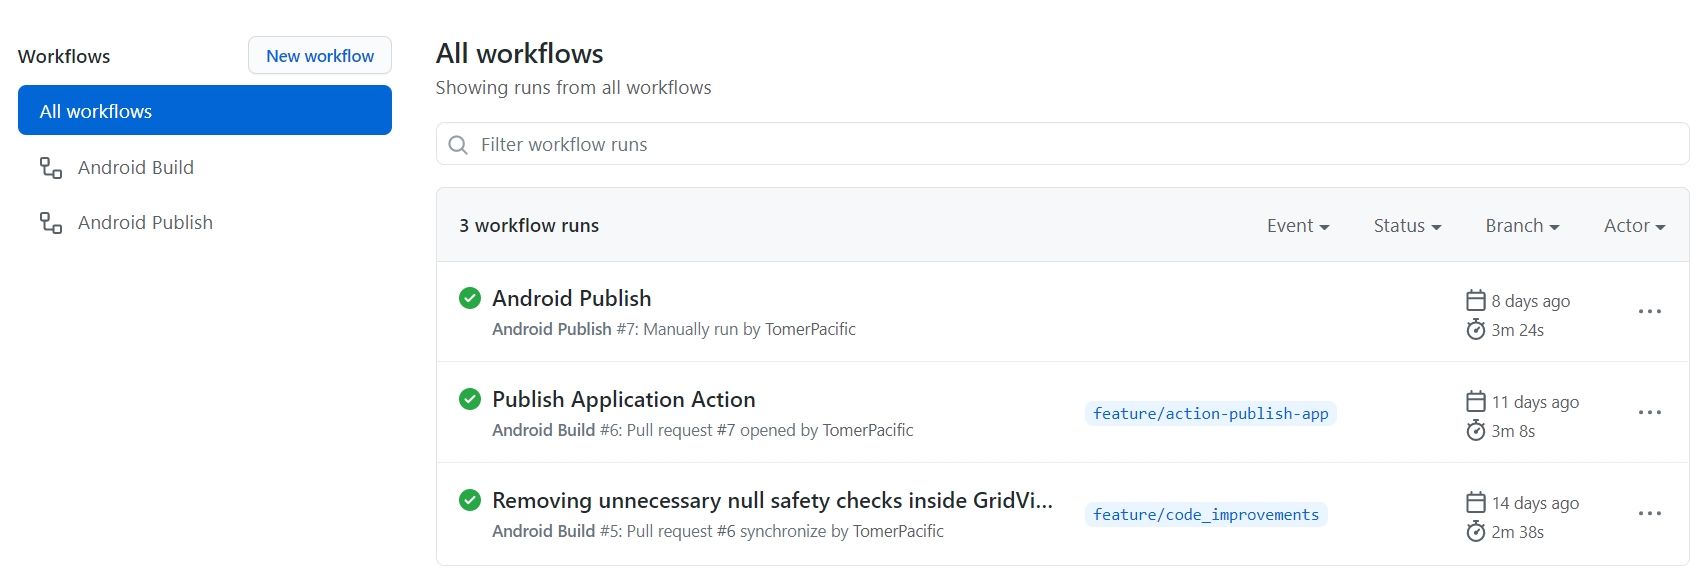
On the left hand side you can see all the actions that have been defined and on the right hand side you can see all the actions that have been run. If you want to look at a specific action, you can click on it.
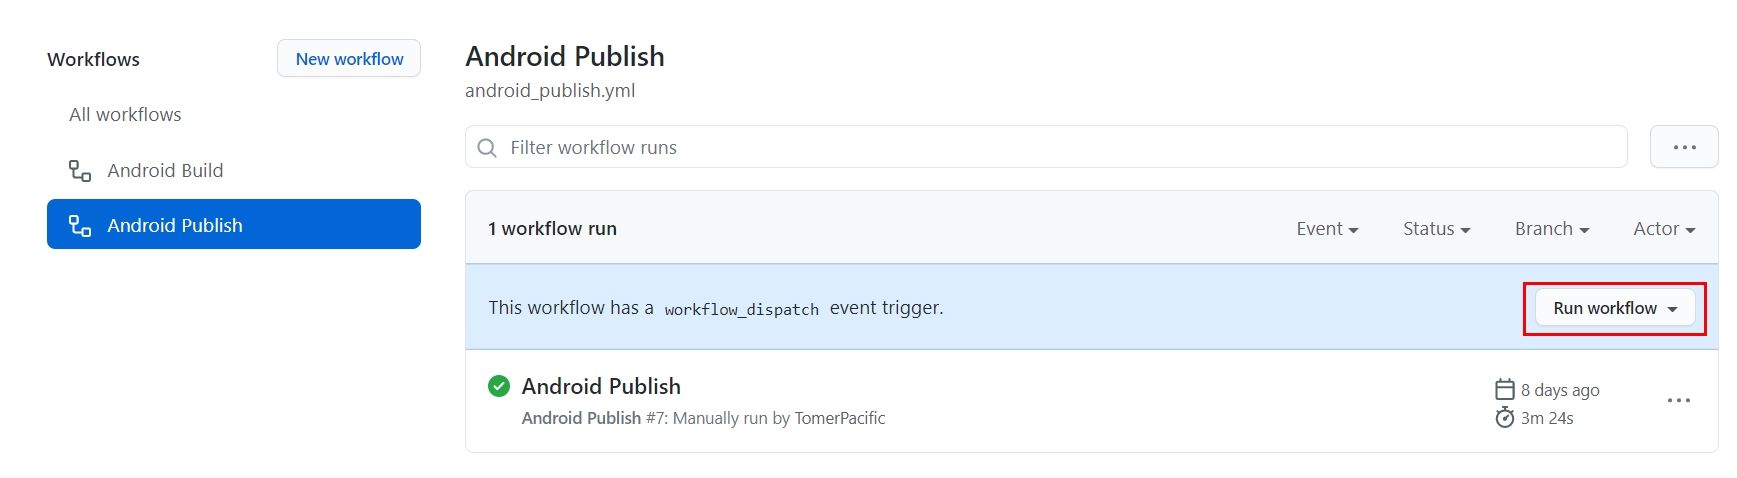
If the action is defined to run on workflow_dispatch, you will see a button enabling you to run it (like in the picture above).
If you want to see a specific run of a workflow, you can also do that from the main Workflows page by clicking on one of the runs. If one of the actions fails to run, this would be the place to investigate and see what went wrong.
Our first action is supposed to be triggered when a pull request is opened. If it works correctly, you should be seeing this:

And there you have it!
Wrapping Up
It’s been a long read up to this point, but we have gone through everything that you need to get started creating a Continuous Integration and Continuous Deployment pipeline for your applications.
If you are interested in seeing how GitHub Actions are set up, you can check them out in one of my repositories here:
To read more about GitHub Actions, head over here: