
You may have seen tutorials that help you build a simple React.js app that use some third-party API or a Node.js server as a backend. You could also use Laravel for this purpose and integrate it with React.
As a backend framework, Laravel actually offers a tool to help you do this, called Inertia. Here's what the docs say about it:
It bridges the gap between your Laravel application and your modern Vue or React frontend, allowing you to build full-fledged, modern frontends using Vue or React while leveraging Laravel routes and controllers for routing, data hydration, and authentication — all within a single code repository.
But what if you don't want to use such a tool? And instead, you just want to use React.js as a frontend library and have a simple Laravel-powered backend?
Well, in this article, you will learn how to use React.js with Laravel as a backend by building a draggable tasklist app.
For this full-stack single-page app, you'll use Vite.js as your frontend build tool and the react-beautiful-dnd package for draggable items.
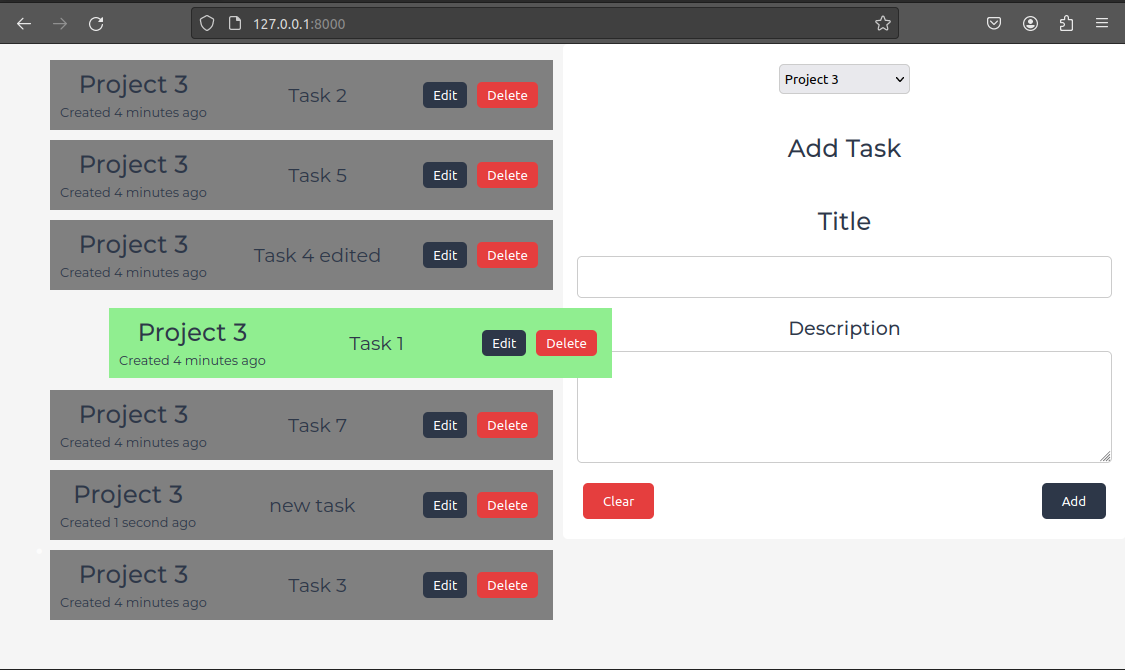
By the end of this article, you will have a single-page app for managing tasks, which will look like this:
 Captured from a local working project
In this article, we'll create a dynamic page that will have a list of tasks, each of which will belong to a specific project. This way, the user will be able to select a project, and only the tasks of the selected project will be shown on the page. The user can also create a new task for the current project, as well as edit, delete and reorder tasks by dragging and dropping them.
Table of Contents:
- Prerequisites
- The Backend: How to Install Laravel
- How to Create Models and Migrations
- How to Create Seeders
- How to Connect to the MySQL Database
- Service Injection
- Web and API Routes in Laravel
- Validation Requests in Laravel
- How to Write a Controller that Uses Services
- How to Test the API Routes
- The Frontend: How to Install the Packages
- How to Configure Vite.js
- React.js – Initial Integration
- How to Add CSS
- A Service for the API requests
- React.js Components
- Final Results
- Conclusion
Prerequisites
Before following along, it would be helpful to have a basic understanding of React.js, Laravel, and familiarity with fundamental web development concepts.
You'll need the following tools for the app that we'll build in this article:
- PHP 8.1 or above (run
php -vto check the version) - Composer (run
composerto check that it exists) - Node.js 18 or above (run
node -vto check the version) - MySQL 5.7 or above (run
mysql --versionto check if it exists, or follow the docs)
Additional (optional) tools that you can use:
- Postman – a program with a UI for testing the API routes
- curl – a CLI command for testing the API routes
We'll start by building out the backend, and then move to the frontend.
The Backend: How to Install Laravel
First, if you don't have it already, you'll need to install the Laravel framework on your local machine.
One way to install Laravel is by using a popular dependency manager for PHP called Composer. Here's the command to do so:
composer create-project laravel/laravel tasklist
This will install the latest stable version of Laravel in your local machine (currently it's version 10).
The tasklist in the command is the app's root folder name, which you can set to whatever you want.
At this point, you can cd into the project's folder and run the backend app without needing to have a virtual server set up:
cd tasklist/ && php artisan serve
The artisan in the above command is a CLI tool included in Laravel. It exists at the root of your Laravel application as the artisan script file, which provides a number of helpful commands that can assist you while you build your application.
We'll use it in this article often.
Visit http://127.0.0.1:8000 in your browser to see the default page. It should look like this:
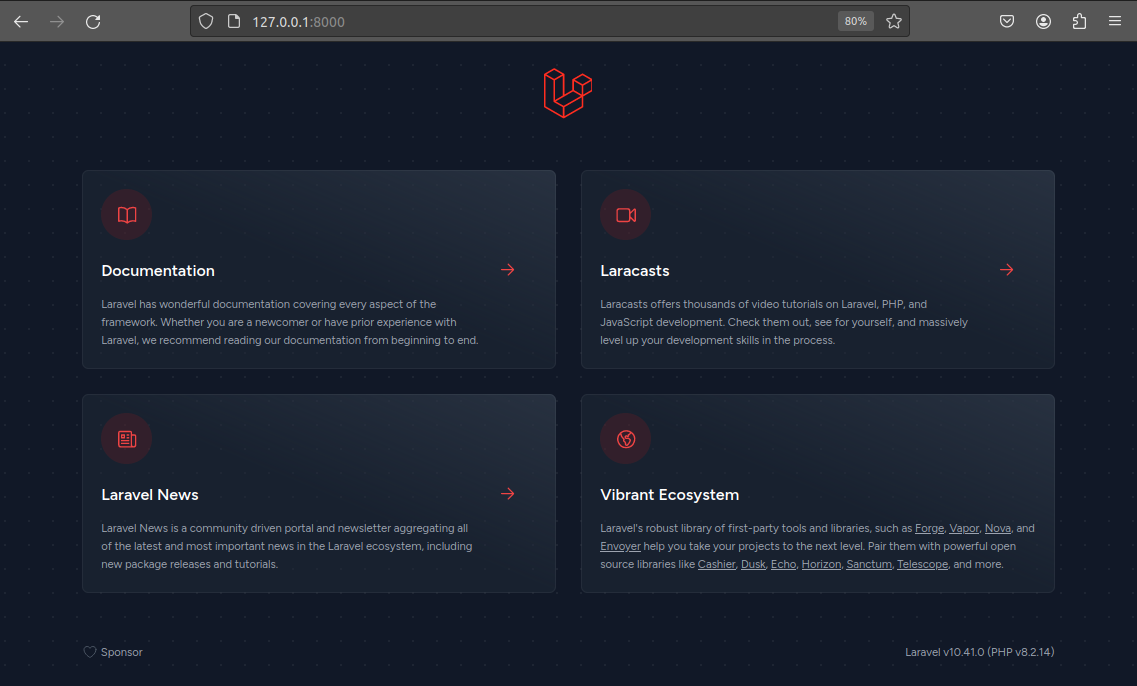 Laravel welcome page
How to Create Models and Migrations
Now, let's create Project and Task models, as well as migrations for them.
Models are the way your app entities should be defined, and migrations are like schema definitions for storing the records of those entities in the database.
You can create model and migration files manually as well as generate them using the artisan command:
php artisan make:model Project -m
php artisan make:model Task -m
The -m argument will automatically generate a migration file using the provided model name.
Keep the command execution sequence as it is, so the Project's migration later can run before the Task's migration.
This is important, because the projects and tasks tables should have a one-to-many relationship (1-N): each task will refer to a single project, or, in other words, each project can have multiple tasks.
Set the Project model's $fillable fields and the task() relationship method as below:
<?php

namespace App\Models;

use Illuminate\Database\Eloquent\Factories\HasFactory;
use Illuminate\Database\Eloquent\Model;
use Illuminate\Database\Eloquent\Relations\HasMany;

class Project extends Model
{
    use HasFactory;

    protected $table = 'projects';
    public $timestamps = false;
    protected $fillable = [
        'id', // primary key, auto-increment, integer
        'name', // string
    ];

    // a project can have multiple tasks
    public function tasks(): HasMany
    {
        return $this->hasMany(Task::class);
    }
}
By default, the $timestamps public property has a true value, which is coming from the parent Model class. This means that the created_at and updated_at columns in your database table will be maintained automatically by Eloquent (the ORM included in Laravel).
But you can customize it by changing its value to false. We don't need to have created_at and updated_at fields in the projects table, so we'll set the $timestamps to false.
Set the Task model's $fillable fields, project() relationship method, and created accessor. An accessor in Laravel is like a function between the database and your code, that can access the already fetched database record and modify it.
<?php

namespace App\Models;

use Illuminate\Database\Eloquent\Factories\HasFactory;
use Illuminate\Database\Eloquent\Model;
use Illuminate\Database\Eloquent\Relations\BelongsTo;
use Illuminate\Database\Eloquent\SoftDeletes;

class Task extends Model
{
    use HasFactory, SoftDeletes;

    protected $table = 'tasks';
    protected $fillable = [
        'id', // primary key, auto-increment, integer
        'project_id', // foreign key, integer

        'priority', // integer
        'title', // string
        'description', // text
    ];
    protected $appends = [
        'created',
    ];

    // each task belongs to a single project
    public function project(): BelongsTo
    {
        return $this->belongsTo(Project::class);
    }

    public function getCreatedAttribute()
    {
        return $this->created_at->diffForHumans();
    }
}
Above, in the Task model, there is an accessor called created. For having an accessor, we have the created field in the $appends array, and also a public function getCreatedAttribute().
In get**<WordsInCamelCase>**Attribute() function there is logic that will run to modify the already fetched database record.
In our case the getCreatedAttribute() function will return a human-friendly and readable time difference between the current time and the given time. For example, "3 mins ago" or "4 months ago".
Now that the models are ready, let's set up the migrations.
First, set up a migration for the projects table:
<?php

use Illuminate\Database\Migrations\Migration;
use Illuminate\Database\Schema\Blueprint;
use Illuminate\Support\Facades\Schema;

return new class extends Migration
{
    public function up(): void
    {
        Schema::create('projects', function (Blueprint $table) {
            $table->id();
            $table->string('name');
        });
    }

    public function down(): void
    {
        Schema::dropIfExists('projects');
    }
};
Then set up a migration for the tasks table:
<?php

use Illuminate\Database\Migrations\Migration;
use Illuminate\Database\Schema\Blueprint;
use Illuminate\Support\Facades\Schema;

return new class extends Migration
{
    public function up(): void
    {
        Schema::create('tasks', function (Blueprint $table) {
            $table->id();

            $table->foreignId('project_id')->nullable()->constrained();

            $table->integer('priority');
            $table->string('title');
            $table->text('description')->nullable();

            $table->timestamps();
            $table->softDeletes();
        });
    }

    public function down(): void
    {
        // drop existing foreign keys
        Schema::table('tasks', function (Blueprint $table) {
            if (Schema::hasColumn('tasks', 'project_id')) {
                $table->dropForeign(['project_id']);
            }
        });

        // drop the table
        Schema::dropIfExists('tasks');
    }
};
The tasks table has a foreign key project_id, which is a reference to the projects table. So it's a good practice to update the down() method too, to be sure that the project_id foreign will be dropped before dropping the actual projects table.
There is also a priority field, which will be a non-nullable natural number for ordering the tasks. And optionally, you can add a soft deletion feature to the Task model.
How to Create Seeders
Now we need to add dummy data to the projects and tasks tables. To seed some data in the database, you can use Laravel seeders. This allows you to create dummy data to use in your database.
If you want to read more about how this works, you can check out the docs here.
Laravel provides a way to generate those files by using make:seeder artisan command:
php artisan make:seeder ProjectsSeeder
php artisan make:seeder TasksSeeder
So with the above commands, you'll have database/seeders/ProjectsSeeder.php and database/seeders/TasksSeeder.php files created.
At first, you'll need to set up the ProjectsSeeder to add a few projects to the projects table. Then you can set up the TasksSeeder to add tasks to the tasks table.
As I mentioned at the beginning, each task will belong to a specific project. From a relational database perspective, this means that each entry in the tasks table will link to a specific entry in the projects table. Here's the importance of having a project_id foreign key in the tasks table to be able to relate each task to a specific project as well as retrieve the specific project's tasks.
You can imagine the database structure by looking at the following visuals:
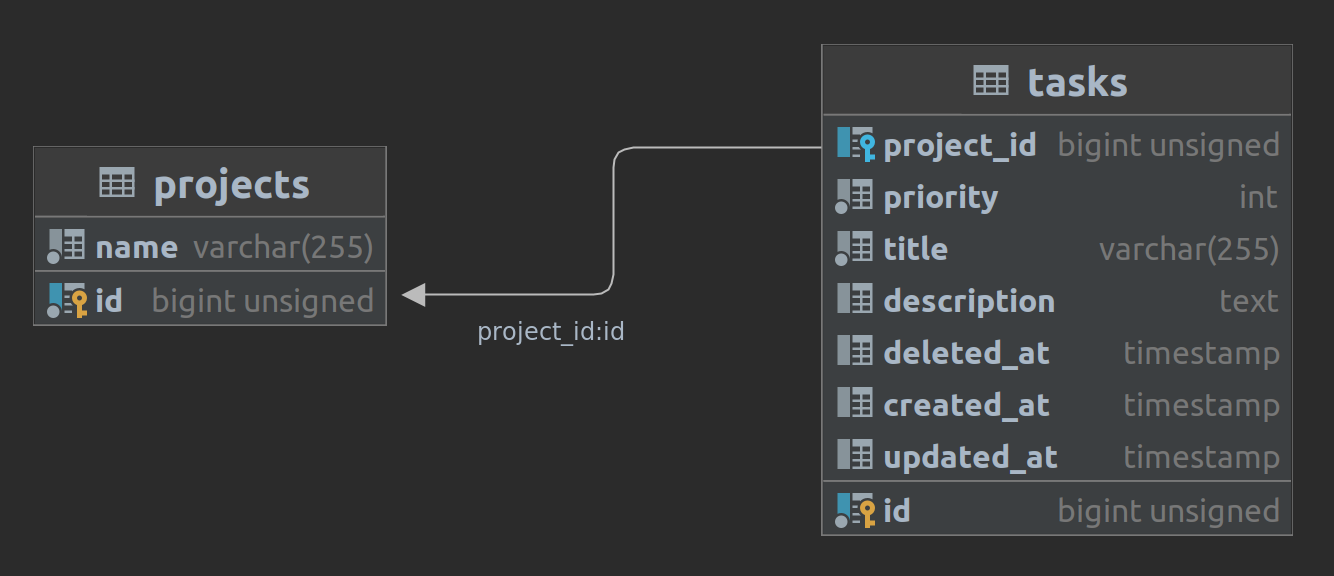 generated by PHPStorm IDE
Using the example below, you can generate 3 projects:
<?php

namespace Database\Seeders;

use App\Models\Project;
use Illuminate\Database\Seeder;

class ProjectsSeeder extends Seeder
{
    public function run(): void
    {
        for ($i = 1; $i <= 3; $i++) {
            Project::create([
                'name' => "Project $i",
            ]);
        }
    }
}
Next, set up TasksSeeder. You'll run all the seeder files after setting them up, and they will run one by one. That being said, at this point your ProjectsSeeder is ready to create a few projects.
By imagining it, the next step will be generating the tasks, each of them will have a reference to one of the already existing projects by its project_id field.
Using the example below, you can generate 10 projects:
<?php

namespace Database\Seeders;

use App\Models\Project;
use App\Models\Task;
use Illuminate\Database\Seeder;

class TasksSeeder extends Seeder
{
    public function run(): void
    {
        $project_ids = Project::all()->pluck('id')->toArray();

        $now = now();
        $tasks = [];
        $project_priorities = [];
        foreach ($project_ids as $project_id) {
            $project_priorities[$project_id] = 0;
        }

        for ($i = 1; $i <= 10; $i++) {
            $project_id = $project_ids[array_rand($project_ids)];
            $project_priorities[$project_id]++;

            $tasks[] = [
                'project_id' => $project_id,
                'priority' => $project_priorities[$project_id],
                'title' => "Task " . $project_priorities[$project_id],
                'description' => "Description for Task " . $project_priorities[$project_id],

                'created_at' => $now,
                'updated_at' => $now,
            ];
        }

        Task::insert($tasks);
    }
}
The above code just grabs all the project IDs, then randomly chooses a project for each task. In the end, it inserts all the tasks into the tasks table.
As you may have noticed, we're inserting $tasks into the tasks table using the insert() static function, which allows us to insert all the items into the database table with a single query.
But it has a downside as well: it doesn't manage created_at and updated_at fields. That's why there's a need to set up those fields manually by assigning them the same $now timestamp.
Now, when you have all the seeders ready, you need to register them into the DatabaseSeeder.
<?php

namespace Database\Seeders;

use Illuminate\Database\Seeder;

class DatabaseSeeder extends Seeder
{
    public function run(): void
    {
        $this->call([
            ProjectsSeeder::class,
            TasksSeeder::class,
        ]);
    }
}
How to Connect to the MySQL Database
Before running migrations and seeds, create a MySQL database and set up the appropriate credentials in the .env file. If there is not a .env, then create it and paste the .env.example file's content into it.
After setting up the database credentials, you'll have these kinds of environment variables:
DB_CONNECTION=mysql
DB_HOST=127.0.0.1
DB_PORT=3306
DB_DATABASE="<DATABASE_NAME>"
DB_USERNAME="<USERNAME>"
DB_PASSWORD="<PASSWORD>"
After setting up environment variables, optimize the cache:
php artisan optimize
Now you'll be able to create projects and tasks tables in the MySQL database, setup their structure, and add initial records with a single command:
php artisan migrate:fresh --seed
In the above command, the migrate:fresh argument will drop all tables from the database. Then it will execute the migrate command, which will run your migrations to create projects and tasks tables appropriately.
With the --seed argument, it will run ProjectsSeeder and TasksSeeder after the migrations. That being said, it will empty your database for you, and will create all the tables and fill all the necessary dummy data.
After running the command, you'll have these kinds of database records:
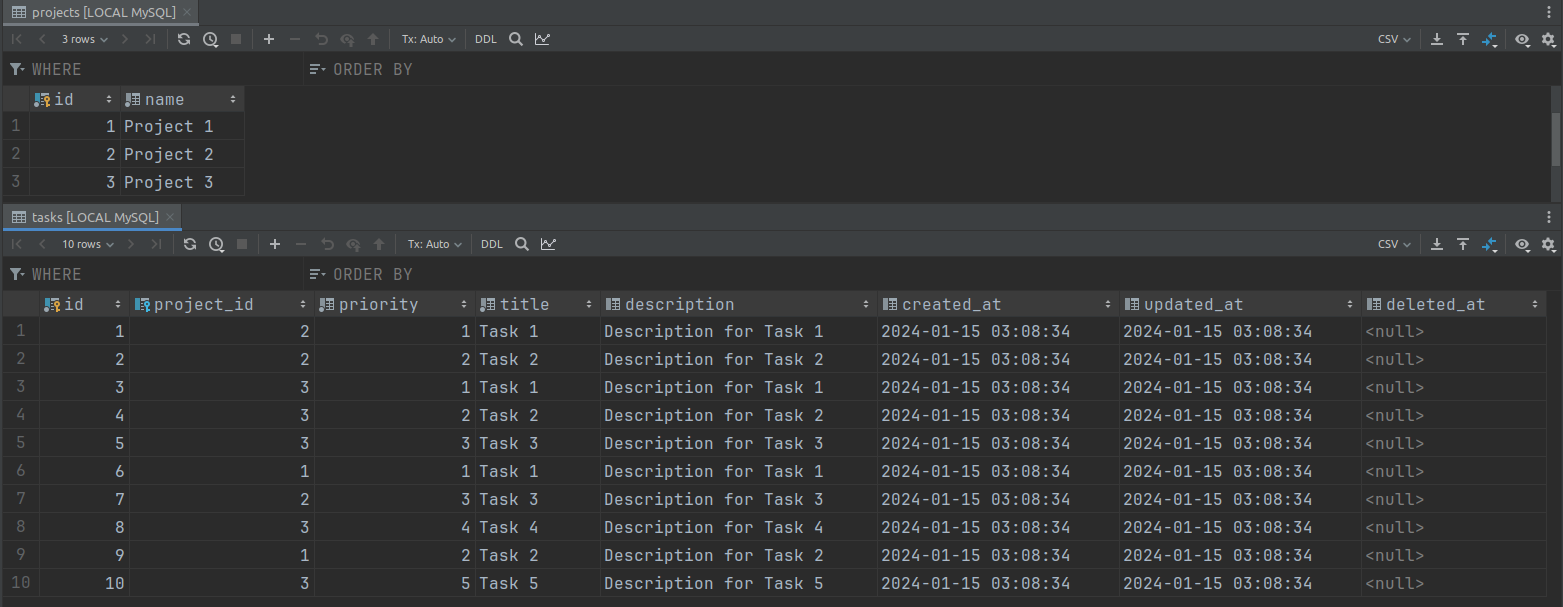 A screenshot from the PHPStorm IDE
Service Injection
Now let's create a controller and a service classes to manage all the task features, such as listing, creating, updating, deleting, and reordering the tasks.
At first, use the below command to generate a controller.
php artisan make:controller TaskController
In order not to place all the code in the controller, you can keep only the main logic in it, and move the other logic implementations to another class file.
Those classes are generally called services, and using service implementations in a controller method is called service injection (it comes from the term dependency injection).
One of the main advantages of using services is that it helps you create a maintainable codebase.
You can inject your service class into the controller's construction method as an argument, so after each controller execution (when a controller's __construct() method runs) you can initialize an object of service. This means that you can access your service's functions right in your controller.
Now, let's create two separate service classes, which will be used in the TaskController.
Manually create a app/Services/ProjectService.php service class, which will be responsible for the project-related logic.
<?php

namespace App\Services;

use App\Models\Project;
use Illuminate\Database\Eloquent\Collection;

class ProjectService
{
    public function getAll(): Collection
    {
        return Project::all();
    }
}
The second service class will be the app/Services/TaskService.php, which will be responsible for doing task manipulations:
<?php

namespace App\Services;

use App\Models\Task;
use Illuminate\Support\Facades\DB;

class TaskService
{
    public function list(int $projectId)
    {
        return Task::with('project')->where('project_id', $projectId)
            ->orderBy('priority')->get();
    }

    public function getById(int $id)
    {
        return Task::where('id', $id)->with('project')->first();
    }

    public function store($data): void
    {
        $count = Task::where('project_id', $data['project_id'])->count();
        $data['priority'] = $count + 1;

        Task::create($data);
    }

    public function update(int $id, array $data): void
    {
        $task = $this->getById($id);
        if (!$task) { return; }

        $task->update($data);
    }

    public function delete(int $id): void
    {
        $task = $this->getById($id);
        if (!$task) { return; }

        $task->delete();

        $tasks = Task::where('project_id', $task->project_id)
            ->where('priority', '>', $task->priority)->get();
        if ($tasks->isEmpty()) {
            return;
        }

        $when_then = "";
        $where_in = "";
        foreach ($tasks as $task) {
            $when_then .= "WHEN ".$task->id
                ." THEN ".($task->priority - 1)." ";
            $where_in .= $task->id.",";
        }

        $table_name = (new Task())->getTable();
        $bulk_update_query = "UPDATE `".$table_name
            ."` SET `priority` = (CASE `id` ".$when_then."END)"
            ." WHERE `id` IN(".substr($where_in, 0, -1).");";

        // there is no way to be SQL injected here
        // because all the values are not provided by the user
        DB::update($bulk_update_query);
    }

    public function reorder(int $project_id, int $start, int $end): void
    {
        $items = Task::where('project_id', $project_id)
            ->orderBy('priority')->pluck('priority', 'id')->toArray();

        if ($start > count($items) || $end > count($items)) {
            return;
        }

        $ids = [];
        $priorities = [];
        foreach ($items as $id => $priority) {
            $ids[] = $id;
            $priorities[] = $priority;
        }

        $out_priority = array_splice($priorities, $start - 1, 1);
        array_splice($priorities, $end - 1, 0, $out_priority);

        $when_then = "";
        $where_in = "";
        foreach ($priorities as $out_k => $out_v) {
            $id = $ids[$out_v - 1];
            $when_then .= "WHEN ".$id." THEN ".($out_k + 1)." ";
            $where_in .= $id.",";
        }

        $table_name = (new Task())->getTable();
        $bulk_update_query = "UPDATE `".$table_name
            ."` SET `priority` = (CASE `id` ".$when_then."END)"
            ." WHERE `id` IN(".substr($where_in, 0, -1).")"
            ." AND `deleted_at` IS NULL;"; // soft delete

        DB::update($bulk_update_query);
    }
}
In the above TaskService class, you'll use the following functions in the TaskController.
- list: fetches tasks for a given project ID, including the related project, and orders them by priority.
- getById: retrieves a specific task by its ID, including the related project.
- store: stores a new task, calculating the priority based on existing tasks for the same project.
- update: updates an existing task by its ID.
- delete: deletes a task by its ID and adjusts the priorities of remaining tasks in the same project.
- reorder: changes the priorities of tasks within a project, (handles soft delete as well with
deleted_at IS NULL).
Web and API Routes in Laravel
Now you can add routes to test the methods you've already written. In this project, we have a stateless app on the frontend which requests API routes for getting JSON data, so it will follow RESTful principles (GET, POST, PUT, DELETE methods). Only the initial HTML page will be retrieved as a whole web page.
So now, set up a route in routes/web.php for the initial single-page:
<?php

use Illuminate\Support\Facades\Route;
use App\Http\Controllers\TaskController;

Route::group(['prefix' => '/', 'as' => 'tasks.'], function () {
    Route::get('/', [TaskController::class, 'index'])->name('index');
});
Set up API routes in routes/api.php like this:
<?php

use Illuminate\Support\Facades\Route;
use App\Http\Controllers\TaskController;

Route::group(['prefix' => '/tasks', 'as' => 'tasks.'], function () {
    Route::get('/', [TaskController::class, 'list']);
    Route::get('/{id}', [TaskController::class, 'get'])
        ->where('id', '[1-9][0-9]*');
    Route::post('/', [TaskController::class, 'store']);
    Route::put('/{id}', [TaskController::class, 'update'])
        ->where('id', '[1-9][0-9]*');
    Route::delete('/{id}', [TaskController::class, 'delete'])
        ->where('id', '[1-9][0-9]*');
    Route::put('/', [TaskController::class, 'reorder']);
});
We have all the API routes in the routes/api.php instead of the routes/web.php because in the web.php file, all the routes by default are CSRF protected. So, in a stateless app, usually you won't need that – that's why api.php was invented in Laravel.
As you can see, there is a "task" prefix for all API routes. It's optional to have a prefix, but it's just a good practice. And for the specific API routes, there are regex validations for accepting only natural numbers as project IDs.
Don't forget to refresh route caches after the above changes. It's important to remember that Laravel (version 10 in this case) reads routes from the cached bootstrap/cache/routes-v7.php file, and they won't be updated automatically right after your changes. It just generates one if it hasn't cached yet.
Use the below command to refresh Laravel caches as well as the route caches:
php artisan optimize
Validation Requests in Laravel
Before writing controller methods, you'll need to add some validation request files. You can do that manually or by just using the artisan command:
php artisan make:request Task/CreateTaskRequest
php artisan make:request Task/ListTasksRequest
php artisan make:request Task/ReorderTasksRequest
php artisan make:request Task/UpdateTaskRequest
After creating them, you'll need to set up validation rules for each request.
Validation rules in Laravel are a way to describe how to expect to get incoming HTTP data. If the data matches the rules, then it passes the validation – otherwise, Laravel will return a failure.
Laravel provides a set of rules you can use to check incoming data. A field of the incoming request can have multiple rules.
One way to write validation rules for a single field is concatenating those rules by a "|" character.
Below are the validation rules for creating a new task:
return [
    'project_id' => 'required|integer|exists:projects,id',
    'title' => 'required|string|max:255',
    'description' => 'nullable|string',
];
Below is the validation rule for listing project tasks:
return [
    'project_id' => 'required|integer|exists:projects,id',
];
Below are the validation rules for tasks reordering:
return [
    'project_id' => 'required|integer|exists:projects,id',
    'start' => 'required|integer',
    'end' => 'required|integer|different:start',
];
Below are the validation rules for updating a task:
return [
    'title' => 'required|string|max:255',
    'description' => 'nullable|string',
];
Don't forget to return true in the authorize() method in all validation classes:
public function authorize(): bool
{
    return true;
}
This function is usually designed to determine if the user is authorized to make the request. As we don't use authentication as well as authorization stuff in the app, it should return true for all the cases.
How to Write a Controller that Uses Services
As the last step in the backend part, it's time to write controller methods for each API route, which will use service functions.
<?php

namespace App\Http\Controllers;

use App\Http\Requests\Task\CreateTaskRequest;
use App\Http\Requests\Task\ListTasksRequest;
use App\Http\Requests\Task\ReorderTasksRequest;
use App\Http\Requests\Task\UpdateTaskRequest;
use App\Services\ProjectService;
use App\Services\TaskService;
use Illuminate\Http\JsonResponse;

class TaskController extends Controller
{
    protected ?TaskService $taskService = null;

    public function __construct(TaskService $taskService)
    {
        $this->taskService = $taskService;
    }

    public function index()
    {
        $projects = (new ProjectService())->getAll();

        return view('tasks.index', [
            'projects' => $projects,
        ]);
    }

    public function list(ListTasksRequest $request): JsonResponse
    {
        $tasks = $this->taskService->list($request->get('project_id'));

        return response()->json([
            'success' => true,
            'tasks' => $tasks,
            'message' => "Tasks retrieved successfully.",
        ]); // 200
    }

    public function store(CreateTaskRequest $request): JsonResponse
    {
        $this->taskService->store($request->all());

        return response()->json([
            'success' => true,
            'message' => "Task created successfully.",
        ], 201);
    }

    public function get(int $id): JsonResponse
    {
        $task = $this->taskService->getById($id);

        if ($task) {
            return response()->json([
                'success' => true,
                'task' => $task,
                'message' => "Task retrieved successfully.",
            ]); // 200
        } else {
            return response()->json([
                'success' => false,
                'message' => "Task not found!",
            ], 404);
        }
    }

    public function update(UpdateTaskRequest $request, int $id): JsonResponse
    {
        $this->taskService->update($id, $request->all());

        return response()->json([
            'success' => true,
            'message' => "Task updated successfully.",
        ], 201);
    }

    public function delete(int $id): JsonResponse
    {
        $this->taskService->delete($id);

        return response()->json([
            'success' => true,
            'message' => "Task deleted successfully.",
        ], 201);
    }

    public function reorder(ReorderTasksRequest $request): JsonResponse
    {
        $this->taskService->reorder(
            $request->get('project_id'),
            $request->get('start'),
            $request->get('end')
        );

        return response()->json([
            'success' => true,
            'message' => "Tasks reordered successfully.",
        ], 201);
    }
}
As you can see in the TaskController:
TaskServiceis injected into the constructor method as an argument. In the constructor body, an instance of theTaskServiceclass is created, and the$taskServiceproperty is initialized. So in the custom methods, you'll be able to access that$taskServiceand its functions.- The
indexmethod is for returning the HTML. - All the other custom methods (
list,store,get,update,delete,reorder) are using theTaskServicefunctions through the already initialized$taskServiceproperty. So, all the logic implementation goes to the service, and this way, you just call a service function and return the response.
How to Test the API Routes
At this point, you can test the API routes by requesting them via Postman or any similar tool. Just run (or rerun) the backend:
php artisan serve
Here's the published Postman collection with all the requests.
Instead of using Postman, you can use a command line tool such as curl right from your terminal.
Below are all the sample commands that you can run to test out the API routes:
- Create a new task for a specific project:
curl --location '127.0.0.1:8000/api/tasks?project_id=1' \
--header 'Content-Type: application/json' \
--data '{
    "title": "Title",
    "description": "Description"
}'
- List project tasks:
curl --location 'http://127.0.0.1:8000/api/tasks?project_id=1'
- Get a task by ID:
curl --location 'http://127.0.0.1:8000/api/tasks/1'
- Update a task by ID:
curl --location --request PUT 'http://127.0.0.1:8000/api/tasks/11' \
--header 'Content-Type: application/json' \
--data '{
    "title": "Title edited",
    "description": "Description edited"
}'
- Reorder project tasks:
curl --location --request PUT 'http://127.0.0.1:8000/api/tasks' \
--header 'Content-Type: application/json' \
--data '{
    "project_id": "1",
    "start": "1",
    "end": "2"
}'
- Delete a task by ID:
curl --location --request DELETE 'http://127.0.0.1:8000/api/tasks/11'
In the below screenshot, there is an example of getting project tasks by its ID using the curl command (at the bottom right):
 An example of using curl command to retrieve the existing tasks from the database
The Frontend: How to Install the Packages
Now it's time to switch to the frontend. We'll use TypeScript for React.js. After completing this part, you'll be able to integrate React.js (with Vite) in your Laravel app.
First, make sure you have Node.js version 18 or above by using this command:
node -v
Install these necessary npm packages:
npm i react-dom dotenv react-beautiful-dnd react-responsive-modal react-toastify @vitejs/plugin-react
react-domis a library from the React team for rendering React components in the DOM (Document Object Model)dotenvis for loading environment variables from the.envfile into the process environmentreact-beautiful-dndis a library from Atlassian for creating drag-and-drop interfaces with animationsreact-responsive-modalis for creating simple and responsive modal dialogsreact-toastifyis for displaying notifications or toasts@vitejs/plugin-reactis a plugin for the Vite build tool that enables seamless integration of React with fast development and optimized production builds
Install the development dependencies with this command:
npm i -D @types/react-dom @types/react-beautiful-dnd
@types/react-domis TypeScript type definitions for thereact-dompackage@types/react-beautiful-dndis TypeScript type definitions for thereact-beautiful-dndpackage
How to Configure Vite.js
As Laravel v10 already has vite.config.js, you'll want to set up any React-related stuff there. Or if you still don't have this file, create one like this:
import { defineConfig } from 'vite';
import laravel from 'laravel-vite-plugin';
import react from '@vitejs/plugin-react';
import 'dotenv/config';

export default defineConfig({
    build: {
        minify: process.env.APP_ENV === 'production' ? 'esbuild' : false,
        cssMinify: process.env.APP_ENV === 'production',
    },
    plugins: [
        laravel({
            input: ['resources/react/app.tsx'],
            refresh: true,
        }),
        react(),
    ],
});
As you can see in the Vite configuration file, there is a reference to the resources/react/app.tsx, which will be the entry point for Laravel to use React resources.
For the initial HTML page, create a resources/views/tasks/index.blade.php blade file, so all the frontend assets will be injected there in the div with ID app:
<!DOCTYPE html>
<html lang="{{ str_replace('_', '-', app()->getLocale()) }}">
<head>
    <meta charset="utf-8">
    <meta name="viewport" content="width=device-width, initial-scale=1">
    <title>{{ config("app.name") }}</title>
    <link rel="shortcut icon" href="{{ asset('favicon.ico') }}" />
    <link rel="stylesheet" href="https://fonts.googleapis.com/css?family=Montserrat">
    <link rel="stylesheet" href="https://fonts.googleapis.com/icon?family=Material+Icons">
    @viteReactRefresh
    @vite('resources/react/app.tsx')
</head>
<body>
<div id="app" data-projects="{{ json_encode($projects) }}"></div>
</body>
</html>
As you can see in the blade file, there is a $projects variable passed from the backend. It's the whole project data that will be used to filter tasks in the frontend.
React.js – Initial Integration
In this article, we'll just have a basic React.js app working with Laravel.
At first, it's a good idea to delete unnecessary resources, like default resources/css and resources/js directories.
Create a resources/react/app.tsx file like this:
import ReactDOM from 'react-dom/client';
import Main from "./Main";
import './index.css'

ReactDOM.createRoot(document.getElementById('app')).render(
    <Main />
);
So, the resources/react folder will be the root directory for all the upcoming React stuff.
Create an index.css with some temporary content:
.test-class {
  color: red;
}
Also create a Main.tsx with some temporary content:
function Main() {
    return (
        <div>
            <h2 className="test-class">React App</h2>
        </div>
    );
}

export default Main;
To check the result in the browser, make sure you have backend running and build the assets via the vite tool:
npm run build
Or, if you want to watch React file changes and automatically build assets, you can keep this command running:
npm run dev
The two npm run commands above refer to vite, which builds the assets.
You can see this by checking the package.json file, "scripts" field:
"scripts": {
    "dev": "vite",
    "build": "vite build"
}
Now you can open http://localhost:8000 to see the initial rendered view:
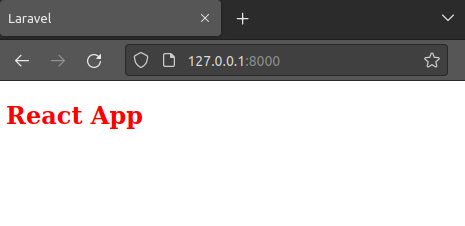 Screenshot from browser
How to Add CSS
Now, once you've set up Vite and have React integrated into your Laravel app, you can work on the React part.
We won't spend too much time on styles, so you can paste this CSS into your index.css:
body { background-color: whitesmoke; color: rgba(255, 255, 255, 0.7); font-family: "Montserrat", sans-serif; cursor: default; margin: auto 0; }

/* MODAL start */
.modal-content { display: flex; flex-direction: column; justify-content: center; align-items: center; background-color: #fff; padding: 20px; border-radius: 5px; width: 500px; color: #2d3748; }
.modal-header { font-size: 1.5rem; font-weight: 600; margin-bottom: 20px; }
.modal-input-header { font-weight: 600; margin-bottom: 10px; }
.modal-input { width: 100%; height: 30px; border: 1px solid #ccc; border-radius: 5px; padding: 5px; }
.modal-textarea { width: 100%; height: 100px; border: 1px solid #ccc; border-radius: 5px; padding: 5px; margin-bottom: 20px; resize: vertical; }
.modal-actions { display: flex; justify-content: space-between; align-items: center; width: 100%; }
.modal-btn { padding: 10px 20px; border-radius: 5px; cursor: pointer; }
.modal-btn-cancel { background-color: #e53e3e; color: #fff; border: none; }
.modal-btn-cancel:hover { background-color: #c53030; }
.modal-btn-submit { background-color: #2d3748; color: #fff; border: none; }
.modal-btn-submit:hover { background-color: #4a5568; }
.modal-question { font-size: 1.2rem; font-weight: 600; margin-bottom: 20px; }
/* MODAL end */

/* LEFT & RIGHT SIDE start */
.left-side { width: 50%; float: left; }
.right-side { width: 50%; float: left; }
/* LEFT & RIGHT SIDE end */

/* LEFT SIDE start */
.left-side .no-tasks { font-size: 1.2rem; font-weight: 600; margin-bottom: 20px; text-align: center; color: #2d3748; }
.left-side .task-item { padding: 10px; margin: 10px; min-height: 20px; min-width: 200px; color: #2d3748; list-style-type: none; }
.left-side .task-item-content { display: flex; justify-content: space-between; align-items: center; }
.left-side .task-project { display: flex; flex-direction: column; justify-content: center; align-items: center; margin-right: 10px; }
.left-side .task-project-name { font-size: 1.5rem; font-weight: 600; margin-bottom: 5px; }
.left-side .task-time { font-size: 0.8rem; }
.left-side .task-title { font-size: 1.2rem; }
.left-side .task-actions { display: flex; justify-content: space-between; align-items: center; }
.left-side .task-edit-btn { background-color: #2d3748; color: #fff; border: none; border-radius: 5px; padding: 5px 10px; cursor: pointer; margin: 0 5px; }
.left-side .task-edit-btn:hover { background-color: #4a5568; }
.left-side .task-delete-btn { background-color: #e53e3e; color: #fff; border: none; border-radius: 5px; padding: 5px 10px; cursor: pointer; margin: 0 5px; }
.left-side .task-delete-btn:hover { background-color: #c53030; }
/* LEFT SIDE end */

/* RIGHT SIDE start */
.right-side .projects { display: flex; justify-content: space-between; align-items: center; margin-bottom: 20px; }
.right-side .projects-select { width: 100%; height: 30px; border: 1px solid #ccc; border-radius: 5px; padding: 5px; }
.right-side .no-project-selected { font-size: 1.2rem; font-weight: 600; margin-bottom: 20px; }
.right-side .right-side-wrapper { display: flex; flex-direction: column; justify-content: center; align-items: center; background-color: #fff; padding: 20px; border-radius: 5px; color: #2d3748; }
.right-side .add-task-header { font-size: 1.5rem; font-weight: 600; margin-bottom: 20px; }
.right-side .add-task-input-header { font-weight: 600; margin-bottom: 10px; }
.right-side .add-task-input { width: 100%; height: 30px; border: 1px solid #ccc; border-radius: 5px; padding: 5px; }
.right-side .add-task-textarea { width: 100%; height: 100px; border: 1px solid #ccc; border-radius: 5px; padding: 5px; margin-bottom: 20px; resize: vertical; }
.right-side .add-task-actions { display: flex; justify-content: space-between; align-items: center; width: 100%; }
.right-side .add-task-btn { padding: 10px 20px; border-radius: 5px; cursor: pointer; }
.right-side .add-task-btn-cancel { background-color: #e53e3e; color: #fff; border: none; }
.right-side .add-task-btn-cancel:hover { background-color: #c53030; }
.right-side .add-task-btn-submit { background-color: #2d3748; color: #fff; border: none; }
.right-side .add-task-btn-submit:hover { background-color: #4a5568; }
/* RIGHT SIDE end */
Later you'll attach the index.css file in your main component.
A Service for the API Requests
As you did in backend, here in the frontend you also can move all the logic implementations into a different file, so your code will be more readable and maintainable. We can name that file utils.ts, as there will be utilities in it we need.
Before that, just create axiosConfig.ts for the global Axios configuration, which you'll use in utils.ts.
import axios from 'axios';

export default axios.create({ baseURL: '/api' });
Using the above setup, you can be sure that all the HTTP requests will have the /api prefix.
For example, if you use axiosConfig.get('/example'), it will send a GET request to the /api/example. This is an optional configuration, but it's a recommended way to have non-repetitive code.
As you'll have a few use cases for sending HTTP requests to the server, you can have separate utilities file for those operations:
- Create a new task for a project
- Update a task
- List project's tasks
- Delete a task
- Reorder project's tasks
So below is the utils.ts file:
import axiosConfig from './axiosConfig';
import { toast } from 'react-toastify';

export const getErrorMessage = (error: unknown) => {
    if (error instanceof Error) return error.message;
    return String(error)
}

export const getTasks = async (projectId) => {
    if (!projectId) {
        toast.error("Project is required!");
        return;
    }

    try {
        const response = await axiosConfig.get(`/tasks?project_id=${projectId}`);
        const { success, tasks, message } = response.data;

        if (success) {
            return tasks;
        } else {
            toast.error(message);
            return [];
        }
    } catch (err) {
        toast.error(getErrorMessage(err));
        return [];
    }
}

export const reorderTasks = async (projectId, start, end) => {
    try {
        const response = await axiosConfig.put('/tasks', {
            project_id: projectId,
            start,
            end,
        });
        const { success, message } = response.data;

        toast[success ? 'success' : 'error'](message);
    } catch (err) {
        toast.error(getErrorMessage(err));
    }
}

export const editTask = async (task) => {
    if (!task.id) return;
    if (!task.title) {
        toast.error("Title is required!");
        return;
    }

    try {
        const response = await axiosConfig.put(`/tasks/${task.id}`, {
            title: task.title,
            description: task.description,
        });
        const { success, message } = response.data;

        toast[success ? 'success' : 'error'](message);
    } catch (err) {
        toast.error(getErrorMessage(err));
    }
}

export const deleteTask = async (id) => {
    if (!id) {
        toast.error("Invalid task!");
        return;
    }

    try {
        const response = await axiosConfig.delete(`/tasks/${id}`);
        const { success, message } = response.data;

        toast[success ? 'success' : 'error'](message);
    } catch (err) {
        toast.error(getErrorMessage(err));
    }
}

export const createTask = async (task, projectId) => {
    if (!projectId) {
        toast.error("Project is required!");
        return;
    }
    if (!task.title) {
        toast.error("Title is required!");
        return;
    }

    try {
        const response = await axiosConfig.post(`/tasks?project_id=${projectId}`, {
            title: task.title,
            description: task.description,
        });
        const { success, message } = response.data;

        toast[success ? 'success' : 'error'](message);
    } catch (err) {
        toast.error(getErrorMessage(err));
    }
}
In the above file, you'll find the following functions:
- getErrorMessage: Returns the error message if the input is an instance of Error – otherwise, converts it to a string.
- getTasks: Retrieves tasks for a given project ID using Axios. Displays an error toast if the project ID is missing or if the API request is unsuccessful.
- reorderTasks: Sends a PUT request to reorder tasks within a project based on start and end positions. Displays a success or error toast based on the API response.
- editTask: Sends a PUT request to update task information. Validates that the task has an ID and a title before making the request. Displays a success or error toast based on the API response.
- deleteTask: Sends a DELETE request to delete a task by its ID. Displays a success or error toast based on the API response.
- createTask: Sends a POST request to create a new task for a given project ID. Validates that the project ID is present, and the task has a title before making the request. Displays a success or error toast based on the API response.
React.js Components
Now, since you have utilities ready, in the resources/react/components folder, you can create the components you need to use in your Main.tsx.
First, create SelectProject.tsx, which will be responsible for choosing the current project:
import {getTasks} from "../utils";

function SelectProject({projectId, projects, setProjectId, setTasks}) {
    const selectProject = (e) => {
        const value = e.target.value;
        setProjectId(value);
        if (value === '') {
            setTasks([]);
        } else {
            getTasks(value).then((tasksData) => setTasks(tasksData));
        }
    };

    return (
        <div className="projects">
            <select className="projects-select"
                    value={projectId}
                    onChange={selectProject}>
                <option value="" defaultValue>Choose a project</option>
                {projects.map((project) => (
                    <option key={project.id}
                            value={project.id}>{project.name}</option>
                ))}
            </select>
        </div>
    );
}

export default SelectProject;
The SelectProject component renders a dropdown menu allowing the user to select a project. When a project is selected, it updates the state with the selected project ID, fetches tasks for that project using the getTasks utility function, and updates the state with the retrieved tasks, providing dynamic interaction with project selection and task loading.
Then create TaskList.tsx, which will be responsible for rendering the project's tasks and for their drag and drop manipulations:
import {DragDropContext, Draggable, Droppable} from "react-beautiful-dnd";
import Task from "./Task";
import {reorderTasks} from "../utils";

const getItemStyle = (isDragging, draggableStyle) => ({
    background: isDragging ? 'lightgreen' : 'grey',
    ...draggableStyle,
});

function TaskList({ tasks, setIsModalEditOpen, setModalEditTask, setIsModalDeleteOpen, setModalDeleteTaskId, projectId, setTasks })
{
    const handleDragEnd = (result) => {
        if (!result.destination || result.destination.index === result.source.index) {
            return;
        }

        const items = Array.from(tasks);
        const [reorderedItem] = items.splice(result.source.index, 1);
        items.splice(result.destination.index, 0, reorderedItem);
        reorderTasks(projectId, result.source.index + 1, result.destination.index + 1);

        setTasks(items);
    };

    return (
        <DragDropContext onDragEnd={handleDragEnd}>
            <Droppable droppableId="droppable">
                {(provided) => (
                    <ul {...provided.droppableProps} ref={provided.innerRef}>
                        {tasks.map((task, index) => (
                            <Draggable key={task.id.toString()} draggableId={task.id.toString()} index={index}>
                                {(provided, snapshot) => (
                                    <li ref={provided.innerRef}
                                        {...provided.draggableProps}
                                        {...provided.dragHandleProps}
                                        className="task-item"
                                        style={getItemStyle(snapshot.isDragging, provided.draggableProps.style)}
                                    >
                                        <Task task={task}
                                              setIsModalEditOpen={setIsModalEditOpen}
                                              setModalEditTask={setModalEditTask}
                                              setIsModalDeleteOpen={setIsModalDeleteOpen}
                                              setModalDeleteTaskId={setModalDeleteTaskId}
                                        />
                                    </li>
                                )}
                            </Draggable>
                        ))}
                        {provided.placeholder}
                    </ul>
                )}
            </Droppable>
        </DragDropContext>
    );
}

export default TaskList;
The TaskList component utilizes the react-beautiful-dnd library to implement a draggable task list. It renders a list of tasks, allowing users to drag and drop tasks to reorder them, with drag-and-drop functionality triggering a function (handleDragEnd) that updates the task order both visually and in the backend using the reorderTasks utility function.
Now, create Task.tsx, which will be responsible for a single Task from a list:
function Task({ task, setIsModalEditOpen, setModalEditTask, setIsModalDeleteOpen, setModalDeleteTaskId })
{
    const handleEdit = () => {
        setModalEditTask(task);
        setIsModalEditOpen(true);
    };

    const handleDelete = () => {
        setModalDeleteTaskId(task.id);
        setIsModalDeleteOpen(true);
    };

    return (
        <div className="task-item-content">
            <span className="task-project">
                <span className="task-project-name">
                    {task.project.name}
                </span>
                <span className="task-time">
                    Created {task.created}
                </span>
               </span>
            <span className="task-title">{task.title}</span>
            <div className="task-actions">
                <button className="task-edit-btn"
                    onClick={handleEdit}>Edit</button>
                <button className="task-delete-btn"
                    onClick={handleDelete}>Delete</button>
            </div>
        </div>
    );
}

export default Task;
The Task component represents a single task item. It displays task details including the project name, creation time, and title, and provides buttons to trigger actions such as editing and deleting the task, with corresponding handlers (handleEdit and handleDelete).
Next, create AddTaskForm.tsx, which will be responsible for the task form for adding tasks to the current selected project:
import {createTask} from "../utils";

function AddTaskForm({newTask, setNewTask, projectId, reloadTasks })
{
    const clearTaskCreate = () => {
        setNewTask({title: '', description: ''});
    };
    const submitTaskCreate = () => {
        createTask(newTask, projectId).then(() => {
            setNewTask({title: '', description: ''});
            reloadTasks();
        });
    };

    return (
        <>
            <h2 className="add-task-header">Add Task</h2>

            <h3 className="add-task-header">Title</h3>
            <input type="text"
                   className="add-task-input"
                   onChange={(e) => setNewTask({
                       ...newTask,
                    title: e.target.value
                   })}
                   value={newTask.title}
            />
            <h3 className="add-task-input-header">Description</h3>
            <textarea className="add-task-textarea"
                      onChange={(e) => setNewTask({
                          ...newTask,
                        description: e.target.value
                      })}
                      value={newTask.description || ''}
            />
            <div className="add-task-actions">
                <button className="add-task-btn add-task-btn-cancel"
                        onClick={clearTaskCreate}>Clear
                </button>
                <button className="add-task-btn add-task-btn-submit"
                        onClick={submitTaskCreate}>Add</button>
            </div>
        </>
    );
}

export default AddTaskForm;
The AddTaskForm component provides a form for adding new tasks. It includes input fields for the task title and description, with buttons to clear the form or submit the task creation, and it utilizes the createTask utility function to handle the task creation process, triggering a reload of tasks upon success.
Then, create ModalEdit.tsx, which will be responsible for the modal popup for editing and submitting changes to a task:
import {Modal} from "react-responsive-modal";
import React from "react";
import {editTask} from "../utils";

function ModalEdit({
    isModalEditOpen, setIsModalEditOpen, setModalEditTask,
    modalEditTask, reloadTasks
}) {
    const submitTaskEdit = () => {
        setIsModalEditOpen(false);
        editTask(modalEditTask).then(() => {
            reloadTasks();
        });
    };

    return (
        <Modal open={isModalEditOpen} center
            onClose={() => setIsModalEditOpen(false)}>
            <div className="modal-content">
                <h2 className="modal-header">Edit Task</h2>
                <h3 className="modal-input-header">Title</h3>
                <input type="text" value={modalEditTask.title}
                       className="modal-input"
                       onChange={(e) => setModalEditTask({
                           ...modalEditTask,
                        title: e.target.value
                       })}
                />
                <h3 className="modal-input-header">Description</h3>
                <textarea className="modal-textarea"
                          onChange={(e) => setModalEditTask({
                              ...modalEditTask,
                            description: e.target.value
                          })}
                          value={modalEditTask.description || ''}
                />
                <div className="modal-actions">
                    <button className="modal-btn modal-btn-cancel"
                            onClick={() => setIsModalEditOpen(false)}
                    >Close
                    </button>
                    <button className="modal-btn modal-btn-submit"
                            onClick={submitTaskEdit}
                    >Save</button>
                </div>
            </div>
        </Modal>
    )
}

export default ModalEdit;
The ModalEdit component displays a modal for editing task details. It includes input fields for modifying the task title and description, and buttons to close the modal or save the changes, using the editTask utility function to handle the task editing process and triggering a reload of tasks upon successful editing.
Next, create ModalDelete.tsx, which will be responsible for submitting a task deletion:
import {Modal} from "react-responsive-modal";
import {deleteTask} from "../utils";

function ModalDelete({
    isModalDeleteOpen, setIsModalDeleteOpen,
    modalDeleteTaskId, reloadTasks
}) {
    const submitTaskDelete = () => {
        setIsModalDeleteOpen(false);
        deleteTask(modalDeleteTaskId).then(() => {
            reloadTasks();
        });
    };

    return (
        <Modal open={isModalDeleteOpen} onClose={() => setIsModalDeleteOpen(false)} center>
            <div className="modal-content">
                <h2 className="modal-header">Delete Task</h2>
                <p className="modal-question">
                    Are you sure you want to delete this task?
                </p>
                <div className="modal-actions">
                    <button className="modal-btn modal-btn-cancel"
                            onClick={() => setIsModalDeleteOpen(false)}
                    >Cancel</button>
                    <button className="modal-btn modal-btn-submit"
                            onClick={submitTaskDelete}
                    >Yes</button>
                </div>
            </div>
        </Modal>
    );
}

export default ModalDelete;
The ModalDelete component displays a modal for confirming the deletion of a task. It provides options to either cancel the deletion or proceed with deleting the task, utilizing the deleteTask utility function and triggering a reload of tasks upon successful deletion.
And lastly, set up the Main.tsx by using the above-defined components.
import { useState } from 'react';
import {getTasks} from "./utils";
import "react-responsive-modal/styles.css";
import { ToastContainer } from 'react-toastify';
import 'react-toastify/dist/ReactToastify.css';
import ModalEdit from "./components/ModalEdit";
import ModalDelete from "./components/ModalDelete";
import TaskList from "./components/TaskList";
import SelectProject from "./components/SelectProject";
import AddTaskForm from "./components/AddTaskForm";

function Main () {
    const [projectId, setProjectId] = useState('');
    const projectsData = document.getElementById('app').getAttribute('data-projects');
    const projects = JSON.parse(projectsData);
    const [tasks, setTasks] = useState([]);
    const [isModalEditOpen, setIsModalEditOpen] = useState(false);
    const [modalEditTask, setModalEditTask] = useState({id: '', title: '', description: ''});
    const [isModalDeleteOpen, setIsModalDeleteOpen] = useState(false);
    const [modalDeleteTaskId, setModalDeleteTaskId] = useState('');
    const [newTask, setNewTask] = useState({title: '', description: ''});

    const reloadTasks = () => {
        getTasks(projectId).then((tasksData) => setTasks(tasksData));
    };

    return (
        <div>
            <ToastContainer autoClose={2000} />
            <ModalEdit isModalEditOpen={isModalEditOpen}
                       setIsModalEditOpen={setIsModalEditOpen}
                       modalEditTask={modalEditTask}
                       setModalEditTask={setModalEditTask}
                       reloadTasks={reloadTasks}
            />
            <ModalDelete isModalDeleteOpen={isModalDeleteOpen}
                         setIsModalDeleteOpen={setIsModalDeleteOpen}
                         modalDeleteTaskId={modalDeleteTaskId}
                         reloadTasks={reloadTasks}
            />
            <div className="left-side">
                {tasks.length > 0 ? (
                    <TaskList tasks={tasks}
                              setIsModalEditOpen={setIsModalEditOpen}
                              setModalEditTask={setModalEditTask}
                              setIsModalDeleteOpen={setIsModalDeleteOpen}
                              setModalDeleteTaskId={setModalDeleteTaskId}
                              projectId={projectId}
                              setTasks={setTasks}
                    />
                ) : (
                    <div className="no-tasks">
                        {projectId === '' ? (
                            <p>Choose a project to see its tasks.</p>
                        ) : (
                            <p>This project has no tasks.</p>
                        )}
                    </div>
                )}
            </div>
            <div className="right-side">
                <div className="right-side-wrapper">
                    <SelectProject projectId={projectId}
                                   projects={projects}
                                   setProjectId={setProjectId}
                                   setTasks={setTasks}
                    />
                    {projectId === '' ? (
                        <div className="no-project-selected">
                            <p>Please select a project.</p>
                        </div>
                    ) : (
                        <AddTaskForm newTask={newTask}
                                     setNewTask={setNewTask}
                                     projectId={projectId}
                                     reloadTasks={reloadTasks}
                        />
                    )}
                </div>
            </div>
        </div>
    );
}

export default Main;
The Main component is a central component that managing project and task-related functionalities. It includes modals for editing and deleting tasks, a task list with dynamic updates, a project selection dropdown, and a form for adding new tasks, leveraging state management and utility functions for smooth user interaction.
Final Results
At this point, all the components are ready to interact with each other. So you can build the frontend assets and run the server:
npm run build && php artisan serve
By visiting http://127.0.0.1:8000 you'll get this kind of result:
 GIF generated from a local working project
That's it!
Now you can easily integrate React.js into your Laravel app without using any additional Laravel tools (like Inertia). And as a result, you can continue to maintain your Laravel app to build more scalable APIs with its authentication and other stuff.
So, this can be just an example app for your next full-stack Laravel and React.js project.
Conclusion
With this article, you built a single-page, full-stack Tasklist app using React.js (with TypeScript) with Vite.js as frontend technologies, Laravel as a backend framework, and react-beautiful-dnd package for having draggable items.
Now you know how to manually integrate React.js in your Laravel app and maintain it.
You can find the complete code of the project here on my GitHub⭐, where I actively publicize much of my work about various modern technologies.
For more information, you can visit my website: boolfalse.com
Feel free to share this article. 😇