

In this article, you will learn how to use TypeScript with React.
By the end, you will have a solid understanding of how to write React code with TypeScript.
Want to watch the video version of this tutorial? You can check out the video below:
Table of Contents
- Prerequisites
- Getting Started
- React and TypeScript Basics
- Three Ways of Defining Prop Types
- How to Create a Random Users List Application
- How to Store the Users List in State
- How to Display the Users on the UI
- How to Create a Separate User Component
- How to Create a Separate File for Type Declarations
- How to Display a Loading Indicator
- How to Load Users on Button Click
- How to Handle the Change Event
- Thanks for Reading
Prerequisites
To follow along with this tutorial, here's what you should have:
- a basic knowledge of how to work with React
- a basic understanding of writing TypeScript code
Getting Started
To get started with TypeScript, you first need to install TypeScript on your machine. You can do this by executing npm install -g typescript from the terminal or command prompt.
Now, we will create a Vite project using TypeScript.
npm create vite
Once executed, you will be asked some questions.
For the project name, enter react-typescript-demo.
For framework, select React, and for variant select TypeScript.
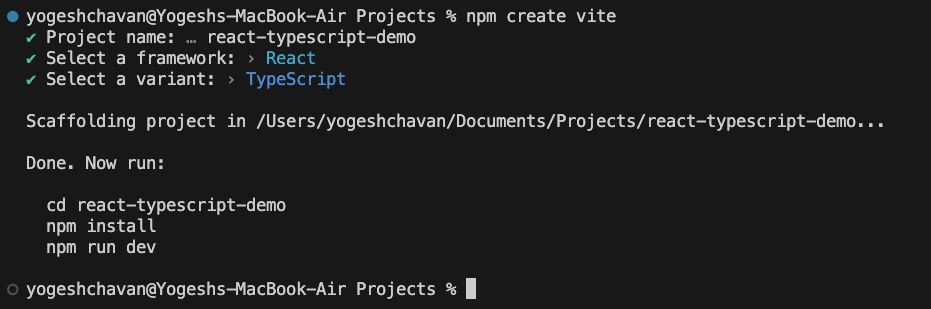 Create Project Using Vite
Once you've created the project, open it in VS Code and execute the following commands from the terminal:
cd react-typescript-demo
npm install
Now, let's do some code cleanup.
Remove the src/App.css file and replace the content of src/App.tsx file with the following content:
const App = () => {
  return <div>App</div>;
};

export default App;
After saving the file, you might see the red underlines in the file as shown below:
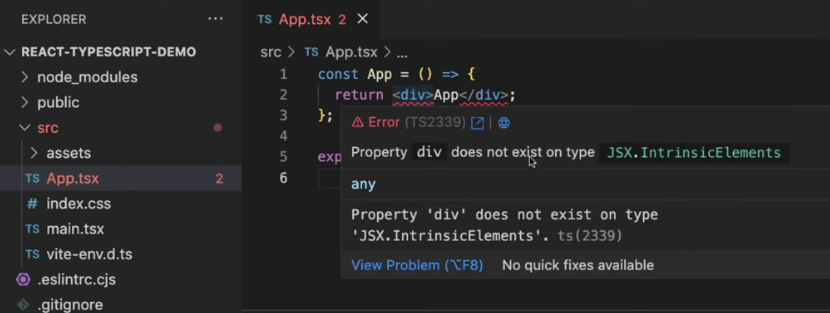 TypeScript Version Error
If you get that error, just press Cmd + Shift + P(Mac) or Ctrl + Shift + P(Windows/Linux) to open the VS Code command palette and enter TypeScript text in the search box and select the option TypeScript: Select TypeScript Version...:
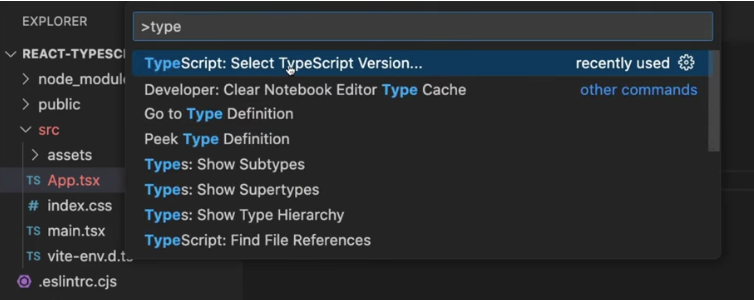 VSCode Command Palette Options
Once selected, you will see options to select between the VS Code version and the workspace version as shown below:
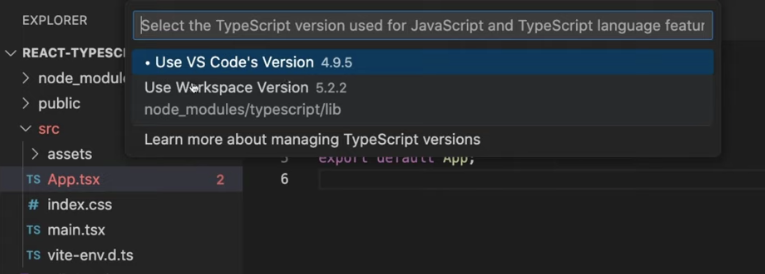 Select Use Workspace Version
From these options, you need to select Use Workspace Version option. Once you select that option, the error from the App.tsx file will be gone.
Now, open the src/index.css file and replace its contents with the following code:
:root {
  font-family: Inter, system-ui, Avenir, Helvetica, Arial, sans-serif;
  line-height: 1.5;
  font-weight: 400;

  font-synthesis: none;
  text-rendering: optimizeLegibility;
  -webkit-font-smoothing: antialiased;
  -moz-osx-font-smoothing: grayscale;
  -webkit-text-size-adjust: 100%;
}
Now, let's start the application by executing the npm run dev command.
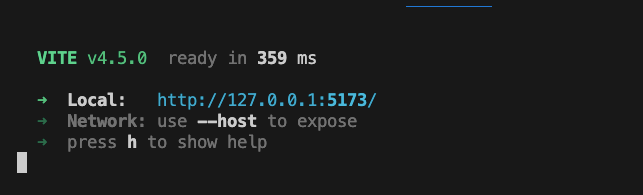 Application Started
Now, click on the displayed URL and access the application. You will see the following initial screen with text App displayed in the browser.
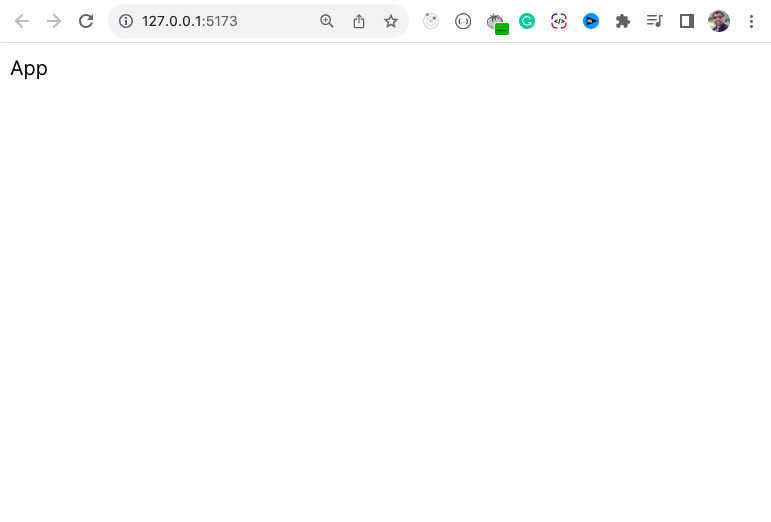 Running Application
React and TypeScript Basics
When using React with TypeScript, the first thing you should know is the file extension.
Every React + TypeScript file needs to have a .tsx extension.
If the file does not contain any JSX-specific code, then you can use the .ts extension instead of the .tsx extension.
To create a component in React with TypeScript, you can use the FC type from the react package and use it after the component name.
So open the src/App.tsx file and replace it with the following contents:
import { FC } from 'react';

const App: FC = () => {
  return <div>App</div>;
};

export default App;
Now, let's pass some props to this App component.
Open src/main.tsx and pass a title prop to the App component as shown below:
import React from 'react';
import ReactDOM from 'react-dom/client';
import App from './App.tsx';
import './index.css';

ReactDOM.createRoot(document.getElementById('root')!).render(
  <React.StrictMode>
    <App title='TypeScript Demo' />
  </React.StrictMode>
);
However, with the added title prop, we now have a TypeScript error as you can see below:
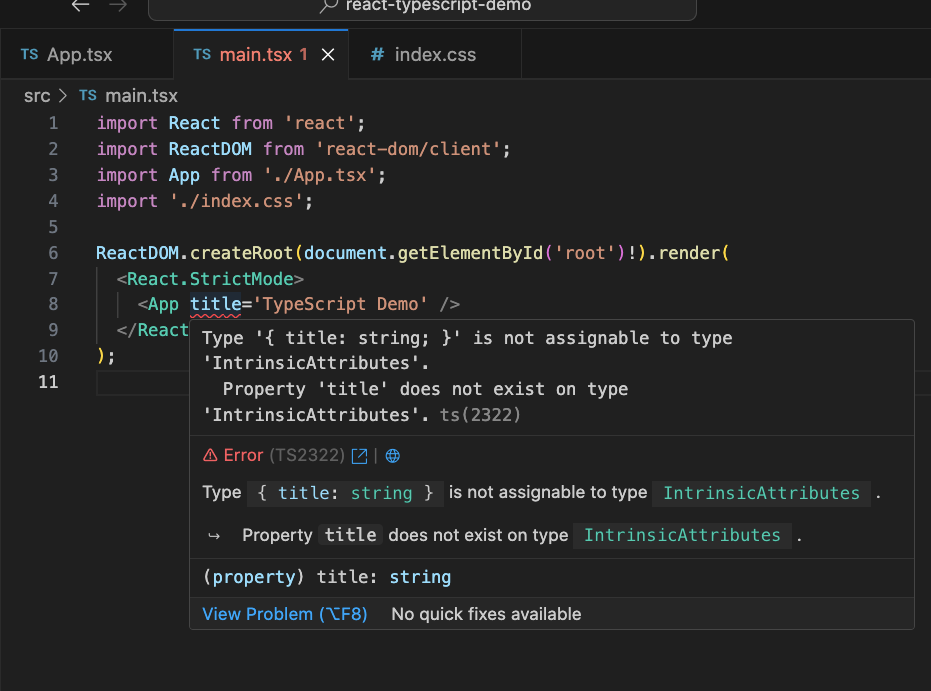 Prop Error
Three Ways of Defining Prop Types
We can fix the above TypeScript error in three different ways.
- Declaring Types Using Interface
The error is coming because we have added a title prop as a mandatory prop for the App component – so we need to mention this inside the App component.
Open the src/App.tsx file and replace its contents with the following code:
import { FC } from 'react';

interface AppProps {
  title: string;
}

const App: FC<AppProps> = () => {
  return <div>App</div>;
};

export default App;
As you can see above, we have added an extra interface AppProps to specify which props the component is accepting. We also used the AppProps interface after the FC in angle brackets.
It's a good practice and recommended to start the interface name with a capital letter like AppProps in our case.
Now, with this change, the TypeScript error will be gone as you can see below:
 Adding Prop Types To Component
This is how we specify what props a particular component accepts.
- Declaring Types Using type
We can also declare the props type using type keyword.
So open the App.tsx file and change the below code:
import { FC } from 'react';

interface AppProps {
  title: string;
}

const App: FC<AppProps> = () => {
  return <div>App</div>;
};

export default App;
to this code:
import { FC } from 'react';

type AppProps = {
  title: string;
};

const App: FC<AppProps> = () => {
  return <div>App</div>;
};

export default App;
Here, instead of the interface declaration, we used the type declaration. Now the code will work without any TypeScript error.
It's up to you which one you use. I always like to use an interface for declaring component types.
- Using Inline Type Declaration
The third way of declaring a type is by defining inline types as shown below:
const App = ({ title }: { title: string }) => {
  return <div>App</div>;
};

export default App;
As you can see above, we have removed the use of FC as it's not needed, and while destructuring the title prop we defined the type of it.
So out of these three ways, you can use whichever way you want. I always prefer to use an interface with FC. That way, if I want to add more props later, the code will not look complicated (which will happen if you define inline types).
Now, let's use the title prop and display it on the UI.
Replace the contents of the App.tsx file with the following code:
import { FC } from 'react';

interface AppProps {
  title: string;
}

const App: FC<AppProps> = ({ title }) => {
  return <h1>{title}</h1>;
};

export default App;
As you can see, we're using an interface with FC, and we're destructuring the title prop and displaying it on the screen.
Now, open the src/index.css file and add the following CSS inside it:
h1 {
  text-align: center;
}
If you check the application in the browser, you will see that the title with text TypeScript Demo is correctly getting displayed.
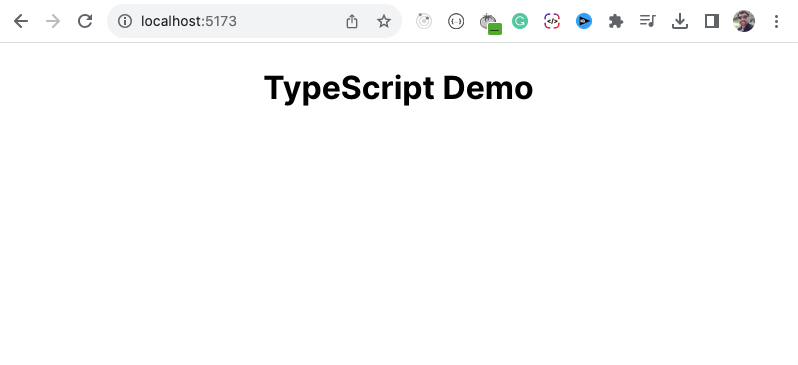 Application Title Displayed Correctly
How to Create a Random Users List Application
Now that you have a basic idea of how to declare component props, let's create a simple Random Users List Application that will display a list of 10 random users on the screen.
For that, we will be using the Random User Generator API.
This is the API URL we will be using:
https://randomuser.me/api/?results=10
Let's first install the Axios npm library so we can make an API call using it.
Execute the following command to install the Axios library:
npm install axios
Once installed, restart the application by executing the npm run dev command.
Now, replace the contents of the App.tsx file with the following content:
import axios from 'axios';
import { FC, useEffect } from 'react';

interface AppProps {
  title: string;
}

const App: FC<AppProps> = ({ title }) => {
  useEffect(() => {
    const getUsers = async () => {
      try {
        const { data } = await axios.get(
          'https://randomuser.me/api/?results=10'
        );
        console.log(data);
      } catch (error) {
        console.log(error);
      }
    };
    getUsers();
  }, []);

  return <h1>{title}</h1>;
};

export default App;
As you can see above, we have added a useEffect hook where we're making the API call to get the the list of users.
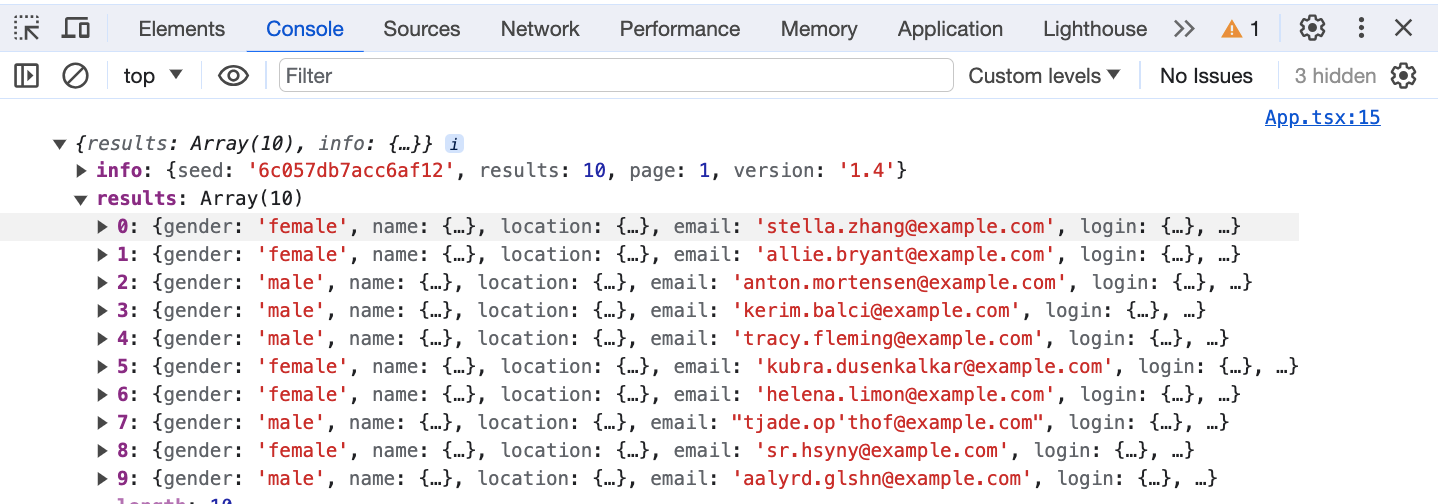
Now, if you open the console in the browser, you will be able to see the API response displayed in the console.
 API Response
As you can see, we're correctly getting a list of 10 random users and the actual users list is coming in the results property of the response.
How to Store the Users List in State
Now, let's store those users in the state so we can display them on the screen.
Inside the App component, declare a new state with an initial value of an empty array like this:
const [users, setUsers ] = useState([]);
And call the setUsers function to store the users in the useEffect hook after the API call.
So your App component will look like this now:
import axios from 'axios';
import { FC, useEffect, useState } from 'react';

interface AppProps {
  title: string;
}

const App: FC<AppProps> = ({ title }) => {
  const [users, setUsers] = useState([]);

  useEffect(() => {
    const getUsers = async () => {
      try {
        const { data } = await axios.get(
          'https://randomuser.me/api/?results=10'
        );
        console.log(data);
        setUsers(data.results);
      } catch (error) {
        console.log(error);
      }
    };
    getUsers();
  }, []);

  return <h1>{title}</h1>;
};

export default App;
As you can see here, we're calling the setUsers function with the value of data.results.
How to Display the Users on the UI
Now, let's display the name and email of the individual user on the screen.
If you check the console output, you can see that there is a name property for each object that contains the first and last name of the user. So we can combine them to display the complete name.
Also, we have a direct email property for each user object which we can use to display the email.
 Exploring API Response
So replace the contents of the App.tsx file with the following content:
import axios from 'axios';
import { FC, useEffect, useState } from 'react';

interface AppProps {
  title: string;
}

const App: FC<AppProps> = ({ title }) => {
  const [users, setUsers] = useState([]);

  useEffect(() => {
    const getUsers = async () => {
      try {
        const { data } = await axios.get(
          'https://randomuser.me/api/?results=10'
        );
        console.log(data);
        setUsers(data.results);
      } catch (error) {
        console.log(error);
      }
    };
    getUsers();
  }, []);

  return (
    <div>
      <h1>{title}</h1>
      <ul>
        {users.map(({ login, name, email }) => {
          return (
            <li key={login.uuid}>
              <div>
                Name: {name.first} {name.last}
              </div>
              <div>Email: {email}</div>
              <hr />
            </li>
          );
        })}
      </ul>
    </div>
  );
};

export default App;
As you can see, we're using the array map method to loop over the users array, and we're using object destructuring to destructure the login, name, and email properties of individual user objects. Also, we're displaying the name and email of the user as an un-ordered list.
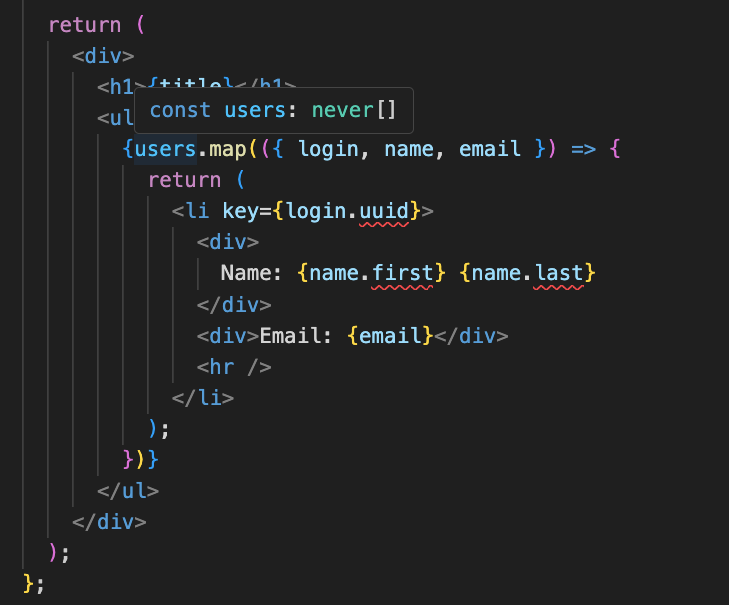
But you will see some TypeScript errors in the file, as can be seen below:
 User Properties TypeScript Error
This is because, as you can see above, by default TypeScript assumes the type of users array to be never[] – so it's not able to find out which properties the users array contains.
This means that we need to specify all of the properties that we're using along with their types.
So now, declare a new interface after the AppProps interface like this:
interface Users {
  name: {
    first: string;
    last: string;
  };
  login: {
    uuid: string;
  };
  email: string;
}
Here, we're specifying that each individual user will be an object with name, login, and email properties. We're also specifying the data type of each property.
As you can see, each user object coming from the API has a lot of other properties like phone, location and others. But we only need to specify those properties that we're using in the code.
Now, change the useState users array declaration from this:
const [users, setUsers] = useState([]);
to this:
const [users, setUsers] = useState<Users[]>([]);
Here, we're specifying that users is an array of objects of type Users which is the interface we declared.
Now, if you check the App.tsx file, you will see that there are no TypeScript errors.
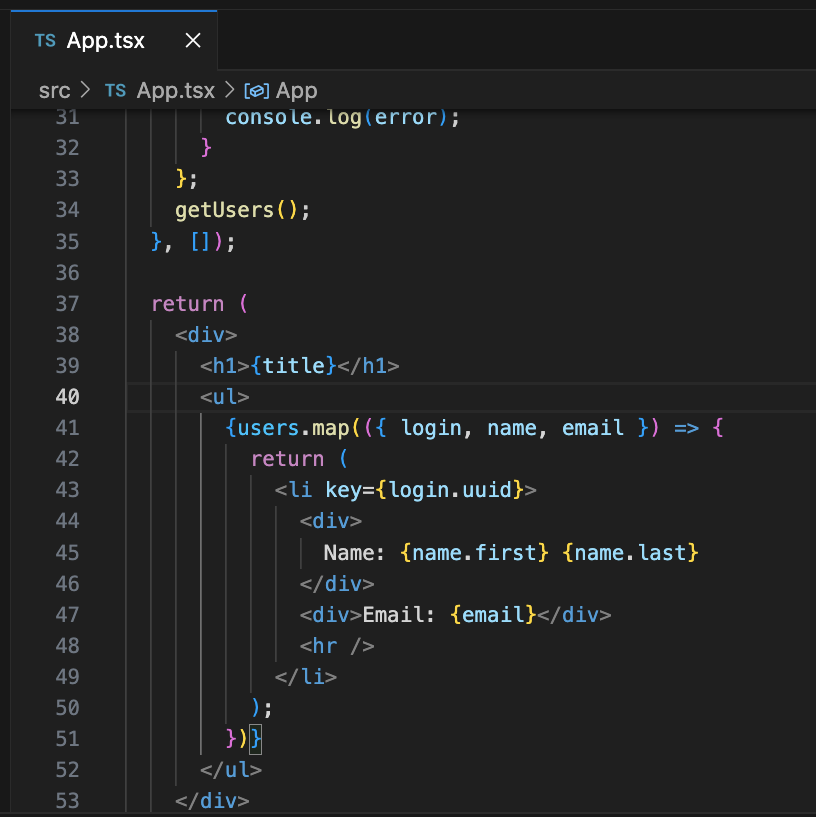 Fixed Property Types Error
And you will be able to see the list of 10 random users displayed on the screen:
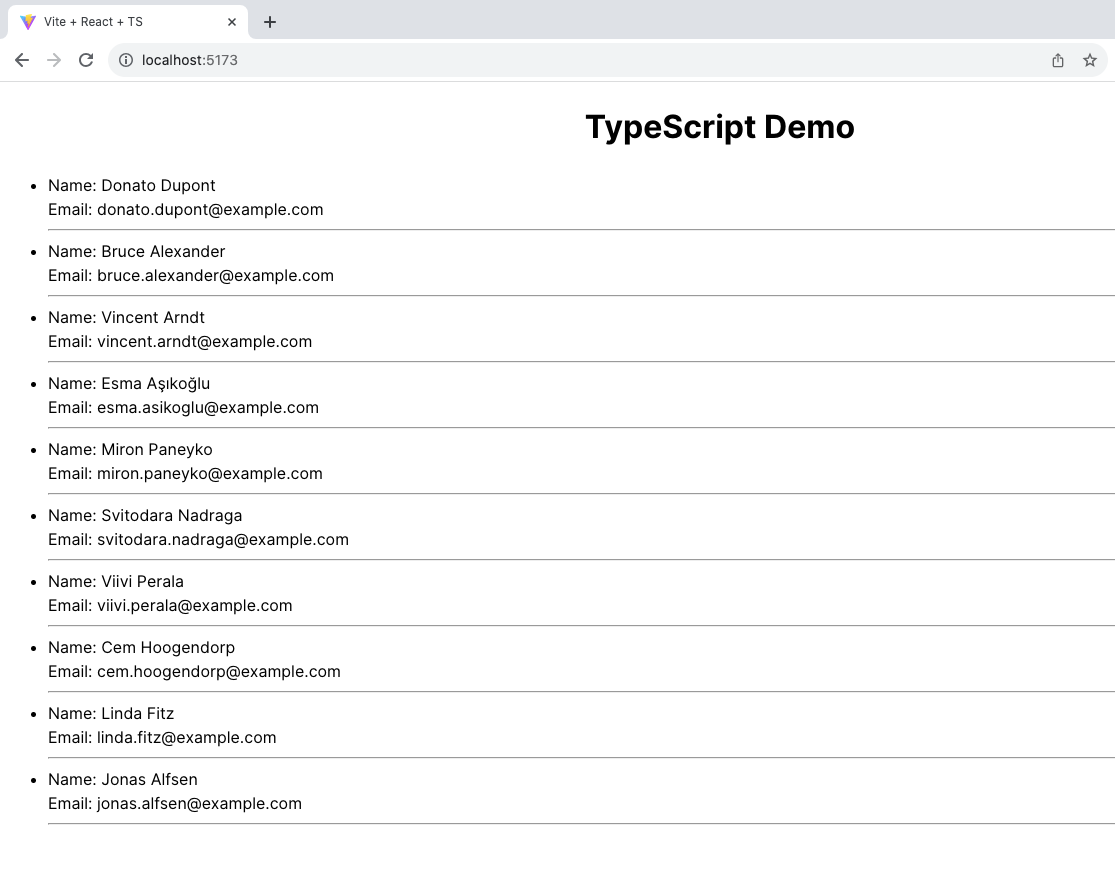 List Of Random Users Displayed On Screen
As you have seen previously, we have declared the Users interface like this:
interface Users {
  name: {
    first: string;
    last: string;
  };
  login: {
    uuid: string;
  };
  email: string;
}
But when you have nested properties, you will see it written like this:
interface Name {
  first: string;
  last: string;
}

interface Login {
  uuid: string;
}

interface Users {
  name: Name;
  login: Login;
  email: string;
}
The advantage of declaring separate interfaces for each nested property is that, if you want to use the same structure in any other file, you can just export any of the above interfaces and re-use them other files (instead of re-declaring the same interface again).
So let's export all of the above interfaces as a named export. So the code will look like this:
export interface Name {
  first: string;
  last: string;
}

export interface Login {
  uuid: string;
}

export interface Users {
  name: Name;
  login: Login;
  email: string;
}
As I said previously, you can also use type declaration here instead of using the interface, so it will look like this:
type Name = {
  first: string;
  last: string;
};

type Login = {
  uuid: string;
};

type Users = {
  name: Name;
  login: Login;
  email: string;
};
How to Create a Separate User Component
When we're using an array map method to display something on the screen, it's common to separate out that display part in a different component. This makes it easy to test, and it will also make your component code shorter.
Create a components folder inside the src folder and create a User.tsx file inside it. Then add the following contents inside that file:
const User = ({ login, name, email }) => {
  return (
    <li key={login.uuid}>
      <div>
        Name: {name.first} {name.last}
      </div>
      <div>Email: {email}</div>
      <hr />
    </li>
  );
};

export default User;
If you save the file, you will see the TypeScript errors again.
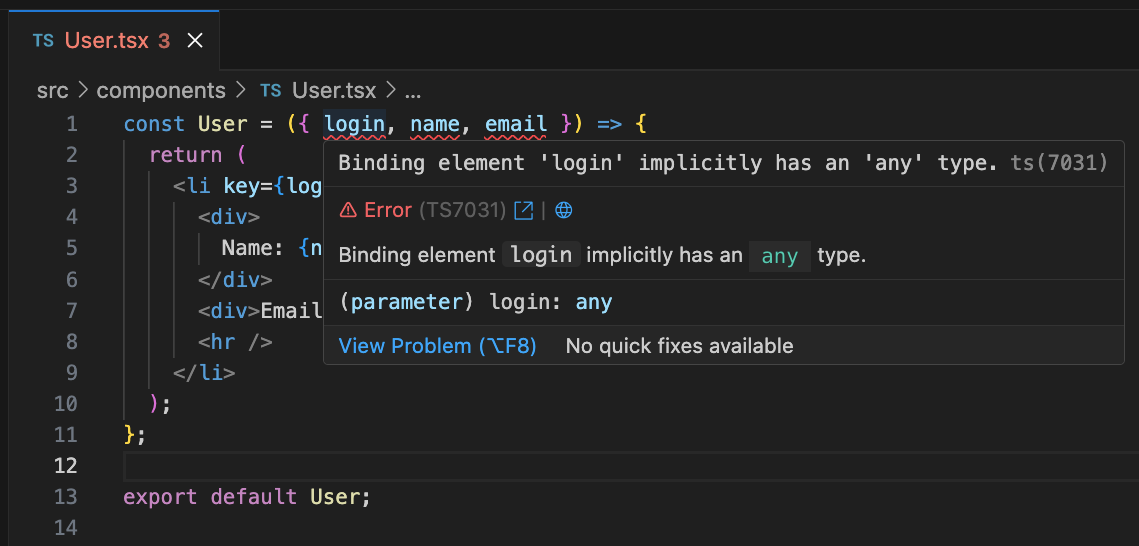 User Component Props Declaration Error
So again, we need to specify which props the User component will be receiving. We also need to specify the data type of each of them.
So the updated User.tsx file will look like this:
import { FC } from 'react';
import { Login, Name } from '../App';

interface UserProps {
  login: Login;
  name: Name;
  email: string;
}

const User: FC<UserProps> = ({ login, name, email }) => {
  return (
    <li key={login.uuid}>
      <div>
        Name: {name.first} {name.last}
      </div>
      <div>Email: {email}</div>
      <hr />
    </li>
  );
};

export default User;
As you can see above, we have declared a UserProps interface above and we have specified it for the User component using FC.
Also, note that we're not declaring the data type of the name and login properties. Instead we're using the exported types from the App.tsx file:
import { Login, Name } from '../App';
That's why it's good to declare separate types for each nested property, so we can reuse them elsewhere.
Now, we can use this User component inside the App.tsx file.
So change the below code:
{users.map(({ login, name, email }) => {
  return (
    <li key={login.uuid}>
      <div>
        Name: {name.first} {name.last}
      </div>
      <div>Email: {email}</div>
      <hr />
    </li>
  );
})}
to this code:
{users.map(({ login, name, email }) => {
  return <User key={login.uuid} name={name} email={email} />;
})}
As you might know, when using the array map method, we need to provide the key for the parent element which is User in our case. So we have added the key prop while using the User component as shown above.
That means we don't need a key inside the User component, so we can remove the key and login prop from the User component.
So the updated User component will look like this:
import { FC } from 'react';
import { Name } from '../App';

interface UserProps {
  name: Name;
  email: string;
}

const User: FC<UserProps> = ({ name, email }) => {
  return (
    <li>
      <div>
        Name: {name.first} {name.last}
      </div>
      <div>Email: {email}</div>
      <hr />
    </li>
  );
};

export default User;
As you can see, we have removed the login prop from the interface while also destructuring it. The application is still working as before without any issues, as you can see below.
 List Of Random Users Displayed On UI
How to Create a Separate File for Type Declarations
As you can see, the App.tsx file has become quite large because of the interface declarations. It's common to have a separate file just for declaring types.
So create a App.types.ts file inside the src folder and move all the type declarations from the App component to the App.types.ts file:
export interface AppProps {
  title: string;
}

export interface Name {
  first: string;
  last: string;
}

export interface Login {
  uuid: string;
}

export interface Users {
  name: Name;
  login: Login;
  email: string;
}
Note that we're also exporting the AppProps component in the above code.
Now, update the App.tsx file to use these types as shown below:
import axios from 'axios';
import { FC, useEffect, useState } from 'react';
import { AppProps, Users } from './App.types';
import User from './components/User';

const App: FC<AppProps> = ({ title }) => {
  const [users, setUsers] = useState<Users[]>([]);

  // ...
};

export default App;
As you can see above, we're importing AppProps and Users from the App.types file:
import { AppProps, Users } from './App.types';
And your User.tsx file will look like this now:
import { FC } from 'react';
import { Name } from '../App.types';

interface UserProps {
  name: Name;
  email: string;
}

const User: FC<UserProps> = ({ name, email }) => {
  return (
    <li>
      <div>
        Name: {name.first} {name.last}
      </div>
      <div>Email: {email}</div>
      <hr />
    </li>
  );
};

export default User;
As you can see above, we're importing Name from the App.types file.
import { Name } from '../App.types';
How to Display a Loading Indicator
Whenever you're making an API call to display something, it's always good to display some loading indicator while the API call is going on.
So let's add a new isLoading state inside the App component:
const [isLoading, setIsLoading] = useState(false);
As you can see, we have not mentioned any data type while declaring a state like this:
const [isLoading, setIsLoading] = useState<boolean>(false);
This is because, when we assign any initial value (false in our case), TypeScript automatically infers the type of data we will be storing – which is boolean in our case.
When we declared the users state, it was not clear what we would be storing by just the initial value of an empty array []. So we needed to mention its type like this:
const [users, setUsers] = useState<Users[]>([]);
Now, change the useEffect code to the below code:
useEffect(() => {
  const getUsers = async () => {
    try {
      setIsLoading(true);
      const { data } = await axios.get(
        'https://randomuser.me/api/?results=10'
      );
      console.log(data);
      setUsers(data.results);
    } catch (error) {
      console.log(error);
    } finally {
      setIsLoading(false);
    }
  };
  getUsers();
}, []);
Here, we're calling setIsLoading with a value of true before the API call. Inside the finally block, we're setting it back to false.
The code written inside the finally block will always execute whether it's a success or failure. So whether the API call succeeds or fails, we need to hide the loading message, and we're using the finally block to achieve that.
Now, we can use the isLoading state value to display a loading message on the screen.
After the h1 tag and before the ul tag, add the following code:
{isLoading && <p>Loading...</p>}
Now, if you check the application, you will be able to see the loading message while the list of users is getting loaded.
 Loading Indication Display
So this is a better user experience.
But if you keep a closer look at the displayed users, you will see that the users are getting changed once loaded.
So initially we see a set of 10 random users, but then immediately after we see a different set of random users without reloading the page.
This is because we're using React version 18 (which you can verify from the package.json file) and React.StrictMode inside the src/main.tsx file.
And with version 18 of React, when we use React.StrictMode, every useEffect hook executes twice even with no dependency specified.
This only happens in the development environment and not in production when you deploy the application.
Because of this, the API call is made twice. Since the random users API returns a new set of random users every time the API is called, we're setting a different set of users to the users array using the setUsers call inside the useEffect hook.
This is the reason we see users getting changed without refreshing the page.
If you don't want this behaviour during development, you can remove the React.StrictMode from the main.tsx file.
So change the below code:
import React from 'react';
import ReactDOM from 'react-dom/client';
import App from './App.tsx';
import './index.css';

ReactDOM.createRoot(document.getElementById('root')!).render(
  <React.StrictMode>
    <App title='TypeScript Demo' />
  </React.StrictMode>
);
to this code:
import ReactDOM from 'react-dom/client';
import App from './App.tsx';
import './index.css';

ReactDOM.createRoot(document.getElementById('root')!).render(
  <App title='TypeScript Demo' />
);
Now, if you check the application, you will see that the list of users is not getting changed once it's loaded.
How to Load Users on Button Click
Now, instead of making the API call on page load, let's add a "show users" button and we will make the API call when we click on that button.
So after the h1 tag, add a new button as shown below:
<button onClick={handleClick}>Show Users</button>
Now, add the handleClick method inside the App component and move all the code from the getUsers function to the handleClick method:
const handleClick = async () => {
  try {
    setIsLoading(true);
    const { data } = await axios.get('https://randomuser.me/api/?results=10');
    console.log(data);
    setUsers(data.results);
  } catch (error) {
    console.log(error);
  } finally {
    setIsLoading(false);
  }
};
Now, you can remove or comment out the useEffect hook, as it's no longer needed.
Your updated App.tsx file will look like this now:
import axios from 'axios';
import { FC, useState } from 'react';
import { AppProps, Users } from './App.types';
import User from './components/User';

const App: FC<AppProps> = ({ title }) => {
  const [users, setUsers] = useState<Users[]>([]);
  const [isLoading, setIsLoading] = useState<boolean>(false);

  const handleClick = async () => {
    try {
      setIsLoading(true);
      const { data } = await axios.get('https://randomuser.me/api/?results=10');
      console.log(data);
      setUsers(data.results);
    } catch (error) {
      console.log(error);
    } finally {
      setIsLoading(false);
    }
  };

  return (
    <div>
      <h1>{title}</h1>
      <button onClick={handleClick}>Show Users </button>
      {isLoading && <p>Loading...</p>}
      <ul>
        {users.map(({ login, name, email }) => {
          return <User key={login.uuid} name={name} email={email} />;
        })}
      </ul>
    </div>
  );
};

export default App;
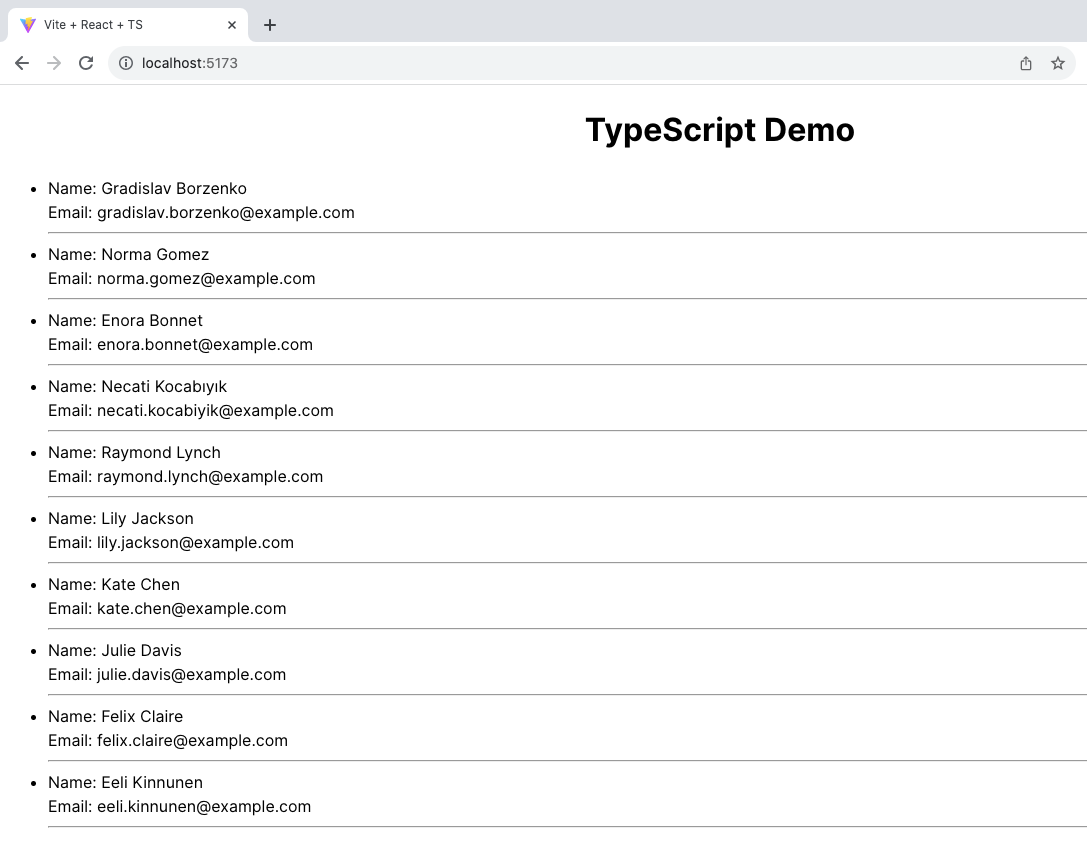
Now, if you check the application, you will see that users are loaded only when clicking on the show users button. We also see the loading message.
 Users Loaded On Button Click
How to Handle the Change Event
Now, let's add an input field. When we type anything in that input field, we will display the entered text below that input field.
Add an input field after the button like this:
<input type='text' onChange={handleChange} />
And declare a new state to store the entered value like this:
const [username, setUsername] = useState('');
Now, add a handleChange method inside the App component like this:
 const handleChange = (event) => {
  setUsername(event.target.value);
};
However, you will see that we're getting a TypeScript error for the event parameter.
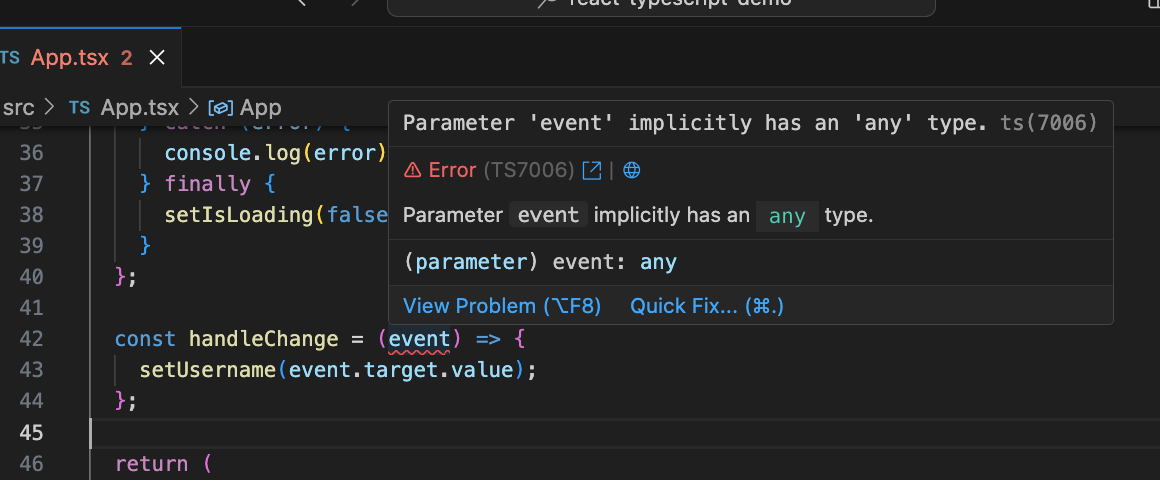 Event Type Missing TypeScript Error
With TypeScript, we always need to specify the type of each and every function parameter.
Here, TypeScript is not able to identify the type of the event parameter.
To find out the type of event parameter, we can change the below code:
<input type='text' onChange={handleChange} />
to this code:
<input type='text' onChange={(event) => {}} />
Here, we're using an inline function, because when using inline function, the correct type is automatically passed to the function parameter so we don't need to specify it.
If you mouse over the event parameter, you will be able to see the exact type of event that we can use in our handleChange function as you can see below:
 Identifying TypeScript Event Type Using Inline Function
Now, you can revert the below code:
<input type='text' onChange={(event) => {}} />
to this code:
<input type='text' onChange={handleChange} />
Now, let's display the value of the username state variable below the input field:
<input type='text' onChange={handleChange} />
<div>{username}</div>
If you check the application now, you will be able to see the entered text displayed below the input field.
 Displaying User Entered Text On UI
Thanks for Reading
That's it for this tutorial. I hope you learned a lot from it.
Want to watch the video version of this tutorial? You can check out this video.
You can find the complete source code for this application in this repository.
If you want to master JavaScript, ES6+, React, and Node.js with easy-to-understand content, check out my YouTube channel. Don't forget to subscribe.
Want to stay up to date with regular content on JavaScript, React, and Node.js? Follow me on LinkedIn.