By Marina Ferreira
Learn JS, CSS and HTML by building a memory game in 30 minutes!
This tutorial explains some basic HTML5, CSS3 and JavaScript concepts. We will discuss data attribute, positioning, perspective, transitions, flexbox, event handling, timeouts and ternaries. You are not expected to have much prior knowledge in programming. If you know what HTML, CSS and JS are for, it’s more than enough!
- ?Demo: Memory Game Project
File Structure
Let’s start creating the files in the terminal:
? mkdir memory-game ? cd memory-game ? touch index.html styles.css scripts.js ? mkdir img
HTML
The initial template linking bothcssandjsfiles.
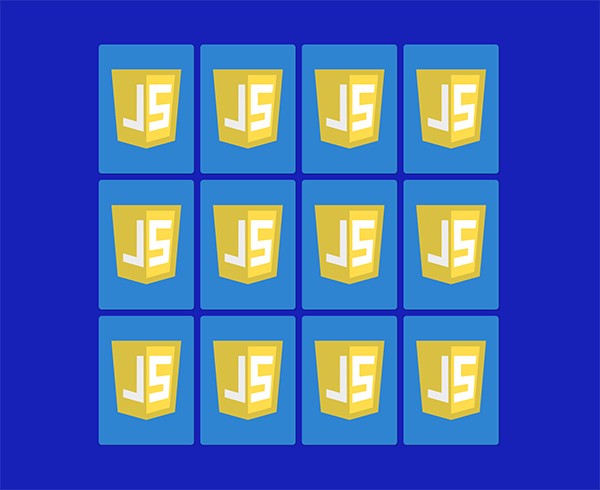
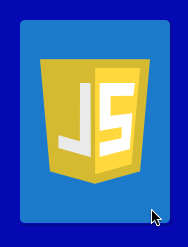
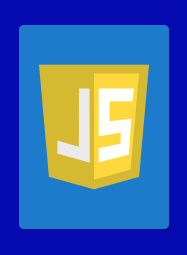
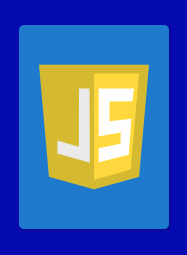
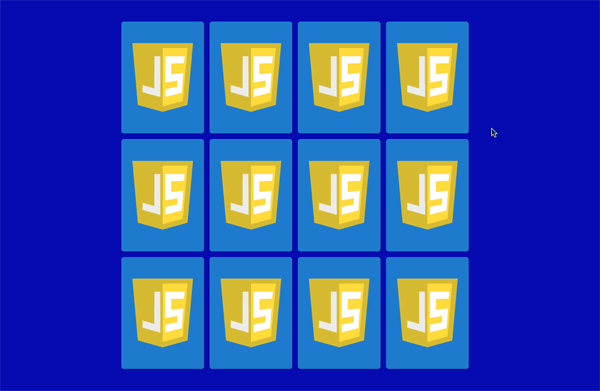
The game has 12 cards. Each card consists of a containerdivnamed.memory-card, which holds twoimgelements. The first one represents the cardfront-faceand the second itsback-face.

You can download the assets for this project at: [Memory Game Repo](https://github.com/code-sketch/memory-game).
The set of cards will be wrapped in asectioncontainer element. The final result:
CSS
We will use a simple but yet very useful reset, applied to all items:
Thebox-sizing: border-boxproperty includes padding and border values into element’s total width and height, so we can skip the math.
By setting [display: flex](https://marina-ferreira.github.io/tutorials/css/flexbox/#introduction) to thebodyandmargin: autoto the.memory-gamecontainer, it will be centered both vertically and horizontally.
.memory-game will also be a flex-container. By default, the items are set to shrink in width to fit the container. By setting flex-wrap to wrap, flex-items wrap along multiple lines, accordingly to their size.
Each cardwidthandheightis calculated with [calc()](https://developer.mozilla.org/en-US/docs/Web/CSS/calc) CSS function. Let’s make three rows, four card each by settingwidthto25%andheightto33.333%minus10pxfrommargin.
To position.memory-cardchildren, let’s addposition: relativeso we can position the children absolutely, relative to it.
The propertyposition: absoluteset to bothfront-faceandback-face, will remove the elements from the original position, and stack them on top of each other.
The template should be looking like this:
Let’s also add a click effect. The:activepseudo class will be triggered every time the element gets clicked. It will apply a .2s transition to its size:
Flip Card
To flip the card when clicked, a classflipis added to the element. For that, let’s select allmemory-cardelements withdocument.querySelectorAll. Then loop through them withforEachand attach an event listener. Every time a card gets clickedflipCardfunction will be fired. Thethisvariable represents the card that was clicked. The function accesses the element’sclassListand toggles theflipclass:
In the CSS theflipclass rotates the card 180deg:
To produce the 3D flip effect, we will add the [perspective](https://developer.mozilla.org/en-US/docs/Web/CSS/perspective) property to.memory-game. That property sets how far in thezplane the object is from the user. The lower the value the bigger the perspective effect. For a subtle effect, let’s apply1000px:
To the.memory-cardelements let’s addtransform-style: preserve-3d, to position them in the 3D space created in the parent, instead of flattening it to thez = 0plane ([transform-style](https://developer.mozilla.org/en-US/docs/Web/CSS/transform-style)).
Now, a transition has to be applied to thetransformproperty to produce the movement effect:
So, we got the card to 3D flip, yay! But why isn’t the card face showing up? Right now, both.front-faceand.back-faceare stacked up onto each other, because they are absolutely positioned. Every element has aback face, which is a mirror image of itsfront face. The property [backface-visibility](https://developer.mozilla.org/en-US/docs/Web/CSS/backface-visibility) defaults tovisible, so when we flip the card, what we get is the JS badge back face.
To reveal the image underneath it, let’s applybackface-visibility: hiddento.front-faceand.back-face.
If we refresh the page and flip a card, it’s gone!

Since we’ve hidden both images back face, there is nothing in the other side. So now we have to turn the.front-face180 degrees:
And now, there’s the desired flip effect!
Match card
Now that we have flipping cards, let’s handle the matching logic.
When we click the first card, it needs to wait until another card is flipped. The variableshasFlippedCardandflippedCardwill manage the flip state. In case there is no card flipped,hasFlippedCardis set totrueandflippedCardis set to the clicked card. Let’s also switch thetogglemethod toadd:
So now, when the user clicks the second card, we will fall into the else block in our condition. We will check to see if it’s a match. In order to do that, let’s identify each card.
Whenever we feel like adding extra information to HTML elements, we can make use of [data attributes](https://developer.mozilla.org/en-US/docs/Learn/HTML/Howto/Use_data_attributes). By using the following syntax:data-, where,can be any word, that attribute will be inserted in the element’s dataset property. So, let’s add adata-frameworkto each card:
So now we can check for a match by accessing both cards dataset. Let’s extract the matching logic to its own methodcheckForMatch()and also sethasFlippedCardback to false. In case of a match,disableCards()is invoked and the event listeners on both cards are detached, to prevent further flipping. Otherwise,unflipCards()will turn both cards back by a 1500ms timeout that removes the.flipclass:
Putting all together:
A more elegant way of writing the matching condition is to use a [ternary operator](https://developer.mozilla.org/en-US/docs/Web/JavaScript/Reference/Operators/Conditional_Operator). It’s composed by three blocks. The first block is the condition to be evaluated. The second block is executed if the condition returns true, otherwise the executed block is the third:
Lock Board
So now that we have the matching logic covered, we need to lock the board. We lock the board to avoid two sets of cards being turned at the same time, otherwise the flipping will fail.
Let’s declare alockBoardvariable. When the player clicks the second card,lockBoardwill be set totrueand the conditionif (lockBoard) return;will prevent any card flipping before the cards are hidden or match:
Same Card Click
The is still the case where the player can click twice on the same card. The matching condition would evaluate to true, removing the event listener from that card.

To prevent that, let’s check if the current clicked card is equal to thefirstCardand return if positive.
ThefirstCardandsecondCardvariables need to be reset after each round, so let’s extract that to a new methodresetBoard(). Let’s place thehasFlippedCard = false;andlockBoard = falsethere too. The es6 [destructuring assignment](https://developer.mozilla.org/en-US/docs/Web/JavaScript/Reference/Operators/Destructuring_assignment)[var1, var2] = ['value1', 'value2'], allows us to keep the code super short:
The new method will be called both fromdisableCards()andunflipCards():
Shuffling
Our game looks pretty good, but there is no fun if the cards are not shuffled, so let’s take care of that now.
Whendisplay: flexis declared on the container,flex-itemsare arranged by the following hierarchy: _group_ and _source_ order. Each group is defined by the [order](https://marina-ferreira.github.io/tutorials/css/flexbox/#order) property, which holds a positive or negative integer. By default, eachflex-itemhas itsorderproperty set to0, which means they all belong to the same group and will be laid out by source order. If there is more than one group, elements are firstly arranged by ascending group order.
There is 12 cards in the game, so we will iterate through them, generate a random number between 0 and 12 and assign it to the flex-itemorderproperty:
In order to invoke theshufflefunction, let’s make it a [Immediately Invoked Function Expression (IIFE)](https://developer.mozilla.org/en-US/docs/Glossary/IIFE), which means it will execute itself right after its declaration. The scripts should look like this:
And that’s all folks!
You can also find a video explanation at ? C[ode Sketch Channel.](https://www.youtube.com/watch?v=eMhiMsEC9Uk&list=PLLX1I3KXZ-YH-woTgiCfONMya39-Ty8qw)
References
[Marina Ferreira — Flexbox Fundamentals](https://marina-ferreira.github.io/tutorials/css/flexbox/)[MDN Web Docs — Main Axis](https://developer.mozilla.org/en-US/docs/Glossary/Main_Axis)[MDN Web Docs — Cross Axis](https://developer.mozilla.org/en-US/docs/Glossary/Cross_Axis)[MDN Web Docs — calc](https://developer.mozilla.org/en-US/docs/Web/CSS/calc)[MDN Web Docs — perspective](https://developer.mozilla.org/en-US/docs/Web/CSS/perspective)[MDN Web Docs — transform-style](https://developer.mozilla.org/en-US/docs/Web/CSS/transform-style)[MDN Web Docs — backface-visibility](https://developer.mozilla.org/en-US/docs/Web/CSS/backface-visibility)[MDN Web Docs — Using data attributes](https://developer.mozilla.org/en-US/docs/Learn/HTML/Howto/Use_data_attributes)[MDN Web Docs — order](https://developer.mozilla.org/en-US/docs/Web/CSS/CSS_Flexible_Box_Layout/Ordering_Flex_Items)[MDN Web Docs — IIFE](https://developer.mozilla.org/en-US/docs/Glossary/IIFE)[MDN Web Docs — ternary operator](https://developer.mozilla.org/en-US/docs/Web/JavaScript/Reference/Operators/Conditional_Operator)[MDN Web Docs — destructuring assignment](https://developer.mozilla.org/en-US/docs/Web/JavaScript/Reference/Operators/Destructuring_assignment)
_Originally published at [marina-ferreira.github.io](https://marina-ferreira.github.io/tutorials/js/memory-game/)._