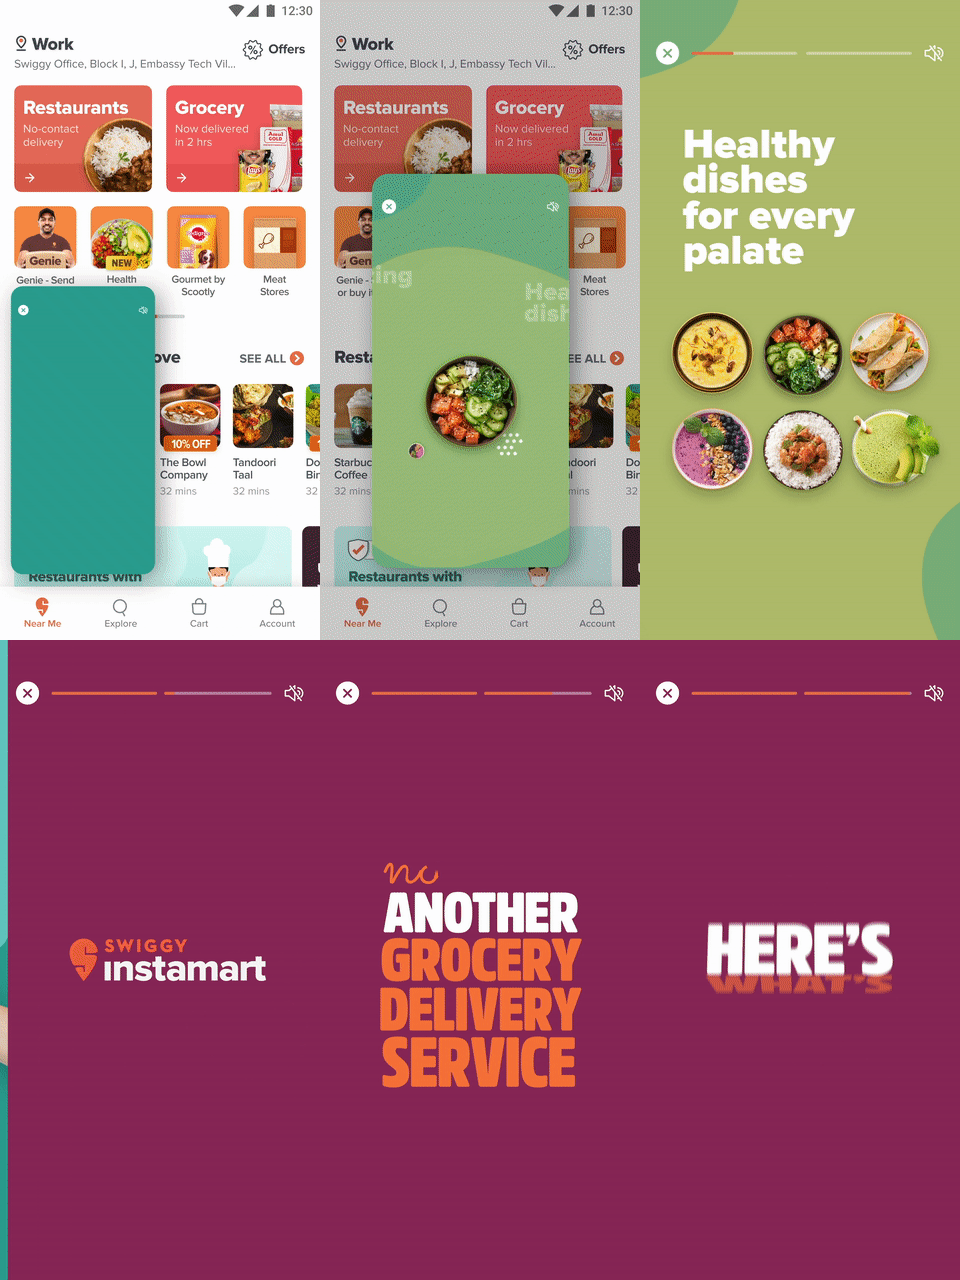
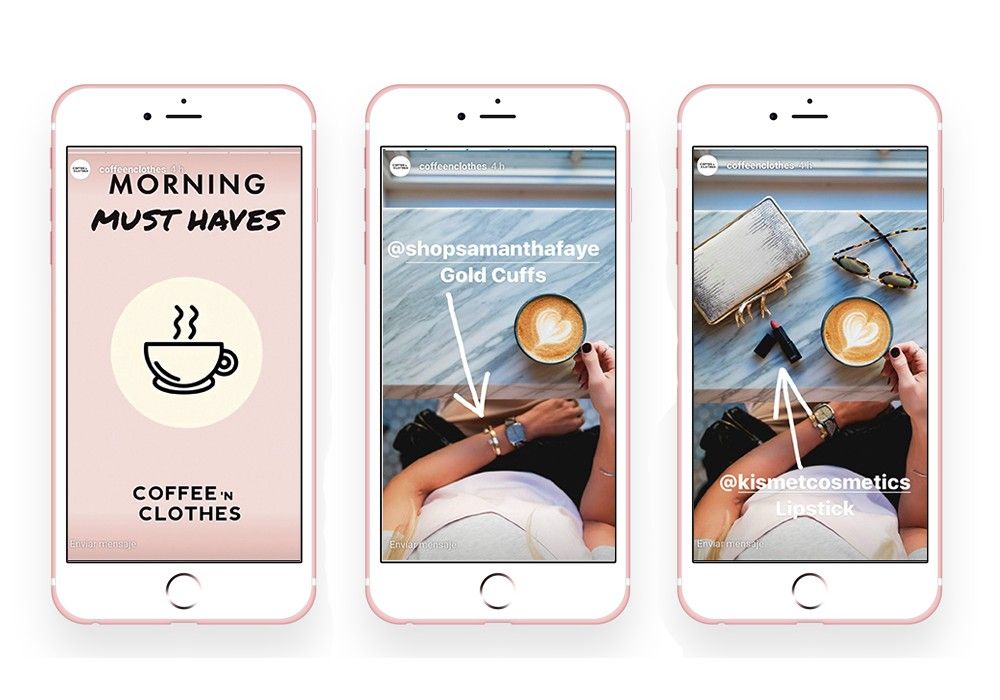
The article will teach you how you can show multiple videos in one view, like we see in Instagram Stories.
We'll also learn how to cache the videos in the user's device to help save that user's data and network calls and smooth out their experience.
A quick note: this implementation is for iOS, but the same logic can be applied in other codebases as well.

In general, whenever we want to play a video, we get the video URL and simply present AVPlayerViewController with that URL.
let videoURL = URL(string: "Sample-Video-Url")
let player = AVPlayer(url: videoURL!)
let playerViewController = AVPlayerViewController()
playerViewController.player = player
self.present(playerViewController, animated: true) {
    playerViewController.player.play()
}Pretty straightforward, right?
But the drawback of this implementation is that you can’t customize it. Which, if you are working for a good product company, will be an everyday ask. :D
Alternatively, we can use AVPlayerLayer which will do a similar job – but it allows us to customize the view and other elements.
let videoURL = URL(string: "Sample-Video-Url")
let player = AVPlayer(url: videoURL!)
let playerLayer = AVPlayerLayer(player: player)
playerLayer.frame = self.view.bounds
self.view.layer.addSublayer(playerLayer)
player.play()But what if you want to combine multiple videos, similar to Instagram stories? Then we probably have to dive in a bit deeper.
Coming Back to the Problem Statement
Now, let me tell you about my use case.
In my company, Swiggy, we want to be able to show multiple videos, where each video should be shown x number of times.
On top of that, it should have an Instagram-like stories feature.
- Video-2 should seamlessly autoplay after video-1, and so on
- It should jump to corresponding videos whenever the user taps left or right.
If you think caching could be the answer, don't worry – I’ll get to that in a bit.
Multiple layers in one view
First things first, we need to figure out how to add multiple videos in one view.
What we can do is create one AVPlayerLayer and assign the first video to it. When the first video is finished, then we assign the next video to the same AVPlayerLayer .
func addPlayer(player: AVPlayer) {
    player.currentItem?.seek(to: CMTime.zero, completionHandler: nil)
    playerViewModel?.player = player
    playerView.playerLayer.player = player
}To jump to the previous or next video, we can do the following:
- Add a tap gesture on the view
- If the touch location ‘x’ is less than half of the screen, then assign the previous video, else assign the next video
@objc func didTapSnap(_ sender: UITapGestureRecognizer) {
   let touchLocation = sender.location(ofTouch: 0, in: view)
   if touchLocation.x < view.frame.width/2 {
     changePlayer(forward: false)
     }
   else {
     fillupLastPlayedSnap()
     changePlayer(forward: true)
    }
}There we go. We now have our own Insta-like Stories video feature.
But our task is not done yet!
Now Back to Caching
We don't want it to be the case that every time a user navigates from one video to another, it starts to download the video from the beginning.
Also, if the video is shown again in the next session, we don't need to do another server call.
If we can cache the video, then the user’s internet will be saved. The load on the server will also be reduced.
Finally, the UX will improve as the user won't have to wait a long time to load the video.
As a good developer, reducing a user’s internet usage should be our priority.


Load Videos Asynchronously
The first thing we can use to load videos is loadValuesAsynchronously.
According to the Apple documentation, loadValuesAsynchronously:
Tells the asset to load the values of all of the specified keys (property names) that are not already loaded.
The advantage here is that it saves the video until it is rendered. So it will not download the video from the start whenever the user navigates to a previous video. It will only download the part which was not rendered earlier.
Let's look at an example: say we have Video_1 that is 15 seconds long, and the user saw 10 seconds of that video before jumping to Video_2.
Now if the user comes back to Video_1 again by tapping to the left, loadValuesAsynchronously will have that 10 seconds of video saved and will only download the remaining (unwatched) 5 seconds.
func asynchronouslyLoadURLAssets(_ newAsset: AVURLAsset) {
	DispatchQueue.main.async {
            newAsset.loadValuesAsynchronously(forKeys: self.assetKeysRequiredToPlay) {
                for key in self.assetKeysRequiredToPlay {
                    var error: NSError?
                    if newAsset.statusOfValue(forKey: key, error: &error) == .failed {
                        self.delegate?.playerDidFailToPlay(message: "Can't use this AVAsset because one of it's keys failed to load")
                        return
                    }
                }

                if !newAsset.isPlayable || newAsset.hasProtectedContent {
                    self.delegate?.playerDidFailToPlay(message: "Can't use this AVAsset because it isn't playable or has protected content")
                    return
                }
                let currentItem = AVPlayerItem(asset: newAsset)
                let currentPlayer = AVPlayer(playerItem: currentItem)
                self.delegate?.playerDidSuccesToPlay(playerDetail: currentPlayer)
            }

}You can find more details on loadValuesAsynchronously at this link.
The caveat here is it persists video data for that session only. If the user closes and comes back to the app, the video has to be downloaded again.
So what other options do we have?
Saving Videos in Device
Now comes Video Caching!
When the video is rendered completely, we can export the video and save it to the user’s device. When the video comes up again in their next session, we can pick the video from the device and simply load it.
AVAssetExportSession
According to Apple's documentation:
An object that transcodes the contents of an asset source object to create an output of the form described by a specified export preset.
This means that AVAssetExportSession acts as an exporter, through which we can save the file to the user’s device. We have to give the output URL and the output file type.
let exporter = AVAssetExportSession(asset: avUrlAsset, presetName: AVAssetExportPresetHighestQuality)
exporter?.outputURL = outputURL
exporter?.outputFileType = AVFileType.mp4

exporter?.exportAsynchronously(completionHandler: {
	print(exporter?.status.rawValue)
	print(exporter?.error)
})You can find more details on AVAssetExportSession at this link.
Now the only thing left is to fetch the data from the cache and load the video.
Before loading, check if the video is present in the cache. Then fetch that local URL and give it to loadValuesAsynchronously.
if let cacheUrl = FindCachedVideoURL(forVideoId: videoId) {
	let cacheAsset = AVURLAsset(url: cacheUrl)
	asynchronouslyLoadURLAssets(cacheAsset)
}
else {
  asynchronouslyLoadURLAssets(newAsset)
}Caching will help reduce a lot of user data usage as well as server load (sometimes up to TBs of data).
Other use cases for caching
What other use cases we can handle with caching? The following are examples of ways you could use caching here:
Ensure Optimum Storage
Before saving the video on the device, you should check whether enough storage is present on the device to do so.
func isStorageAvailable() -> Bool {
   let fileURL = URL(fileURLWithPath: NSHomeDirectory() as String)
   do {
      let values = try fileURL.resourceValues(forKeys: [.volumeAvailableCapacityForImportantUsageKey, .volumeTotalCapacityKey])
      guard let totalSpace = values.volumeTotalCapacity,
      let freeSpace = values.volumeAvailableCapacityForImportantUsage else {
          return false
      }
      if freeSpace > minimumSpaceRequired {
         return true
      } else {
          // Capacity is unavailable
          return false
      }
    catch {}
    return false
}Remove Deprecated Videos
You can have a timestamp for each video so that you can clean up old videos from device memory after a certain number of days.
func cleanExpiredVideos() {
        let currentTimeStamp = Date().timeIntervalSince1970
        var expiredKeys: [String] = []
        for videoData in videosDict where currentTimeStamp - videoData.value.timeStamp >= expiryTime {
            // video is expired. delete
            if let _ = popupVideosDict[videoData.key] {
                expiredKeys.append(videoData.key)
            }
        }
        for key in expiredKeys {
            if let _ = popupVideosDict[key] {
                popupVideosDict.removeValue(forKey: key)
                deleteVideo(ForVideoId: key)
            }
        }
}Maintain a limited number of videos
You can make sure only a limited number of videos are saved in the file at a time. Let's say 10.
Then when the 11th video comes, you can have it delete the least-viewed video and replace it with the new one. This will also help you not consume too much of the user’s device memory.
func removeVideoIfMaxNumberOfVideosReached() {
        if popupVideosDict.count >= maxVideosAllowed {
            // remove the least recently used video
            let sortedDict = popupVideosDict.keysSortedByValue { (v1, v2) -> Bool in
                v1.timeStamp < v2.timeStamp
            }
            guard let videoId = sortedDict.first else {
                return
            }
            popupVideosDict.removeValue(forKey: videoId)
            deleteVideo(ForVideoId: videoId)
        }
}Measure Impact
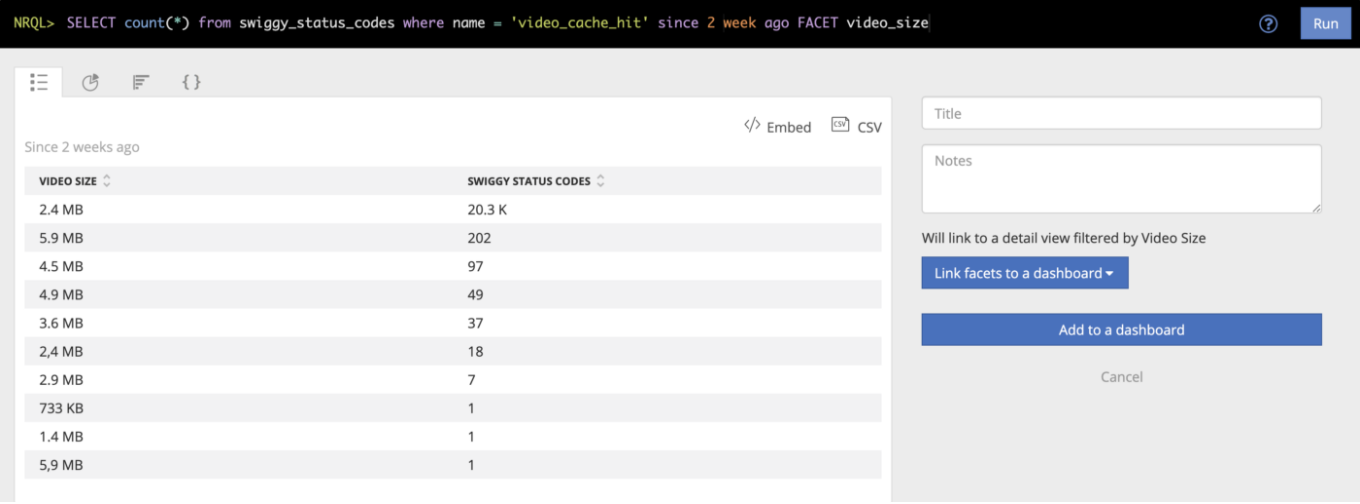
Don’t forget to add logs, so that you can measure the impact of your feature. I have used a custom New Relic Log Event to do so:
 static func findCachedVideoURL(forVideoId id: String) -> URL? {
        let nsDocumentDirectory = FileManager.SearchPathDirectory.documentDirectory
        let nsUserDomainMask = FileManager.SearchPathDomainMask.userDomainMask
        let paths = NSSearchPathForDirectoriesInDomains(nsDocumentDirectory, nsUserDomainMask, true)
        if let dirPath = paths.first {
            let fileURL = URL(fileURLWithPath: dirPath).appendingPathComponent(folderPath).appendingPathComponent(id + ".mp4")
            let filePath = fileURL.path
            let fileManager = FileManager.default
            if fileManager.fileExists(atPath: filePath) {
                NewRelicService.sendCustomEvent(with: NewRelicEventType.statusCodes,
                                                                   eventName: NewRelicEventName.videoCacheHit,
                                                                   attributes: [NewRelicAttributeKey.videoSize: fileURL.fileSizeString])
                return fileURL
            } else {
                return nil
            }
        }
        return nil
}To convert the file size to a readable format, I fetch the file size and convert it to Mbs.
extension URL {
    var attributes: [FileAttributeKey : Any]? {
        do {
            return try FileManager.default.attributesOfItem(atPath: path)
        } catch let error as NSError {
            print("FileAttribute error: \(error)")
        }
        return nil
    }

    var fileSize: UInt64 {
        return attributes?[.size] as? UInt64 ?? UInt64(0)
    }

    var fileSizeString: String {
        return ByteCountFormatter.string(fromByteCount: Int64(fileSize), countStyle: .file)
    }
}This is how you can measure your impact:

Total data saved = number of requests * video_size = 2.4MB*20.3K ~= 49GB
This is just two weeks of data. You do the math for the whole year. ? And this will keep on increasing exponentially over time.
That’s it! You have now built your own caching mechanism.

Wrapping up
In this article, we saw how easily we can integrate multiple videos in one view, giving an Instagram-like story feature.
We also learned why and how caching plays an important role here. We saw how it helps the user save a lot of data and have a smooth user experience.
Do let me know if I missed something, or if you can think of any more use cases.
Thanks for your time. :)

