

The first step to designing a website: wireframe it.
A good wireframe can give you the vision for the entire layout and functionality of your website. It can also serve as the first stage of a design.
Wireframes give you an idea of the overall structure pages will take, and how navigation will flow.
If you are considering building a website, you can do a wireframe quickly and easily. You don't even have to be a graphic designer to do so.
To get started, all you need is a pencil and some paper. (Or if you want to get fancy, an iPad and iPencil like I use in my video tutorial above.)
We are going to create a wireframe and show how it allows for a quick, iterative design process. This will create a living piece of documentation that you can use for yourself and for a client. And you can use this to reason through your planning – all before you invest any time in actually coding it.
Here are some steps we'll cover in this article (and in the accompanying video tutorial):
- Sitemap planning
- Creating a homepage wireframe
- Using markup in wireframes
- Wireframe components (header, menu, footer)
- Wireframing your Features Page and Contact Page
- Mobile Responsive Wireframes
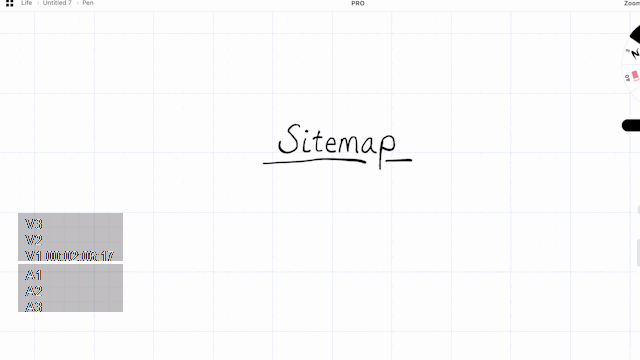 Sketching out a sitemap
Step #1: Sitemap Planning
Getting started with wireframing begins with a good sitemap. Before you create a page wireframe, a sitemap will give you some structure. This way, you'll understand which pages you're going to build, and how they will all connect to one another.
Most small sites may not need a sitemap. They usually just have either a single landing page, or a few common pages like Features, About, and Contact Us.
This said, as soon as your website or application becomes larger and more complex, you'll want a sitemap.
Sitemaps provide you with a brief overview of where items exist and how they interconnect.
In our example, we will create a simple sitemap which will contain just the Home Page, Features Page, and Contact Us page.
You don't have to spend too much time on this. Just add a few boxes to show each page, lines underneath to show sub-pages, and that's it.
 Creating a homepage wireframe
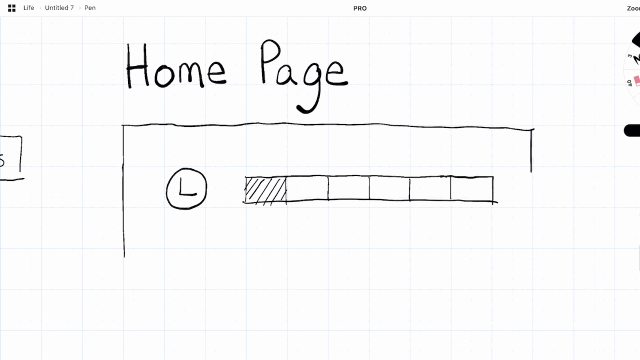
Step #2: Creating Homepage Wireframe
We are going to create our first wireframe page. If you haven't wireframed before, the process is quite simple. Each aspect of a website is represented with a shape or simple graphic, such as:
- boxes with diagonal lines through them to represent images
- horizontal lines to represent paragraphs of text
- and a circle with an L in it to represent your logo.
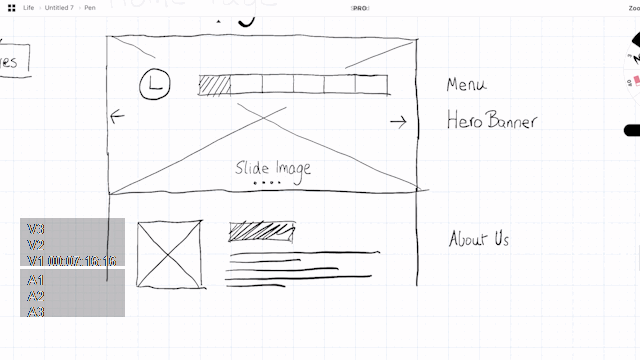
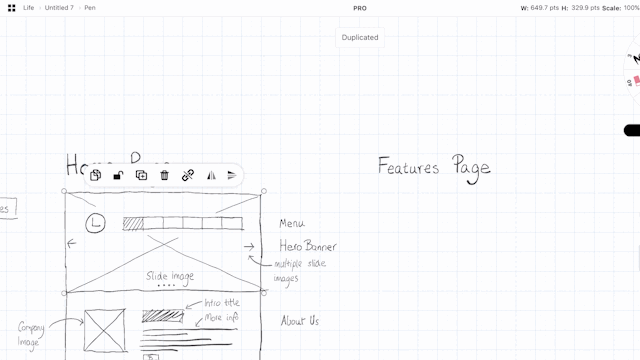
For the homepage, we'll build out a slider image, menu, and logo. We'll also give it a few labels to show what each item is.
This is also useful to organize each section into rectangles that we can later copy-paste onto other pages (especially for the header and footer).
 Creating a wireframe for the body of our home page
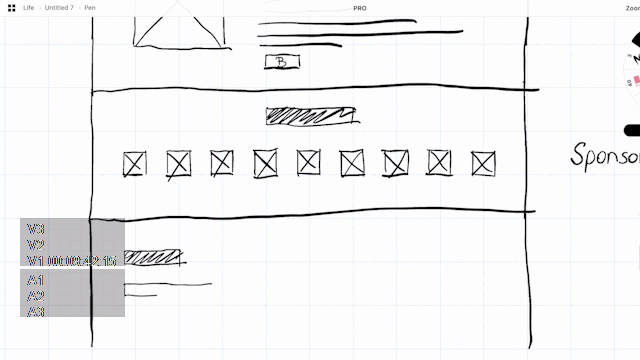
Let's also create another section for an introduction to the company (About Us) and a sponsor section (with logos and images of our sponsors).
As we progress through the design, we can also implement other items into the homepage, like call-to-action buttons in areas that would be appropriate.
We finalize the design with a Footer section where we add common elements such as a Contact Form, Contact Info, and reuse the Logo once more.
 Creating additional page elements in our wireframe
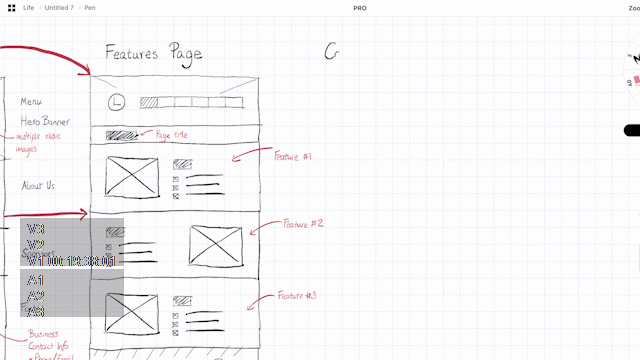
Step #3: Using Markup in Wireframes
The wireframe is often viewed not just by designers, but by developers, clients, and management. So it's useful to add some markup to each part of the content. This can help guide people viewing your wireframe for the first time. I usually do this at the end of completing a page.
In our example, let's markup the homepage and label each part of the content with red text.
Aspects you want to markup include items such as sections, titles, contact forms, and what images might be.
Note that Markup doesn't have to literally explain what the content will eventually be – just what it represents. So instead of putting in the actual "Example of intro title", you can label the title as "Intro Title."
 How to Markup a wireframe
Step #4: Add Other Wireframe Components like Header, Menu, and Footer
Now that we have already created a header and footer, we can reuse them for additional pages. If you're working digitally, you can copy-paste headers, footers, and other recurring elements into new page wireframes. (And if you are just using paper and pen, you can always use a razor and a photocopier to achieve the same effect.)
This allows your wireframe design to remain consistent. Tools like Figma will allow you to create asset components which you can also copy-paste throughout your design. You can even configure them to dynamically update other parts of your wireframe when you change your root component.
In our example, we are going to reuse components to build a features page. By creating our first features section component, we can then copy and paste it below several times to build out our entire features page in just a few minutes.
 Adding wireframe components and reusing them on different pages
Step #5: Features Page and Contact Page
It gets easier and easier to building out additional pages once you get started with wireframing and build out some components. With the features page finished, we can create a Contact Us page. All we really have to do is add a few common elements, such as a Google Map, Contact Us form, and some basic contact details like a phone number and email address.
In this example, I have small logos for a phone and email, and large blocks to represent where they will be located on the page.
The contact form will be located below (without a box outline), as well as a Google map on the right hand side.
 Wireframing the Contact Us Page
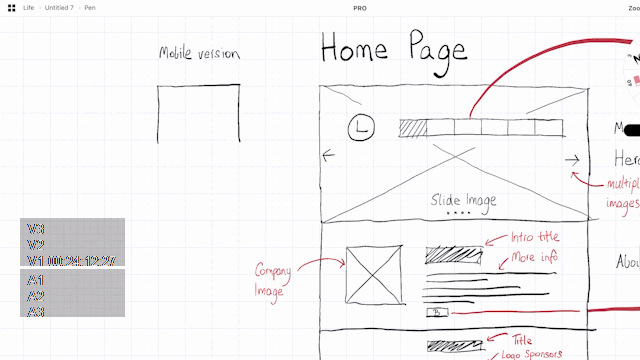
Step #6: Make a Mobile Responsive Wireframe
No good wireframe can exist these days without a mobile version. This is because much of the web today is viewed on mobile devices.
It's good to know how a design might collapse down to smaller viewports. If you are have more time on your hands, you can also build out a tablet version of the responsive wireframe as well.
In our example, we build out the home page design wireframe section-by-section. Most of the rows and columns are collapsed. And since we're on a mobile viewport, many of the images, texts and blocks reduce in size.
Because of this, it's possible for some of the sections to still have the same amount of height as their respective desktop versions. On the other hand, some sections with lots of images (like the sponsors section) might end up having much more scroll height.
Due to this, I often also add additional markup to show which desktop version sections correspond to which responsive equivalents for the mobile version.
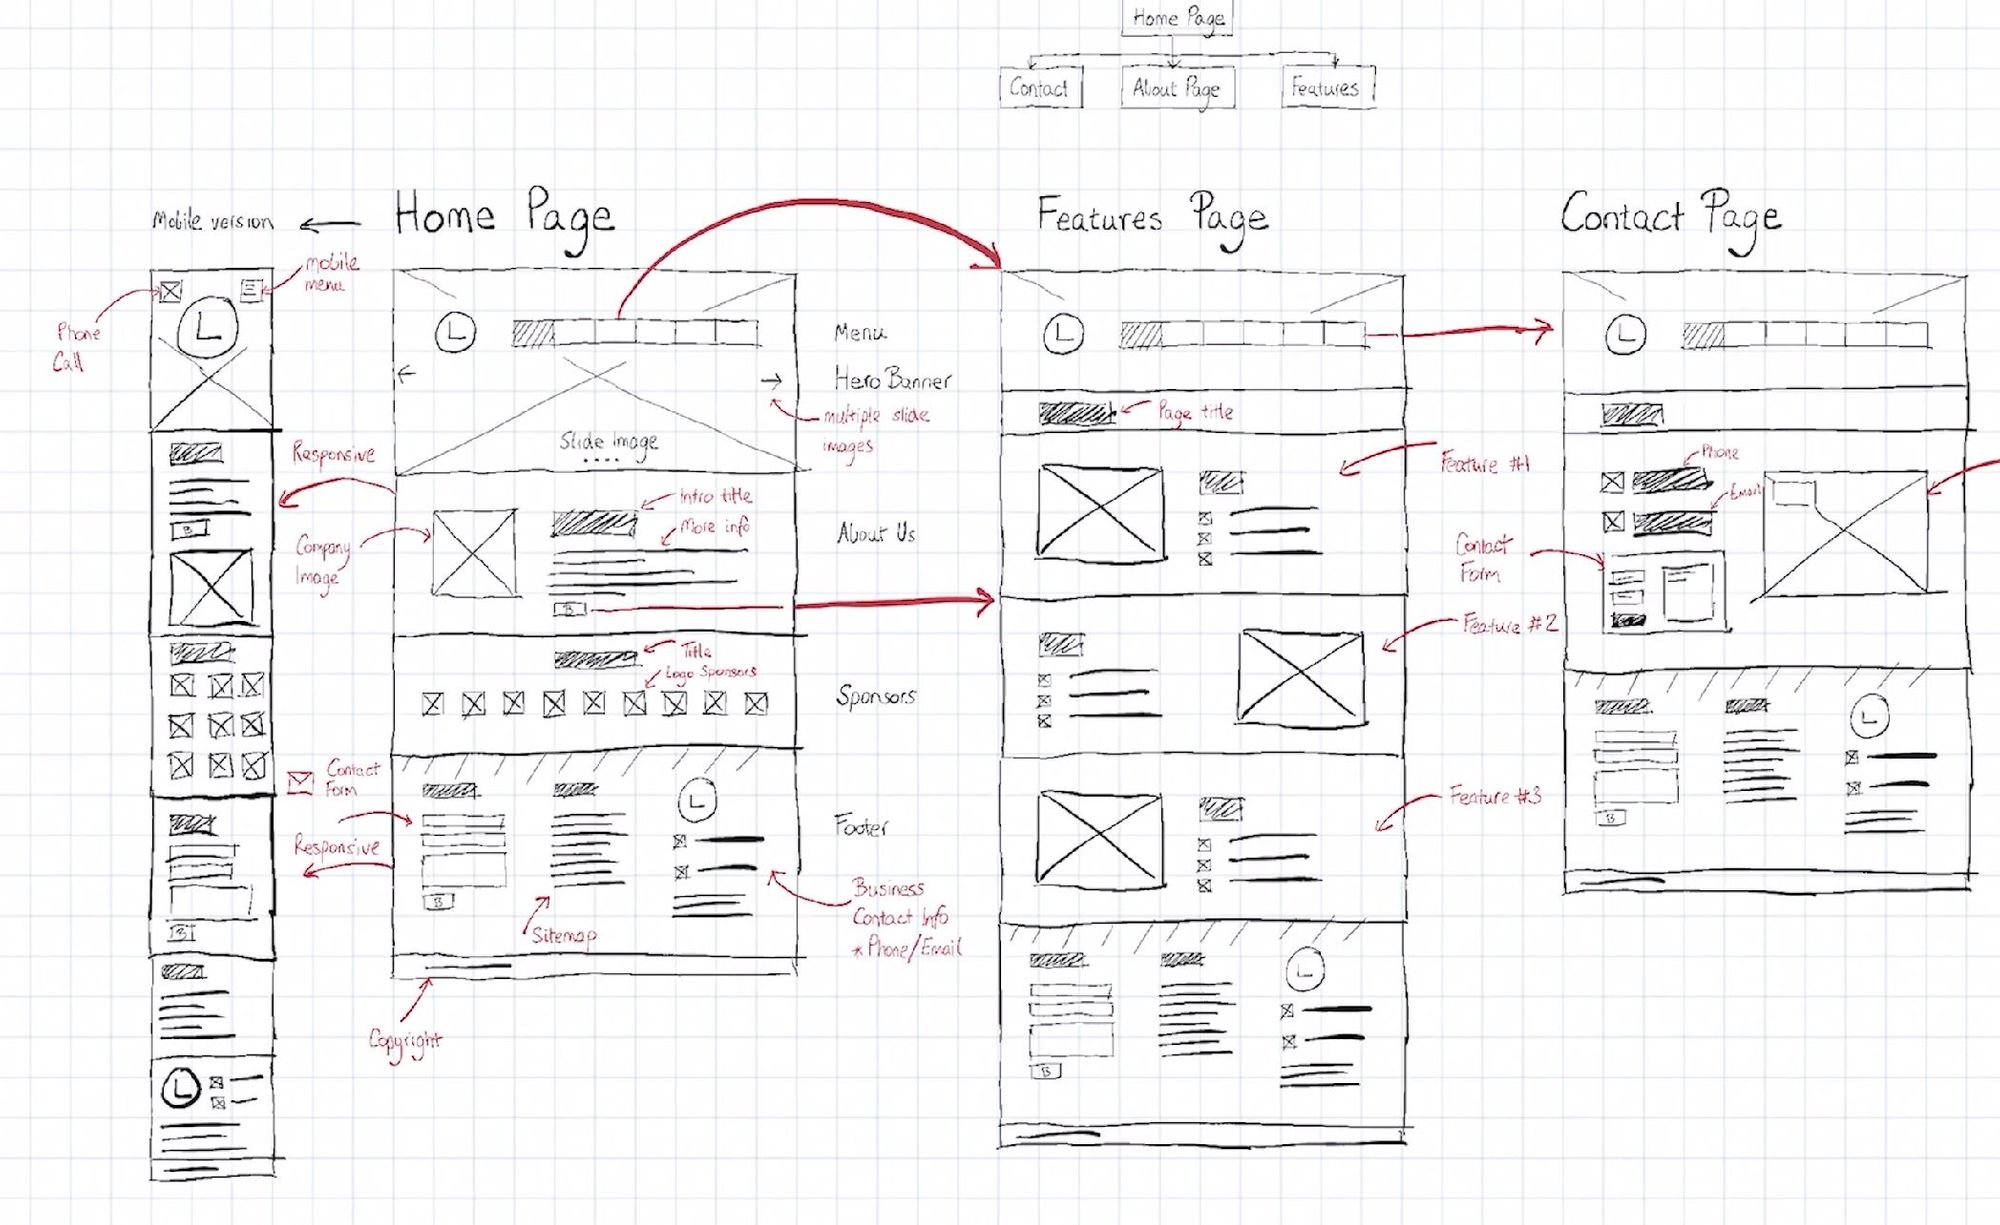 The final wireframe with several pages designed, the sitemap, and markup
Conclusion
Wireframing is a quick way to get a better idea of your website or application visually. I recommend you try it for your next project to help you plan how it might function and look.
Wireframing is the ideal approach for this, since it takes so much less time than having a designer do a full-blown User Interface prototype.
As a developer, I've built wireframes for my websites for years. I almost never develop a website without sketching out at least some of my ideas of how it will look visually.
Happy wireframing.

I hope you enjoyed this article. If you don't know who I am, I'm Adrian from Australia ? I have a tiny channel on Twitter & YouTube, so if you want to know more about me or enjoy my content, check me out sometime ?
- Youtube: https://youtube.com/adriantwarog
- Twitter: https://twitter.com/adrian_twarog