
By Amber Wilkie
The first programs you write will probably not be very impressive. You'll make lots of mistakes and you'll never want to revisit the past.
But soon enough, you'll be writing large, complex programs. Maybe you'll delete some stuff now that you want to bring back later. Or maybe you'll bring in a friend to help, and want to gracefully add their changes to your program while you continue to work on your parts.
That's where version control comes in, and it's a skill that any employer will expect you to have mastered. It's also extremely useful for anyone working on anything that is saved in pieces - from a computer program to a recipe to a novel.
What is version control?
Version control refers to the ability to save your place in a document or folder and reference previous saves.
As I write this article, my newest changes are constantly overwriting my previous versions. It's not version control, because I can't go back to the draft I had a week ago. But if I wrote this using Git, that would be possible.
What is Git?
Git is a version control system developed by Linus Torvalds in 2005 (the same guy who wrote Linux). Git helps developers keep track of the state of their code and allows collaboration on a codebase. We'll go over the main components a little later.
If you want to follow along, you'll have to have Git installed on your computer. Open up a terminal and type git. If you see a list of possible commands, you're good to go!
Many computers come with Git already installed. If you need to install, you can follow the instructions here for your computer.
Using Git
If you've ever used a computer program or a video game and noticed that you can go back to a previously saved version, you inherently understand the need for Git. It is simply saving a snapshot of your program in time.
But instead of needing to keep track of every single line of code in your program, it instead notes the changes between the code you have now and the last time you saved. It keeps a running note of when each line of code was saved last, and stores them in a special hidden folder.
Let's consider this JavaScript program. It prints three lines to the console (an output you can see in your browser or terminal):
console.log('Hello, this is a git example!')
console.log('And here is another!')
console.log('And yet a third')
git init
If I want to save versions of my work, I can use Git. First, I'll type git init into my terminal so that I can start using Git. That will create a .git folder, where Git will store its files.
git add
git add . will add all the files in our program. If you did git init after you created a file, or any time you make new files, you'll have to tell Git to start tracking changes to them with this command.
git commit
Next, I'll type git commit -am "Initial commit". git commit is the command to save a version of our code. The -am is called a "flag" and signals that there are optional actions we would like to take with this commit. The flag a means we are going to save All of our changes. The flag m denotes that we will provide a Message afterwards, which is "Initial commit".
You can write anything you want here - freeCodeCamp has many articles on how to write great commit messages.
How Git saves changes
If we make a change to our program (like changing the text on the first line), we may want to save a version. We could even toggle between versions if we wanted to see how our program has changed over time.
console.log('Now I have changed the first line.')
console.log('And here is another!')
console.log('And yet a third')
git diff
Here's what this looks like as you run git diff. Git will show you the difference between the code you have now and the last time it was saved.
It's a little hard to understand what is going on here, but the - are deletions and the + are insertions. We removed text "Hello, this is a git example!" and added text "Now I have changed the first line." This is how Git keeps track of what has changed between versions.
diff --git a/git.js b/git.js
index eb0f1d1..8dbf769 100644
--- a/git.js
+++ b/git.js
@@ -1,3 +1,3 @@
+console.log('Now I have changed the first line.')
-console.log('Hello, this is a git example!')
 console.log('And here is another!')
 console.log('And yet a third')
Now that we've reviewed the changes we are committing, we can go ahead and make a second commit: git commit -am 'Update first console log'. This will save the changes I made to the first line of text.
git log
We can review the commits we have made with the command git log. If I run it in my program now, I get this output:
commit 67627dd44e84a3106a18a19e94cf9f3723e59b3c (HEAD -> master)
Author: amberwilkie <amber@amberwilkie.com>
Date:   Wed Apr 22 16:55:39 2020 -0400

    Update first console log

commit 49fe4152f474a9674a83e2b014a08828209d2690
Author: amberwilkie <amber@amberwilkie.com>
Date:   Wed Apr 22 16:54:59 2020 -0400

    Initial commit
We see our commit messages, the time we committed and a unique ID for our commit, which we can use to reference commits in the future.
git checkout
If we wanted to go back and see the changes to our code from a previous commit, we'll do so with git checkout 49fe4152f474a9674a83e2b014a08828209d2690. Git will put our code in a temporary state so we can view what the code looked like at that snapshot in time.
I copied the ID for my first commit. If I run this command, my program says "Hello, this is a git example!" on the first line.
To get back to the latest code, you'll type git checkout master.
Branches
If you noticed above, we had to type master to get back to the current state of our code. Why? Because master is the default name for the branch of branches - the place where our code is most up-to-date.
Git relies on branching to maintain our code. You can consider master the trunk of your tree of code. You may break off and make some changes, but the end goal is always to bring them back to the trunk, to master.
You can use git checkout to make a new branch, not just to check out previous versions of your code. Try git checkout -b new-branch. The -b flag is used when we are making a new Branch and after the flag we write the name of our new branch. We can make many commits on this branch and later get them back to master with a process called merging.
In the diagram below, the dots represent commits. Two branches have been made "off" of master. In software development, we often call these "feature" branches, as opposed to the main master branch. The blue branch has been merged back into master and the yellow branch is still being developed.
Note that even though the yellow branch was created after the blue branch, only changes from master will be visible in that branch. If we made a third branch sometime in the future, changes from both master and the blue branch would be present in the new, third branch.
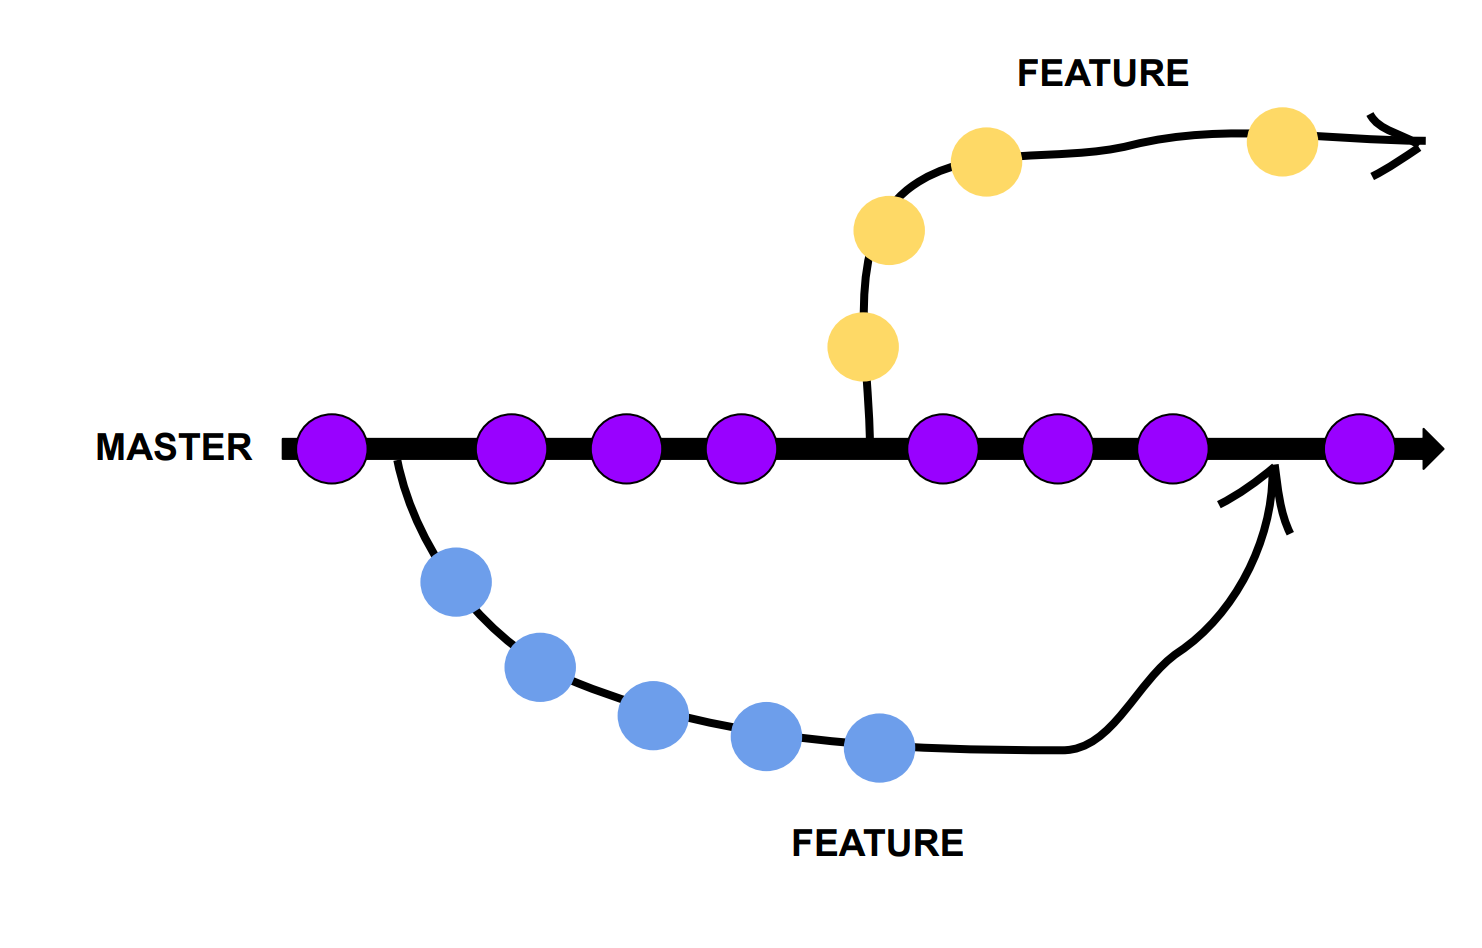 Git branching visualization
git merge
git merge will take all the commits you've made on that branch and stick them into the master branch, saving your work.
Why use branches?
If you're working alone, it may not make a lot of sense to split your work into branches. Why not just save everything on master?
The utility of branching does not become very clear until we start thinking about working on a team of developers. If they were all committing to the master branch every time they made a change, things would get very messy very quickly. It would also be difficult to control what code goes "to production" (live to customers) and which code is still being tested or worked on.
This way, every developer can have their own branch (or, likely, many), work on their feature for as long as they need, and merge it when the time is right.
What is GitHub?
GitHub is a free (for personal use), cloud-hosted platform for code. It works with Git on your and your colleagues' computers, serving as the origin, the source of truth for anyone working on the code.
You and your collaborators upload their code to GitHub periodically, and GitHub provides tooling to help manage changes to the code over time.
Uploading your code to GitHub
First, you'll need to create a GitHub account. You'll use this account for your entire programming career, so hot tip: stick with a professional name, preferably with your actual name in it.
Once you're in, look for a + in the top corner. Click "New Repository" (the name for Git folders, "repo" for short). Give it a name - probably the same as the folder you created earlier where you've saved your commits. Then click "Create Repository". You can now copy the url you are redirected to and we can set the origin for our code.
There will be an authentication step at some point here - just follow the directions. Git is very good about giving us clear instructions on the next steps to take.
git remote add origin
Now we will tell our codebase (the folder where our code is) where to store our code in the cloud. We'll type git remote add origin <your-url>, which will set an origin for our repository. Now we can push to our origin to store our cloud at GitHub.
git push
Assuming we're still in our master branch (that is, we have not checked out another branch), we can now type git push and our code will go to GitHub.
Viewing your code
Now your code lives in GitHub! Here's what my example from above looks like after I follow the GitHub steps I've explained:
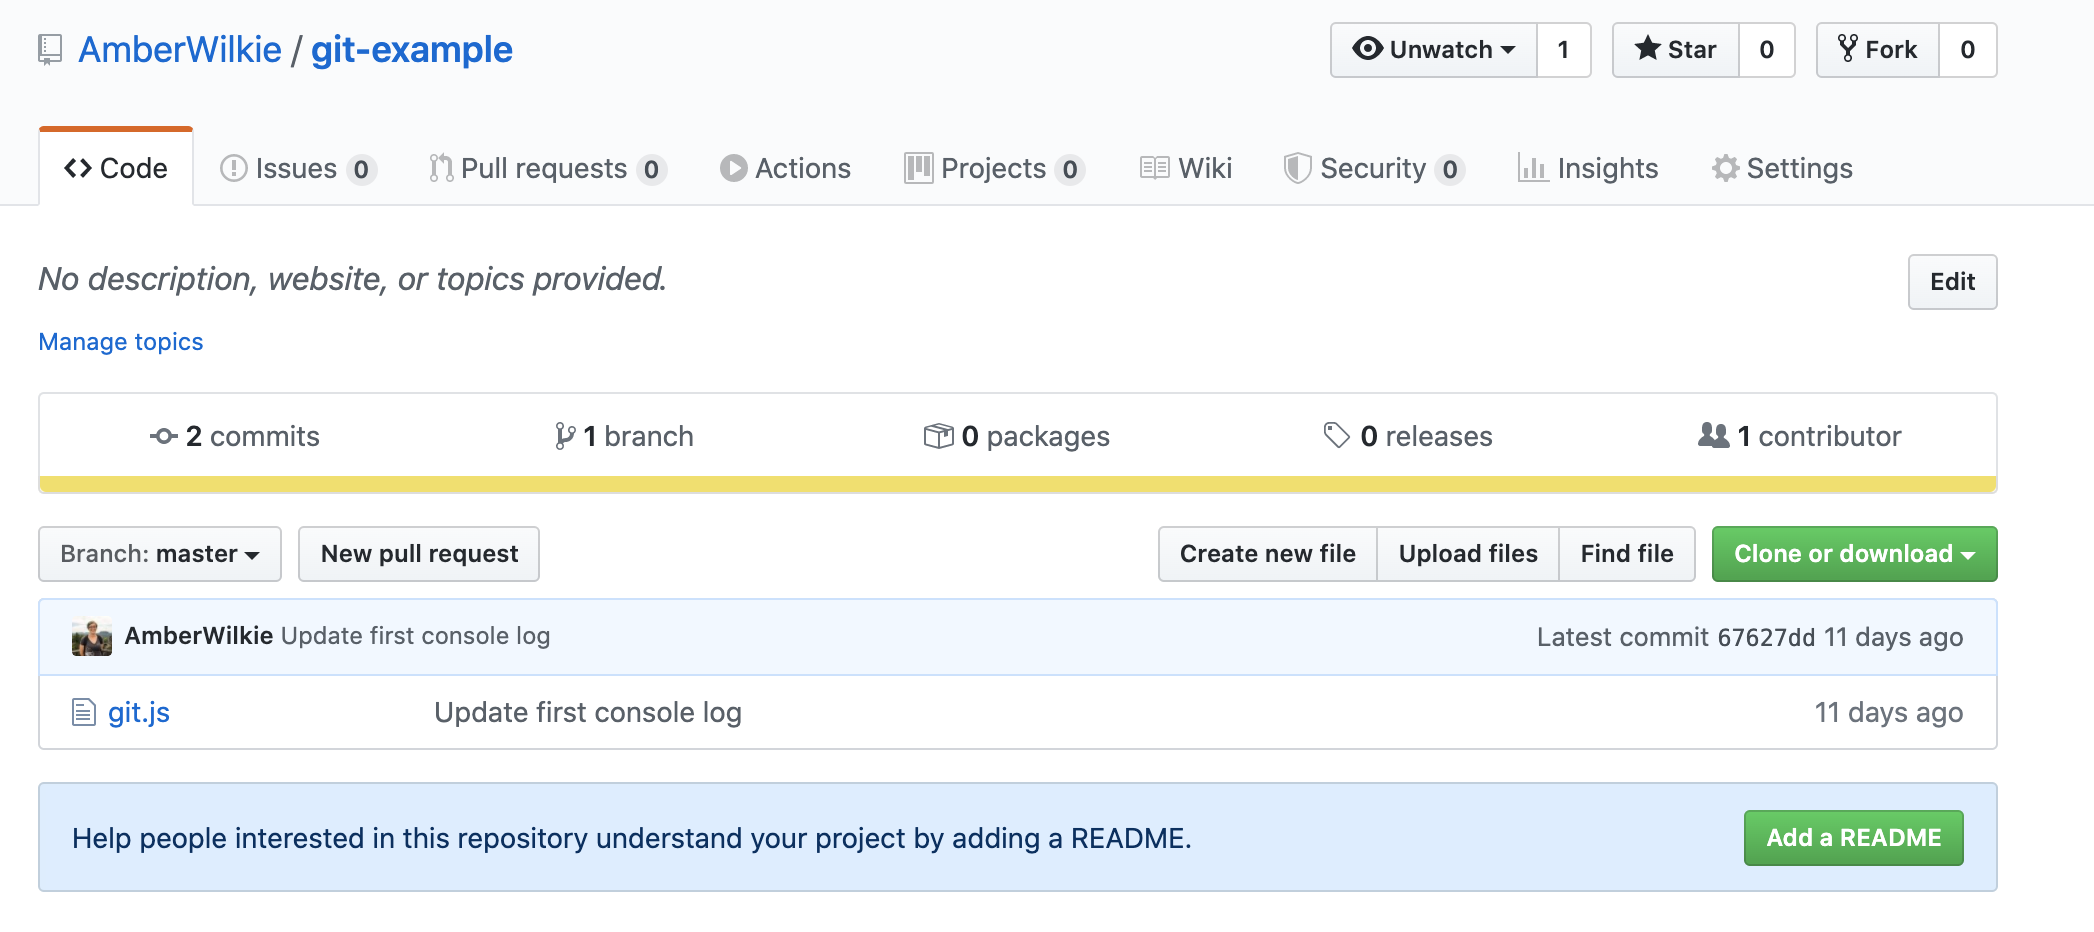 GitHub repo for the git example in this article
You can click through the files and folders of your repository, viewing the current state of the code. You can also view previous versions of the code, by clicking "X commits" on the right side, middle. You'll see a list of the commits made to the repo and if you click into them, you can browse the files of your project as they existed at that slice of time.
Pull Requests
There are many other features of GitHub, but the most important in collaborating with colleagues is a pull request. A pull request (very frequently shortened to PR) is a way to manage incoming changes to the code base.
To make one, you'll make a new branch on your local computer, create at least one commit on that branch, then git push origin head to send that branch to GitHub. (You can put the name of your branch instead of head but it's useful for keeping everything matched up exactly).
Now when you go back to GitHub, you should see your branch available to make a PR.
 GitHub automatically prompts you to create PRs from new branches
If you click the "Compare & pull request" button, you'll be able to change many settings for your PR. Most important are generally title and description. If you're working on a team, you can tag colleagues to ask them to review your code, add to projects, and many other features you probably don't care about yet.
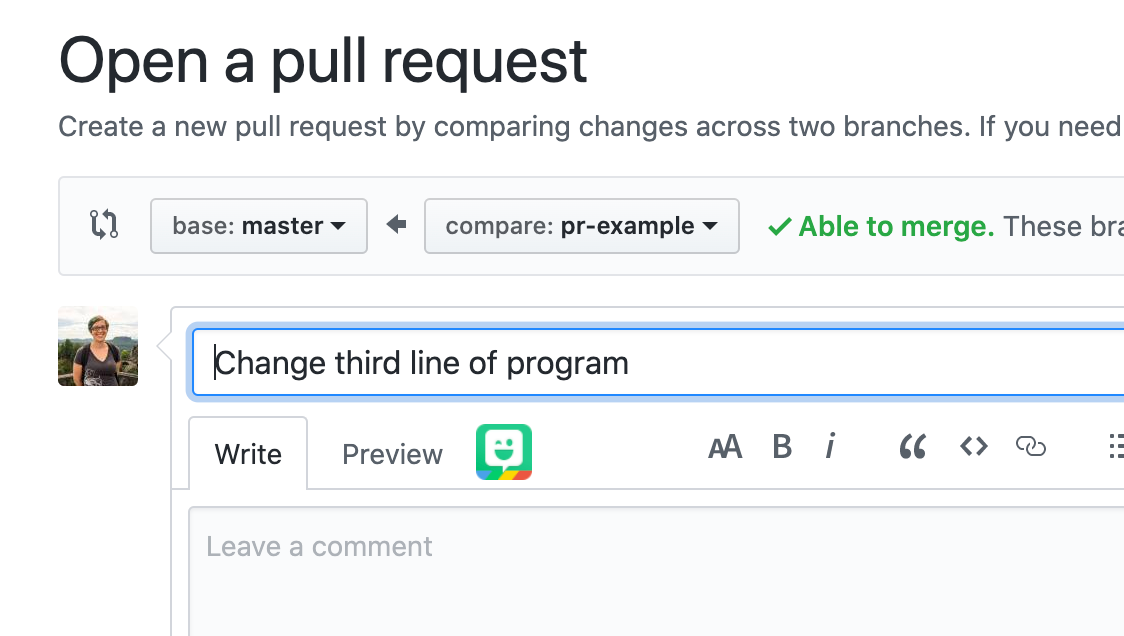 Creating a pull request on GitHub
Note that we are comparing branches. Here we are requesting to add the changes from this branch (pr-example) into the master branch. But we could target any of the other branches in our repo. For now, just understand that master isn't the only branch you can "make a pull request against".
When you click "Create Pull Request", you'll see this screen:
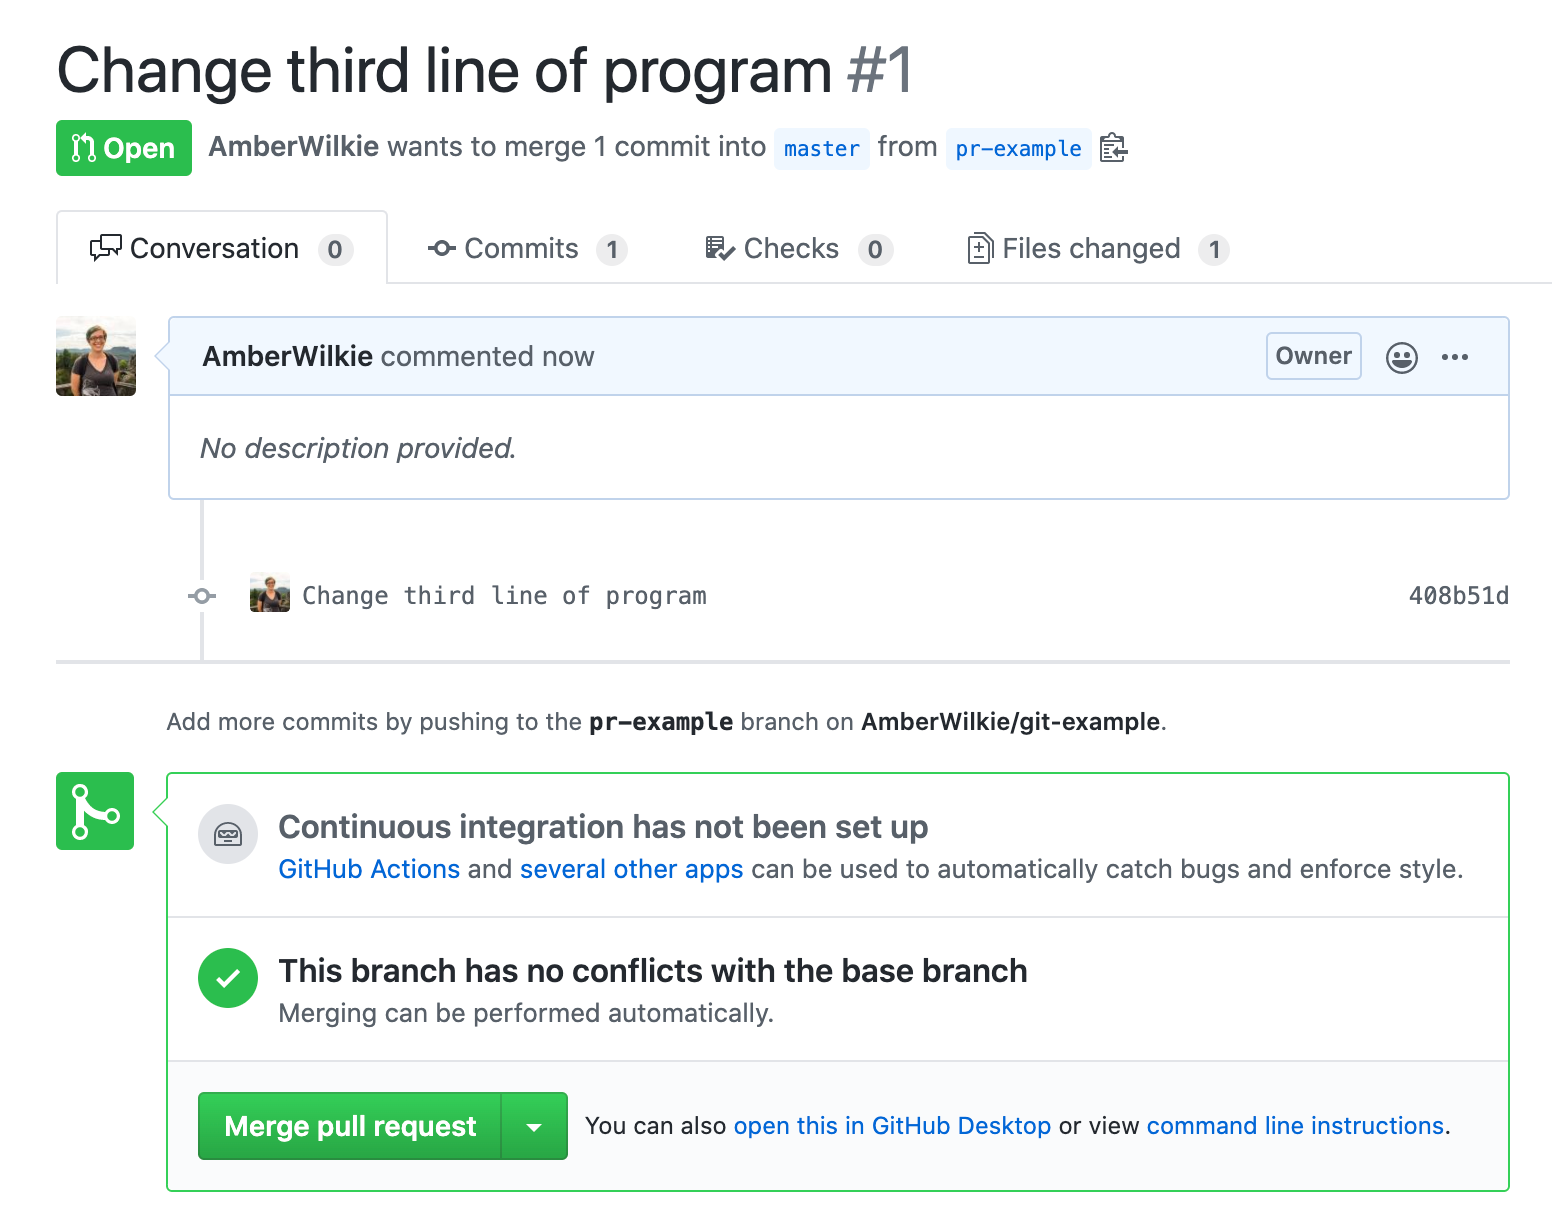 Pull request example
You can see all the commits in this branch (I have only one - "Change third line of program"), and you can also merge your pull request.
Remember how we could merge our code locally when we talked about Git? We can perform the same action with our cloud-hosted code on GitHub. If you click the green "Merge pull request" button, your changes will be merged into master.
git pull
The last command you need to know right now is git pull. If you merged your PR into the master branch on GitHub, there are now changes to the origin that you do not have yet on your local computer. If you check out the master branch, then git pull origin master, the changes you have just merged will now be on your local computer.
➜  git-example git:(master) git pull origin master
From https://github.com/AmberWilkie/git-example
 * branch            master     -> FETCH_HEAD
Updating 67627dd..38ad2da
Fast-forward
 git.js | 2 +-
 1 file changed, 1 insertion(+), 1 deletion(-)
That "Fast-forward" refers to our local master branch "catching up" with the origin branch on GitHub. We have completed the circle:
- Local changes
- Push to GitHub and make PR
- Merge PR into master
- Pull master to local computer
Once you are comfortable with these steps, you will be 80% of the way to mastering Git and GitHub!