

Modern web pages are dynamic. This means we need a suitable and convenient way to modify and manipulate a web document's structure.
This modification in an HTML document, for instance, usually takes the form of creating, adding, or removing elements in the document.
In this article, you'll learn what the Document Object Model (DOM) is, a bit about its history, and how you use it to manipulate web documents, especially HTML documents.
What is the Document Object Model (DOM)?
The DOM is a web interface, developed and released by the World Wide Web Consortium (W3C). This organization was founded to establish standards for the World Wide Web.
The DOM is a web API that is language-neutral. This means that you can implement and adopt it in any programming language.
The DOM represents the structural pieces of a web document as objects that can be accessed and manipulated. In other words, the DOM allows you as a software developer to do the following:
Create and build web documents.
Navigate the structure of web documents.
Add, modify, or delete elements and content within web documents.
History of the DOM
The history of the DOM is relative to JavaScript and JScript as the first widely used scripting languages. These languages helped make web pages interactive.
Prior to the development of a standard DOM specification by the W3C, JavaScript and JScript had different ways of enabling access to manipulating HTML documents.
These limited methods and interfaces that let you manipulate HTML documents in this way became the DOM Level 0.
In 1998, the W3C completed its draft of the first standard DOM specification, which became the recommended standard for all browsers. This standard DOM specification became DOM Level 1. The DOM level 1 provided a comprehensive model for manipulating both HTML and XML documents.
In 2000, the W3C released DOM Level 2, which introduced methods such as getElementById(), as well as a standardized event model and support for XML namespaces and CSS.
The DOM Level 3, released in 2004, added support for XPath and keyboard event handling. And in late 2015, the latest DOM specification, DOM Level 4, became a published standard.
What is the DOM Tree?
The structural representation created by the DOM is very much like a tree. It has several objects in it known as nodes.
The browser uses the DOM tree representation it builds from an HTML document to determine what to render on a web page. For example, a visual representation of a DOM tree will look like this:

The DOM Tree
The HTML document of the above DOM tree looks like this:
<!DOCTYPE html>
<html lang="en">
<head>
    <meta charset="UTF-8">
    <meta http-equiv="X-UA-Compatible" content="IE=edge">
    <meta name="viewport" content="width=device-width, initial-scale=1.0">
    <title>TITLE</title>
    <link rel="stylesheet" href="style.css">
</head>
<body>
    <div>
        <h1>HELLO WORLD</h1>
    </div>
    <a href="link text">Document Object Model</a>
</body>
</html>
Nodes vs Elements in the DOM
Often, developers confuse nodes with elements. So we should distinguish between the two early in this article to avoid confusion.
Nodes are all the components a web page document is made up of. In other words, a web page is collection of nodes.
An element is a type of node within a document. For instance, the DOM property nodes.childNodes when used on a parent node will return all the different nodes contained within that specified parent node.
In the example below, the childNodes property is used on the <body> element node of the HTML document given above:
//javascript content

//select the <body> element node with the DOM method querySelector
const body = document.querySelector('body')
//select the children nodes with the <body> element node with the DOM property node.childNodes
const childrenNodes = body.childNodes
//console log the children nodes
console.log(childrenNodes)//NodeList(5) [text, div, text, a, text]
Notice that there are five items in the nodeList. This is because we have another type of node, the text nodes, different from the element nodes within the <body> element node.
To investigate this further, go through the following steps in your console:
Click on the dropdown icon just before "nodeList".
Select the text node by clicking on the dropdown icon before "test".
Check for the textContent option within the list options in the dropdown.
If you follow the above instructions, you will see that the test content of the first text node is "/n ". This is a text node indicating a new line after the <body> element node, the <div> element node, and the <a> element node.

Relationships Between Nodes in the DOM Tree
The nodes in the DOM tree have a hierarchical relationship with each other in the DOM tree. They are defined by their position relative to each other in the DOM tree.
These are the node positions present in the DOM tree illustration above:
Root node: The root node is always at the apex of the DOM tree. In an HTML document, the root node is always the
<html>element.Child node: A child node is a node embedded inside another node. In the illustration given above, the
<head>and the<body>elements are the children of the<html>element.Descendant node: Any node positioned below another node in the hierarchical order is the descendant of the nodes positioned above it. For example, although the
<h1>element is not the direct child of the<body>element, it is a descendant of the<body>and root<html>elements.Parent node: Any node which has another node inside it is a parent node. For example, the
<body>element is the parent of the<div>and<a>elements in the above example. Note that only element type nodes can be a parent node.Sibling nodes: Nodes that are on the same level in hierarchical order in the DOM tree are sibling nodes. For example,
<div>and<a>elements in the above example are siblings.Leaf nodes: The text inside of elements are leaf nodes. This is because they cannot have children nodes of their own.
HTMLCollection vs nodeList
To manipulate the DOM tree, you need a way to select individual items or a collection of items in it.
You can use a programming language like JavaScript to select an item or a collection of items in the DOM tree by using a few methods provided by the DOM.
The methods getElementById() and querySelector() can select individual items. The methods getElementsByClassName(), getElementsByTagName(), or querySelectorAll() can select a collection of items.
In the DOM tree, we can either get an HTMLCollection or a NodeList based on the method used to select a collection of items. The getElementsByClassName() and getElementsByTagName() methods return HTMLCollections, while querySelectorAll returns a nodeList.
HTMLCollection and nodeList share some similarities and differences. They're similar in the following ways:
They are array-like objects.
They are collections of items.
They can be converted into an array by using the
Array.from()method.They both have a zero-based indexing.
They can both be iterated over with a for...loop.
They have a length property.
They do not have array methods available to them.
Below is a sample HTML document and JavaScript code to emphasize these similarities:
<!-- html documant -->

<!DOCTYPE html>
<html lang="en">
<head>
    <meta charset="UTF-8">
    <meta http-equiv="X-UA-Compatible" content="IE=edge">
    <meta name="viewport" content="width=device-width, initial-scale=1.0">
    <title>Document</title>
</head>
<body>
   <ul>
    <li>item one</li>
    <li>item two</li>
    <li>item three</li>
    <li>item four</li>
   </ul>

    <script src="main.js"></script>
</body>
</html>
//javascript content

const listItemsHtmlCollection = document.getElementsByTagName("li")
console.log(listItemsHtmlCollection) // HTMLCollection(4) [li, li, li, li]

const listItemsNodeList = document.querySelectorAll("li")
console.log(listItemsNodeList) // NodeList(4) [li, li, li, li]
You can see from the above that while the getElementsByTagName returns an HTMLCollection with items matching the <li> tag specified, the querySelectorAll returns a nodeList.
Now, let's use a for...loop to iterate on both collections:
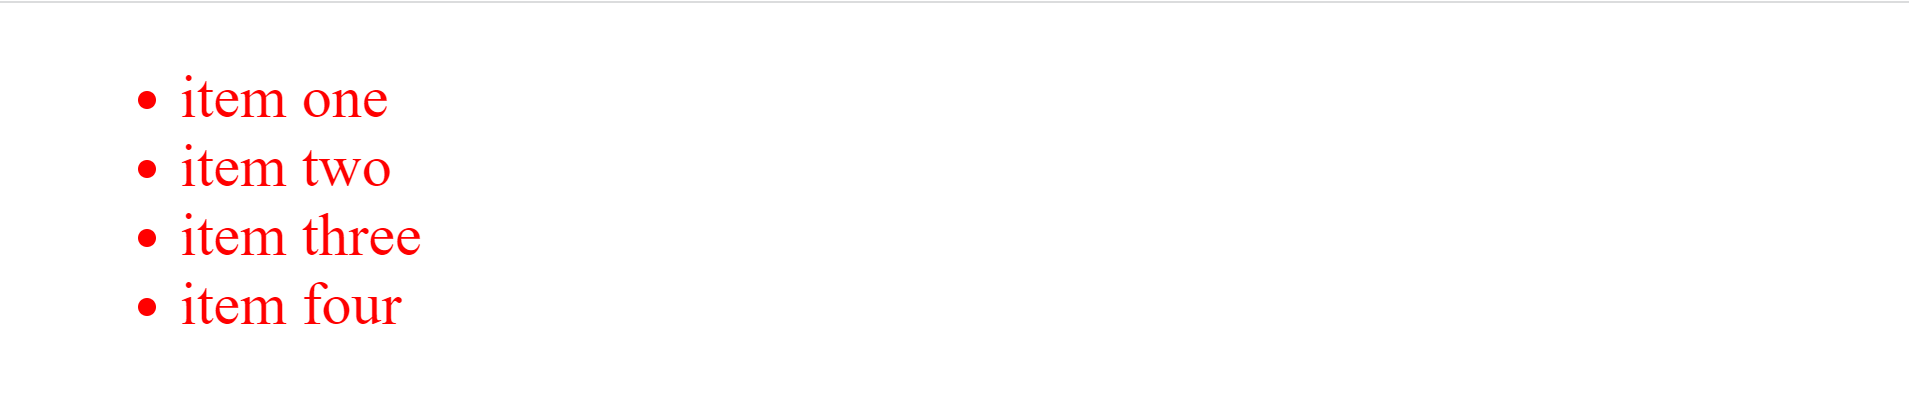
for(let i = 0; i < listItemsHtmlCollection.length; i++) {
    listItemsHtmlCollection[i].style.color = 'red'
}

for(let i = 0; i < listItemsHtmlCollection.length; i++) {
    listItemsHtmlCollection[i].style.color = 'red'
}
In both instances the color of the text will be changed to red.
Now let's delete the for...loop iteration and use an array method on map to iterate over both collections:
listItemsHtmlCollection.map( element => element.style.color = 'red' )
listItemsNodeList.map( element => element.style.color = 'red' )
To use the map array method successfully, you have to convert both items to an array with the Array.from() method like this:
Array.from(listItemsHtmlCollection).map( element => element.style.color = 'red' )
Array.from(listItemsNodeList).map( element => element.style.color = 'red' )
There are two major ways in which HTMLCollection and a nodeList differ from one another. They are:
A nodeList comes with some inbuilt methods and properties not available in an HTMLCollection. The methods include the
forEach()and theentriesmethods to iterate over a nodeList. The properties include the keys property and the value property.An HTMLCollection is always live, while a nodeList can either be live or static. A collection of nodes is live if a change in the DOM tree updates the collection automatically. If a change in the DOM tree does not affect the collection, then it is static. DOM changes can be the addition of a new node or the removal of an existing node. DOM methods such as
getElementById()andgetElementsByClassName()return HTMLCollections, which is always live. ThequerySelectorAll()method returns a static nodeList.
DOM HTML Methods
The DOM level 1 core, Dom level 2 core, and Dom level 3 core introduced several methods that allow web developers to manipulate the DOM tree. Some of these methods are the following:
The createElement() DOM method
The createElement() method creates an element of the type specified as its argument.
//html document

<!DOCTYPE html>
<html lang="en">
<head>
    <meta charset="UTF-8">
    <meta http-equiv="X-UA-Compatible" content="IE=edge">
    <meta name="viewport" content="width=device-width, initial-scale=1.0">
    <title>Document</title>
    <link rel="stylesheet" href="style.css">
</head>
<body>
   <ul>
    <li>item one</li>
    <li>item two</li>
    <li>item three</li>
    <li>item four</li>
   </ul>

    <script src="main.js"></script>
</body>
</html>
//javascript content

//select the parent element
const list = document.querySelector('ul')
//create a new element
const listItem = document.createElement('li')
//make the newly created element a child of the parent
list.appendChild('listItem')
console.log(list)
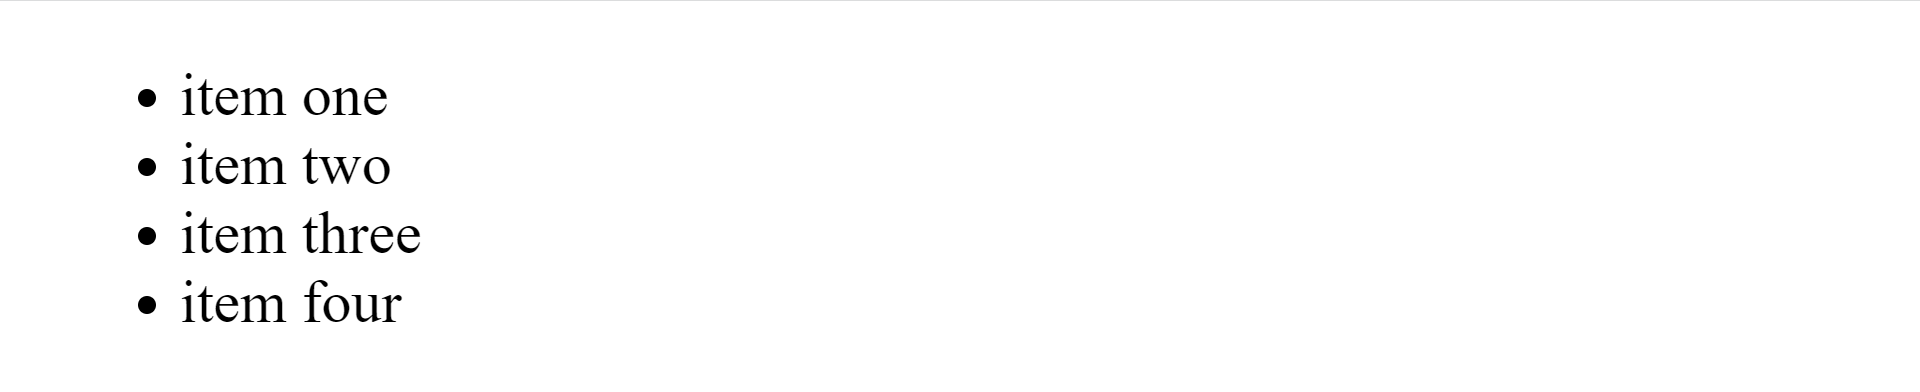
Now check the console for the list console logged. You'll see that there are five <li> elements now within the <ul> parent element.

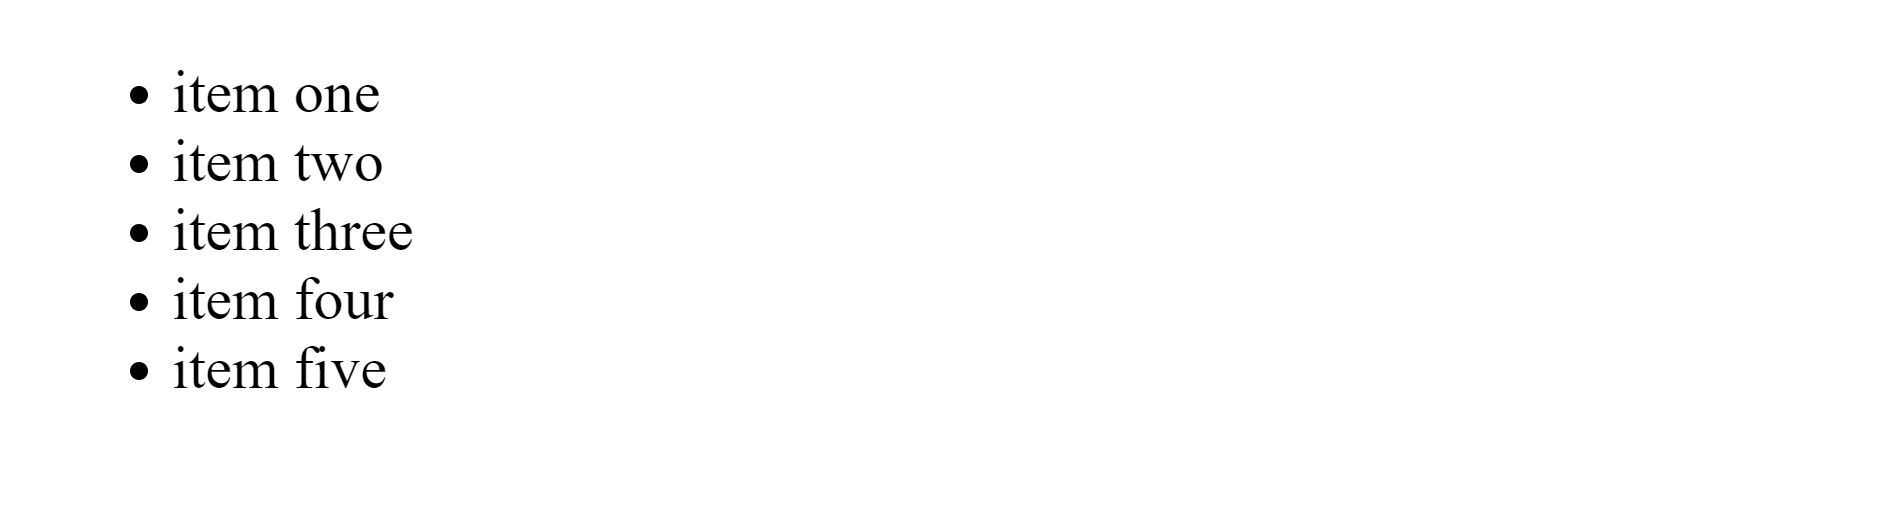
The createTextNode() DOM method
The createTextNode() method creates a text node with the string specified as its argument. Let's add text to the <li> element we created above.
//javascript content

const listText = document.createTextNode("item five")
listItem.appendChild(listText)
Now save your JavaScript file and reload your webpage.
The appendChild() DOM method
The appendChild() method adds a node to the end of the list of children of a parent node.
If the specified child is an existing node in the document, appendChild() moves it from its current position on the DOM tree to the new position. We used the method earlier to make our newly created <li> element a child of the <ul> element.
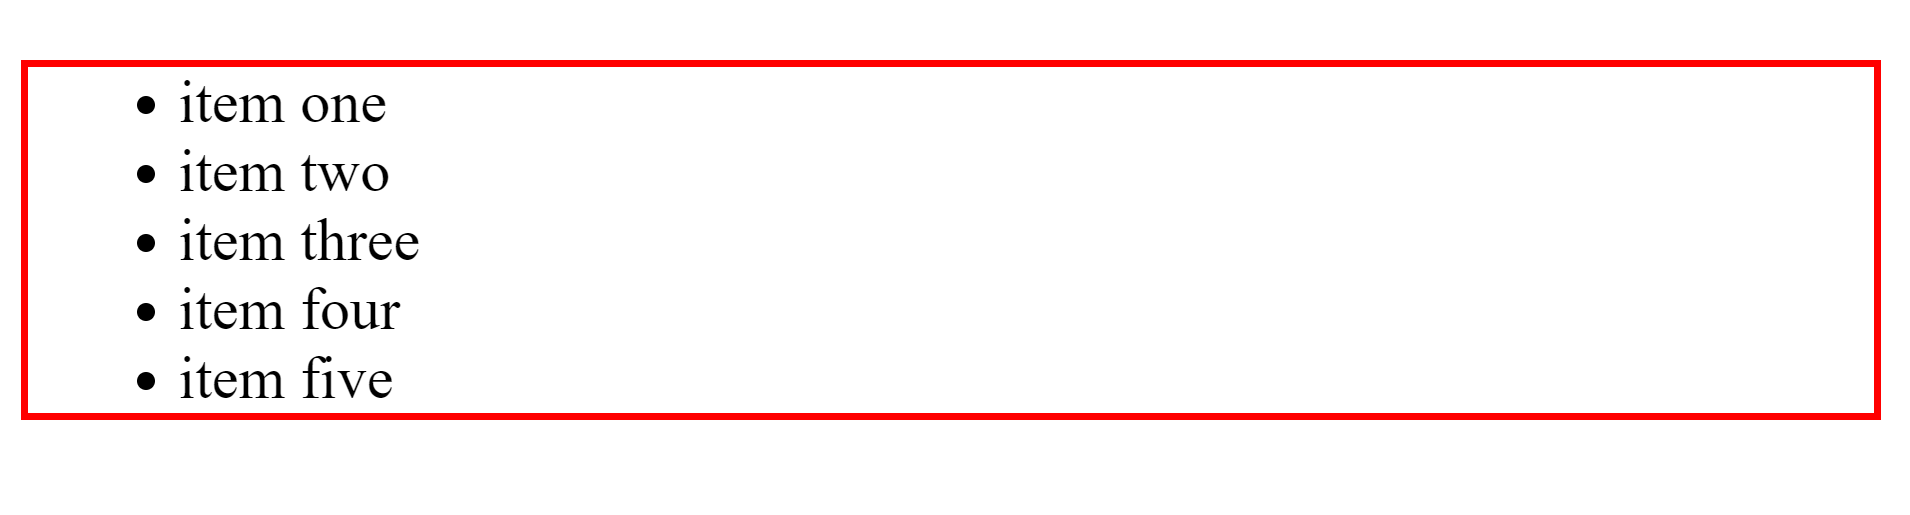
The getElementById() DOM method
This method selects and returns the element whose ID is specified within it as a argument. If no such element exists, the method returns null. Let's add an id attribute to our <ul> element in the HTML document and give it a red border.
//html document

<!DOCTYPE html>
<html lang="en">
<head>
    <meta charset="UTF-8">
    <meta http-equiv="X-UA-Compatible" content="IE=edge">
    <meta name="viewport" content="width=device-width, initial-scale=1.0">
    <title>Document</title>
    <link rel="stylesheet" href="style.css">
</head>
<body>
   <ul id="ulList">
    <li>item one</li>
    <li>item two</li>
    <li>item three</li>
    <li>item four</li>
   </ul>


    <script src="main.js"></script>
</body>
</html>
//javascript content

const ulList = document.getElementById("ulList")
ulList.style.border = '2px solid red'
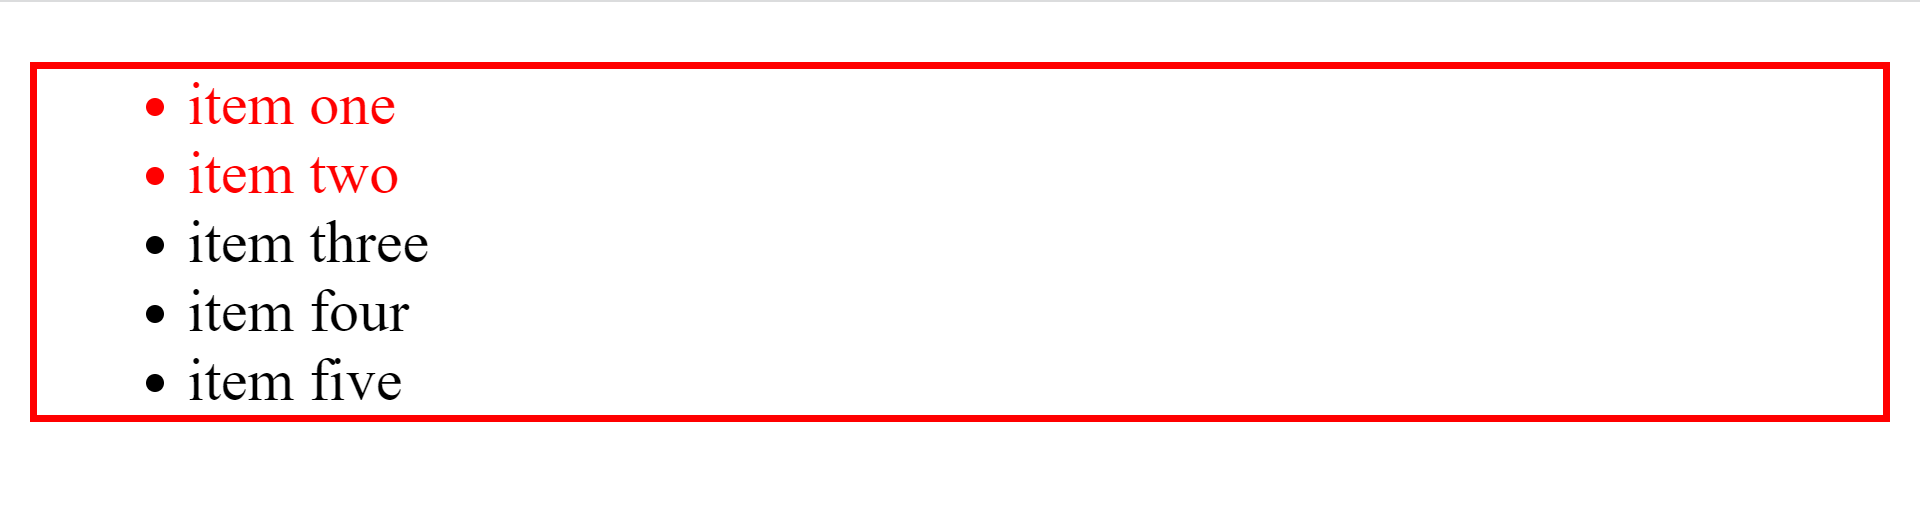
The getElementsByClassName() DOM method
The getElementsByClassName() method selects all elements with the specified class name and returns them as an HTMLCollection in the order they appear on the DOM tree.
You can access individual elements in the HTMLCollection by their index number. Let's add a class attribute to the first two <li> elements in our HTML document and change their text color to red like this:
//html document

<!DOCTYPE html>
<html lang="en">
<head>
    <meta charset="UTF-8">
    <meta http-equiv="X-UA-Compatible" content="IE=edge">
    <meta name="viewport" content="width=device-width, initial-scale=1.0">
    <title>Document</title>
    <link rel="stylesheet" href="style.css">
</head>
<body>
   <ul id="ulList">
    <li class="itemOneAndTwo">item one</li>
    <li class="itemOneAndTwo">item two</li>
    <li>item three</li>
    <li>item four</li>
   </ul>


    <script src="main.js"></script>
</body>
</html>
//javascript content

//select by elements one and two by their class name
const itemOneAndTwo = document.getElementsByClassName("itemOneAndTwo")
//change text color to red with use of index
itemOneAndTwo[0].style.color = 'red'
itemOneAndTwo[1].style.color = 'red'
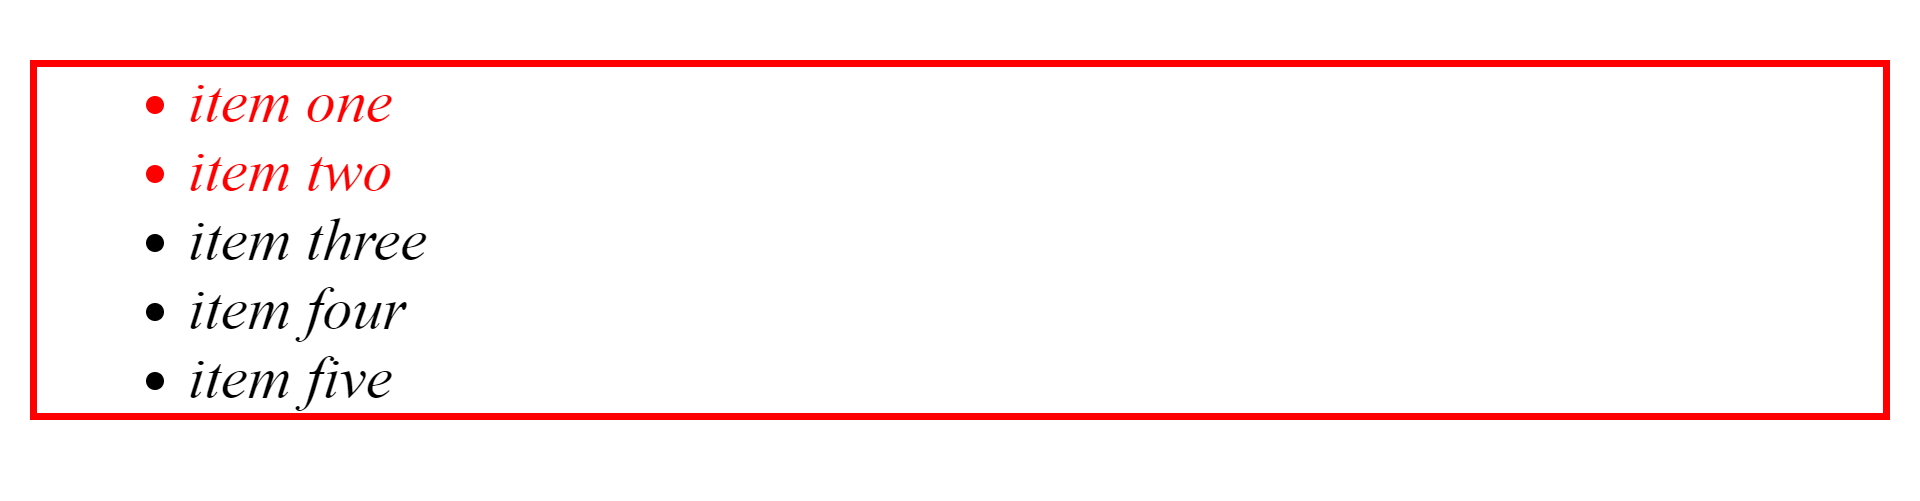
The getElementsByTagName() DOM method
The getElementsByTagName() method returns an HTMLCollection of all the elements with the tag name specified as its argument, in the order they appear on the DOM tree.
Let's select the <li> elements with the getElementsBytagName() method and change their font style to italic.
//javascript content

const liTags = document.getElementsByTagName("li")
for(let i = 0; i < liTags.length; i++) {
    liTags[i].style.fontStyle = 'italic'
}
The querySelector() DOM method
The querySelector() method accepts any CSS string selector as an argument. It then uses the specified selector to select the first within the document that matches that specified selector.
Let's change select our first two <li> elements with the querySelector() method and change their text color back to black.
//javascript content

const querySelectItem = document.querySelector("itemOneAndTwo")
querySelectItem.style.color = 'black'
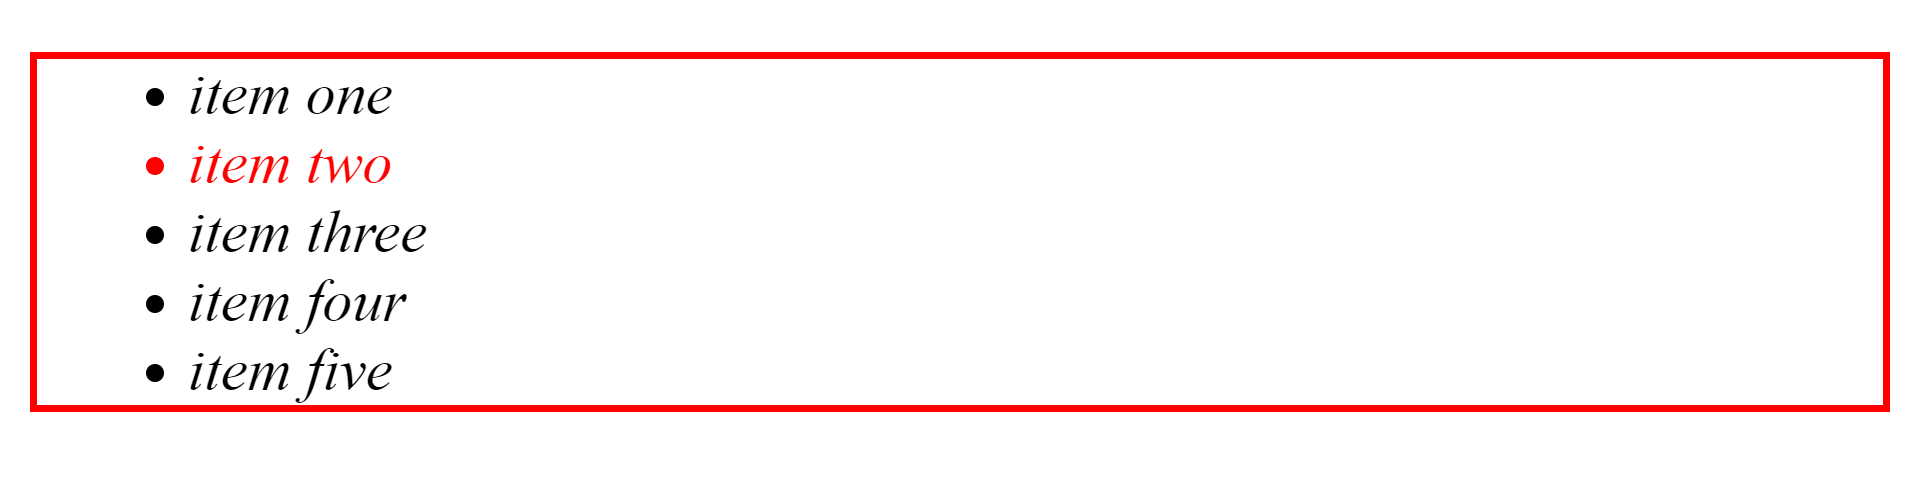
Notice that only the first list item has had its color changed to black.
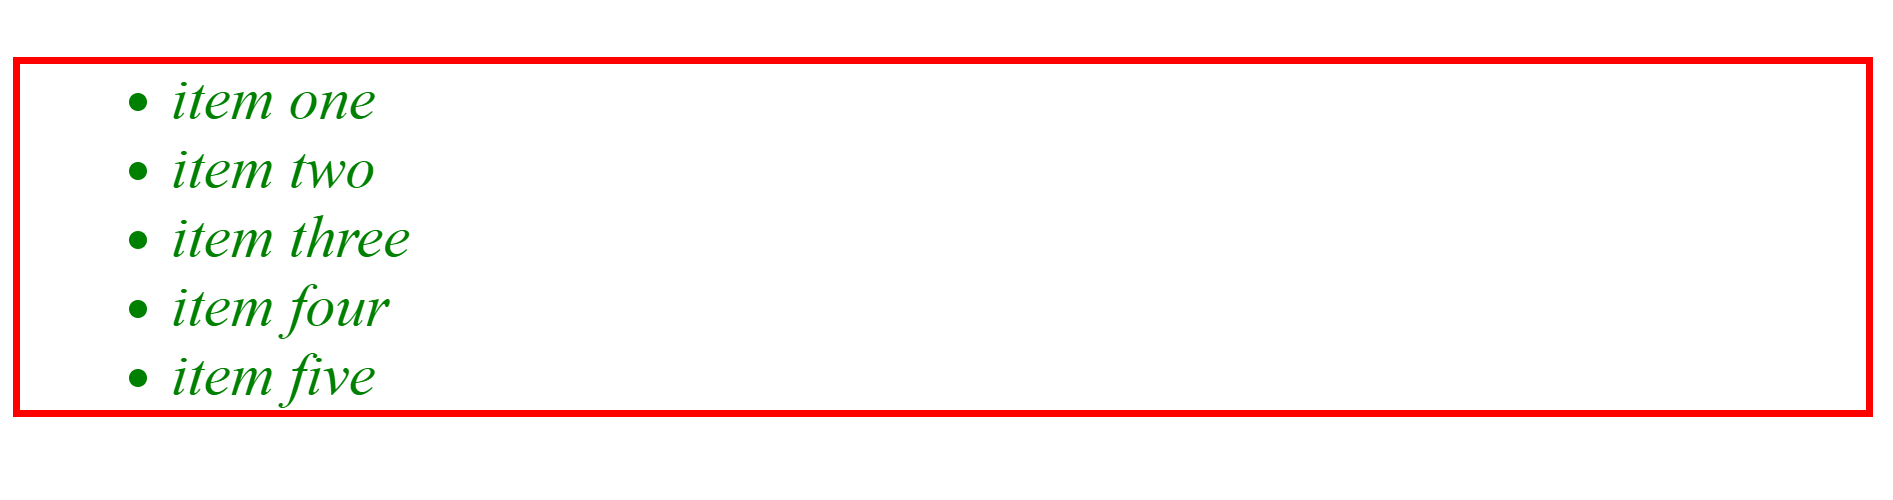
The querySelectorAll() DOM method
The querySelectorAll() method, just like the querySelector method, accepts any CSS string selector as its argument. It then uses the specified CSS string selector to select all elements that match that specified selector, put them in a nodeList, and return that nodeList.
Now, let's use it to change all the text in out list items to green.
//javascript content

const querySelectAllItems = document.querySelectorAll("li")
for(let i = 0; i < querySelectAllItems.length; i++) {
    querySelectAllItems[i].style.color = 'green'
}
The setAttribute() DOM method
The setAttribute() method adds a new attribute name to an element. If an attribute with that name is already present in the element, its value will change to that of the value set in the argument.
The method accepts two arguments. The first argument is the name of the attribute you want to create. The second argument is the value to set on the attribute, which is always a string.
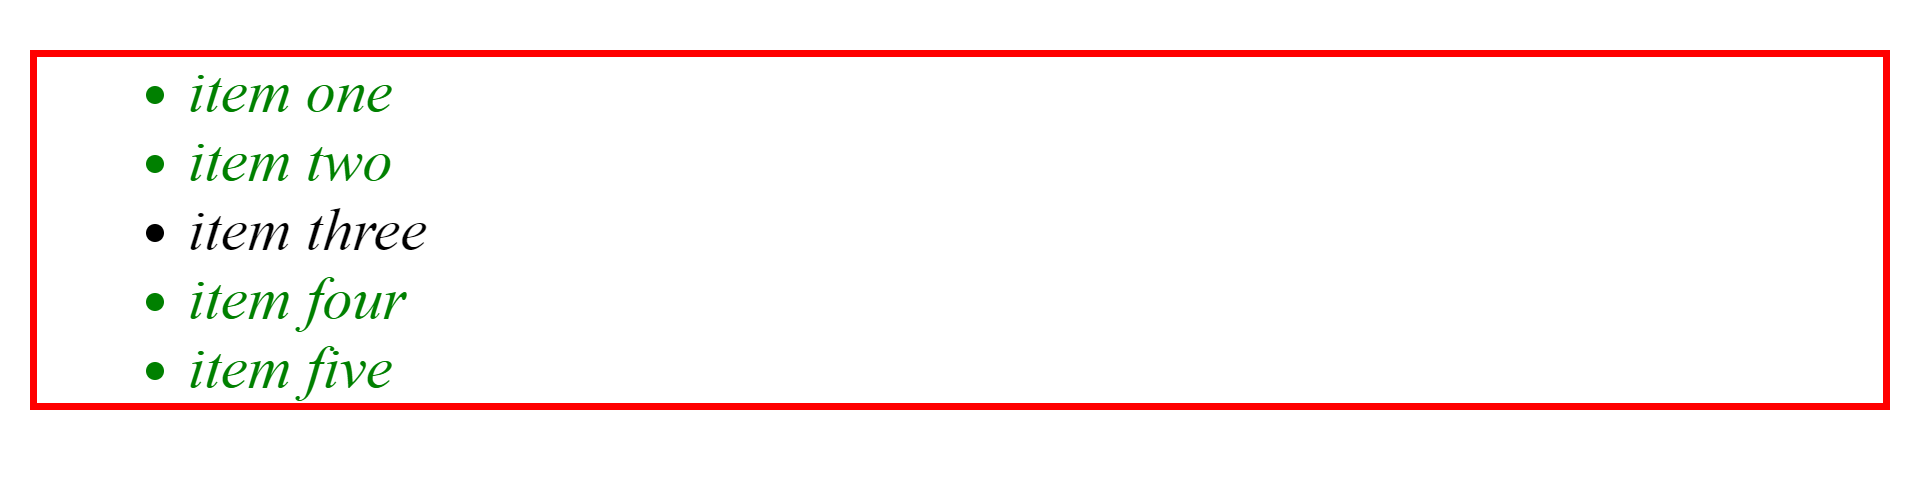
Let's use it to give our third item a class attribute and change the text color to black.
//javascript content

const itemThree = querySelectAllItems[2]
itemThree.setAttribute("class", "attributeValue")
const attributeValue = document.querySelector('.attributeValue')
attributeValue.style.color = 'black'
The removeAttribute() DOM method
The removeAttribute() method removes a specified attribute. It takes in the name of the attribute to be removed as its argument. Let's remove the id attribute from the <ul> parent element and use the removed id to removed its red border.
//javascript content

//remove attribute
ul.removeAttribute('id')
ul.style.border = 'none'
Now save your JavaScript file and reload your web page. Notice that the borders are still there. If you check the console you will see an error message stating that ul is no longer defined.
The contains() DOM method
The contains() method returns true if a node is a descendant of a node and returns false otherwise.
<--HTML document-->
<body>
    <h1>Heading</h1>
</body>
//javascript content
const body = document.querySelector('body')
const h1Element = document.querySelector('h1')
console.log( body.contains(h1Element) ) // true
The item() DOM method
The item() method returns the item specified at the index specified as its argument when used on a collection.
<--HTML document-->
<body>
    <p>Paragraph</p>
    <p>Paragraph</p>
</body>
//javascript content
const pElements = document.querySelectorAll("p")
console.log(pElements.item(0)) // <p></p>
The hasChildNodes() DOM method
The hasChildNodes method returns true if the element it is called on has child nodes within it and returns false otherwise.
<--HTML document-->
<body>
    <p>Paragraph</p>
    <p>Paragraph</p>
</body>
//javascript content

const body = document.querySelector("body")

console.log(body.hasChildNodes()) // true
What are DOM Events?
To make our web page logically interactive by initiating automatic responses or incidents on the web page, we need Events.
DOM events are:
actions or occurrences that happen in the system you are programming, which the system tells you about so your code can react to them. (Source: MDN)
A common example of an event is when a user clicks a submit button in a form, which then submits the data input by the user as a response to the click.
Another example is when a user clicks on a menu icon, which then triggers a drop-down navigation or options.
You can use scripting languages such as JavaScript to register event handlers or listeners on elements inside the DOM tree, which runs when the specified event fires.
An event handler is a:
block of code (usually a JavaScript function that you as a programmer create) that runs when the event fires. When such a block of code is defined to run in response to an event, we say we are registering an event handler. (Source: MDN)
Examples of events used on elements in the DOM tree include:
click: A click event is a mousedown or mouseup over an element on a webpage.
keypress: A keypress event occurs when keys on the keyboard are pressed.
mouseover: A mouseover event occurs when the pointing device is moved onto an element.
dblclick: A dblclick occurs when there is a double-click event over an element on a webpage.
submit: A submit event occurs when a form is submitted.
Conclusion
The DOM is the backbone of modern web dynamism. It represents every piece of a web document as an object and provides programming languages with the necessary methods to manipulate and modify each piece.
If you enjoyed this write-up, you should give me a shoutout.