
By Ankit Sharma
Introduction
Angular has released its latest version, Angular 7.0. In this article, we will explore the following points:
- What is new in Angular 7.0
- Creating your first Angular 7.0 application using Angular CLI
- How to update your existing Angular application to Angular 7.0
What’s new in Angular 7.0?
- While creating a new Angular application, the Angular CLI will prompt the user to select if they want to add features like Angular routing or the format of the stylesheet they want to use in their application
- Angular 7.0 applications will use the Bundle Budget feature of Angular CLI. This will warn developers if the application bundle size exceeds the predefined limit. The default value for the warning is set to 2MB, and for errors it is 5MB. This value is configurable and can be changed from the
angular.jsonfile. This feature enhances the application’s performance considerably. The Component Dev Kit (CDK) of Angular Material also receives some new features as part of this update. The two newly added feature of the CDK are:
Virtual Scrolling If you are trying to load a large list of elements, then it can affect the application’s performance. The
<cdk-virtual-scroll-viewport>tag can be used to load only the visible part of the list on the screen. It will render only the items that can fit on the screen. When a user scrolls through the list then the DOM will load and unload the elements dynamically based on the display size. This feature is not to be confused with infinite scrolling which is altogether a different strategy to load elements. You can read more about Virtual Scrolling here.Drag and Drop
We can easily add the drag and drop feature to an item. It supports features such as free dragging of an element, reordering items of a list, moving items between list, animation, adding a custom drag handle, and restricted dragging along X or Y axis. You can read more about Drag and Drop here.The
mat-form-fieldwill now support the use of the native select element. This will provide enhanced performance and usability to the application. Read more about this feature here.Angular 7.0 has updated its dependencies to support Typescript 3.1, RxJS 6.3 and Node 10.
Now we will proceed to create our first Angular 7 application.
Prerequisites
Installing Node.js will also install npm on your machine. After installing Node.js, open the command prompt. Run the following set of commands to check the version of node and npm installed on your machine.
- node -v
- npm -v
Refer to the image below:

Installing Angular CLI
Angular CLI is the Command Line interface for Angular. It helps us to initialize, develop and maintain Angular applications easily.
To install Angular CLI, run the following command in the command window:
npm i -g @angular/cli
This will install Angular CLI 7.0 globally in your machine. Refer to the image below:

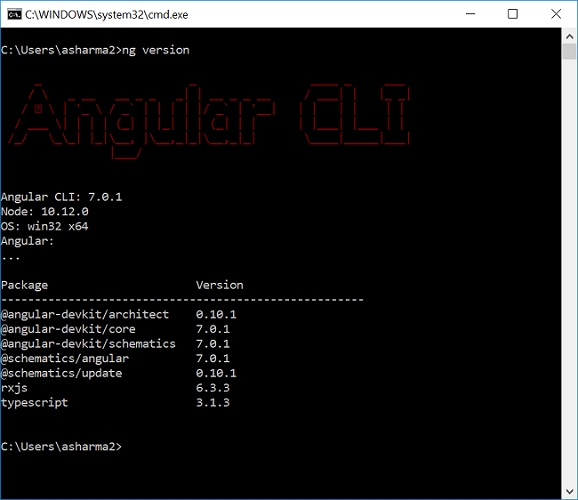
To check the version of angular CLI installed in your machine, run the following command:
Refer to the image below:
Create the Angular 7 app
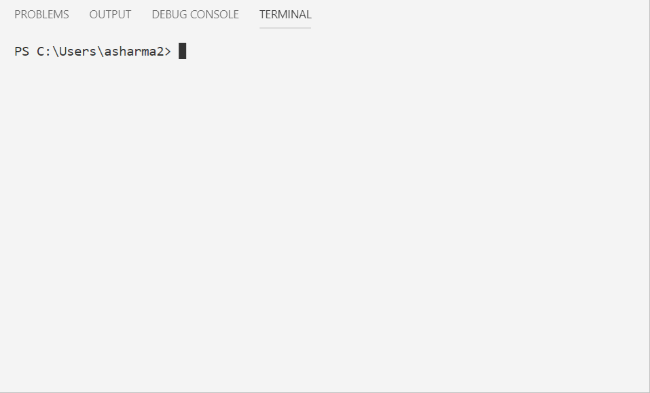
Open Visual Studio Code and navigate to View >> Terminal. This will open the VS code terminal window. Alternatively, you can also use the keyboard shortcut ctrl+` to open the terminal window.
Type the following sequence of commands in the terminal window. These commands will create a directory named “ng7Demo”. Then create an Angular application with the name “ng7App” inside that directory.
- mkdir ng7Demo
- cd ng7Demo
- ng new ng7App
As you run the ng new command, the Angular CLI will ask you to make selections in the following two options:
- Would you like to add Angular routing? (y/N)
- Which stylesheet format would you like to use?
Once you select the options and hit enter, the Angular 7.0 application will be created.
Refer to the below Gif for better understanding.
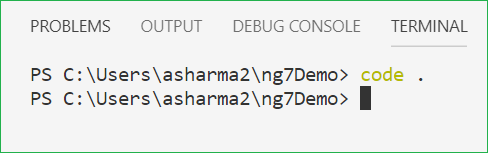
Once the application is created successfully, run the following command to open the project:
- code .
Refer to the image below:
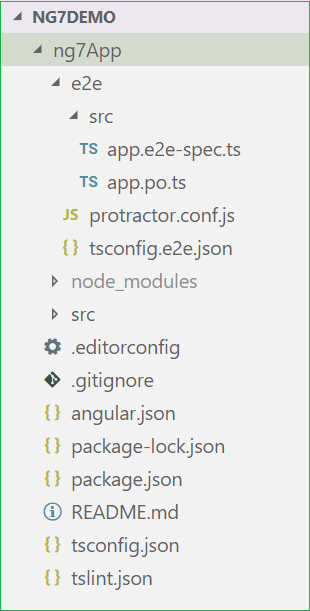
This will open the code file of our application in a new VS Code window. You can see the following file structure in Solution Explorer.
Open the package.json file and you can observe that we have the latest Angular 7.0.0 packages installed in our project.
{
  "name": "ng7-app",
  "version": "0.0.0",
  "scripts": {
    "ng": "ng",
    "start": "ng serve",
    "build": "ng build",
    "test": "ng test",
    "lint": "ng lint",
    "e2e": "ng e2e"
  },
  "private": true,
  "dependencies": {
    "@angular/animations": "~7.0.0",
    "@angular/common": "~7.0.0",
    "@angular/compiler": "~7.0.0",
    "@angular/core": "~7.0.0",
    "@angular/forms": "~7.0.0",
    "@angular/http": "~7.0.0",
    "@angular/platform-browser": "~7.0.0",
    "@angular/platform-browser-dynamic": "~7.0.0",
    "@angular/router": "~7.0.0",
    "core-js": "^2.5.4",
    "rxjs": "~6.3.3",
    "zone.js": "~0.8.26"
  },
  "devDependencies": {
    "@angular-devkit/build-angular": "~0.10.0",
    "@angular/cli": "~7.0.1",
    "@angular/compiler-cli": "~7.0.0",
    "@angular/language-service": "~7.0.0",
    "@types/node": "~8.9.4",
    "@types/jasmine": "~2.8.8",
    "@types/jasminewd2": "~2.0.3",
    "codelyzer": "~4.5.0",
    "jasmine-core": "~2.99.1",
    "jasmine-spec-reporter": "~4.2.1",
    "karma": "~3.0.0",
    "karma-chrome-launcher": "~2.2.0",
    "karma-coverage-istanbul-reporter": "~2.0.1",
    "karma-jasmine": "~1.1.2",
    "karma-jasmine-html-reporter": "^0.2.2",
    "protractor": "~5.4.0",
    "ts-node": "~7.0.0",
    "tslint": "~5.11.0",
    "typescript": "~3.1.1"
  }
}
Execution Demo
The name of our Angular application is ng7App which is inside the ng7Demo directory.
So, we will first navigate to our application using the below commands.
- cd ng7Demo
- cd ng7App
Now, we use the following command to start the web server.
- ng serve
Refer to the image below:
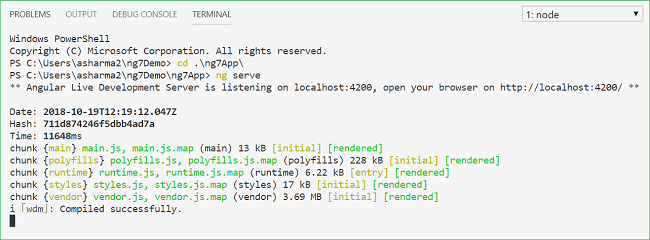
After running this command, you can see that it is asking to open _http://localhost:4200_ in your browser. So, open any browser on your machine and navigate to this URL. Now, you can see the following page.

How to upgrade to Angular 7
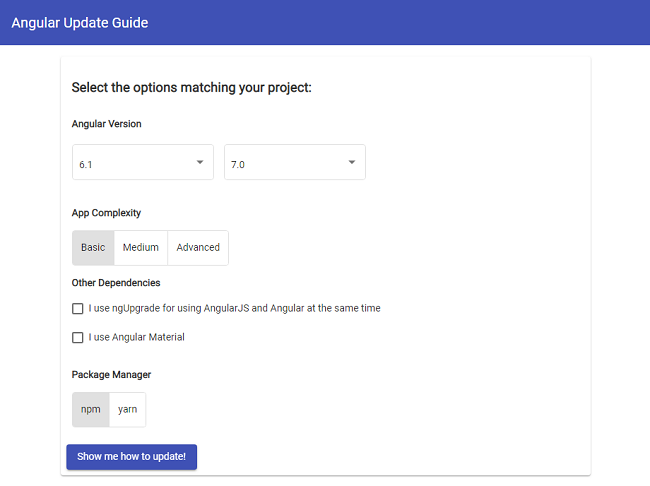
The angular team has provided an Angular Update Guide to ensure the smooth upgrade of angular versions. Navigate to https://update.angular.io/ to access it. It is a self-explanatory and easy to use application. It will show you the steps that you need to follow before updating, during the update and after the update. Refer to the image below:
If you want to update your application from Angular 6 to Angular 7 then run the following command in the project folder:
ng update @angular/cli @angular/core
Conclusion
We have learned about the new features of Angular 7.0. We also installed Angular CLI 7.0. To create and execute an Angular 7.0 app we have used Angular CLI and VS Code. We also explored the method to upgrade an existing application to Angular 7.0.
See Also
- Getting Started With Angular 6.0
- Understanding Angular 6 Animations
- Getting Started With Angular 5 Using Visual Studio Code
- CRUD Operations With ASP.NET Core Using Angular 5 And ADO.NET
- ASP.NET Core — CRUD Using Angular 5 And Entity Framework Core
- ASP.NET Core — Using Highcharts With Angular 5
Originally published at https://ankitsharmablogs.com/