

If you're a front-end engineer, you've probably faced weird z-index bugs and ended up spending hours trying to fix them.
Change one property here and you have your header flying away from where it was meant to be.
Well, we can attribute this to the fact that debugging CSS can be quite hard and most times we are doing so blindly. We change properties expecting to see the bugs magically get resolved, but they don't.
Unlike JavaScript that yells at you, giving you hints about what you are doing, CSS is just watches you do rubbish and quietly hopes you figure it out.
One of the many ways to get really good at using CSS is by researching and understanding the mechanism behind some CSS properties you use every day.
This will give you a clear and concise technical know-how about how to implement certain complicated designs. It'll also give you insight on how to resolve some difficult unexplainable bugs you might come across while writing code.
The Problem with the Z-index Property in CSS
We can all agree that one of the weirdest, most confusing, and not-so-straightforward CSS properties is the z-index.
When I started learning CSS, I was told by certain instructors that you use z-index when you want a certain DOM (Document Object Model) element to be on top of another. Sounds simple, right?
So I thought – but life experience has a way of letting us know that things aren't always as easy as we thought they'd be.
Not understanding how the z-index property actually works behind the scenes led me down a frustating rabbit hole of having unexplainable bugs relating to z-index. So I started cranking up the z-index value to enormous numbers like the infamous 99999 to see if I could get the desired result.
Sometimes this works, but other times it doesn't which can be the most annoying thing because it worked the other time.
Another situation is when it works fine at first, but then as you progress in your work, you face yet again the same problem on a different part of your app. So this has you doing the default – cranking up the new z-index up to 99999999, an even bigger number than the previous one.
Deep down in your heart as a professional developer, you know this is not right. It is a mess (and personally, I hate messy CSS code). But you also know you have no idea how to approach the problem that will lead to a permanent fix and a win in your z-index wars.
If you are reading this article and want to understand the z-index once and for all, you're in the right place.
I'm about to help demistify the z-index for you. By the time you're done reading through this guide, I hope you'll know how to fix tough z-index bugs and how the z-index actually works. You'll also have a deeper and more fundamental understanding of how browsers render DOM elements and how it relates to the z-index.
Ready? Let's dive right in.
What is Stacking Context in CSS?
Before we even start to understand z-index in all its glory, it'll be to your benefit if you can, for a moment, pretend like you don't know anything about z-index. Forget what you know about it, because from here on, your mental model about z-index is about to change.
There is no smoke without fire, and the fire that powers the z-index property is a concept called stacking context. In the next section, we are going to go over the meaning of this term, what it actually means in practice, how it works, and how it relates to z-index.
The stacking context is simply a term we use to define how the browser decides which elements in the DOM come first and which to "render" on top.
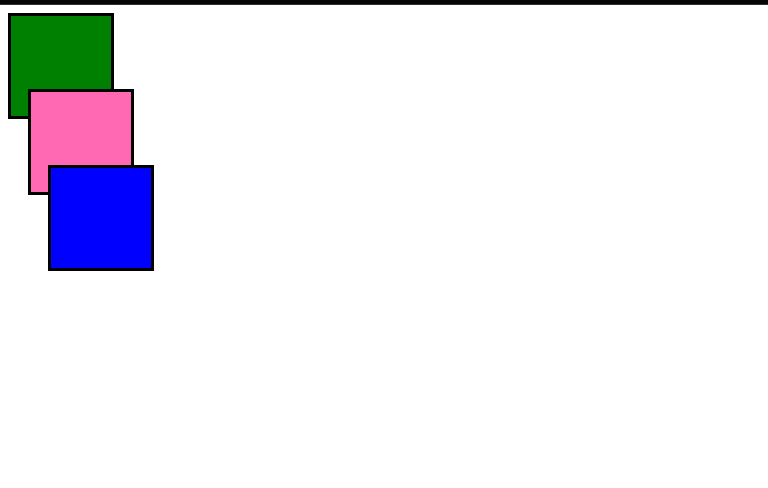
When we start writing a block of HTML code, one element after the other, the natural way the browser decides which element comes on top is by checking the order of the DOM elements. See the codepen playground below for more details:
<div class="green-box">  </div>
<div class="pink-box">  </div>
<div class="blue-box">  </div>
div{
  width: 100px;
  height: 100px;
  border: 3px solid;

}

.green-box{
  background-color: green;
}
.pink-box{
  background-color: hotpink;
  margin-top: -30px;
  margin-left: 20px;
}
.blue-box{
  background-color: blue;
  margin-top: -30px;
  margin-left: 40px;
}
From the example above, you can see how the browser stacks DOM elements. It does so by simply checking the DOM order of each element, and rendering the latter element on top of the former element.
Think of it this way – how do you stack books? The last one always appears on top, the first one is always the one at the bottom. When you see some stacked books, you already know that the one at the bottom of the stack was the first book to be added to the stack (it started the stack) and the one on the top of the stack was the last to be added to the stack.
In the example above, the blue box is on top because it is the last on the stack as interpreted by the browser, while the green box is at the bottom of the stack because it is the first element in the DOM order.
 A pictorial representation of how the browser render DOM elements - shown as stacked books.
The process of the browser making the decision about which DOM element to be painted and rendered on top the other element is called the stacking context. Let's keep this in mind as we will make reference to this term during the rest of the article.
Whenever a stacking context gets created, it is a memo sent to the browser asking it to re-evaluate the DOM elements and render/stack them accordingly.
Now that we have seen and understood what a stacking context means and how the browser renders DOM elements, let's move to other CSS properties that have the ability to affect how the browser makes these decisions.
Positioned Elements in CSS
There is a rule of thumb I want you to always remember as you go about your daily battles with CSS, especially when working with z-index and the stacking context: "Positioned elements always come on top".
What does this mean? Let's find out below:
<div class="green-box">  </div>
<div class="pink-box">  </div>
<div class="blue-box">  </div>
div{
  width: 100px;
  height: 100px;
  border: 3px solid;

}

.green-box{
  background-color: green;
  position: relative;
}
.pink-box{
  background-color: hotpink;
  margin-top: -30px;
  margin-left: 20px;
}
.blue-box{
  background-color: blue;
  margin-top: -30px;
  margin-left: 40px;

}
Here it goes! What happened? In the previous Codepen snippet I shared above, we saw how the browser rendered the boxes. Because of thier DOM order, the green box was farther below the stack than it peers.
But now it is on top of the rest. From the result in the Codepen playground, we can clearly see that the green box is being rendered above the pink box. How?
 The green box being rendered on top of the rest of the other elements
Just like the rule of thumb clearly stated, setting the position property on any element in the DOM tells the browser to kindly re-do its calculations. Then, after those calculations, the browser decided to render the DOM element with the position property on top of any other elements regardless of their DOM order.
It is also worth mentioning that no matter the number of the z-index value we add for the other elements, they will never come on top of a positioned element. Yeah! I know you just had that euphoric revelation moment of "So this was the cause of my bug the other day at work".
You can play around with the playground by adding a z-index property to the other elements and adding a large value and see the result – take it up to 500 even. I assure you none of those elements will get placed on top of the positioned element.
Note: This doesn't apply to position: static. This is because position: static is the default positioned value assigned by CSS to all DOM elements. You can check it out by editing the playground above to have position: static.
You are probably thinking, "oh well, what if more than one element has the position property set. If you face this scenario, who wins the stacking context war?".
First I would like you to try it out. Try editing the playground above and setting the position properties on the two other elements.
When this happens, we have just evened all the elements by setting a position property. When the browser sees this, it returns to its default way of stacking these elements by following their DOM order. So it again renders the latter over the former just like how we stack up books. Check out the code snippet below to get a proper understanding.
<div class="green-box">  </div>
<div class="pink-box">  </div>
<div class="blue-box">  </div>
div{
  width: 100px;
  height: 100px;
  border: 3px solid;

}

.green-box{
  background-color: green;
  position: relative;
}
.pink-box{
  background-color: hotpink;
  margin-top: -30px;
  margin-left: 20px;
  position: relative;
}
.blue-box{
  background-color: blue;
  margin-top: -30px;
  margin-left: 40px;
  position: relative;

}

This is how stacking context works in the browser. Adopting this mental model is one of the fundamental ways of truly understanding how z-index works.
From the explanations above and the code snippets we saw, you might be wondering: if the z-index won't work when we try to use it when sibling elements have the position property set, how then do we even use it?
Well, what we just experienced is how the browser decides stacking context by default. z-index is simply a property that allows us to override this default value.
But that comes with some rules of its own. We'll explore this in the section below.
How to Use the Z-index Property
If we are looking to change how things work and opt-out from the default way of how the browser renders and stacks DOM elements, CSS has provided us with a property called z-index. And we can use it to achieve this.
First let's demisfity the almighty z-index property:
The z in z-index refers to the z-axis. z-axis represents the 3 dimensional part of an element.
x-axisis left and righty-axisis up and downz-axisis forward and backward
The mental model is that z-index works like 3D – elements with a higher z-index are elevated and pushed closer to a user's view in the browser so that it looks like they are over/in front of the rest of the other elements.
This is the same way 3D billboards work, by pushing images closer to us optically so that if feels almost as if the characters in these billboards are jumping out of the screen. The z-index shares the same concept with a 3D billboard.
Just like every other CSS property with default values, the default value for the z-index property is auto, which can be interpreted as zero.
When we are using z-index on any DOM element, adding a value of 1 or above is a direct command/signal that tells the browser to push that particular DOM element so that it sits right in front of its siblings.
For us to be able to use z-index effectively, there are some rules guiding how it works. Understanding and properly digesting how these rules apply is very important as it takes you one step closer to being free from the z-index struggle and uneccassary bugs. Check out the code snippet below:
<div class="green-box">  </div>
<div class="pink-box">  </div>
<div class="blue-box">  </div>
div{
  width: 100px;
  height: 100px;
  border: 3px solid;

}

.green-box{
  background-color: green;
  z-index: 6;
}

.pink-box{
  background-color: hotpink;
  margin-top: -30px;
  margin-left: 20px;
}
.blue-box{
  background-color: blue;
  margin-top: -30px;
  margin-left: 40px;
}
 Even after adding a big z-index value to the green box it still doesn't comes on top the pink box
Isn't it surprising that, after setting a z-index value of 6 (a relatively big number for z-index), stacking context doesn't change?
The expectation after doing this is to see the green box being rendered on top of the rest the the boxes (since of course we know that z-index is used to get one element to be on top of the rest).
But in this case it is not working. Moments like this will lead to endless frustration and pulling out of hair and the rhetorical question: "Why aren't you not working?" and eventually a bad day at work.
I introduce you to the first rule of z-index:
z-index only works with positioned elements.
Now, I want you to go edit the playground and set position: relative on the green box and see the result. Try it by editing the Codepen playground above.
If you did, you will immediately see that the green box is now being rendered on top and the browser has re-calculated the stacking context and rendered the DOM elements accordingly via the new information it received. Always remember this first rule. See the first rule in action below:
<div class="green-box">  </div>
<div class="pink-box">  </div>
<div class="blue-box">  </div>
div{
  width: 100px;
  height: 100px;
  border: 3px solid;

}

.green-box{
  background-color: green;
  z-index: 6;
  position: relative;
}
.pink-box{
  background-color: hotpink;
  margin-top: -30px;
  margin-left: 20px;
}
.blue-box{
  background-color: blue;
  margin-top: -30px;
  margin-left: 40px;
}
 After setting a position property on the green box, the z-index now works properly, rendering the green box on top.
Next stop is the second rule – but before we go into the details and understand what that rule does, I want to introduce you to a little bug. And I want you to see if you know what is happening and if you can resolve it.
If you can't, don't worry, as I will be explaining it in great detail below.
<body>
  <header> This is a header </header>
  <main> <p>Hello there I am the main </p>
    <button> Click me </button>

  </main>

</body>
@import url('https://fonts.googleapis.com/css2?family=Mulish:wght@200..900&display=swap');
body{
  font-family: 'Mulish', sans-serif;

}
header {
  background-color: hotpink;
  text-align: center;
  padding: 30px;
  position: relative;
  z-index: 2;
}

main {
  text-align: center;
  background-color: blue;
  color: white;
  padding: 30px;
  position: relative;
  z-index: 1;

}
button {
  margin: 0 auto;
  width: 90px;
  border: none;
  text-align: center;
  padding: 8px;
  background: white;
  box-shadow: 1px 2px 8px hsl(0deg 0% 0% / 0.25);
  border-radius: 6px;

  position: absolute;
  z-index: 999999;
  top: -12px;
}
From the code snippet above, we have seen yet another z-index issue that can lead to hours of debugging without even knowing what is wrong.
Going through the code, we can see that the button has a outrageous number as its z-index value, and yet it is not sitting on top of the header. This might make you take a step back and reflect on the first rule of z-index and say "But it is a positioned element, why is it not working?".
That brings us to the second rule of z-index:
A z-index property in an Isolated stacking context is not regarded outside the Isolated stacking context.
What does this mean? Let me break it down:
From the code above, we can see that the main has a position property and also a z-index property. The same thing applies to the header element – the browser has used this value and calculated the stacking context. Since the header has a higher z-index value, it rendered it on top. As simple as that.
Now, the button is a child of main that also has the position property set. It also a z-index set to even a higher number.
In reference to the second rule, since main has the z-index property which creates something called an isolated stacking context, the button element is not regarded when the browser tries to work up the new stacking context.
You can go ahead and remove the z-index property on the main element and see what happens.
If you did that, you likely saw that immediately the button was rendered on top of the header element.
This might be pretty confusing at first, but trust me – when you use it and pratice more with it, it'll stick. I have an analogy to help you create a mental model when you think of this second rule:
Captain analogy
In a plane, there are usually 2 pilots, both of whom are equally qualified to fly and captain an airplane. But only one of those 2 pilots are actually chosen to be the captain of that specific flight. As long as the chosen pilot is not missing, sick, or injured during the course of the flight, there is no need for the second pilot to assume being a captain.
But in a situation where something bad happens to the chosen pilot, the second pilot is allowed and mandated to be captain.
Use this same analogy on the main and button, main has already been assigned a captain by having the z-index property. Because of this, the z-index property of the button becomes useless not matter how big we bump up the numbers.
But once we take away the z-index property from the main , the button is now free to be the captain.
Incase you have forgotten what a stacking context means:
The stacking context is simply a term used to define how the browser decides which elements in the DOM comes first and which to "render" on top.
We have discussed extensively how stacking context works and how it's created, but below is a summary:
- Setting a position property (relative, fixed or absolute) on a DOM element.
- Setting the
z-indexproperty on a DOM element. - Setting
opacityto a value less than1. - Using the
isolationproperty. - Using the
transform,filter,clip-path, orperspectiveCSS properties.
This simply means that using any of the properties above tells the browser to calculate and see which DOM element should be rendered on top of the rest of the elements.
You can read more about how stacking context works on the MDN.
How to Debug the Z-Index
Before we wrap up this article, I want to introduce you to a new property that you can use alongside the z-index property. It helps you deal with stacking contexts in a more pleasant way.
I will do so by introducing a bug so we can see how to fix it. Check the codepen playground below to see:
<body>
  <header> This is a header </header>
  <main>
        <button> Click here to suscribe </button>
    <p>Hello there I am the main </p>
    <p>Lorem ipsum dolor sit amet consectetur adipisicing elit.   Reiciendis numquam sapiente veniam fugiat. Harum voluptatum est ab similique incidunt,Quae, amet rem. Minima vitae, accusantium corrupti dolorem perferendis qui magnam...[view the full code snippet on the codepen playground above</p>

  </main>

</body>
@import url('https://fonts.googleapis.com/css2?family=Mulish:wght@200..900&display=swap');
body{
  font-family: 'Mulish', sans-serif;

}
header {
  background-color: hotpink;
  text-align: center;
  padding: 30px;
  position: sticky;
  top: 0;
  z-index: 2;
}

main {
  text-align: center;
  background-color: blue;
  color: white;
  padding: 30px;
  position: relative;
  min-height: 100vh;
}
button {
  border: none;
  text-align: center;
  padding: 8px;
  background: white;
  box-shadow: 1px 2px 8px hsl(0deg 0% 0% / 0.25);
  border-radius: 6px;

  position: sticky;
  top: 0;
  right: 20px;
  margin-left: 100rem;
  z-index: 2;
}
If you run the playground above and see the result you will notice an issue there. Here is what I'm trying to do:
We have a blog, and in every blog post we want a floating sticky button that says "Click here to subscribe" because of course we want more viewers subscribed to the blog.
We do this by adding the position: sticky on the button so that it is always floating and in view as the users read the blog post. Once they see it enough, maybe they'll decide to subscribe.
We also want this button to be adherent to the blog post itself, which means as soon as the blog post is no longer in view, there is no reason why the button should be there. Because of this, we made the button a child of the main element which contains the blog post.
While this is true, we also want the button to be above/in front of the content of the blog post, simply floating on top the posts' text. To do this we added a z-index property. Now, because we already have a position property, we were very confident that the button would be stacked on top of the content by the browser.
From the page, we also added a sticky header, so that the header is glued to the page and never scrolls away. We also want the header to be on top on the other elements, so the blog post and any other preceding DOM elements just slip under the header.
To accomplish this, we add a z-index value of 2 so it is pushed further up the stack and closer to the screen which renders it on top of the other DOM elements.
After doing this and feeling satisfied with our work, we notice that we have a bug (I hate bugs): the button is simply not doing what we want it do.
The button is actually going above the header instead of going below alongside the blog post as we intended.
This is a recipe for further frustration that causes quite a bit of pulling and screaming at the computer screen along with "Why is CSS so difficult?".

Try going over the code and figuring out what the issue really is. Then come back to this article and we will solve it together.
Remember our second rule of z-index? Where we used the Captain analogy to describe how stacking contexts are compared? That is what is playing out here.
Looking at the code, we can see that we created 2 stacking contexts:
- When we used the
positionedandz-indexon theheaderelement. - When we used the
positionedandz-indexon thebuttonelement.
From the points above we can see that these two elements are the ones being compared by the browser in order to create the correct stacking context.
Also remember we discussed that:
If two DOM elements have the exact same properties for creating a stacking context, the browser decides which comes out on top by following the DOM order. This means that the latter element comes on top of the former, just like in a stack of books.
That is how the browser decided that button has has to come on top. When we compare alongside the browser, we see that:
- The
headerhasposition: sticky, but thebuttonalso hasposition: sticky. It doesn't matter which value is used as long as the element is using apositionproperty. - The header has a
z-indexof 2 (because it wants to come on top), and the button also has az-indexof 2 (because it wants to be above the content of the blog).
This has left the browser with no other choice than to decide the winner by following the DOM order, which means that since button is the latter in the DOM order it will come on top of the header. Phew! What a bug.
How do we solve this? We can go back to our Captain analogy:
On a plane, there are 2 pilots, both of them are equally qualified to fly and captain the plane. But only one of those 2 pilots are actually chosen to be the captain for that flight. As long as the chosen pilot is not missing, sick, or injured, there is no need for the second pilot to assume being a captain.
But in a situation where something bad happens to the chosen pilot, the second pilot is allowed and mandated to be captain.
Remember that button is a child of main but the main has no z-index. This means it is not a captain, which also means there is no isolated stacking context hindering the button's z-index property from being disregarded. Instead, the browser will consider it and compare it with the header element to decide which element should be rendered on top.
We can resolve this by applying the second rule of z-index by simply creating an isolated stacking context. We do this by adding a z-index property and also setting a position property on the main element. Let's see this in the code snippet below:
<body>
  <header> This is a header </header>
  <main>
        <button> Click here to suscribe </button>
    <p>Hello there I am the main </p>
    <p>Lorem ipsum dolor sit amet consectetur adipisicing elit.   Reiciendis numquam sapiente veniam fugiat. Harum voluptatum est ab similique incidunt,Quae, amet rem. Minima vitae, accusantium corrupti dolorem perferendis qui magnam...[view the full code snippet on the codepen playground above</p>

  </main>

</body>
@import url('https://fonts.googleapis.com/css2?family=Mulish:wght@200..900&display=swap');
body{
  font-family: 'Mulish', sans-serif;

}
header {
  background-color: hotpink;
  text-align: center;
  padding: 30px;
  position: sticky;
  top: 0;
  z-index: 2;
}

main {
  text-align: center;
  background-color: blue;
  color: white;
  padding: 30px;
  position: relative;
  min-height: 100vh;
  position: relative;
  z-index: 1;
}
button {
  border: none;
  text-align: center;
  padding: 8px;
  background: white;
  box-shadow: 1px 2px 8px hsl(0deg 0% 0% / 0.25);
  border-radius: 6px;

  position: sticky;
  top: 0;
  right: 20px;
  margin-left: 100rem;
  z-index: 2;
}
Tada! Solved.
Now we have handed the captain mantle to main who is a parent to the button. This forces the button to step aside. And since the z-index on the header is 2 (which is a bigger number than 1 which we set on the main), the button is now going under the header alongside the blog post.
This is because, just like the second rule of z-index explained, the z-index value on the button no longer has any effect on the stacking context decision made by the browser.
Here are the 2 rules of the z-index property again:
z-indexonly works with positioned elements.- A
z-indexproperty in an isolated stacking context is not regarded outside the isolated stacking context.
How to use the isolation property
While the above code clearly solved our problem, we are still left with something every developer hates – that is, having littered z-index all over our codebase, we can go on vacation for a month, come back to our codebase, and encounter yet another z-index bug. We might forget what some particular z-index value was even supposed to do. Then we'll remove it which will plunge ourselves into another endless round of bug fighting.
Instead of using position: relative; z-index: 1; on our main element to create the isolated stacking context, we can simply do this instead:
 Using the isolation property to solve the bug
main {
  isolation: isolate;
}
The isolation property does only one thing which is: it creates a stacking context.
This is the simplest way to create a stacking context. It can be useful when you want to prevent the z-index values of child elements from affecting the layout of a webpage (except, of course, when we want it to do so). This property allows us achieve this without the burden of having the z-index every where in our code.
Conclusion
We have reached the end of this article. Hopefully you now understand the underlying mechanism behind how the browser stacks elements in the DOM (called a stacking context). You should also know how the z-index propery works, z-index rules, how to effectively use these rules.
I hope you learned a lot from this article, and I am looking forward to seeing you win every z-index battle you might face in future. You can always come back to this post and read it again.
For more CSS tips, follow me on Twitter.
Thanks for reading! See you next time.