By Clark Jason Ngo
The goal of this guide is to play around with cloud databases and connect one to a database tool. Once you are done with this guide, you should be able to create databases and tables, and more.
Importing a sample database is a pain, so here's another guide that I created: How to Import a Sample Database to your AWS RDS Microsoft SQL Server using S3.
Luckily as I was new to this, I also discovered how to connect to a MSSQL Server with Docker to Azure Data Studio. Check this guide: How to Connect your AWS RDS Microsoft SQL Server using Azure Data Studio.
We will be touching on the technologies shown below:
- Database: Amazon Relational RDS with MSSQL Server Express Edition
- Database tool and GUI: Azure Data Studio
Creating and Configuring your AWS RDS MSSQL Server Instance
Sign in to AWS.com:
- Go to https://aws.amazon.com/console/
- Click Sign into your AWS account
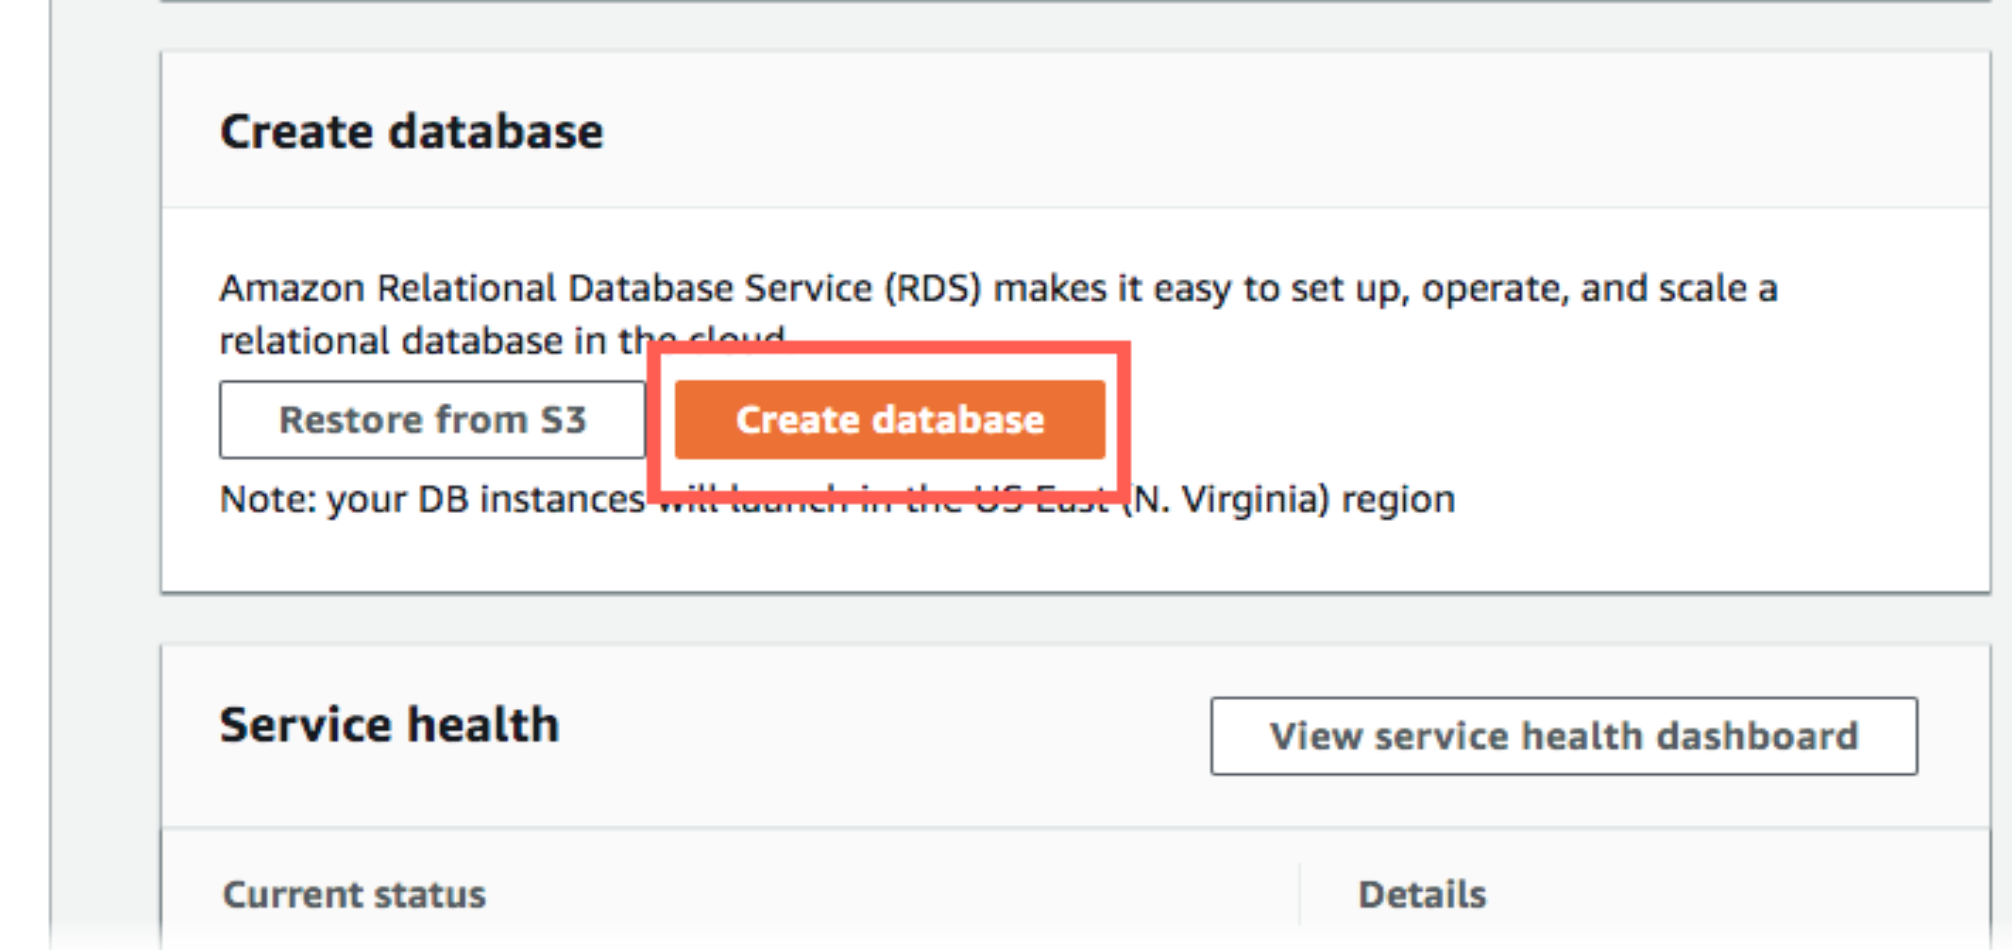
Create a Microsoft SQL Server DB Instance:
- In the Create database section, choose Create database.
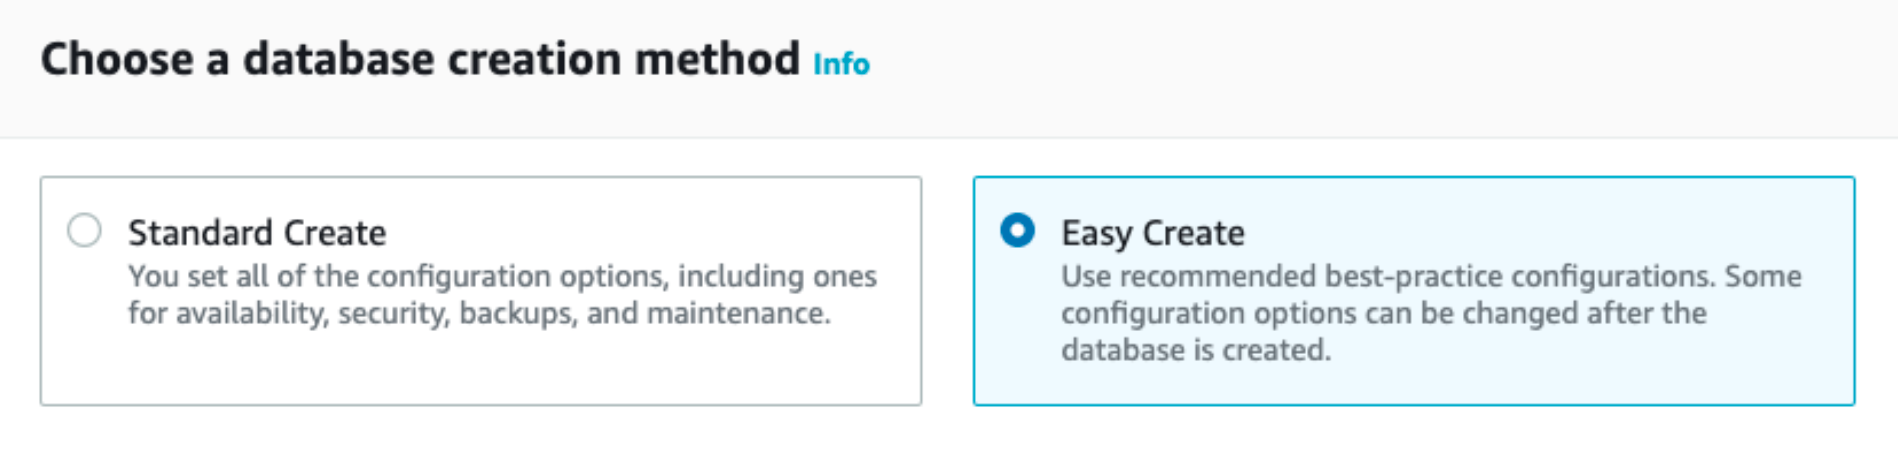
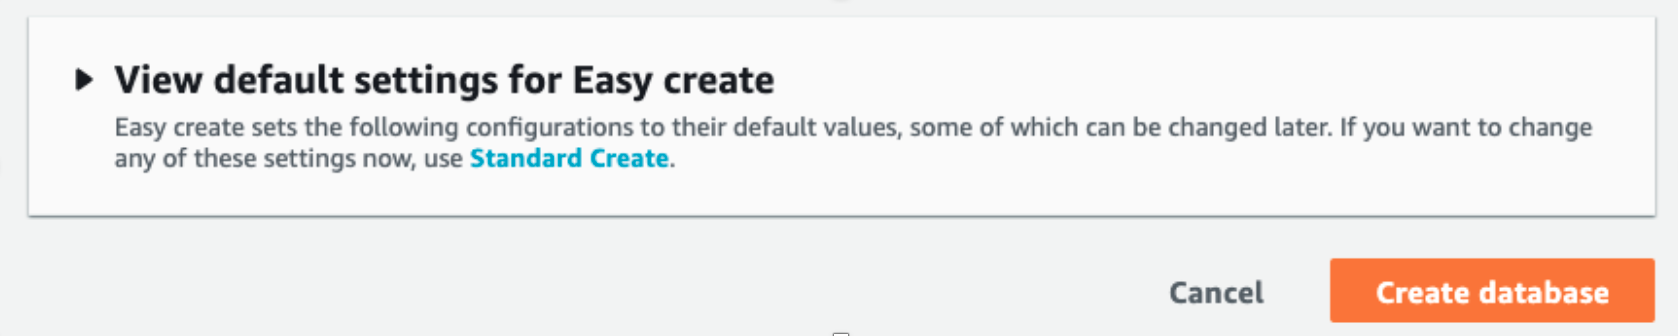
- Choose Easy Create for database creation method.
- Choose the Microsoft SQL Server icon for engine type.

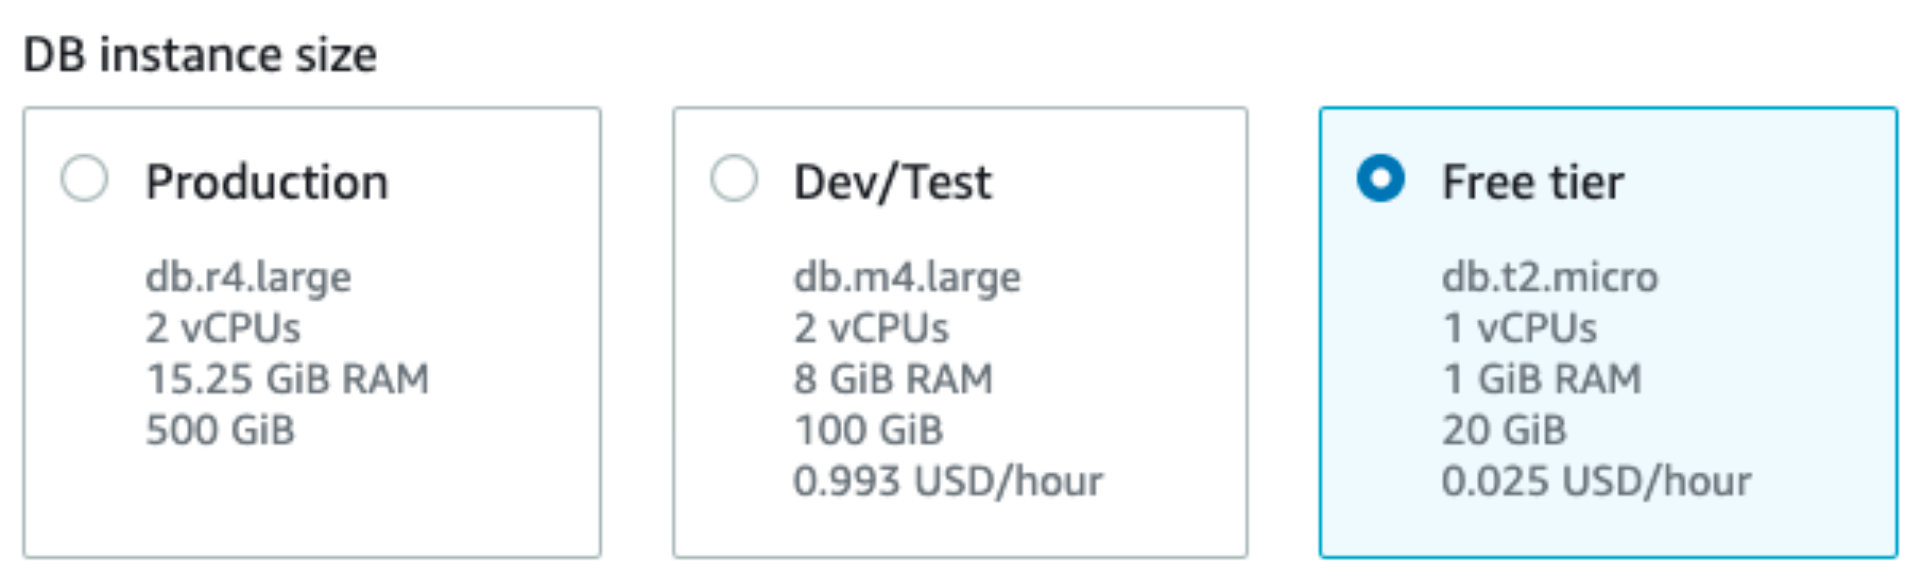
- Select Free Tier for the DB instance size.
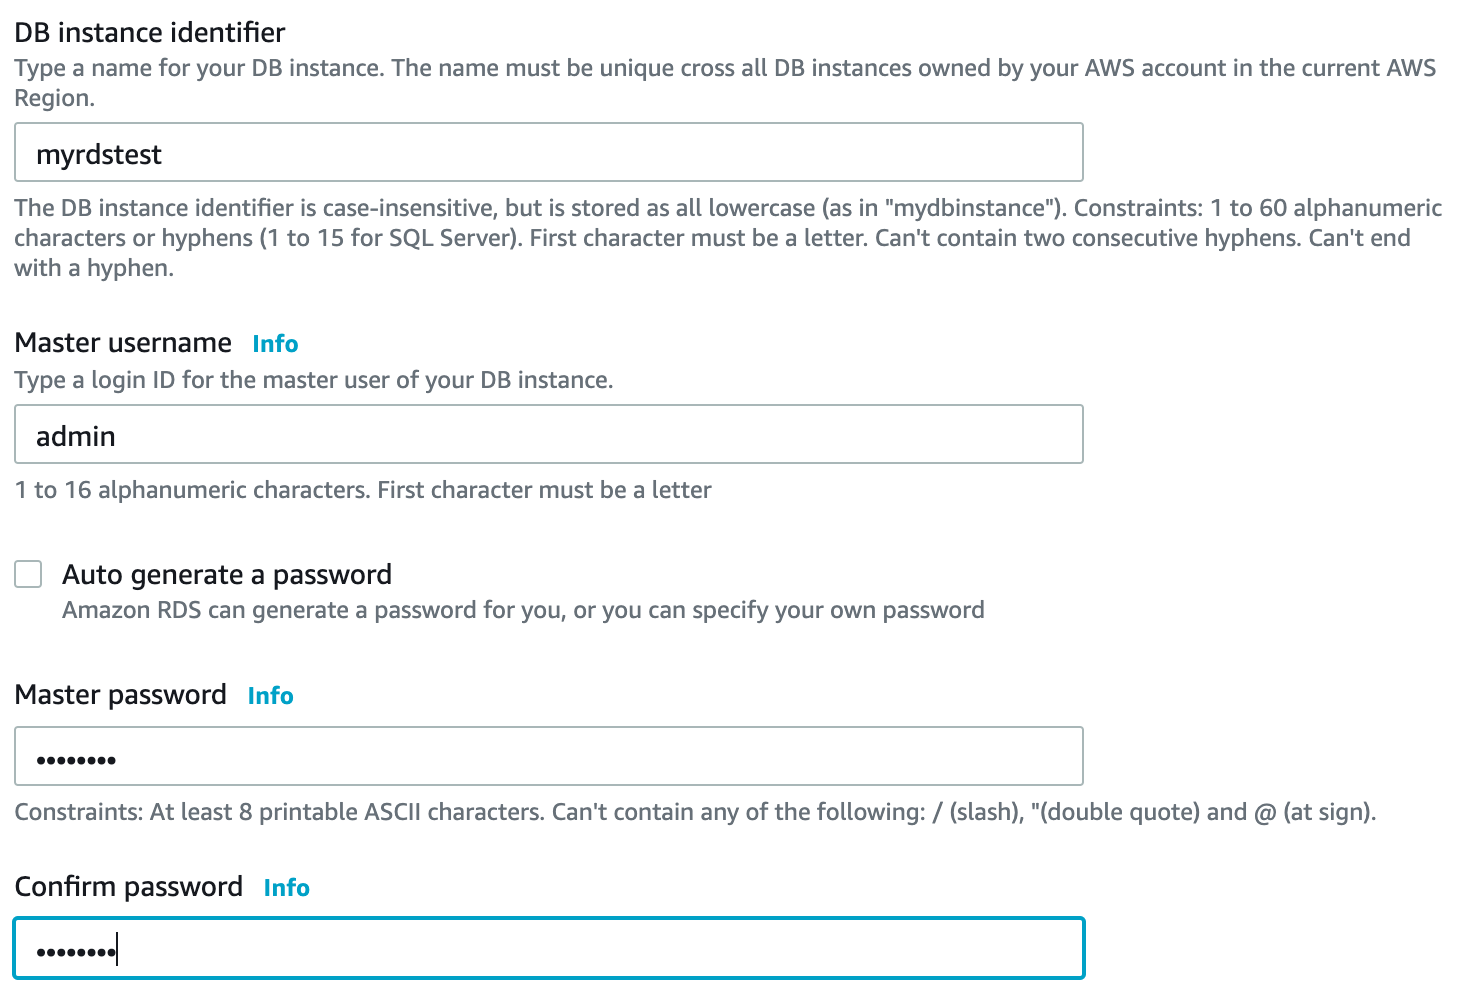
Fill in the following details for DB instance identifier:
DB instance identifier: myrdstest.
- Master username: Type a username
- Master password: Type a password that contains from 8 to 41 printable.
- Select Create database.
Note: It might take a couple of minutes to provision
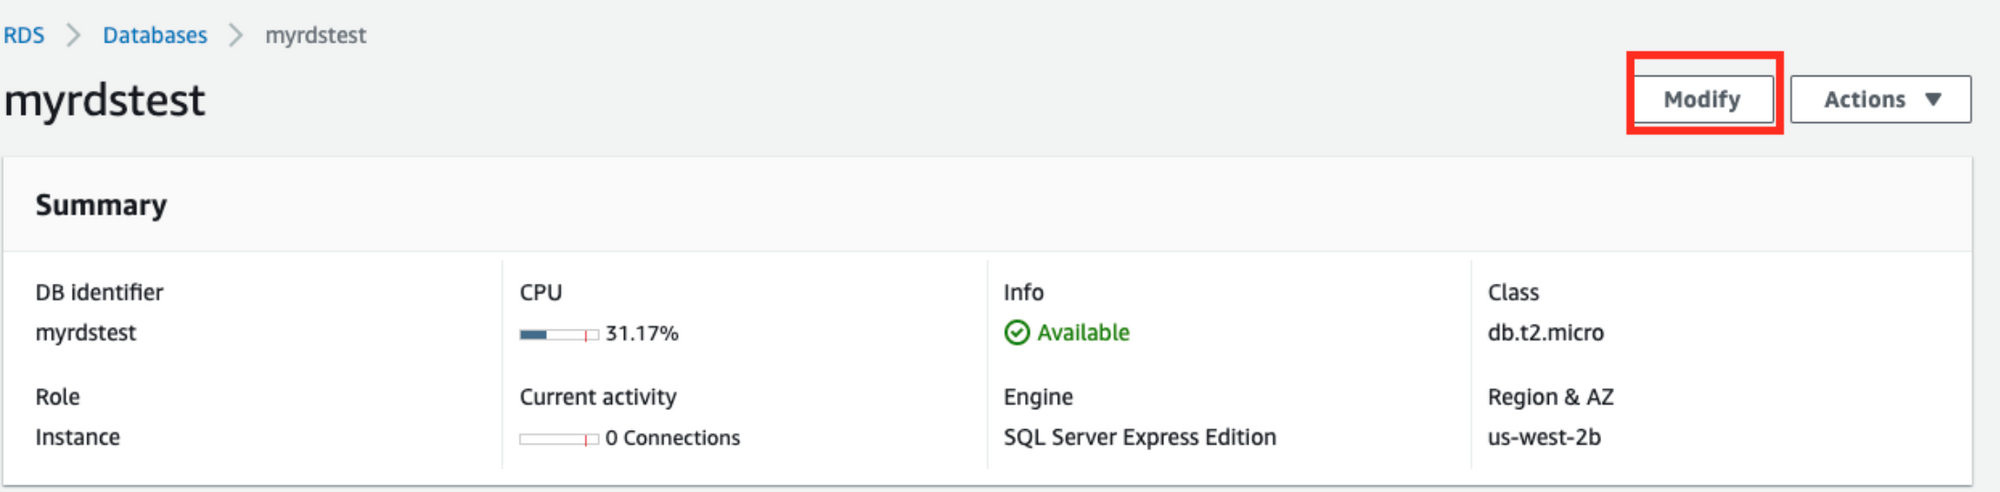
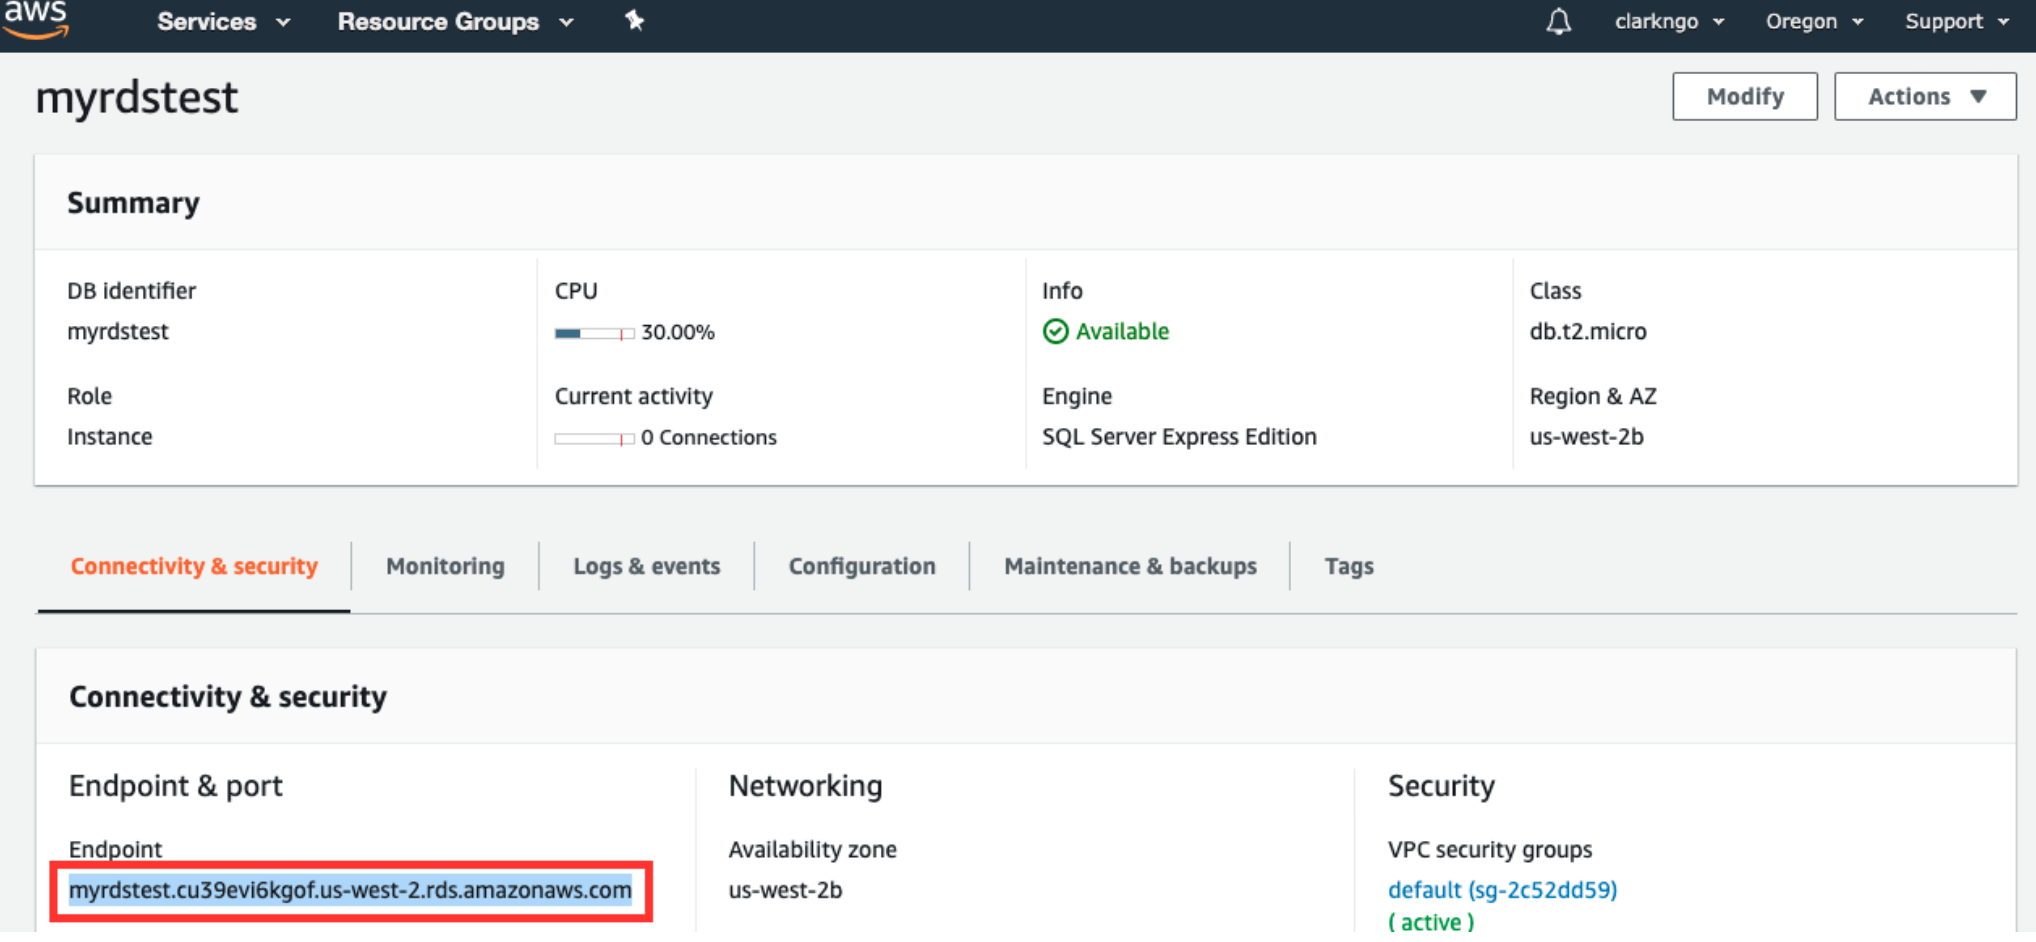
If you accidentally exit the page, you should see your database myrdstest under RDS > Databases.
For a more detailed tutorial, follow the steps in the AWS docs.
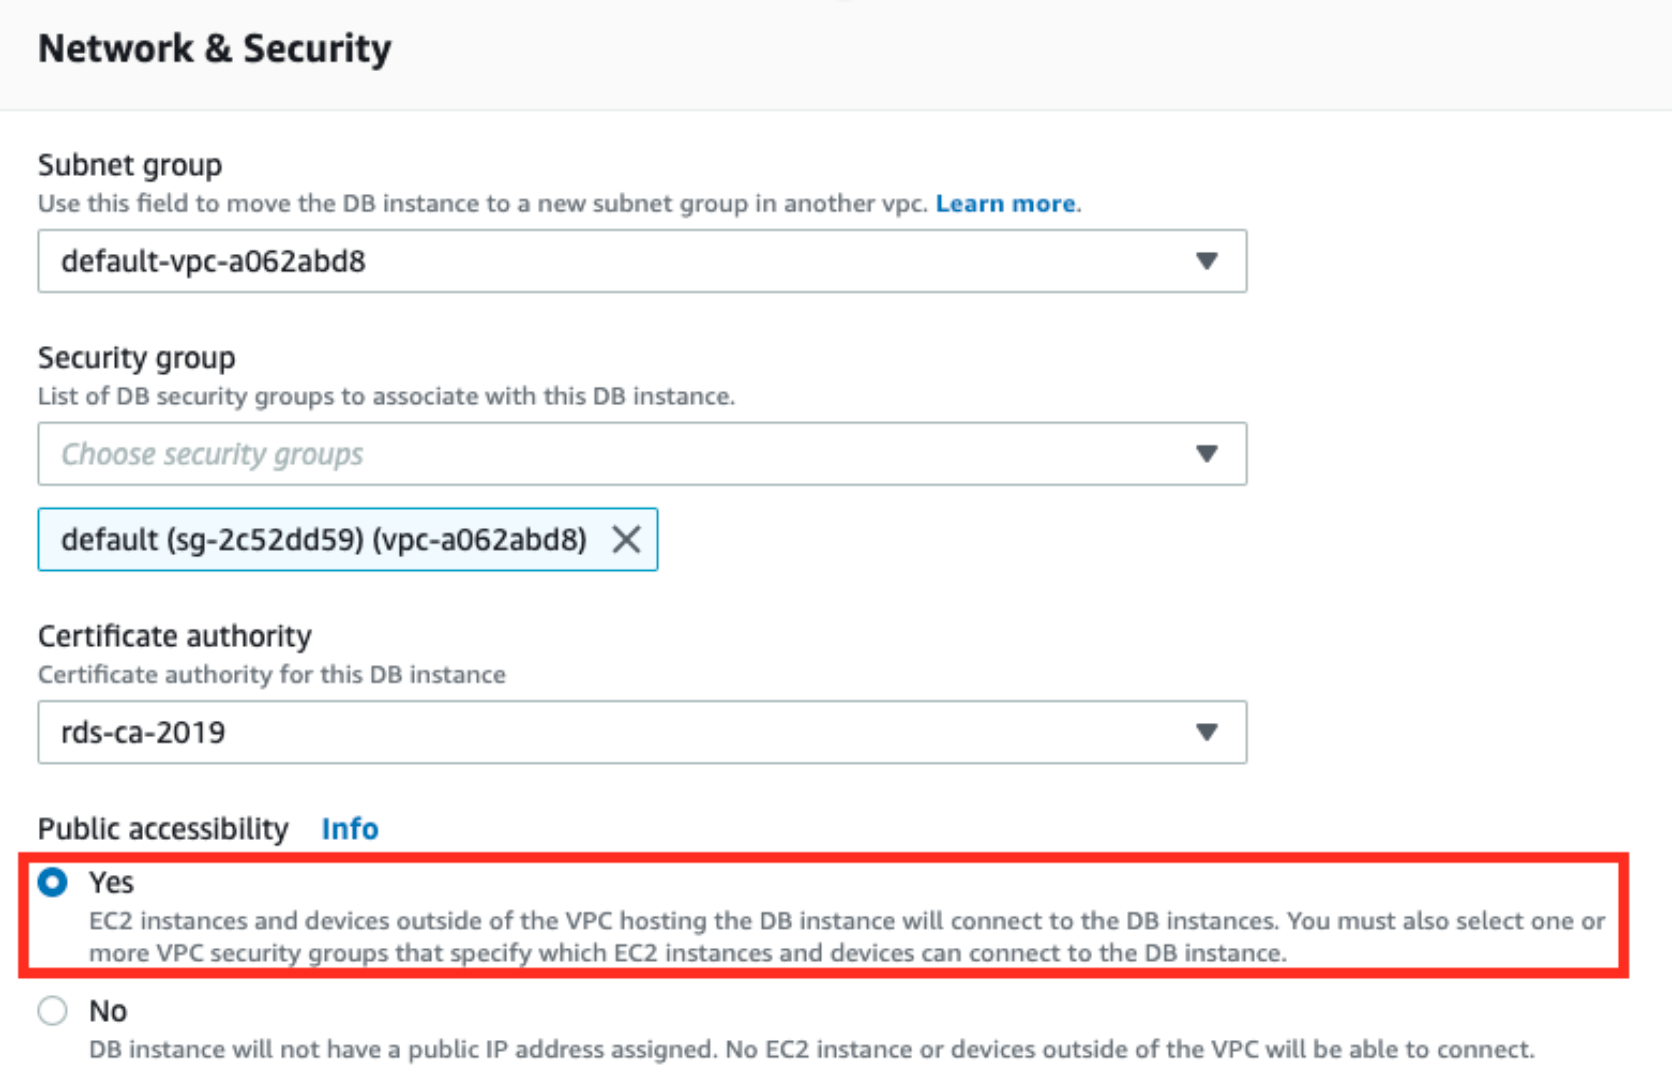
Allow Public Access to your RDS instance
- Click Modify
- Choose Yes in Public Accessibility under Network & Security.
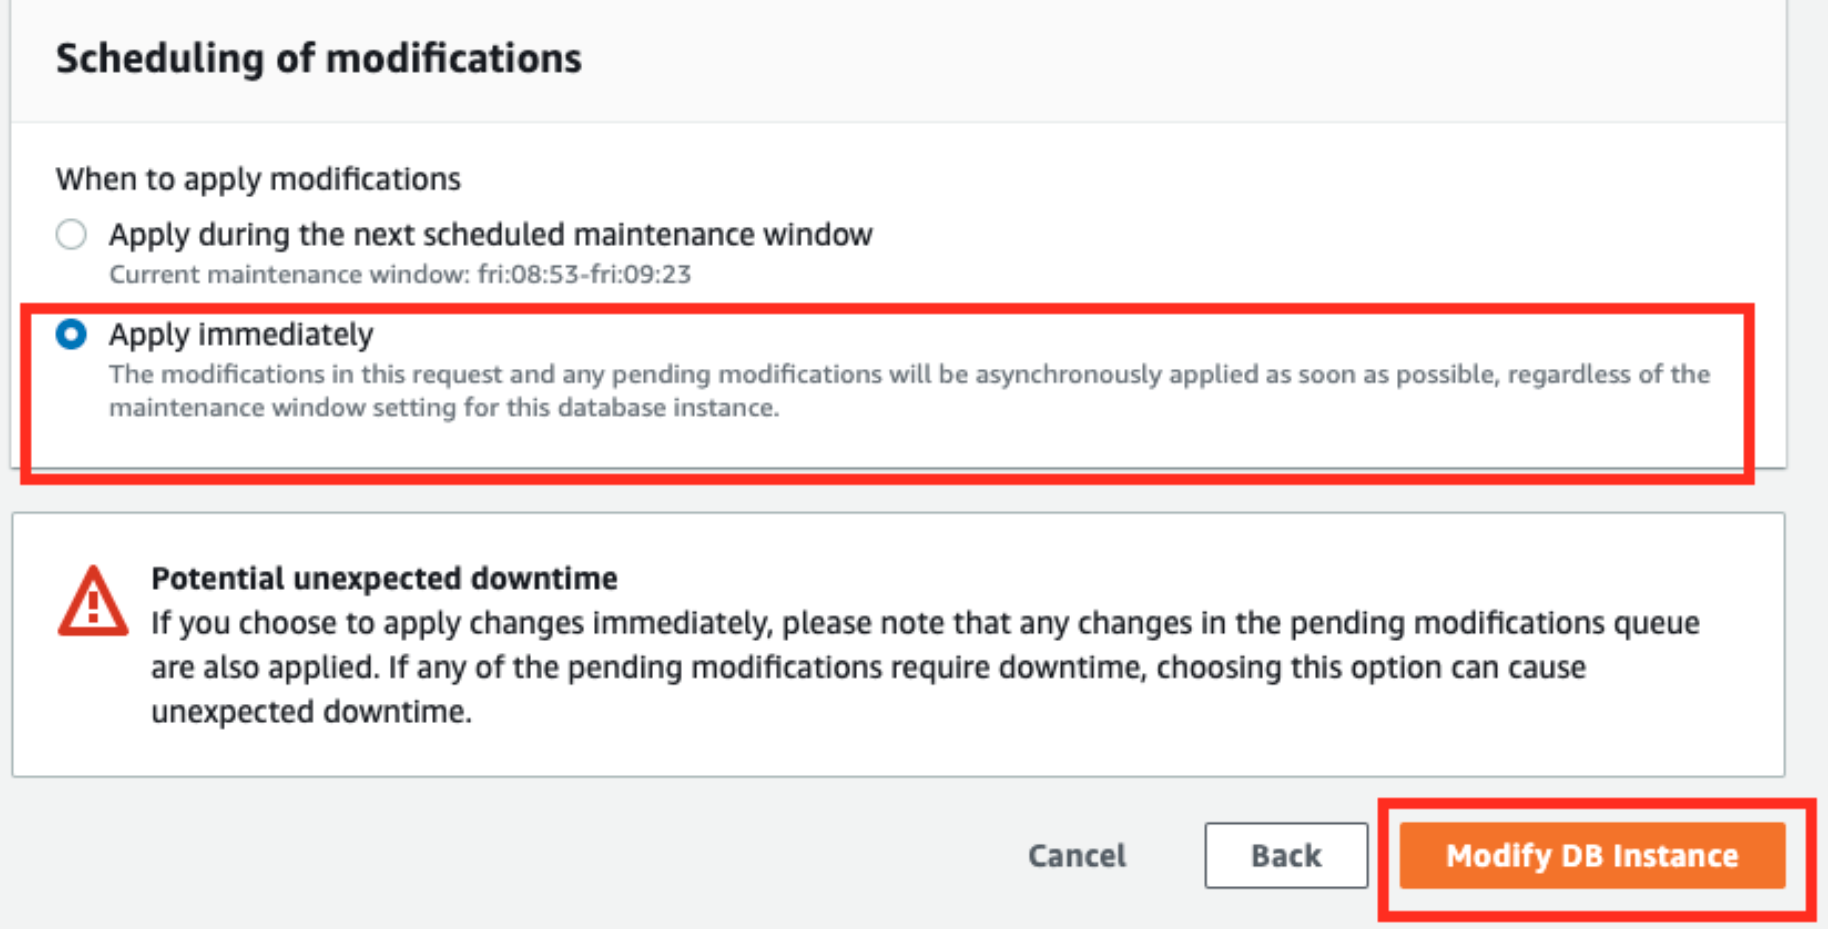
- Choose Apply immediately under Scheduling of modifications, then Click Modify DB instance.
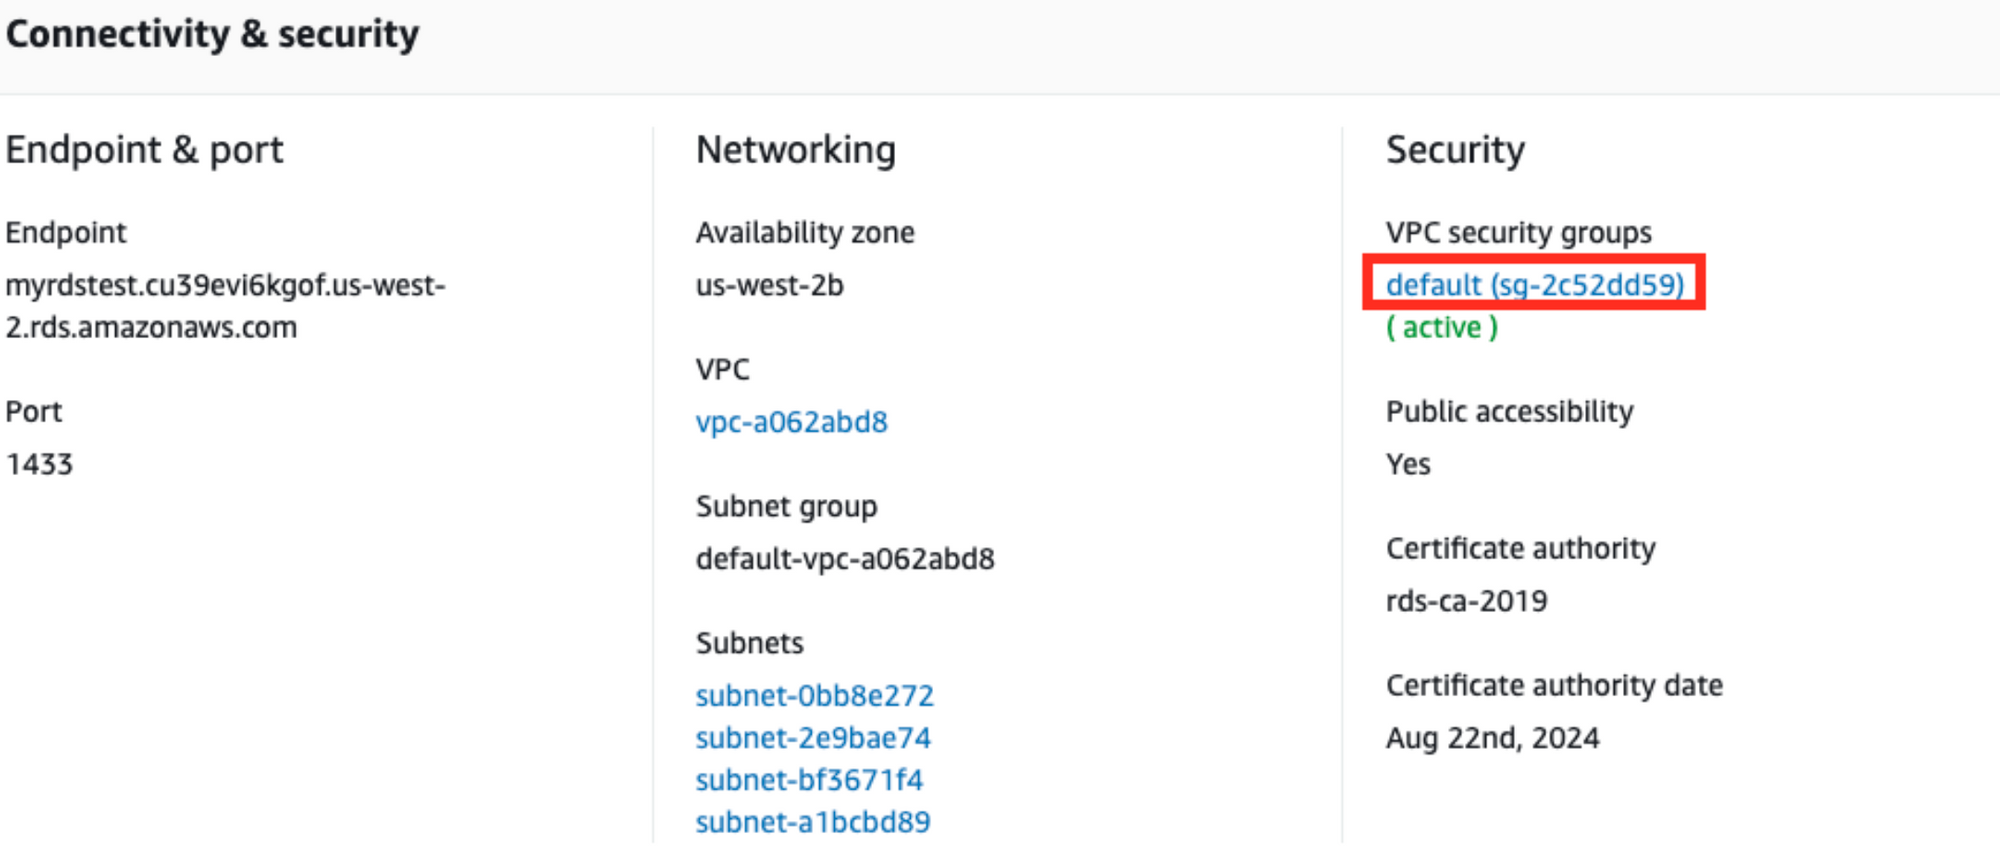
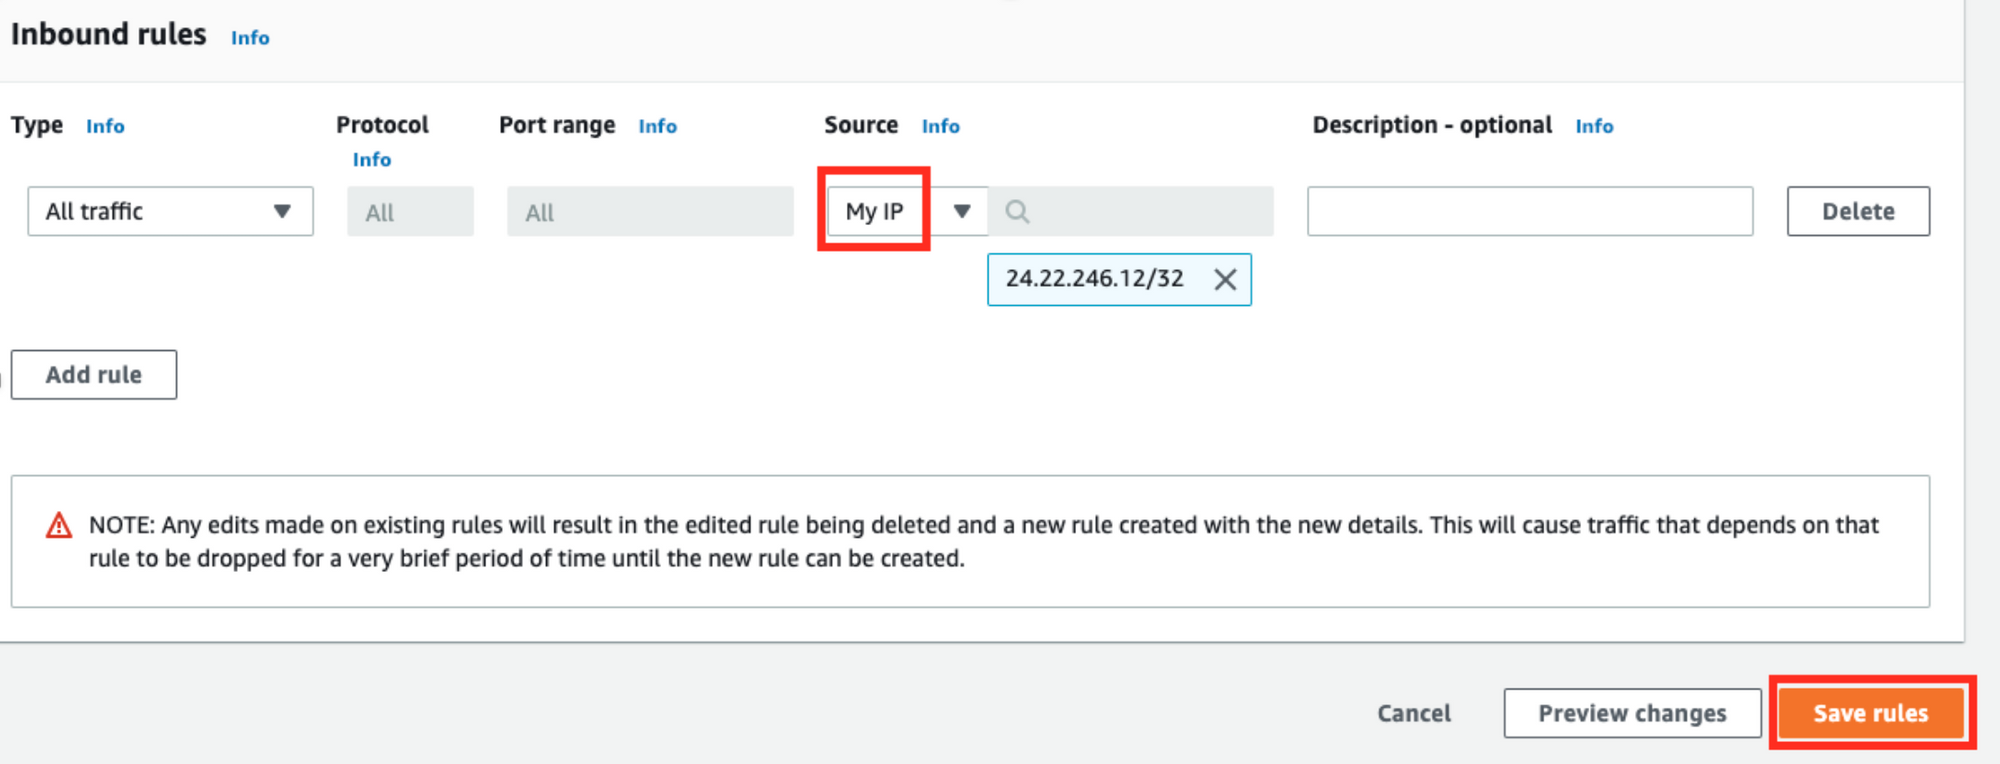
Allow Inbound Rules
- Click default (sg-0000d009) under VPC security groups.
Note: the number is different in your own instance.
- Click Inbound, then click Edit inbound rules.
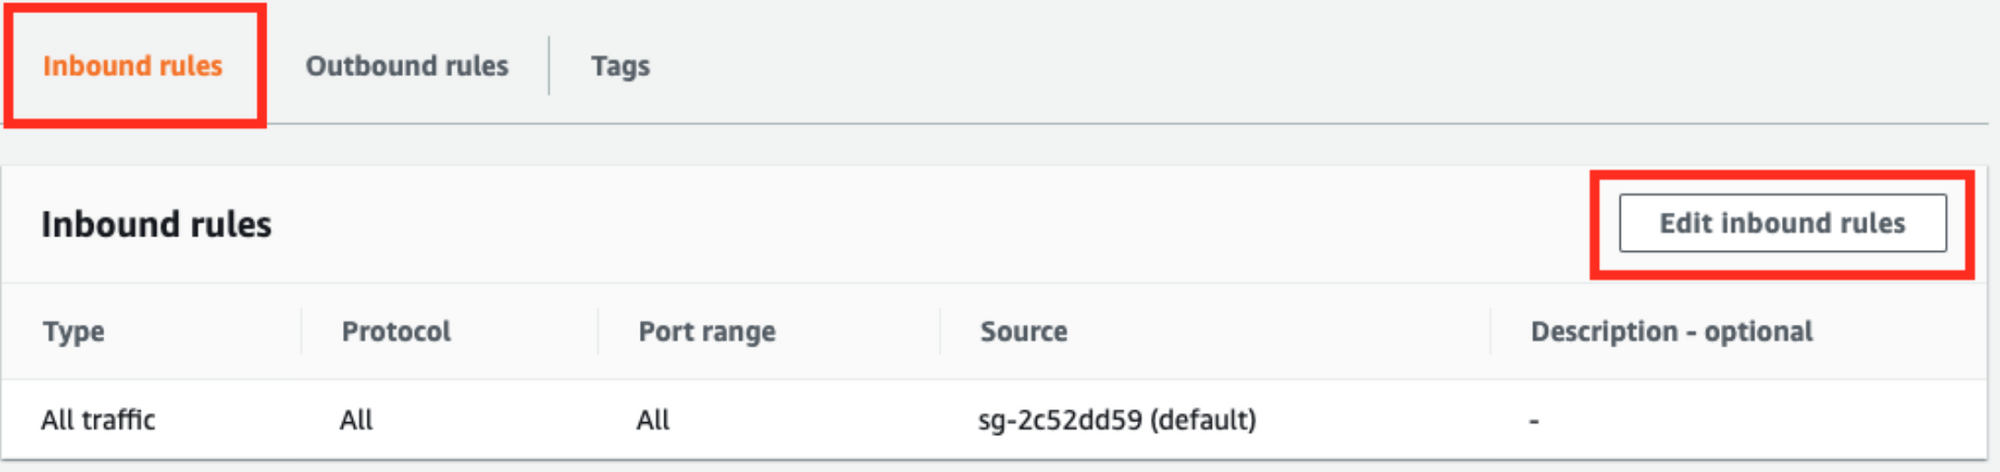
- Choose My IP in Source, then click Save rules.
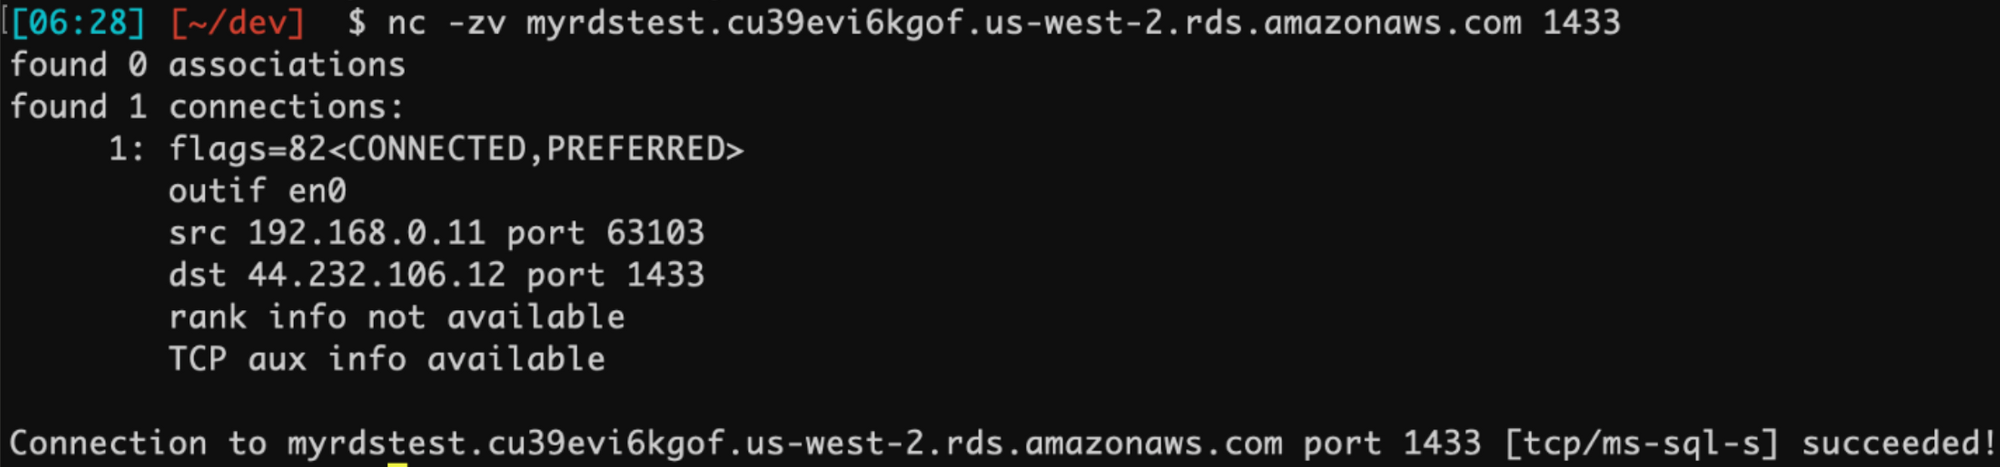
Test your Connection to AWS RDS
Open your terminal (MacOS), and type the following: nc -zv _aws_rds_endpoint portnumber
Successful connection example:
Failed connection example:

Make sure your RDS instance is Public and Inbound rules allows your IP.
Download a SQL Server GUI - Azure Data Studio
Azure Data Studio (formerly SQL Operations Studio) is a free GUI management tool that you can use to manage SQL Server. You can use it to create and manage databases, write queries, backup and restore databases, and more.
Azure Data Studio is available on Windows, Mac, and Linux.
Install Azure Data Studio
To install Azure Data Studio on a Mac:
- Visit the Azure Data Studio download page, and click the .zip file for macOS
- Once the .zip file has finished downloading, double click it to expand its contents
- Drag the .app file to the Applications folder.
Connect to SQL Server
Now that Azure Data Studio is installed, you can use it to connect to SQL Server:
- Launch Azure Data Studio. It is located in your Applications folder.
- Enter the login credentials and other information for the SQL Server instance that you’d like to connect to:
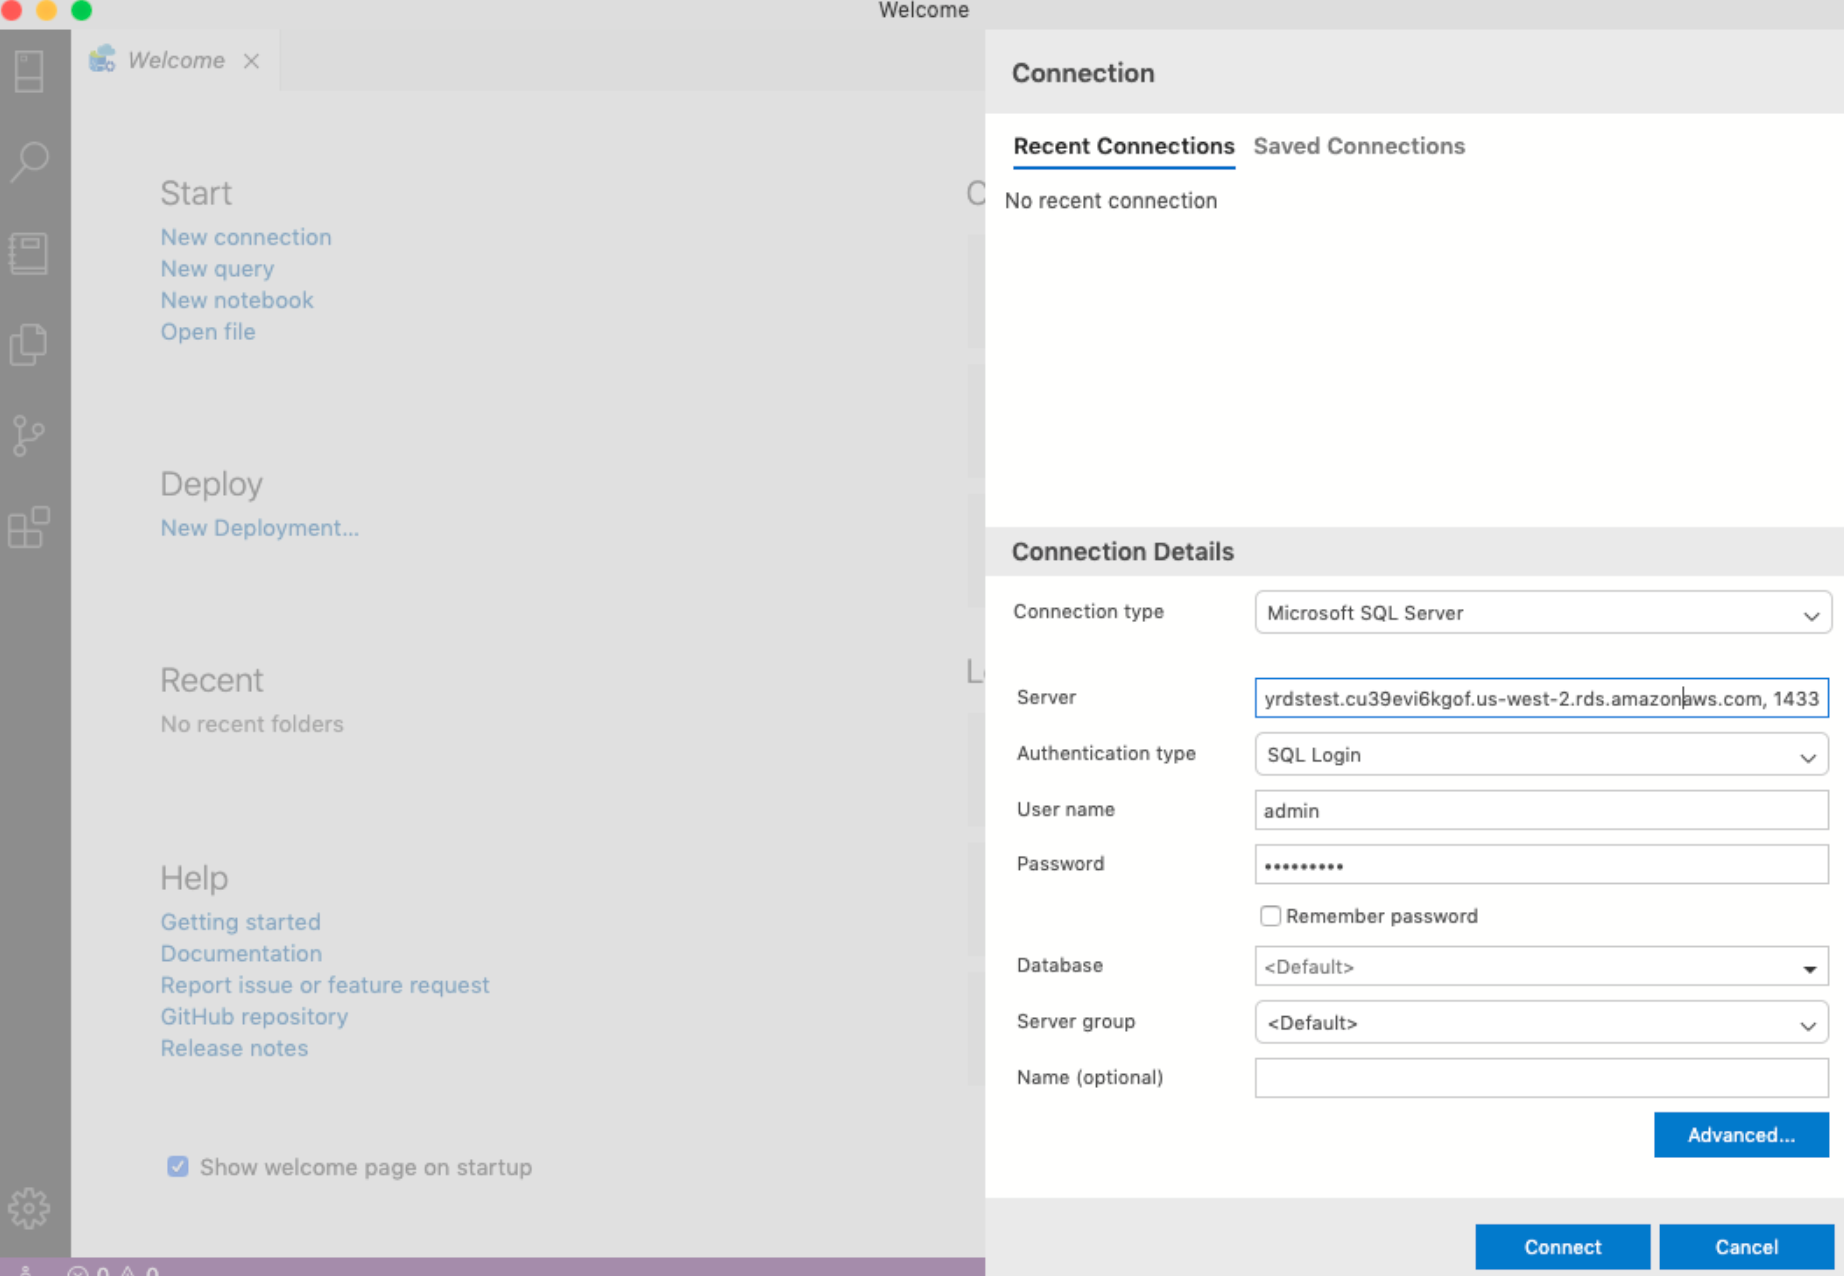
It should look similar to this:
- Server Name: [AWS RDS Endpoint], [port number]
Example: myrdstest.blahblahblah.us-west-2/ds.amazonaws.com, 1433 - Authentication Type: SQL Login
- User name: [your AWS username]
- Password: [your AWS password]
- Database Name:
- Server Group:
If you used a port other than the default 1433, click Advanced and enter it in the Port field.
Alternatively, you can append it to your server name with a comma in between. For example, if you used port 1400, type in localhost,1400.
If you get an error:
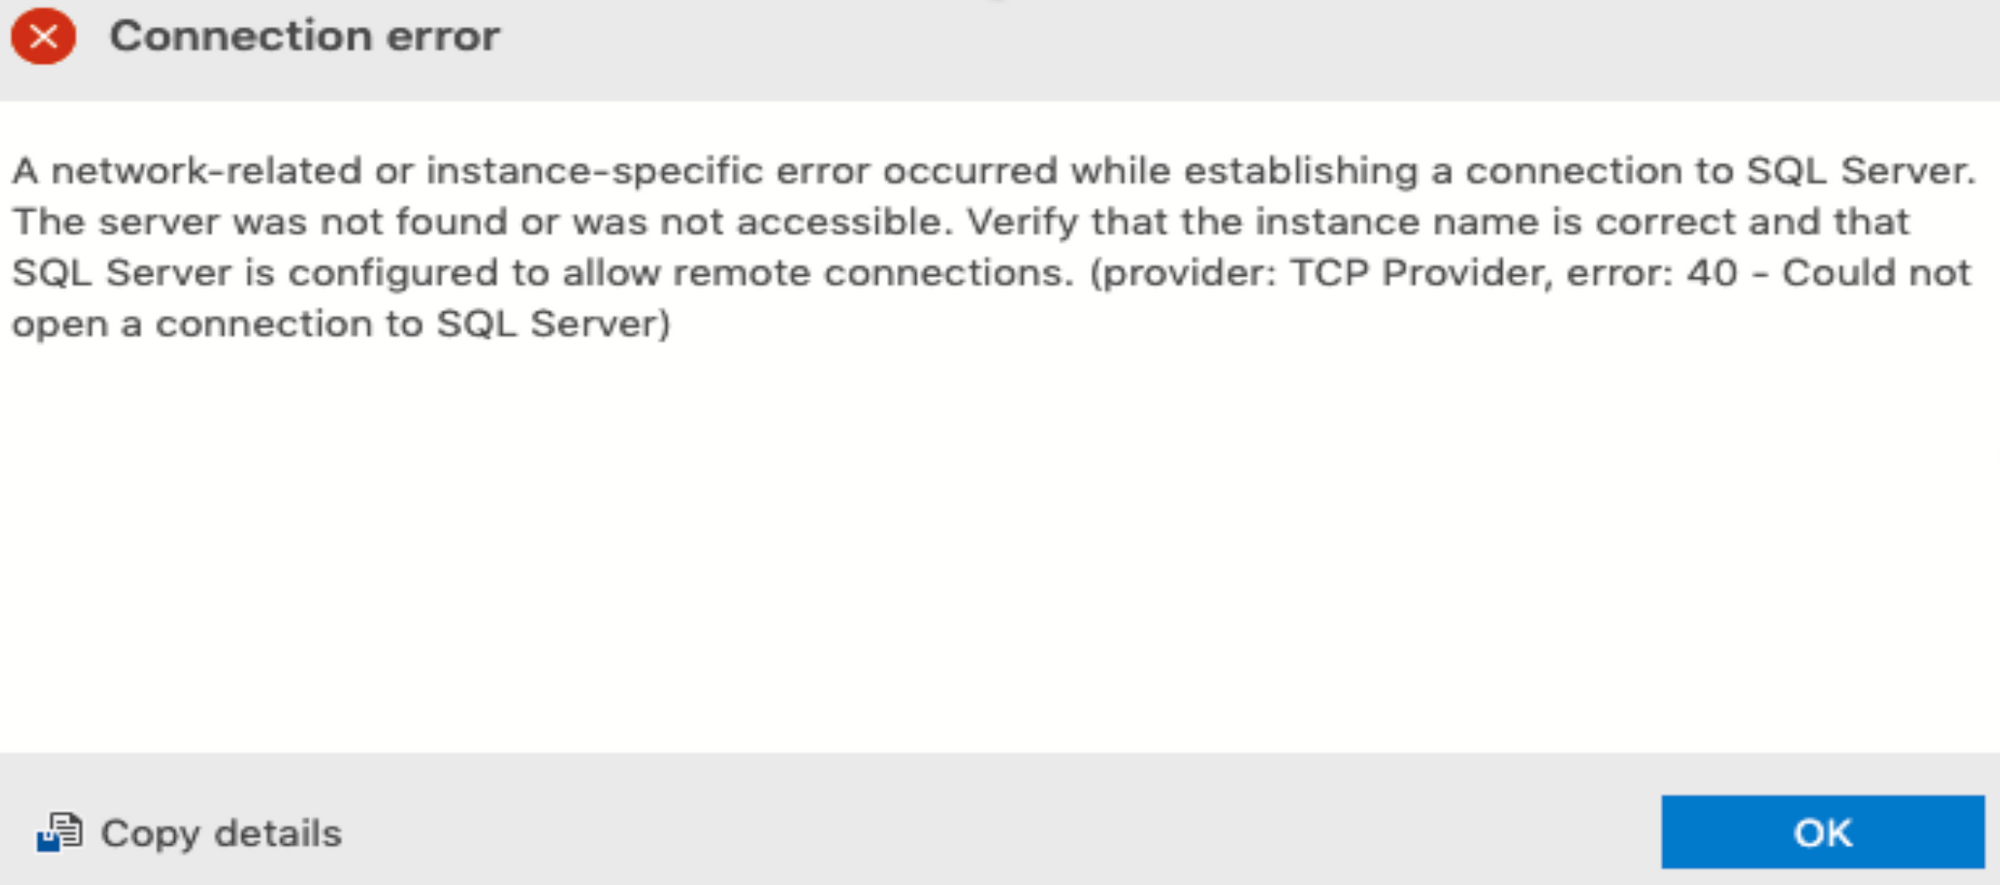
Make sure your RDS instance is Public and Inbound rules allows your IP.
You can now go ahead and create databases, run scripts, and perform other SQL Server management tasks.
- Click New Query
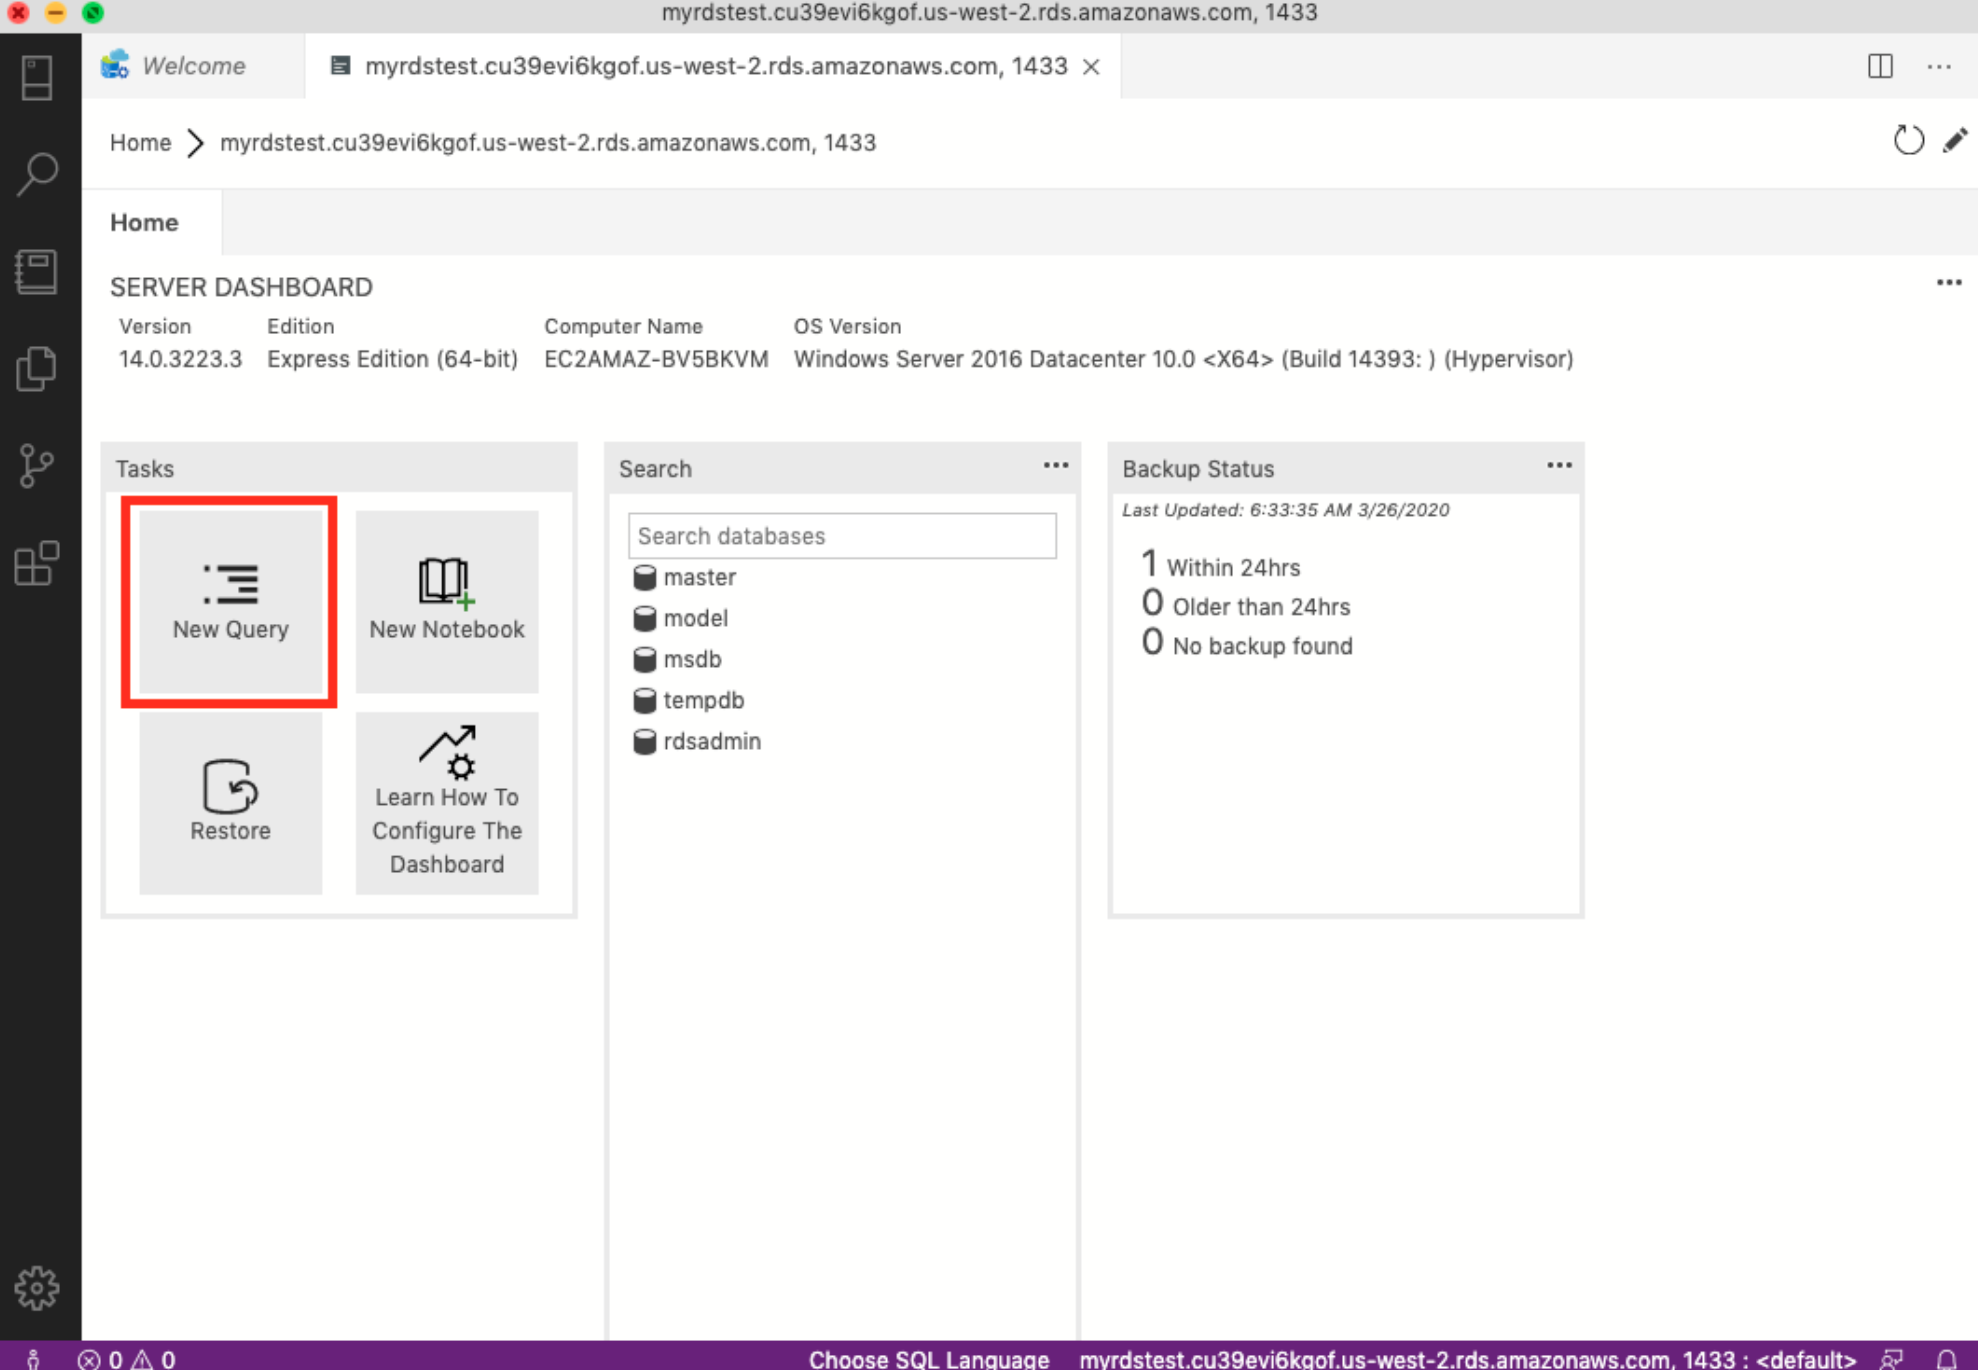
- Type SELECT @@VERSION, then Click Run Query.
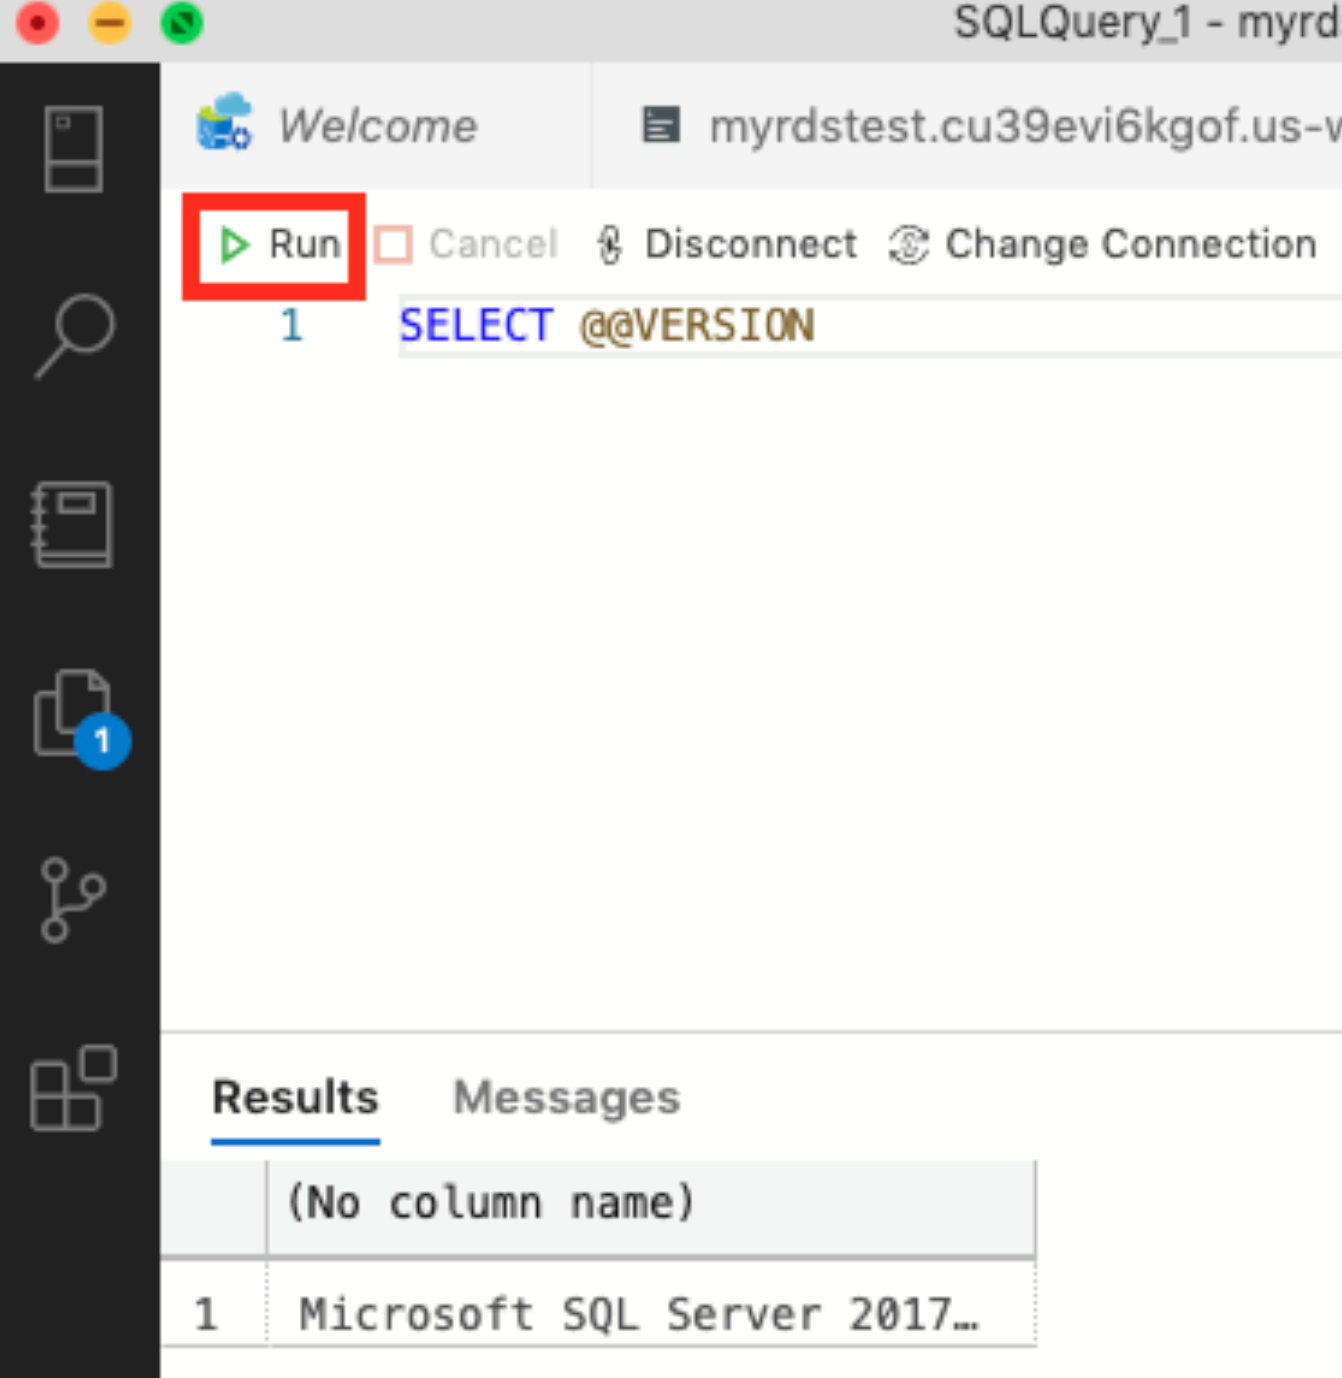
You should be able to see: Microsoft SQL Server in the Results
Congratulations! ???
Resources:
Connect with me on LinkedIn here