
By Prajwal Kulkarni
In today's fast-paced world, seamless integration between various services and systems has become ever more important.
Security is also equally important while stitching these services together. So it's crucial to design applications meaningfully so that there's minimal friction between various systems.
This article focuses on the communication between a client and other backend services – whether it's a serverless function or a third-party API.
Whether you're a developer, architect, or technology enthusiast, this tutorial will equip you with the knowledge and skills to set up a robust and scalable API gateway that simplifies communication between clients and backend services.
A Brief Refresher on the Fundamentals
Before we dive in and understand the potential of AWS HTTP API to streamline your API integration process, let's quickly brush up on the basic terminologies.
Many of you may understand what an API and a proxy gateway is. That said, things might get a little intimidating when we dig deeper into such concepts while trying to understand the nitty-gritty details and differences.
An API (Application Programming Interface) is an abstraction that allows two programs to communicate with each other. APIs could be methods exposed by API service providers in the form of a package or an endpoint via which information can be transmitted (REST API).
A proxy gateway is a gateway that forwards the incoming requests to the target URI, whereas a regular gateway sends the information back and forth between the client and server.
Proxy gateways are also a great way of masking your target URIs and API keys, which would otherwise have been exposed if the network call were to be made directly made from the frontend (browser).
HTTP API vs REST API – What's The Difference?
Technically speaking, there isn't an "HTTP API" – this is specific to AWS.
While creating API gateway on AWS, you can either create a HTTP API or a REST API. The difference between the two is that the latter provides more flexibility in designing an API, like per-client throttling, request validation, private endpoints, and so on.
Why Choose HTTP API Over REST API?
As mentioned above, REST API provides more flexibility and fine-grained configuration to set up APIs when compared to HTTP API. Why would you then want to work with HTTP API?
Well, it is not always about the flexibility of having many options to choose from – unless the requirement is concrete, this usually adds noise when it comes to choosing the right set of options.
On the other hand, HTTP API comes with limited configuration options, which helps you in building APIs with minimal decisions.
Another advantage of an HTTP API is that it lets you add a JWT authorizer to the gateway, which is not present in REST API.
If you're using a third-party auth system in your application, it would make sense to make use of JWT authorizer to protect your API endpoints.
Lastly, HTTP API is more affordable than REST API.
Looking at the salient features, which of the two you should choose entirely depends on your requirements. But vaguely speaking, HTTP APIs are a good choice for small-scale, non-business critical applications.
How to Create an HTTP Proxy Gateway and Integrate with Target URI
Time to get our hands dirty.
Navigate to your AWS console and search for "API Gateway".
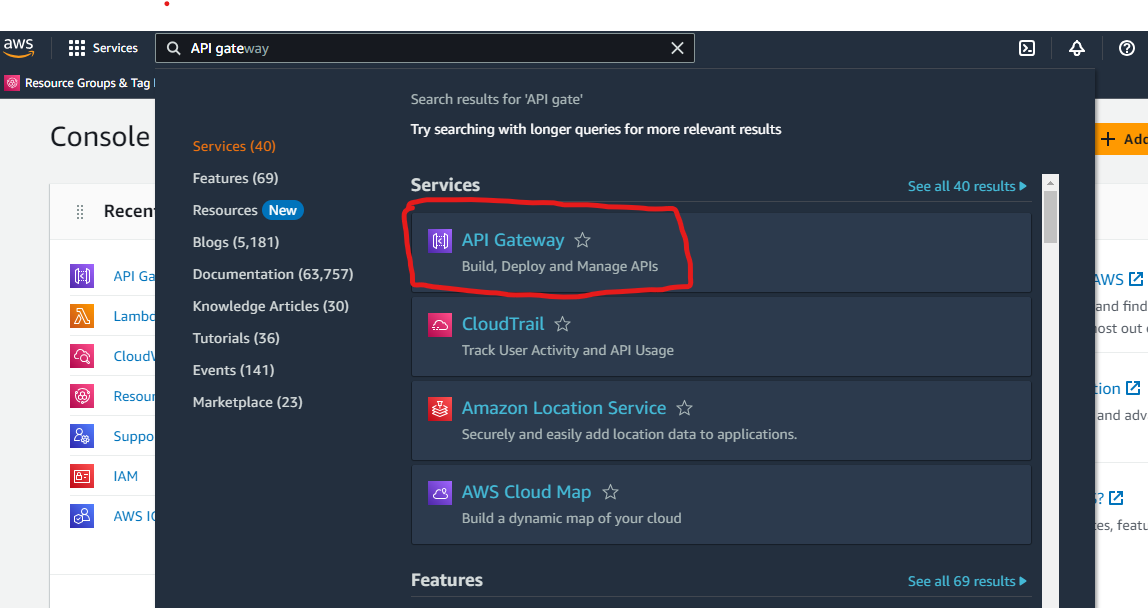 Find API Gateway on the AWS console
Clicking on Create API will present you with the various available API types. Click "Build" on HTTP API.
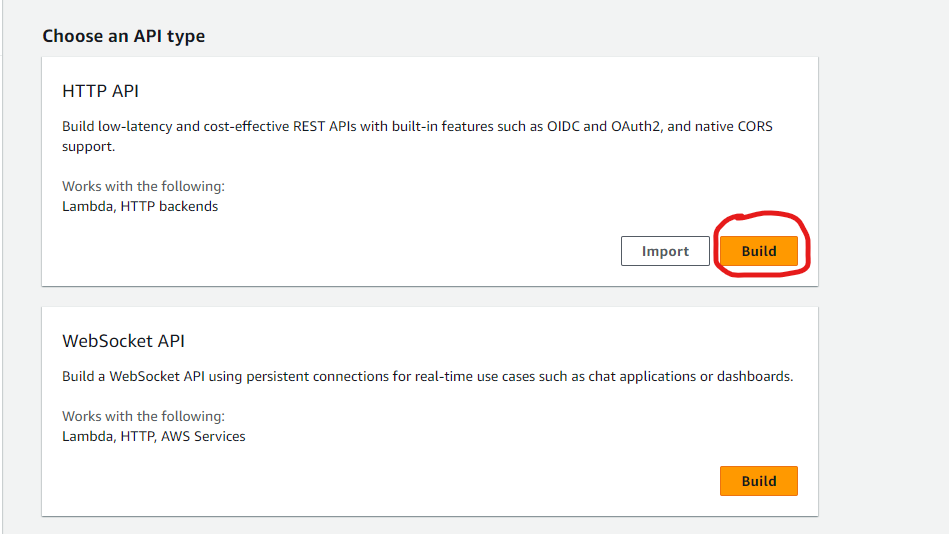 Choosing "Build" on HTTP API
Enter the API name and click on "Review and create". Alternatively, you could input other required configuration information but ignore it for now, as we'll see the configuration in detail below.
There are 3 parts to creating a secure proxy gateway:
- Defining routes
- Adding integration
- Attaching authorizers
Let's go over each one in more detail.
How to Define Routes
Routes are the path endpoints that correspond to a resource action or a target URI.
It is possible to send dynamic values to the route by defining path variables in the route. Path variables are defined by adding curly braces around the path variable, like so: /getmusic/{track}.
In the above route {track} is the path variable that can be substituted with any value.
A route can have any number of path variables. However, it is important to know that query parameters cannot be added in the route definition.
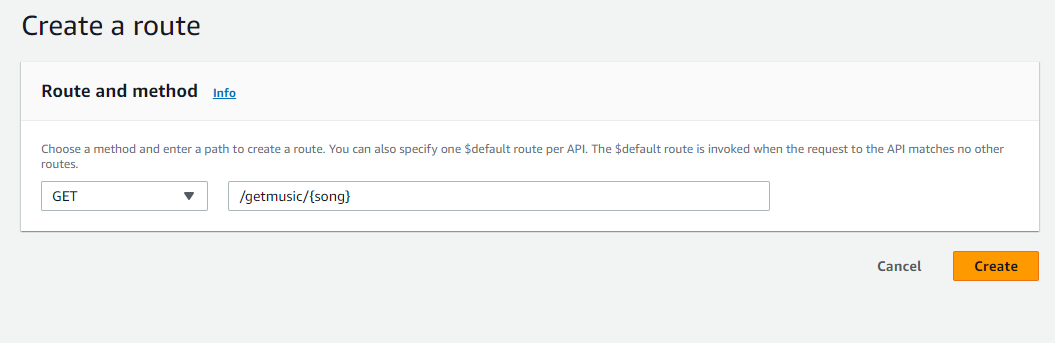 Define the route for API proxy gateway
Also make sure to select the appropriate method for the defined route. For simplicity, you may consider using "GET".
How to Add Integration
This is the perhaps the most important step in creating a proxy gateway.
The challenging part here is creating the correct mapping of dynamic values between the incoming and the outgoing request. It is quite surprising to see that there are no tutorials, docs, or guides addressing this issue, so I hope this helps.
After clicking on the newly defined route's method, you can see the route details in the right pane.
You may notice that there are no integrations attached to the route. Click on "Attach integration" followed by "Create and attach an integration".
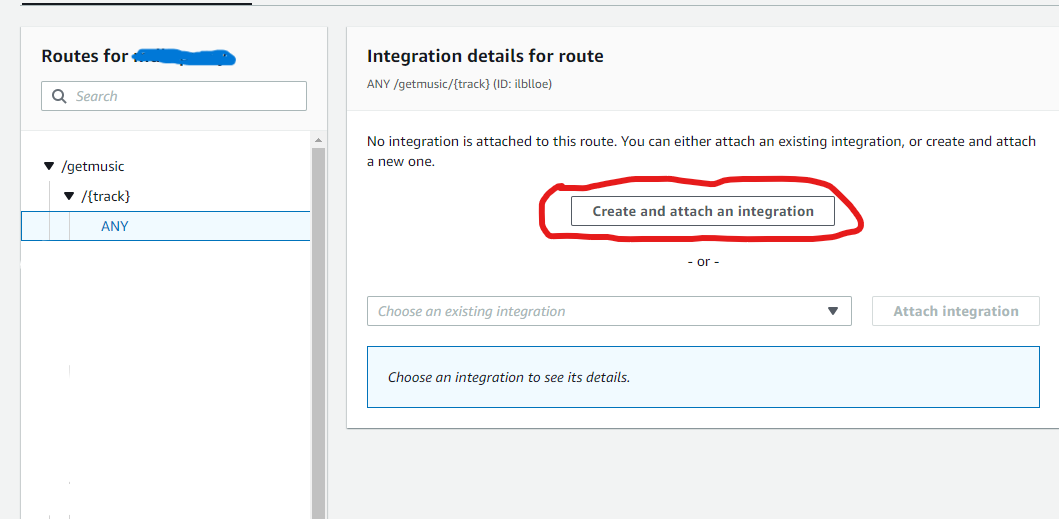 Create and attach an integration screen
In the Integration type, select "HTTP URI" as we're aiming to create a proxy gateway that forwards the request to a target third-party API.
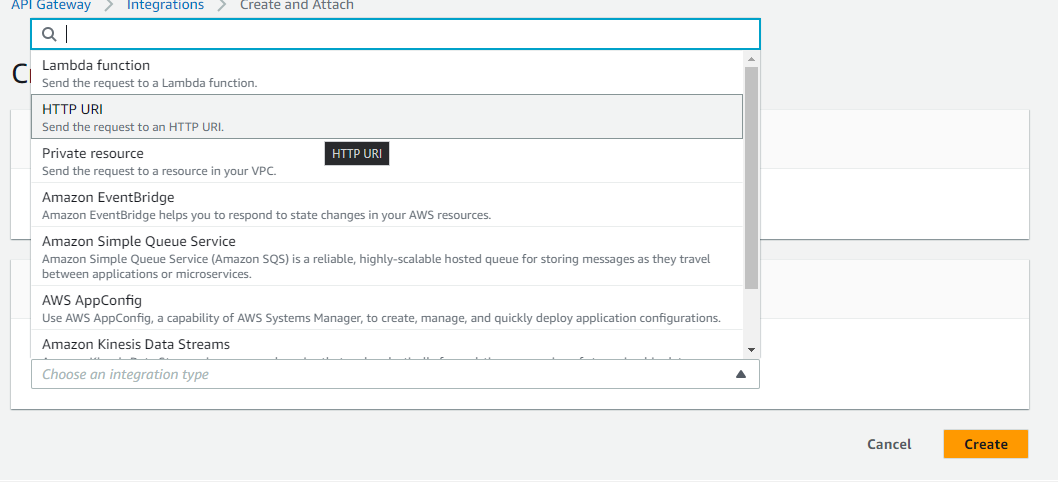 Select "HTTP URI" from the options
Enter your target URI and select the same method as the incoming request, so that the request is forwarded with the appropriate method.
Caveat: In the target URI, you're supposed to add only the domain of the API and not the entire path with query params, as this is something that we'll be constructing through parameter mapping.
For instance, let's say we want to get a list of tracks by their name.
In this case your input endpoint could be:
/getmusic/{track}
And based on the third-party API you are using, the target URI could be something like:
http://api.musixmatch.com/ws/1.1/track.search?q_track={track}
Our objective is to make sure that the value sent for the track path variable is properly substituted with the real value in the query parameter of the outgoing request.
Strangely, if we define our target URI as: http://api.musixmatch.com/ws/1.1/track.search?q_track={track}, the {track} variable isn't substituted with the actual value.
Instead the literal string, {track} is sent as it is for the query param value, fetching you the same set of wrong results regardless of what you request.
To avoid this pitfall, we don't define the complete path in the target URI.
Moving ahead, add the domain part of the API, which should be http://api.musixmatch.com considering the above example.
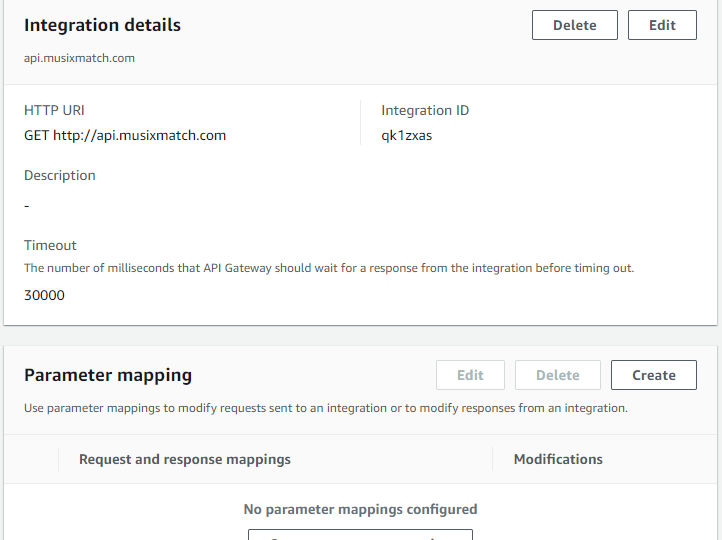
As you can see, below the integration details section, there's a parameter mapping rules which is currently empty. Click on "Create" to start adding mapping rules.
Next, select the mapping type as "All incoming requests" followed by "Add new mapping".
In order to create a mapping rule, you need to be aware of the following three things:
- what should be modified
- how it should be modified
- what the modified value should be
What should be modified? Typically, all the API endpoints would have a path suffixed to the domain part, for example v1/ , which would be redundant in our proxy gateway endpoint. So we'd want to start off by overwriting the path.
The value is something that is statically typed to conform to the URI path.
Taking the above API as the example, the value should be:
/ws/1.1/track.search
The dynamic part of the URI is the track value which is a query parameter.
Next, we need to append a query parameter that holds the dynamic value.
To do this, click on "Add new mapping" and select querystring.<querystring_name> in the parameter to modify followed by selecting "Append".
In the value input field, enter $request.path.track as {track} is the path variable name in the incoming request. Refer to this documentation from AWS for more information on the syntax.
All in all, your mapping rules should now look something like this:
 Parameter mapping rules
Click on "Create" and now your API Proxy gateway should be good to go. Yay!
You may similarly append other query params by appending the query string to the path as new mapping. For example, API keys are typically sent as a query param.
In addition, it is also possible to send headers and body in the outgoing request.
How to Attach Authorizers
Although attaching authorizers isn't mandatory while testing your API gateways, it is definitely recommended to secure them in production.
If you're using a third party authentication service like Google Authenticator or something similar, HTTP API gateway provides an easy way to manage authorization on your routes based on JWT token.
Navigate to the "Authorization" page from the left menu and click on "Create and attach an authorizer". By default the "Authorizer type" is selected as JWT.
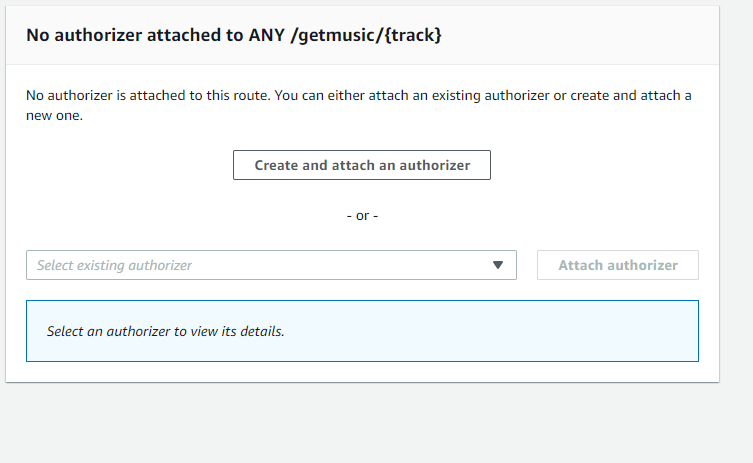
Key in the required input like the name, issuer URL and audience. The value and format varies based on the auth service you happen to use. For instance, Google auth's issuer URL is https://securetoken.google.com/<project-id>.
Wrapping up
The crux of this article is the emphasis on constructing the path using parameter mapping in contrast to directly defining it in route and expecting the magic to happen.
One drawback I've noticed is that parameter mapping doesn't work when there's more than one path variable defined in the outing request. So it's important to make sure that outgoing request has at most one path param.
HTTP API gateways are a quick and easy way of setting up proxy/non-proxy gateways with minimal configurations.
That's all, folks! I hope this helped you gain some knowledge on creating HTTP API gateways and constructing paths with parameter mapping. Share it with your friends and acquaintances who might be interested in reading this.
Keep coding, keep building. Until next time.