
By Cem Eygi
The z-index property of CSS is a tricky one. It won't work easily by itself if you don't know how to use it properly.
So in this post, I'm going to explain what the z-index property is, what stacking order is, and how to use them in the right way.
I will also give some common examples of why the z-index property might not be working and also show you the solutions.
What is the Z-index?
First of all, the character Z comes from the representation of three dimensions x, y, and z. x and y stand for width and height, and the 3rd dimension, Z, stands for depth:
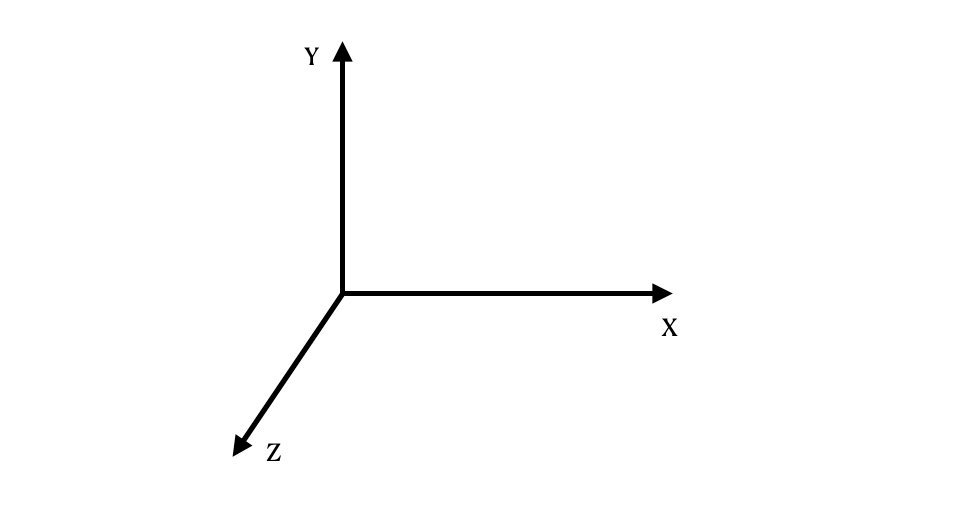
CSS provides a property called z-index so that we can use it to determine the depth of an element. As the z-index value of an element increases, it will be positioned in front of other elements in terms of the 3rd dimension.
Let’s move on with some examples and see how to use the z-index in the right way.
Z-Index does not work without a defined position or Position: Static
The first important thing to know is that every element on a webpage has a default position – in other words, a statically defined position (by default). Let's say we have one red and one blue box on our page:
<div class="box box-red"></div>
<div class="box box-blue"></div>

If you apply z-index directly to the boxes, you’ll see that it’s not going to work. This is because they don't have a defined position yet:
.box {
  height: 150px;
  width: 150px;
}

.box-red {
  background: red;
  z-index: 1;
}

.box-blue {
  background: #00d5f1;
  bottom: 80px;
  left: 55px;
  z-index: 2;
}
This is one of the most common examples of why the z-index is not working properly. In order to solve it, we can apply a position property to the box class which will do the trick:
.box {
  height: 150px;
  width: 150px;
  position: relative;
}

You can also watch my tutorial video to see the example usage of z-index:
What is the Stacking Order?
If we remove the z-index properties from both of the boxes, the blue box will still be positioned in front of the red box, even if there is no z-index property anymore:
.box {
  height: 150px;
  width: 150px;
  position: relative;
}

.box-red {
  background: red;
}

.box-blue {
  background: #00d5f1;
  bottom: 80px;
  left: 55px;
}
Which renders the following:

So when the elements are all on the same level, one element will still be in front of the other one, because they also have a default order in terms of the Z-axis. This is called the stacking order.
Like in the example above, when there's no z-index applied to an element, browsers use a default stacking order to stack elements on the page:
- The background and borders of the root element
- Descendant non-positioned blocks, in order of appearance in the HTML
- Descendant positioned elements, in order of appearance in the HTML
Note that the root element refers to the <html> element, while non-positioned elements are those with the default position: static, and positioned elements are elements with position set to another value.
If we add another box, but set its position attribute to the default static, it will appear behind the blue and red boxes:
<div class="box box-red"><p>Positioned</p></div>
<div class="box box-blue"><p>Positioned</p></div>
<div class="box box-yellow"><p>Non-positioned</p></div>
.box {
  height: 150px;
  width: 150px;
  position: absolute;
}

p {
  color: #0a0a23;
  margin: 0;
  padding-left: 5px;
}

.box-red {
  background: red;
  top: 40px;
  left: 27px;
}

.box-blue {
  background: #00d5f1;
  top: 80px;
  left: 55px;
}

.box-yellow {
  background: rgb(251, 239, 0);
  position: static;
}
Which produces the following:
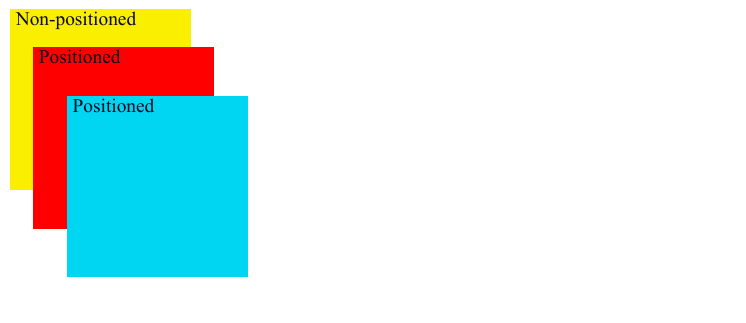
While we did modify the blue and red boxes to use position: absolute instead of relative, and adjust their placement a bit, this helps show the browser's default stacking order – positioned elements on the same level will always appear over non-positioned (or position: static) elements.
Now you might be wondering what happens when elements are not on the same level. Let's dig into that now.
Stacking Context: How the Parent Element's Z-index Applies to Children as Well
Let’s say we put a yellow box between the red and the blue one:
<div class="box box-red">
  <div class="box box-yellow"></div>
</div>
<div class="box box-blue"></div>
.box-red {
  background: red;
  z-index: 1;
}

.box-blue {
  background: #00d5f1;
  bottom: 80px;
  left: 55px;
  z-index: 2;
}

.box-yellow {
  background: rgb(251, 239, 0);
  left: 25px;
  top: 25px;
  z-index: 3;
}
Which renders the following:

Now as you see in the code, even if the yellow box has a higher z-index value compared to the blue one, it is positioned behind the blue box.
This is because the yellow box is the child of the red box, and the z-index of the parent element always applies to its children as well. Since the parent element has a lower z-index, its children inherit the same z-index value as well.
This is due to something called stacking context. Put simply, a stacking context is like a new instance of the stacking order list from before:
- A root HTML element
- Non-positioned elements (
position: static) in the order they appear - Positioned elements (
positionis set to another value) in the order they appear
The main thing to remember is that a positioned element with a z-index value besides the default auto will create a new stacking context.
So looking at our HTML above, because the red box has a z-inxex of 1, it creates a new stacking context for its child, the yellow box. In that stacking context, the red box serves as the root HTML element, and the yellow box is a positioned element inside of it.
Then because the blue box is part of the same stacking context as the red box (where the <html> element serves as the root element), it will always appear above the yellow box.
If you see this kind of issue, you can solve it by either taking the child element out of its parent, or you removing the position property of the parent so the z-index won’t affect its children:
<div class="box box-red"></div>
<div class="box box-yellow"></div>
<div class="box box-blue"></div>
.box {
  height: 150px;
  width: 150px;
  position: relative;
}

.box-red {
  background: red;
  z-index: 1;
}

.box-blue {
  background: #00d5f1;
  bottom: 240px;
  left: 55px;
  z-index: 2;
}

.box-yellow {
  background: rgb(251, 239, 0);
  bottom: 120px;
  left: 25px;
  z-index: 3;
}
Which gives us:

Note that there are a number of other properties that affect the stacking context of an element. You can read more about them here.
Because it's a bit unintuitive, this is one of the most common reasons that z-index doesn't work.
Don't Assign Large Numbers to Z-Index
Another common reason why z-index might not be working is because sometimes people assign very high numbers to the z-index property:
.box-blue {
  z-index: 9999;
}
In a couple of projects I’ve worked on in the past, I often saw people assign these very large numbers like 9999 to the z-index of an element.
Sure it works, but it's like using a hammer when you really need a screwdriver.
Picture it this way – you come into a large project and are working on some HTML, but no matter what you try you can't get the elements to appear in the correct order. So after a bunch of digging and searching online, you find out that someone at some point had set a global z-index property to 9999, which keeps overwriting your z-index.
Now that you know how to use z-index properly, and understand stacking context, you shouldn't have to use large values like this :)
I hope this post has helped you to have a better understanding of how to use the z-index property, along with stacking order and stacking context as well. If you want to learn more about web development, don't forget to subscribe my channel.
Thank you for reading!