Docker is becoming increasingly popular, and many organizations have started incorporating it into their development lifecycle.
Because of this, it's an important tool to learn and can help you automate many of your tasks and workflows.
If you are new to Docker, please read my previous tutorial on what Docker is and how to use it. This will help you easily understand the workflow in Docker.
In this tutorial, we will explore five simple and powerful Docker extensions that can improve the efficiency and productivity of your Docker workflow.
These extensions are designed to simplify the development process, increase scalability, and help you save time and resources. They are:
- JFrog
- Portainer
- Disk Usage
- Drone CI
- Okteto
1. JFrog Scan
If you've worked with Docker images before, you may know that sometimes you'll need to work with open-source Docker images. This extension is useful in those cases.
Using the JFrog Docker extension, you can scan any type of Docker image. Most of your internal Docker images won't have any harmful configurations. But, some open source docker images may contain vulnerabilities, so this is most useful for open-source or third-party docker images.
You can install it from the Docker marketplace.

Before using JFrog, you'll need an active account from JFrog. You can create an account for free.

After a successful sign in, choose an Image to scan for vulnerabilities.

You can see that the image is being scanned for vulnerabilities. It may take some time.

Oops, this Docker image has 25 critical vulnerabilities, as you can see in the image below:

Similarly, you can scan the images before you use them to be aware of the vulnerabilities and address them.
2. Portainer
Portainer provides a web-based interface for managing containers, images, volumes, networks, and other Docker-related resources.
You can use this extension to more easily manage container hosts, Docker Swarm clusters, and Kubernetes clusters.
Using portainer, you can manage the running containers, images, and Environments in a uniform UI.

When to use Portainer:
- This extension allows you to manage remote Docker hosts from a central Portainer instance. It provides a way to manage multiple Docker hosts from a single interface.
- It provides a library of templates that you can use to quickly deploy popular applications, such as WordPress, Drupal, and MySQL. This extension also provides a set of templates for deploying containerized applications on popular cloud platforms such as AWS, Azure, and Google Cloud.
- This extension allows you to backup and restore your Portainer configuration and data. It can be used to create a snapshot of your Portainer environment, which can be used to restore your environment in case of a disaster.
- This extension allows you to manage containers running on edge devices, such as Raspberry Pis or other embedded devices.
We can quickly take any type of action on the containers and images.
3. Disk Usage
Disk Usage is an official Docker extension that provides developers with insights into their Docker disk usage. Once installed, this extension thoroughly examines and categorizes the disk space occupied by various entities, such as images, containers, local volumes, and build cache.
By utilizing this extension, you can efficiently manage your disk space by removing unnecessary objects.

This optimization process is crucial to free up disk space for critical resources. The Disk Usage extension is readily accessible on the Docker extensions tab and can be easily enabled.

You can reclaim the space by removing unused images, dangling images, and build caches. The disk image extension itself gives some suggestions.

4. Drone CI
Before getting into this extension, you should know about CI. CI stands for Continuous Integration. Whenever you start with DevOps, the first thing you need to learn is continuous integration.
Nowadays, developers expect that code changes should immediately reflect the production or testing server in a few clicks. So to automate this, you can enable CI / CD Pipelines in the development lifecycle.
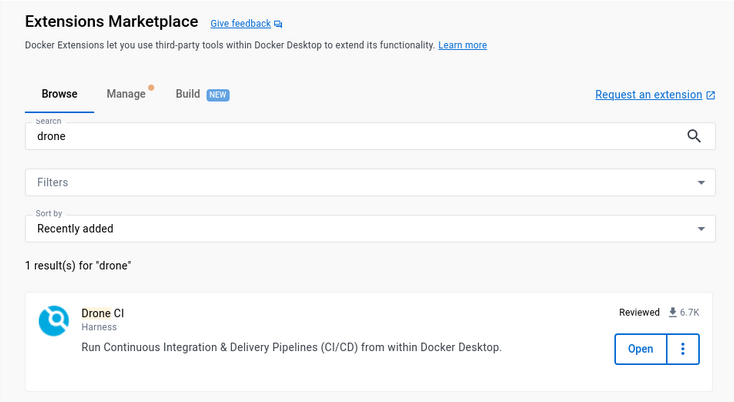
DroneCI is an open-source application that helps you to deploy your app continuously into your desired server.
DroneCI is simple to set up and use. Let's see how to deploy and test a NodeJS application using DroneCI.
You can install it from the Docker extensions marketplace.


Before importing the pipeline, you should have an .drone.yml file.
kind: pipeline
type: docker
name: default

platform:
 os: linux
 arch: arm64

steps:
- name: message
  image: busybox

- name: test
  image: node
  commands:
  - npm install
- npm testPut this file into the root of your Node project.

After importing the pipeline, you can run the pipeline.

Here we are running only for testing the NodeJS application. You can follow the same steps to deploy it as well.
5. Okteto
Okteto is a useful tool that enhances your productivity and satisfaction by providing you with pre-configured environments. This helps free up your time from manually setting up environments.
This accelerates the software development process and release cycles when combined with a proper CI/CD platform. It also enables you to create preview environments resembling test and development environments, allowing you to test changes before deploying them to production. With Okteto, cloud-native development becomes much easier.
The Okteto extension is readily available in the Docker desktop extension marketplace and you can install it with a simple click.
To leverage the benefits of Okteto, you'll need to configure the Okteto manifest for your application. After installing the extension, it prompts you to launch a remote environment. Choose the application folder with the Okteto manifest file and start exploring.
In simple words, you can connect to a remote environment using Okteto cloud. For more information on how to set up and use Okteto, refer to their official documentation.

In order to sign in to Okteto, you need a business email.
After successful login, you have to choose the docker-compose.yml file.

Conclusion
Docker is a powerful tool that simplifies the development process and enables developers to build, test, and deploy applications quickly and efficiently.
By using these Docker extensions, you can take advantage of additional features and functionality to streamline your workflow and optimize your Docker environment.
Apart from the above extensions that I've mentioned above, there are some more important extension that can be very useful:
- To automate multi-container applications, you can use Docker Compose
- For scaling applications, Docker Swarm is very useful
- You can manage Docker images with Docker Registry
And so on. These extensions can significantly enhance the capabilities of Docker and improve the efficiency of your software development workflow.
I hope this guide has been informative and helps you make the most out of Docker extensions.
To learn more about Docker, subscribe to my email newsletter on my site (https://5minslearn.gogosoon.com) and follow me on social media.

