This comprehensive CSS flexbox cheatsheet will cover everything you need to know to start using flexbox in your web projects.
CSS flexbox layout allows you to easily format HTML. Flexbox makes it simple to align items vertically and horizontally using rows and columns. Items will "flex" to different sizes to fill the space. It makes responsive design easier.
CSS flexbox is great to use for the general layout of your website or app. It's easy to learn, is supported in all modern browsers, and it doesn't take that long to figure out the basics. By the end of this guide, you'll be ready to start using flexbox in your web projects.
The article includes helpful animated gifs from Scott Domes which will make flexbox even easier to understand and visualize.
All CSS Flexbox properties
Here is a list of all the CSS flexbox properties that can be used to position elements in CSS. Next, you'll see how they work.
CSS that can be applied to the container
display: flexbox | inline-flex;
flex-direction: row | row-reverse | column | column-reverse;
flex-wrap: nowrap | wrap | wrap-reverse;
flex-flow: <‘flex-direction’> || <‘flex-wrap’>
justify-content: flex-start | flex-end | center | space-between | space-around;
align-items: flex-start | flex-end | center | baseline | stretch;
align-content: flex-start | flex-end | center | space-between | space-around | stretch;
CSS that can be applied to items/elements in the container
order: <integer>;
flex-grow: <number>; /* default 0 */
flex-shrink: <number>; /* default 1 */
flex-basis: <length> | auto; /* default auto */
flex: none | [ <'flex-grow'> <'flex-shrink'>? || <'flex-basis'> ]
align-self: auto | flex-start | flex-end | center | baseline | stretch;
Terminology
 Flexbox terminology diagram from official W3C specification.
Before you learn what the flexbox properties do, it's important to understand the associated terminology. Here are definitions of the key flexbox terms, taken from the official W3C specification for flexbox.
- main-axis: The main axis of a flex container is the primary axis along which flex items are laid out. The direction is based on the flex-direction property.
- main-start | main-end: The flex items are placed within the container starting on the main-start side and going toward the main-end side.
- main size: The width or height of a flex container or flex item, whichever is in the main dimension, is that box’s main size. Its main size property is thus either its width or height property, whichever is in the main dimension.
- cross axis: The axis perpendicular to the main axis is called the cross axis. Its direction depends on the main axis direction.
- cross-start | cross-end: Flex lines are filled with items and placed into the container starting on the cross-start side of the flex container and going toward the cross-end side.
- cross size: The width or height of a flex item, whichever is in the cross dimension, is the item's cross size. The cross size property is whichever of ‘width’ or ‘height’ that is in the cross dimension.
CSS Display Flex
display: flex is tells your browser, "I wanna use flexbox with this container, please."
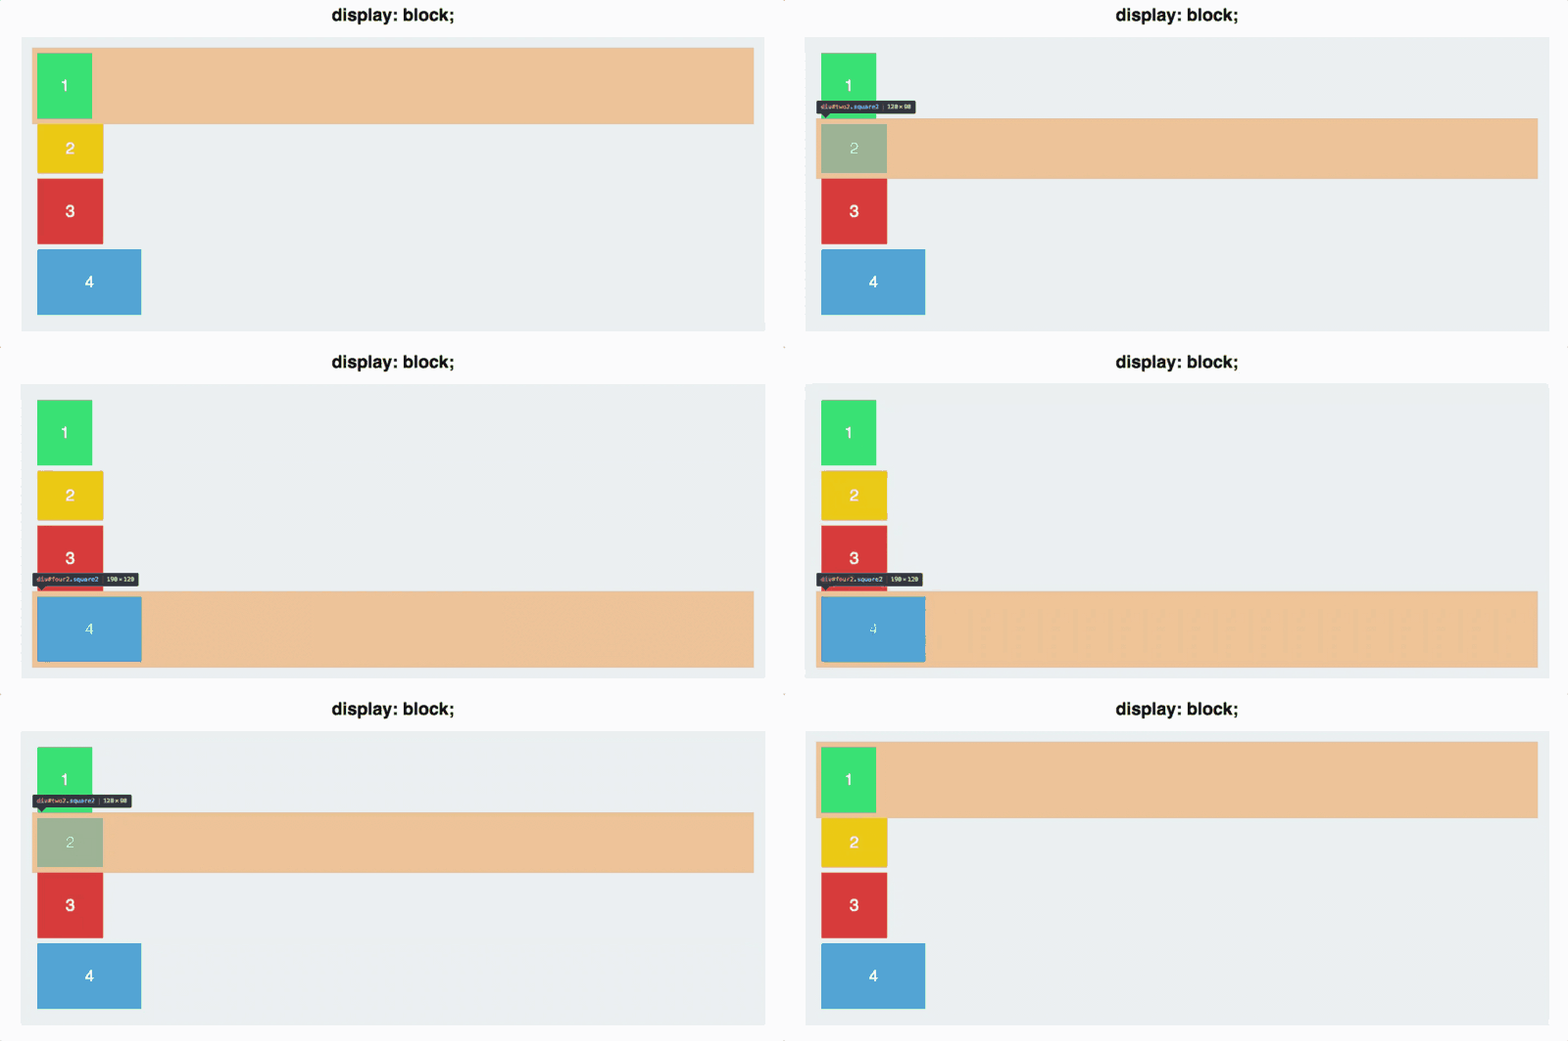
A div element defaults to display:block. An element with this display setting takes up the full width of the line it is on. Here is an example of four colored divs in a parent div with the default display setting:
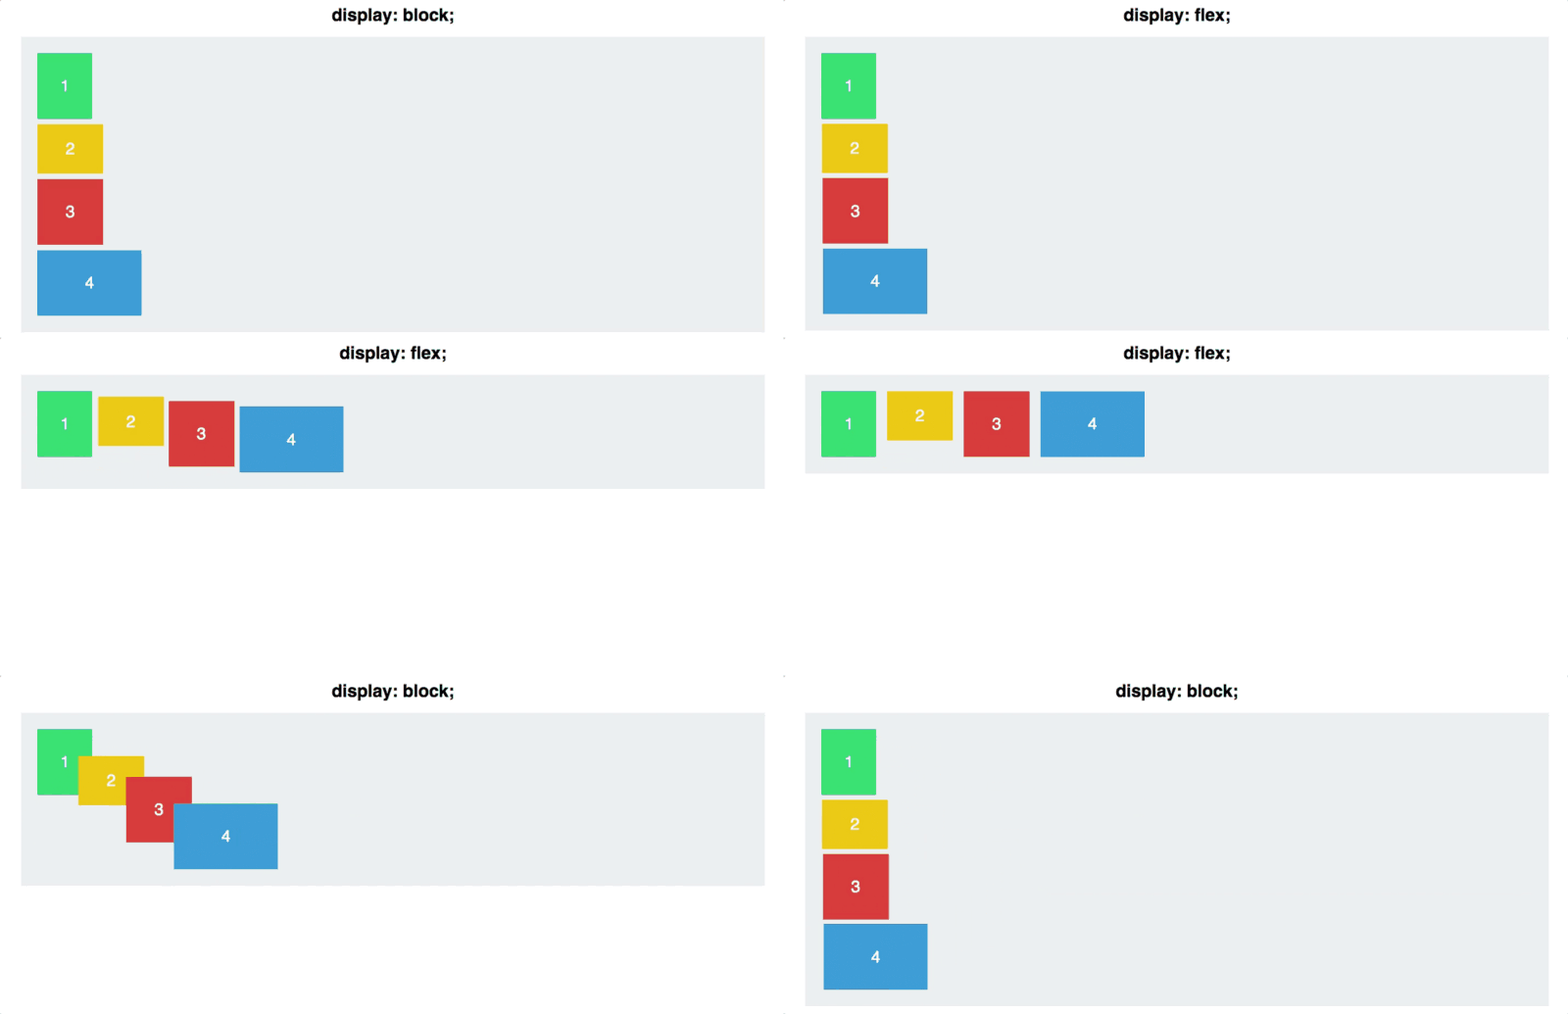
To use flexbox on a section of your page, first convert the parent container to a flex container by adding display: flex; to the CSS of the parent container.
This will initialize this container as a flex container and apply some default flex properties.
Flex Direction
flex-direction allows you to control how the items in the container display. Do you want them left to right, right to left, top to bottom, or bottom to top? You can do all of these easily by setting the flex-direction of the container.
The default arrangement after applying display: flex is for the items to be arranged along the main axis from left to right. The animation below shows what happens when flex-direction: column is added to the container element.
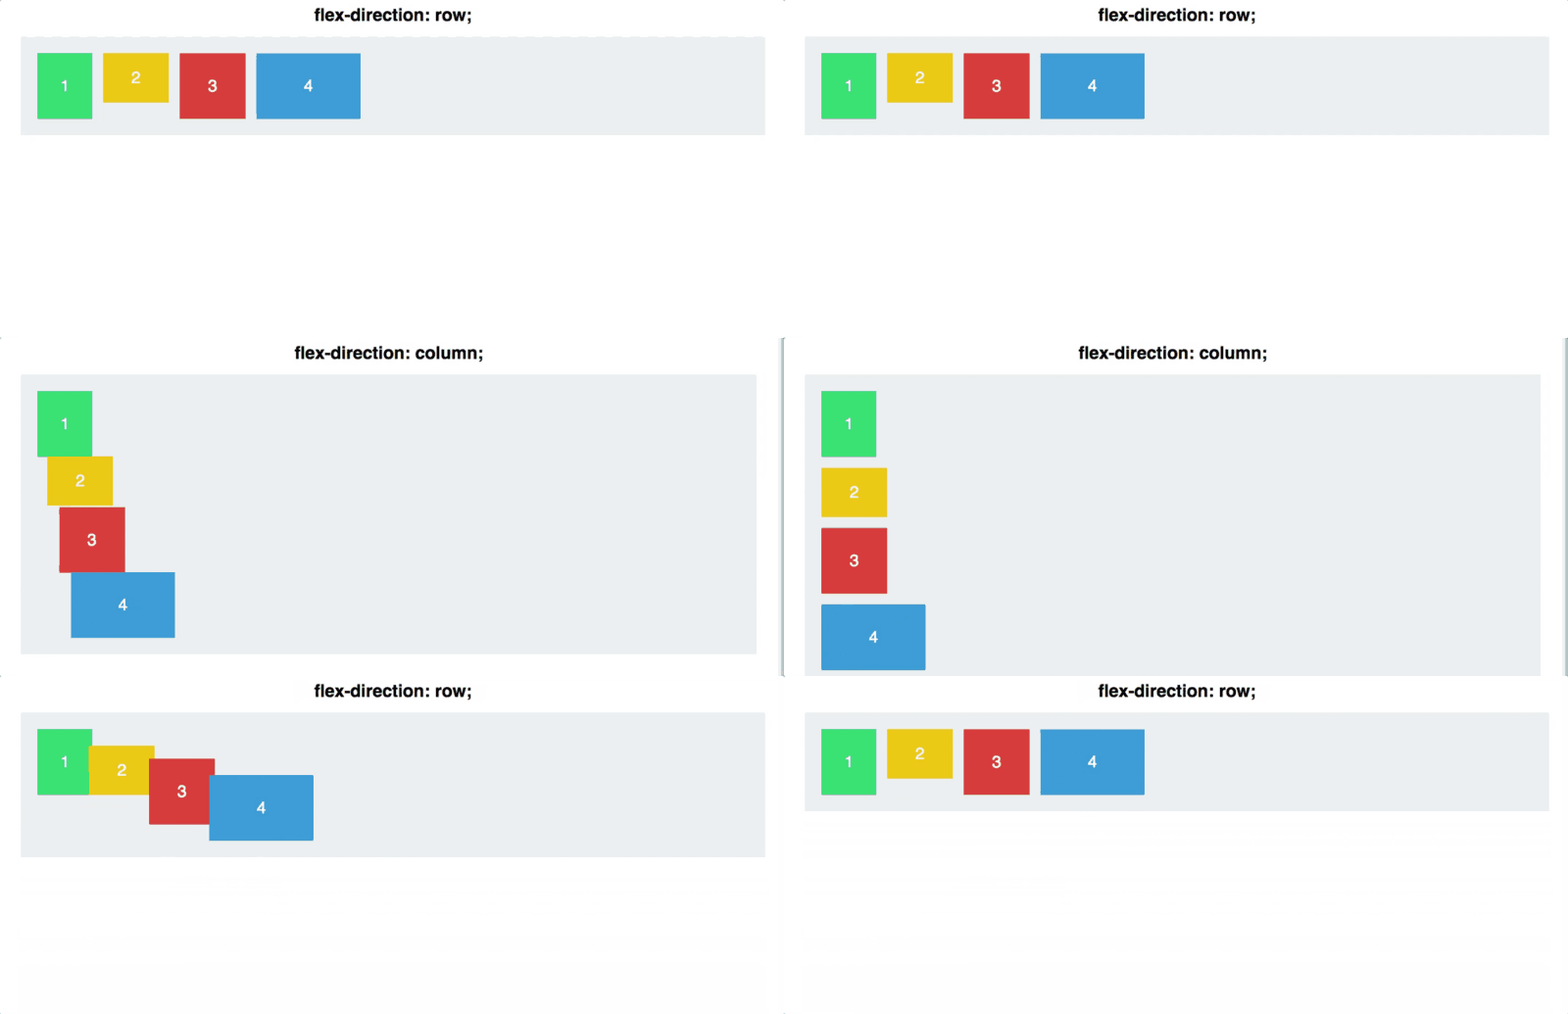
You can also set flex-direction to row-reverse and column-reverse.

Justify Content
justify-content is a property to align items in the container along the main axis (see terminology diagram above). This changes depending on how content is displayed. It allows us to fill any empty space on rows and define how we want to ‘justify’ it.
Here are our the most common options used to justify content: flex-start | flex-end | center | space-between | space-around.
Here is what the different options look like:

space-between distributes items so that the first item is flush with the start and the last is flush with the end. space-around is similar but items have a half-size space on either end.
Flex Align Items
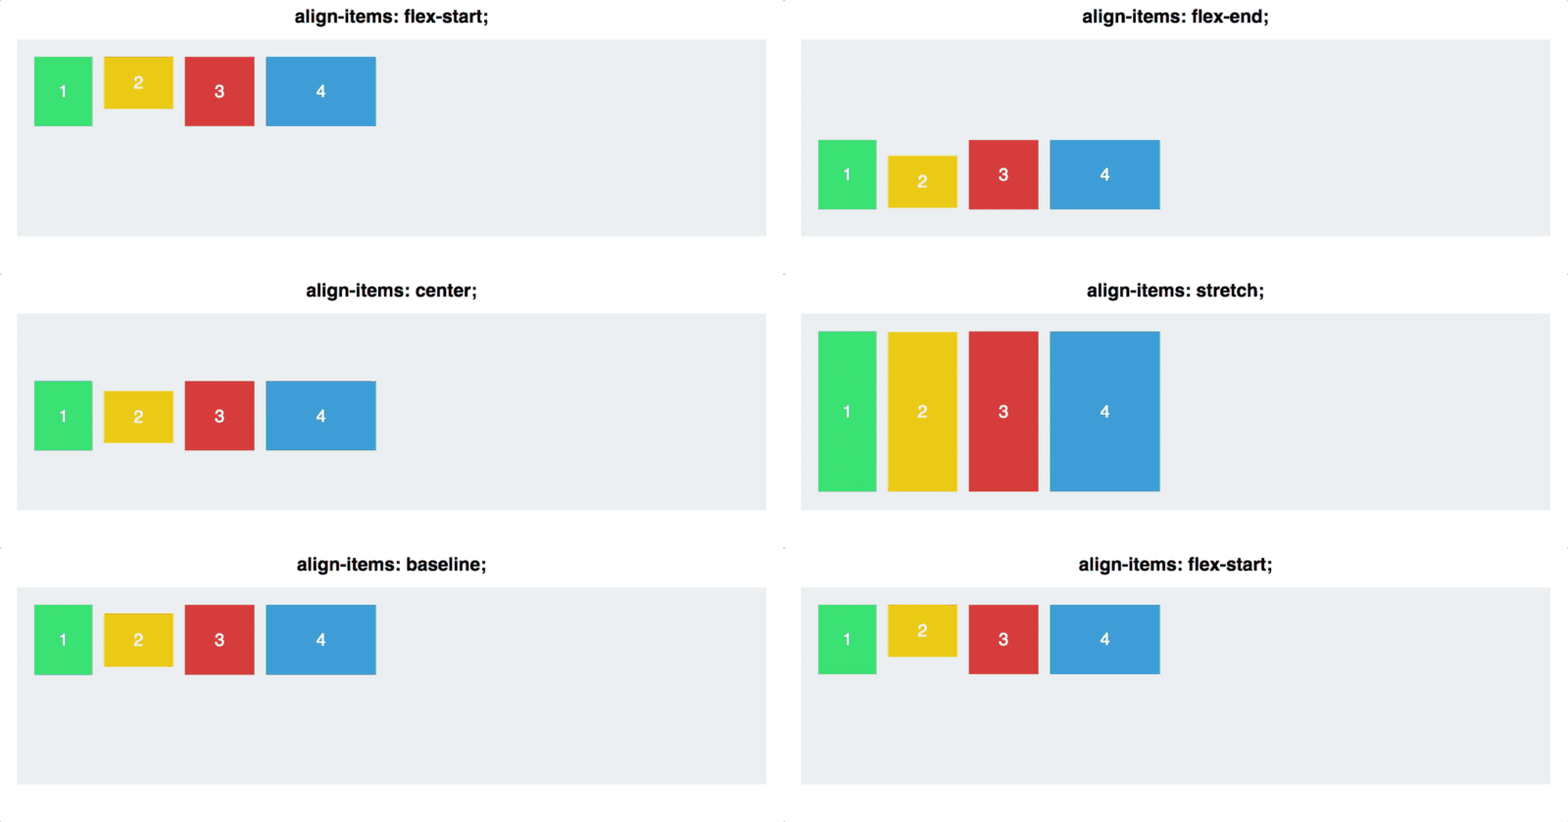
align-items allows us to align items along the cross axis (see terminology diagram above). This allows content to be positioned in many different ways using justify content and align items together.
Here are the most common options used to align items: flex-start | flex-end | center | baseline | stretch
For stretch to work how you would expect, the height of the elements must be set to auto instead of a specific height.
This animation shows what the options look like:
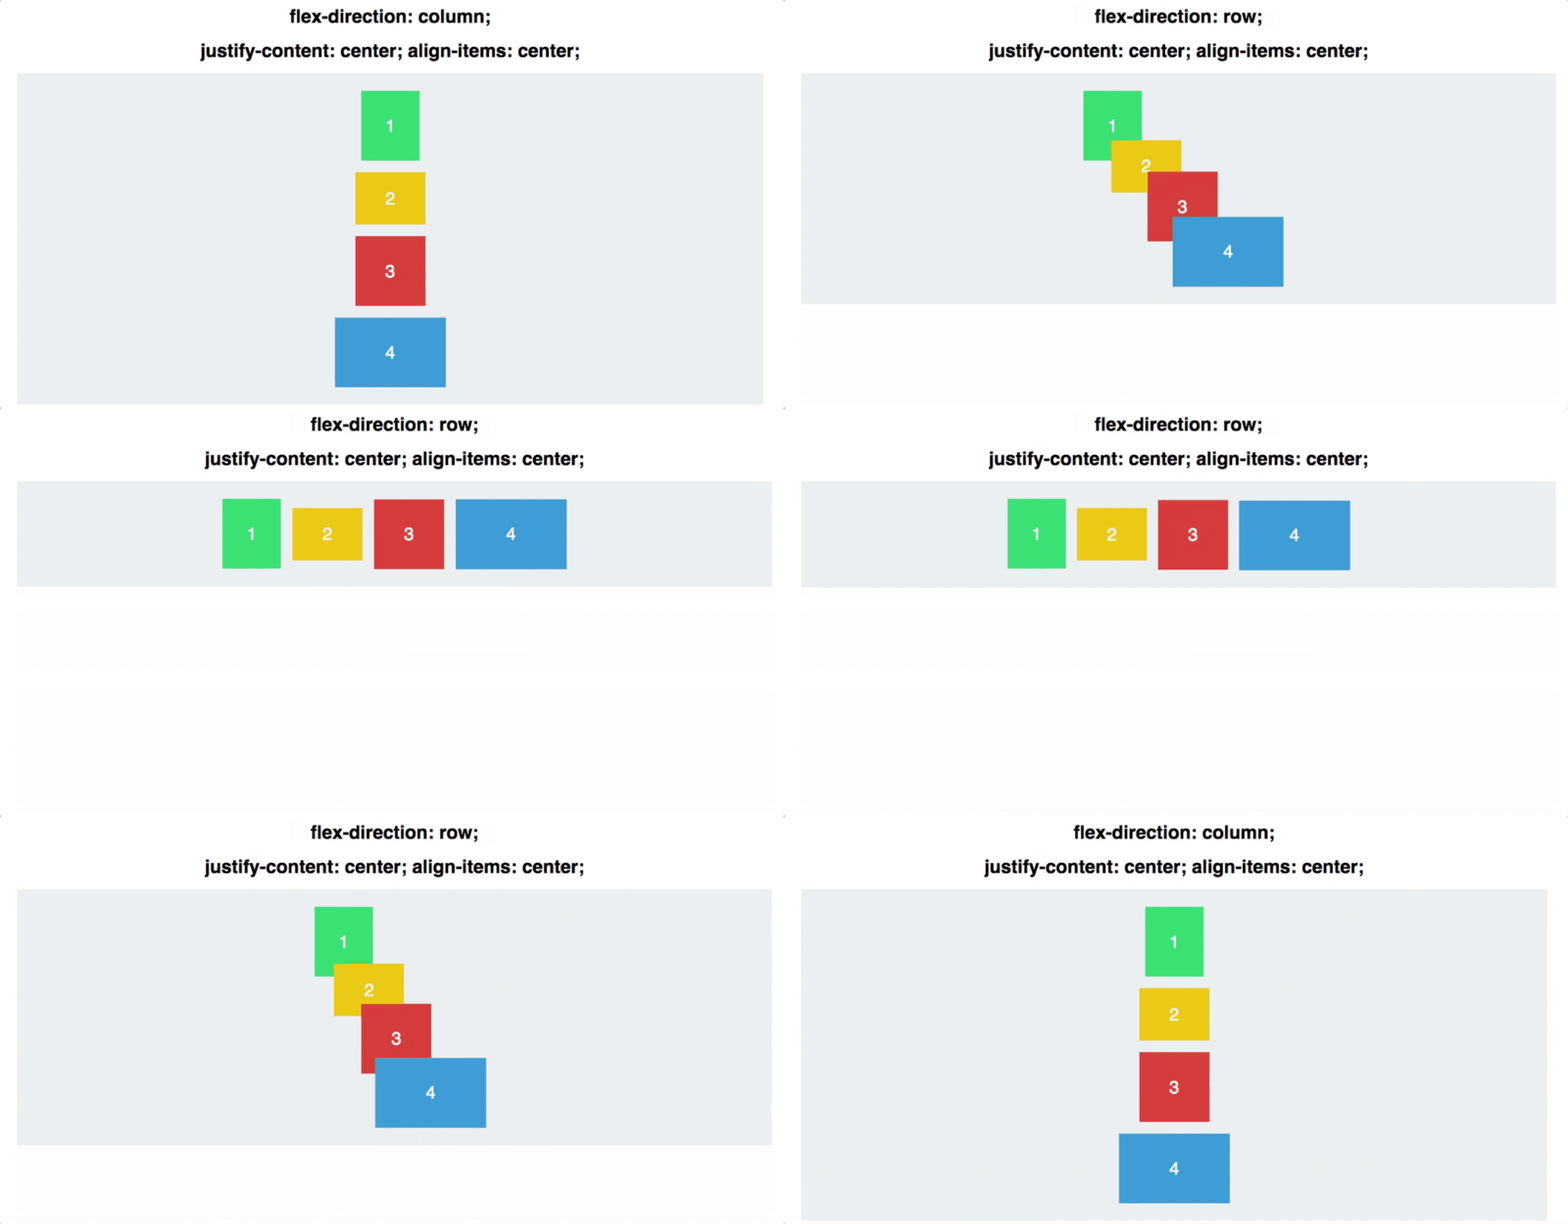
Now we'll use both justify-content and align-items. This will show off the difference between the main axes and the cross axes.
Align Self
align-self allows you to adjust the alignment of a single element.
It has all the same properties of align-items.
In the following animation, the parent div has the CSS align-items: center and flex-direction: row. The first two squares cycle through different align-self values.

Flex Wrap
Flexbox by default will try to fit all elements into one row. However, you can change this with the flex-wrap property. There are three values you can use to determine when elements go to another row.
The default value is flex-wrap: nowrap. This will cause everything to stay in one row from left to right.
flex-wrap: wrap will allow items to pop to the next row if there is not enough room on the first row. The items will be displayed from left to right.
flex-wrap: wrap-reverse also allows items to pop to the next row but this time the items are displayed from right to left.
Flex Flow
flex-flow combines the use of flex-wrap and flex-direction into one property. It is used by first setting the direction and then the wrap. Here is an example: flex-flow: column wrap;
Align Content
align-content is used for aligning items with multiple lines. It is for aligning on the cross axis and will have no effect on content that is one line.
Here are the options: align-content: flex-start | flex-end | center | space-between | space-around | stretch;
Vertically Centering with Flexbox
If you want to vertically center all the contents inside a parent element, use align-items. Here is the code to use:
.parent {
    display: flex;
    align-items: center;
}
Games and Apps
If you want to practice using flexbox, try out these games and apps that will help you master flexbox.
- Flexbox Defense is a web game where you learn flexbox while trying to stop the incoming enemies from getting past your defenses.
- Flexbox Froggy is a game where you help Froggy and friends by writing CSS code.
- Flexyboxes is an app that allows you to see code samples and change parameters to see how Flexbox works visually.
- Flexbox Patters is a website that shows off a bunch of Flexbox examples.
Conclusion
We've covered all the most common CSS flexbox properties. The next step is practice! Try making a few projects using flexbox so you can get used to how it works.

