
By Sijil Salim
Last week, I was excited to dive into chatbot development with the open-source framework Rasa. With Rasa, you get a ton of flexibility, from designing the conversation to developing the NLU logic to deployment.
But the "Yay" soon transformed into banging my head against a brick wall. The initial Rasa bot itself started crashing on my not-so-bad laptop with 4 cores and 16GB RAM.
I had to find some other platform where I could do my development, but I didn't want to spend any money toying around with open-source frameworks. To be precise, what I really needed was a free Machine Learning experimentation platform with VS Code support.
I am going to take you through how I solved these challenges with completely free cloud-based platforms.
I found AWS Sagemaker Studiolab to be a solid choice to run my Rasa machine learning workloads. It is free, has 15 GB persistent storage, and has 12-hour CPU sessions for complex algorithms or 4-hour GPU sessions for deep learning algorithms.
Sagemaker also offers a Jupyterlab server, not a development IDE platform. I desperately needed my favourite VS Code interface, which is how I stumbled upon Github Codespaces.
Codespaces provides a cloud-based VS Code environment but it cannot run compute intensive jobs like ML training. So I needed a "best of both worlds" approach. I needed VScode in Studiolab.
Code-server to the rescue! Code-server is a python library which helps you set up a VS Code server on a machine.
Tools we will be using
- AWS Sagemaker Studiolab
- Conda
- Rasa
- Code-server for VScode
Conda Environment Setup
Let's see how we can connect all these together. We'll start off by creating an empty folder in Studiolab and running the below commands inside that folder:
conda create --name rasa-env python==3.8
conda activate rasa-env

python -m pip uninstall pip
python -m ensurepip
python -m pip install -U pip

python -m pip install --upgrade setuptools
python -m pip install rasa
These commands will create a new Conda environment in Studiolab named rasa-env and install Rasa in it. You can also run conda install openssh if you want SSH access to Git.
To install the VS Code server in this Conda environment, execute the command conda install -y -c conda-forge code-server. Now, you have your own Conda environment with Rasa, code-server and OpenSSH installed.
Of course, we will be maintaining the Rasa code in a Git repository. If someone wishes to pull down the repo, we don't want that person to go through the same hassle of creating the environment, right?.
To make their life easier, we will generate an environment.yml file, which is the Conda equivalent of requirements.txt, using the command conda env export --file environment.yml. Using this file, you can recreate the environment by running conda env create -n rasa-env -f environment.yml.
VScode Setup
Now that we have the environment setup out of our way, we can launch the VS Code server in a new tab and kick off with our Rasa development.
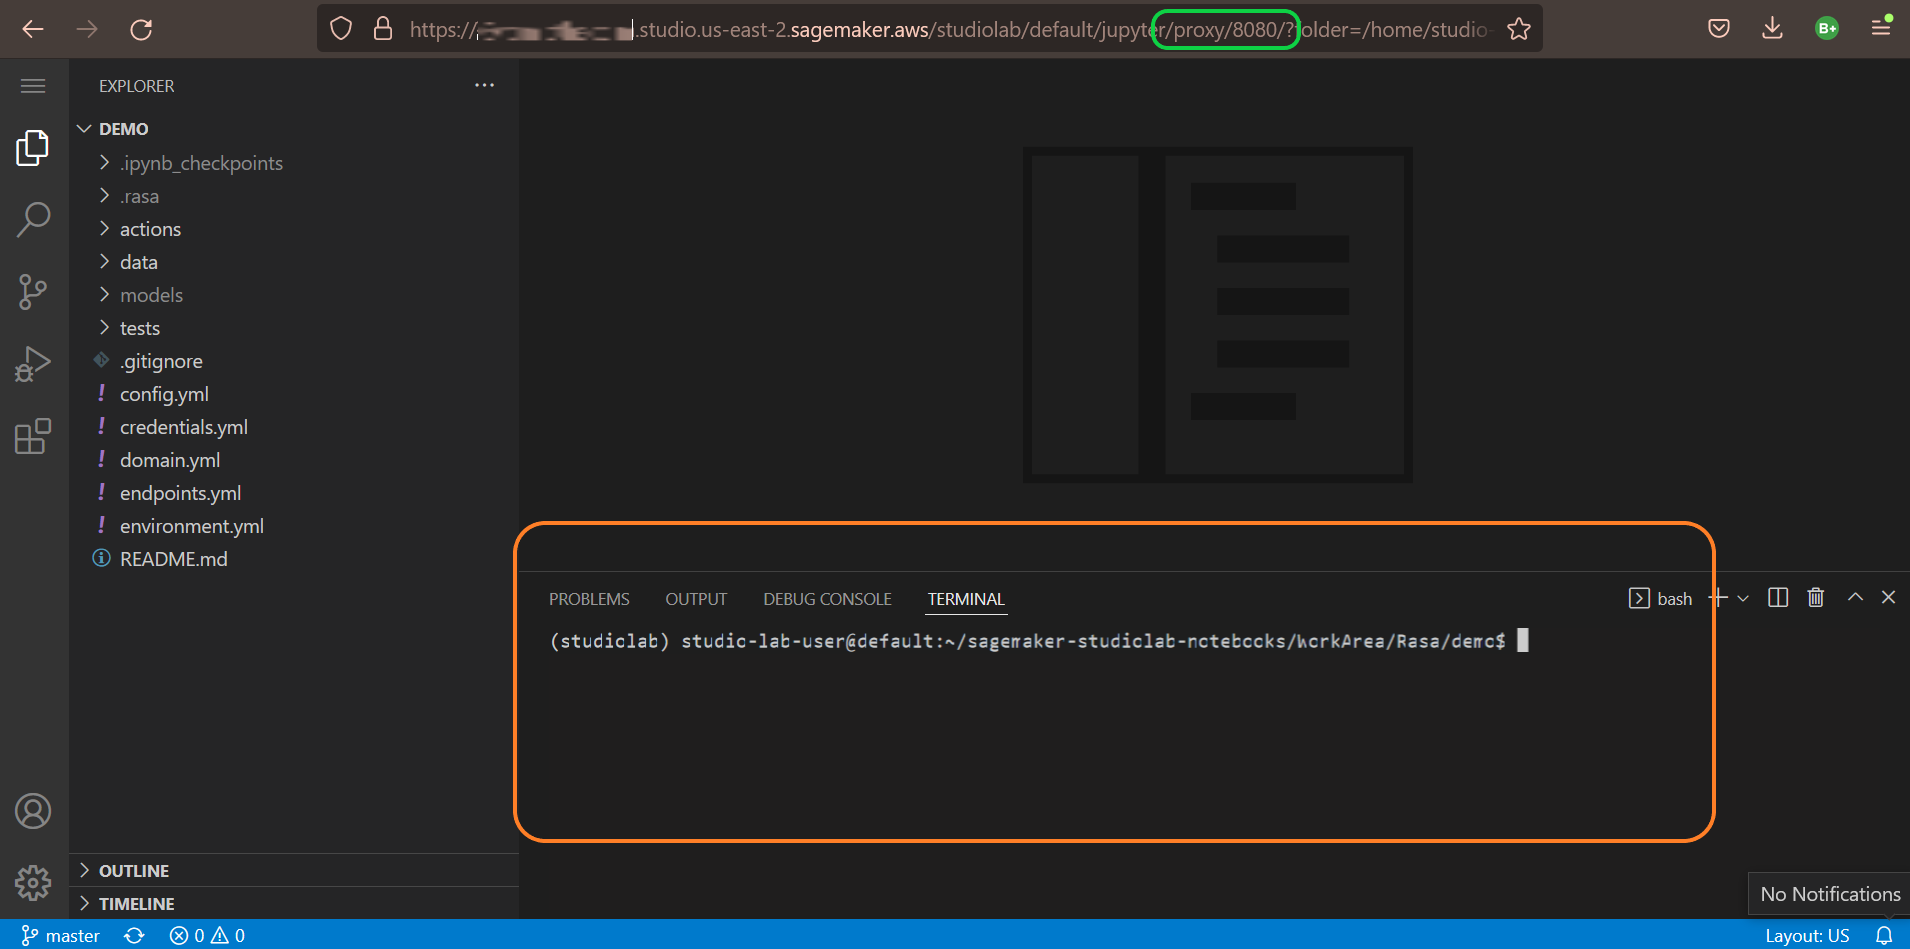
To launch the VS Code server, open a new terminal in Studiolab and execute code-server --auth none.

The above image shows the logs generated after running the code-server command. You can start code-server with authentication as well, which will allow only those who have the password to access the VS Code server.
Copy the URL of your Studiolab environment, which will look something like https://xxxxxxxxxxxxxxxxxx.studio.us-east-2.sagemaker.aws/studiolab/default/jupyter/lab and replace the /lab in the end with /proxy/8080/ to create the VS Code server URL.
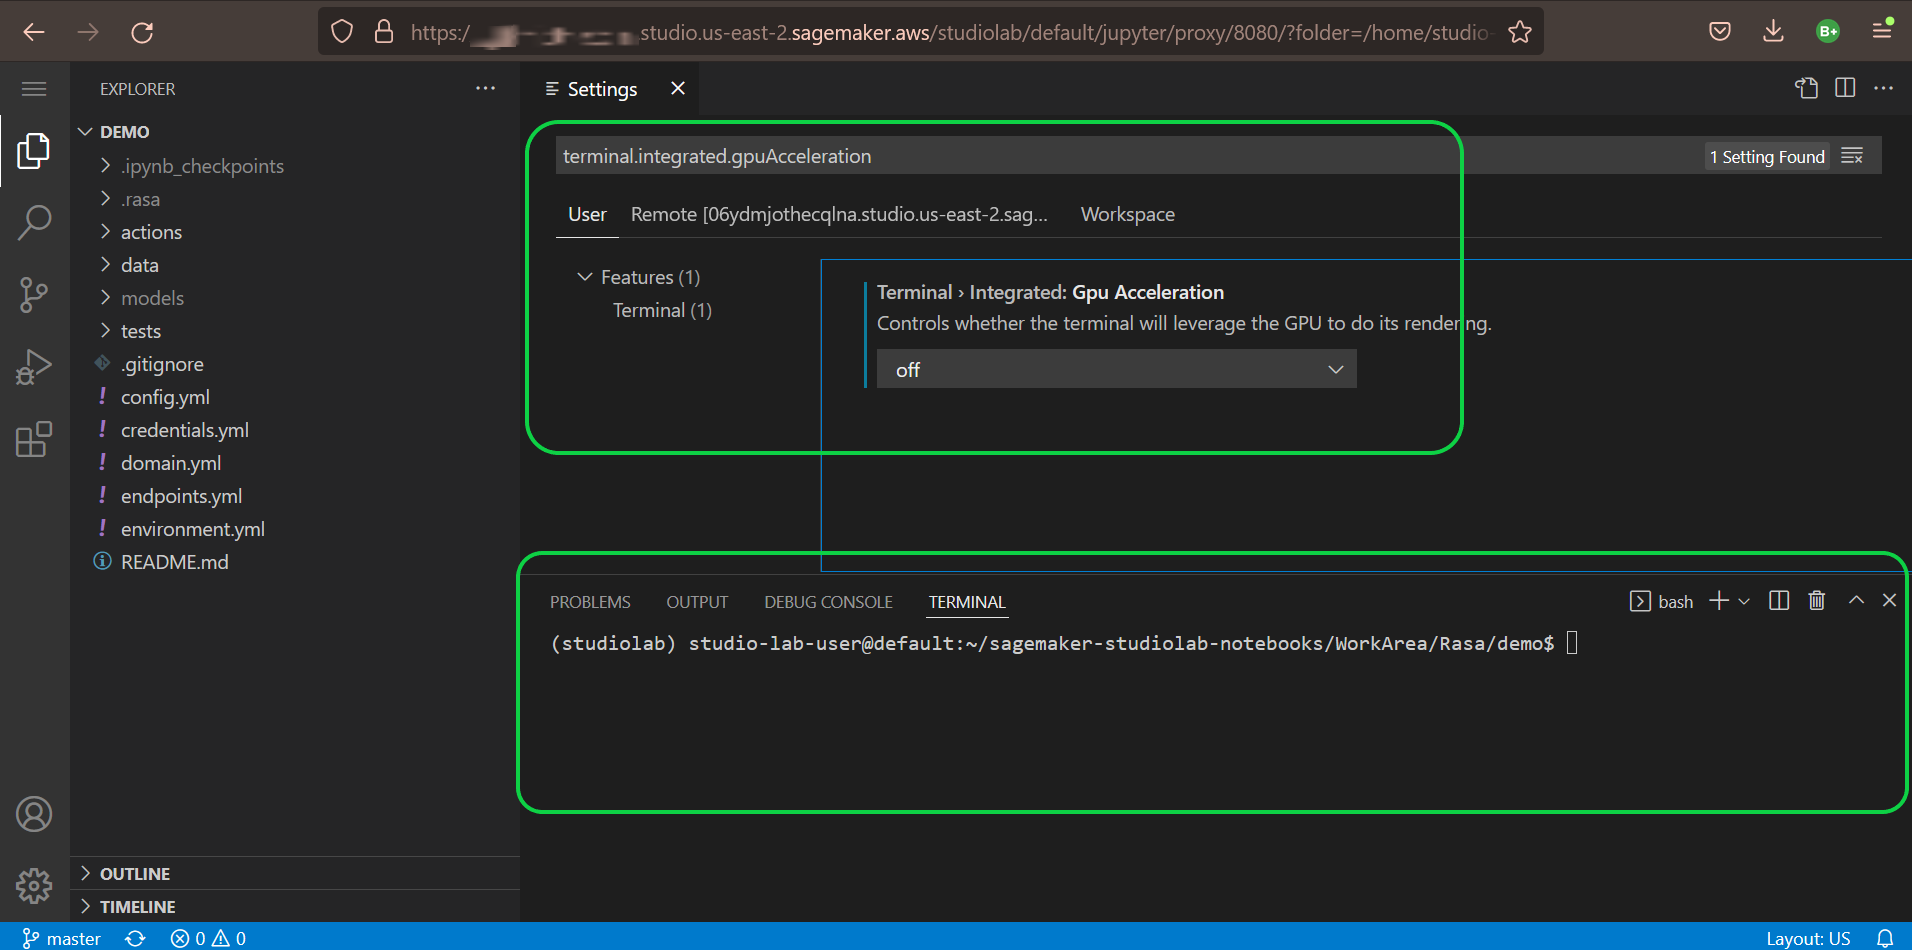
Enter this new URL in a separate tab to navigate to the VS Code running in Studiolab. Wait for 3-5 mins for the server to come up. Once the server is up, we will see that the text in the terminal of VS Code is blurred.
To rectify this, turn off gpu acceleration for VS Code terminal using the VS Code setting terminal.integrated.gpuAcceleration.
Rasa Development
Finally, activate the rasa-env Conda environment by running conda activate rasa-env to activate our Rasa environment for development.
Let's get our hands dirty with Rasa now. To initialize a sample Rasa project, run rasa init in the folder. Once the initialization is done, we will have the code for a basic bot in the folder.
Next, we have to generate the NLU model for the bot. rasa train will generate the model and dump it in the models subfolder in .tar.gz format.
Now, the moment of truth – run rasa shell. If everything goes well, we should have our bot up and running in the VS Code server, which in turn is running in the Studiolab runtime.
Do not forget to clean up everything after you are done by stopping the VS Code server in the Studiolab runtime and finally stopping the runtime itself.
Wrapping Up
Thats it! You have your very own, completely free, cloud-based chatbot development environment where you can run compute intensive workloads via the VS Code interface.
If you learned something new or enjoyed reading this article, please share it so that others can see it. Until then, see you in the next post!
You can also find me on Twitter @Live_ByThe_Code.
And you can read more articles like this here.