

The Go programming language is renowned for its efficiency in backend development. But it's pretty easy to extend its capabilities to frontend projects as well.
This article explores essential Go tools that empower frontend developers to enhance their workflows, emphasizing simplicity and productivity.
Prequisites
Before diving into the exploration of the Go tools for frontend projects, ensure you have the following in place:
- Go installed on your machine. You can download it from the official Go website.
- Code editor of your choice installed, such as Visual Studio Code, GoLand, or Zed.
- Basic understanding of Go, check out Go's documentation or this Go handbook.
Go Tools for Your Frontend Projects
Here are five Go tools you can try out for your cool frontend projects:
1. Fiber: A Performant Web Framework
Fiber is an Express.js-inspired web framework for Go, known for its high performance and minimalist design. It facilitates efficient routing and middleware support, making it ideal for frontend-backend communication and API development.
Fiber is particularly useful in creating robust and performant APIs that frontend applications can interact with seamlessly.
Code example:
This example will be a simple web app where users can enter their names, submit a form, and receive a personalized greeting in return.
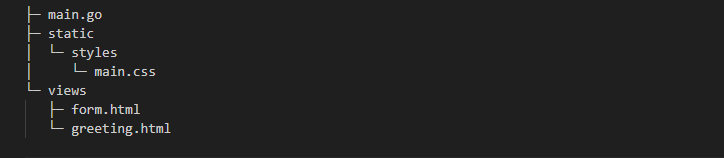
In your code editor, use this struture for the project:
Enter this code for the main.go file:
package main

import (
    "fmt"
    "github.com/gofiber/fiber/v2"
    "github.com/gofiber/template/html/v2"
)

// RenderForm renders the HTML form.
func RenderForm(c *fiber.Ctx) error {
    return c.Render("form", fiber.Map{})
}

// ProcessForm processes the form submission.
func ProcessForm(c *fiber.Ctx) error {
    name := c.FormValue("name")
    greeting := fmt.Sprintf("Hello, %s!", name)
    return c.Render("greeting", fiber.Map{"Greeting": greeting})
}

func main() {
    app := fiber.New(fiber.Config{
        Views: html.New("./views", ".html"),
    })

    // Serve static files (HTML templates and stylesheets).
    app.Static("/", "./static")

    // Define routes.
    app.Get("/", RenderForm)
    app.Post("/submit", ProcessForm)

    // Start the Fiber app on port 8080.
    app.Listen(":8080")
}
The views folder contains two HTML files that display the form and response on the browser. Enter the code for them:
form.html
<!-- views/form.html -->

<!DOCTYPE html>
<html lang="en">
<head>
    <meta charset="UTF-8">
    <meta name="viewport" content="width=device-width, initial-scale=1.0">
    <title>Fiber Example</title>
    <link rel="stylesheet" href="/styles/main.css">
</head>
<body>
    <form action="/submit" method="post">
        <label for="name">Enter your name:</label>
        <input type="text" id="name" name="name" required>
        <button type="submit">Submit</button>
    </form>
</body>
</html>
greeting.html
<!-- views/greeting.html -->

<!DOCTYPE html>
<html lang="en">
<head>
    <meta charset="UTF-8">
    <meta name="viewport" content="width=device-width, initial-scale=1.0">
    <title>Fiber Example</title>
    <link rel="stylesheet" href="/styles/main.css">
</head>
<body>
    <p>{{.Greeting}}</p>
</body>
</html>
Next, in the styles folder inside the static directory, enter this code for the main.css:
/* main.css */

body {
    font-family: Arial, sans-serif;
    background-color: #f0f0f0;
    margin: 20px;
  }

  form {
    max-width: 400px;
    margin: 0 auto;
    background-color: #fff;
    padding: 20px;
    border-radius: 8px;
    box-shadow: 0 0 10px rgba(0, 0, 0, 0.1);
  }

  label {
    display: block;
    margin-bottom: 10px;
  }

  input {
    width: 100%;
    padding: 8px;
    margin-bottom: 20px;
    box-sizing: border-box;
  }

  button {
    background-color: #007bff;
    color: #fff;
    padding: 10px;
    border: none;
    border-radius: 4px;
    cursor: pointer;
  }

  button:hover {
    background-color: #0056b3;
  }
The code for this project can be accessed on this GitHub repo.
Fiber's View Engine
Fiber integrates with view engines, and we'll use the HTML template engine in this example. Setting up the view engine is straightforward, allowing for a clean separation of concerns between the backend and frontend.
app := fiber.New(fiber.Config{
    Views: html.New("./views", ".html"),
})
Fiber simplifies the serving of static assets, ensuring efficient delivery of stylesheets, images, and client-side JavaScript files. In our example, styles are stored in the static folder and linked in the HTML templates.
// Serve static files (HTML templates and stylesheets)
app.Static("/", "/.static")
Run the program using main.go to start the server on port 8080. It diplays a console output generated by the Fiber framework.
go run main.go
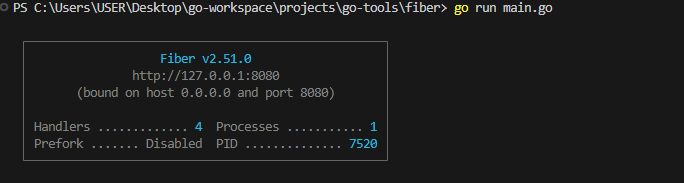
Visit http://127.0.0.1:8080/ in your browser to see the response. Here is how it works:

2. Buffalo: Holistic Web Development Ecosystem
Buffalo is a holistic web development ecosystem for Go, providing a complete set of tools, libraries, and conventions for building modern web applications. It simplifies frontend and backend development by offering scaffolding and hot-reload features.
Buffalo is beneficial for rapidly setting up full-stack web applications, enabling developers to focus on building features rather than dealing with boilerplate code.
A typical Buffalo project has the following structure:
myapp/
|-- actions/
|-- grifts/
|-- migrations/
|-- models/
|-- public/
|-- templates/
|-- go.mod
|-- go.sum
|-- main.go
- actions: Contains handlers for web routes.
- grifts: Houses Grift tasks for automation.
- migrations: Stores database migration files.
- models: Defines data models.
- public: Holds static assets like stylesheets and images.
- templates: Stores HTML templates.
go.mod and go.sum: Track project dependencies and their versions.main.go: Entry point of Buffalo app, initializes and starts the server.
Run this command to create a new Buffalo application:
buffalo new myapp
3. Grift: Automating Tasks in Go
Grift is a task runner ideal for automating various project-related tasks. It manages frontend build processes, asset handling, and deployment automation.
Grift proves valuable when automating repetitive tasks in the frontend development workflow, enhancing efficiency and reducing manual intervention.
Code example:
This example demonstrates how Grift can be utilized to bundle and minify JavaScript files in a frontend project.
Project Structure:

Here are the JavaScript files:
file1.js and file2.js, are in the src directory.
file.js`
// file1.js
function greet(name) {
  console.log(`Hello, ${name}!`);
}
greet("John");
file2.js
// file2.js
function multiply(a, b) {
  return a * b;
}
console.log(multiply(3, 4));
Grift Task
Grift task bundles and minifies these JavaScript files into a single file named bundle.js. The task is defined in the main.go file of the project.
main.go
// main.go
package main

import (
    "fmt"
    "github.com/markbates/grift/grift"
    "github.com/tdewolff/minify/v2"
    "github.com/tdewolff/minify/v2/js"
    "io/ioutil"
    "os"
    "path/filepath"
)

// BundleAndMinifyJS is a Grift task that bundles and minifies JavaScript files.
func BundleAndMinifyJS(c *grift.Context) error {
    // ... (code omitted for brevity)

    fmt.Printf("JavaScript files bundled and minified successfully. Output: %s\n", outputPath)
    return nil
}

// main function registers the Grift task and runs it.
func main() {
    grift.Desc("bundle-js", "Bundle and minify JavaScript files")
    grift.Add("bundle-js", BundleAndMinifyJS)

    taskName := "bundle-js"
    context := &grift.Context{}
    if err := grift.Run(taskName, context); err != nil {
        if err.Error() == "task not found" {
            fmt.Println("Task not found.")
            os.Exit(1)
        }
        panic(err)
    }
}
Running Grift Task
To execute Grift task, run the following command in your terminal:
go run main.go bundle-js
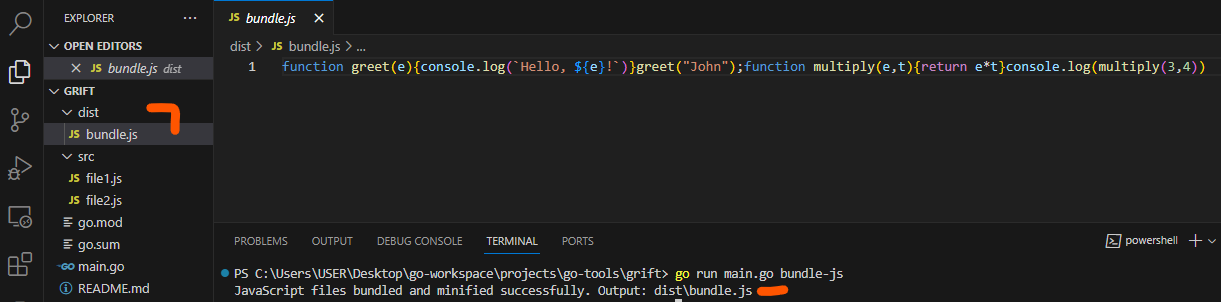
This Grift task will bundle and minify file1.js and file2.js into a single file named bundle.js within the dist directory.
Here is the output, showing the new directory and file bundle.js created and also the message printed in the terminal:
4. Gomponents: Creating Web UI Components in Go
Gomponents is a library for generating HTML components in Go. It simplifies the creation of UI components for frontend applications.
Gomponents is particularly useful when you want to generate HTML components dynamically within your Go code, allowing for more flexibility and abstraction in building UIs.
Code example: This web app shows how to use Gomponents and is inspired by the Gomponents tailwindcss example by Markus Wüstenberg..
Create a file main.go and enter the code below:
package main

import (
    "fmt"
    "net/http"

    g "github.com/maragudk/gomponents"
    c "github.com/maragudk/gomponents/components"
    . "github.com/maragudk/gomponents/html"
)

func main() {
    http.Handle("/", createHandler("Welcome!", simpleComponent("Hello, this is the main page!")))
    http.Handle("/contact", createHandler("Contact", simpleComponent("Contact us!")))
    http.Handle("/about", createHandler("About", simpleComponent("About this site!")))

    // Print a message indicating that the server is running
    fmt.Println("Server is running on http://localhost:8080")

    _ = http.ListenAndServe("localhost:8080", nil)
}

func createHandler(title string, body g.Node) http.HandlerFunc {
    return func(w http.ResponseWriter, r *http.Request) {
        _ = Page(title, r.URL.Path, body).Render(w)
    }
}

func simpleComponent(content string) g.Node {
    return Div(
        H1(g.Text(content)),
        P(g.Text("This is a simple component.")),
    )
}

func Page(title, path string, body g.Node) g.Node {
    return c.HTML5(c.HTML5Props{
        Title:    title,
        Language: "en",
        Body: []g.Node{
            Navbar(path),
            Container(body),
        },
    })
}

func Navbar(currentPath string) g.Node {
    return Nav(Class("navbar"),
        Container(
            NavbarLink("/", "Home", currentPath == "/"),
            NavbarLink("/contact", "Contact", currentPath == "/contact"),
            NavbarLink("/about", "About", currentPath == "/about"),
        ),
    )
}

func NavbarLink(path, text string, active bool) g.Node {
    return A(Href(path), g.Text(text),
        c.Classes{
            "active": active,
        },
    )
}

func Container(children ...g.Node) g.Node {
    return Div(Class("container"), g.Group(children))
}
Run the code with this command to start the server:
go run main.go
Then enter this URL in your browser to the Go components: http://localhost:8080 as shown here:
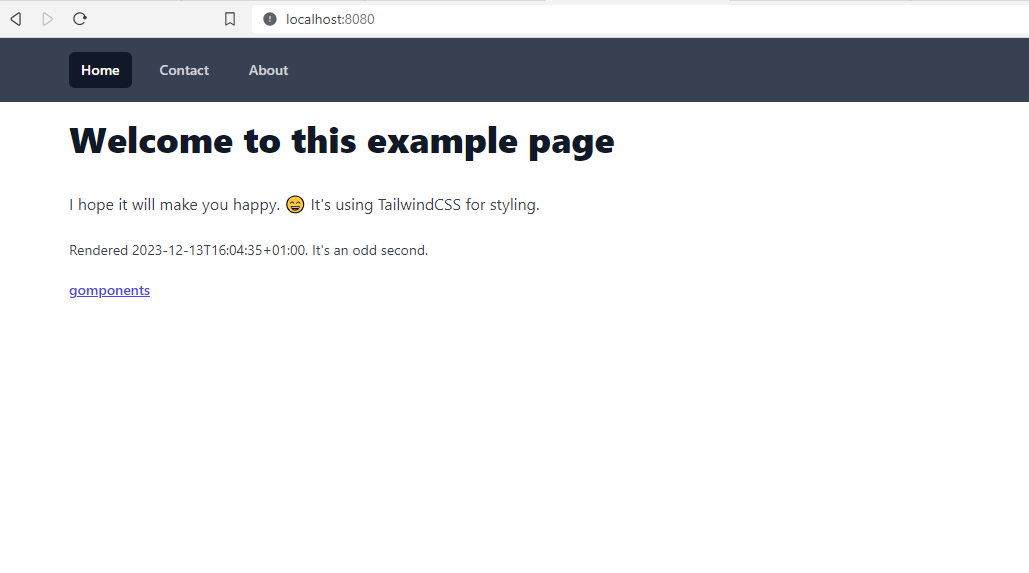
And we have the Home, About, and Contact components built with Gomponents.
5. Present: A Go-based Slide Deck Tool
Present is a tool in the Go ecosystem used for creating slide decks and presentations. It allows developers to generate technical presentations or documentation directly in Go.
Present is beneficial when you need to create and share technical presentations about frontend development topics, project updates, or any other relevant information.
Here's how you can use Present in your projects:
First, create a file named presentation.slide in your code editor and enter this sample code:
# My Frontend Tech Talk

---

## Agenda

1. Introduction
2. Project Scope
3. Live Demo
4. Q&A
Then write your presentation content using CommonMark, a simple markup language. Use headings (#) for slides and --- to separate them.
Install the Present tool like this:
go get -u golang.org/x/tools/cmd/present
Then run the Present tool in the directory containing your presentation file. Your browser then displays a presentation.
present
Why Use Go Tools in Frontend Projects?
Efficiency: Go tools are designed to enhance efficiency, automate repetitive tasks, and reduce manual intervention in frontend development workflows.
Performance: Tools like Fiber are optimized for performance, ensuring that your frontend-backend communication is swift and responsive.
Consistency: Buffalo's conventions and project structure promote consistency, allowing developers to focus on building features rather than dealing with boilerplate code.
Flexibility: Gomponents' ability to generate HTML components dynamically in Go provides flexibility in constructing UIs within the language.
Documentation and Presentation: Present simplifies the creation of technical presentations and documentation, keeping your project insights and updates organized.
The seamless integration of Go tools not only streamlines development but also aligns with Go's philosophy of simplicity and efficiency.
Experiment with these tools, and you'll see the positive impact they can have on your workflow.
Happy coding! 💜