
By Johan Rin
After passing my last certification, I asked myself how much time I spent studying cloud computing.
More than 100 days!
It also made me realize two things:
- There was no #100DaysOfCloud challenge
- We have now enough content to create this challenge
So I immediately contacted Alex Kallaway, the creator of #100DaysOfCode, to ask him if it was possible to create #100DaysOfCloud based on his challenge.
And a few days later, the #100DaysOfCloud challenge was official:
But something was missing.
If you already used the #100DaysOfCode hashtag, you know that your tweets are going to be retweeted at least three times by Twitter bots.
Because there were no bots for the new #100DaysOfCloud challenge, I decided to fix that problem.
In this post, we're gonna see how I deployed my Twitter bot and why I choose to deploy it on AWS Fargate.
Let's start!
Prerequisites
If you want to follow along and run the commands below, be sure to:
- Have an AWS account with access key and secret key
- Have Twitter API Authentication Credentials
- Install Docker on your machine
- Clone the repository from https://github.com/johanrin/100-days-of-cloud-bot
Why AWS Fargate?
If you check my code, you’ll see that:
- The code is written in Python and use tweepy package
- The bot is always running (using a
whileloop) - There is a
Dockerfileto build my image
I will not explain all the code because that's beyond the scope of this post. But I did mention all the sources I used in the GitHub repository.
My idea was to deploy the Docker image in a container in the cloud with the following constraints:
- I don't want to spend much money
- I don't want to manage and operate servers
Because I have credits on AWS, the first constraint was easy — go with AWS.
As for constraint number 2, I knew from the AWS Certified Developer - Associate course, that we could deploy serverless containers with AWS Fargate.
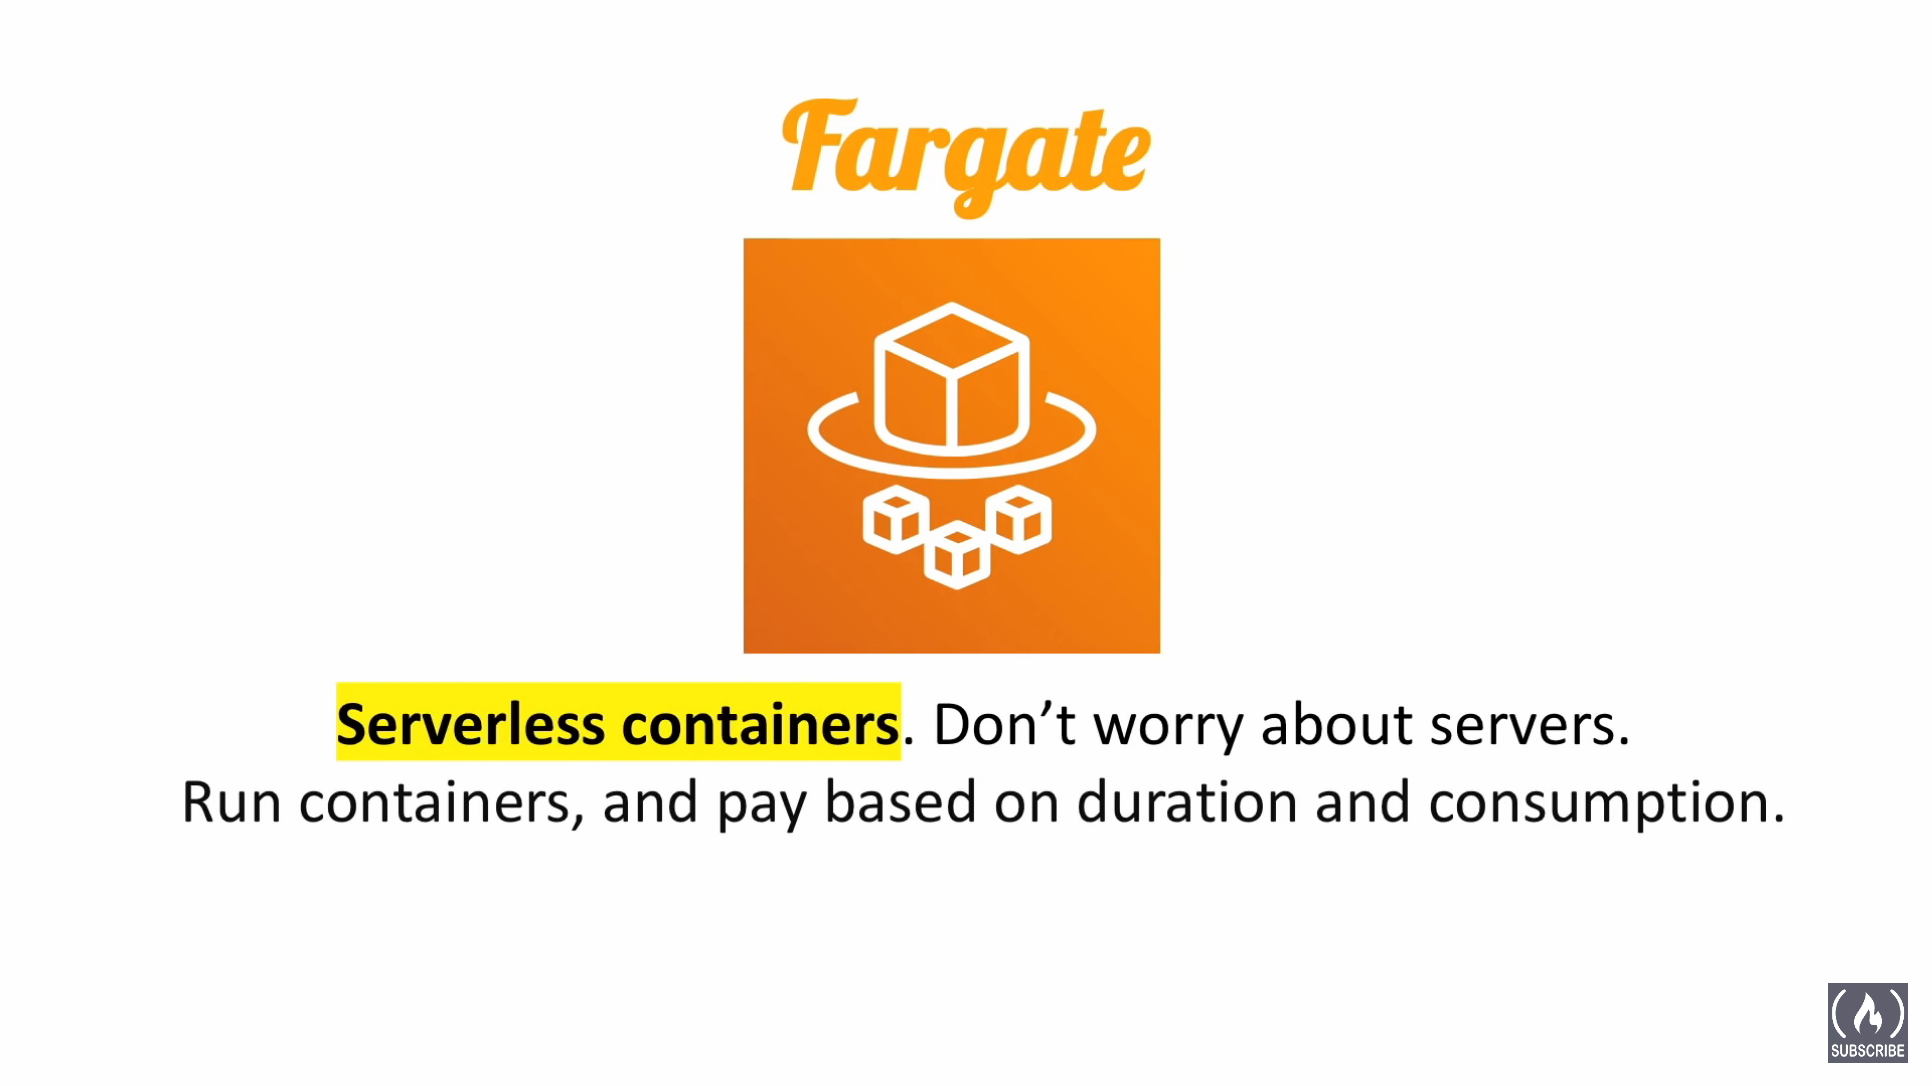 From the AWS Certified Developer - Associate 2020 course
Depending on your region, the pricing for AWS services can vary. It's often just a matter of a few cents, but I planned to run my bot for at least one year. So, every cent mattered.
To see AWS Fargate pricing and minimize your cost, you can check the AWS documentation. I found that the cheapest region close to me was Ireland, so I decided to deploy my bot to AWS Fargate there.
How did I deploy my bot?
Now that I've explained why I used AWS Fargate, let's see how I deployed my bot.
There are two big steps to deploy a Docker image on AWS Fargate:
- Push the Docker image to Amazon Elastic Container Registry (ECR)
- Deploy the Docker image on Fargate
Let's explain each step in detail.
Push the Docker image to Amazon Elastic Container Registry (ECR)
- In the root directory, build your image from the
Dockerfile.
docker build . -t 100-days-of-cloud-bot
- Authenticate your Docker to Amazon ECR.
aws ecr get-login-password --region region | docker login --username AWS --password-stdin aws_account_id.dkr.ecr.region.amazonaws.com
- Tag your image with the Amazon ECR repository.
docker tag 100-days-of-cloud-bot aws_account_id.dkr.ecr.region.amazonaws.com/100-days-of-cloud-bot
- Push your image to Amazon ECR.
docker push aws_account_id.dkr.ecr.region.amazonaws.com/100-days-of-cloud-bot
Deploy the Docker image on Amazon Fargate
- Open the Amazon ECS console first run wizard.

- Click Configure in the custom container, complete with the following settings, and then select Update.
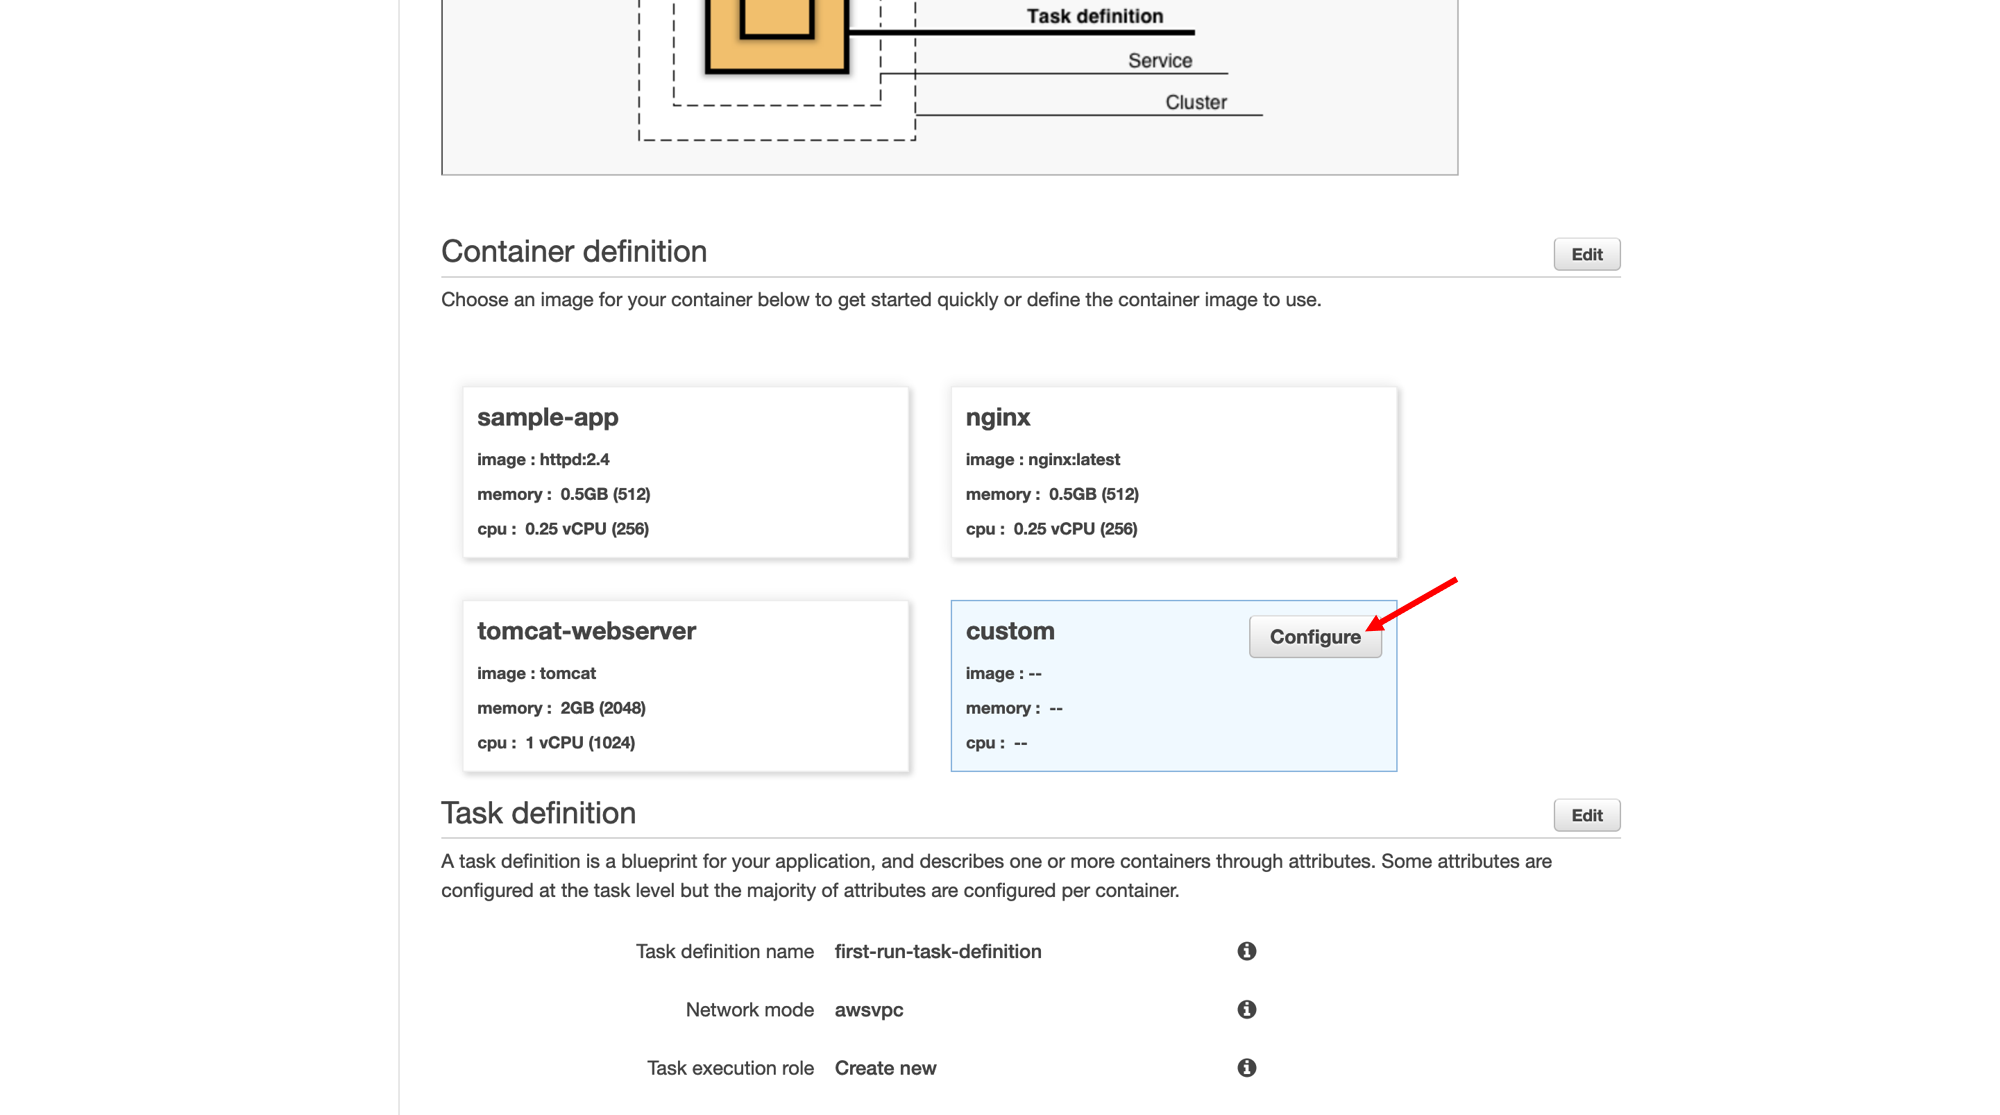
| Property | Value | ||||||||
| Container name | container-100-days-of-cloud-bot | ||||||||
| Image | aws_account_id.dkr.ecr.region.amazonaws.com/100-days-of-cloud-bot | ||||||||
| Memory Limits (MiB) | Soft Soft limit \ | 512 | |||||||
| Port mappings | Container port: 80 Protocol: tcp | ||||||||
| CPU units | 256 | ||||||||
| Environment variables (Twitter API Authentication Credentials) | CONSUMER_KEY \ | Value \ | consumer_key CONSUMER_SECRET \ | Value \ | consumer_secret ACCESS_TOKEN \ | Value \ | access_token ACCESS_TOKEN_SECRET \ | Value \ | access_token_secret |
- Click Edit in the Task definition section, complete with the following settings, and then select Save.
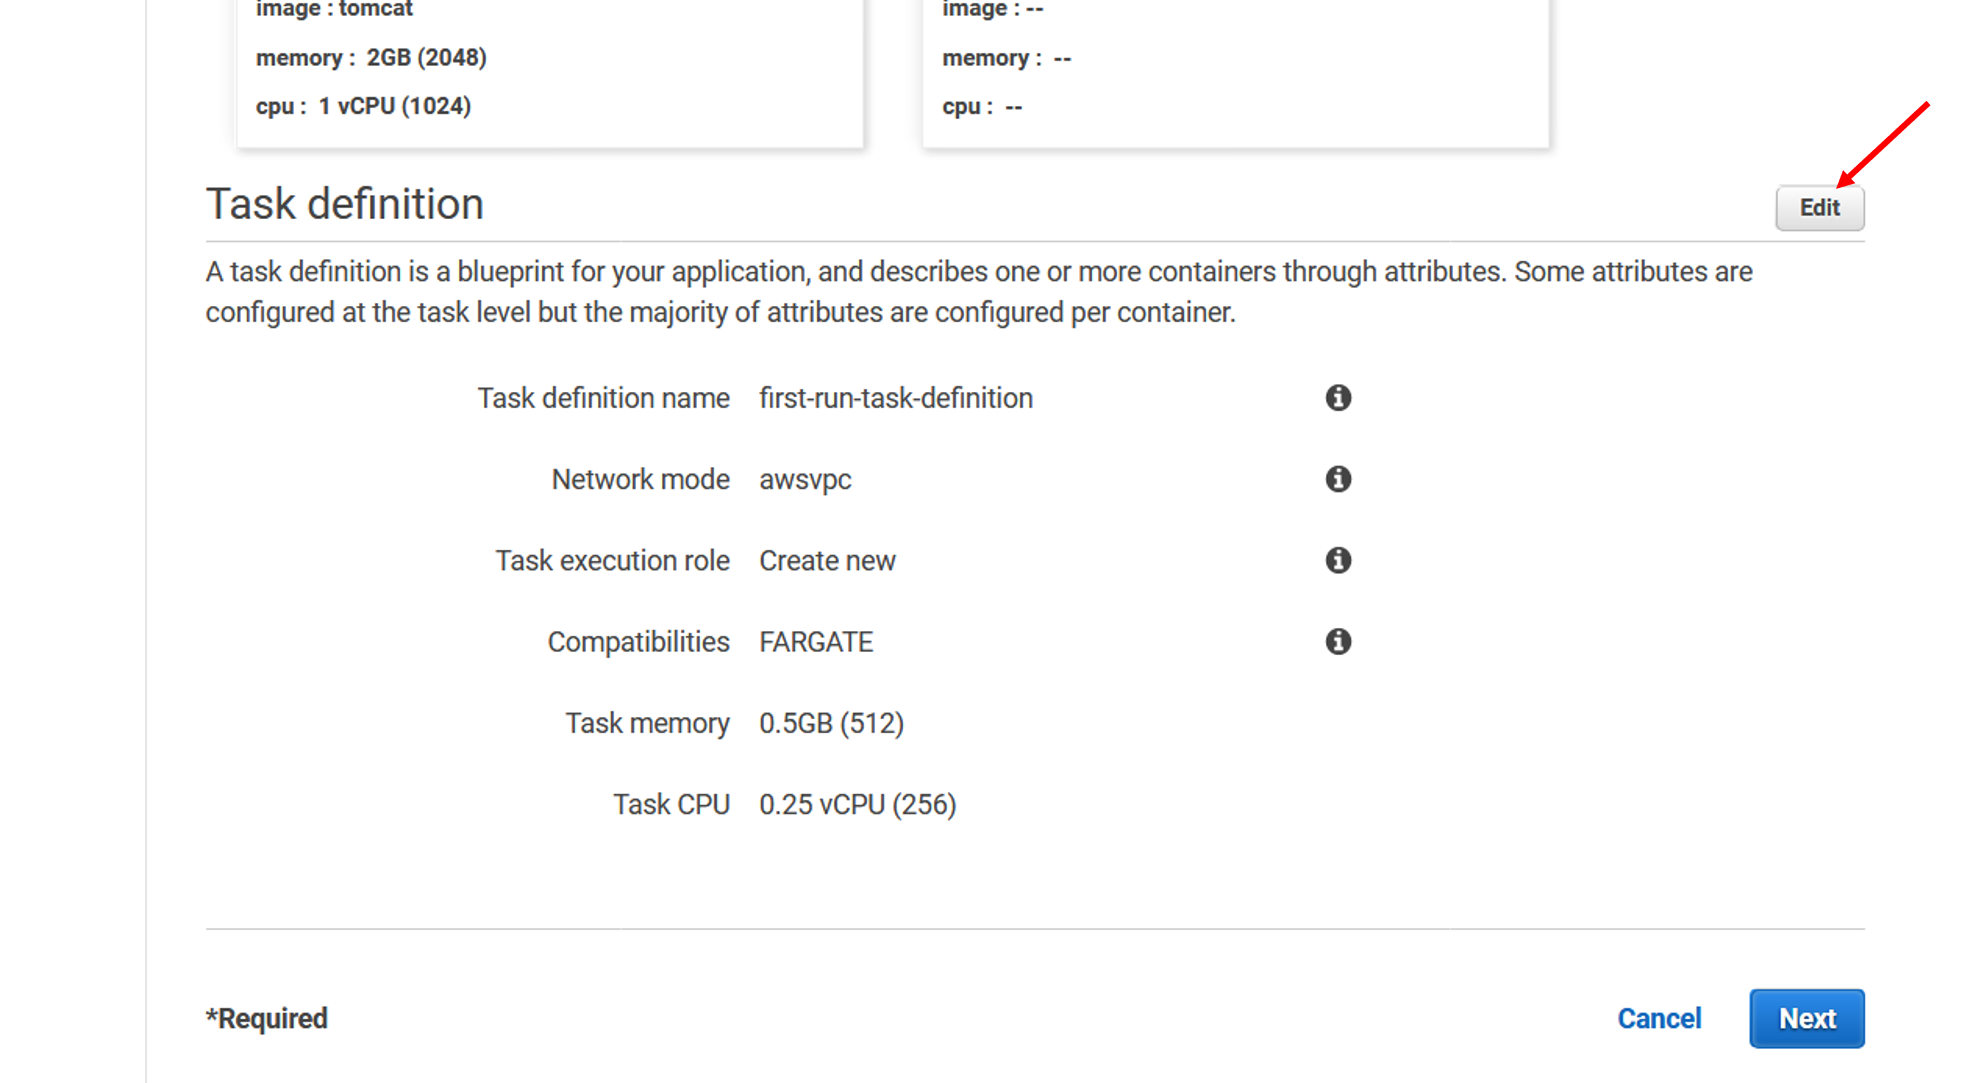
| Property | Value |
| Task definition name | task-definition-100-days-of-cloud-bot |
| Task memory | 0.5GB (512) |
| Task CPU | 0.25 vCPU (256) |
- Click Next.
- Click Edit in the Define your service section, complete with the following settings, and then select Save.
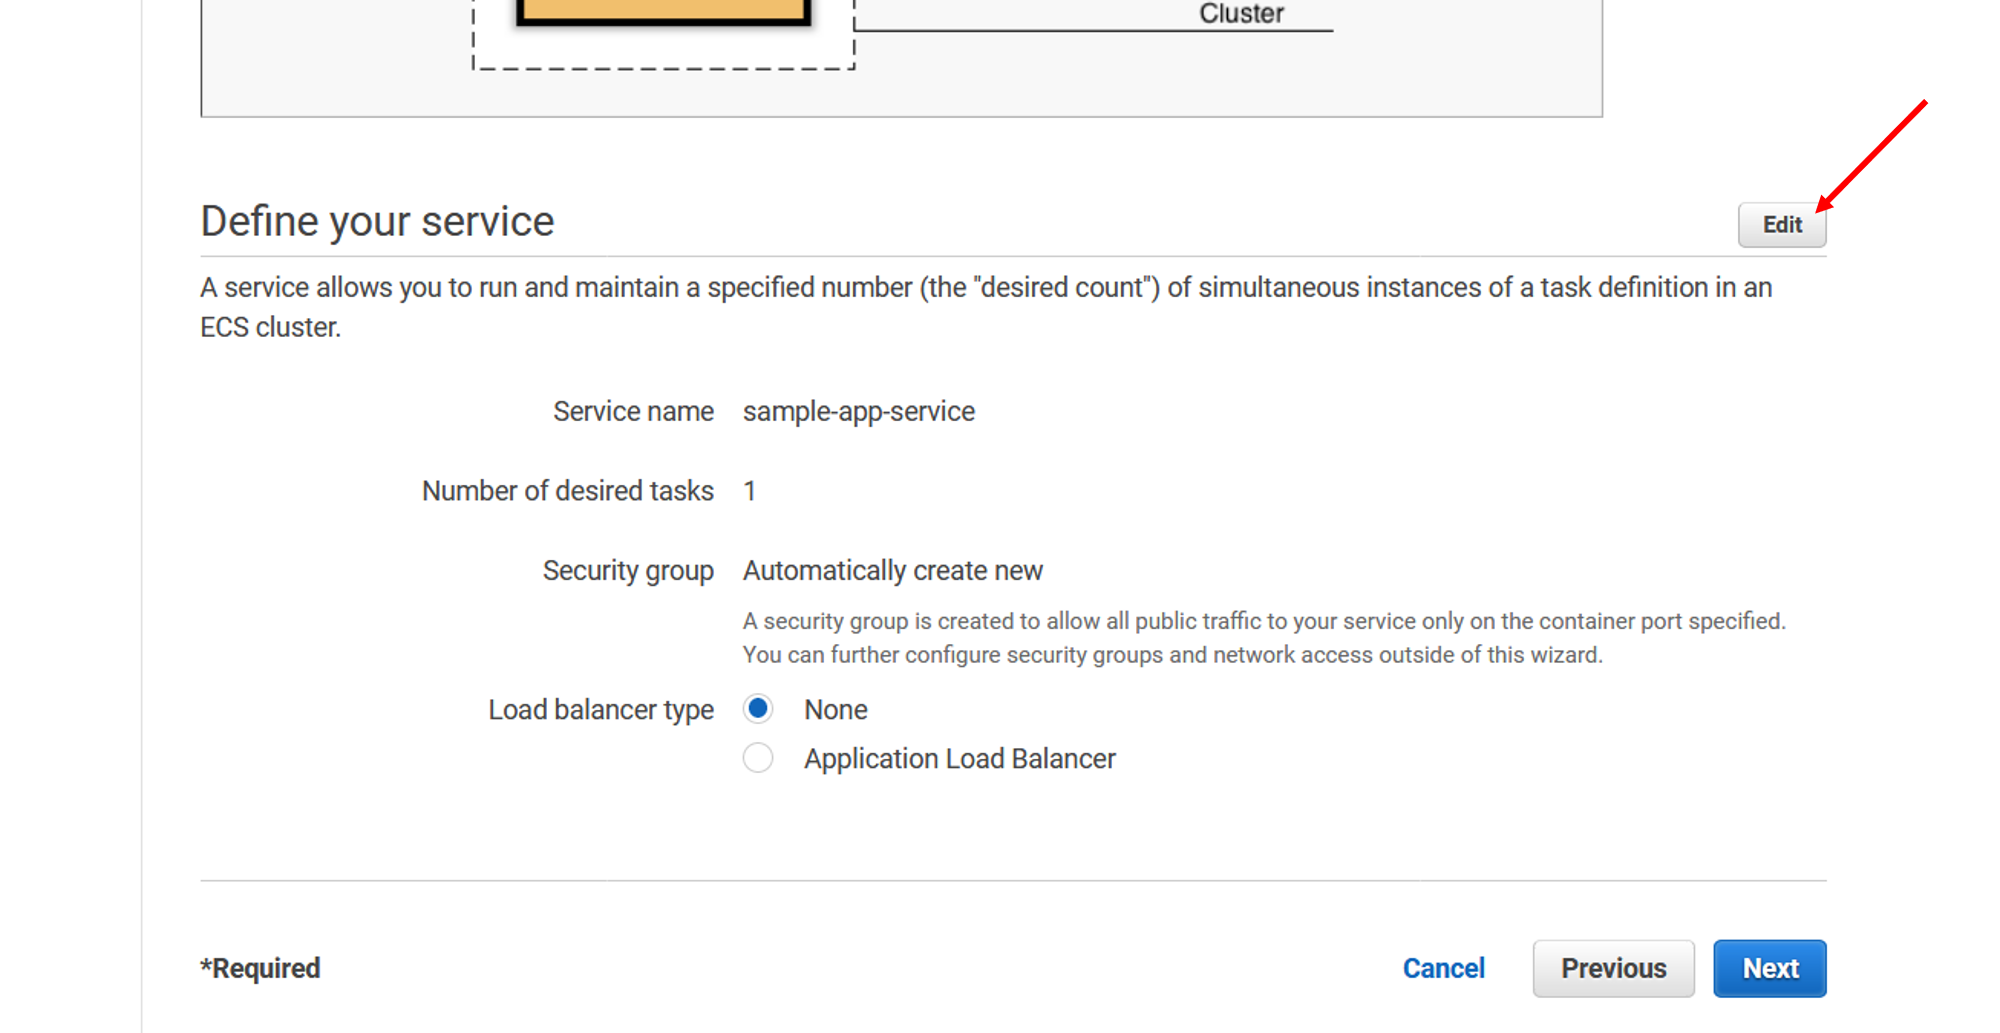
| Property | Value |
| Service name | service-100-days-of-cloud-bot |
| Number of desired tasks | 1 |
| Load balancer type | None |
We don't need a load balancer here because of the Twitter API rate limit. Even if we scale-out our containers, Twitter's API will send us a 420 error message because the bot is being rate limited for making too many requests.
- Click Next.
- Edit your Cluster name with cluster-100-days-of-cloud-bot.
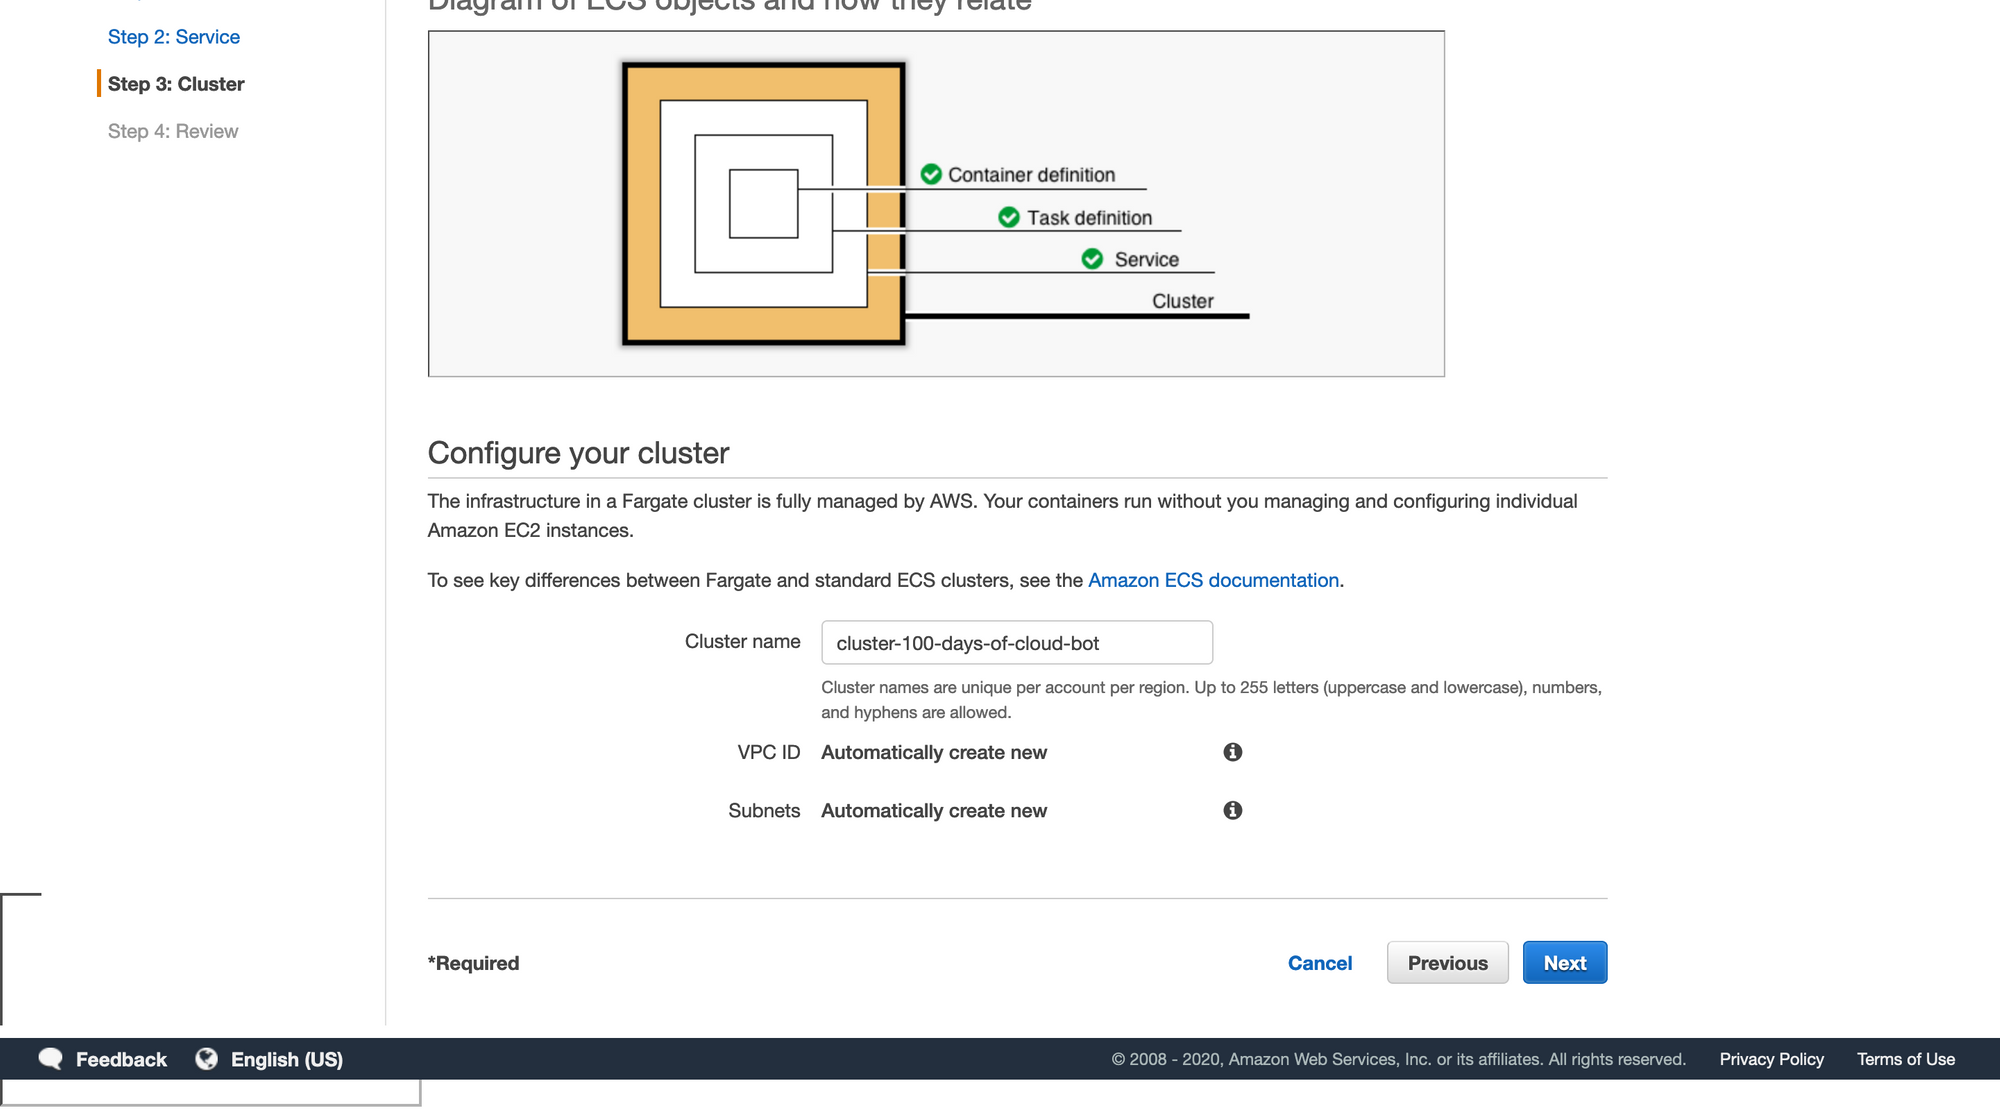
- Click Next.
- Review your configuration and click Create.
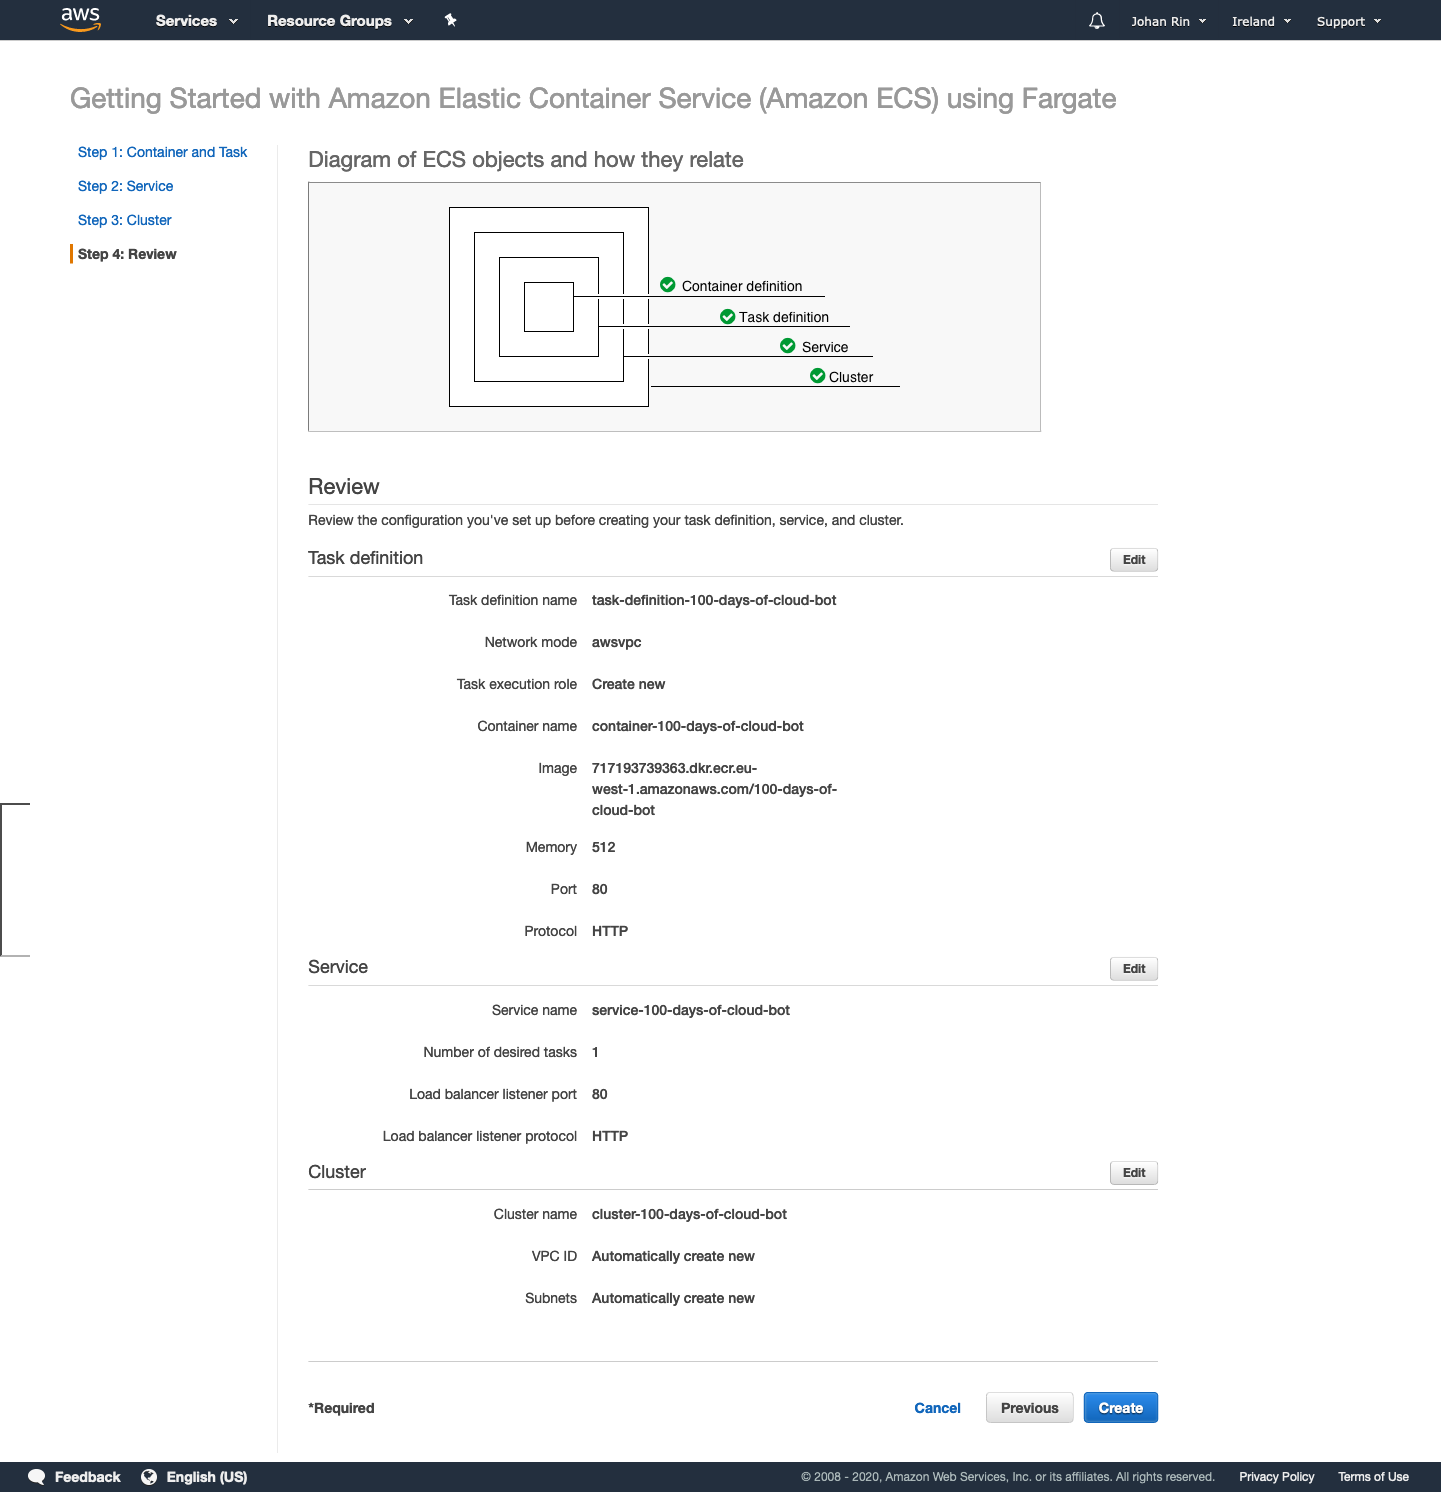
That's it, the container is deployed on AWS Fargate!
Conclusion
You deployed your Twitter bot on AWS Fargate with only four steps.
AWS Fargate is easy to use, allowing us to deploy containers without managing and operating servers.
This use case was simple, but we can do much more like adding a load balancer or defining more tasks. I recommend you to check the documentation for more details.
Because this post was about the #100DaysOfCloud challenge, I should mention that we have Discord server, so feel free to join the community and the challenge! We have amazing people from all around the world ready to help you to get started with the Cloud.
That's it for me, hope you learned something! If you have any questions, find me on Twitter and feel free to ask me anything.