By Fabio Pacific
In this tutorial, you will learn how to build a single page application. I'll take you through the process step by step, using cutting edge technologies like Laravel 9, Jetstream, Vuejs, Inertiajs, MySQL, Tailwind CSS, and Docker.
Let's get started.
What you need to follow this guide:
To follow along you will need:
- a computer
- to know how to install software
- a basic understanding of HTML, CSS, JavaScript, and PHP
- knowledge of at least one JavaScript framework and an understanding of the MVC design pattern.
This guide is organized into 10 chapters and is based off a live coding series that I record. The live coding series is completely unscripted, so there will be bugs and gotchas there that you won't find in this guide.
You can find the complete playlist at the end of this article.
Everything here should just work, but if it doesn't feel free to ask for help by joining my community on Slack. There you can share code snippets and chat with me directly.
Table of Contents
- What Tech Are We Using?
- How to Setup Your Machine
- How to build the app with Laravel 9, Laravel Sail, Jetstram, Inertia and Vue3
- How to Refactor the Admin Dashboard and Create New Admin Pages
- How to Submit Forms with Files
- How to Add the Form to the Component
- How to Store Data
- How to Update Operations
- How to Delete a Resourse
- Wrap up and what's next
- Conclusion
What Tech Are We Using?
First, let's go over the different tools we'll be using in this project.
Docker
Docker is a set of platform as a service products that use OS-level virtualization to deliver software in packages called containers.
To simplify this concept, Docker lets you package applications and dependencies in a container.
A containerized application allows you to have a flexible development environment so that you can run different applications without worrying about dependencies, their requirements, and conflicts between different versions. You can easily run applications that, for instance, require two different versions of PHP and MySQL.
Each team member can quickly reproduce the same environment of your application by simply running the same container's configuration.
If you want to learn more about Docker, its Documentation is a great place to start.
Here's a Handbook on Docker essentials, as well, so you can practice your skills.
Mysql
MySQL is an open-source relational database management system. You can use it to organize data into one or more tables with data that may be related to each other.
We need to store data somewhere and here is where MySQL comes into play.
Here are the Docs if you want to read up more. Here's a full free course on MySQL if you want to dive deeper.
Laravel
Laravel is a free, open-source PHP web framework that helps you develop web applications following the model–view–controller architectural pattern.
Laravel is an amazing PHP framework that you can use to create bespoke web applications.
Here's the Laravel Documentation for more info, and here's a full project-based course to help you learn Laravel.
Laravel Sail
Laravel Sail is a lightweight command-line interface for interacting with Laravel's default Docker development environment.
Sail provides a great starting point for building a Laravel application using PHP, MySQL, and Redis without requiring prior Docker experience.
Usually, creating a development environment to build such applications means you have to install software, languages, and frameworks on your local machine – and that is time-consuming. Thanks to Docker and Laravel Sail we will be up and running in no time!
Laravel Sail is supported on macOS, Linux, and Windows via WSL2.
Here's the Documentation if you want to read up on it.
Laravel Jetstream
When building web applications, you likely want to let users register and log in to use your app. That is why we will use Jetstream.
Laravel Jetstream is a beautifully designed application starter kit for Laravel and provides the perfect starting point for your next Laravel application.
It uses Laravel Fortify to implement all the back end authentication logic. Here are the Docs.
Vuejs
Vue.js is an open-source model–view–ViewModel front end JavaScript framework for building user interfaces and single-page applications.
Vue is a fantastic framework that you can use as a stand-alone to build single-page applications, but you can also use it with Laravel to build something amazing.
Here's the Vue Documentation if you want to read up. And here's a great Vue course to get you started.
Inertia JS
Inertia is the glue between Laravel and Vuejs that we will use to build modern single-page applications using classic server-side routing.
You can learn more about it in the Documentation here.
Tailwind
Tailwind CSS is a utility-first CSS framework packed with classes like flex, pt-4, text-center, and rotate-90 that you can use to build any design, directly in your markup
We'll use it in this project to build our design. Here's a quick guide to get you up and running if you aren't familiar with Tailwind.
How to Set Up Your Machine
To follow along with my live coding (and this tutorial), you will need to install Docker desktop on your machine. If you are using Windows, you will also need to enable WSL in your system settings.
Visit the Docker getting started page to install Docker Desktop.
If you are on Windows, enable WSL2 by following the steps here.
If you have any trouble, feel free to reach out or join my community on Slack to get help.
Laravel Installation with Sail
If you have successfully installed Docker Desktop on your machine, we can open the terminal and install Laravel 9.
Open a terminal window and browse to a folder where you want to keep your project. Then run the command below to download the latest Laravel files. The command will put all files inside a folder called my-example-app, which you can tweak as you like.
# Download laravel
curl -s "https://laravel.build/my-example-app" | bash
# Enter the laravel folder
cd my-example-app
Deploy Laravel on Docker using the sail up command
With Docker Desktop up and running, the next step is to start Laravel sail to build all the containers required to run our application locally.
Run the following command from the folder where all Laravel files have been downloaded:
vendor/bin/sail up
It will take a minute. Then visit http://localhost and you should see your Laravel application.
If you run sail up and you get the following error, it is likely that you need to update Docker Desktop:
ERROR: Service 'laravel.test' failed to build:
How to Build the App with Laravel 9, Laravel Sail, Jetstram, Inertia and Vue3
In this section, we will define a basic roadmap, install Laravel 9 with Laravel Sail, Run sail, and build the containers.
I will also take you on a tour of Laravel Sail and the sail commands.
Then we will install Jetstream and scaffold Vue and Inertia files and have a look at the files and available features.
Next, we will populate our database and add the front end provided by Jetstream to register an account and log into a fresh Laravel application.
Finally, we will have a look at the Jetstream dashboard, and the Inertia/Vue Components and then start playing around.
Along the way, we'll disable the registration, enable the Jetstream user profile picture feature, and then add our first Inertia page where we'll render some data taken from the database.
Here's the live coding video if you want to follow along that way:
And if you prefer following along in this written tutorial, here are all the steps.
Just a reminder – you should have Laravel installed with Sail and have Docker set up on your machine. You can follow the steps above to do so if you haven't already.
Laravel Sail Overview – Sail Commands
With Laravel Sail installed, our usual Laravel commands have sligtly changed.
For instance, instead of running the Laravel artisan command using PHP like php artisan, we now have to use Sail, like so: sail artisan.
The sail artisan command will return a list of all available Laravel commands.
Usually, when we work with Laravel, we also have to run the npm and composer commands.
Again, we need to prefix our commands with sail to make them run inside the container.
Below you'll find a list of some commands you will likely have to run:
# Interact with the database - run the migrations
sail artisan migrate # It was: php artisan migrate
# Use composer commands
sail composer require <packageName> # it was: composer require <packageName>
# Use npm commands
sail npm run dev # it was: npm run dev
You can read more in the Sail documentation.
Install Jetstream and Scaffold Vue and Inertia
Let's now install the Laravel Jetstream authentication package and use the Inertia scaffolding with Vue3.
cd my-example-app
sail composer require laravel/jetstream
Remember to prefix the composer command with sail.
The command above has added a new command to Laravel. Now we need to run it to install all the Jetstream components:
sail artisan jetstream:install inertia
Next we need to compile all static assets with npm:
sail npm install
sail npm run dev
Before we can actually see our application, we will need to run the database migrations so that the session table, required by Jetstream, is present.
sail artisan migrate
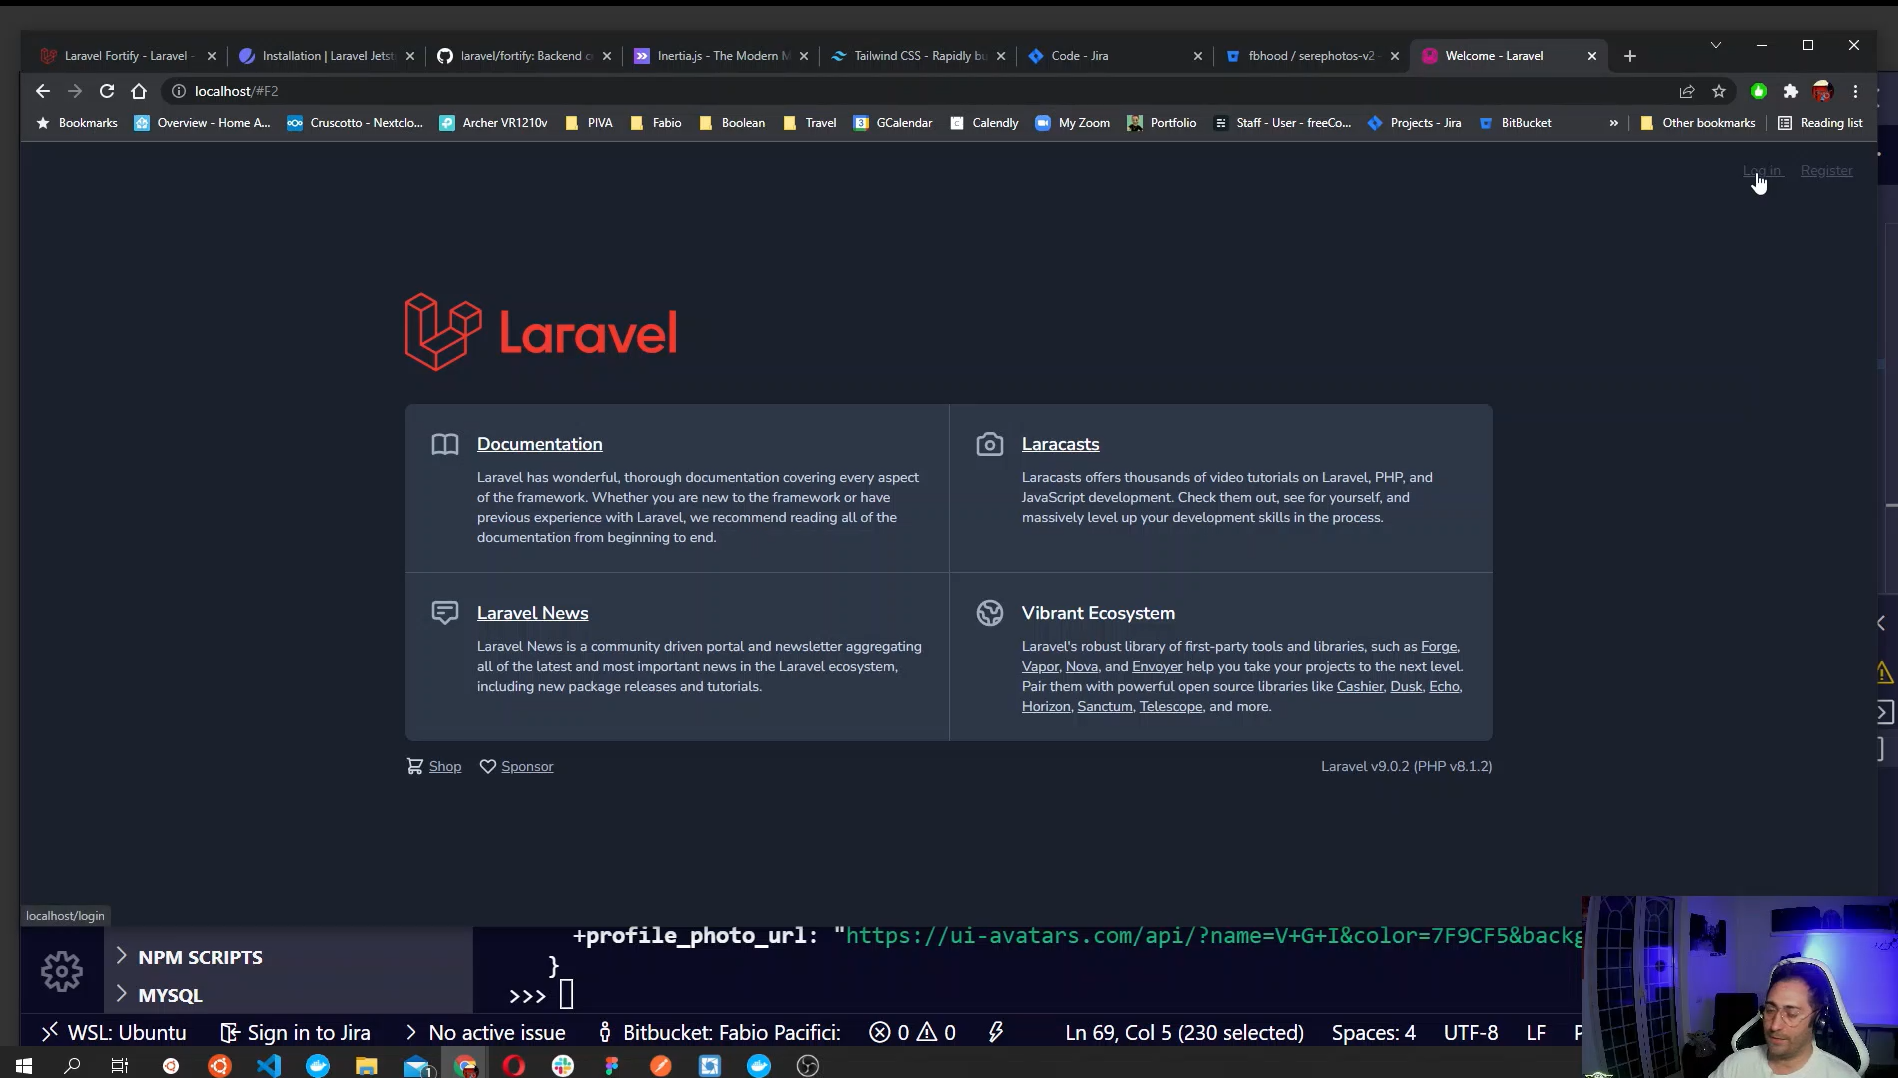
Done! Jetstream is now installed in our application. If you visit http://localhost in your browser you should see the Laravel application with two links at the top to register and log in.
Populate the Database and Create a User Account
Before creating a new user, let's have a quick look at the database configuration that Laravel Sail has created for us in the .env file.
DB_CONNECTION=mysql
DB_HOST=mysql
DB_PORT=3306
DB_DATABASE=my-example-app
DB_USERNAME=sail
DB_PASSWORD=password
As you can see, Laravel Sail configures everything we need to access the database container that is running on Docker. The DB_DATABASE is the name of the database and it is the same as the project folder. This is why in the previous step we were able to run the migrate command without issues.
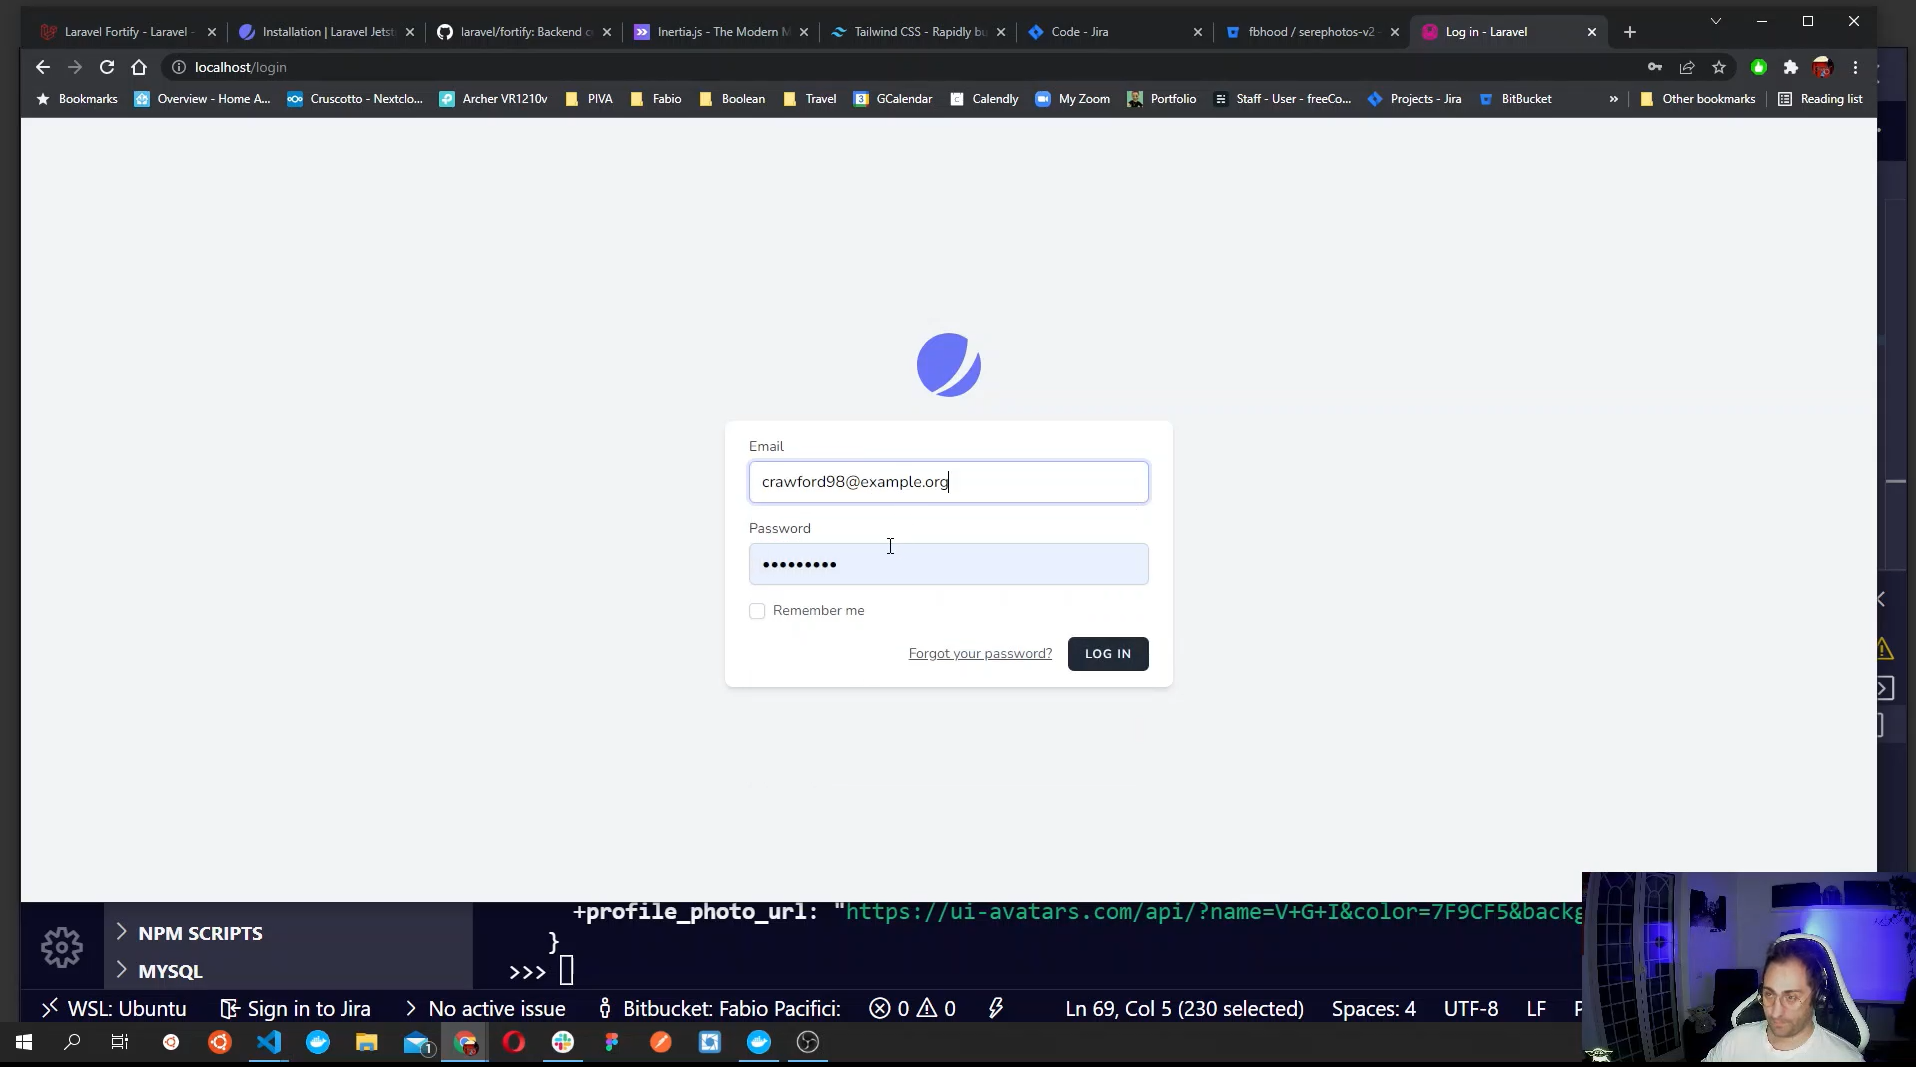
Since we already migrated all database tables, we can now use the Laravel built-in user factory to create a new user then use its details to log in our user dashboard.
Let's open artisan tinker to interact with our application.
sail artisan tinker
The command above will open a command line interface that we can use to interact with our application. Let's create a new user.
User::factory()->create()
The command above will create a new user and save its data in our database. Then it will render the user data onto the screen. Make sure to copy the user email so we can use it later to log in. Then exit by typing exit;.
The default password for every user created with a factory is password.
Let's visit the login page and access our application dashboard.
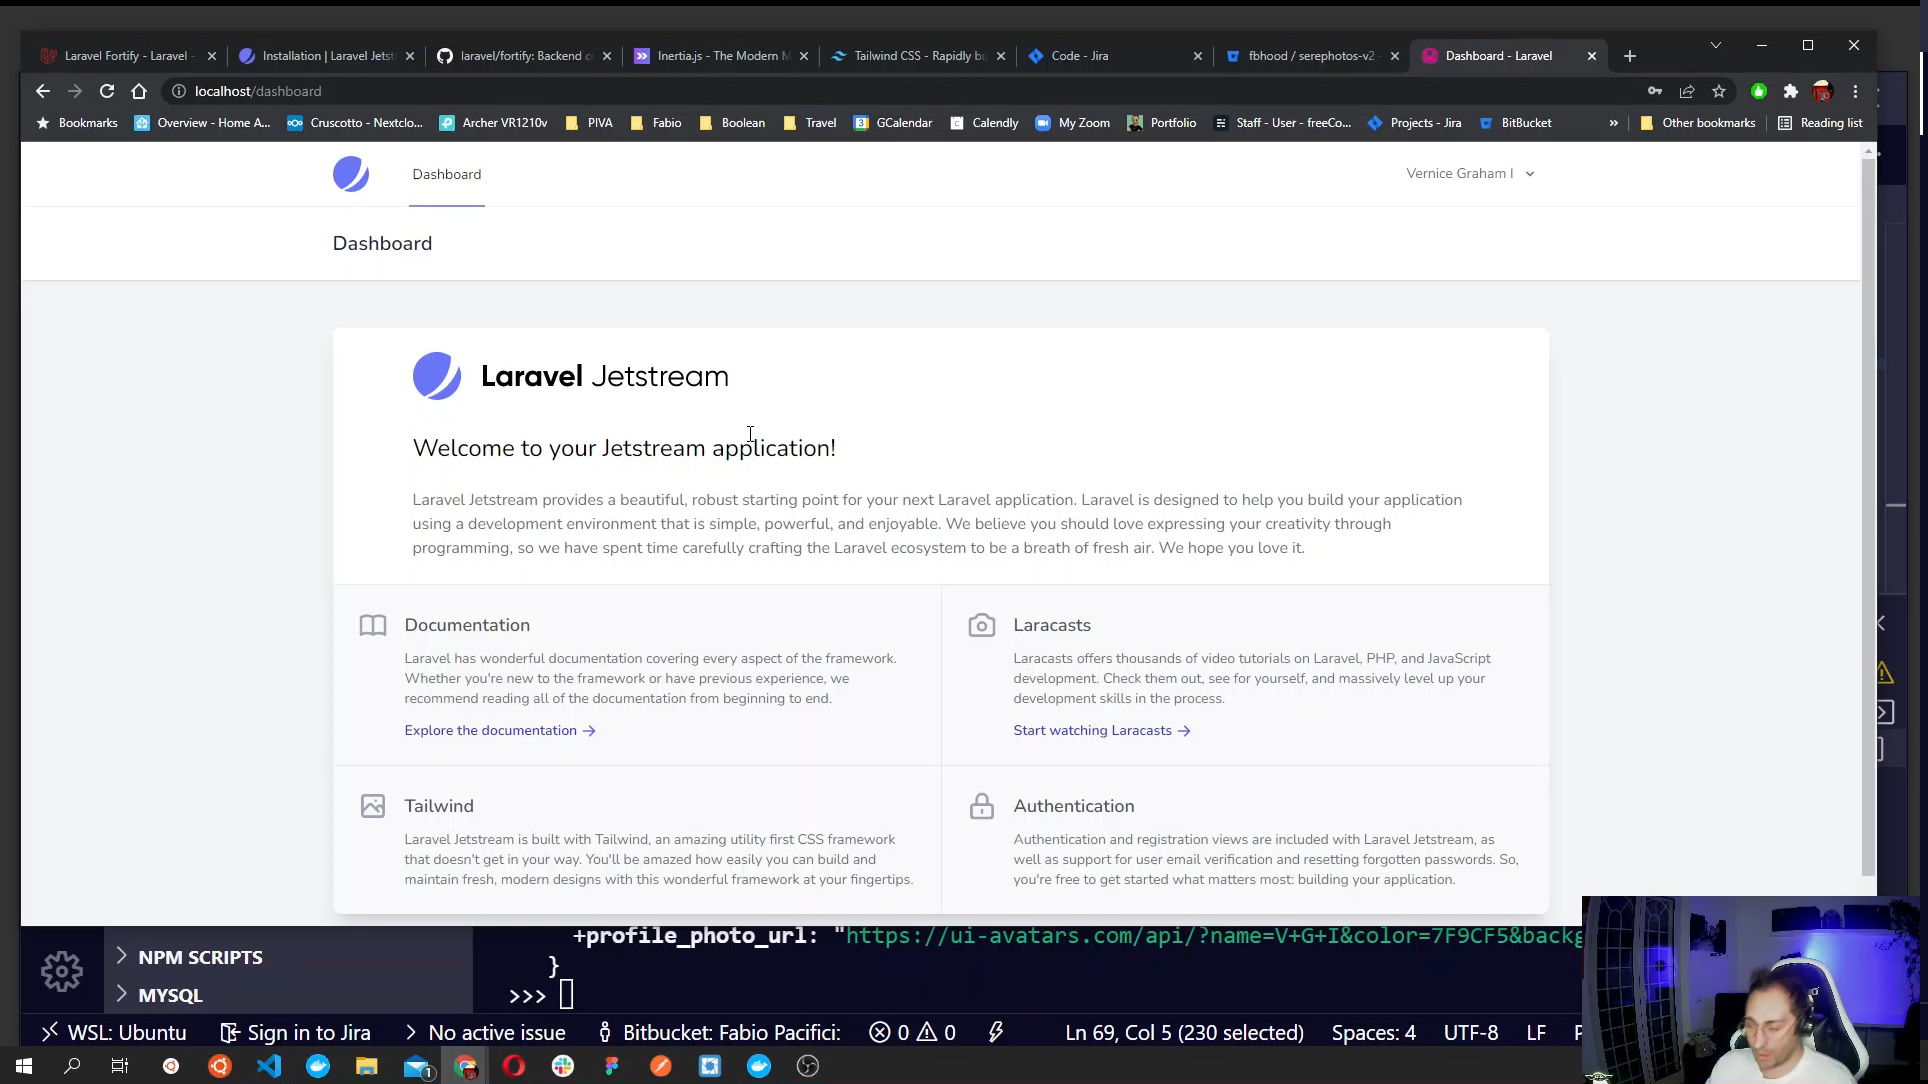
Jetstream Dashboard
After login you are redirected to the Jetstream dashboard, which looks amazing by default. We can customize it as we like, but it is just a starting point.
Jetstream/Vue Components and Inertia Overview
The first thing you may notice after installing Jetstram is that there are a number of Vue components registered in our application. Not only that, also Inertia brings in Vue components.
To use Inertia, we need to get familiar with it when defining routes.
When we installed Jetstream, it created inside the resources/js directory a number of subfolders where all our Vue components live. There are not just simple components but also Pages components rendered by inertia as our Views.
The Jetstream inertia scaffolding created:
resources/js/JetstreamHere we have 27 components used by Jetstream, but we can use them in our application too if we want.resources/js/LayoutsIn this folder there is the layout component used by inertia to render the dashboard pageresources/js/PagesThis is where we will place all our Pages (views) components. You will find the Dashboard page as well as the Laravel Welcome page components here.
The power of Inertia mostly comes from how it connects Vue and Laravel, letting us pass data (Database Models and more) as props to our Vue Pages components.
When you open the routes/web.php file you will notice that we no longer return a view but instead we use Inertia to render a Page component.
Let's examine the / homepage route that renders the Welcome component.
Route::get('/', function () {
    return Inertia::render('Welcome', [
        'canLogin' => Route::has('login'),
        'canRegister' => Route::has('register'),
        'laravelVersion' => Application::VERSION,
        'phpVersion' => PHP_VERSION,
    ]);
});
It looks like our usual Route definition, exept that in the closure we are returning an \Inertia\Response by calling the render method of the Inertia class Inertia::render().
This method accepts two parameters. The first is a component name. Here we passed the Welcome Page component, while the second parameter is an associative array that will turn into a list of props to pass to the component. Here is where the magic happens.
Looking inside the Welcome component, you will notice that in its script section, we simply define four props matching with the keys of our associative array. Then inertia will do the rest.
<script>
    import { defineComponent } from 'vue'
    import { Head, Link } from '@inertiajs/inertia-vue3';

    export default defineComponent({
        components: {
            Head,
            Link,
        },
        // 👇 Define the props
        props: {
            canLogin: Boolean,
            canRegister: Boolean,
            laravelVersion: String,
            phpVersion: String,
        }
    })
</script>
We can then just call the props inside the template. If you look at the template section you will notice that laravelVersion and phpVersion are referenced in the code as you normally would do with props in Vuejs.
<div class="ml-4 text-center text-sm text-gray-500 sm:text-right sm:ml-0">
  Laravel v{{ laravelVersion }} (PHP v{{ phpVersion }})
</div>
The dashboard component is a little different. In fact it uses the Layout defined under Layouts/AppLayout.vue and uses the Welcome component to render the Dashboard page content, which is the same as the laravel Welcome page.
<template>
    <app-layout title="Dashboard">
        <template #header>
            <h2 class="font-semibold text-xl text-gray-800 leading-tight">
                Dashboard
            </h2>
        </template>

        <div class="py-12">
            <div class="max-w-7xl mx-auto sm:px-6 lg:px-8">
                <div class="bg-white overflow-hidden shadow-xl sm:rounded-lg">
                    <welcome />
                </div>
            </div>
        </div>
    </app-layout>
</template>
Inside the layout component you will notice the two inertia components Head and Link.
We can use the Head component to add head elements to our page, like meta tags, page title, and so on. The Link component is a wrapper aroud a standard anchor tag that incercepts click events and prevents full page reload as you can read in the Inertia documentation.
Disable the Registration Feature
If you are following along, the next step I'll take is to disable one on the features Jetstream provides – register an account.
To do that, we can navigate to config/fortify.php and comment out line 135 Features::registration() from the features array.
'features' => [
        //Features::registration(),
        Features::resetPasswords(),
        // Features::emailVerification(),
        Features::updateProfileInformation(),
        Features::updatePasswords(),
        Features::twoFactorAuthentication([
            'confirmPassword' => true,
        ]),
    ],
If we visit the welcome page we will notice that the register link is gone. Also, the route is no longer listed when we run sail artisan route:list.
Enable Jetstream User Profile Picture
Now let's try to enable the Jetstream feature called ProfilePhotos. As you can guess, this will allow the user to add a profile picture.
To do that we need to visit config/jetstream.php and uncomment line 59 Features::profilePhoto.
    'features' => [
        // Features::termsAndPrivacyPolicy(),
        Features::profilePhotos(), // 👈
        // Features::api(),
        // Features::teams(['invitations' => true]),
        Features::accountDeletion(),
    ],
If you log in you will see that in the user profile, a new section is available to upload a profile picture.
But before doing anything else we need to run sail artisan storage:link so that Laravel creates a symlink to the storage/app/public folder where we will save all user profile images.
Now try to visit the user profile and update the profile picture. If you get a 404 on the image this is because by default Laravel sail assumes we are using Laravel valet and sets the app URL like so APP_URL=http://my-example-app.test in the .env file. Let's change it and use localhost instead.
APP_URL=http://localhost
Now we should be good to go and be able to see and change our profile image!🥳
How to Add our First Inertia Page and Render Records from the DB
Since we are rendering Vue components instead of blade views, it is wise to start sail npm run watch to watch and recompile our Vue components as we create or edit them. Next let's add a new Photos page.
I will start by creating a new Route inside web.php:
Route::get('photos', function () {
    //dd(Photo::all());
    return Inertia::render('Guest/Photos');
});
In the code above I defined a new GET route and then rendered a component that I will place inside the resources/js/Pages/Guest and call Photos. Let's create it.
Create a Guest folder:
cd resources/js/Pages
mkdir Guest
cd Guest
touch Photos.vue
Then let's define a basic component:
<template>
  <h1>Photos Page</h1>
</template>
If we visit http://localhost/photos/ we will see our new page, cool! Let's copy over the page structure from the Welcome page so that we get the login and dashboard links as well.
The component will change to this:
<template>
    <Head title="Phots" />

    <div class="relative flex items-top justify-center min-h-screen bg-gray-100 dark:bg-gray-900 sm:items-center sm:pt-0">
        <div v-if="canLogin" class="hidden fixed top-0 right-0 px-6 py-4 sm:block">
            <Link v-if="$page.props.user" :href="route('admin.dashboard')" class="text-sm text-gray-700 underline">
                Dashboard
            </Link>

            <template v-else>
                <Link :href="route('login')" class="text-sm text-gray-700 underline">
                    Log in
                </Link>

                <Link v-if="canRegister" :href="route('register')" class="ml-4 text-sm text-gray-700 underline">
                    Register
                </Link>
            </template>
        </div>

        <div class="max-w-6xl mx-auto sm:px-6 lg:px-8">
            <h1>Photos</h1>

        </div>
    </div>
</template>

<script>
    import { defineComponent } from 'vue'
    import { Head, Link } from '@inertiajs/inertia-vue3';

    export default defineComponent({
        components: {
            Head,
            Link,
        },

        props: {
            canLogin: Boolean,
            canRegister: Boolean,

        }
    })
</script>
The next step is to render a bunch of data onto this new page. For that we will build a Model and add some records to the database.
saild artisan make:model Photo -mfcr
This command creates a Model called Photo, plus a database migration table class, a factory, and a resource controller.
Now let's define the database table inside the migration we just creted. Visit the database/migrations folder and you should see a file with a name similar to this: 2022_02_13_215119_create_photos_table (yours will be sligly different).
Inside the migration file we can define a basic table like the following:
 public function up()
    {
        Schema::create('photos', function (Blueprint $table) {
            $table->id();
            $table->string('path');
            $table->text('description');
            $table->timestamps();
        });
    }
For our table we defined just two new columns, path and description, plus the id, created_at and updated_at that will be created by the $table->id() and by the $table->timestamps() methods.
After the migration we will define a seeder and then run the migrations and seed the database.
At the top of the database/seeders/PhotoSeeder.php file we will import our Model and Faker:
use App\Models\Photo;
use Faker\Generator as Faker;
Next we will implement the run method using a for loop to create 10 records in the database.
    public function run(Faker $faker)
    {
        for ($i = 0; $i < 10; $i++) {
            $photo = new Photo();
            $photo->path = $faker->imageUrl();
            $photo->description = $faker->paragraphs(2, true);
            $photo->save();
        }
    }
We are ready to run the migrations and seed the database.
sail artisan migrate
sail artisan db:seed --class PhotoSeeder
We are now ready to show the data on the Guest/Photos page component.
First update the route and pass a collection of Photos as props to the rendered component:
Route::get('photos', function () {
    //dd(Photo::all());
    return Inertia::render('Guest/Photos', [
        'photos' => Photo::all(), ## 👈 Pass a collection of photos, the key will become our prop in the component
        'canLogin' => Route::has('login'),
        'canRegister' => Route::has('register'),
    ]);
});
Second, pass the prop to the props in the script section of the Guest/Photos component:
props: {
    canLogin: Boolean,
    canRegister: Boolean,
    photos: Array // 👈 Here
}
Finally loop over the array and render all photos in the template section, just under the h1:
<section class="photos">
    <div v-for="photo in photos" :key="photo.id" class="card" >
        <img :src="photo.path" alt="">
    </div>
</section>
Done! if you visit the /photos page you should see ten photos. 🥳
How to Refactor the Admin Dashboard and Create New Admin Pages
In this chapter we will Re-route the Jetstream dashboard and make a route group for all admin pages.
Then we will see how to add a new link to the dashboard and add a new admin page.
Finally we will take a collection of data from the db and render them in a basic table. The default table isn't cool enough, so for those reading this article, I decided to add a Tailwind table component.
Re-route the Jetstream Dashboard
If we look at the config/fortify.php file we can see that around line 64 there is a key called home. It is calling the Home constant of the Route service provider.
This means that we can tweek the constant and redirect the authenticated user to a different route.
Lets go through it step-by-step:
- update the HOME Constant
- make a route group and redirect logged in users to
admin/instead of '/dashboard'
Our application will have only a single user, so once they're logged in it is clearly the site admin – so makes sense to redirect to an admin URI.
Change the HOME constant in app/Providers/RouteServiceProvider.php around line 20 to match the following:
public const HOME = '/admin';
How to Add an Admin Pages Route Group
Next let's update our route inside web.php. We will change the route registered by Jetstream from this:
Route::middleware(['auth:sanctum', 'verified'])->get('/', function () {
        return Inertia::render('Dashboard');
    })->name('dashboard');
To this:
Route::middleware(['auth:sanctum', 'verified'])->prefix('admin')->name('admin.')->group(function () {

    Route::get('/', function () {
        return Inertia::render('Dashboard');
    })->name('dashboard');

    // other admin routes here
});
The route above is a route group that uses the auth:sanctum middleware for all routes within the group, a prefix of admin, and adds a admin suffix to each route name.
The end result is that we will be able to refer to the dashboard route by name, which now will be admin.dashboard. When we log in, we will be redirected to the admin route. Our dashboard route will respond since it's URI is just / but the goup prefix will prefix every route in the group and make their URI start with admin.
If you now run sail artisan route:list you will notice that the dashboard route has changed as we expected.
Before moving to the next step we need to update both the /layouts/AppLayout.vue and /Pages/Welcome.vue components.
Do you remeber that the dashboard route name is now admin.dashboard and not just dashboard?
Let's inspect the two components and update every reference of route('dahsboard') to this:
route('admin.dahsboard')
and also every reference of route().current('dashboard') to this:
route().current('admin.dashboard')
After all the changes, make sure to recompile the Vue components and watch changes by running sail npm run watch. Then visit the home page to check if everything is working.
How to Add a New Link to the Dashboard
Now, to add a new admin page where we can list all photos stored in the database, we need to add a new route to the group we created earlier. Let's hit the web.php file and make our changes.
In the Route group we will add a new route:
Route::middleware(['auth:sanctum', 'verified'])->prefix('admin')->name('admin.')->group(function () {

    Route::get('/', function () {
        return Inertia::render('Dashboard');
    })->name('dashboard');

    // 👇 other admin routes here 👇

    Route::get('/photos', function () {
        return inertia('Admin/Photos');
    })->name('photos'); // This will respond to requests for admin/photos and have a name of admin.photos

});
In the new route above we used the inertia() helper function that does the same exact thing – returns an Inertia/Response and renders our Page component. We placed the component under an Admin folder inside Pages and we will call it Photos.vue.
Before we create the component, let's add a new link to the dashboard that points to our new route.
Inside AppLayout.vue, find the Navigation Links comment and copy/paste the jet-nav-link component that is actually displaing a link to the dashboard and make it point to our new route.
You will end up having something like this:
<!-- Navigation Links -->
<div class="hidden space-x-8 sm:-my-px sm:ml-10 sm:flex">
    <jet-nav-link :href="route('admin.dashboard')" :active="route().current('admin.dashboard')">
        Dashboard
    </jet-nav-link>
    <!-- 👇 here it is our new link -->
      <jet-nav-link :href="route('admin.photos')" :active="route().current('admin.photos')">
        Photos
    </jet-nav-link>
</div>
Our link above uses route('admin.photos') to point to the correct route in the admin group.
If you visit localhost/dashboard and open the inspector, you should see an error:
Error: Cannot find module `./Photos.vue`
It is fine – we haven't created the Photos page component yet. So let's do it now!
How to Add a New Admin Page Component
Make a file named Photos.vue inside the Pages/Admin folder. Below are the bash commands to create the folder and the file via terminal, but you can do the same using your IDE's graphical interface.
cd resources/js/Pages
mkdir Admin
touch Admin/Photos.vue
To make this new page look like the Dashboard page, we will copy over its content. You should end up having something like this:
<template>
  <app-layout title="Dashboard"> <!-- 👈 if you want you can update the page title -->
    <template #header>
      <h2 class="font-semibold text-xl text-gray-800 leading-tight">Photos</h2>
    </template>

    <div class="py-12">
      <div class="max-w-7xl mx-auto sm:px-6 lg:px-8">
        <div class="bg-white overflow-hidden shadow-xl sm:rounded-lg">
          <!-- 👇  All photos for the Admin page down here -->
          <h1 class="text-2xl">Photos</h1>

        </div>
      </div>
    </div>
  </app-layout>
</template>

<script>
import { defineComponent } from "vue";
import AppLayout from "@/Layouts/AppLayout.vue";

export default defineComponent({
  components: {
    AppLayout,
  },
});
</script>
I removed a few pieces from the Dashboard template so make sure to double check the code above. The welcome component was removed from the template as it is not required in this page, and also its reference in the script section. The rest is identical.
Feel free to update the page title referenced as prop on the <app-layout title="Dashboard">.
Now when you visit localhost/admin you can click on the Photos menu item and see our Photos page component content. It's not much for now, just an h1.
How to Render Records in the Admin Page as a Table
Now it's time to render the data onto a table. To make things work let's first add our markup and fake that we already have access to as an array of objects and loop over them inside our table. Than we will figure out how to make things work for real.
 <table class="table-auto w-full text-left">
  <thead>
    <tr>
      <th>ID</th>
      <th>Photo</th>
      <th>Desciption</th>
      <th>Actions</th>
    </tr>
  </thead>
  <tbody>
    <tr v-for="photo in photos">
      <td>{{ photo.id }}</td>
      <td><img width="60" :src="photo.path" alt="" /></td>
      <td>{{photo.description}}</td>
      <td>View - Edit - Delete</td>

    </tr>
  </tbody>
</table>
Ok, since we assumed that our component has access to a list of Photos, let's pass a new prop to the component from the Route.
Update the route in web.php and pass to the inertia() function a second argument that will be an associative array. It will have its keys passed as props to the Vue Page component.
In it we will call Photo::all() to have a collection to assign to a photos key, but you can use other eloquent methods if you want to paginate the results, for example.
Route::get('/photos', function () {
    return inertia('Admin/Photos', [
        'photos' => Photo::all()
    ]);
})->name('photos');
To connect the prop to our Page component we need to define the prop also inside the component.
<script>
import { defineComponent } from "vue";
import AppLayout from "@/Layouts/AppLayout.vue";

export default defineComponent({
  components: {
    AppLayout,
  },
  /* 👇 Pass the photos array as a props 👇 */
  props: {
    photos: Array,
  },
});
</script>
Extra: How to use a Tailwind table component
Tailwind is a CSS framework similar to Bootstrap. There are a number of free to use components that we can grab from the documentation, tweak, and use.
This table component is free and looks nice:https://tailwindui.com/components/application-ui/lists/tables.
We can tweek the Photos page template and use the Tailwind table component to get a nice looking table like so:
<template>
    <app-layout title="Dashboard">
        <template #header>
            <h2 class="font-semibold text-xl text-gray-800 leading-tight">Photos</h2>
        </template>

         <div class="py-12">
            <div class="max-w-7xl mx-auto sm:px-6 lg:px-8">
              <!-- All posts goes here -->
              <h1 class="text-2xl">Photos</h1>
              <a class="px-4 bg-sky-900 text-white rounded-md" href>Create</a>
              <div class="flex flex-col">
                  <div class="-my-2 overflow-x-auto sm:-mx-6 lg:-mx-8">
                      <div class="py-2 align-middle inline-block min-w-full sm:px-6 lg:px-8">
                          <div class="shadow overflow-hidden border-b border-gray-200 sm:rounded-lg">
                              <table class="min-w-full divide-y divide-gray-200">
                                  <thead class="bg-gray-50">
                                      <tr>
                                          <th
                                              scope="col"
                                              class="px-6 py-3 text-left text-xs font-medium text-gray-500 uppercase tracking-wider"
                                          >ID</th>
                                          <th
                                              scope="col"
                                              class="px-6 py-3 text-left text-xs font-medium text-gray-500 uppercase tracking-wider"
                                          >Photos</th>
                                          <th
                                              scope="col"
                                              class="px-6 py-3 text-left text-xs font-medium text-gray-500 uppercase tracking-wider"
                                          >Description</th>
                                          <th scope="col" class="relative px-6 py-3">
                                              <span class="sr-only">Edit</span>
                                          </th>
                                      </tr>
                                  </thead>
                                  <tbody class="bg-white divide-y divide-gray-200">
                                      <tr v-for="photo in photos" :key="photo.id">
                                          <td class="px-6 py-4 whitespace-nowrap">
                                              <div
                                                  class="text-sm text-gray-900"
                                              >{{ photo.id }}</div>
                                          </td>

                                          <td class="px-6 py-4 whitespace-nowrap">
                                              <div class="flex items-center">
                                                  <div class="flex-shrink-0 h-10 w-10">
                                                      <img
                                                          class="h-10 w-10 rounded-full"
                                                          :src="photo.path"
                                                          alt
                                                      />
                                                  </div>
                                              </div>
                                          </td>

                                          <td class="px-6 py-4 whitespace-nowrap">
                                              <div class="text-sm text-gray-900">
                                                {{ photo.description.slice(0, 100) + '...' }}
                                              </div>
                                          </td>
                                        <!-- ACTIONS -->
                                          <td class="px-6 py-4 whitespace-nowrap text-right text-sm font-medium">
                                              <a href="#" class="text-indigo-600 hover:text-indigo-900">
                                              View - Edit - Delete
                                              </a>
                                          </td>
                                      </tr>
                                  </tbody>
                              </table>
                          </div>
                      </div>
                  </div>
                </div>
            </div>
        </div>
    </app-layout>
</template>
How to Submit Forms with Files
For the next section we will look into how to submit a form so that we can add a new photo to the database.
- Add a create button
- Add a create route
- Define the PhotosCreate component
- Add a form
- Validate data
- Show validation errors
- Save the file to the filesystem
- Save the model
How to Create a New Photo
Add a link that points to a create route:
<a class="px-4 bg-sky-900 text-white rounded-md" :href="route('admin.photos.create')">Create</a>
Create the route within the admin group:
Route::get('/photos/create', function () {
    return inertia('Admin/PhotosCreate');
})->name('photos.create');
Let's add also the route that will handle the form submission for later:
Route::post('/photos', function () {
    dd('I will handle the form submission')
})->name('photos.store');
Create the Admin/PhotosCreate.vue component:
    <template>
    <app-layout title="Dashboard">
        <template #header>
            <h2 class="font-semibold text-xl text-gray-800 leading-tight">Photos</h2>
        </template>

         <div class="py-12">
            <div class="max-w-7xl mx-auto sm:px-6 lg:px-8">
                <h1 class="text-2xl">Add a new Photo</h1>
                <!-- 👇 Photo creation form goes here -->

            </div>
        </div>
    </app-layout>
</template>


<script>
import { defineComponent } from "vue";
import AppLayout from "@/Layouts/AppLayout.vue";

export default defineComponent({
  components: {
    AppLayout,
  },

});
</script>
How to Add the Form to the Component
The next step is to add the form to the page and figure out how to submit it.
If you hit the Inertia documentation you will find out that there is a useForm class that we can use to simplify the process.
First, import the module inside the script tag of the Admin/PhotosCreate.vue component:
import { useForm } from '@inertiajs/inertia-vue3';
Next we can use it in the setup function (Vue 3 composition API):
setup () {
    const form = useForm({
      path: null,
      description: null,
    })

    return { form }
  }
In the code above we defined the function called setup() then a constant called form to have the useForm() class assigned to it.
Inside its parentheses we defined two properties, path and description which are the column names of our photos model.
Finally we returned the form variable for the setup function. This is to make the variable available inside our template.
Next we can add the form markup:
<form @submit.prevent="form.post(route('admin.photos.store'))">

<div>
    <label for="description" class="block text-sm font-medium text-gray-700"> Description </label>
    <div class="mt-1">
        <textarea id="description" name="description" rows="3" class="shadow-sm focus:ring-indigo-500 focus:border-indigo-500 mt-1 block w-full sm:text-sm border border-gray-300 rounded-md" placeholder="lorem ipsum" v-model="form.description"/>
    </div>
    <p class="mt-2 text-sm text-gray-500">Brief description for your photo</p>
        <div class="text-red-500" v-if="form.errors.description">{{form.errors.description}}</div>
</div>
<div>
    <label class="block text-sm font-medium text-gray-700"> Photo </label>
    <div class="mt-1 flex justify-center px-6 pt-5 pb-6 border-2 border-gray-300 border-dashed rounded-md">
    <div class="space-y-1 text-center">
        <svg class="mx-auto h-12 w-12 text-gray-400" stroke="currentColor" fill="none" viewBox="0 0 48 48" aria-hidden="true">
        <path d="M28 8H12a4 4 0 00-4 4v20m32-12v8m0 0v8a4 4 0 01-4 4H12a4 4 0 01-4-4v-4m32-4l-3.172-3.172a4 4 0 00-5.656 0L28 28M8 32l9.172-9.172a4 4 0 015.656 0L28 28m0 0l4 4m4-24h8m-4-4v8m-12 4h.02" stroke-width="2" stroke-linecap="round" stroke-linejoin="round" />
        </svg>
        <div class="flex text-sm text-gray-600">
        <label for="path" class="relative cursor-pointer bg-white rounded-md font-medium text-indigo-600 hover:text-indigo-500 focus-within:outline-none focus-within:ring-2 focus-within:ring-offset-2 focus-within:ring-indigo-500">
            <span>Upload a file</span>
            <input id="path" name="path" type="file" class="sr-only" @input="form.path = $event.target.files[0]" />
        </label>
        <p class="pl-1">or drag and drop</p>
        </div>
        <p class="text-xs text-gray-500">PNG, JPG, GIF up to 10MB</p>
    </div>
    </div>
</div>
<div class="text-red-500" v-if="form.errors.path">{{form.errors.path}}</div>

<button type="submit" :disabled="form.processing" class="inline-flex justify-center py-2 px-4 border border-transparent shadow-sm text-sm font-medium rounded-md text-white bg-indigo-600 hover:bg-indigo-700 focus:outline-none focus:ring-2 focus:ring-offset-2 focus:ring-indigo-500">Save</button>
</form>
The code above uses the Vue v-on directive short end syntax @submit.prevent="form.post(route('admin.photos.store'))" on the form tag, and the dom event submit with the prevent modifier.
Then it uses the form variable that we created earlier and a post method. This is available because we are using the useForm class.
Next we point the form to the route named admin.photos.store that we created earlier.
Inside the form we have two groups of inputs. First, we have the textarea that uses the v-model to bind it to the property form.description that we declared before.
The second group uses the form.path in a Tailwind component (showing the markup for a drop file area).
Right now we are allowing users to upload only a single photo using the v-on directive on the input DOM event @input="form.path = $event.target.files[0]".
The last two things to notice are the error handling done via <div class="text-red-500" v-if="form.errors.path">{{form.errors.path}}</div> for the path and also for the description.
Finally we use form.processing to disable the submit button while the form is processing.
The next step is to define the logic to save the data inside the database.
How to Store Data
To store the data, we can edit the route we defined earlier like so:
Route::post('/photos', function (Request $request) {
    //dd('I will handle the form submission')

    //dd(Request::all());
    $validated_data = $request->validate([
        'path' => ['required', 'image', 'max:2500'],
        'description' => ['required']
    ]);
    //dd($validated_data);
    $path = Storage::disk('public')->put('photos', $request->file('path'));
    $validated_data['path'] = $path;
    //dd($validated_data);
    Photo::create($validated_data);
    return to_route('admin.photos');
})->name('photos.store');
The code above uses dependency injection to allow us to use the parameter $request inside the callback function.
We first validate the request and save the resulting array inside the variable $validated_data. Then we use the Storage facades to save the file in the filesystem and obtain the file path that we store inside the $path variable.
Finally we add a path key to the associative array and pass to it the $path variable. Next we create the resource in the database using the Photo::create method and redirect the user to the admin.photos page using the new to_route() helper function.
Make sure to import the Request class and the Storage facades at the top of the web.php file like so:
use Illuminate\Http\Request;
use Illuminate\Support\Facades\Storage;
Now we can add a new photo in the database and show a list of photos for both the admin and standard visitors.
Next we need to complete the CRUD operations and allow the user to edit/update a photo and delete it.
How to Update Operations
Let's start by adding the routes responsible for showing the forms used to edit the resource and update its values onto the database.
Just under the other routes in the Admin group, let's add the following code:
Route::get('/photos/{photo}/edit', function(Photo $photo){
     return inertia('Admin/PhotosEdit', [
            'photo' => $photo
        ]);
})->name('photos.edit');
The route above uses dependency injection to inject inside the function the current post, selected by the URI /photos/{photo}/edit.
Next it returns the Inertia response via the inertia() function that accepts the Component name 'Admin/PhotosEdit' as its first parameter and an associative array as its second.
Doing ['photo' => $photo] will allow us to pass the $photo model as a prop to the component later.
Next let's add the new Page component under resources/js/Pages/Admin/PhotosEdit.vue
This will be its template:
<template>
    <app-layout title="Edit Photo">
        <template #header>
            <h2 class="font-semibold text-xl text-gray-800 leading-tight">Edit Photo</h2>
        </template>
        <div class="py-12">
            <div class="max-w-7xl mx-auto sm:px-6 lg:px-8">
                <form @submit.prevent="form.post(route('admin.photos.update', photo.id))">
                    <div>
                        <label
                            for="description"
                            class="block text-sm font-medium text-gray-700"
                        >Description</label>
                        <div class="mt-1">
                            <textarea
                                id="description"
                                name="description"
                                rows="3"
                                class="shadow-sm focus:ring-indigo-500 focus:border-indigo-500 mt-1 block w-full sm:text-sm border border-gray-300 rounded-md"
                                placeholder="lorem ipsum"
                                v-model="form.description"
                            />
                        </div>
                        <p class="mt-2 text-sm text-gray-500">Brief description for your photo</p>
                        <div
                            class="text-red-500"
                            v-if="form.errors.description"
                        >{{ form.errors.description }}</div>
                    </div>

                    <div class="grid grid-cols-2">
                        <div class="preview p-4">
                            <img :src="'/storage/' + photo.path" alt />
                        </div>
                        <div>
                            <label class="block text-sm font-medium text-gray-700">Photo</label>
                            <div
                                class="mt-1 flex justify-center px-6 pt-5 pb-6 border-2 border-gray-300 border-dashed rounded-md"
                            >
                                <div class="space-y-1 text-center">
                                    <svg
                                        class="mx-auto h-12 w-12 text-gray-400"
                                        stroke="currentColor"
                                        fill="none"
                                        viewBox="0 0 48 48"
                                        aria-hidden="true"
                                    >
                                        <path
                                            d="M28 8H12a4 4 0 00-4 4v20m32-12v8m0 0v8a4 4 0 01-4 4H12a4 4 0 01-4-4v-4m32-4l-3.172-3.172a4 4 0 00-5.656 0L28 28M8 32l9.172-9.172a4 4 0 015.656 0L28 28m0 0l4 4m4-24h8m-4-4v8m-12 4h.02"
                                            stroke-width="2"
                                            stroke-linecap="round"
                                            stroke-linejoin="round"
                                        />
                                    </svg>
                                    <div class="flex text-sm text-gray-600">
                                        <label
                                            for="path"
                                            class="relative cursor-pointer bg-white rounded-md font-medium text-indigo-600 hover:text-indigo-500 focus-within:outline-none focus-within:ring-2 focus-within:ring-offset-2 focus-within:ring-indigo-500"
                                        >
                                            <span>Upload a file</span>
                                            <input
                                                id="path"
                                                name="path"
                                                type="file"
                                                class="sr-only"
                                                @input="form.path = $event.target.files[0]"
                                            />
                                        </label>
                                        <p class="pl-1">or drag and drop</p>
                                    </div>
                                    <p class="text-xs text-gray-500">PNG, JPG, GIF up to 10MB</p>
                                </div>
                            </div>
                            <div class="text-red-500" v-if="form.errors.path">{{ form.errors.path }}</div>
                        </div>
                    </div>

                    <button
                        type="submit"
                        :disabled="form.processing"
                        class="inline-flex justify-center py-2 px-4 border border-transparent shadow-sm text-sm font-medium rounded-md text-white bg-indigo-600 hover:bg-indigo-700 focus:outline-none focus:ring-2 focus:ring-offset-2 focus:ring-indigo-500"
                    >Update</button>
                </form>
            </div>
        </div>
    </app-layout>
</template>
The template is actually identical to the Create component, except for a few things. The form points to a route that expects a paramenter that we pass as the second argument to the funtion route. It looks like this: <form @submit.prevent="form.post(route('admin.photos.update', photo.id))">.
There is a section where we can see the original photo next to the upload form group:
 <div class="preview p-4">
    <img :src="'/storage/' + photo.path" alt />
</div>
The rest is identical, and here we have the script section:
import { defineComponent } from "vue";
import AppLayout from "@/Layouts/AppLayout.vue";
import { useForm } from '@inertiajs/inertia-vue3';

export default defineComponent({
    components: {
        AppLayout,
    },
    props: {
        photo: Object
    },
    setup(props) {
        const form = useForm({
            _method: "PUT",
            path: null,
            description: props.photo.description,
        })

        return { form }
    },

});
Notice that we are passing a props object with the photo key, which allows us to reference the model in the template.
Next, this _method: "PUT", line of code is required to be able to submit a PUT request instead of the POST request called on the form tag.
Now let's implement the logic to handle the form submission inside the Route below.
In web.php just under the previous route, let's add one that responds to the PUT request submitted by our form.
Route::put('/photos/{photo}', function (Request $request, Photo $photo)
    {
        //dd(Request::all());

        $validated_data = $request->validate([
            'description' => ['required']
        ]);

        if ($request->hasFile('path')) {
            $validated_data['path'] = $request->validate([
                'path' => ['required', 'image', 'max:1500'],

            ]);

            // Grab the old image and delete it
            // dd($validated_data, $photo->path);
            $oldImage = $photo->path;
            Storage::delete($oldImage);

            $path = Storage::disk('public')->put('photos', $request->file('path'));
            $validated_data['path'] = $path;
        }

        //dd($validated_data);

        $photo->update($validated_data);
        return to_route('admin.photos');
    })->name('photos.update');
The route logic is straigthforward. First we validate the description, next we check if a file was uploaded and if so we validate it.
Then we delete the previously uploaded image Storage::delete($oldImage); before storing the new image onto the datadabse and update the resource using $photo->update($validated_data);.
As before with the store route, we redirect to the admin.photos route using return to_route('admin.photos');.
How to Delete a Resource
The last step we need to take is to write the logic to delete the photo. Let's start by adding the route.
Right below the previous route we can write:
Route::delete('/photos/{photo}', function (Photo $photo)
{
    Storage::delete($photo->path);
    $photo->delete();
    return to_route('admin.photos');
})->name('photos.delete');
This route is also using a wildcard in its URI to identify the resource. Next, its second paramenter is the callback that uses the dependency injection as before. Inside the callback we first delete the image from the filesystem using Storage::delete($photo->path);.
Then we remove the resource from the database $photo->delete(); and redirect the user back return to_route('admin.photos'); like we did in the previous reoute.
Now we need to add a delete button to the table we created in one of the previous steps to show all photos.
Inside the template section of the component Admin/Photos.vue within the v-for, we can add this Jetstream button:
<jet-danger-button @click="delete_photo(photo)">
    Delete
</jet-danger-button>
Find the table cell that has the ACTIONS comment and replace the DELETE text with the button above.
So the final code will be:
<td class="px-6 py-4 whitespace-nowrap text-right text-sm font-medium">
    <a href="#" class="text-indigo-600 hover:text-indigo-900">
    View - Edit -

    <jet-danger-button @click="delete_photo(photo)">
        Delete
    </jet-danger-button>
    </a>
</td>
As you can see there is a @click event listener on the button. It calls a method delete_photo(photo) that we need to define along with a bunch of other methods to have a nice modal opening to ask for confirmation from the user.
First import the Inertia helper function useForm:
// 0. Import the useForm class at the top of the script section along with all required components
import { useForm } from '@inertiajs/inertia-vue3';
import JetDangerButton from '@/Jetstream/DangerButton.vue'
import { ref } from "vue";
Remember to register the component JetDangerButton inside the components object before moving forward.
Next add the setup() function in the script section and implement the logic required to submit the form and show a modal. The comments in the code will guide you thorought all the steps.
// 1. add the setup function
setup() {
    // 2. declare a form variable and assign to it the Inertia useForm() helper function
    const form = useForm({
        // 3. override the form method to make a DELETE request
        _method: "DELETE",
    });
    // 4. define a reactive object with show_modal and photo property
    // this will be used to figure out when to show the modal and the selected post values
    const data = ref({
        show_modal: false,
        photo: {
            id: null,
            path: null,
            description: null,
        }
    })

    // 5. define the delete_photo function and update the values of the show_modal and photo properties
    // of the reactive object defined above. This method is called by the delete button and will record the details
    // of the selected post
    const delete_photo = (photo) => {
        //console.log(photo);
        //console.log(photo.id, photo.path, photo.description);
        data.value = {
            photo: {
                id: photo.id,
                path: photo.path,
                description: photo.description
            },
            show_modal: true
        };
    }
    // 6. define the method that will be called when our delete form is submitted
    // the form will be created next
    const deleting_photo = (id) => {
        form.post(route('admin.photos.delete', id))
        closeModal();
    }
    // 7. delare a method to close the modal by setting the show_modal to false
    const closeModal = () => {
        data.value.show_modal = false;
    }
    // 8. remember to return from the setup function the all variables and methods that you want to expose
    // to the template.
    return { form, data, closeModal, delete_photo, deleting_photo }

}
Finally outside the v-for loop add the modal using the following code. You can place this where you want but not inside the loop.
 <JetDialogModal :show="data.show_modal">
    <template #title>
        Photo {{ data.photo.description.slice(0, 20) + '...' }}
    </template>
    <template #content>
        Are you sure you want to delete this photo?

    </template>
    <template #footer>
        <button @click="closeModal" class="px-4 py-2">Close</button>
        <form @submit.prevent="deleting_photo(data.photo.id)">
            <jet-danger-button type="submit">Yes, I am sure!</jet-danger-button>
        </form>
    </template>
</JetDialogModal>
This is our final JavaScript code:
import { defineComponent } from "vue";
import AppLayout from "@/Layouts/AppLayout.vue";
import TableComponent from "@/Components/TableComponent.vue";
import { Link } from '@inertiajs/inertia-vue3';
import { useForm } from '@inertiajs/inertia-vue3';
import JetDialogModal from '@/Jetstream/DialogModal.vue';
import JetDangerButton from '@/Jetstream/DangerButton.vue'
import { ref } from "vue";
export default defineComponent({
    components: {
        AppLayout,
        Link,
        TableComponent,
        JetDialogModal,
        JetDangerButton
    },
    props: {
        photos: Array,
    },

    setup() {

        const form = useForm({
            _method: "DELETE",
        });
        const data = ref({
            show_modal: false,
            photo: {
                id: null,
                path: null,
                description: null,
            }

        })


        const delete_photo = (photo) => {
            //console.log(photo);
            console.log(photo.id, photo.path, photo.description);
            data.value = {
                photo: {
                    id: photo.id,
                    path: photo.path,
                    description: photo.description
                },
                show_modal: true
            };
        }
        const deleting_photo = (id) => {
            form.post(route('admin.photos.delete', id))
            closeModal();
        }

        const closeModal = () => {
            data.value.show_modal = false;


        }

        return { form, data, closeModal, delete_photo, deleting_photo }

    }
});
</script>
And here we have the HTML:
<template>
    <app-layout title="Dashboard">
        <template #header>
            <h2 class="font-semibold text-xl text-gray-800 leading-tight">Photos</h2>
        </template>

         <div class="py-12">
            <div class="max-w-7xl mx-auto sm:px-6 lg:px-8">
              <!-- All posts goes here -->
              <h1 class="text-2xl">Photos</h1>
              <a class="px-4 bg-sky-900 text-white rounded-md" href>Create</a>
              <div class="flex flex-col">
                  <div class="-my-2 overflow-x-auto sm:-mx-6 lg:-mx-8">
                      <div class="py-2 align-middle inline-block min-w-full sm:px-6 lg:px-8">
                          <div class="shadow overflow-hidden border-b border-gray-200 sm:rounded-lg">
                              <table class="min-w-full divide-y divide-gray-200">
                                  <thead class="bg-gray-50">
                                      <tr>
                                          <th
                                              scope="col"
                                              class="px-6 py-3 text-left text-xs font-medium text-gray-500 uppercase tracking-wider"
                                          >ID</th>
                                          <th
                                              scope="col"
                                              class="px-6 py-3 text-left text-xs font-medium text-gray-500 uppercase tracking-wider"
                                          >Photos</th>
                                          <th
                                              scope="col"
                                              class="px-6 py-3 text-left text-xs font-medium text-gray-500 uppercase tracking-wider"
                                          >Description</th>
                                          <th scope="col" class="relative px-6 py-3">
                                              <span class="sr-only">Edit</span>
                                          </th>
                                      </tr>
                                  </thead>
                                  <tbody class="bg-white divide-y divide-gray-200">
                                      <tr v-for="photo in photos" :key="photo.id">
                                          <td class="px-6 py-4 whitespace-nowrap">
                                              <div
                                                  class="text-sm text-gray-900"
                                              >{{ photo.id }}</div>
                                          </td>

                                          <td class="px-6 py-4 whitespace-nowrap">
                                              <div class="flex items-center">
                                                  <div class="flex-shrink-0 h-10 w-10">
                                                      <img
                                                          class="h-10 w-10 rounded-full"
                                                          :src="photo.path"
                                                          alt
                                                      />
                                                  </div>
                                              </div>
                                          </td>

                                          <td class="px-6 py-4 whitespace-nowrap">
                                              <div class="text-sm text-gray-900">
                                                {{ photo.description.slice(0, 100) + '...' }}
                                              </div>
                                          </td>
                                        <!-- ACTIONS -->
                                         <td class="px-6 py-4 whitespace-nowrap text-right text-sm font-medium">
                                            <a href="#" class="text-indigo-600 hover:text-indigo-900">
                                            View - Edit -

                                            <jet-danger-button @click="delete_photo(photo)">
                                                Delete
                                            </jet-danger-button>
                                            </a>
                                        </td>
                                      </tr>
                                  </tbody>
                              </table>
                          </div>
                      </div>
                  </div>
                </div>
            </div>
        </div>
         <JetDialogModal :show="data.show_modal">
            <template #title>
                Photo {{ data.photo.description.slice(0, 20) + '...' }}
            </template>
            <template #content>
                Are you sure you want to delete this photo?

            </template>
            <template #footer>
                <button @click="closeModal" class="px-4 py-2">Close</button>
                <form @submit.prevent="deleting_photo(data.photo.id)">
                    <jet-danger-button type="submit">Yes, I am sure!</jet-danger-button>
                </form>
            </template>
        </JetDialogModal>
    </app-layout>
</template>
That's it. If you did everything correctly you should be able to see all photos, create new photos as well as edit and delete them.
I will leave you some home work. Can you figure out how to implement the view and edit links before the delete button in the section below?
<!-- ACTIONS -->
<td class="px-6 py-4 whitespace-nowrap text-right text-sm font-medium">
    <a href="#" class="text-indigo-600 hover:text-indigo-900">
    View - Edit -

    <jet-danger-button @click="delete_photo(photo)">
        Delete
    </jet-danger-button>
    </a>
</td>
Wrapup and What's next
During this guide we took our first steps and learned how to build a single page application using Laravel as our backend framework and Vue3 for the front end. We glued them together with Inertia js and built a simple photo application that lets a user manage photos.
We are just at the beginning of a fantastic journey. Learning new technologies isn't easy, but thanks to their exaustive documentations we can keep up and build awesome applications.
Your next step to master Laravel, Vue3, Inertia and all the tech we have been using so far is to hit their documentation and keep learning. Use the app we have build if you want, and improve it or start over from scratch.
Just keep that in mind, coding is fun so relax and enjoy it.
Conclusion
This is just an overview of how I'd build a single page application using these technologies.
If you are familiar with server-side routing and Vuejs then you will enjoy bulding a single page application with Laravel, Inertia, and Vuejs. The learning curve isn't that steep plus you have great documentation to help you out.
I hope you've enjoyed this guide. If so, let me know and consider subscribing to my YouTube channel and following me on Twitter. And if you get stuck, get in touch for help.
You can find the source code for this guide here.