Putting together all of the pieces of a full stack JavaScript application can be a complex endeavor.  

In this tutorial, we're going to build a multiplayer tabletop game simulator using Vue, Phaser, Node/Express, and Socket.IO to learn several concepts that will be useful in any full stack app.

You can follow along with this video tutorial as well (1 hour 16 minute watch):

All of the project files for this tutorial are available on GitHub.

Project Overview

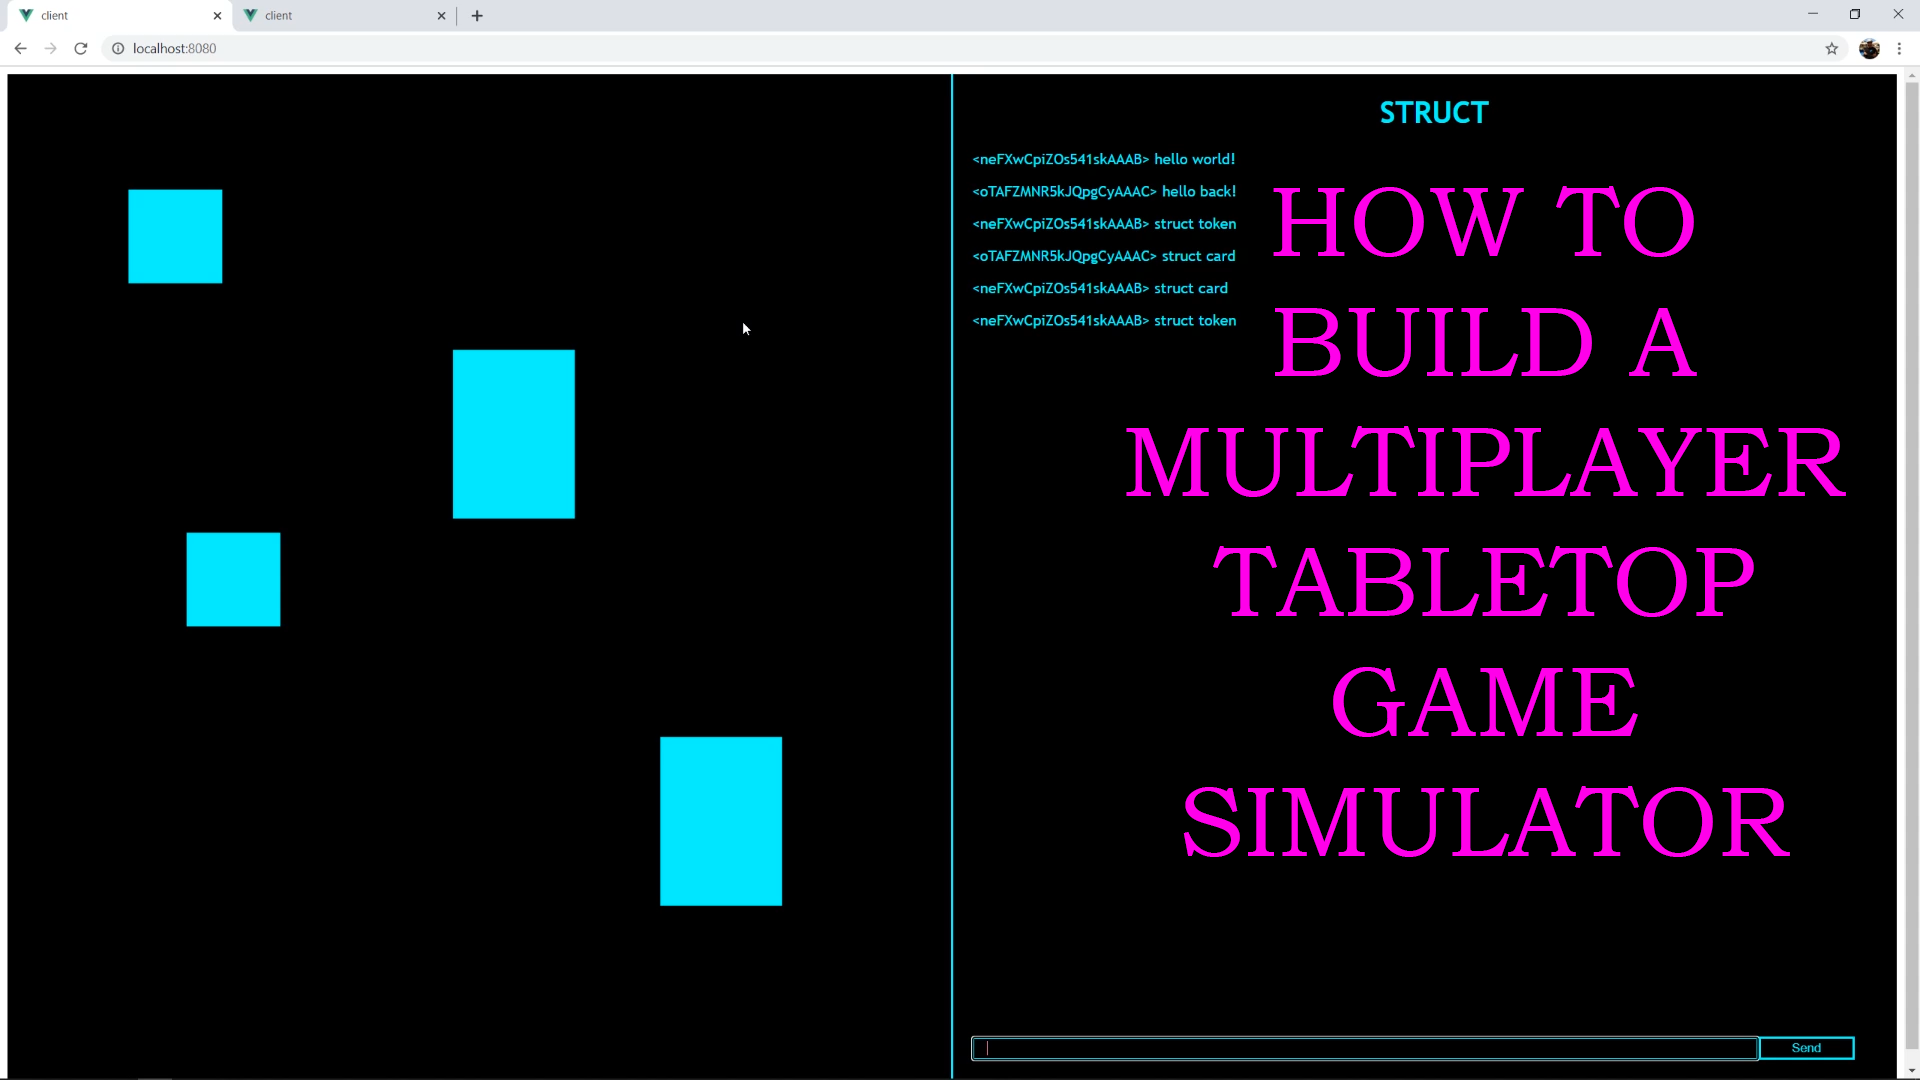
Our project will feature a Phaser game instance that will allow us to create tokens and cards on screen, and move them around on a digital game board.

The Phaser instance will be wrapped in a Vue component that will handle things like multiplayer chat and commands.  Together, Phaser and Vue will comprise our front end (referred to from here on as the "client"), and we'll use Socket.IO to communicate with other players and tie together the front and back ends of our app.

The back end (referred to from here on as the "server") will be a simple Express server that receives Socket.IO events from the client and acts accordingly.  The whole application will run on Node as its runtime.

You don't need to be an expert in any of the above frameworks to complete this project, but it would be a good idea to have a solid foundation in basic JavaScript and HTML/CSS before trying to tackle the specifics. You can also follow along with my series on Learning JavaScript by Making Digital Tabletop Games and Web Apps.  

You'll also want to make sure that you have Node and Git installed, along with your favorite code editor and a command line interface (you can follow my tutorial on setting up an IDE here if you need help).

Let's get started!

Part 1: Client Basics

We'll begin building our client by installing the Vue CLI, which will help us with some tooling and allow us to make changes to our files without having to reload our web browser.

In a command line, type in the following to install the Vue CLI globally:

npm install -g @vue/cli

Navigate to a desired directory and create a new folder for our project:

mkdir tabletop-project
cd tabletop-project

Now we can use the Vue CLI to template a front end project for us:

vue create client

You can just hit "enter" at the ensuing prompts unless you have specific preferences.

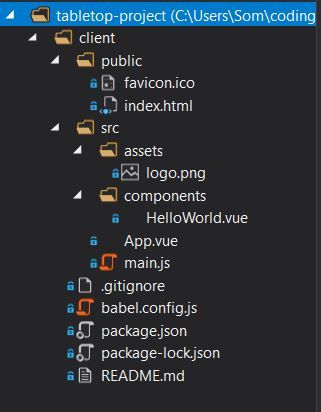
The Vue CLI has helpfully templated a front end project for us, which we can view in our code editor:

1

Let's navigate to our new client folder in our CLI and run the template app:

cd client
npm run serve

After a little work, the Vue CLI should begin displaying our app in a web browser at the default http://localhost:8080:

2

Cool!  We have the basic structure of our client.  Let's break it by creating two new components in the /components folder, called Game.vue and Chat.vue (you can go ahead and delete HelloWorld.vue and anything in the assets folder if you're obsessed with tidiness like I am).

Replace the code in App.vue with the following:

<template>
    <div id="app">
        <div id="game">
            <Game />
        </div>
        <div id="border" />
        <div id="input">
            <Chat />
        </div>
    </div>
</template>

<script>
    import Chat from './components/Chat.vue';
    import Game from './components/Game.vue';

    export default {
        name: 'App',
        components: {
            Chat,
            Game
        }
    }
</script>

<style>
    #app {
        font-family: 'Trebuchet MS';
        text-align: left;
        background-color: black;
        color: cyan;
        display: flex;
    }
    #game {
        width: 50vw;
        height: 100vh;
    }
    #input {
        width: 50vw;
        height: 100vh;
    }
    #border {
        border-right: 2px solid cyan;
    }
    @media (max-width: 1000px) {
        #app {
            flex-direction: column;
        }
        #game {
            width: 100vw;
            height: 50vh;
        }
        #input {
            width: 100vw;
            height: 50vh;
        }
    }
</style>

As you can see, a Vue component ordinarily has three sections: Template, Script, and Style, which contain any HTML, JavaScript, and CSS for that component, respectively.  We've just imported our Game and Chat components here and added a little styling to give it a cyberpunk feel when it's all up and running.

That's actually all that we need to do to set up our App.vue component, which will house everything else in our client.  Before we can actually do anything with it, we'll need to get our server working!

Part 2: Server Basics

At our root directory (tabletop-project, above /client), initialize a new project in a new command line interface by typing:

npm init

Like with our client, you can go ahead and press "enter" at the prompts unless there are specifics that you'd like to designate at this time.

We'll need to install Express and Socket.IO, along with Nodemon to watch our server files for us and reboot as necessary:

npm install --save express socket.io nodemon

Let's open up the new package.json file in that root directory and add a "start" command in the "scripts" section:

  "scripts": {
    "start": "nodemon server.js"
  },

Create a new file called server.js in this directory, and enter the following code:

const server = require('express')();
const http = require('http').createServer(server);
const io = require('socket.io')(http);

io.on('connection', function (socket) {
    console.log('A user connected: ' + socket.id);
    
    socket.on('send', function (text) {
        let newText = "<" + socket.id + "> " + text;
        io.emit('receive', newText);
    });

    socket.on('disconnect', function () {
        console.log('A user disconnected: ' + socket.id);
    });
});

http.listen(3000, function () {
    console.log('Server started!');
});

Excellent!  Our simple server will now listen at http://localhost:3000, and use Socket.IO to log to the console when a user connects and disconnects, with their socket ID.

When the server receives a "send" event from a client, it will create a new text string that includes the socket ID of the client that emitted the event, and emit its own "receive" event to all clients with the text that it received, interpolated with the socket ID.

We can test the server by returning to our command line and starting it up :

npm run start

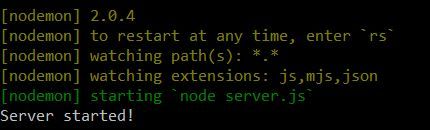
The command console should now display:

3-4

Cool! Let's return to the Chat component of our client to start building out our front end functionality.

Part 3: Chat

Let's open a separate command line interface and navigate to the /client directory. Within that directory, install the client version of Socket.IO:

npm install --save socket.io-client

In /client/src/components/Chat.vue, add the following code:

<template>
    <div id="container">
        <div id="output">
            <h1>STRUCT</h1>
            <p v-for="(text, index) in textOutput" :key="index">{{text}}</p>
        </div>
        <div id="input">
            <form>
                <input type="text" v-model="textInput" :placeholder="textInput" />
                <input type="submit" value="Send" v-on:click="submitText" />
            </form>
        </div>
    </div>
</template>

<script>
    import io from 'socket.io-client';
    let socket = io('http://localhost:3000');

    export default {
        name: 'Chat',
        data: function () {
            return {
                textInput: null,
                textOutput: []
            }
        },
        methods: {
            submitText: function (event) {
                event.preventDefault();
                socket.emit('send', this.textInput);
            }
        },
        created: function () {
            socket.on('connect', () => {
                console.log('Connected!');
            });
            socket.on('receive', (text) => {
                this.textOutput.push(text);
                this.textInput = null;
            });
        }
    }
</script>

<style scoped>
    #container {
        text-align: left;
        display: flex;
        flex-direction: column;
        margin-left: 1vw;
        min-height: 100vh;
    }
    h1 {
        text-align: center;
    }
    .hotpink {
        color: hotpink;
    }
    #input {
        position: fixed;
        margin-top: 95vh;
    }
    input[type=text] {
        height: 20px;
        width:  40vw;
        border: 2px solid cyan;
        background-color: black;
        color: hotpink;
        padding-left: 1em;
    }
    input[type=submit]{
        height: 25px;
        width: 5vw;
        background-color: black;
        color: cyan;
        border: 2px solid cyan;
        margin-right: 2vw;
    }
    input[type=submit]:focus{
        outline: none;
    }
    input[type=submit]:hover{
        color: hotpink;
    }
    @media (max-width: 1000px) {
        #container {
            border-left: none;
            border-top: 2px solid cyan;
            min-height: 50vh;
        }
        #input {
            margin-top: 43vh;
        }
        #output {
            margin-right: 10vw;
        }
        input[type=text] {
            width: 60vw;
        }
        input[type=submit] {
            min-width: 10vw;
        }
    }
</style>

Let's examine the above from bottom to top before moving forward.  Between the <style> tags, we've added some CSS to punch-up the cyberpunkiness of our chat. You can style this however you'd like!

Between the <script> tags, we've imported the client version of Socket.IO and stored it in a variable called "socket" that communicates through http://localhost:3000, where the server is listening.

We've then given the component a name ("Chat"), and utilized the data, methods, and created objects that Vue uses to handle interactivity for us.

In the data object, we store two variables: textInput, which starts out as null, and textOutput, which is an empty array.

In the methods object, we create a simple function, submitText, that emits a "send" event through Socket.IO along with the textInput and prevents the default behavior of such an event (such as sending data through an HTML form).

In the created object, which is triggered when the component is initialized, we have two references to the socket. The first indicates that when it receives a "connect" event from the server, the socket should log to the console that it has "Connected!" The second indicates that when the socket receives a "receive" event, it should push the text from that event to the textOutput array and clear the textInput variable.

Between our <template> tags, we have our HTML that includes input and output sections.  The output section has a header named "Struct" (which is the programming language in my books and games), and utilizes Vue's list rendering to display a <p> element for each piece of text in the textOutput array.

The input section has a simple form with Vue form input bindings and an event handler to receive text input, store it in our textInput variable, and trigger the "send" Socket.IO event when the "Send" button is clicked.

Phew! Our chat is now functional. Save everything and navigate to your browser tab that is running the client at http://localhost:8080:

4

Note that you can open up another browser tab, which will connect to the server with a new socket ID, and the chat should begin populating among both clients:

6

Meanwhile, your command line console should also be indicating when clients connect to and disconnect from the server (with different socket IDs, of course):

5

Awesome.  Let's move to building our tabletop simulator in Phaser!

Part 4: Tabletop Simulator

We'll need a Vue component to house our Phaser instance, and to do so, we'll borrow from Sun0fABeach's Vue - Phaser 3 Webpack boilerplate (you could probably even use this boilerplate to create your client if you so desired).

In our /client/src/components/Game.vue file, add the following code:

<template>
    <div :id="containerId" v-if="downloaded" />
    <div class="placeholder" v-else>
        Downloading...
    </div>
</template>

<script>
    export default {
        name: 'Game',
        data: function () {
            return {
                downloaded: false,
                gameInstance: null,
                containerId: 'game-container'
            }
        },
        async mounted() {
            const game = await import(../game/game');
            this.downloaded = true;
            this.$nextTick(() => {
                this.gameInstance = game.launch(this.containerId)
            })
        },
        destroyed() {
            this.gameInstance.destroy(false);
        }
    }
</script>

<style scoped>

</style>

This component will render our game instance when it's ready, and keep a placeholder until that time (usually just a few seconds).  It won't work just yet, as we haven't created a game instance with which to work.

In a command line interface at the /client directory, type the following

npm install --save phaser

Phaser will handle the rendering all of our game objects like tokens and cards, while also making them interactive with drag-and-drop functionality.

Within the /client/src folder, add a new folder called "game", and a subfolder within that folder called "scenes".

Within the /client/src/game folder, add a file called game.js, and within /client/src/game/scenes, add a file called gamescene.js. Your file structure should now look like:

7

Our game.js file will handle the initial setup for our Phaser instance, importing our gamescene.js and launching our game into the containerId of our Vue component (it also scales the instance to the size of the container).  Here's what it should look like:

import Phaser from "phaser";
import GameScene from "./scenes/gamescene";


function launch(containerId) {
    return new Phaser.Game({
        type: Phaser.AUTO,
        parent: containerId,
        scene: [
            GameScene
        ],
        scale: {
            mode: Phaser.Scale.FIT,
            width: '100%',
            height: '100%'
        }
    });
}

export default launch;
export { launch }

The main functionality of our simulator will be in the gamescene.js file, where we'll write:

import Phaser from 'phaser';
import io from 'socket.io-client';

export default class GameScene extends Phaser.Scene {
    constructor() {
        super({
            key: 'GameScene'
        });
    }

    preload() {
        
    }

    create() {
        this.socket = io('http://localhost:3000');
        
        this.socket.on('struct create', (width, height) => {
            let token = this.add.rectangle(300, 300, width, height, 0x00ffff).setInteractive();
            this.input.setDraggable(token);
        });
        
        this.input.on('drag', (pointer, gameObject, dragX, dragY) => {
            gameObject.x = dragX;
            gameObject.y = dragY;
        });
    }

    update() {

    }
}

Our Phaser architecture utilizes JavaScript classes to create scenes, and has three main functions: preload, create, and update.

The preload function is used for prepping assets like sprites for use within a scene.

The update function is called once per frame, and we're not making use of it in our project.

The create function is called when a scene is created, and where all of our work is being done here. We initialize a socket variable and store the Socket.IO connection at http://localhost:3000 within it, then reference a "struct create" event that we expect to receive from the server.

When the client receives a "struct create" event, our Phaser instance should create a rectangle at the (x, y) coordinates of (300, 300), using the width and height parameters that are designated by that event, and a fun cyberpunk color that we've chosen. Phaser will then set that rectangle to be interactive, and alert the input system that it should also be draggable.

We've also written a little bit of logic that tells Phaser what it should do when the rectangle is dragged; namely, it should follow the direction of the mouse pointer.

All we have to do now is to jump back into our server.js and add logic for our "struct create" event:

const server = require('express')();
const http = require('http').createServer(server);
const io = require('socket.io')(http);

io.on('connection', function (socket) {
    console.log('A user connected: ' + socket.id);
    
    socket.on('send', function (text) {
        let newText = "<" + socket.id + "> " + text;
        if (text === 'struct card') {
            io.emit('struct create', 130, 180)
        };
        if (text === 'struct token') {
            io.emit('struct create', 100, 100)
        };
        io.emit('receive', newText);
    });

    socket.on('disconnect', function () {
        console.log('A user disconnected: ' + socket.id);
    });
});

http.listen(3000, function () {
    console.log('Server started!');
});

Our server now acts as a simple parser when it receives a "send" event from a client. If the client sends the text "struct card", the server will emit our "struct create" event, with arguments of 130 x 180 pixels for the width and height of a card.

If the client sends the text "struct token", the server will instead emit our "struct create" event with arguments of 100 x 100 pixels for the width and height of a token.

Try it! Save everything, make sure the server is running, and open a couple of tabs in a web browser pointed to http://localhost:8080.  When you chat in one tab, it should appear in the other with your client's socket ID, and vice versa.  

If your chat is the command "struct card" or "struct token", a draggable card or token, respectively, should appear in both clients.

8

Neat!

Wrap Up

By following this tutorial, you should now have a working multiplayer tabletop game simulator with chat, card and token creation, and drag-and-drop functionality.

You can continue to build on this simple full stack app by enhancing the styling, adding a scroll bar to the chat, or allowing players to chose usernames and log into specific chat instances by using Socket.IO rooms.

You can improve on the board game functionality by dealing multiple cards and tokens at once, or getting familiar with the Phaser examples to add your own features.  You can also follow along with my tutorial on How to Build a Multiplayer Card Game with Phaser 3, Express, and Socket.IO for inspiration.

Of course, there's no reason that you'd need to use chat commands to create game objects. You could do all of that from within the Phaser instance if you'd like, but you'll need to create your own buttons or some other input interactivity (in my experience, Vue is far better at handling text, hence our chat commands).

The current functionality, could, however, be useful in the case that you'd want to be able to render, say, dice on screen by running a chat command.

Additionally, if you'd like to deploy your new app, you can first read my article on Three Things to Consider Before Deploying Your First Full Stack App, then follow along with my tutorial to Learn How to Deploy a Full Stack Web App with Heroku.

Happy coding!

If you enjoyed this article, please consider checking out my games and books, subscribing to my YouTube channel, or joining the Entromancy Discord.

M. S. Farzan, Ph.D. has written and worked for high-profile video game companies and editorial websites such as Electronic Arts, Perfect World Entertainment, Modus Games, and MMORPG.com, and has served as the Community Manager for games like Dungeons & Dragons Neverwinter and Mass Effect: Andromeda. He is the Creative Director and Lead Game Designer of Entromancy: A Cyberpunk Fantasy RPG and author of The Nightpath Trilogy. Find M. S. Farzan on Twitter @sominator.