By Obed Ehoneah
You may want to host your website on a virtual private server or a virtual machine like AWS EC2. But it can be a challenge to connect a domain name that you purchased from providers like Namecheap or Godaddy.
But if you know the steps to follow, this doesn't have to be difficult.
In this post, I'll break the whole process of connecting a domain name to a website hosted on EC2 down. I'll show you how to do it practically with screenshots guiding you through every step. I'll be using a Namecheap domain in this example.
There are 4 major steps that you'll need to follow, and it shouldn't be too tricky if you follow the discussion in this tutorial. Here they are:
- Step1: Set up your website on EC2
- Step 2: Set up Route 53 for DNS management
- Step 3: Update nameservers with your domain provider
- Step 4: Wait for propagation
Let's get started.
Step 1: How to Set Up Your Website on EC2
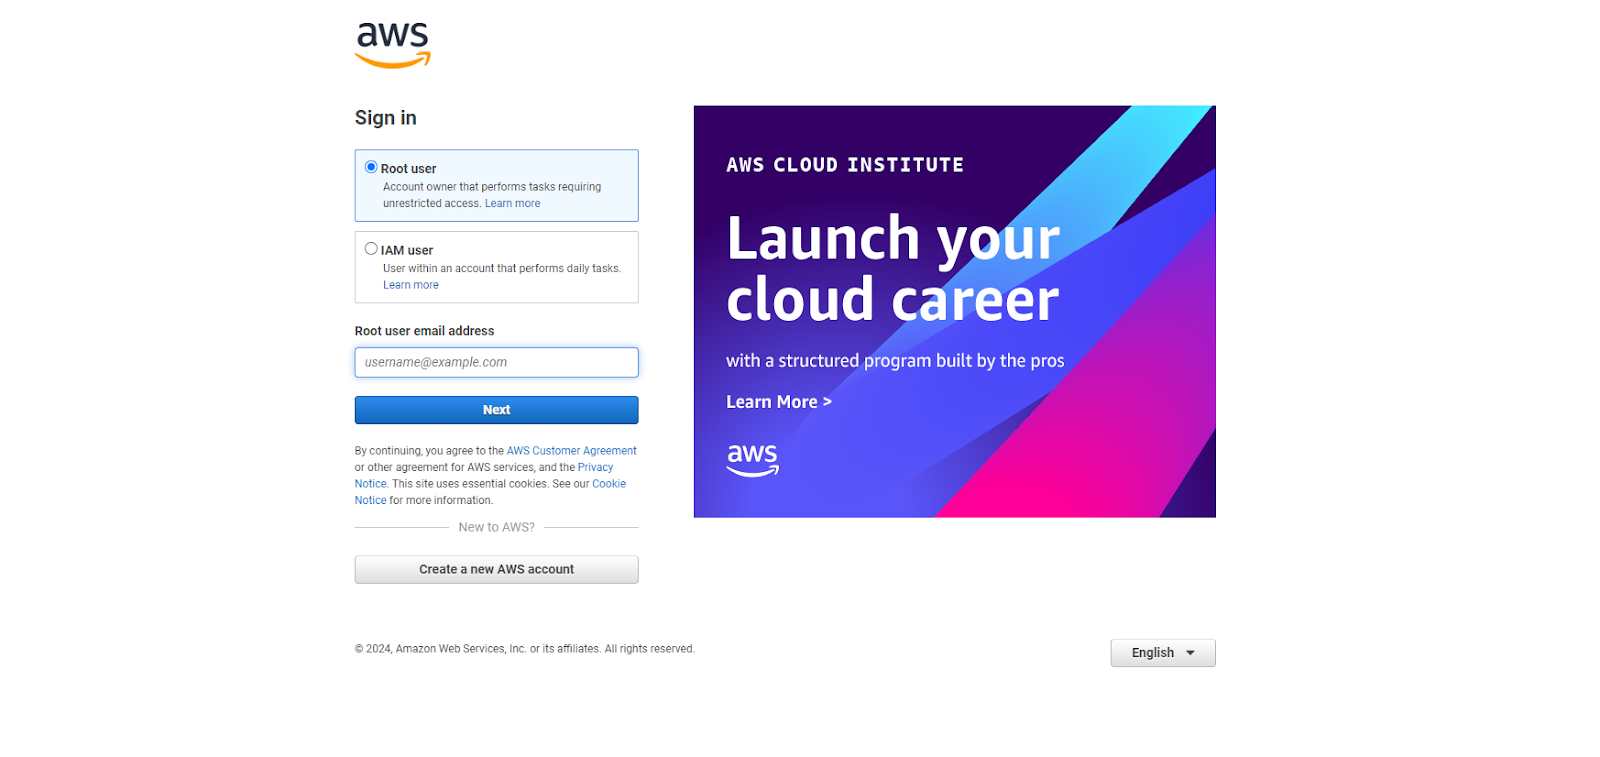
First, visit https://aws.amazon.com/console/. Click on the sign in button at the top right corner or the Log back in button in the middle.

Create an account if you don’t already have one. Otherwise sign in with your credentials.
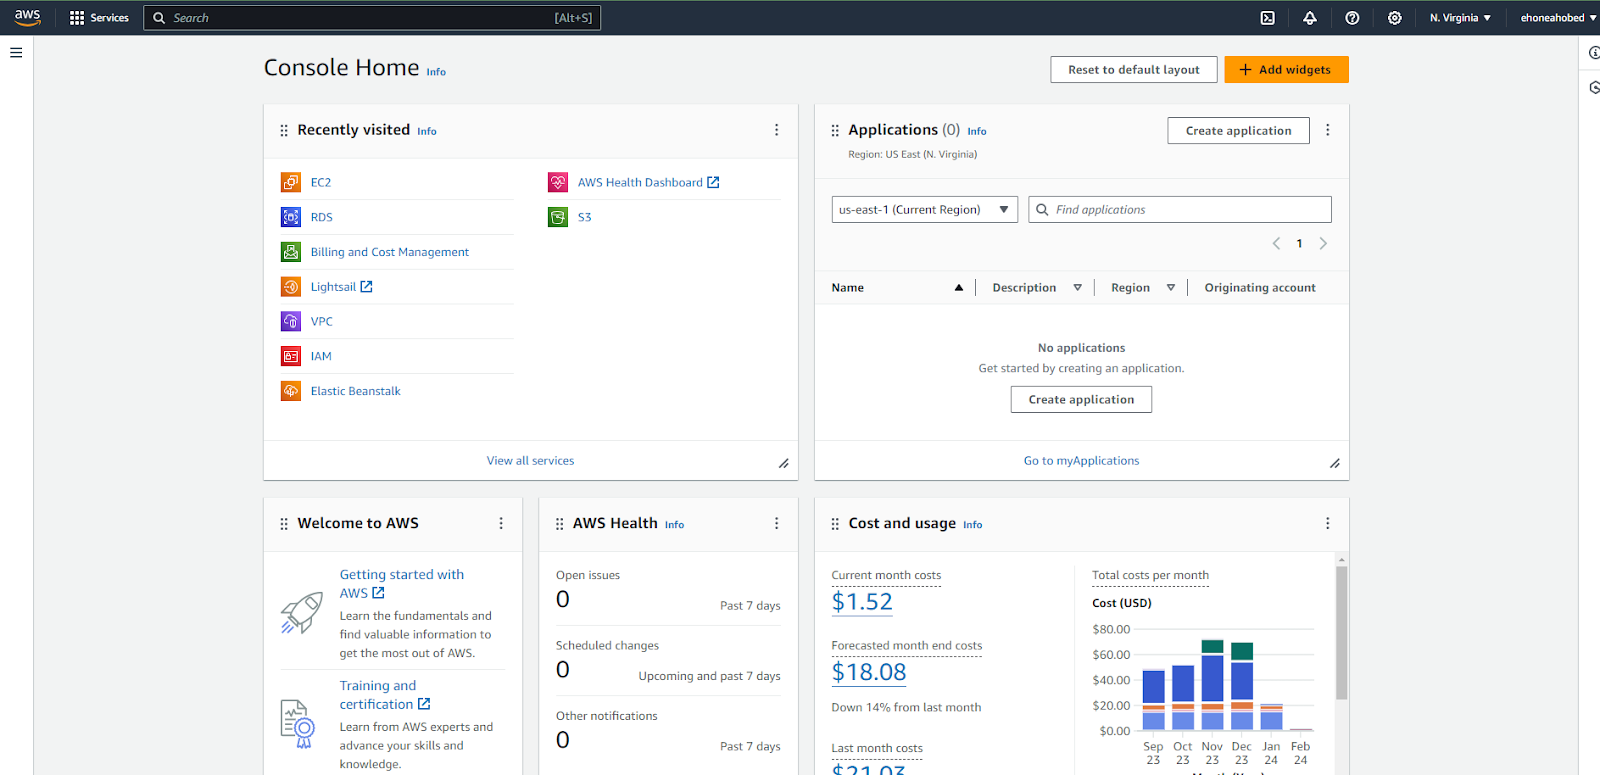
After logging in, you will be redirected to the main dashboard.
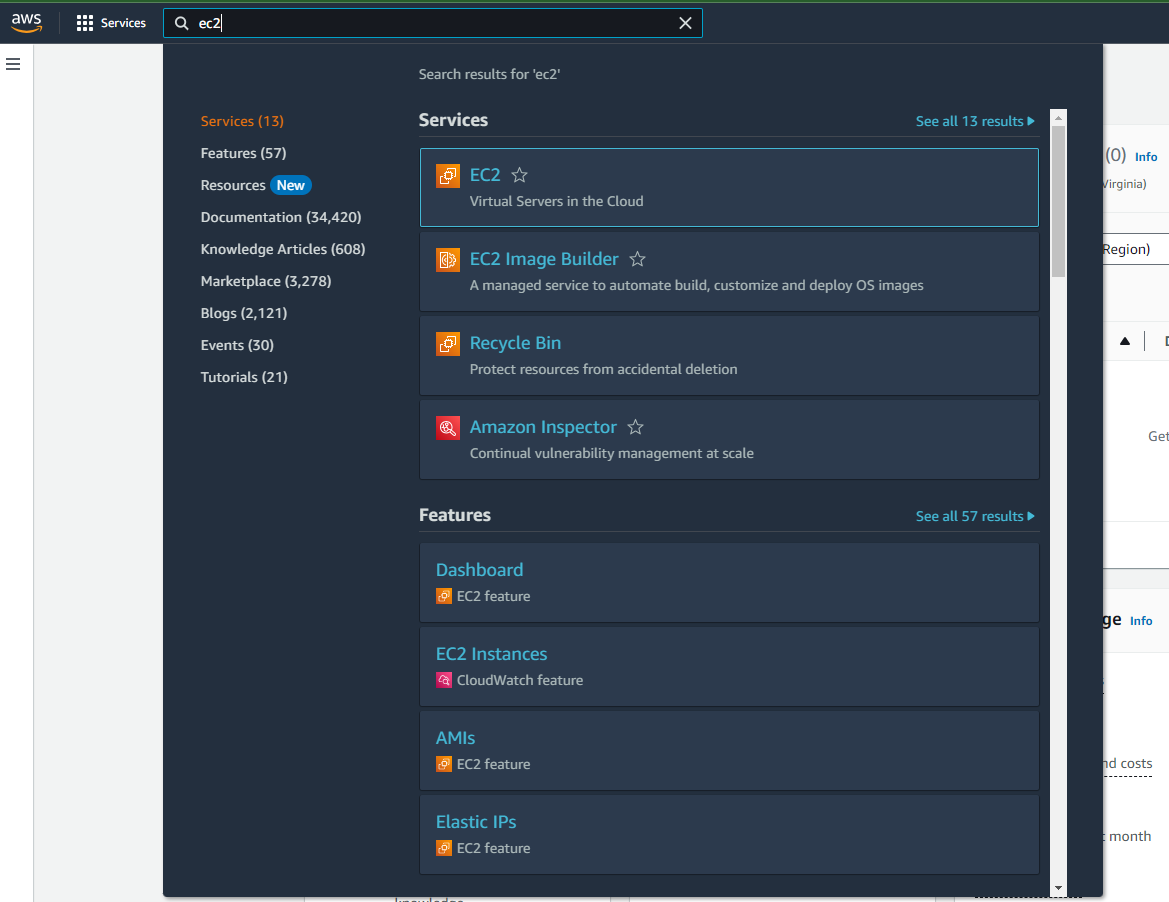
In the search bar at the very top, you can search for EC2 and click on the first option under Services.
This will then open the EC2 dashboard that gives you a summary of all the EC2 resources that you are using. If you are not using any of them, then you are likely to find that the value for each will be zero.
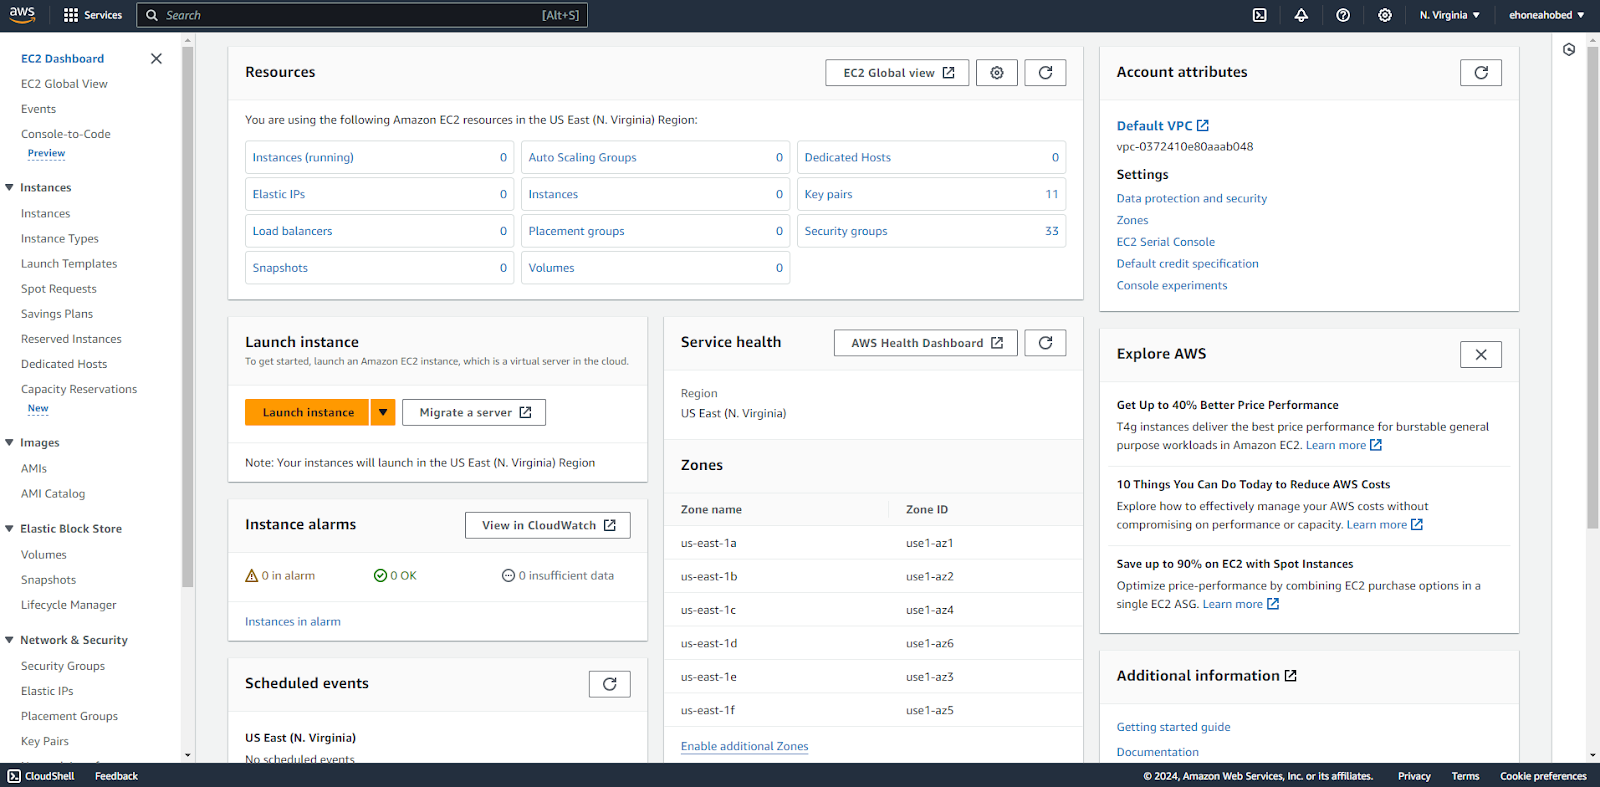
Launching an EC2 instance
Click on the Launch Instance button.
On the "Launch an instance" page, you will select the specifications for the virtual machine intended to host your website or web application. Initially, assign a name to your machine for easy identification..
For the sake of this example, I used the name "FC Web Server".

Choose the Amazon Machine Image (AMI) which represents the specific operating system and applications you want to have by default on your virtual machine when you boot it.
For the sake of this example, I selected Ubuntu, and I'm using the Free tier eligible Ubuntu Server 22.04 LTS as the AMI. I left the architecture at 64-bit (x86).
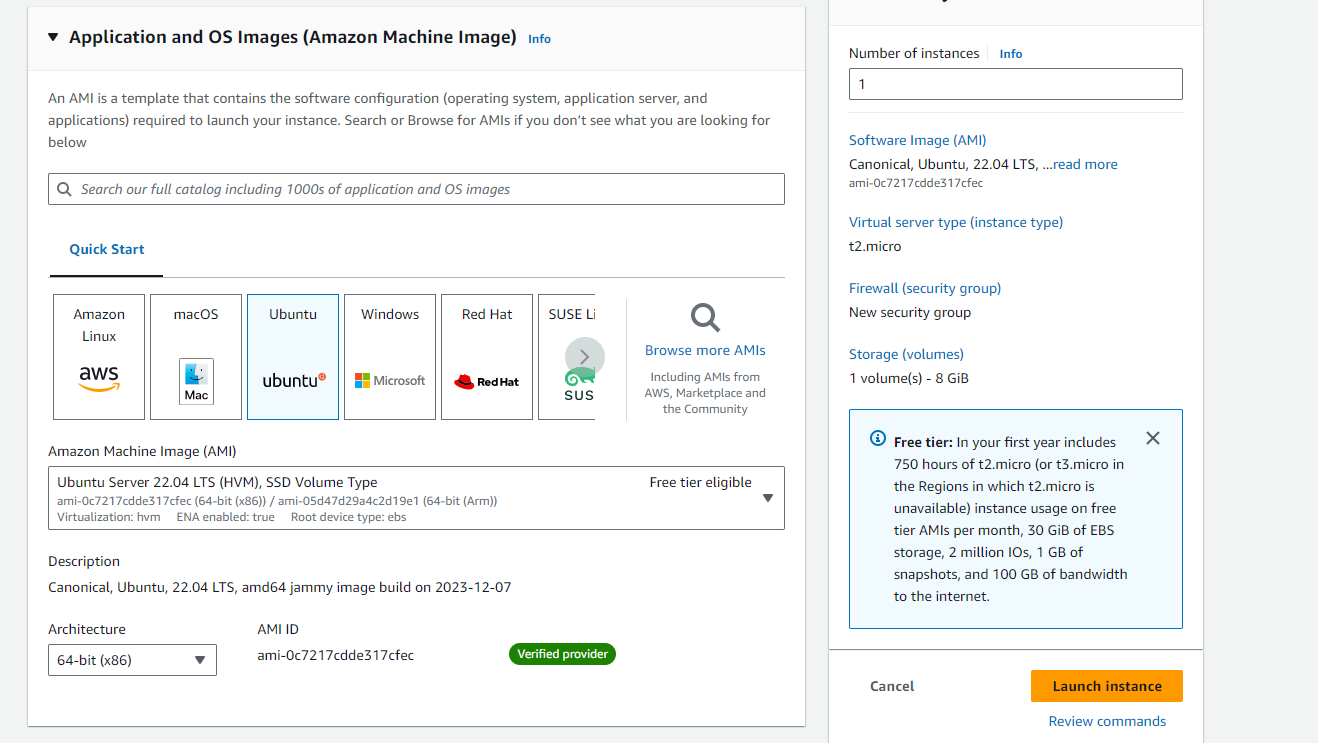
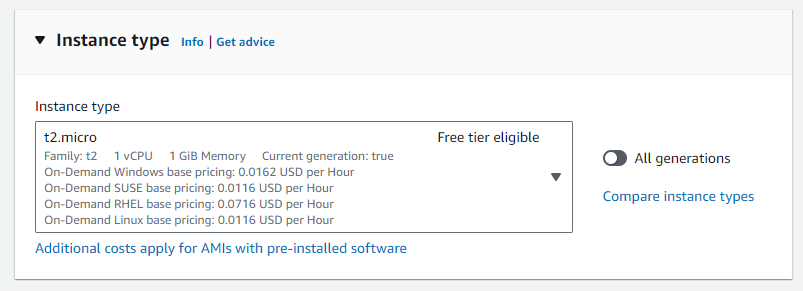
For the instance type, you can also stick with the Free tier eligible t2.micro – but if your app or website requires more resources, then you'll have to choose the most appropriate instance based on the number of vCPU and memory required.
To securely connect to your virtual machine, you will need an SSH key pair. Go ahead and click on the Create new key pair link under the Key pair section if you don’t already have an existing key pair that you can use.
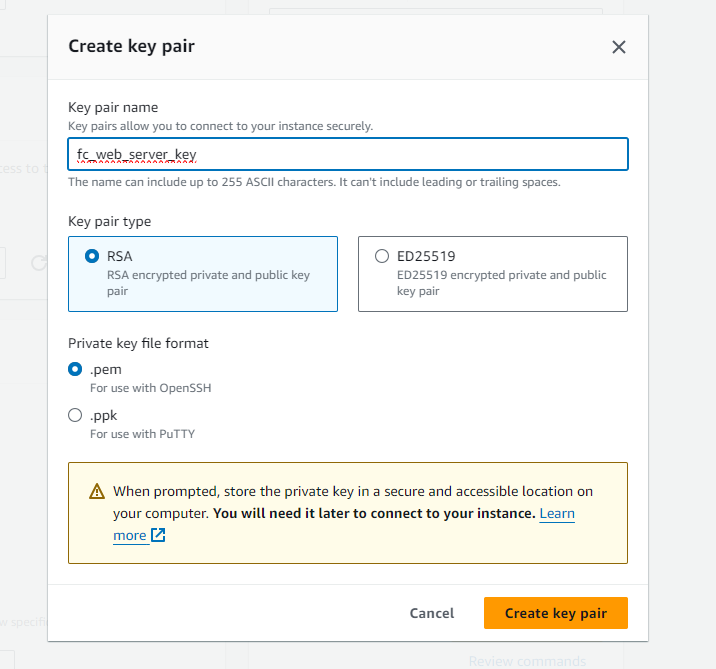
Give your key pair a name that you can easily identify. Set the key pair type to RSA and the private key file format to .pem. You can also use .ppk if you are in a windows environment and know how to use PuTTY.
Click the Create key pair button. After clicking it, the file will automatically be downloaded. Make sure you keep this file in a secured place.
Move on to the Network settings. You need to set up a firewall that controls the various protocols through which your website or web app can be accessed. For the sake of this example, you can choose Create security group and allow SSH, HTTPS, and HTTP.
You can leave the IP address at Anywhere 0.0.0.0/0.
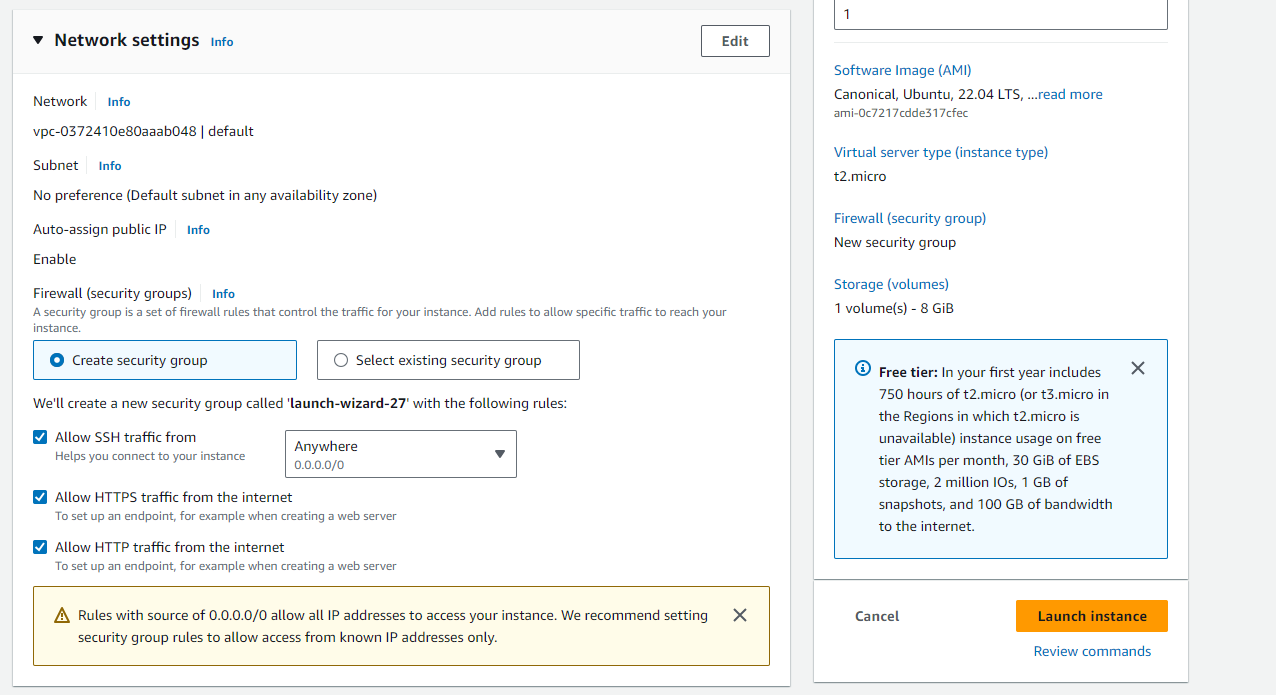
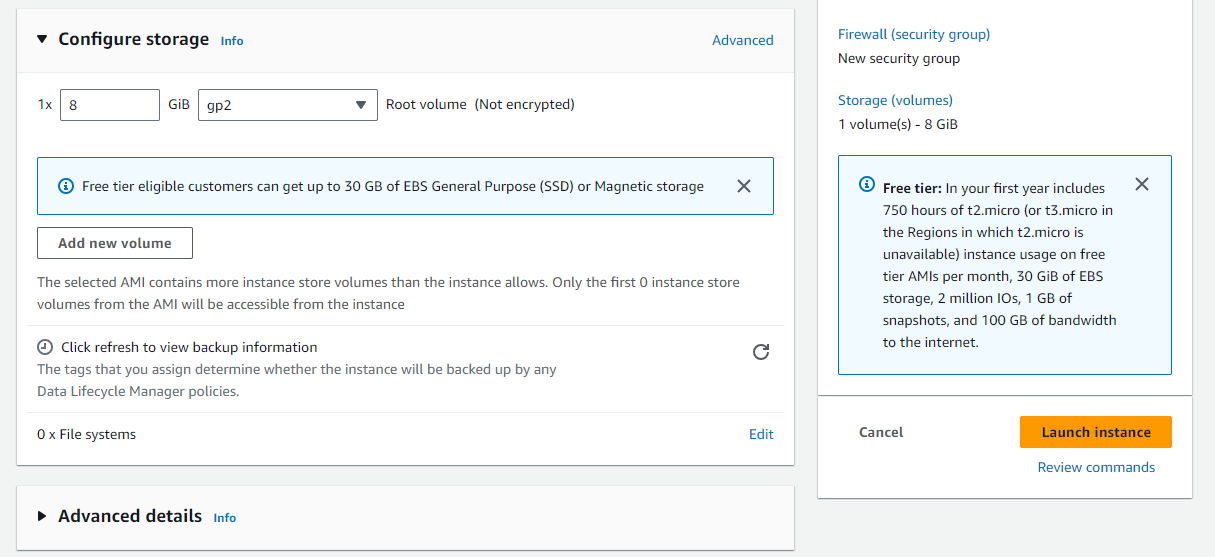
Finally, you need to configure the storage options. You can also go with the default 8GiB gp2. You can ignore the additional details and click on the Launch instance button.
After the instance has successfully be launched, you will get a success message.
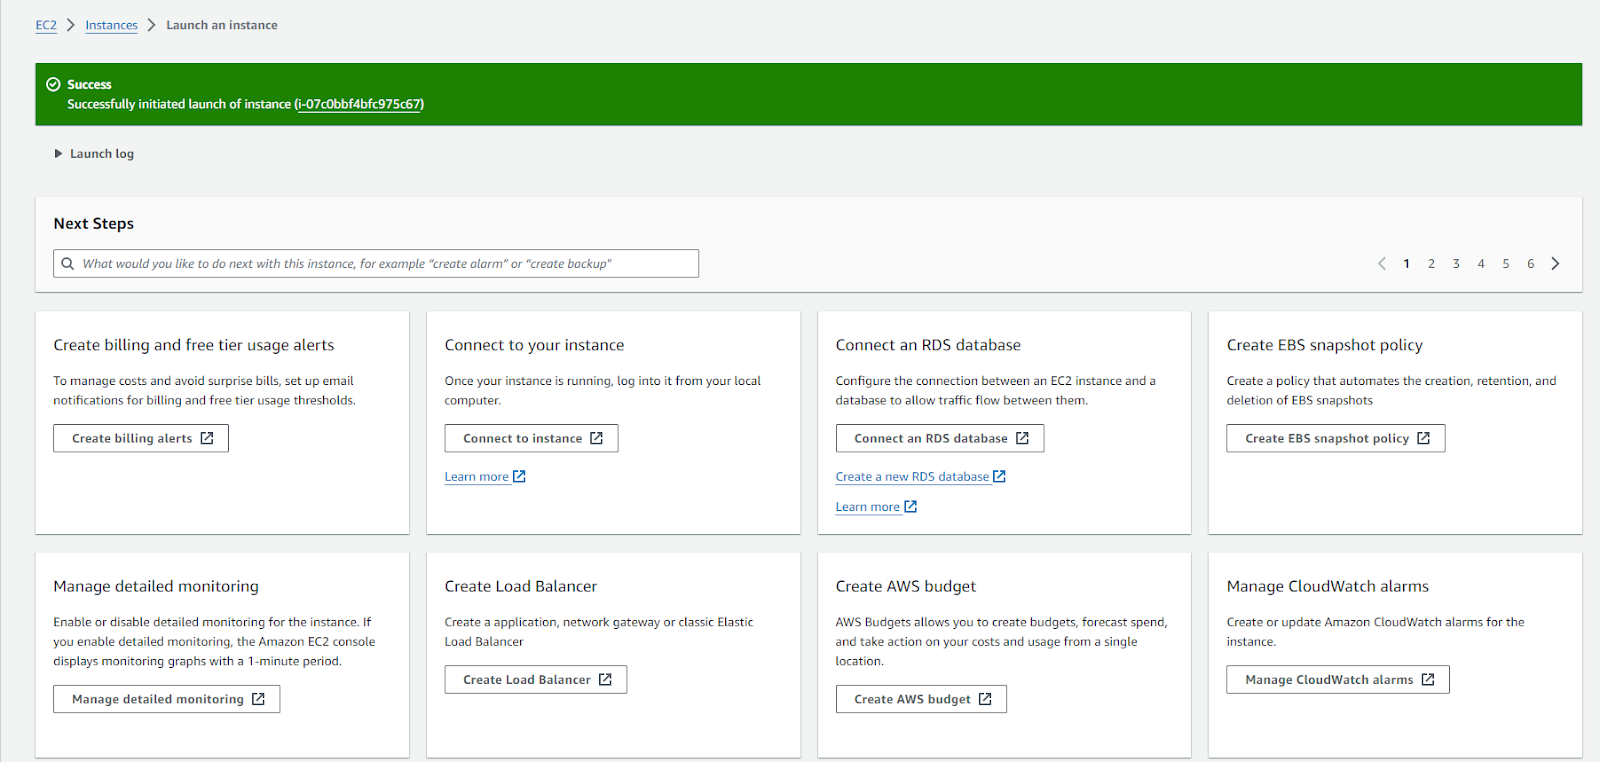
Connecting to an EC2 instance
You've now created your virtual machine – so you need to connect to it and turn it on. You can do this by clicking on the Connect to instance. You can also click on View all instances to see the instance that you created.
If you click on view all instances, it will take you to this page where you see your instance (see below). If you have only one, then you will see something like what is shown below. But if you have other instances, then you will see all of the instances created in that same AWS region.

Select the specific instance that you just created and click the Actions dropdown at the top right side. You can then click on Connect from the dropdown menu.

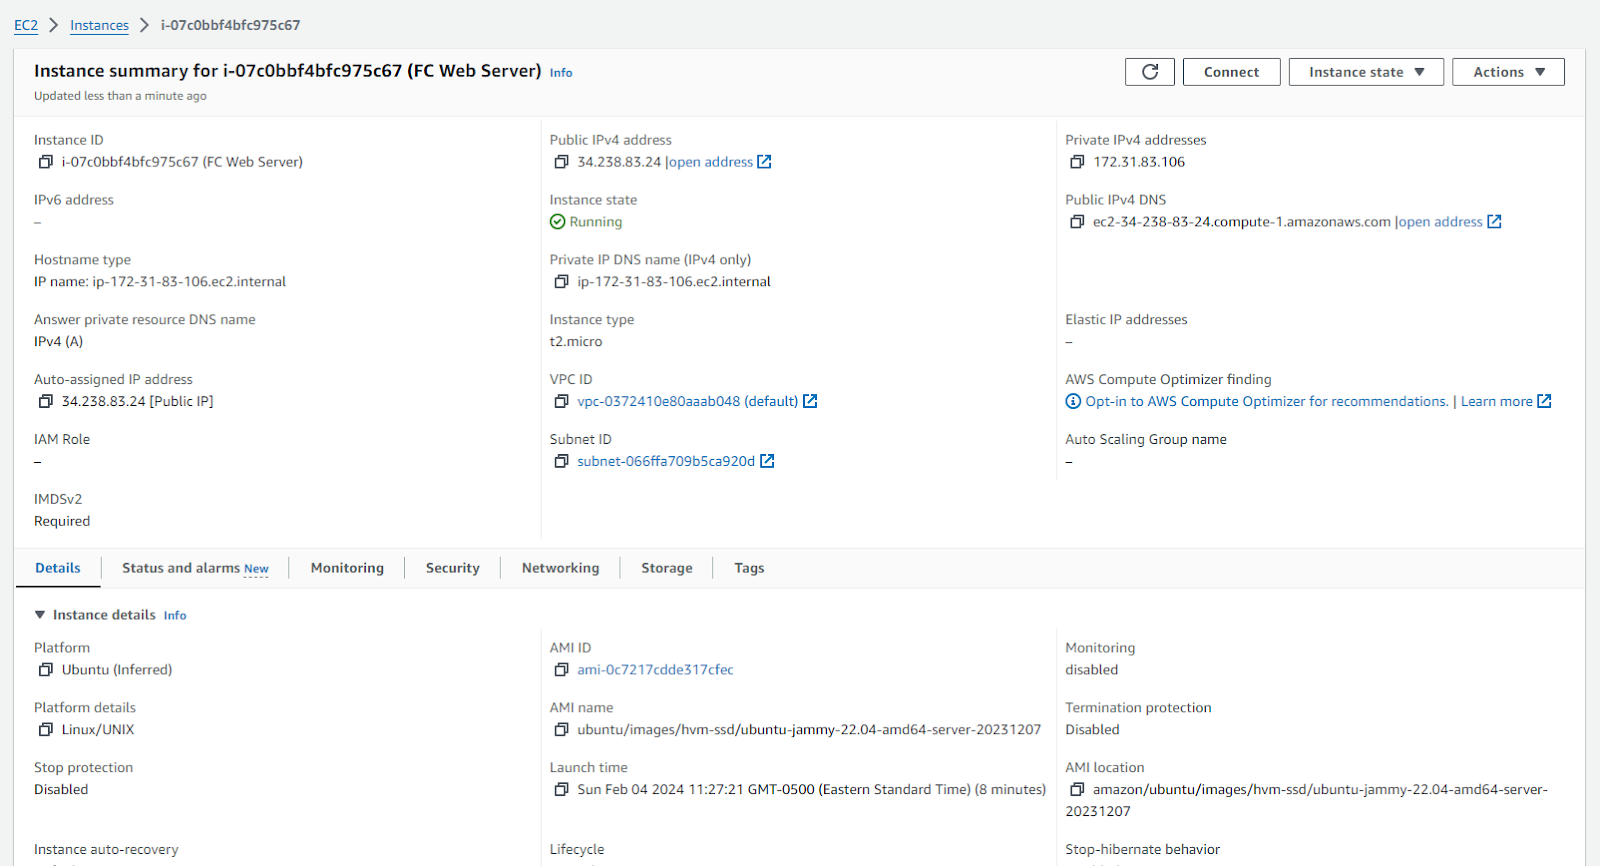
The third way that you could have used to reach the connect to instance page is to click on the Instance ID from the list of instances. It takes you to the instance page with details about your selected instance. You will then find a Connect button at the top right side.
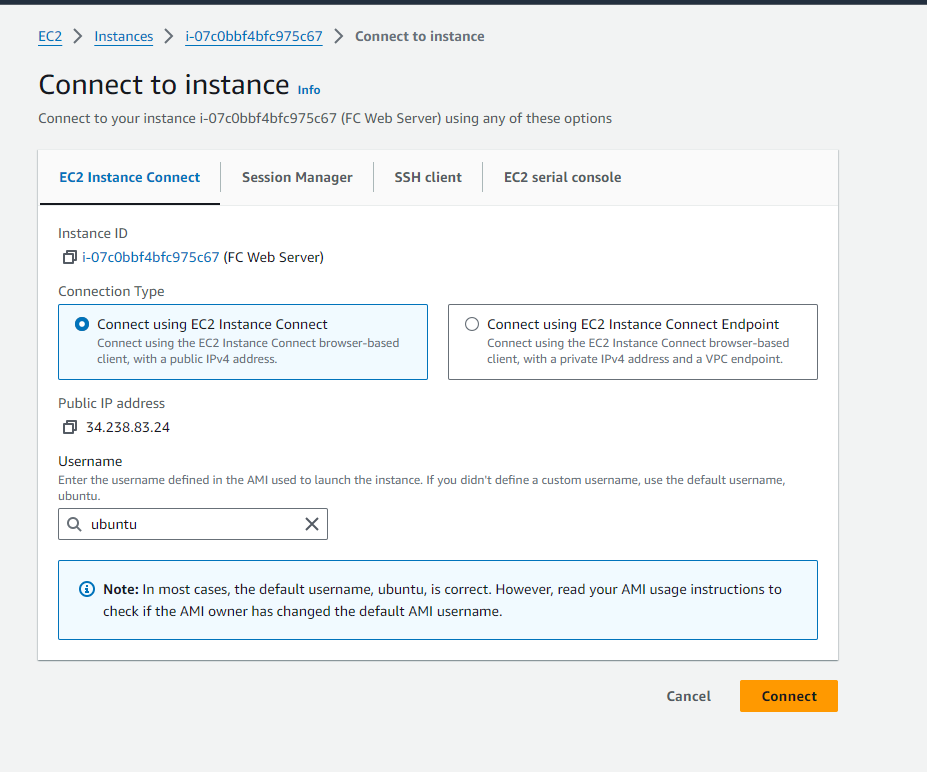
On the Connect to instance page, you are presented with several options to connect to your instance. For the sake of this example, you can use EC2 Instance Connect. This option will allow you to connect to your virtual machine through the browser. You can stick with the default values and click the Connect button.
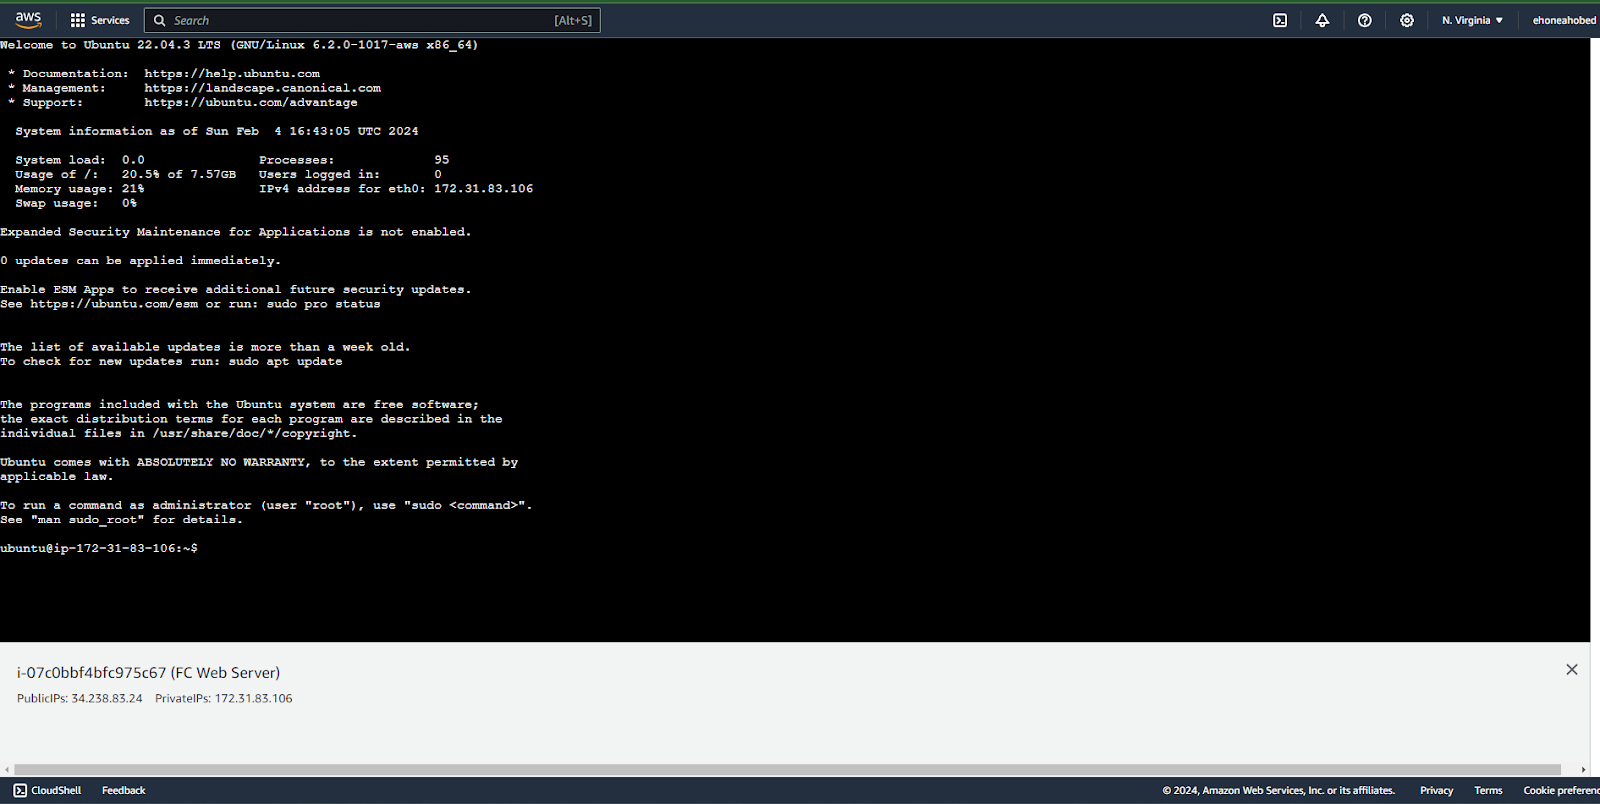
This opens up a terminal in the browser. This is your virtual machine. Remember that you installed Ubuntu so now you have access to an Ubuntu machine with all the specifications you selected.
It is now time for you to install NGINX. Follow the steps below to install NGINX on your instance.
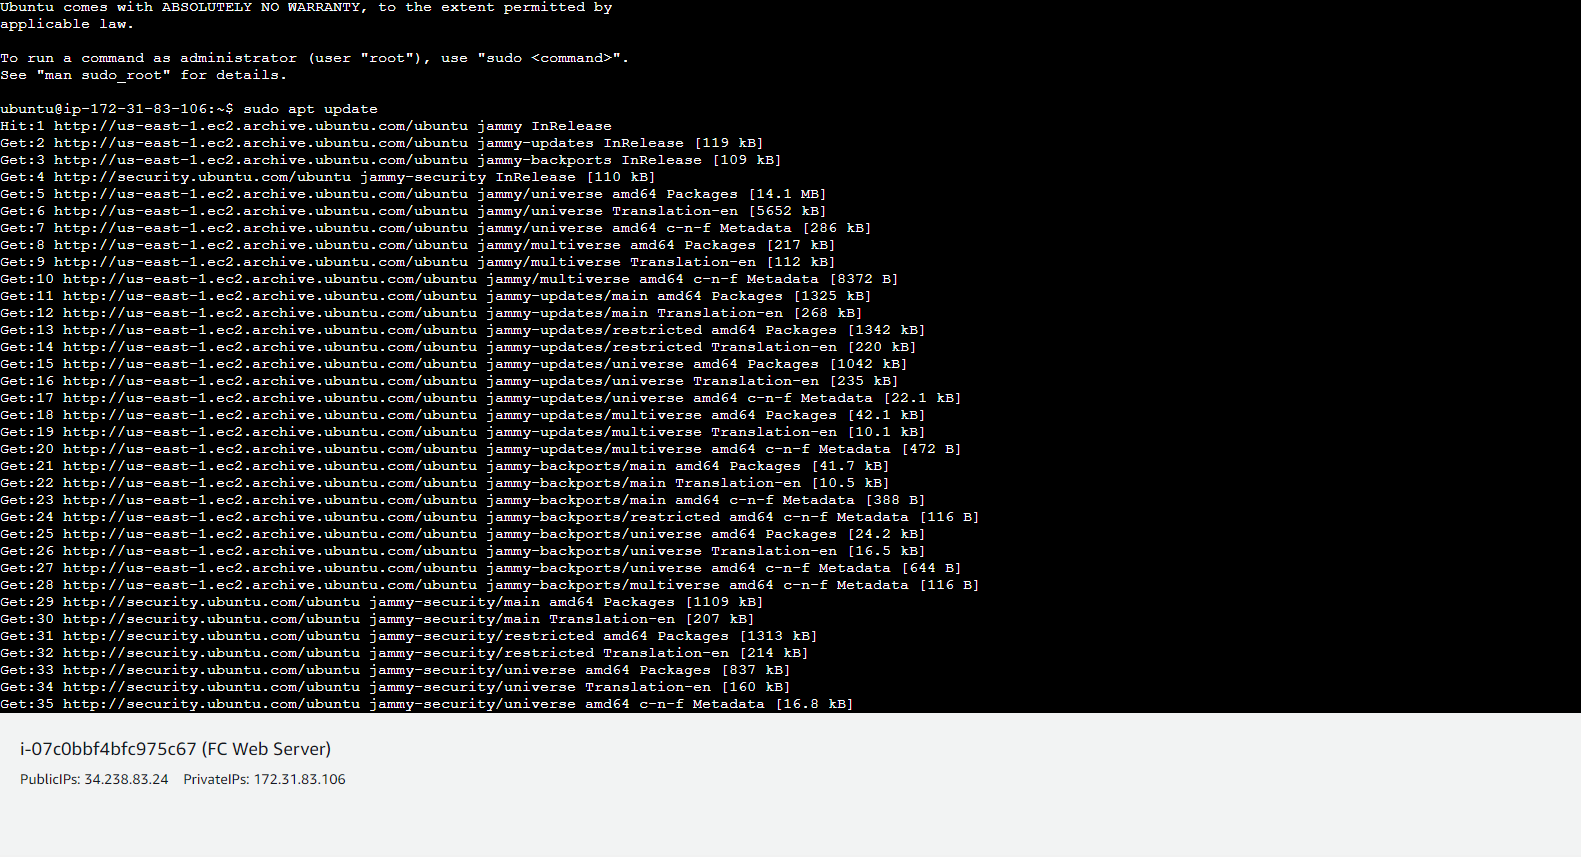
Update your package list
Use this command to update your package lists:
sudo apt update
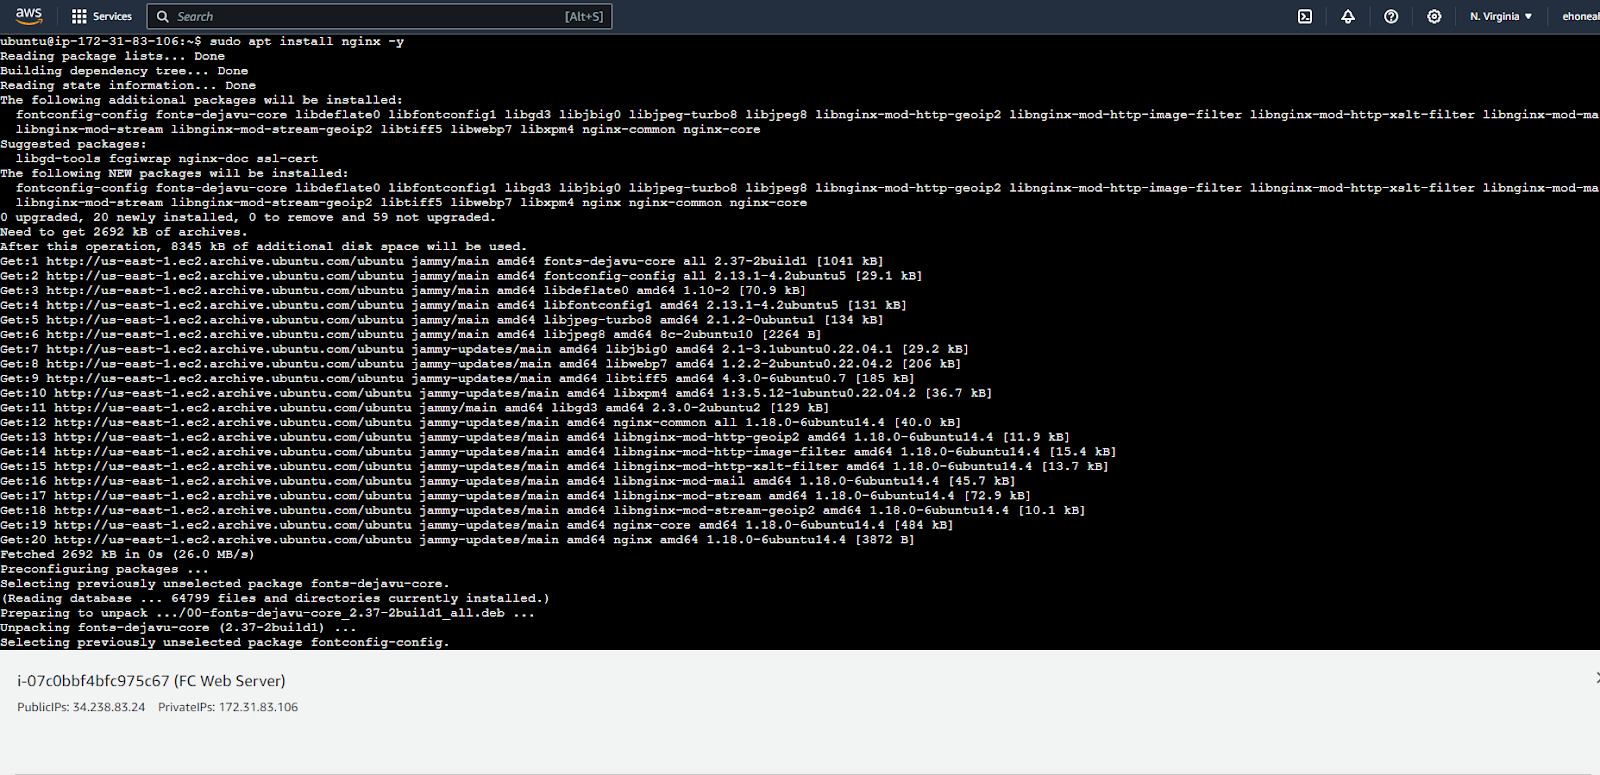
Install NGINX
Use this command to install NGINX:
sudo apt install nginx -y
Once the installation is done, you can access the default page for NGINX by entering the public IP address of your instance in the address bar of your browser.
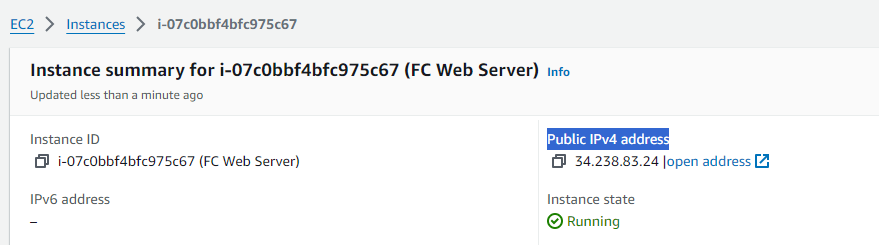
To find the public IP, you can check the bottom of your terminal or go to the instance page and look for Public IPv4 address.
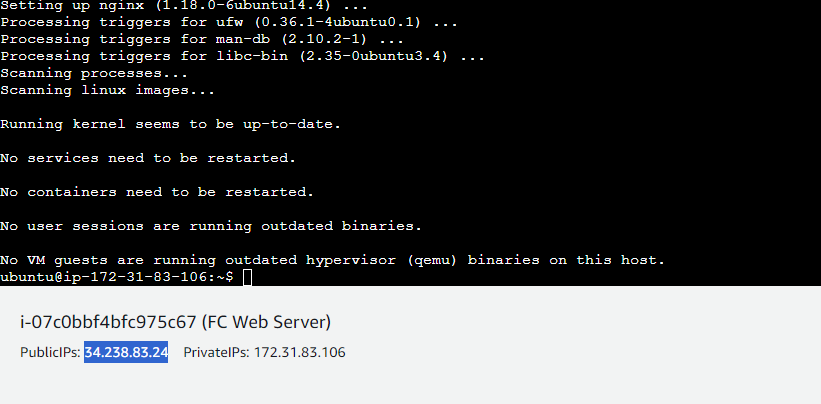
You should get the default page open in your browser like shown below:
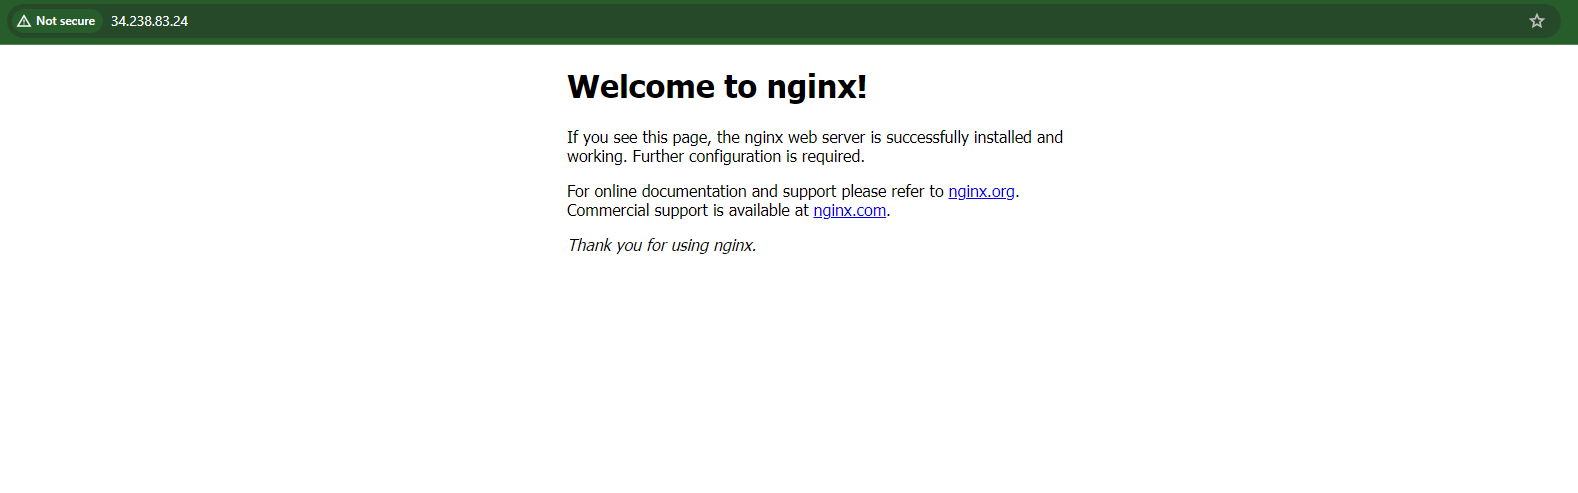
NB: You may have to refresh the page for it to work.
For the next set of steps to set up your website or web app, it will depend on the programming language or framework that you used. But since this tutorial is focused on connecting a domain name to your EC2, you can proceed with the next steps for connecting the domain.

Working from this image, let’s now connect our domain name to this website. As you can see in the image above, I am accessing it with the public IP address of the EC2 instance.
To connect the website with a domain name simply means to replace its IP address with a more memorable name. In our case, I will be replacing it with the domain name krachy.com.
Step 2: How to Set Up Route 53 for DNS Management
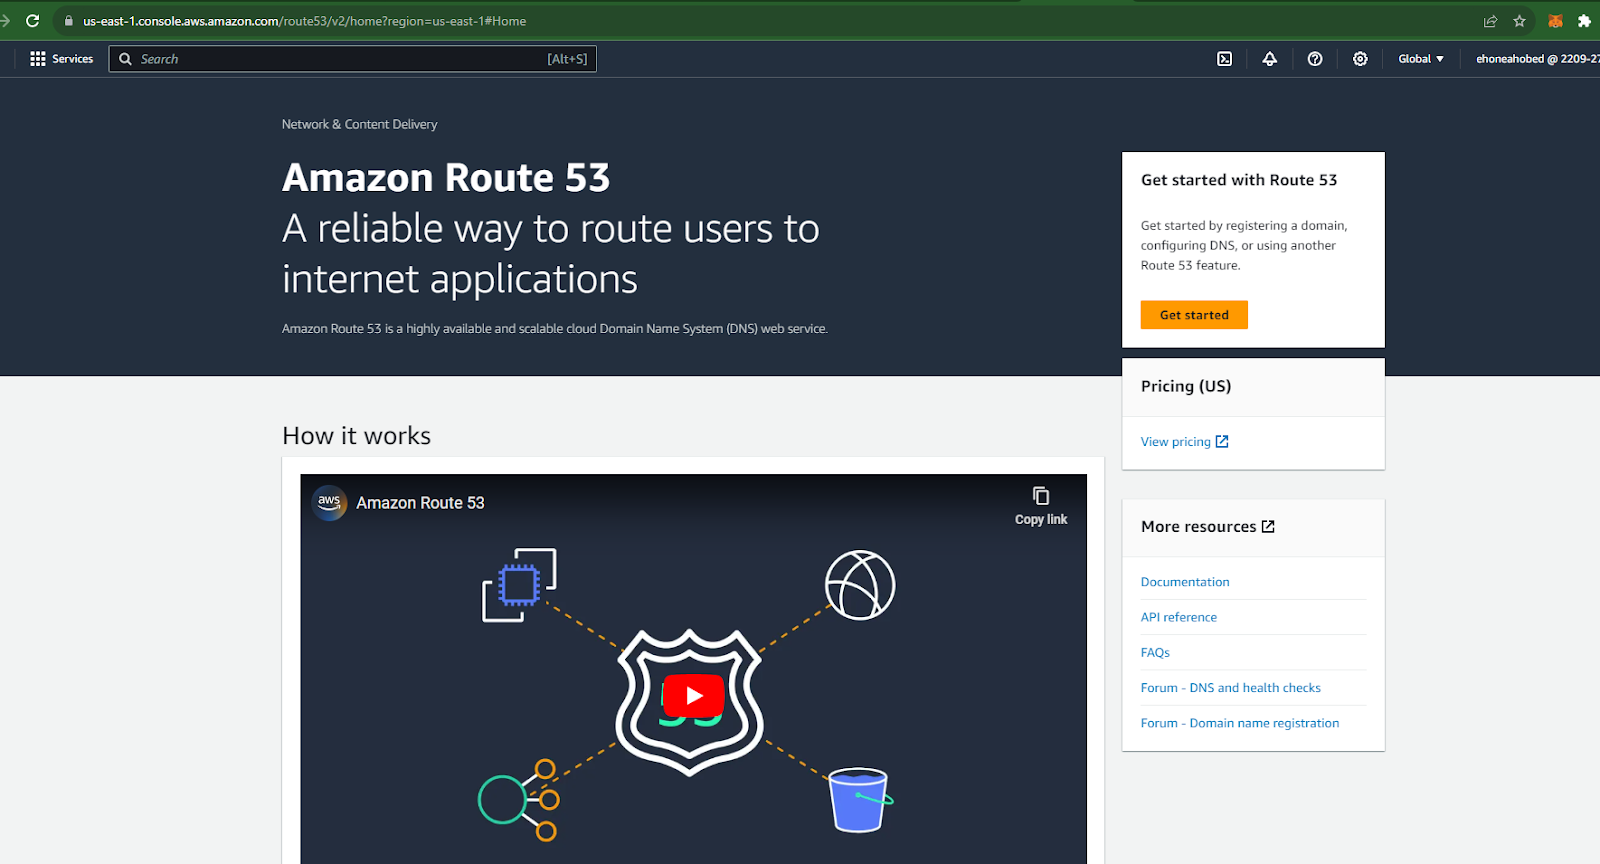
AWS provides a service called Route 53 that you can use for DNS (Domain Name Service) management. So now, we need to set up this service to manage the domain that you purchased.
I have my domain with Namecheap, but the process will be similar for almost every other domain retailing company.
First, you'll need to create a hosted zone in Route 53.
Creating a hosted zone in Route53
To do that, click on the orange Get started button. It takes you to the next page, as shown below.
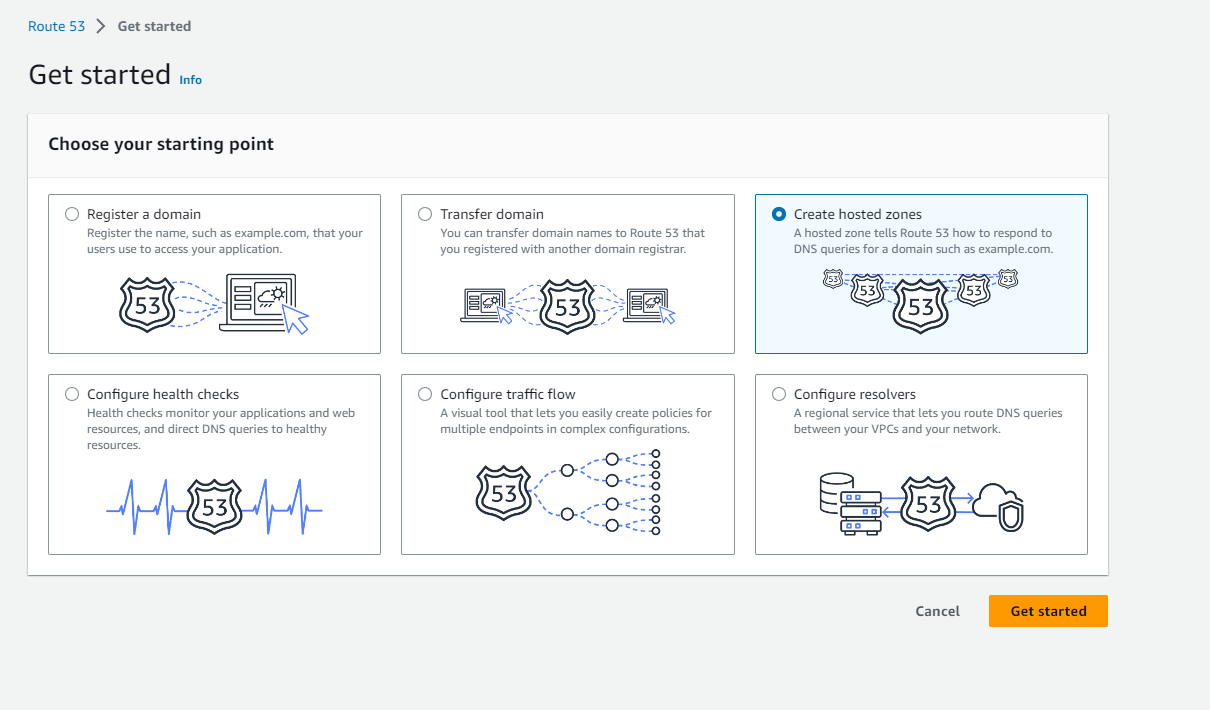
Choose Create hosted zones and click the Get started button. Go ahead and fill out the details on the next page.


Provide the domain name that you want to connect to the EC2 instance and then give it a description that will make it easier for you to distinguish this hosted zone from any others you may have. Choose Public hosted zone since you want your website to be accessible to the public.
Click the orange Create hosted zone button.
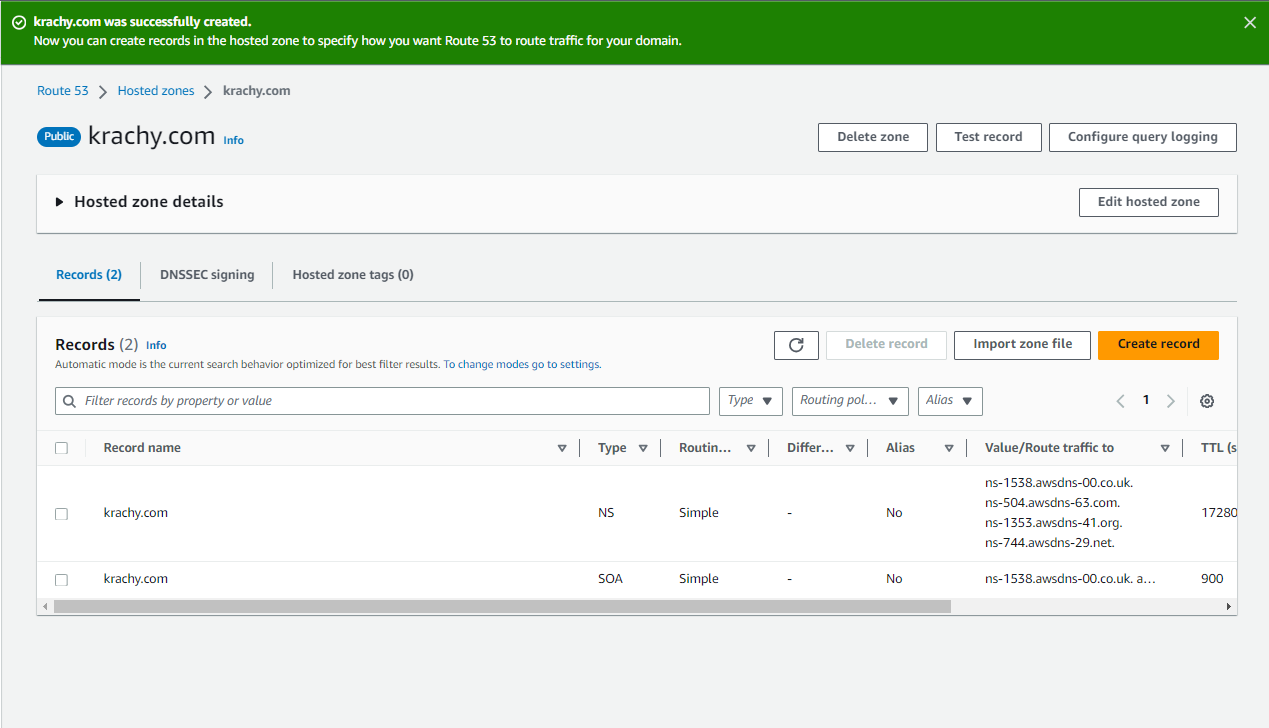
You'll get a green success message showing that you have successfully created the hosted zone.
Adding records to the created Hosted Zone
From the screenshot above, you can see that Route 53 automatically created two records for us: the NS (Name Server) and the SOA (Start of Authority) records. The NS record is what you will need for pointing your domain to this service. But before you grab those, you have a couple of things to do here.
Because our website is being hosted on an EC2 instance which can be accessed through its public IP address, you need to create an A record for it. Also just so you ensure that people who try accessing your website with the www subdomain are still able to access it, you will also need to add another record with an alias for it.
To do that, start by clicking the orange Create record button, as you can see in the screenshot below:
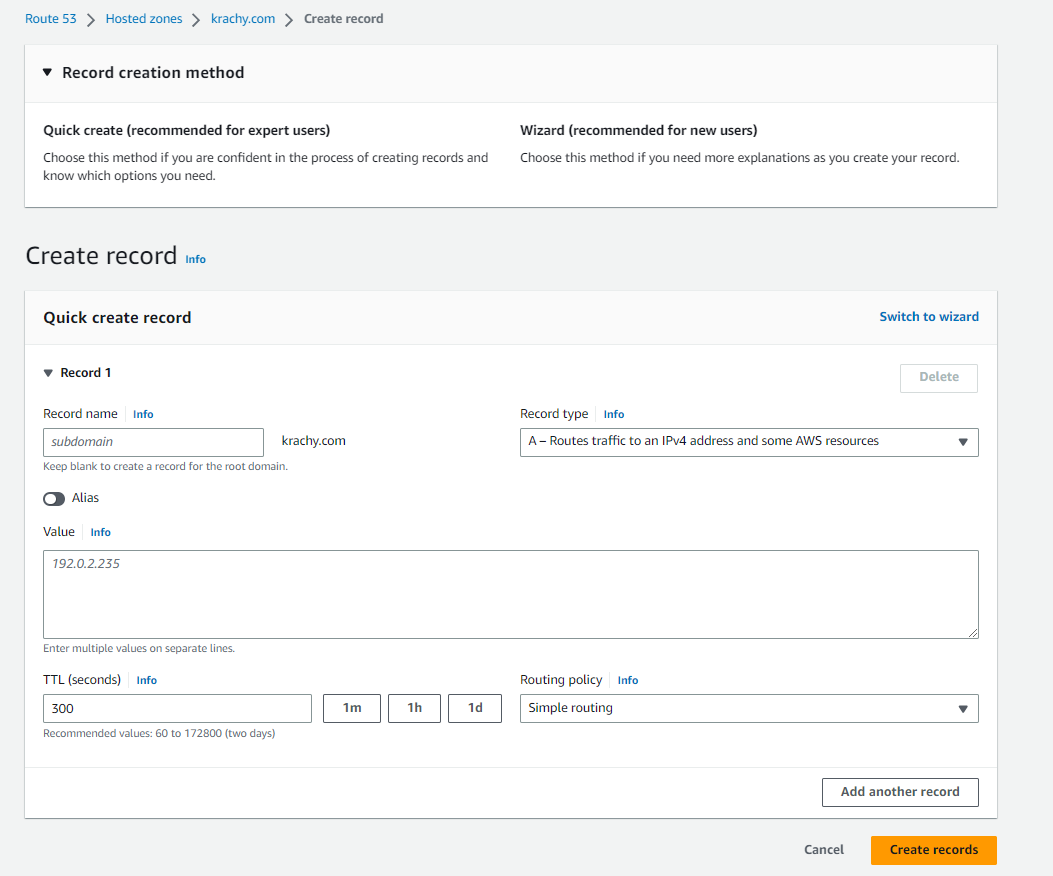
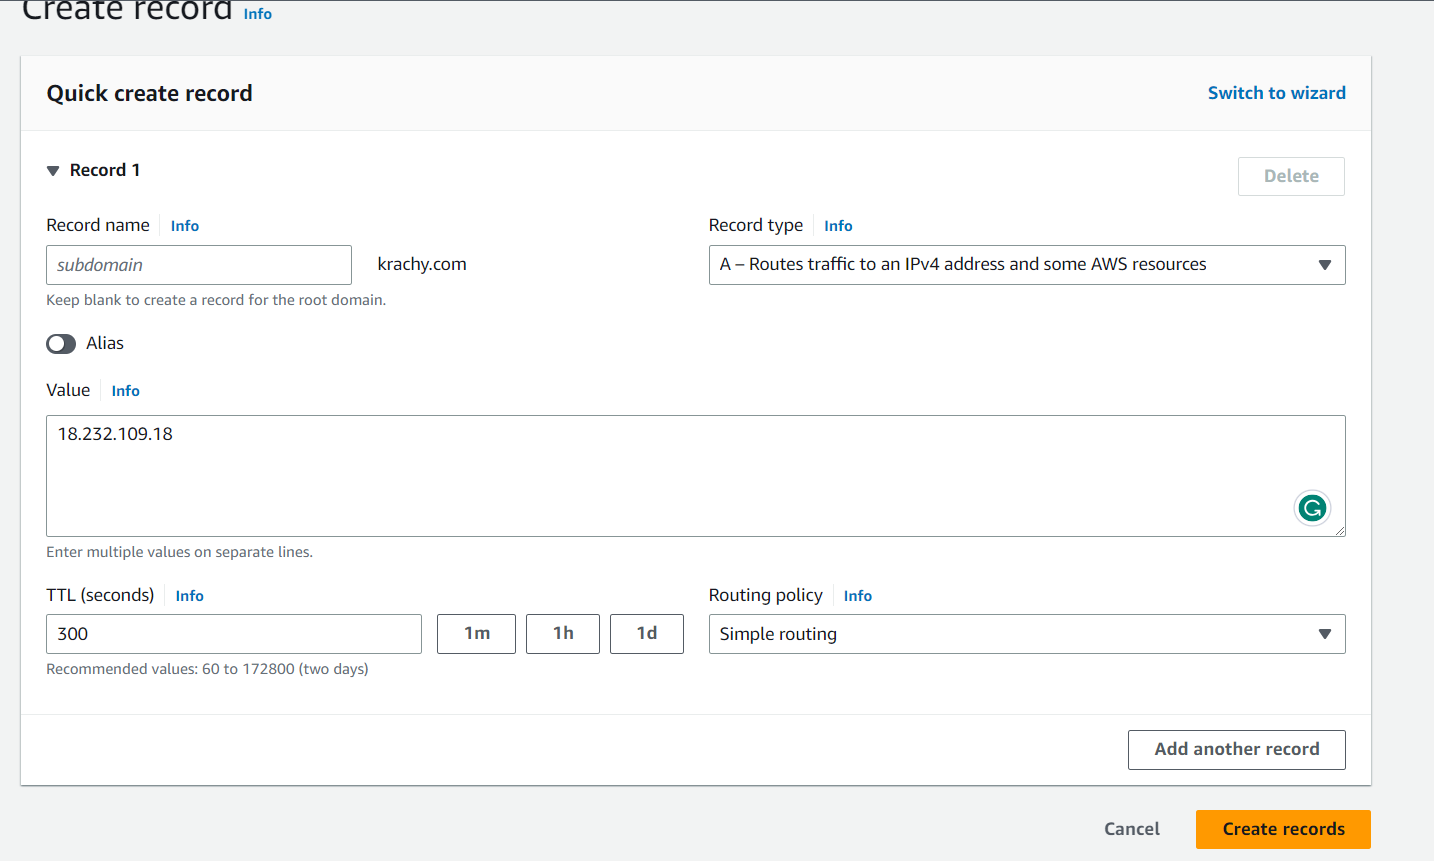
For the A record, don't put anything in the subdomain input box. Under Record type, make sure A – Routes traffic to an IPv4 address and some AWS resources is selected. Then paste or type the public IP of your EC2 instance in the textarea for Value.
You can leave everything as default (NB: Check to ensure that the Routing policy is Simple routing).
To get the IP address, visit the instance that you are using and look for the Public IPv4 address and copy that.
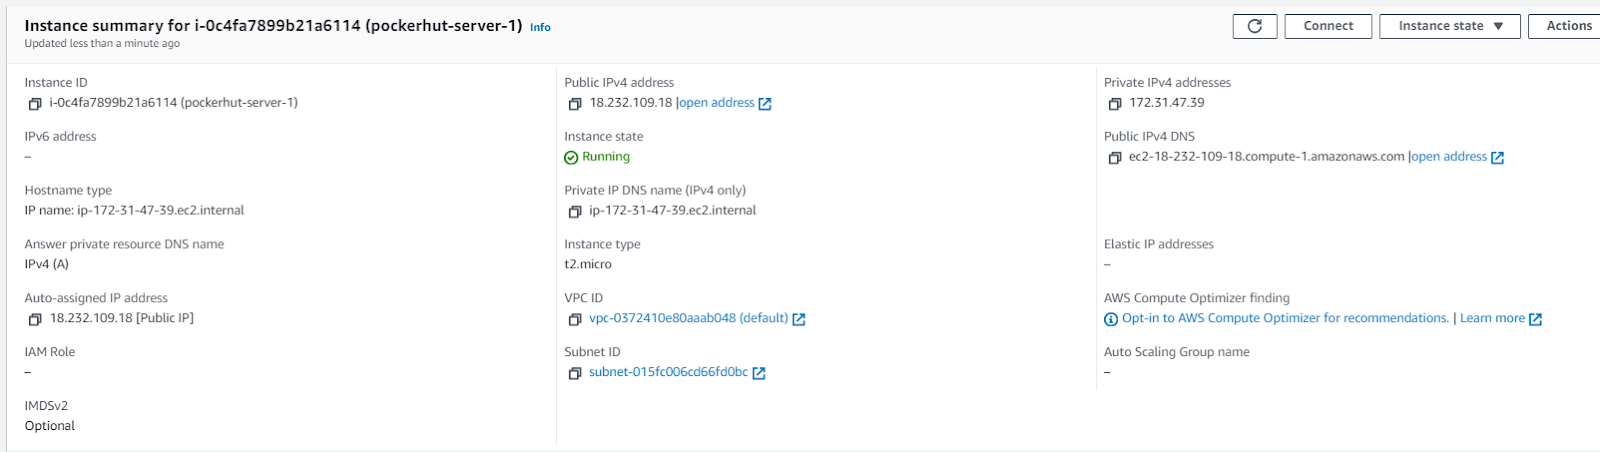
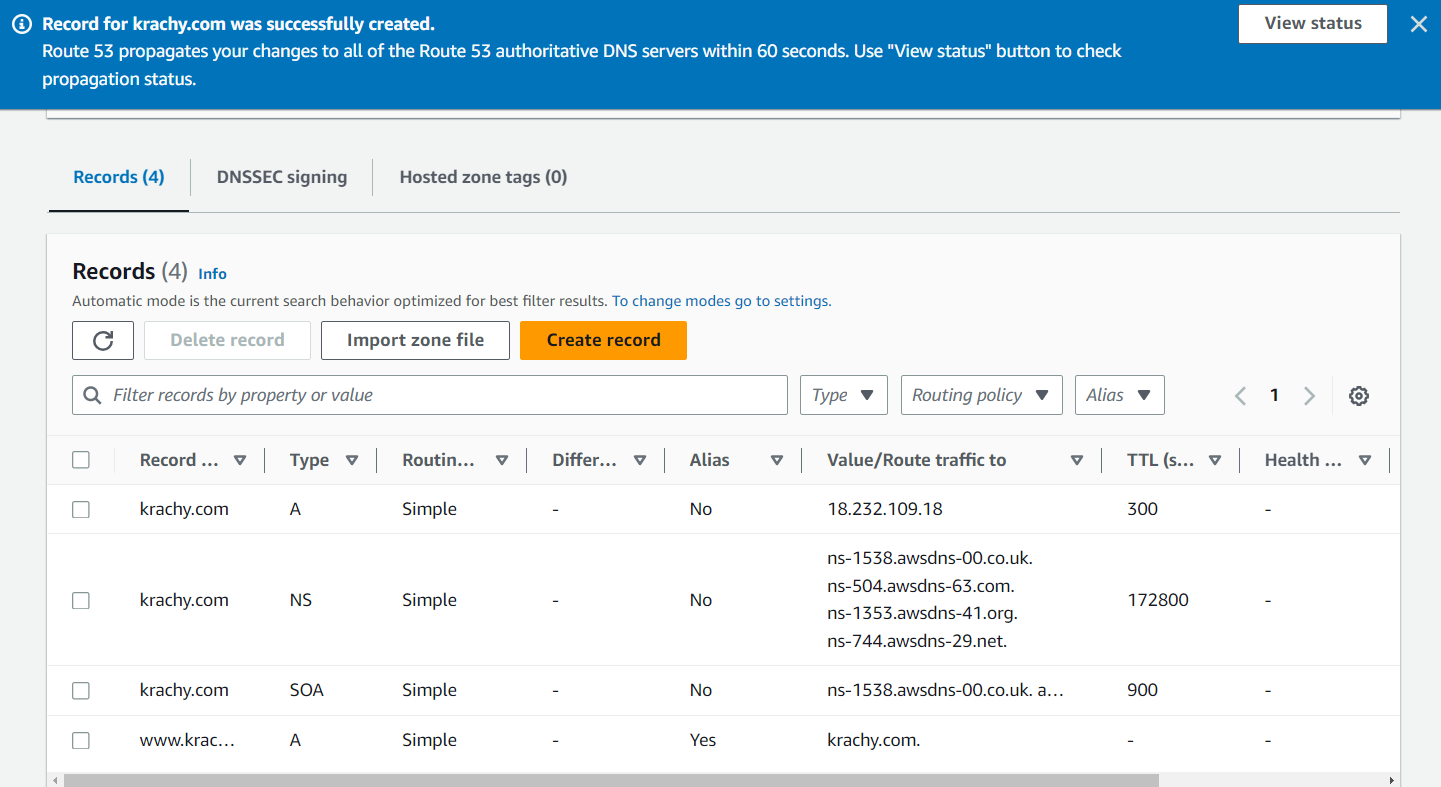
It should now look like what is shown below (where 18.232.109.18 is the public IP for my instance). Afterwards, click the orange Create records button in the bottom right corner.
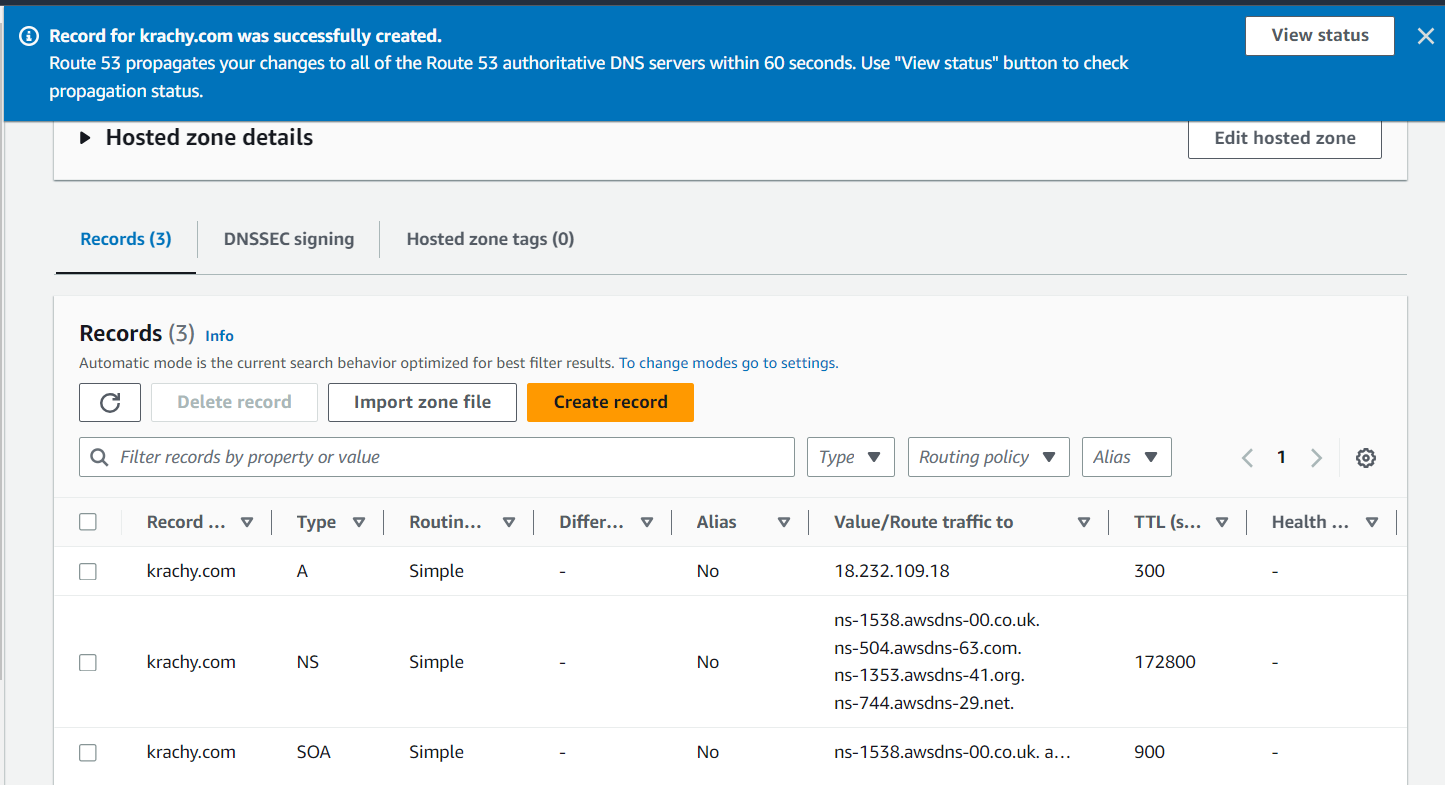
You should see a success message. Also, that the record will now be added to the records table that you saw earlier, as shown below:
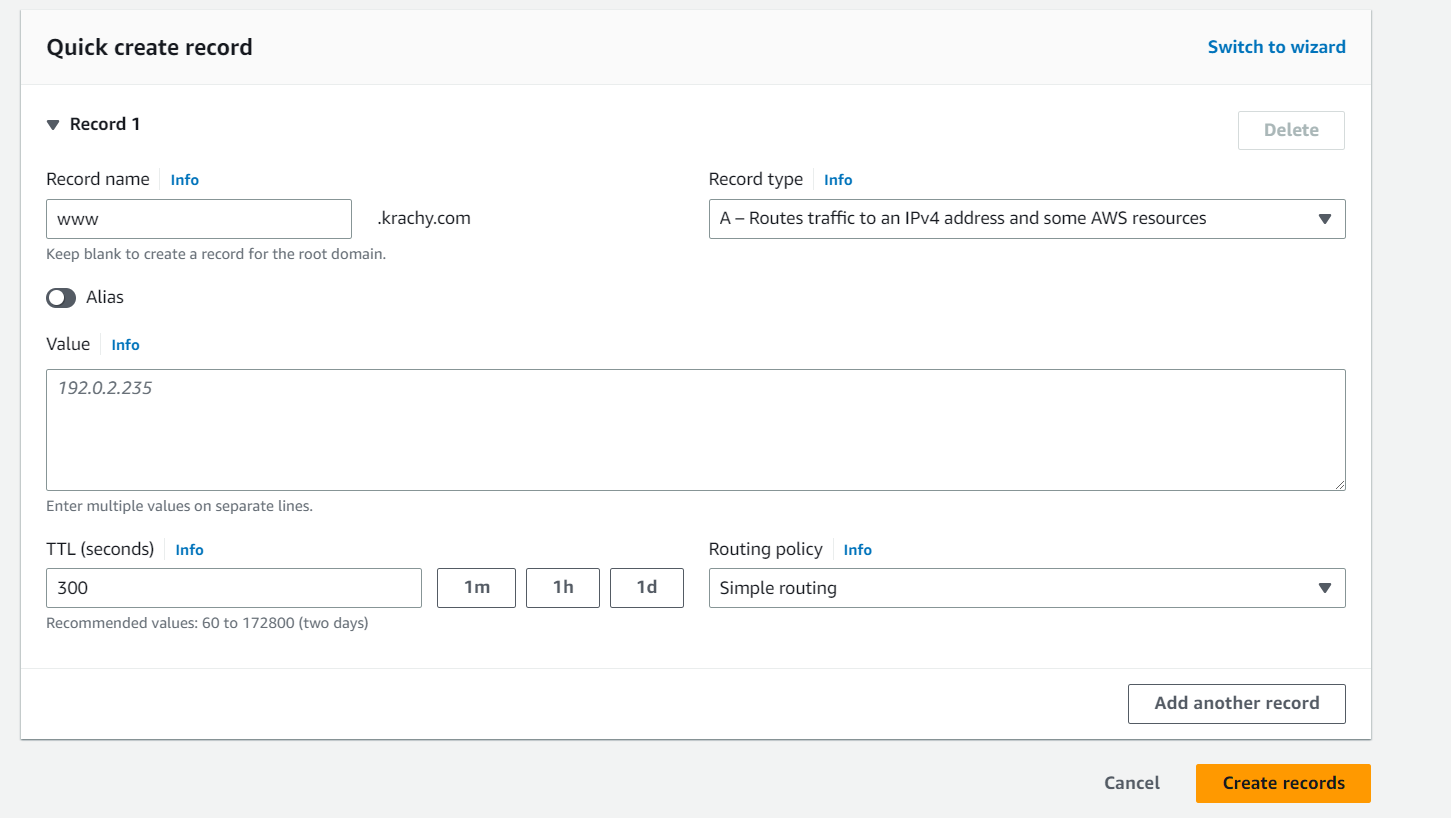
You still have to add the record to cater to the possible use of www when reaching your website. Click the Create record button to add that record. This time around, you will put www into the subdomain input box.
Also, you will need to turn on Alias which is beneath the Record name. After turning it on, a new set of options (Route traffic to) will be made available.
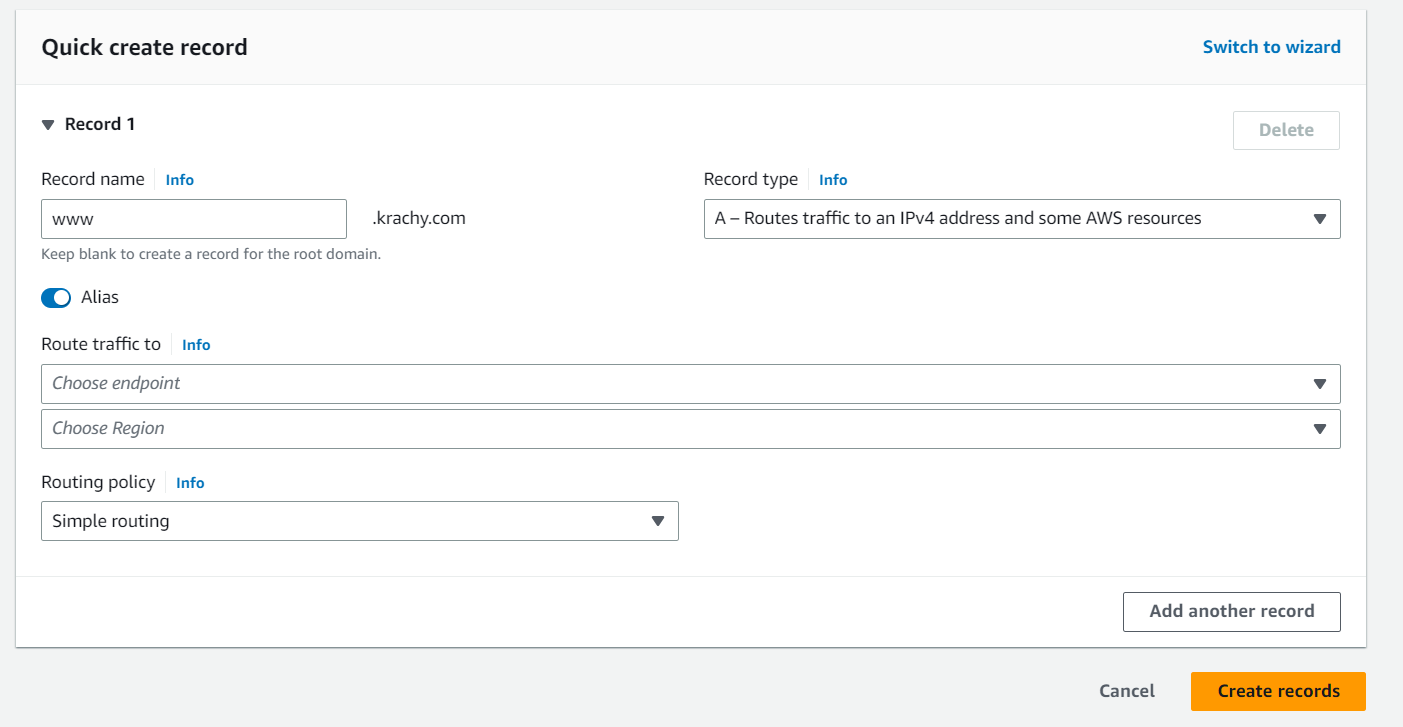
For the Choose endpoint dropdown, select Alias to another record in this hosted zone and the Region will automatically be populated for you. But it also brings up another field labeled Choose record.
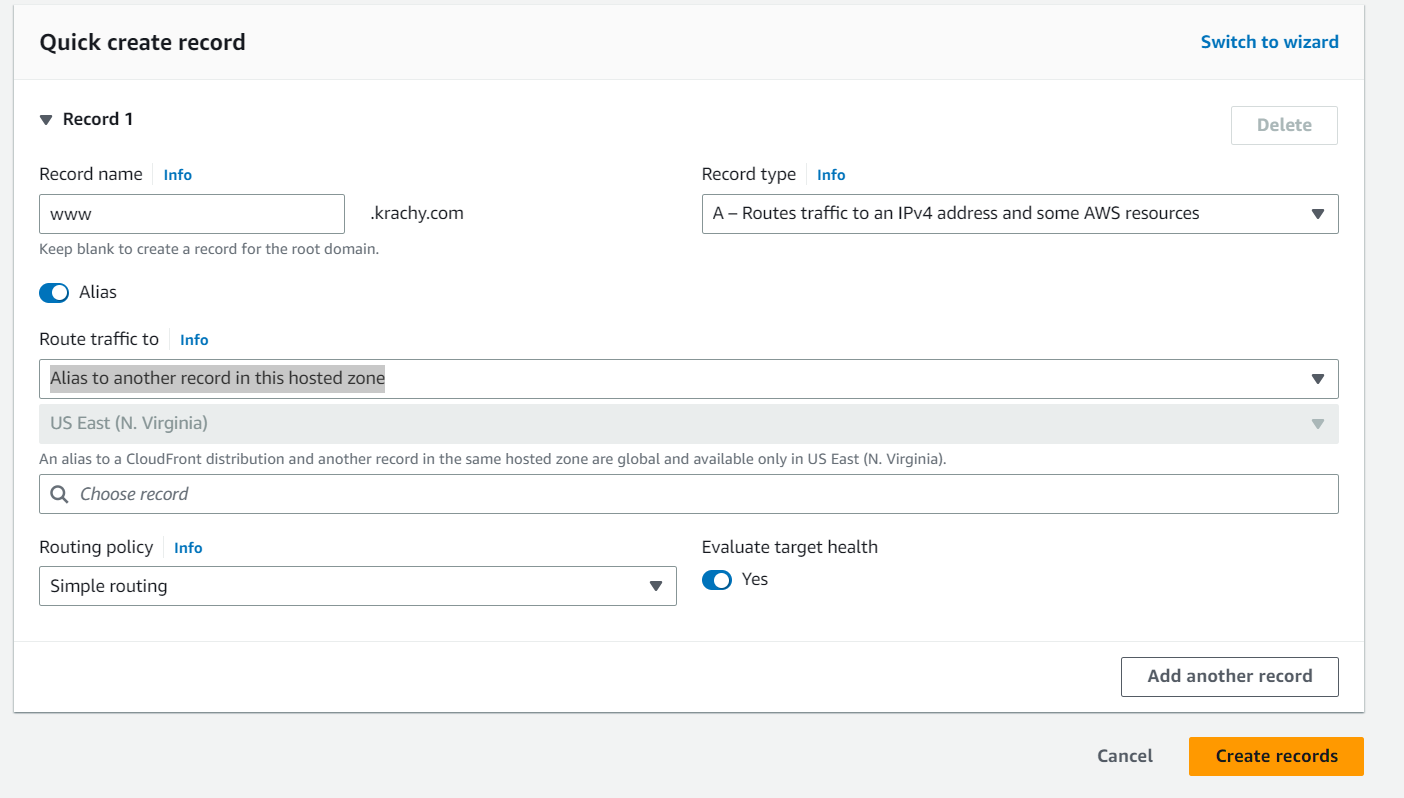
Go ahead and click within the Choose record field and it will suggest your domain name for you. Go ahead and select it.
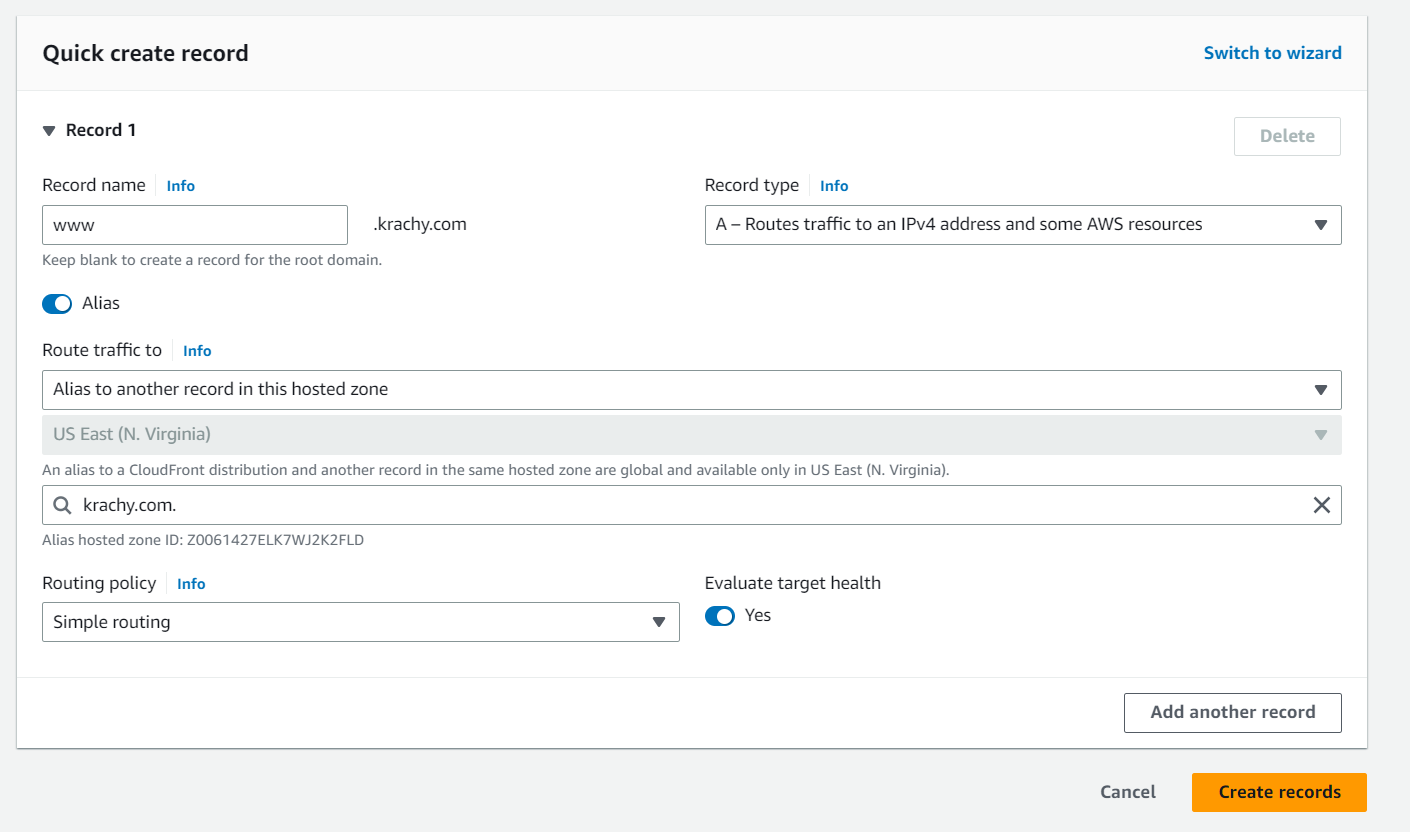
Now you are ready to add this record too so proceed to click the Create records button. You will get a success message and see that the new record has been added to the records table.
Once you are done setting up the records, you can now proceed to update your name servers with our Domain retailing company (NameCheap in my case).
Step 3: Update Nameservers with Your Domain Provider
If you already have an account with a domain provider, then log in to your account. But if not, then you'll need to sign up with one to purchase a new domain.
Personally, I use Namecheap for most of my domains. So, I will be showing how to get this done with Namecheap (but again, it will be similar for various Domain providers).
Note that I already have a domain name, and for any domain that you purchase you will have some default nameservers. Your goal here is to change the default nameservers or whatever your nameservers currently are to the ones which Route 53 provides you.
Changing nameservers in Namecheap

Click on the Domain list to see a list of all the domains that you have in that account. Look for the specific domain that you have.
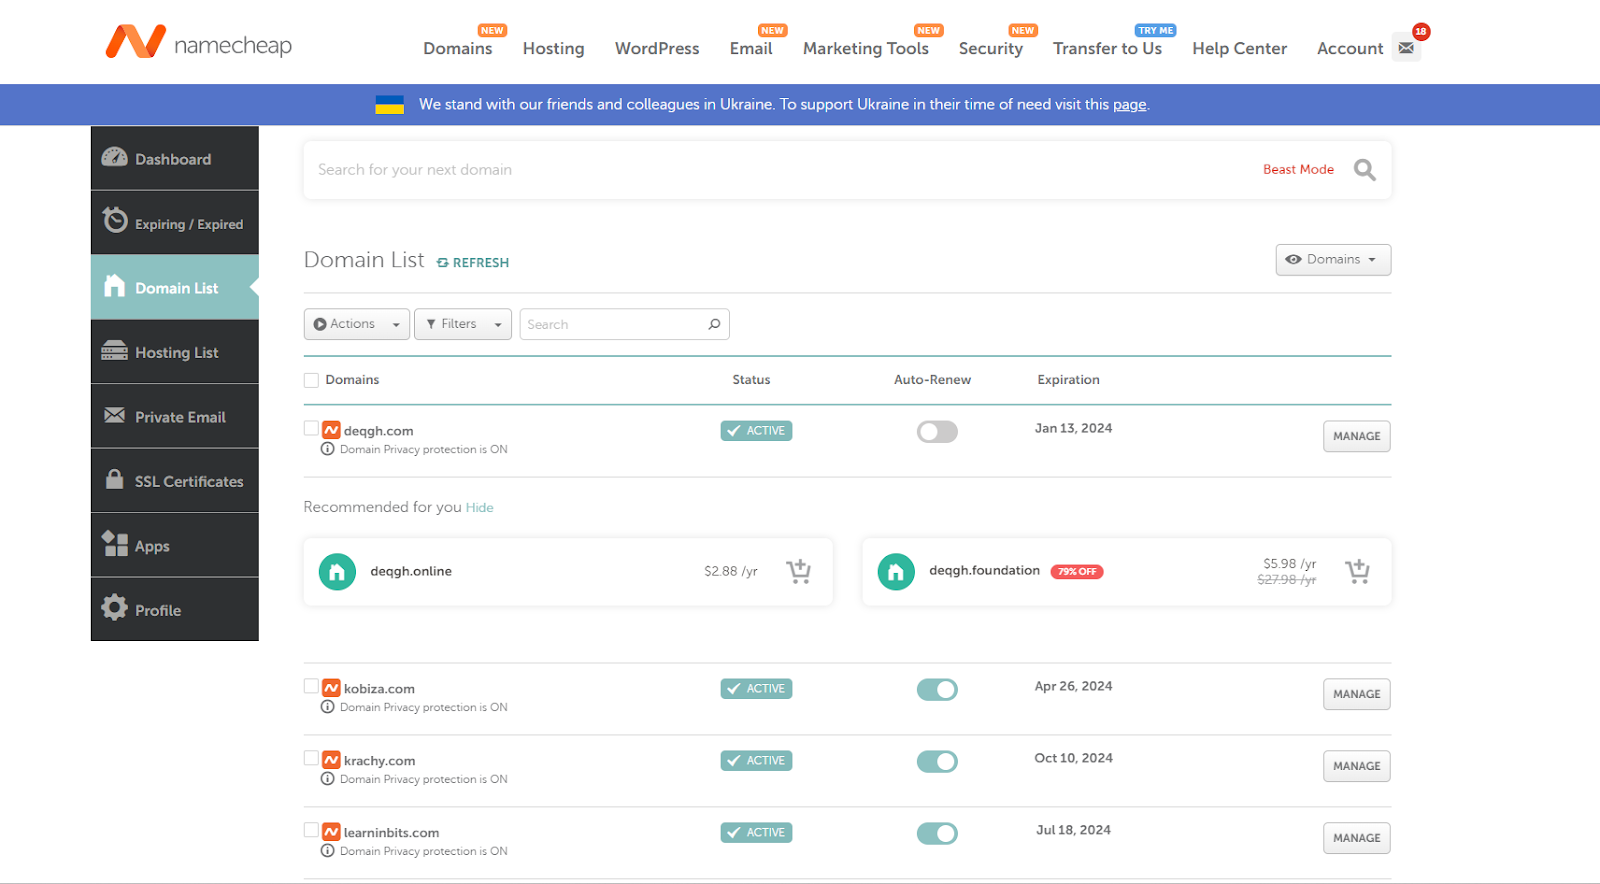
Next to each domain name, you will find the Manage button. Click the respective one for the domain that you are using (krachy.com in my case).
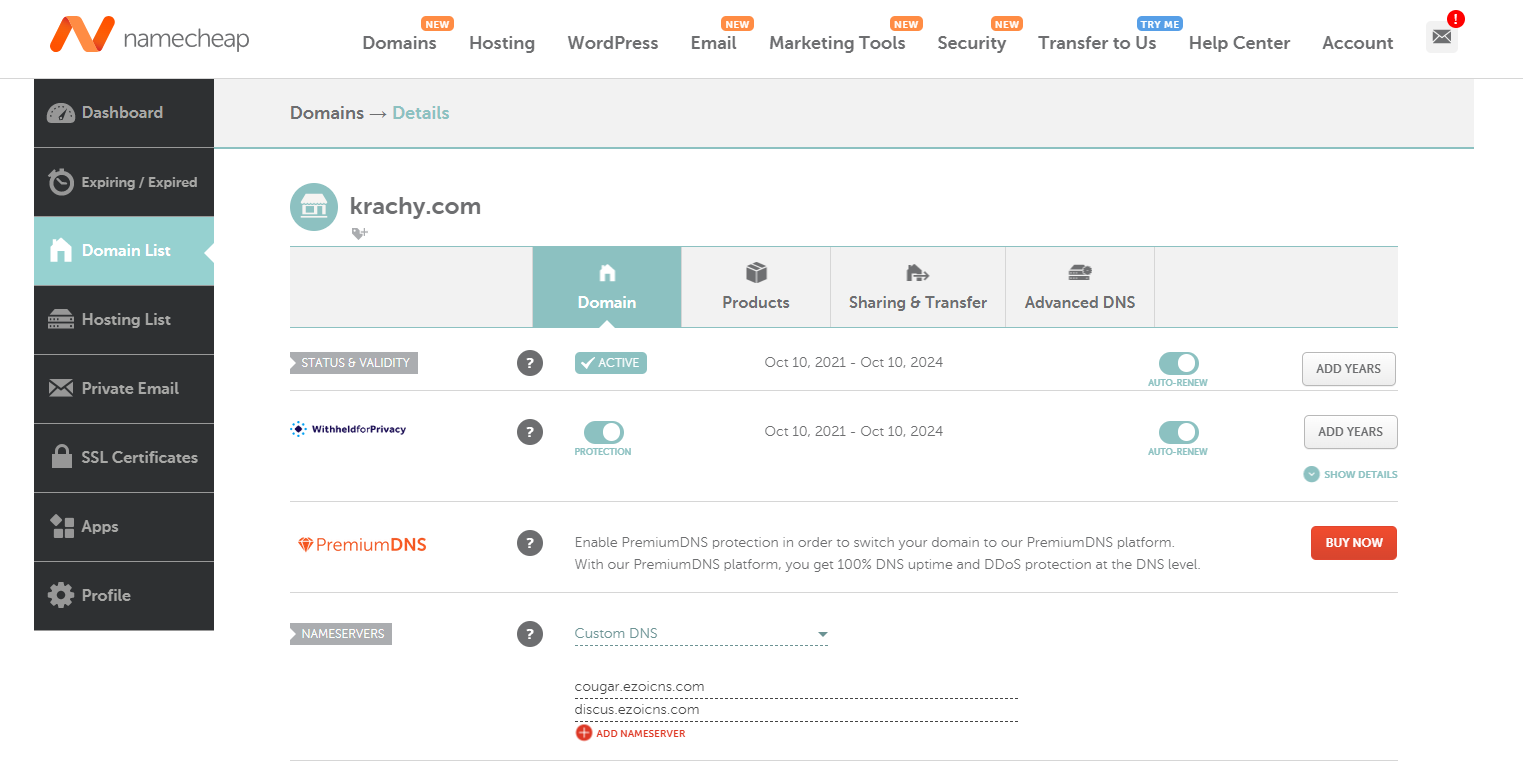
Under Nameservers, make sure you have selected Custom DNS. Then go back to Route 53 and copy the nameservers that you were provided with. Then delete what you currently have and add what you get from Route 53.
In my case, Route 53 gave me four different Nameservers. So I have to copy them one after the other and add them to Namecheap (remember to delete any old ones that were in the domain provider account).

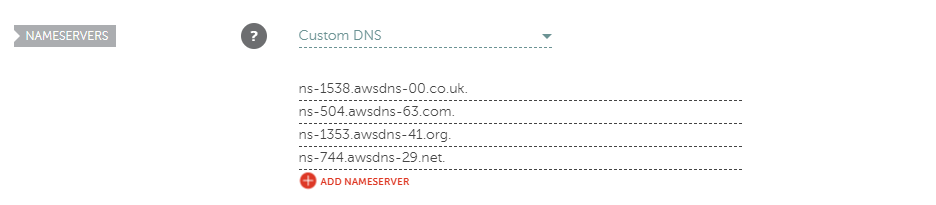
In Namecheap, they provide two spaces for the nameservers – but there is a button just below that lets you add more than 2. In my case, I added all four of them as you can see below:
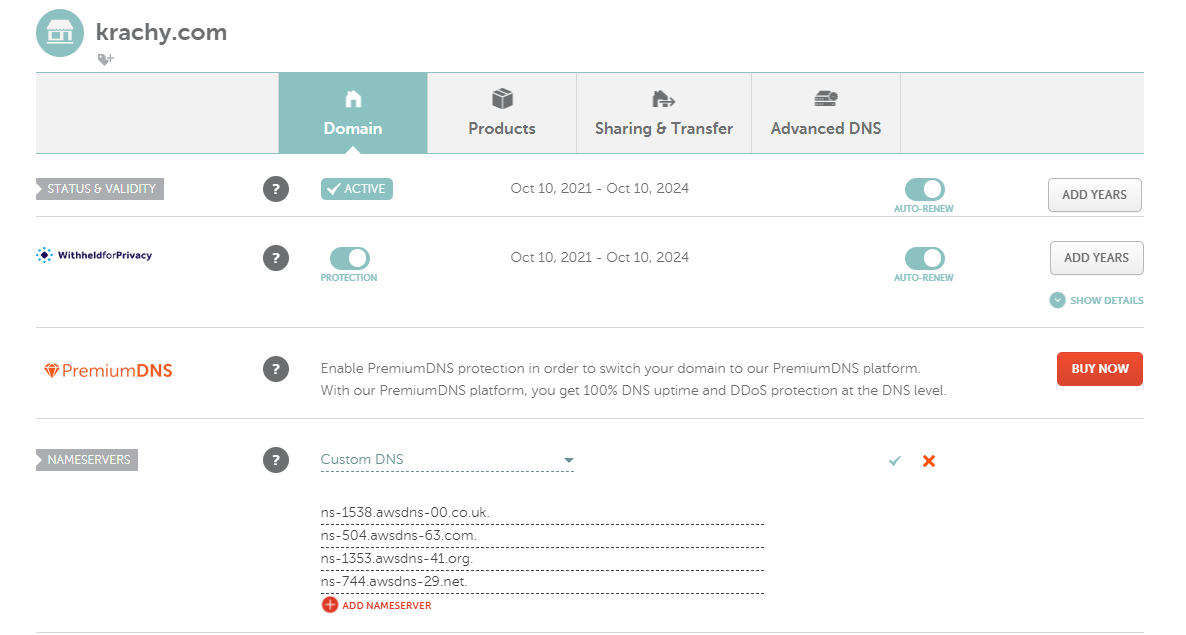
Also, after adding them, you need to accept the changes and save them. In the screenshot above, you can see that at the far right of Custom DNS is a check mark and an x mark. Click on the check mark to save the changes.
After saving, you will notice that those buttons are no longer available.
Step 4: DNS Propagation
Congratulations, you are now done with the set up. Now you just need to wait for the DNS propagation to be completed.
This step doesn’t involve you taking any action, but just waiting for a couple of minutes. The propagation can take anywhere from a couple of minutes to more than 24 hours.
But after a short while, just enter your domain name in your browser’s address bar and see if it shows the website that you have hosted on the EC2 instance.
Once the DNS propagation goes through, your website will be live on the domain name that you used. Congratulations once again!
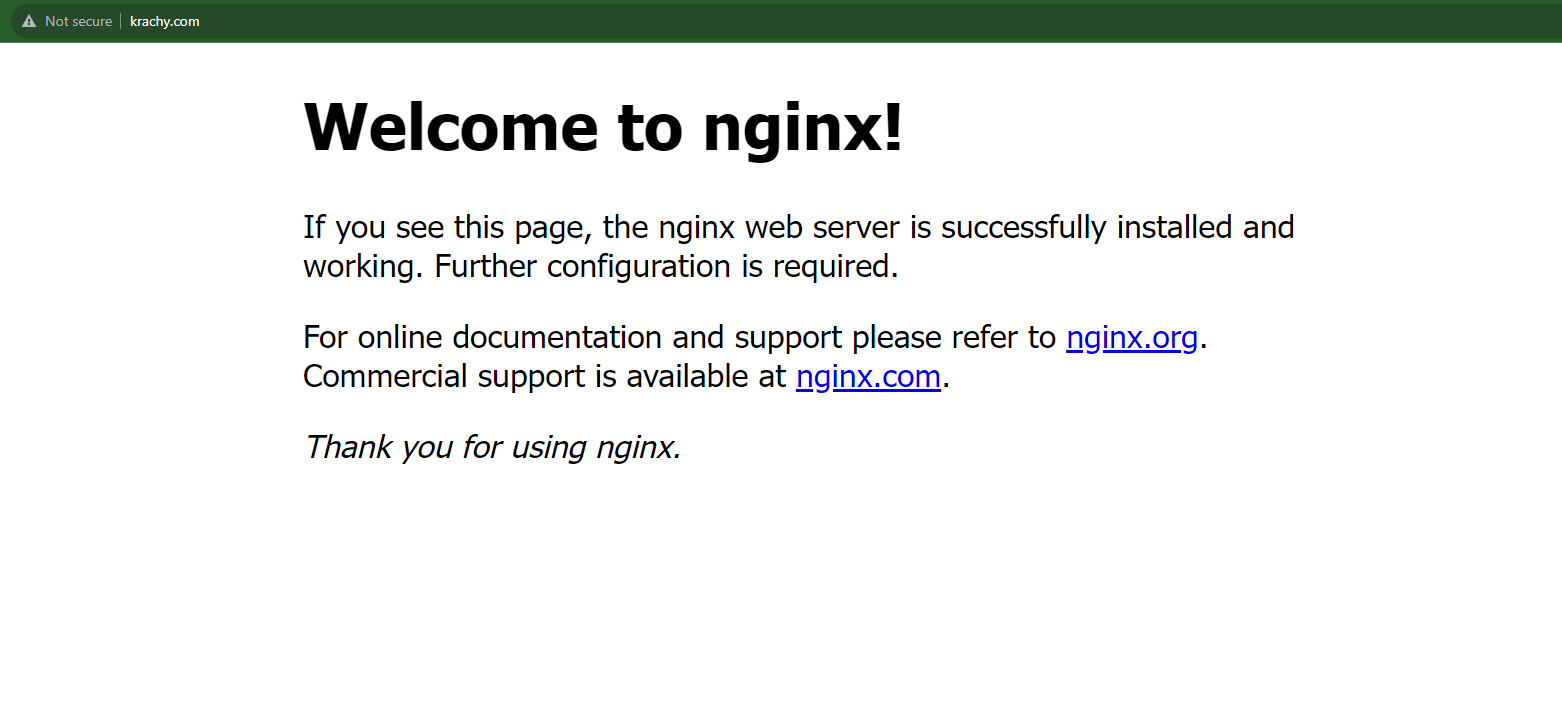
As you can see, this is the same interface that I started with – but the good news is that now, I accessed it with the domain name I purchased and not the IP address of the instance.
Wrapping Up
Even though you are done, you are currently using a non-secured transfer protocol (http) for your website. This is because you haven't yet installed an SSL certificate on your website.
Watch out for my next tutorial where I walk you through how to install SSL on your domain to make it secure (https).