
By Ankit Sharma
Introduction
In this article, we will create an optical character recognition (OCR) application using Blazor and the Azure Computer Vision Cognitive Service.
Computer Vision is an AI service that analyzes content in images. We will use the OCR feature of Computer Vision to detect the printed text in an image.
The application will extract the text from the image and detects the language of the text. Currently, the OCR API supports 25 languages.
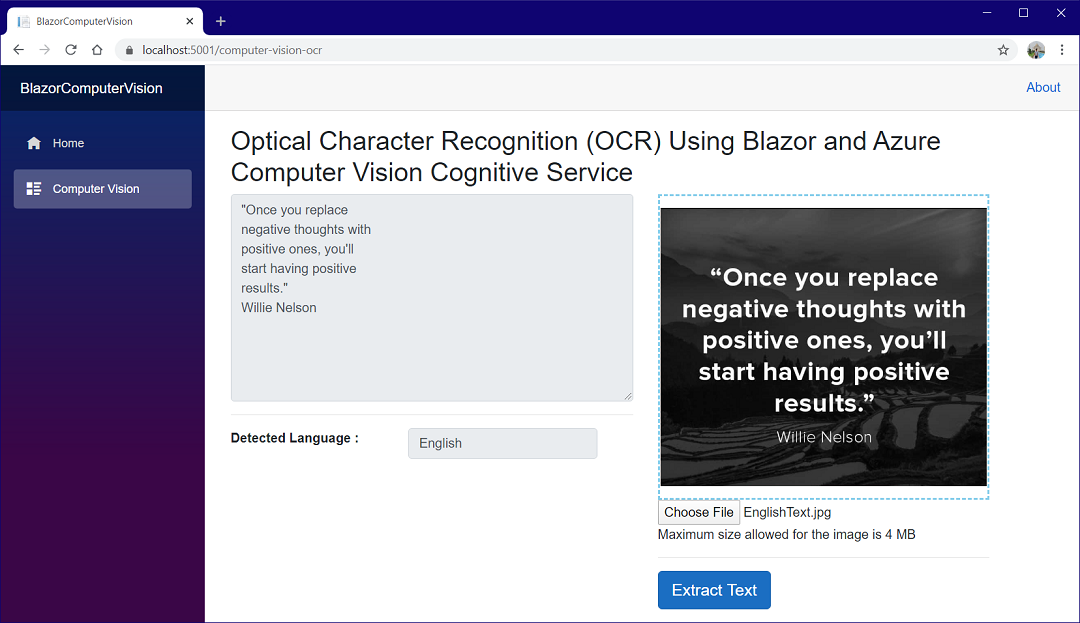
A demo of the application is shown below.
Prerequisites
- Install the latest .NET Core 3.1 SDK from https://dotnet.microsoft.com/download/dotnet-core/3.1
- Install the latest version of Visual Studio 2019 from https://visualstudio.microsoft.com/downloads/
- An Azure subscription account. You can create a free Azure account at https://azure.microsoft.com/en-in/free/
Image requirements
The OCR API will work on images that meet the requirements as mentioned below:
- The format of the image must be JPEG, PNG, GIF, or BMP.
- The size of the image must be between 50 x 50 and 4200 x 4200 pixels.
- The image file size should be less than 4 MB.
- The text in the image can be rotated by any multiple of 90 degrees plus a small angle of up to 40 degrees.
Source Code
You can get the source code from GitHub.
Create the Azure Computer Vision Cognitive Service resource
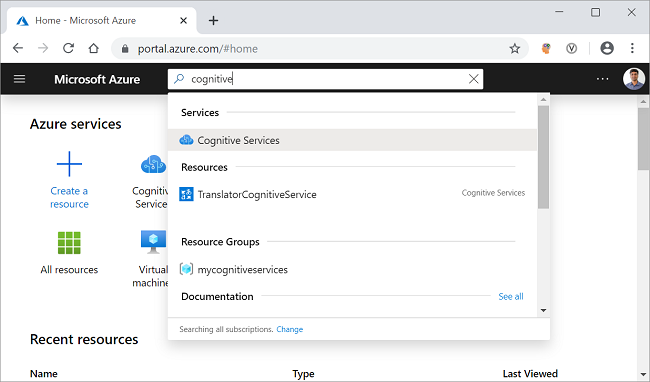
Log in to the Azure portal and search for the cognitive services in the search bar and click on the result. Refer to the image shown below.
On the next screen, click on the Add button. It will open the cognitive services marketplace page.
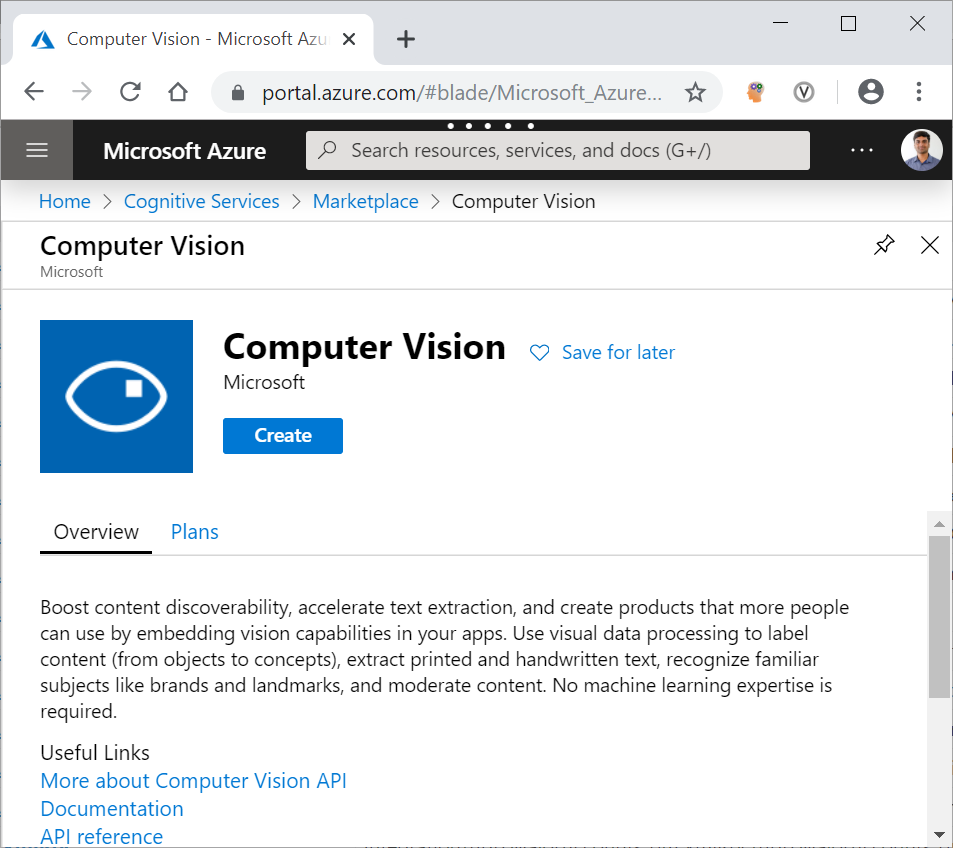
Search for the Computer Vision in the search bar and click on the search result. It will open the Computer Vision API page. Click on the Create button to create a new Computer Vision resource. Refer to the image shown below.
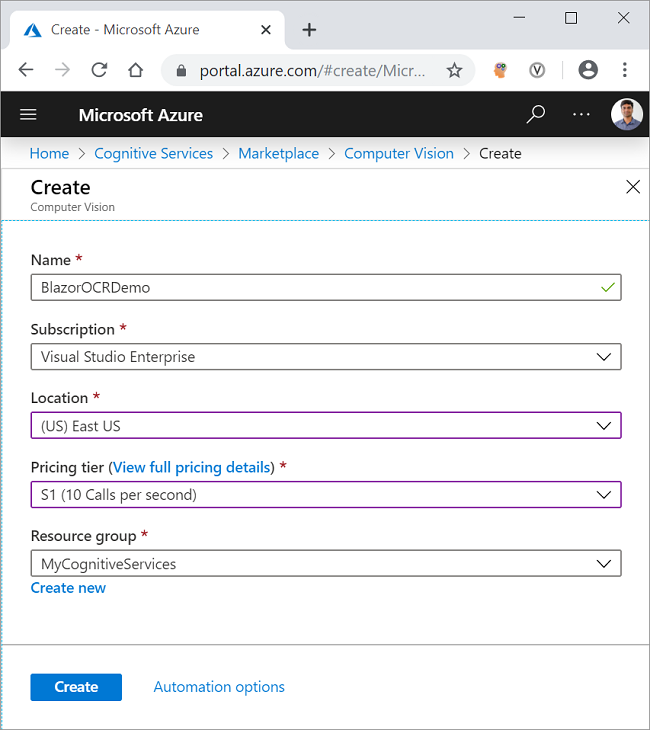
On the Create page, fill in the details as indicated below.
- Name: Give a unique name for your resource.
- Subscription: Select the subscription type from the dropdown.
- Pricing tier: Select the pricing tier as per your choice.
- Resource group: Select an existing resource group or create a new one.
Click on the Create button. Refer to the image shown below.
After your resource is successfully deployed, click on the “Go to resource” button. You can see the Key and the endpoint for the newly created Computer Vision resource. Refer to the image shown below.

Make a note of the key and the endpoint. We will be using these in the latter part of this article to invoke the Computer Vision OCR API from the .NET Code. The values are masked here for privacy.
Create a Server-Side Blazor Application
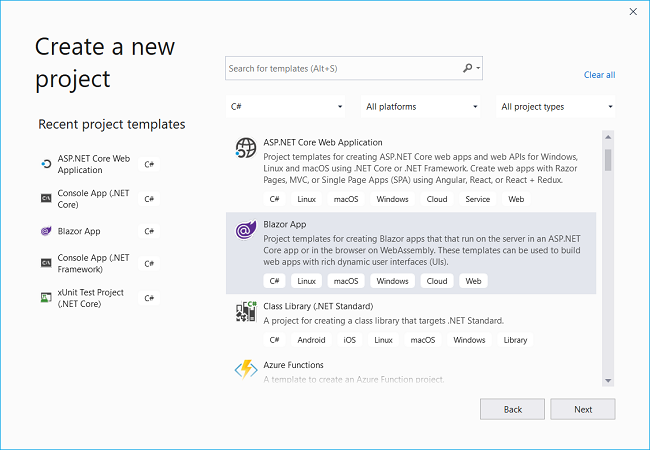
Open Visual Studio 2019, click on “Create a new project”. Select “Blazor App” and click on the “Next” button. Refer to the image shown below.
On the next window, put the project name as BlazorComputerVision and click on the “Create” button.
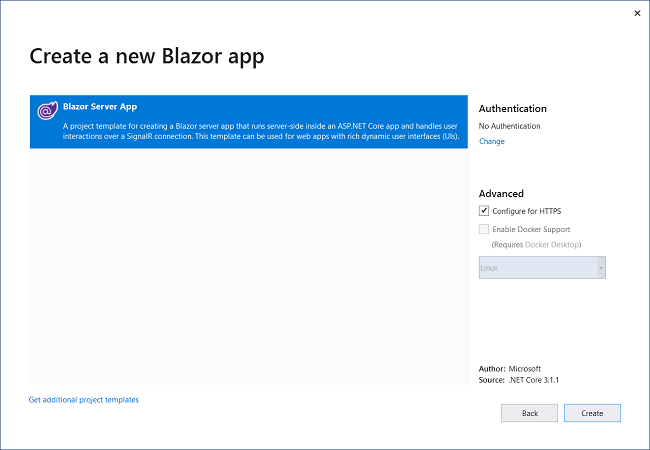
The next window will ask you to select the type of Blazor app. Select Blazor Server App and click on the Create button to create a new server-side Blazor application. Refer to the image shown below.
Installing Computer Vision API library
We will install the Azure Computer Vision API library which will provide us with the models out of the box to handle the Computer Vision REST API response.
To install the package, navigate to Tools >> NuGet Package Manager >> Package Manager Console. It will open the Package Manager Console. Run the command as shown below.
Install-Package Microsoft.Azure.CognitiveServices.Vision.ComputerVision -Version 5.0.0
You can learn more about this package at the NuGet gallery.
Create the Models
Right-click on the BlazorComputerVision project and select Add >> New Folder. Name the folder as Models. Again, right-click on the Models folder and select Add >> Class to add a new class file. Put the name of your class as LanguageDetails.cs and click Add.
Open [LanguageDetails.cs](https://github.com/AnkitSharma-007/Blazor-Computer-Vision-Azure-Cognitive-Services/blob/master/BlazorComputerVision/Models/LanguageDetails.cs) and put the following code inside it.
namespace BlazorComputerVision.Models
{
    public class LanguageDetails
    {
        public string Name { get; set; }
        public string NativeName { get; set; }
        public string Dir { get; set; }
    }
}
Similarly, add a new class file [AvailableLanguage.cs](https://github.com/AnkitSharma-007/Blazor-Computer-Vision-Azure-Cognitive-Services/blob/master/BlazorComputerVision/Models/AvailableLanguage.cs) and put the following code inside it.
using System.Collections.Generic;

namespace BlazorComputerVision.Models
{
    public class AvailableLanguage
    {
        public Dictionary<string, LanguageDetails> Translation { get; set; }
    }
}
Finally, we will add a class as DTO (Data Transfer Object) for sending data back to the client. Add a new class file [OcrResultDTO.cs](https://github.com/AnkitSharma-007/Blazor-Computer-Vision-Azure-Cognitive-Services/blob/master/BlazorComputerVision/Models/OcrResultDTO.cs) and put the following code inside it.
namespace BlazorComputerVision.Models
{
    public class OcrResultDTO
    {
        public string Language { get; set; }

        public string DetectedText { get; set; }
    }
}
Create the Computer Vision Service
Right-click on the BlazorComputerVision/Data folder and select Add >> Class to add a new class file. Put the name of the file as ComputerVisionService.cs and click on Add.
Open the [ComputerVisionService.cs](https://github.com/AnkitSharma-007/Blazor-Computer-Vision-Azure-Cognitive-Services/blob/master/BlazorComputerVision/Data/ComputerVisionService.cs) file and put the following code inside it.
using BlazorComputerVision.Models;
using Microsoft.Azure.CognitiveServices.Vision.ComputerVision.Models;
using Newtonsoft.Json;
using Newtonsoft.Json.Linq;
using System;
using System.Net.Http;
using System.Net.Http.Headers;
using System.Text;
using System.Threading.Tasks;

namespace BlazorComputerVision.Data
{
    public class ComputerVisionService
    {
        static string subscriptionKey;
        static string endpoint;
        static string uriBase;

        public ComputerVisionService()
        {
            subscriptionKey = "b993f3afb4e04119bd8ed37171d4ec71";
            endpoint = "https://ankitocrdemo.cognitiveservices.azure.com/";
            uriBase = endpoint + "vision/v2.1/ocr";
        }

        public async Task<OcrResultDTO> GetTextFromImage(byte[] imageFileBytes)
        {
            StringBuilder sb = new StringBuilder();
            OcrResultDTO ocrResultDTO = new OcrResultDTO();
            try
            {
                string JSONResult = await ReadTextFromStream(imageFileBytes);

                OcrResult ocrResult = JsonConvert.DeserializeObject<OcrResult>(JSONResult);

                if (!ocrResult.Language.Equals("unk"))
                {
                    foreach (OcrLine ocrLine in ocrResult.Regions[0].Lines)
                    {
                        foreach (OcrWord ocrWord in ocrLine.Words)
                        {
                            sb.Append(ocrWord.Text);
                            sb.Append(' ');
                        }
                        sb.AppendLine();
                    }
                }
                else
                {
                    sb.Append("This language is not supported.");
                }
                ocrResultDTO.DetectedText = sb.ToString();
                ocrResultDTO.Language = ocrResult.Language;
                return ocrResultDTO;
            }
            catch
            {
                ocrResultDTO.DetectedText = "Error occurred. Try again";
                ocrResultDTO.Language = "unk";
                return ocrResultDTO;
            }
        }

        static async Task<string> ReadTextFromStream(byte[] byteData)
        {
            try
            {
                HttpClient client = new HttpClient();
                client.DefaultRequestHeaders.Add("Ocp-Apim-Subscription-Key", subscriptionKey);
                string requestParameters = "language=unk&detectOrientation=true";
                string uri = uriBase + "?" + requestParameters;
                HttpResponseMessage response;

                using (ByteArrayContent content = new ByteArrayContent(byteData))
                {
                    content.Headers.ContentType = new MediaTypeHeaderValue("application/octet-stream");
                    response = await client.PostAsync(uri, content);
                }

                string contentString = await response.Content.ReadAsStringAsync();
                string result = JToken.Parse(contentString).ToString();
                return result;
            }
            catch (Exception e)
            {
                return e.Message;
            }
        }

        public async Task<AvailableLanguage> GetAvailableLanguages()
        {
            string endpoint = "https://api.cognitive.microsofttranslator.com/languages?api-version=3.0&scope=translation";
            var client = new HttpClient();
            using (var request = new HttpRequestMessage())
            {
                request.Method = HttpMethod.Get;
                request.RequestUri = new Uri(endpoint);
                var response = await client.SendAsync(request).ConfigureAwait(false);
                string result = await response.Content.ReadAsStringAsync();

                AvailableLanguage deserializedOutput = JsonConvert.DeserializeObject<AvailableLanguage>(result);

                return deserializedOutput;
            }
        }
    }
}
In the constructor of the class, we have initialized the key and the endpoint URL for the OCR API.
Inside the ReadTextFromStream method, we will create a new HttpRequestMessage. This HTTP request is a Post request. We will pass the subscription key in the header of the request. The OCR API will return a JSON object having each word from the image as well as the detected language of the text.
The GetTextFromImage method will accept the image data as a byte array and returns an object of type OcrResultDTO. We will invoke the ReadTextFromStream method and deserialize the response into an object of type OcrResult. We will then form the sentence by iterating over the OcrWord object.
The GetAvailableLanguages method will return the list of all the language supported by the Translate Text API. We will set the request URI and create a HttpRequestMessage which will be a Get request. This request URL will return a JSON object which will be deserialized to an object of type AvailableLanguage.
Why do we need to fetch the list of supported languages?
The OCR API returns the language code (e.g. en for English, de for German, etc.) of the detected language. But we cannot display the language code on the UI as it is not user-friendly. Therefore, we need a dictionary to look up the language name corresponding to the language code.
The Azure Computer Vision OCR API supports 25 languages. To know all the languages supported by OCR API see the list of supported languages.
These languages are a subset of the languages supported by the Azure Translate Text API. Since there is no dedicated API endpoint to fetch the list of languages supported by OCR API, therefore, we are using the Translate Text API endpoint to fetch the list of languages.
We will create the language lookup dictionary using the JSON response from this API call and filter the result based on the language code returned by the OCR API.
Install BlazorInputFile NuGet package
BlazorInputFile is a file input component for Blazor applications. It provides the ability to upload single or multiple files to a Blazor app.
Open [BlazorComputerVision.csproj](https://github.com/AnkitSharma-007/Blazor-Computer-Vision-Azure-Cognitive-Services/blob/master/BlazorComputerVision/BlazorComputerVision.csproj#L8) file and add a dependency for the BlazorInputFile package as shown below:
<ItemGroup>
    <PackageReference Include="BlazorInputFile" Version="0.1.0-preview-00002" />
</ItemGroup>
Open [BlazorComputerVision\Pages\_Host.cshtml](https://github.com/AnkitSharma-007/Blazor-Computer-Vision-Azure-Cognitive-Services/blob/master/BlazorComputerVision/Pages/_Host.cshtml#L17) file and add the reference for the package’s JavaScript file by adding the following line in the <head> section.
<script src="_content/BlazorInputFile/inputfile.js"></script>
Add the following line in the [_Imports.razor](https://github.com/AnkitSharma-007/Blazor-Computer-Vision-Azure-Cognitive-Services/blob/master/BlazorComputerVision/_Imports.razor#L10) file.
@using BlazorInputFile
Configuring the Service
To make the service available to the components we need to configure it on the server-side app. Open the Startup.cs file. Add the following line inside the [ConfigureServices](https://github.com/AnkitSharma-007/Blazor-Computer-Vision-Azure-Cognitive-Services/blob/master/BlazorComputerVision/Startup.cs#L31) method of Startup class.
services.AddSingleton<ComputerVisionService>();
Creating the Blazor UI Component
We will add the Razor page in the BlazorComputerVision/Pages folder. By default, we have “Counter” and “Fetch Data” pages provided in our application. These default pages will not affect our application but for the sake of this tutorial, we will delete fetchdata and counter pages from BlazorComputerVision/Pages folder.
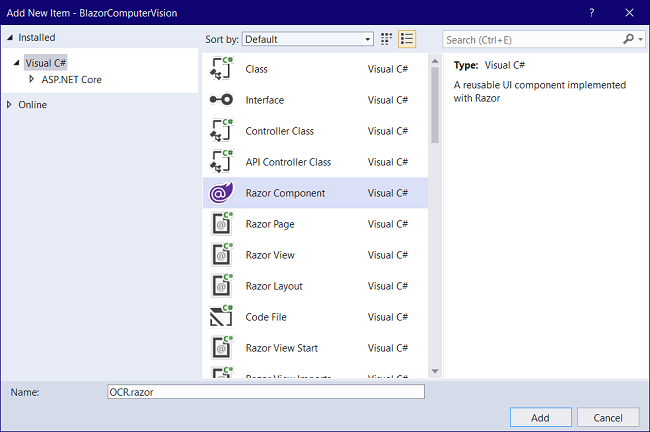
Right-click on the BlazorComputerVision/Pages folder and then select Add >> New Item. An “Add New Item” dialog box will open, select “Visual C#” from the left panel, then select “Razor Component” from the templates panel, put the name as OCR.razor. Click Add. Refer to the image shown below.
We will add a code-behind file for this razor page to keep the code and presentation separate. This will allow easy maintenance for the application.
Right-click on the BlazorComputerVision/Pages folder and then select Add >> Class. Name the class as OCR.razor.cs. The Blazor framework is smart enough to tag this class file to the razor file. Refer to the image shown below.

Blazor UI component code behind
Open the [OCR.razor.cs](https://github.com/AnkitSharma-007/Blazor-Computer-Vision-Azure-Cognitive-Services/blob/master/BlazorComputerVision/Pages/OCR.razor.cs) file and put the following code inside it.
using Microsoft.AspNetCore.Components;
using System;
using System.Collections.Generic;
using System.Linq;
using System.Threading.Tasks;
using System.IO;
using BlazorComputerVision.Models;
using BlazorInputFile;
using BlazorComputerVision.Data;

namespace BlazorComputerVision.Pages
{
    public class OCRModel : ComponentBase
    {
        [Inject]
        protected ComputerVisionService computerVisionService { get; set; }

        protected string DetectedTextLanguage;
        protected string imagePreview;
        protected bool loading = false;
        byte[] imageFileBytes;

        const string DefaultStatus = "Maximum size allowed for the image is 4 MB";
        protected string status = DefaultStatus;

        protected OcrResultDTO Result = new OcrResultDTO();
        private AvailableLanguage availableLanguages;
        private Dictionary<string, LanguageDetails> LanguageList = new Dictionary<string, LanguageDetails>();
        const int MaxFileSize = 4 * 1024 * 1024; // 4MB

        protected override async Task OnInitializedAsync()
        {
            availableLanguages = await computerVisionService.GetAvailableLanguages();
            LanguageList = availableLanguages.Translation;
        }

        protected async Task ViewImage(IFileListEntry[] files)
        {
            var file = files.FirstOrDefault();
            if (file == null)
            {
                return;
            }
            else if (file.Size > MaxFileSize)
            {
                status = $"The file size is {file.Size} bytes, this is more than the allowed limit of {MaxFileSize} bytes.";
                return;
            }
            else if (!file.Type.Contains("image"))
            {
                status = "Please uplaod a valid image file";
                return;
            }
            else
            {
                var memoryStream = new MemoryStream();
                await file.Data.CopyToAsync(memoryStream);
                imageFileBytes = memoryStream.ToArray();
                string base64String = Convert.ToBase64String(imageFileBytes, 0, imageFileBytes.Length);

                imagePreview = string.Concat("data:image/png;base64,", base64String);
                memoryStream.Flush();
                status = DefaultStatus;
            }
        }

        protected private async Task GetText()
        {
            if (imageFileBytes != null)
            {
                loading = true;
                Result = await computerVisionService.GetTextFromImage(imageFileBytes);
                if (LanguageList.ContainsKey(Result.Language))
                {
                    DetectedTextLanguage = LanguageList[Result.Language].Name;
                }
                else
                {
                    DetectedTextLanguage = "Unknown";
                }
                loading = false;
            }
        }
    }
}
We are injecting the ComputerVisionService in this class.
The OnInitializedAsync is a Blazor lifecycle method which is invoked when the component is initialized. We are invoking the GetAvailableLanguages method from our service inside the OnInitializedAsync method. We will then initialize the variable LanguageList which is a dictionary to hold the details of available languages.
Inside the ViewImage method, we will check if the uploaded file is an image only and the size is less than 4 MB. We will transfer the uploaded image to the memory stream. We will then convert that memory stream to a byte array.
To set the image preview, we will convert the image from byte array to a base64 encoded string. The GetText method will invoke the GetTextFromImage method from the service and pass the image byte array as an argument. We will search for the language name from the dictionary based on the language code returned from the service. If no language code is available, we will set the language as unknown.
Blazor UI component template
Open the [OCR.razor](https://github.com/AnkitSharma-007/Blazor-Computer-Vision-Azure-Cognitive-Services/blob/master/BlazorComputerVision/Pages/OCR.razor) file and put the following code inside it.
@page "/computer-vision-ocr"
@inherits OCRModel

<h2>Optical Character Recognition (OCR) Using Blazor and Azure Computer Vision Cognitive Service</h2>

<div class="row">
    <div class="col-md-5">
        <textarea disabled class="form-control" rows="10" cols="15">@Result.DetectedText</textarea>
        <hr />
        <div class="row">
            <div class="col-sm-5">
                <label><strong> Detected Language :</strong></label>
            </div>
            <div class="col-sm-6">
                <input disabled type="text" class="form-control" value="@DetectedTextLanguage" />
            </div>
        </div>
    </div>
    <div class="col-md-5">
        <div class="image-container">
            <img class="preview-image" src=@imagePreview>
        </div>
        <InputFile OnChange="ViewImage" />
        <p>@status</p>
        <hr />
        <button disabled="@loading" class="btn btn-primary btn-lg" @onclick="GetText">
            @if (loading)
            {
                <span class="spinner-border spinner-border-sm mr-1"></span>
            }
            Extract Text
        </button>
    </div>
</div>
We have defined the route for this component. We have inherited the OCRModel class which allows us to access the properties and method of this class from the template. Bootstrap is used for designing the UI. We have a text area to display the detected text and a text box to display the detected language. The image tag is used to show the image preview after uploading the image. The <InputFile> component will allow us to upload an image file and invoke the ViewImage method as we upload the image.
Add styling for the component
Navigate to [BlazorComputerVision\wwwroot\css\site.css](https://github.com/AnkitSharma-007/Blazor-Computer-Vision-Azure-Cognitive-Services/blob/master/BlazorComputerVision/wwwroot/css/site.css#L185-L197) file and add the following style definition inside it.
.preview-image {
    max-height: 300px;
    max-width: 300px;
}
.image-container {
    display: flex;
    padding: 15px;
    align-content: center;
    align-items: center;
    justify-content: center;
    border: 2px dashed skyblue;
}
Adding Link to Navigation menu
The last step is to add the link of our OCR component in the navigation menu. Open [BlazorComputerVision/Shared/NavMenu.razor](https://github.com/AnkitSharma-007/Blazor-Computer-Vision-Azure-Cognitive-Services/blob/master/BlazorComputerVision/Shared/NavMenu.razor#L15-L19) file and add the following code into it.
<li class="nav-item px-3">
    <NavLink class="nav-link" href="computer-vision-ocr">
        <span class="oi oi-list-rich" aria-hidden="true"></span> Computer Vision
    </NavLink>
</li>
Remove the navigation links for Counter and Fetch-data components as they are not required for this application.
Execution Demo
Press F5 to launch the application. Click on the Computer Vision button on the nav menu on the left. On the next page, upload an image with some text in it and click on the “Extract Text” button. You will see the extracted text in the text area on the left along with the detected language for the text. Refer to the image shown below.
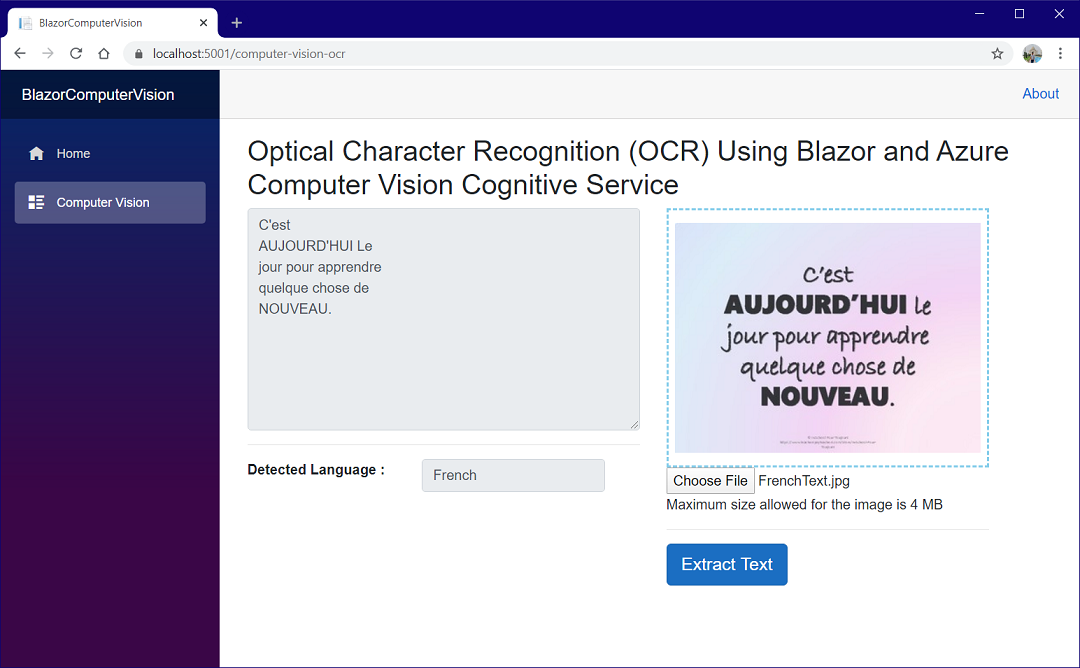
Now we will try to upload an image with some French text on it, you can see the extracted text and the detected language as French. Refer to the image shown below.
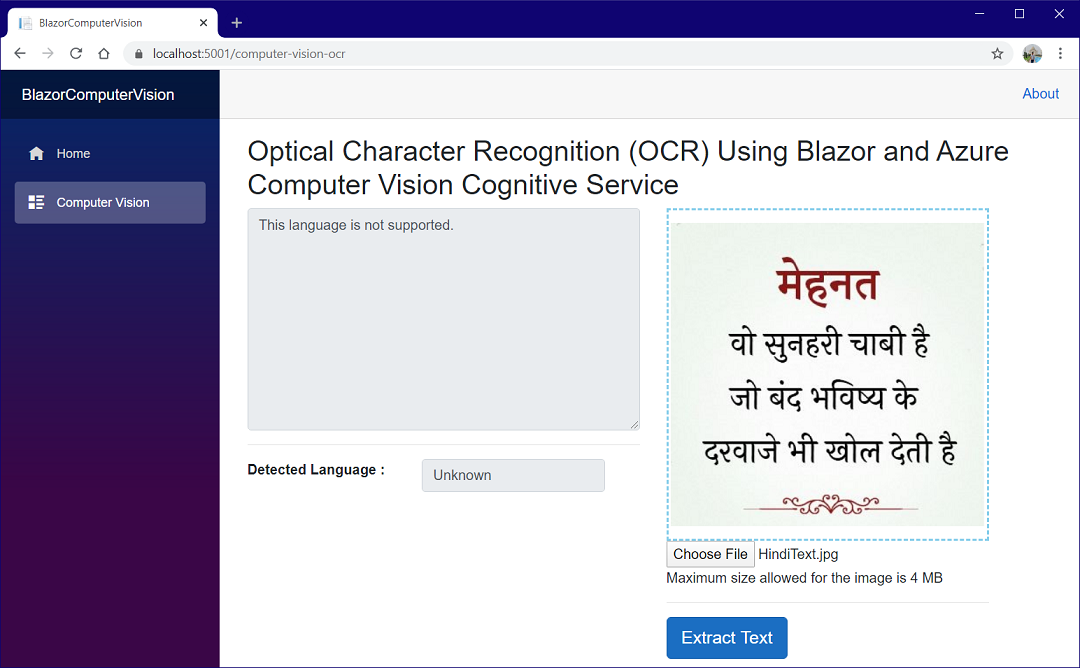
If we try to upload an image with an unsupported language, we will get the error. Refer to the image shown below where an image with text written in Hindi is uploaded.
Summary
We have created an optical character recognition (OCR) application using Blazor and the Computer Vision Azure Cognitive Service. We have added the feature of uploading an image file using the BlazorInputFile component. The application is able to extract the printed text from the uploaded image and recognizes the language of the text. The OCR API of the Computer Vision is used which can recognize text in 25 languages.
Get the Source code from GitHub and play around to get a better understanding.
See Also
- Multi-Language Translator Using Blazor And Azure Cognitive Services
- Facebook Authentication And Authorization In Server-Side Blazor App
- Google Authentication And Authorization In Server-Side Blazor App
- Policy-Based Authorization In Angular Using JWT
- Continuous Deployment For Angular App Using Heroku And GitHub
- Hosting A Blazor Application on Firebase
- Deploying A Blazor Application On Azure