

While the internet is only about 30 years old, in many ways the hosts file is a relic of its (not so ancient) past.
In most cases you probably won't need to update your hosts file on Windows. But knowing where it is and how it works can be helpful if:
- you're having trouble with local development
- you suspect malware has tampered with the hosts file
- you want a quick and simple way to block some websites
- or if you want to set up some helpful shortcuts to internal IP addresses
In this article we'll cover what a hosts file is, how to edit it on Windows, and we'll go over some neat tricks you can do with it.
What's a hosts file anyway?
Back in the early days of the internet, before it was widespread, computers used a hosts file to map long, hard to remember IP addresses with much shorter, easier to remember hostnames.
For example, here's a line you'll find in many hosts files on Windows, Linux, and macOs:
127.0.0.1 localhost
That way, instead of having to remember a long IP address, all you had to do was visit localhost.
Why hosts files fell out of favor
The hosts files system worked well for the early internet, but there were a few major problems.
As the internet grew, so did the length and complexity of the hosts files. Also, each hosts file only worked for the computer it was on, and keeping them in sync with the changes in hostnames and IP addresses became a huge pain.
For example, imagine that you have two computers, A and B. Their hosts files contain this mapping for google.com:
172.217.26.46 google.com
But when Google updates their IP addresses, only computer A updates its hosts file to match:
172.217.175.78 google.com
So everyone on computer B is stuck without Google until someone updates the hosts file. When that person does update the hosts file, they add another entry to handle Google with the www subdomain.
172.217.175.78       google.com
172.217.175.78       www.google.com
Now everyone on computer B is taken to the correct website whether they visit google.com or www.google.com.
And everyone on computer A can only visit google.com, not www.google.com, at least until its own hosts file is updated to match.
As you can imagine, hosts files would get complicated, fast.
The solution
If you're thinking that someone should have just made a central repository to map all IP addresses with all hostnames, that's exactly what happened.
Early on, a central hosts file was manually maintained and shared by the Stanford Research Institute. This system lead to the invention of domains and top level domains like .com and .edu, Whois, and it became increasingly automated.
In the end, the humble hosts file and innovators like Elizabeth J. Feinler lead to the invention of the Domain Name System still in use today.
How to edit a hosts file on Windows
To edit a hosts file on Windows 10, you'll need to open it as an administrator.
First, open Notepad as an administrator by pressing the Windows key, typing in "notepad", and clicking "Run as administrator":
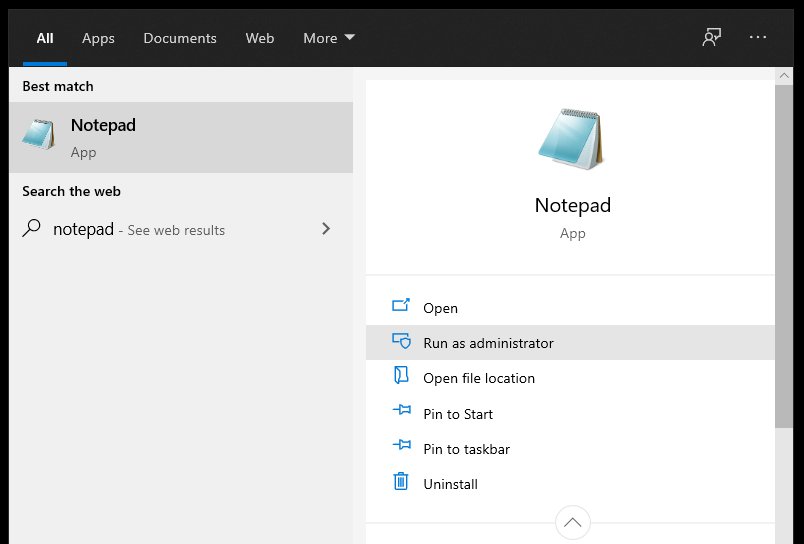 Note: You may need to click the arrow button to expand the dropdown to see the "Run as administrator" option
To open the hosts file in Notepad, click "File", "Open", and navigate to C:\Windows\System32\drivers\etc.
You won't be able to see any files in this directory because they aren't text documents. To change the file type, click on the dropdown in the bottom right of the Open menu and click on "All Files":
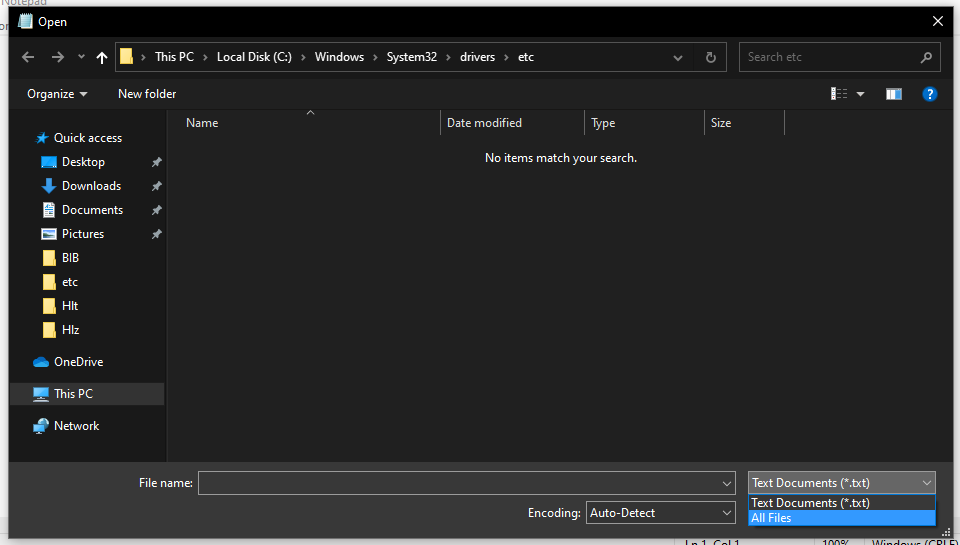
You'll see a file named hosts. Double click on that file to open it.
Then, you'll see a hosts file similar to this:
# Copyright (c) 1993-2009 Microsoft Corp.
#
# This is a sample HOSTS file used by Microsoft TCP/IP for Windows.
#
# This file contains the mappings of IP addresses to host names. Each
# entry should be kept on an individual line. The IP address should
# be placed in the first column followed by the corresponding host name.
# The IP address and the host name should be separated by at least one
# space.
#
# Additionally, comments (such as these) may be inserted on individual
# lines or following the machine name denoted by a '#' symbol.
#
# For example:
#
#      102.54.94.97     rhino.acme.com          # source server
#       38.25.63.10     x.acme.com              # x client host

# localhost name resolution is handled within DNS itself.
#    127.0.0.1       localhost
#    ::1             localhost
Note that everything is commented out with # characters, meaning that nothing is actually being read from the hosts file. Modern versions of Windows include a sort of DNS system already, so if you visit localhost it'll automatically redirect you to 127.0.0.1.
With that out of the way, here are some things you can do with the hosts file.
How to update the hosts file on Windows 10 if you have trouble with localhost
If you're doing some local development and are having problems with localhost, you can just remove the comments from your hosts file:
...
# localhost name resolution is handled within DNS itself.
127.0.0.1       localhost
::1             localhost
After saving the hosts file, close Notepad.
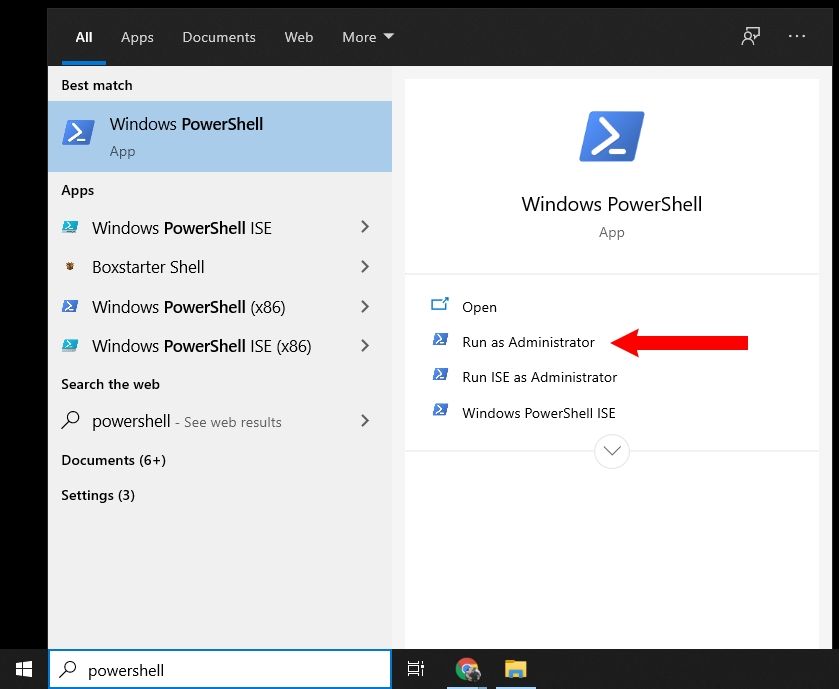
Then, open PowerShell by pressing the Windows key, searching for "powershell", and clicking "Run as Administrator":
In the PowerShell window, enter ipconfig /flushdns to flush the inbuilt Windows DNS:
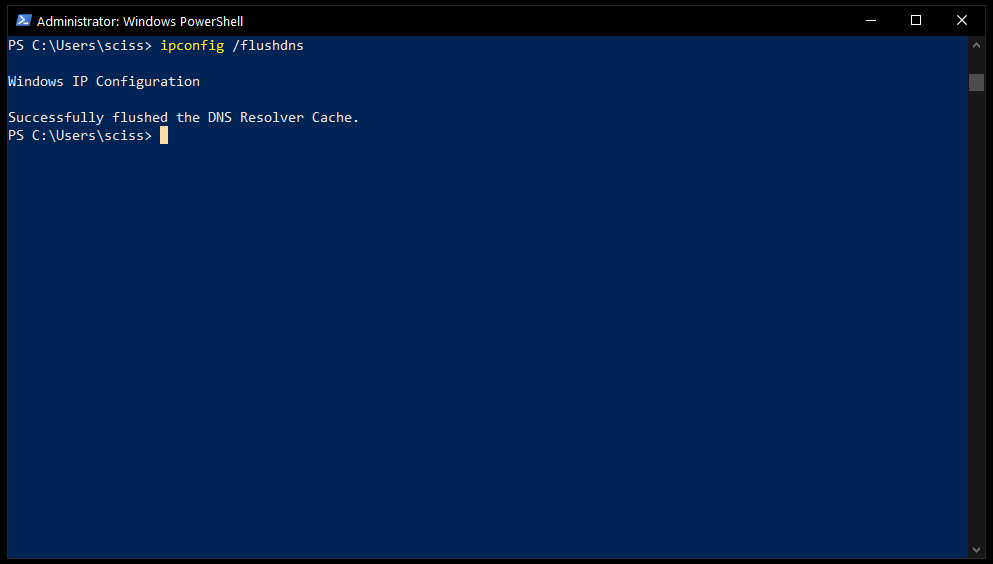
After that, you should be able to visit localhost in your browser and see whatever you're hacking on. If you're still having issues, try closing your browser completely, then open a new browser window and try again.
How to update your hosts file on Windows 10 if you think it's been tampered with
Even though hosts files have fallen out of favor with newer systems like DNS, they still work for legacy reasons. And hackers have definitely taken advantage of this in the past.
What they would do is point a common website like google.com towards an unsafe IP address. This IP address could serve a site that looks just like Google's, but is actually trying to steal your sensitive information.
While this was a problem in the past, most security software like the Windows Security Suite can recognize and fix problems with the hosts file automatically.
That said, if you open up your hosts file and see a lot of strange entries, then you may want to revert to the default Windows hosts file.
Just copy and paste the default hosts file from earlier in the article into your hosts file and save. Then, open PowerShell and use the ipconfig /flushdns command to flush the Windows DNS.
Note that some third-party security software uses the hosts file to block dangerous websites. If that's the case, no worries – your security software should add all those entries back to your hosts file. We'll go over how this works in the next section.
How to use the hosts file on Windows 10 to block websites
Don't want friends or family to visit certain websites on your computer? Or are you like me and get distracted by all the cat photos on the internet?
If so, then you can use the hosts file to block websites entirely.
For example, if you want to block Reddit, just add this to the bottom of your hosts file:
127.0.0.1     reddit.com
127.0.0.1     www.reddit.com
Then, open PowerShell and run ipconfig /flushdns to flush the Windows 10 DNS. Also, close the browser windows that are open and reopen them.
After that, every time you try to visit Reddit, or click on a Reddit URL like https://www.reddit.com/r/FreeCodeCamp/, your browser will be redirected to 127.0.0.1, or localhost.
Since there's no website there, your browser will show an error message:
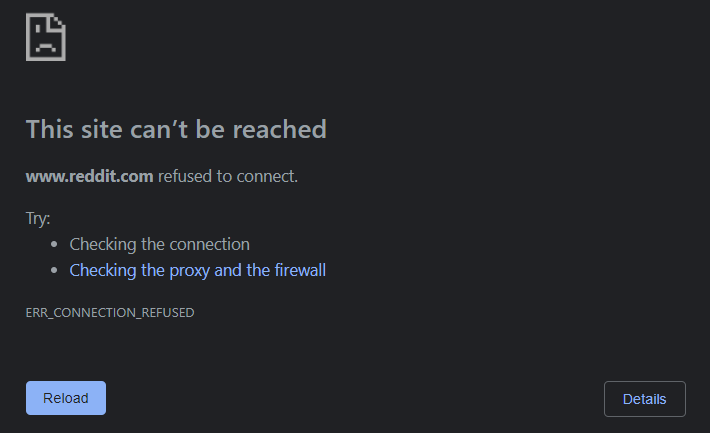
The one downside is that this only works on one device – you could just reach for your phone and browse Reddit on that instead. Still, it's a neat way to create some friction on your work computer.
This leads nicely into the last trick, which is to use the hosts file to make your life a little bit easier.
How to use the hosts file on Windows 10 to set up helpful shortcuts
If you spend a lot of time adjusting your router's settings, or you have a cool project running on a Raspberry Pi, you'll know that typing in a long IP address is a drag.
Instead, you can use the hosts file to make connecting to other devices on your local network much faster.
For example, if your router is at 192.168. 0.1, you can add the following to your hosts file:
192.168.0.1 my.router
Then, flush your Windows 10 DNS with ipconfig /flushdns and restart your browser.
And then any time you visit my.router, you should be redirected to 192.168.0.1.
Just note that you may need to visit http://my.router, at least the first time. Otherwise your browser might not recognize .router as a valid top-level domain (TLD), and will try to search for the term my.router instead.
To get around this, you could use a hostname like this instead:
192.168.0.1 router.my
This should work right away because .my is the TLD for people and companies in Malaysia.
Fortunately there are a whole lot of valid TLDs nowadays. Here's a list of some of the most common TLDs out there: https://en.wikipedia.org/wiki/List_of_Internet_top-level_domains
Again, the one downside to this method is that it only works on once device. You'd have to update the hosts files on your other devices to enable the same shortcuts.
And that should be just about everything you need to know about the hosts file on Windows 10. And a lot of this knowledge should carry over to Linux and macOS.
So get out there and customize your hosts file like the pioneers of the internet once did.
Did you find this helpful? Are there any other hosts file tricks you know? Let me know over on Twitter.
Stay safe and happy hosts file editing!