
Unsplash is a site where you can download free and unlicensed images and use them as you see fit.
In this tutorial, we will make an Image Search App using the Unsplash API to get access to its enormous collection of images and also download them.
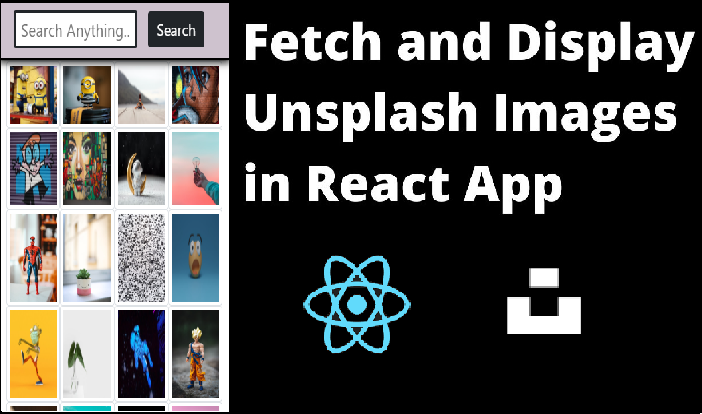
Before starting the development part of our app, let’s see how it will look exactly.
Let’s start…
Contents
How to Create the React App
How to Build the UI of our App
How to Get the Access Key and API Endpoint from Unsplash
How to Use Hooks in our App
How to Display Images in our App
How to Handle Errors
Conclusion
What will we learn?
This project is mainly for beginners, but anyone who wants to brush up their skills can follow along. In this tutorial, you will learn:
How to get API endpoints and Access Keys from the Unsplash developer's dashboard.
How to use the useState and useEffect hooks to fetch data from the API.
How to use the map function to display images or any other data from the API.
How to Create the React App
It's very easy to create a React app – just go to your working directory in your preferred IDE and enter the following command in the terminal:
npx create-react-app image-search-app
If you are unsure how to properly set up a create-react-app project, you can refer to the official guide here at create-react-app-dev.
After the setup, run npm start in the same terminal to start localhost:3000 where our React app will be hosted. We can also see all our changes there.
How to Build the UI of our App
There will be two sections in the UI of our App:
The Input section
The Result section where we will show the images
In the input section, we have an input tag in which we will write the search term or query. We also have a button with an onClick event handler which will trigger the function responsible for fetching the data from the API.
import React from "react";
const App = () => {
  return (
    <>
      <div className="container-fluid">
        <div className="row">
          <div className="col-12 d-flex justify-content-center align-items-center input">
            <input
              className="col-3 form-control-sm py-1 fs-4 text-capitalize border border-3 border-dark"
              type="text"
              placeholder="Search Anything..."
            />
            <button
              type="submit"
              onClick={Submit}
              className="btn bg-dark text-white fs-3 mx-3"
            >
              Search
            </button>
          </div>
        </div>
      </div>
    </>
  );
};
export default App;
The output will be the following:

In this article, we will not be discussing the styling part of the app. This way we can stay more focused on the React part which is more necessary to understand.
How to Get the Access Key and API Endpoint from Unsplash
Let's get those API keys from Unsplash for Developer. follow the steps given below to get your API key and other details:
First, go to the above link and click register as a developer.

Then fill in the credentials they have asked for:

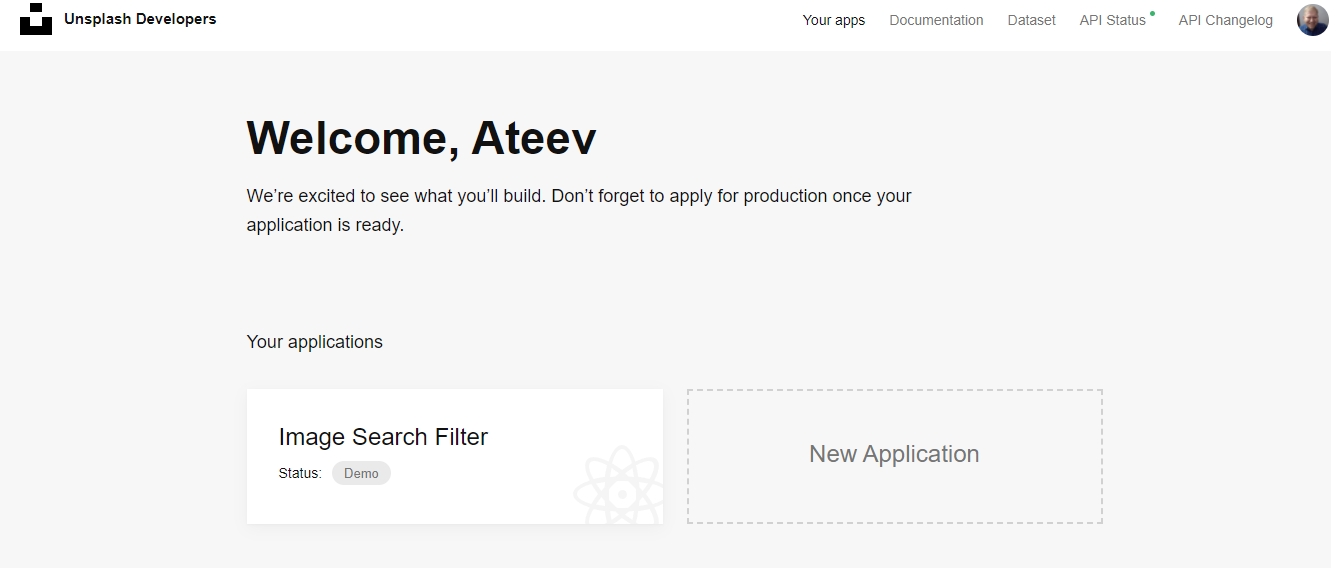
After this, you will be directed to the developer dashboard. Click on the new project.
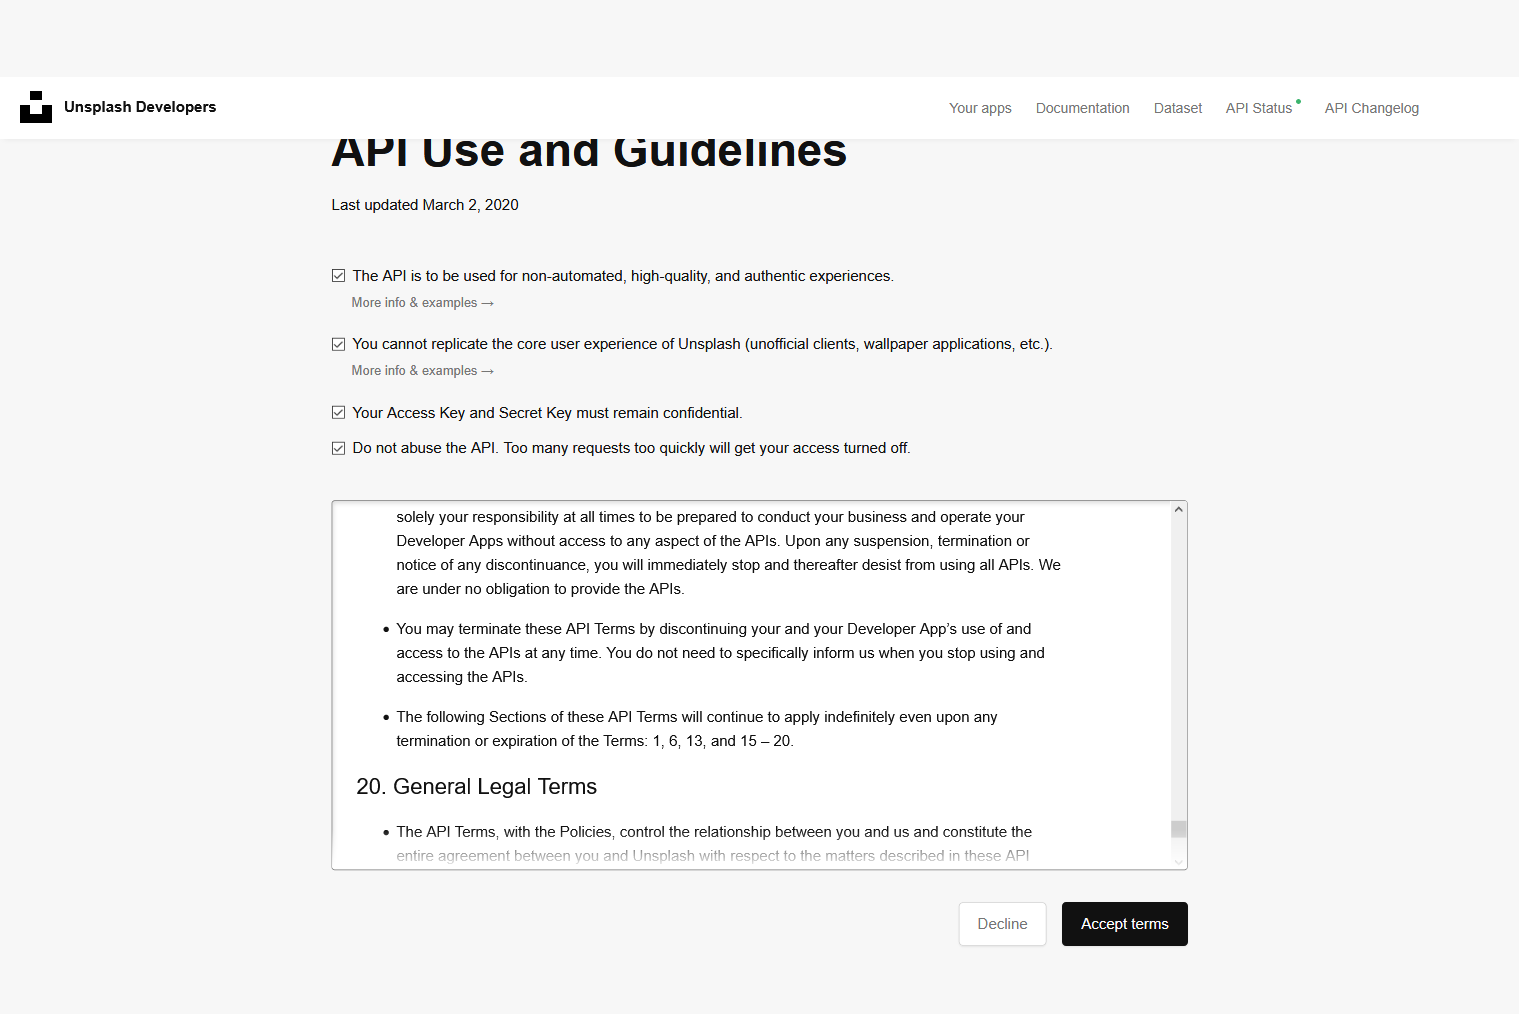
You will be asked to accept all the terms written there. Read them if you want or else just check all of them and click the button at the end to proceed.
Next, a modal form will appear as shown below in which you have to write the application information like name and description.
Then click Create Application.

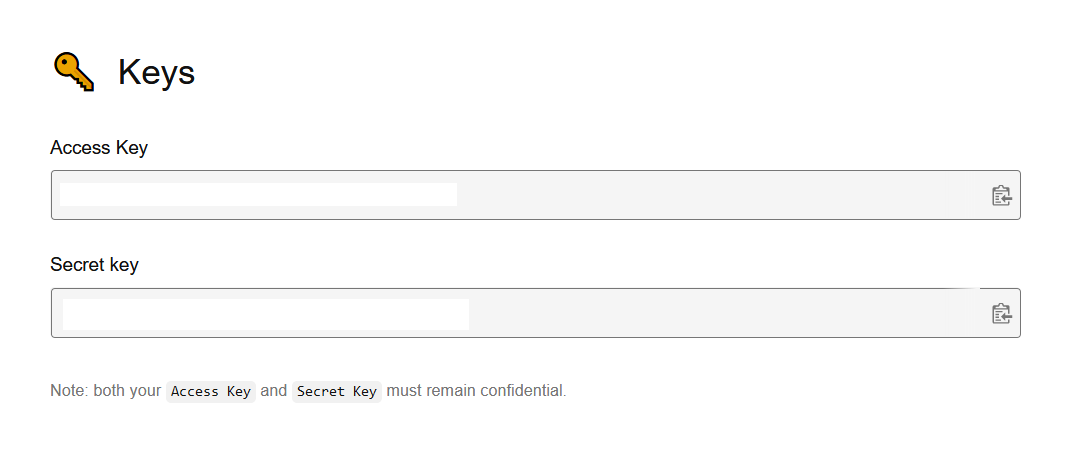
Now that our application has been created, we can access the Access Key and Secret Key under the Keys section:
Notice that at the very beginning of this page, it says Demo. This means that our application has been accepted but is still in development mode.
In this mode, we can only make 50 requests per hour. If we exceed this limit, our API will not work and the images will not load.

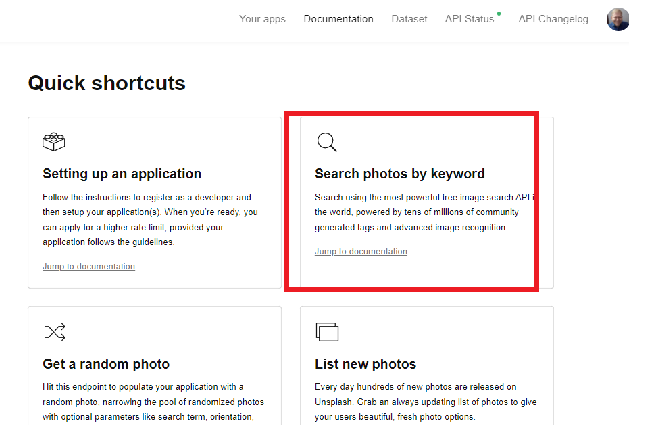
After this, head over to the documentation and select the option “Search Photos by Keyword”.
Scroll down to the Response Section and copy the link as shown:

API endpoint
Now we have both our API key and the API endpoint. Let's proceed with our App.
How to Use Hooks in our App
We will be using the useState and useEffect hooks in our app. They'll let us set the states which are required to get the value of input and search the API for data regarding that value.
For hooks to work, we have to define them at the very top of our app like this:
import React, { useState, useEffect } from "react";
How to Set State Using the useState Hook
As we discussed above, we'll use hooks to extract data from the API using the value searched in the input field. That value will be read by our React app using the useState hook.
We define states using this hook for specific purposes. In this app, we will be defining two of them: one for getting the value from the input field and the other to display results fetched from the API.
const [img, setImg] = useState("");
const [res, setRes] = useState([]);
There are two parameters in the above code used to define the useState hook: one of them is the state which we will use to store values, and the other is the function that we will be using to update the state values. Read more about useState hook here.
We have defined the first state as an empty string as it will be used to store the input from the search bar (and that is also a string).
The other state is initialized as an empty array because it will store the data fetched from the API and then show it in our Result Section
By default, we can only get up to 10 data points per API, but we can exceed that using a parameter per_page which we will see later in this tutorial.
How to use the img state
The next step is to store the value of the input text field into the img state using the value attribute of the input tag. Then we add an onChange() event handler to it. This onChange() event handler will have a function that will be used to update the state using the e.target.value.
<input
  className="col-3 form-control-sm py-1 fs-4 text-capitalize border border-3 border-dark"
  type="text"
  placeholder="Search Anything..."
  value={img}
  onChange={(e) => setImg(e.target.value)}
/>;
How to Make API Requests to Unsplash using the useEffect Hook
We will now use the Unsplash API and the Access key we have acquired in the above step to fetch data and display it in our app.
For this, we will again need a state to store the data fetched from the API which we have already defined in the above section (res, which is initialized as an empty array for this purpose only).
There are many methods in JavaScript we can use to fetch data from an API, but we will be using the async-await method – it's by far the simplest one.
const fetchRequest = async () => {
  const data = await fetch(
    `https://api.unsplash.com/search/photos?page=1&query=${img}&client_id=${Access_Key}`
  );
  const dataJ = await data.json();
  const result = dataJ.results;
  console.log(result);
  setRes(result);
};
useEffect(() => {
  fetchRequest();
}, []);
Notice that we have written ${Access_Key} – here we have to write our access key. We complete this step to secure our API key as anyone can misuse it.
In Unsplash, we can also apply for the production of our app, and by doing so we can go online with the images that Unsplash has to offer.
For this reason, everyone gets a different set of Access Keys and Security Keys. It's always best to hide these keys from others so that it doesn’t get misused and we pay the price for that.
In the above code, we have initially stored the data fetched from the API into the data variable which is then converted into JSON for simplicity's sake. This lets us read the data and extract the necessary values, which are stored in the dataJ variable and consoled to check if we are getting the value we need or not.

API in JSON format
And if we open any one of the above search results to see what values are there for us to extract:
{
    "total": 133,
    "total_pages": 7,
    "results": [
    {
    "id": "eOLpJytrbsQ",
    "created_at": "2014-11-18T14:35:36-05:00",
    width: 4000,
    height: 3000,
    color: "#A7A2A1",
    blur_hash: "LaLXMa9Fx[D%~q%MtQM|kDRjtRIU",
    likes: 286,
    liked_by_user: false,
    description: "A man drinking a coffee.",
    user: {
    id: "Ul0QVz12Goo",
    username: "ugmonk",
    name: "Jeff Sheldon",
    first_name: "Jeff",
    last_name: "Sheldon",
    instagram_username: "instantgrammer",
    twitter_username: "ugmonk",
    portfolio_url: "http://ugmonk.com/",
    profile_image: {
    small:
    "https://images.unsplash.com/profile-1441298803695-accd94000cac?ixlib=rb-0.3.5&q=80&fm=jpg&crop=faces&cs=tinysrgb&fit=crop&h=32&w=32&s=7cfe3b93750cb0c93e2f7caec08b5a41",
    medium:
    "https://images.unsplash.com/profile-1441298803695-accd94000cac?ixlib=rb-0.3.5&q=80&fm=jpg&crop=faces&cs=tinysrgb&fit=crop&h=64&w=64&s=5a9dc749c43ce5bd60870b129a40902f",
    large:
    "https://images.unsplash.com/profile-1441298803695-accd94000cac?ixlib=rb-0.3.5&q=80&fm=jpg&crop=faces&cs=tinysrgb&fit=crop&h=128&w=128&s=32085a077889586df88bfbe406692202",
    },
    links: {
    self: "https://api.unsplash.com/users/ugmonk",
    html: "http://unsplash.com/@ugmonk",
    photos: "https://api.unsplash.com/users/ugmonk/photos",
    likes: "https://api.unsplash.com/users/ugmonk/likes",
    },
    },
    current_user_collections: [],
    urls: {
    raw: "https://images.unsplash.com/photo-1416339306562-f3d12fefd36f",
    full: "https://hd.unsplash.com/photo-1416339306562-f3d12fefd36f",
    regular:
    "https://images.unsplash.com/photo-1416339306562-f3d12fefd36f?ixlib=rb-0.3.5&q=80&fm=jpg&crop=entropy&cs=tinysrgb&w=1080&fit=max&s=92f3e02f63678acc8416d044e189f515",
    small:
    "https://images.unsplash.com/photo-1416339306562-f3d12fefd36f?ixlib=rb-0.3.5&q=80&fm=jpg&crop=entropy&cs=tinysrgb&w=400&fit=max&s=263af33585f9d32af39d165b000845eb",
    thumb:
    "https://images.unsplash.com/photo-1416339306562-f3d12fefd36f?ixlib=rb-0.3.5&q=80&fm=jpg&crop=entropy&cs=tinysrgb&w=200&fit=max&s=8aae34cf35df31a592f0bef16e6342ef",
    },
    links: {
    self: "https://api.unsplash.com/photos/eOLpJytrbsQ",
    html: "http://unsplash.com/photos/eOLpJytrbsQ",
    download: "http://unsplash.com/photos/eOLpJytrbsQ/download",
    },
    },
    // more photos ...
    ],
    },
It's better to use this function inside the useEffect hook as it will prevent any re-rendering of the data if we made any changes in the UI of our App. To understand useEffect in-depth, click here.
We use the setRes function to update the value of res from an empty array to an array which will store all the fetched data in the JSON format as shown above.
We have already given an onClick function to the button at the beginning of our app in the input section. Now it's time to define a function for this event handler which will be triggered as soon as the Search button is clicked. This function will call the fetchRequest function which will fetch the data and show us the result in the Result section.
const Submit = () => {
  fetchRequest();
  setImg("");
};
How to Display Images in our App
In the above section, we have stored the data fetched from the API into the res state which has stored them in the form of an array. To get these values from there, we have to use the map method.
<div className="col-12 d-flex justify-content-evenly flex-wrap">
  {res.map((val) => {
    return (
      <>
        <img
          className="col-3 img-fluid img-thumbnail"
          src={val.urls.small}
          alt="val.alt_description"
        />
      </>
    );
  })}
</div>;
If we go back and see the response in JSON, we will find a different kind of information: URLs which contains the path to the image. So here val.urls.small is the actual path to the image, and val.alt_description is the alt description of the picture.
There are different fields inside "urls" that give different data, such as:
Raw: Actual raw image that was taken by a user.
Full: Raw image in .jpg format.
Regular: Best for practical uses, width=1080px.
Small: Perfect for slow internet speed, width=400px.
Thumb: Thumbnail version of the image, width=200px.
In this article, we will be using small, but there are others too as shown above that we can play with and find the appropriate one for us.

Final Product
By default, the number of items that can be fetched at a time is 10, but this number can be increased or decreased depending upon how many images we want our app to show.
To do this we just have to add a parameter at the end of our API call (per_page) as shown in the code, and put it equal to the number of images we want to show.
const fetchRequest = async () => {
  const data = await fetch(
    `https://api.unsplash.com/search/photos?page=1&query=${img}&client_id=${Access_Key}&per_page=20`
  );
  const dataJ = await data.json();
  const result = dataJ.results;
  console.log(result);
  setRes(result);
};
There are many more parameters that Unsplash has to offer. Below is a list of a few of them:

parameters of Unsplash API
How to Handle Errors
If we do a quick search now on, say, flags, we will get our images. But there are still some issues that need to be fixed. One of them is the error we are receiving in the console.

Error in Console
To fix this, pass a unique key to every child using the id of the image. This key prop explicitly tells React the identity of each child in a list. This also prevents children from losing state between renders.
<div className="col-12 d-flex justify-content-evenly flex-wrap">
  {res.map((val) => {
    return (
      <>
        <img
          key={val.id}
          className="col-3 img-fluid img-thumbnail"
          src={val.urls.small}
          alt="val.alt_description"
        />
      </>
    );
  })}
</div>;
Conclusion
In this tutorial, we have developed a Photo Search app in React using the Unsplash API. While building our app, we discussed many things like how to use React Hooks to get the data from an API and use it to display images in our App.
There is much more you can do with this application to extend it. For example, we could add a Random button to display random images, create a checkbox to toggle between searching for photos or the users that posted them according to the user’s preference, add an infinite scroll to display more images, and more.
You can go through some of my other beginner-friendly, project-based articles here: