

Containerization has transformed the way applications are built, deployed, and scaled. Containers provide a lightweight, portable, and uniform environment for developers to bundle their programs as well as their dependencies into a single unit.
But when a system's container count rises, controlling and coordinating them becomes more difficult. Fortunately, Kubernetes is a powerful container orchestration solution.
This tutorial teaches you how to leverage Azure Kubernetes Service (AKS) for container orchestration in the Azure cloud environment.
Key Terminologies
Before diving into the guide, let's define some essential terminologies:
- Containerization: The process of packaging your application code with all the files and libraries together into a single container to ensure consistency and portability across different environments.
- Kubernetes: An open-source container orchestration platform that automates the deployment, scaling, and management of containerized applications.
- Azure Kubernetes Service (AKS): A managed Kubernetes service provided by Microsoft Azure that simplifies the deployment and management of Kubernetes clusters in the Azure cloud environment.
- Pod: The smallest deployable unit in Kubernetes, representing one or more containers running together on a node.
- Deployment: A Kubernetes resource that defines how many replicas of a Pod should be running and the template for creating them.
- Node: A virtual or physical machine in a Kubernetes cluster on which containers are deployed.
- kubectl: The command-line tool used to interact with Kubernetes clusters.
How to Use Azure Kubernetes Service (AKS)
Create an Azure Resource Group
Let’s start by logging into the Azure portal, then clicking on "Create a resource" and searching for "Resource group.". Click on "Resource group" and then "Create."
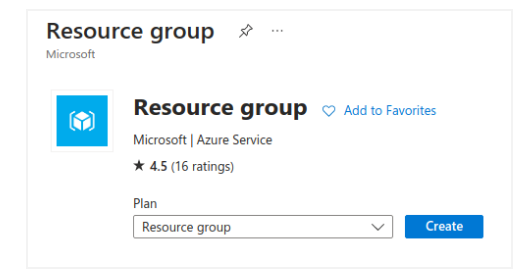 Resource group
After that, let’s fill in the required information, such as the resource group name and region then click "Review + create" and then "Create" to create the resource group.
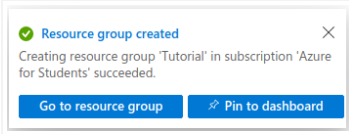 Popup for the created resource group
Create an AKS Cluster
In the Azure portal, click on "Create" and search for "Azure Kubernetes Service."Let’s now click on "Azure Kubernetes Service" and then "Create."
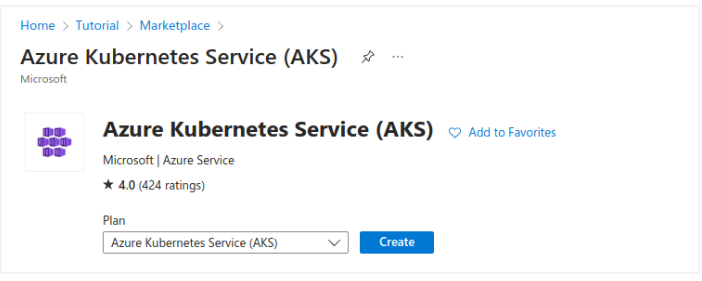 Creating an AKS
Fill in the required information, such as the AKS cluster name, resource group (use the one created in Step 1), and region.
Cluster Details
First, let’s choose our plan and the resource that we created earlier:
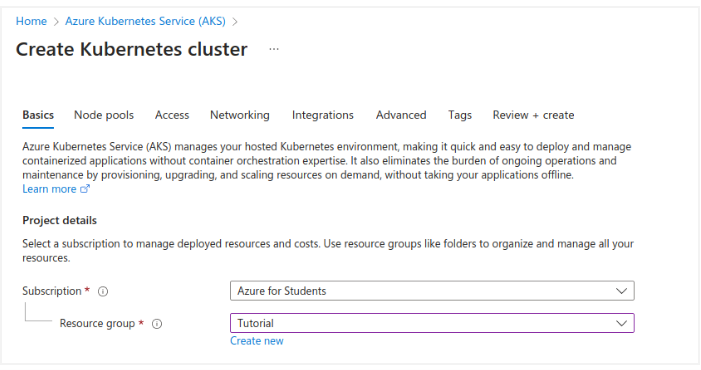 Plan and resource group
Ensure that the Preset configuration is Standard ($$). For more details on preset configurations, see the cluster configuration preset in the Azure portal. Enter a Kubernetes cluster name, such as AKScluster.
Select a Region for the AKS cluster, and leave the default value selected for the Kubernetes version.
 Cluster details
Leave the default values as they are in the "primary node pool":
 Primary node pool
In the next parts, leave the default options and then select Next: Review + create:
When we go to the Review + Create tab, Azure validates the parameters we've selected. If the validation is successful, we may establish the AKS cluster by clicking create. If validation fails, it informs which parameters must be changed.
 Validation passed demo
The AKS cluster is created in a matter of minutes. When our deployment is finished, we may access our resource by either choosing Go to resource, or Selecting the AKS resource from the AKS cluster resource group.
Configure kubectl
After the AKS cluster is successfully created, we should click on "Go to resource."
In the AKS cluster overview page, click on "Connect" and then "Open in Cloud Shell."
The Azure Cloud Shell will open at the bottom of the portal. If prompted, choose "Bash" as the shell type. Then "Create storage".
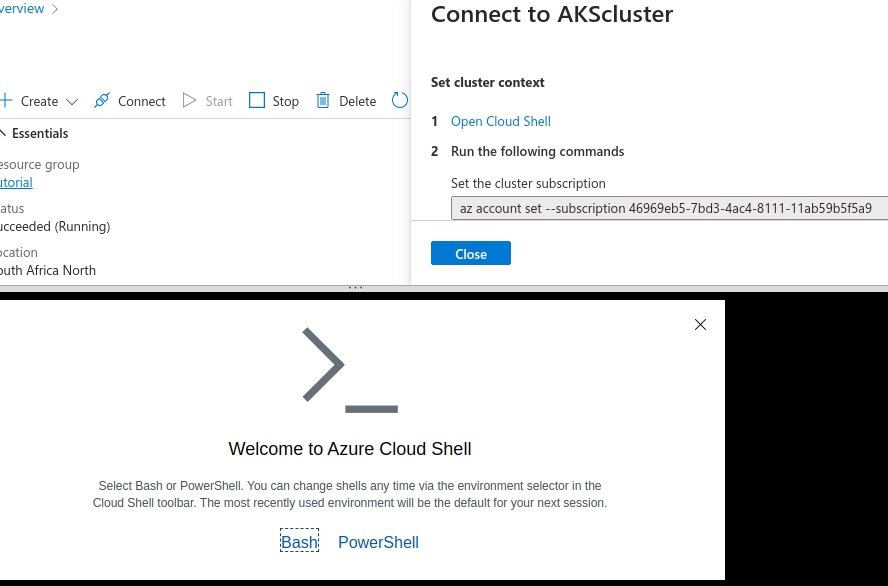 Azure Cloud Shell
Run the following command in the Cloud Shell to configure kubectl to connect to our AKS cluster:
az aks get-credentials --resource-group <your_resource_group_name> --name <your_aks_cluster_name>
In our case, our resource group name is Tutorial and AKS our cluster is AKScluster:
az aks get-credentials --resource-group Tutorial --name AKScluster
This will output the following:
Merged "AKScluster" as current context in /home/valentine/.kube/config
To verify the connection to our cluster, use kubectl get to return a list of the cluster nodes as shown below:
NAME                               STATUS    ROLES   AGE   VERSION
aks-agentpool-22140002-vmss000000   Ready    agent   16m   v1.25.6
Deploy and Manage the Application
Now that kubectl is configured to connect to our AKS cluster, we can deploy and manage applications on it.
Create a Kubernetes deployment manifest file in the Cloud Shell. To do so let’s open the nano text editor and create the "nginx-deployment.yaml" file. Use the following command to do that:
nano nginx-deployment.yaml
The nano editor will open, and we can start typing the content of the deployment manifest. For deploying a simple NGINX web server, use the following YAML content:
apiVersion: apps/v1
kind: Deployment
metadata:
  name: nginx-deployment
spec:
  replicas: 3
  selector:
    matchLabels:
      app: nginx
  template:
    metadata:
      labels:
        app: nginx
    spec:
      containers:
        - name: nginx
          image: nginx:latest
          ports:
            - containerPort: 80
After copying and pasting our code above, we will press Ctrl + X to exit nano. This will prompt us to save the changes. Let’s press Y to confirm, and when asked to save the file, press Enter to save the file with the default name (nginx-deployment.yaml).
Now we have created the nginx-deployment.yaml file, which contains the YAML specification for deploying a simple NGINX web server with three replicas.
Let’s deploy the NGINX application to our AKS cluster using the following command:
kubectl apply -f nginx-deployment.yaml
This will be the output:
 Output showing our application as been deployed
Scale the Application
We can easily scale our deployed application based on demand.
To scale the NGINX deployment to five replicas, let’s use the following command:
kubectl scale deployment nginx-deployment --replicas=5
Test the application
Let’s now check the status of our deployment by using the following command:
kubectl get deployment nginx-deployment --watch
The above command will show the status of the deployment, including the number of desired replicas, the number of available replicas, and the current state of the deployment as shown below:
NAME                     READY   UP-TO-DATE   AVAILABLE   AGE
nginx-deployment          3/3     3            3           13m
Deployment as a service
To expose the deployment as a service and access it externally, we'll need to create a Kubernetes service manifest and apply it using kubectl apply -f service-manifest.yaml.
For example, we can create a service manifest file named nginx-service.yaml and add the following content:
apiVersion: v1
kind: Service
metadata:
  name: nginx-service
spec:
  selector:
    app: nginx
  ports:
    - protocol: TCP
      port: 80
      targetPort: 80
  type: LoadBalancer
Let’s save the file, and then apply it using the following command:
kubectl apply -f nginx-service.yaml
This will create a Kubernetes service named nginx-servicethat maps to the pods deployed by the nginx-deployment based on the app: nginx label selector. The service will be accessible externally through a LoadBalancer, and we can check its status using:
kubectl get service nginx-service --watch
We should be able to access our NGINX web server using the provided IP address.
NAME           TYPE       CLUSTER-IP    EXTERNAL-IP    PORT(S)        AGE
nginx-service LoadBalancer 10.0.61.228   20.87.237.92   80:32415/TCP   93s
Let’s visit the external IP:
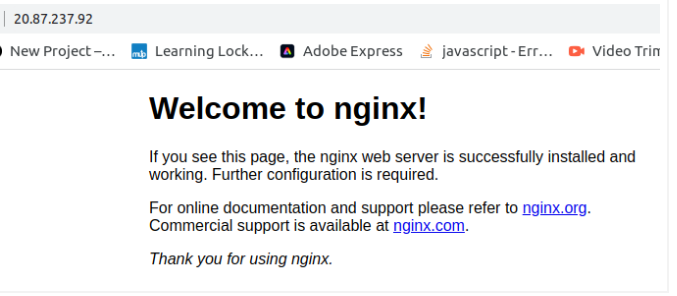 Output
Congratulations! We have successfully deployed a web application to our AKS cluster, exposed it to the internet, and managed its scaling effortlessly using Azure Kubernetes Service.
Monitor the Cluster
AKS integrates seamlessly with Azure Monitor, allowing us to monitor the performance and health of our Kubernetes cluster and applications.
In the Azure portal, navigate to your AKS cluster and click on "Monitoring." There, you can explore the various monitoring options, such as cluster health, performance, and diagnostics.
Conclusion
In this tutorial, we took advantage of Azure's free trial to learn the ins and outs of AKS. We also used the Azure site to establish our own AKS cluster, with the opportunity to adjust parameters as needed. Cloud Shell was also utilized without installing anything on the PC.
You can check out my personal blog here. Happy learning.