
In this guide, you'll learn how to effectively manage multiple Node versions for different projects using Node Version Manager (NVM). Whether you're developing React, Angular, Vue.js, or Node applications, you can always use NVM to set up the project and tailor it down to a specific Node version.
Prerequisites
Before we start, you need to have some basic command line knowledge. Nothing sophisticated, but make sure you've used it before reading this article otherwise you might feel a bit lost.
What Is NVM?
Node Version Manager (NVM) is a command-line utility that enables you to manage multiple installations of Node.js and easily switch between them.
Whether you need to work on projects requiring different Node.js versions or want to experiment with the latest releases without affecting your existing setups, NVM provides an easy way to do so.
Why Do You Need Multiple Node Version?
Nowadays, companies often build their application in the microservice architecture. This means that applications tend to be divided into many smaller services, where every service has its dedicated role.
It might sound like an over-engineering but there are a few benefits from this approach. In some cases, companies decide to build their applications using micro services to reach high availability and allow deployments without downtime. In the end, they can deploy one service at a time.
This approach also has downsides related to complexity and managing multiple projects. Imagine that your application is divided into many micro services, where the first one was built over 5 years ago.
The service is likely running on a legacy version of Node.js. In an ideal world, you would have to upgrade Node version to the newest version but it isn't always possible. In the end, the users' satisfaction comes first, and if they need new features, their needs must be fulfilled first.
Sometimes, a new feature might require you to introduce a new micro service. In this case, you should always try to use the newest Node version available. I will show you how to install multiple Node versions on your machine.
But I Am a Front End Developer
You'll still need NVM as a front end developer.
Nowadays, every JavaScript library and framework requires Node runtime and that's why you should manage Node versions for the frontend projects as well. The example project we will be using in this article is built in React 18 & Next.js.
Let's get started.
How to Install NVM on Linux and Mac
Installation on Linux and Mac is ultra simple.
Just open your terminal and run the following command:
curl -o- https://raw.githubusercontent.com/nvm-sh/nvm/v0.39.7/install.sh | bash
This script will configure NVM on your machine and you will be able to use immediately. Nothing else is required.
Just try to run nvm command in your terminal, and you should see the following output:
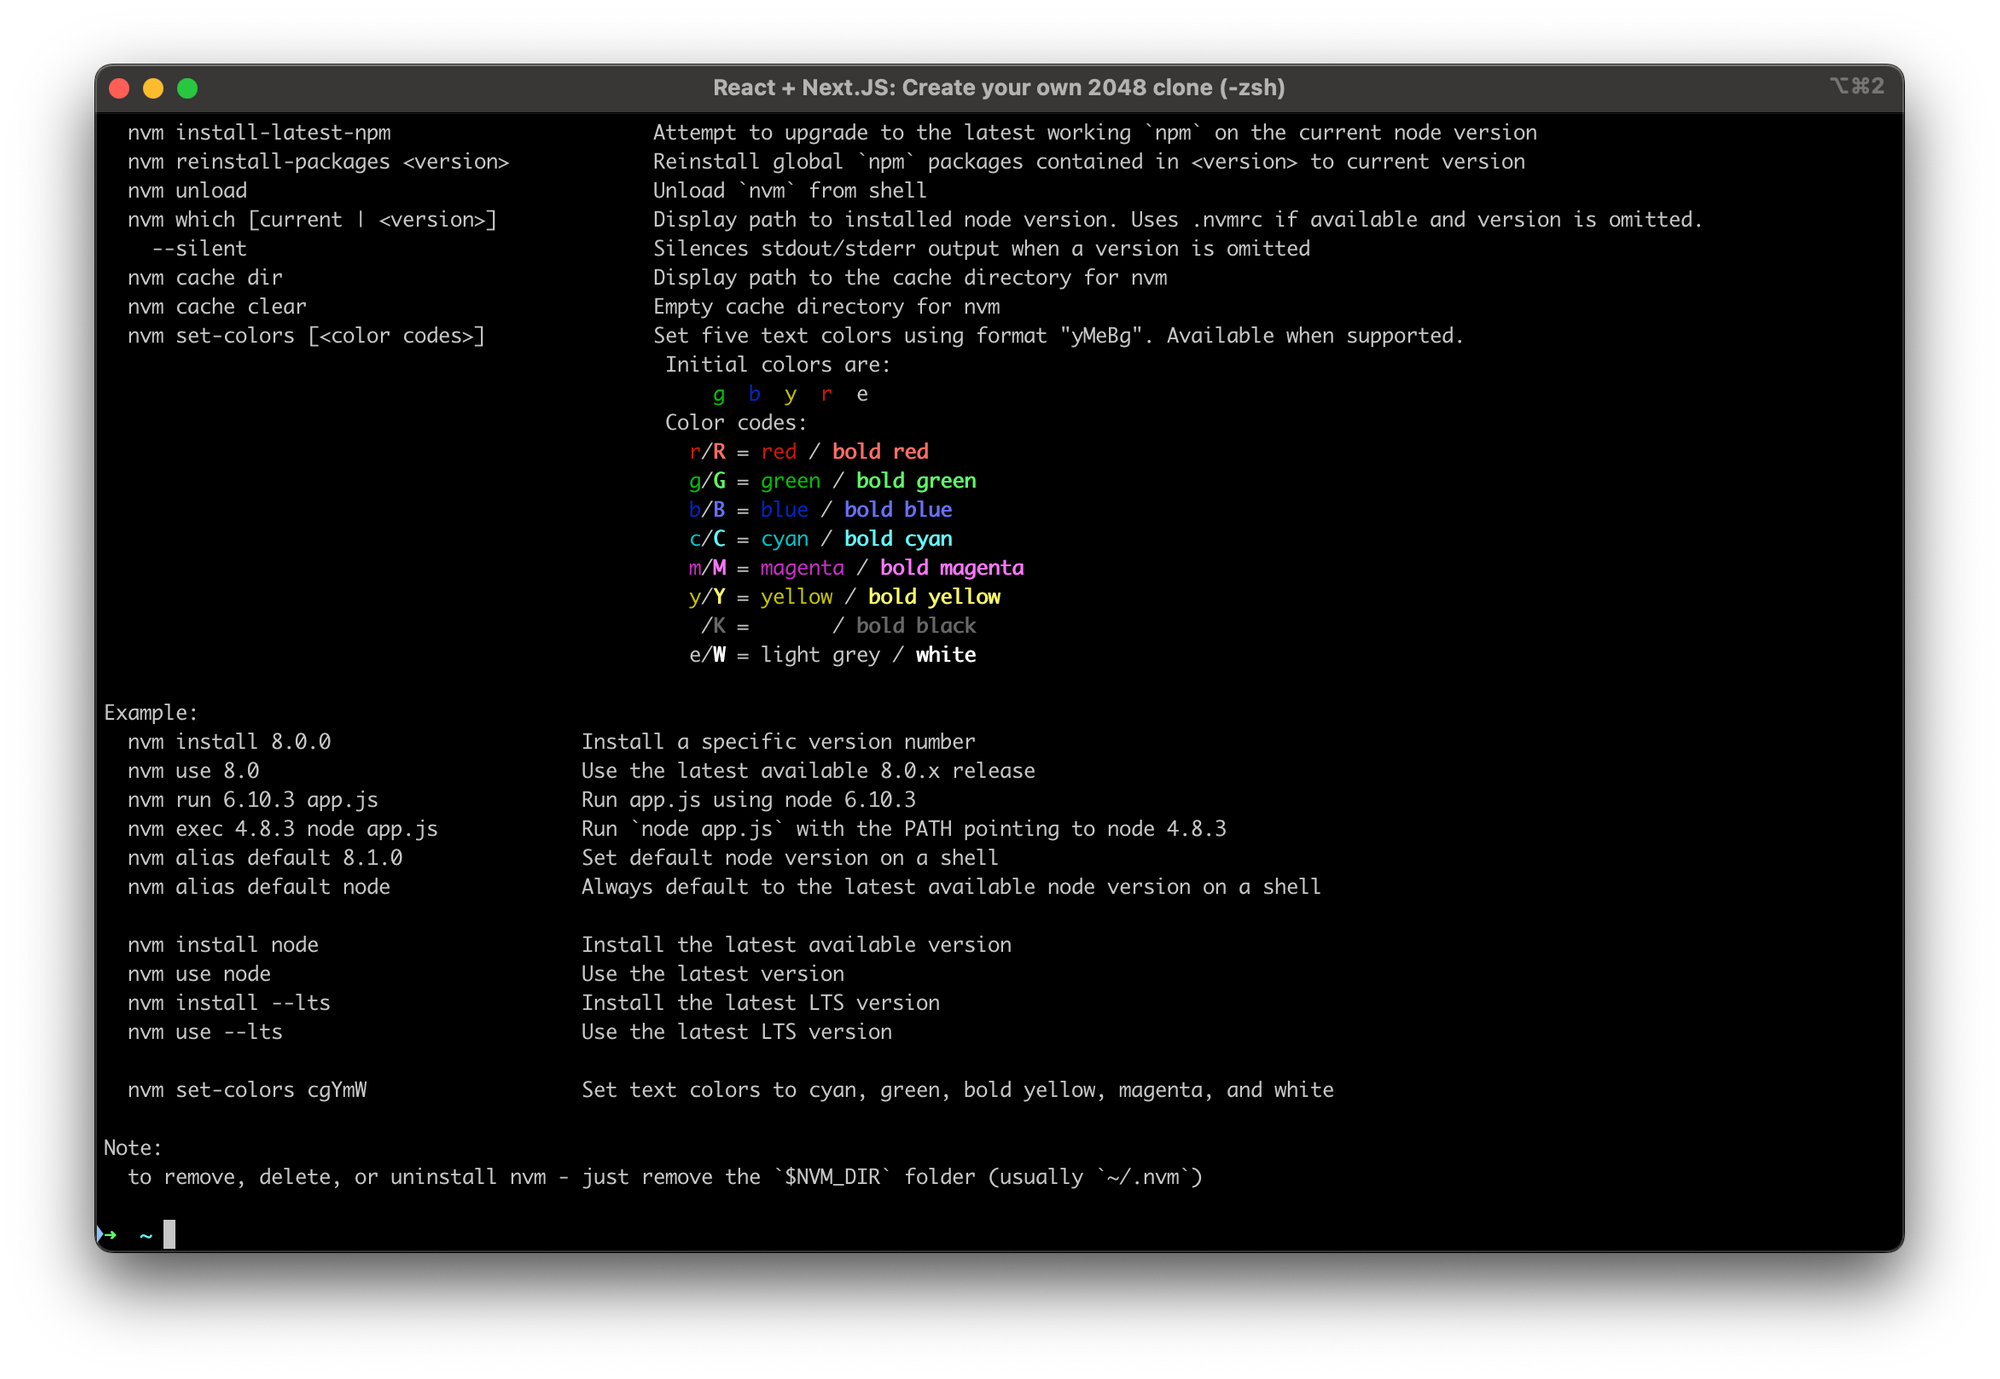 nvm command output
If you see something like nvm: command not found then you can run these commands:
source ~/.bashrc
source ~/.zshrc
It's expected that one of them fails. This commands will reload you bash / zsh profile and enable NVM in your command prompt.
How to Install NVM on Windows
You can easily install NVM on Windows – just open the nvm-windows repository on GitHub, scroll down to the Assets section, and download the nvm-setup.exe file.
 NVM Windows repository
Now the installer file will be downloaded. Once the download is completed, double-click on the nvm-setup.exe file and follow the instructions:
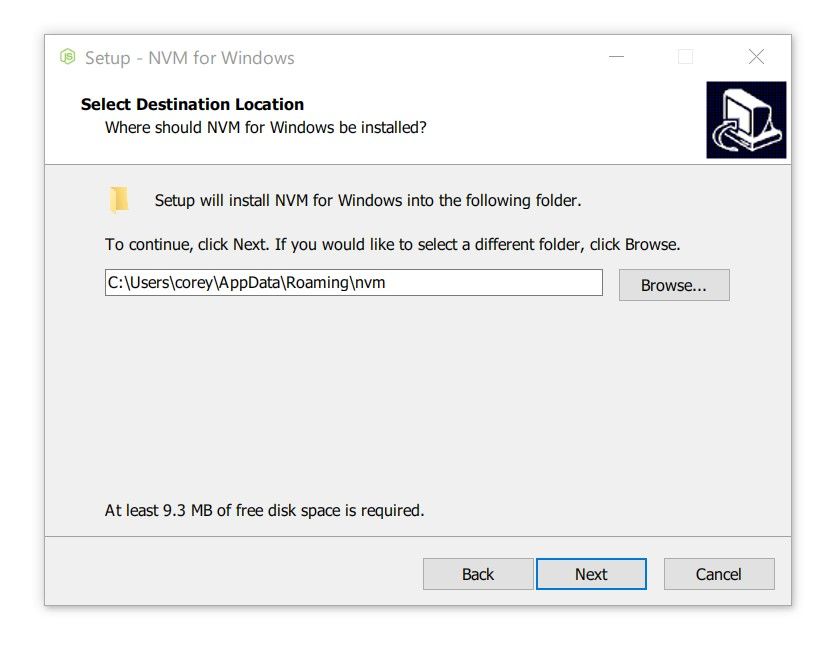 NVM for Windows Installer by Corey Butler
After the installation, open PowerShell and run nvm command, you should see the following output:
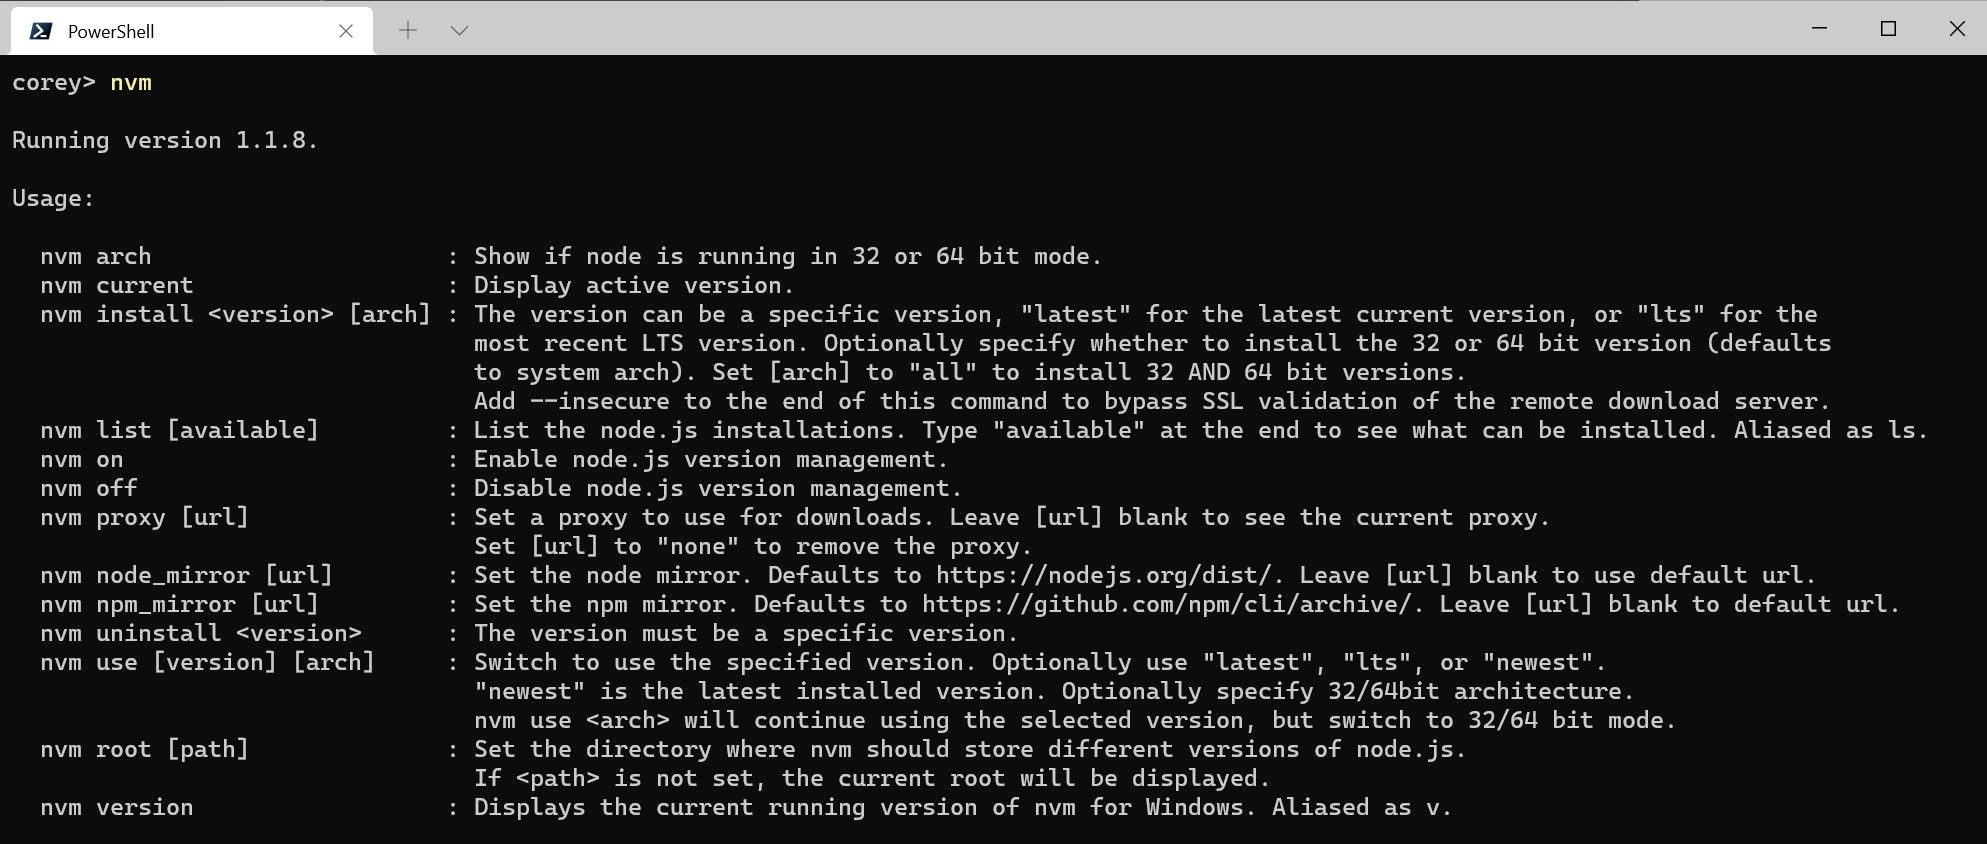 NVM in PowerShell by Corey Butler
If nvm command returns command not found you should restart your computer to refresh your user settings.
How to Set Node Version For Your Project
Now, we are reaching the root of this guide – setting dedicated Node version for your project.
First, create a .nvmrc file in your project root folder and specify the expected Node version.
It is 20.10.0 in my case:
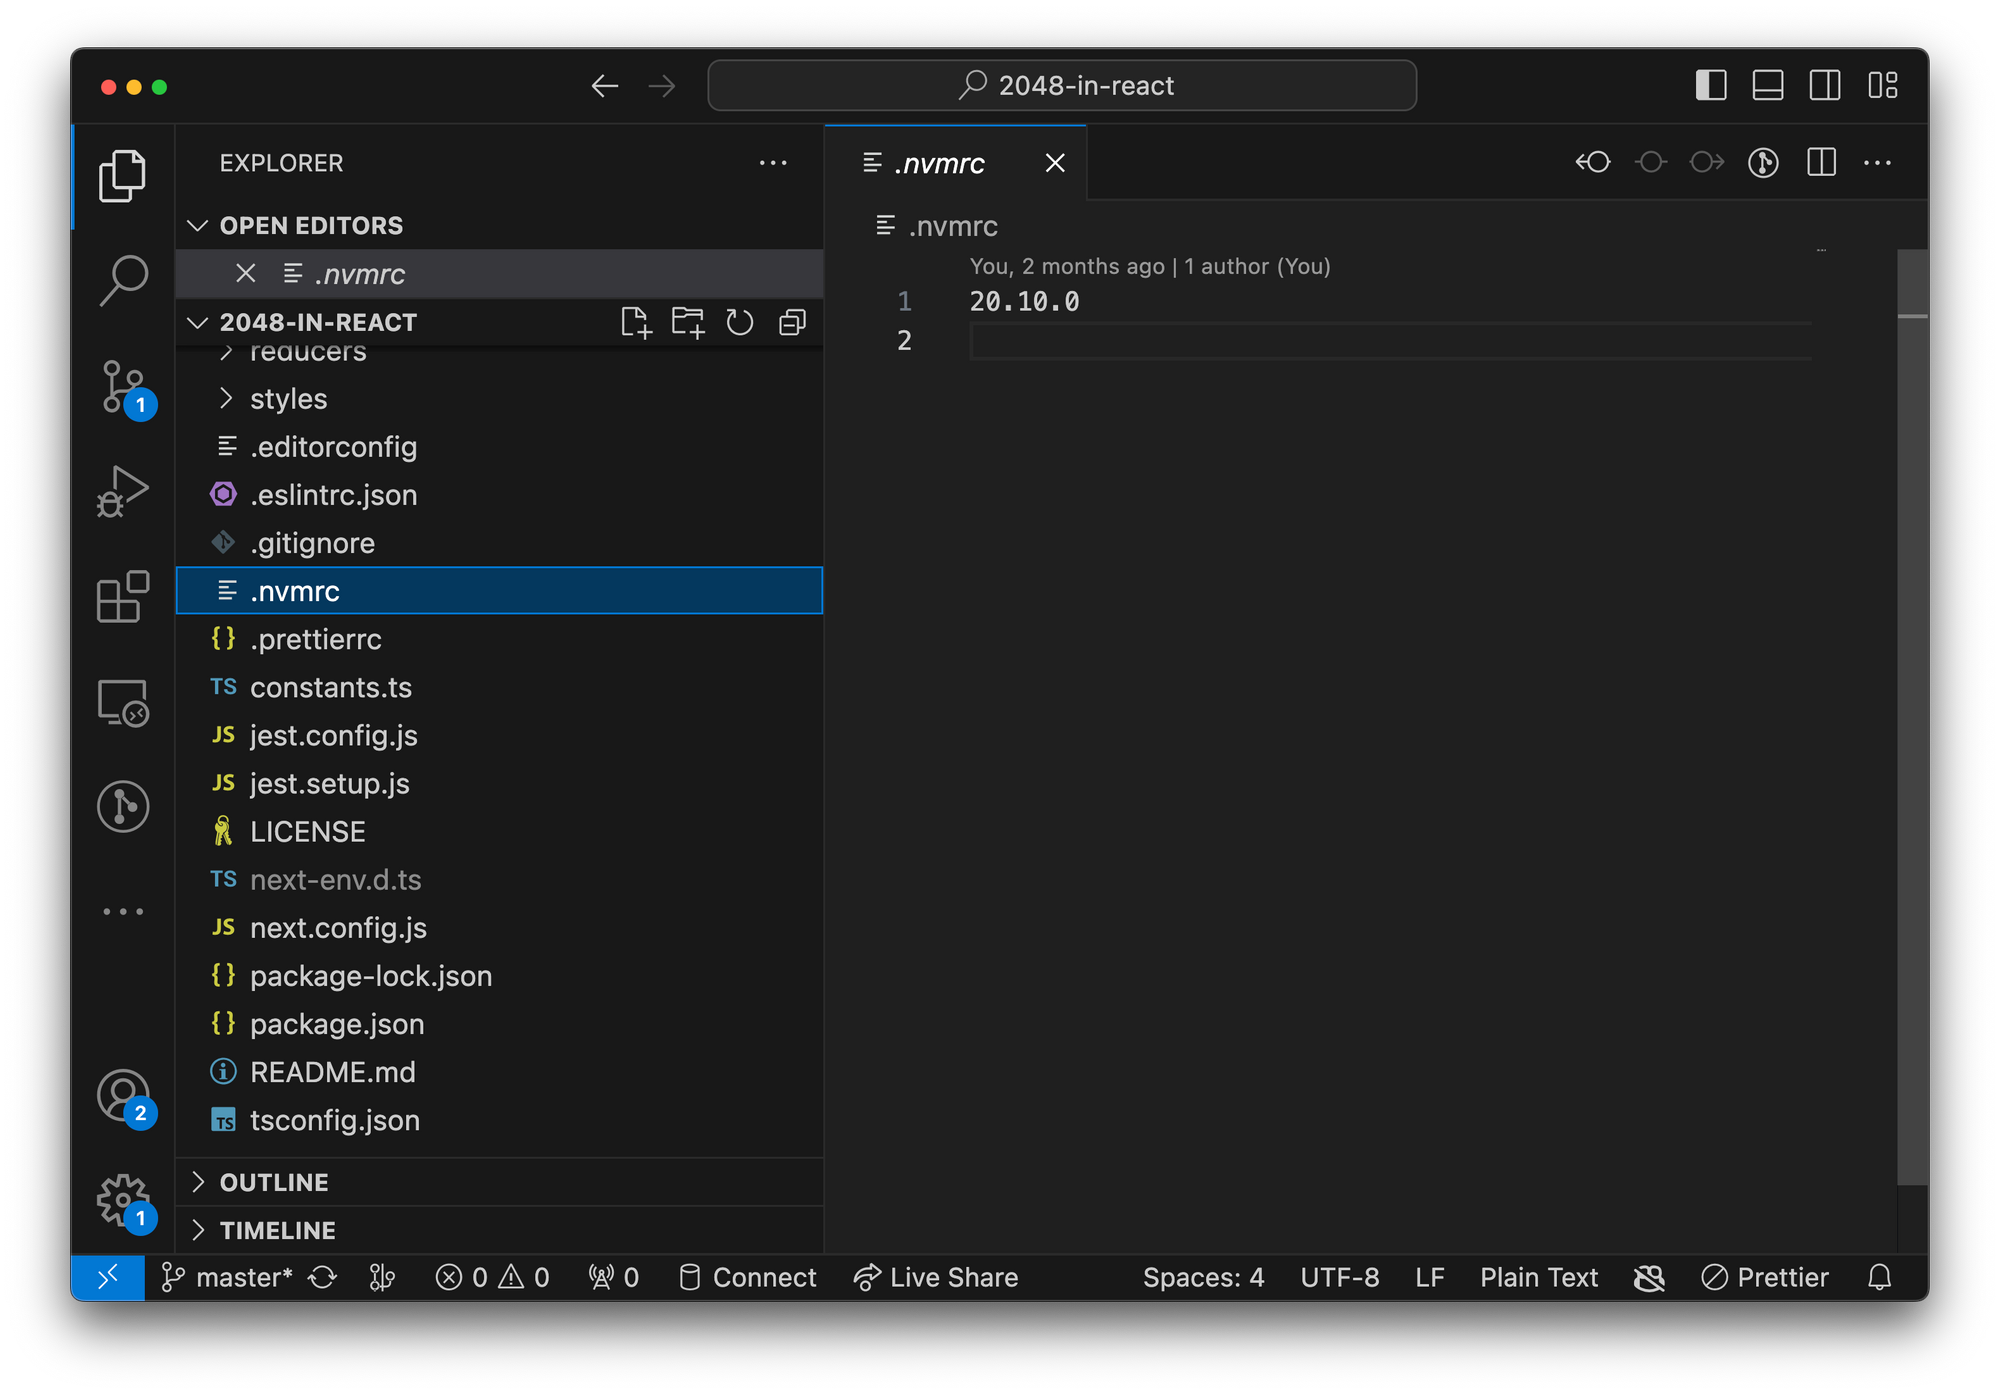 Node version in .nvmrc file
Now open your terminal and navigate to your project and run the nvm use command. NVM will automatically load the expected Node version by your project.
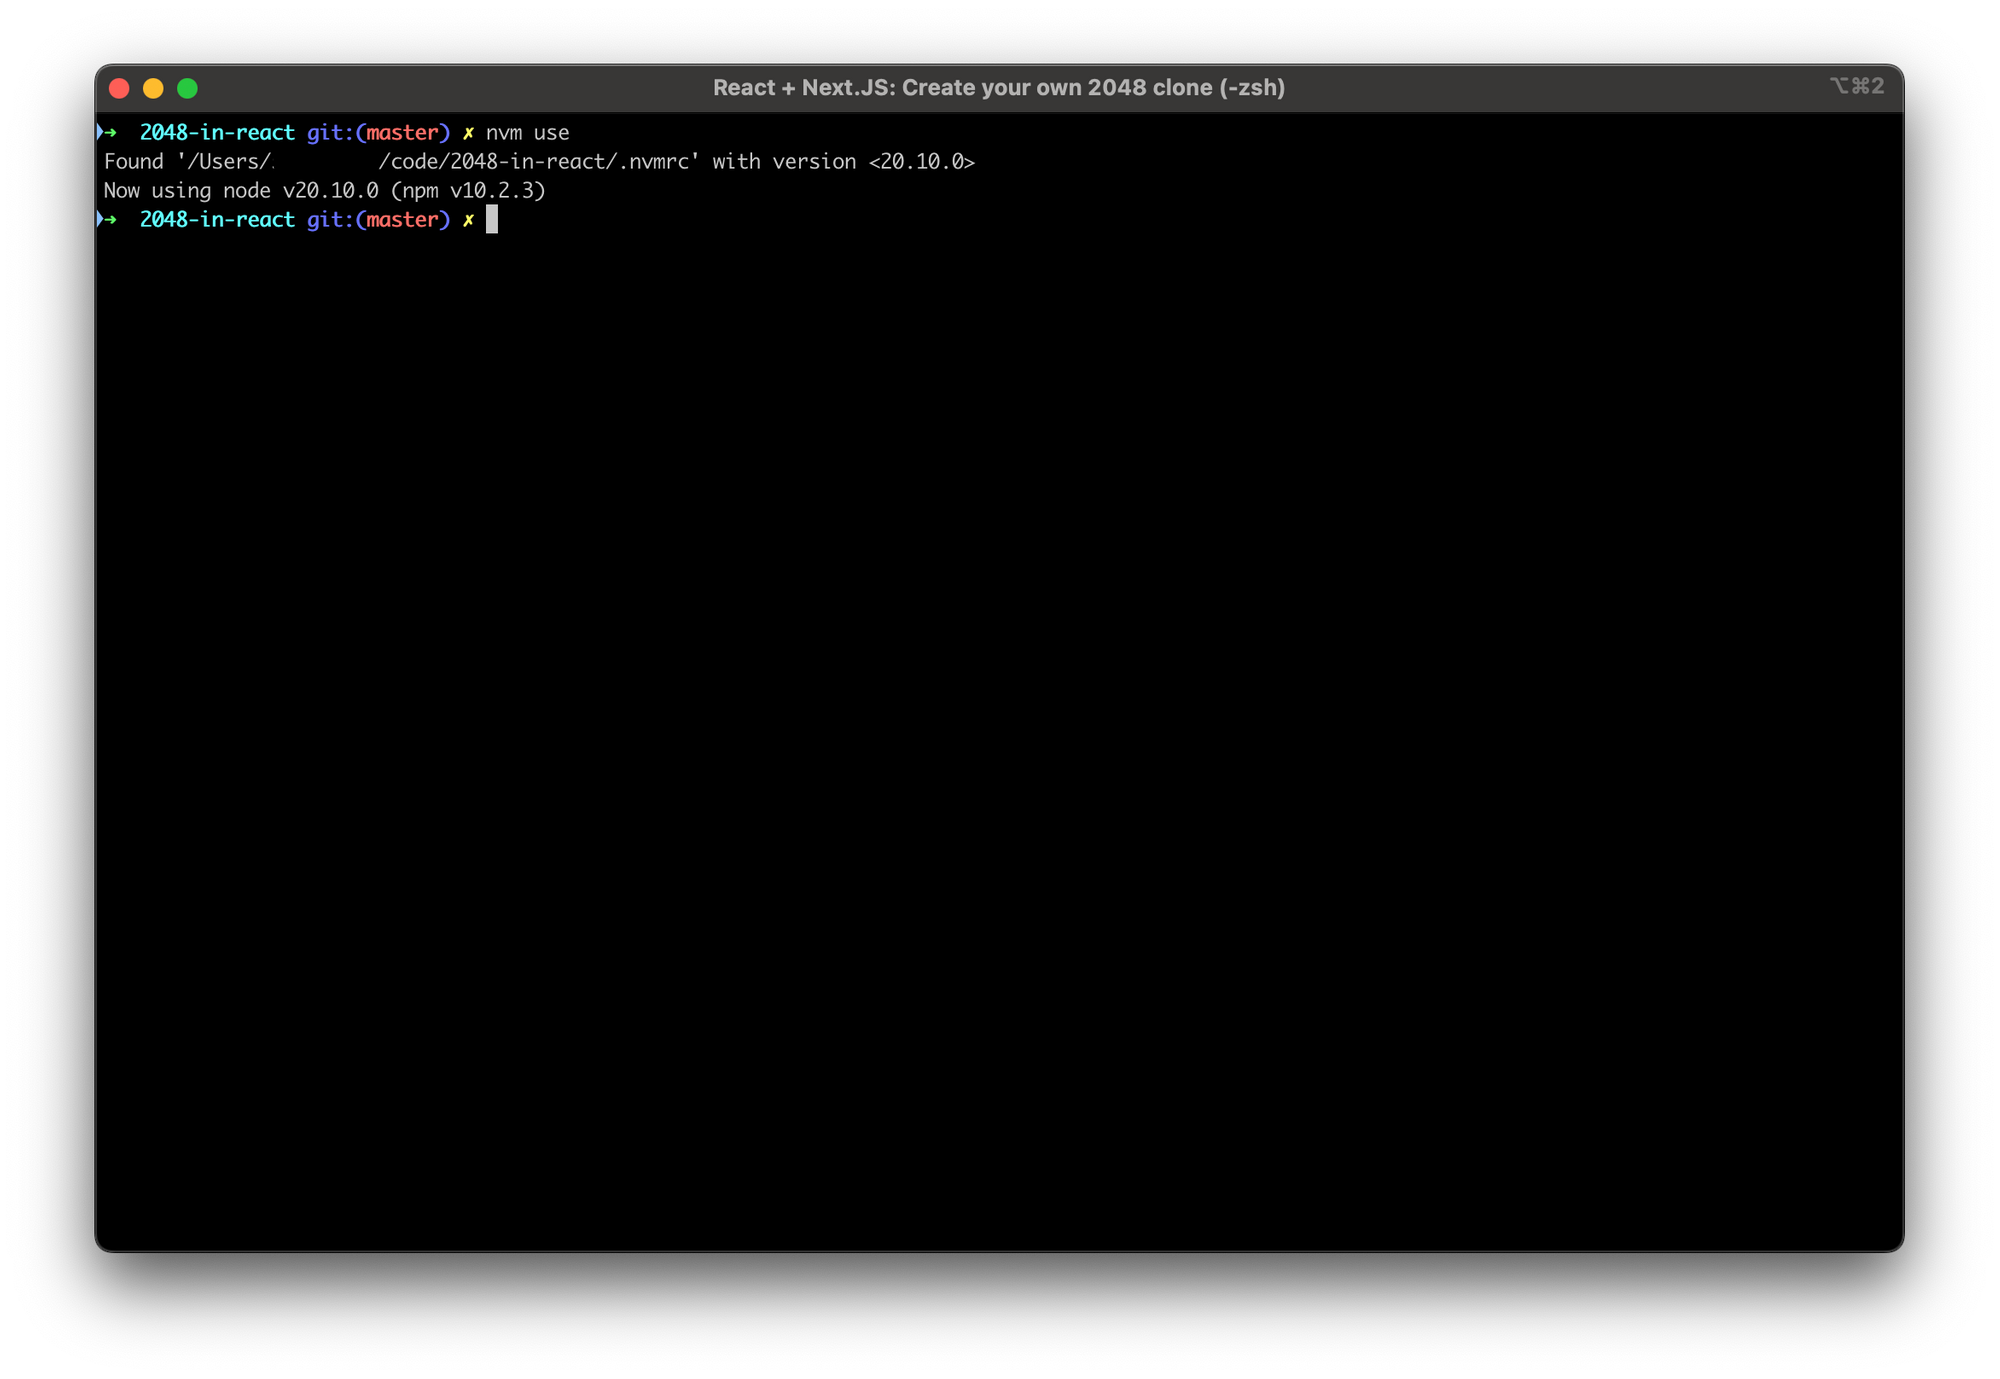 nvm use command
If you don't have the expected version on your machine, you'll be prompted to install it:
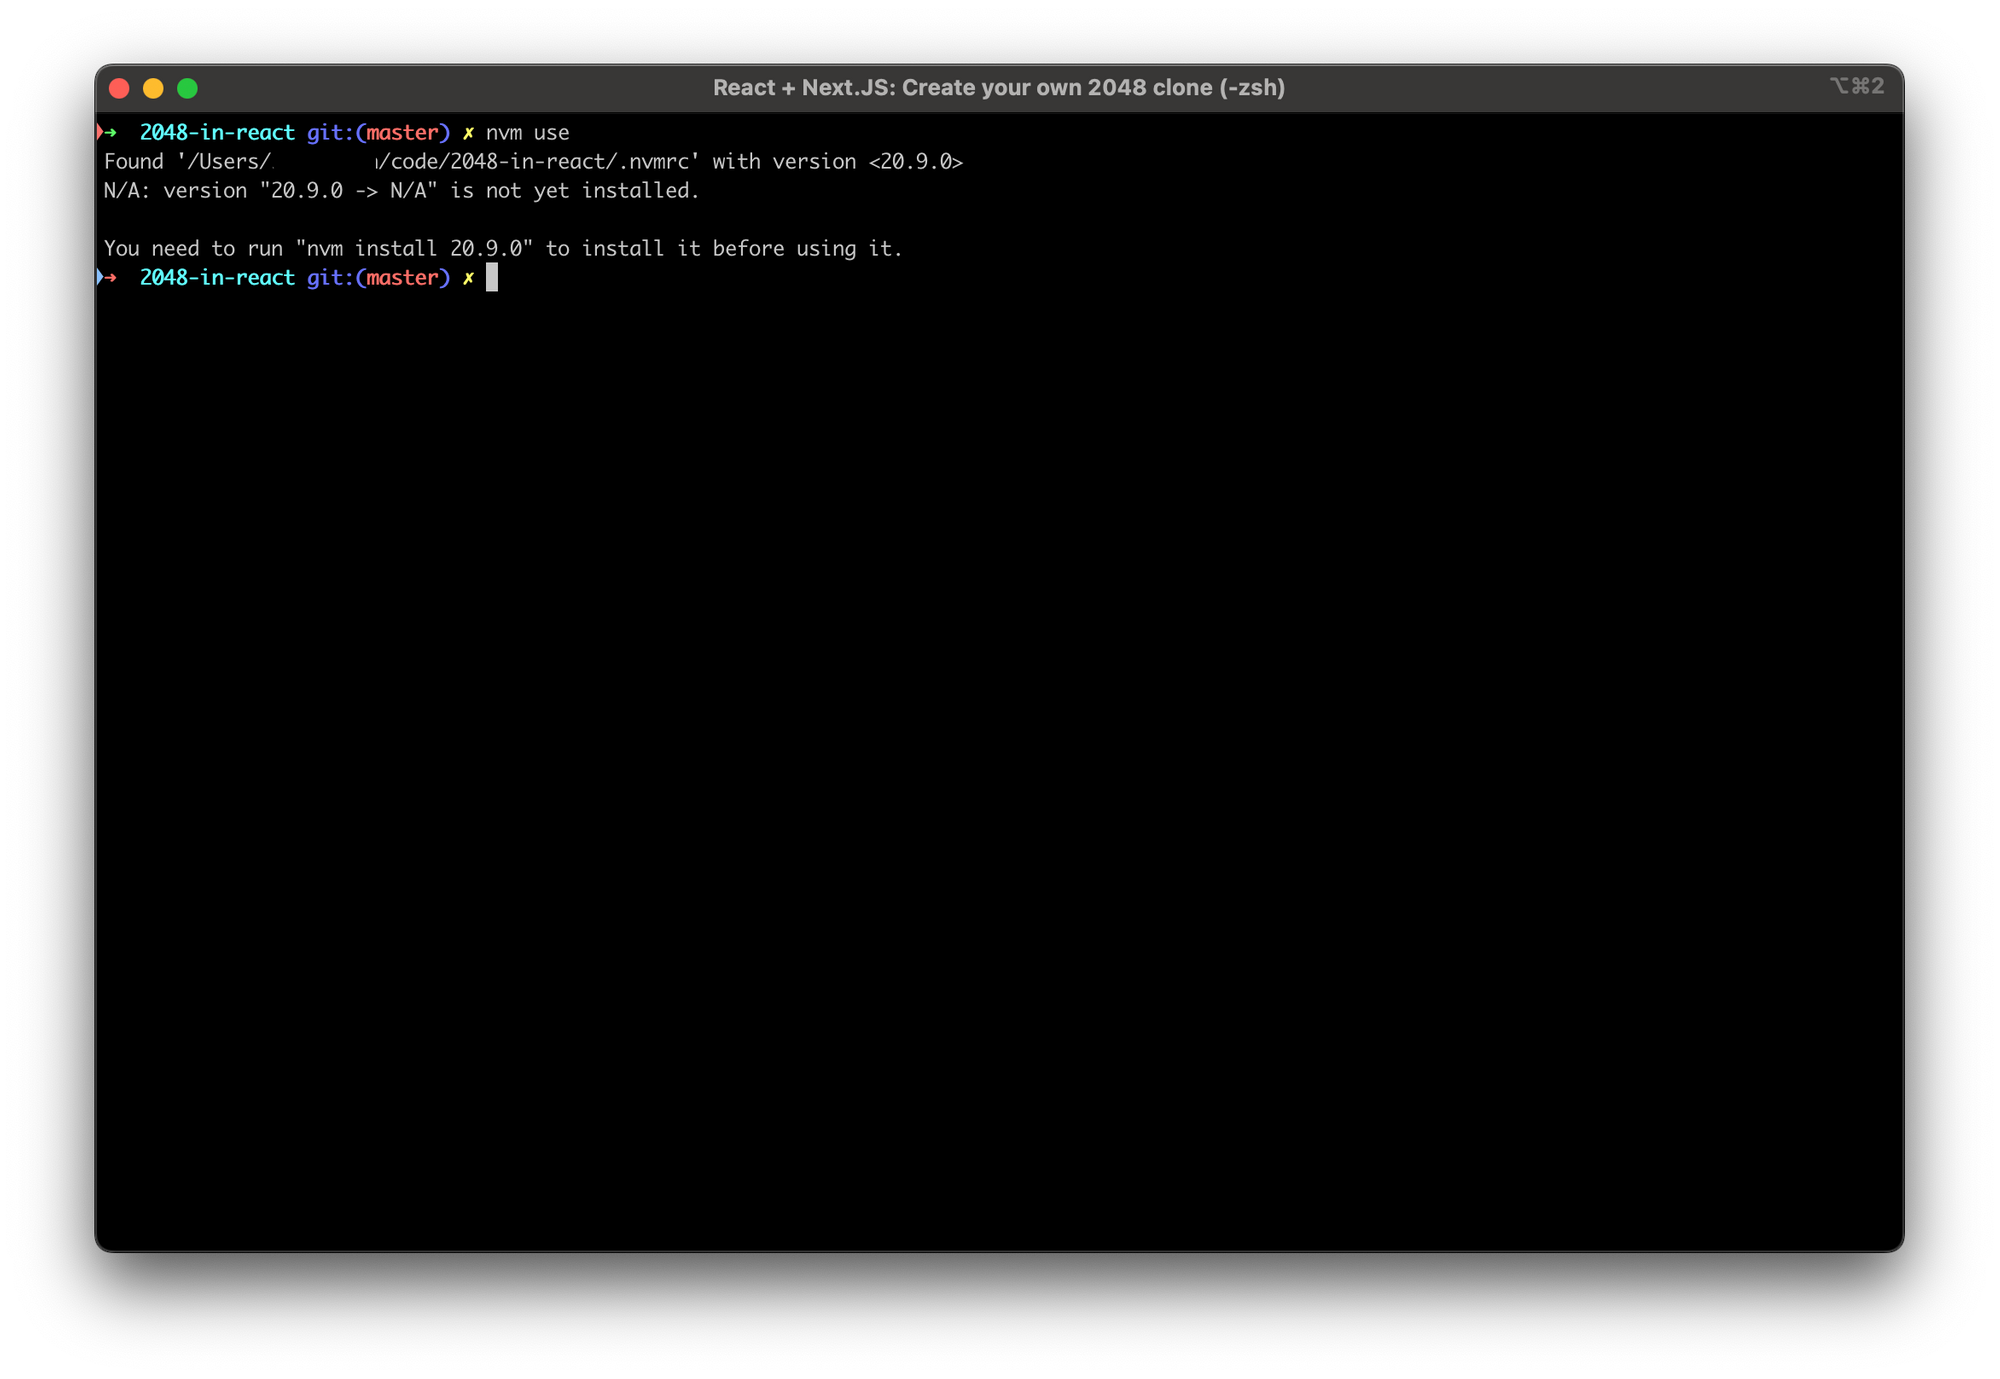 prompt to install node version
In this case, you need to install required Node version by running nvm install x.y.z. Replace x.y.z with the expected Node version. It was 20.10.0, in my case.
Conclusion
Working on multiple projects can be a hassle, especially when they require different Node versions. However, with NVM, changing the Node version is as quick as blinking an eye.
You should always use it, whether you're working alone on your personal project or with multiple colleagues on a large enterprise application.
If this article helped you, please share it on your social media or give me a shout-out on Twitter. Thank you!
Learn React 18 & Next.js
This article is a part of my React and Next.js course on Udemy. I will help you to get started with React and Next.js by creating a 2048 Game with awesome animations. I believe creating games makes learning more fun, and you'll have something cool to show your friends.
👇👇👇👇