

Puppeteer is a JavaScript library that allows you to script and interact with browser windows.
In this guide, we'll explore the basics of using Puppeteer with Node.js so you can start automating your tests.
Prerequisites
- Basic understanding of Node.js
- Basic understanding of Puppeteer
- A suitable IDE such as VS Code
What You'll Learn
- What is puppeteer?
- What is Node.js?
- How to set up your first test with Puppeteer
- How to run headless Chrome tests on a CI server
What is Puppeteer?
Puppeteer is a Node.js library developed by Google that lets you control headless Chrome through the DevTools Protocol.
It is a tool for automating testing in your application using headless Chrome or Chromebit devices, without requiring any browser extensions like Selenium Webdriver or PhantomJS.
Puppeteer lets you automate the testing of your web applications. With it, you can run tests in the browser and then see the results in real-time on your terminal.
Puppeteer uses the WebDriver protocol to connect with the browser and simulate user interaction with HTML elements or pages.
What is Node.js?
Node.js is an open-source JavaScript runtime built on Chrome's V8 engine that runs on Linux, Mac OS X, and Windows operating systems. It was first released in 2009 by Ryan Dahl who was one of its original contributors (with some help from Douglas Crockford).
Node.js has become immensely popular over the years as an essential part of many software development projects. It has extensive capabilities when it comes down to coding certain tasks like server-side applications or peer-to-peer networking protocols like Websockets.
How to Set Up Node.js and Puppeteer
First make a directory which you will be working with by right clicking on your preferred location and choosing new folder. You can also use the command mkdir dir-name in your terminal.
Then create an app.js file in your folder and add the node.js code as shown below:
const puppeteer = require('puppeteer');

(async () => {
    const browser = await puppeteer.launch();
    const page = await browser.newPage();
    await page.goto('https://www.freecodecamp.org/');

    await browser.close();
})();
The code above creates an instance of the browser which lets Puppeteer launch. Let's make sure we understand the code above:
browser.newPage()creates new pagepage.goto()provides the URL tobrowser.newPage()browser.close()closes the running process
Now open your terminal and cd into the folder. Then run npm init to create a package.json file.
Press enter then type yes if asked 'is this ok'.
Your output will look like this:
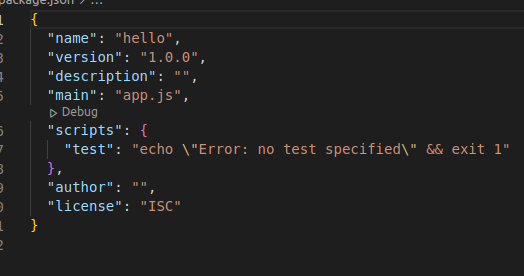 package.json
Follow the setup instructions to install the dependencies that we will use in our project.
How to Set Up Your First Test with Puppeteer
To use Puppeteer with Node.js, you'll need to install several packages and set up a few environment variables. This part will walk you through the steps you'll need to follow to use Puppeteer in your tests:
- Download and install Node.js
- Install Puppeteer
- Install Mocha
- Install Chai
- Install Selenium Webdriver
You only need to complete the last step if you want to run tests on an actual browser instead of just testing against web driver scripts.
If this is your case, then go ahead and install the selenium-web driver module from the npm package manager by typing npm i selenium-webdriver --save.
Installing the dependencies will generate node_modules and a package-lock.json file as shown below:
 package-lock.json
Screenshots are a great way to capture information in your browser. Well, Puppeteer has got you covered!
To take a screenshot of the webpage you navigated to, add the code snippet below:
await page.screenshot({path: 'example.png'});
To run the application:
cd puppeter-tut
cd src
Then type the command below in your terminal:
node app.js
You can also create a PDF by adding the following snippet in your code:
await page.pdf({ path: 'example.pdf' });
The above code snippet will give us the output shown below:

How to Test Your Setup
To test your setup, create a test folder in your code, then add example.test.js.
Your file should contain the following code:
const puppeteer = require('puppeteer')

describe("My first Setup Testing",()=>{
     it("Home landing page",async()=>{
    const browser = await puppeteer.launch({headless:false})
     });
});
Run your test using npm run test. After running your test you will get the following output:

Here's a GitHub link to the tutorial's source-code.
How to Use One Browser Instance with Puppeteer
As a web developer, you can use Puppeteer to run scripts in the headless Chrome browser and access the window object. This is useful when testing apps that need access to web resources like localStorage or cookies.
To use one browser instance with Puppeteer, you just need to pass { headless: false } to the launch method. It's asynchronous so it won't block the main thread and make your application unresponsive.
The best thing about this method is that, once it's launched, it should only be used once. Otherwise you will get an error when trying to access any webpage from Puppeteer again.
Here's an example:
let browser; (async() => { if(!browser) browser = await puppeteer.launch({headless: false});
Conclusion
So, there you have it! Now you know how to get started with Puppeteer and Node.js.
I hope this guide has helped you become more familiar with the tool and its capabilities. Feel free to get in touch with me if you have any questions or suggestions.