

If you're exploring the world of distributed systems and real-time data pipelines, you've probably come across the concept of message queues.
There are a number of tools in this field, but RabbitMQ and Apache Kafka are two of the most popular. While both are robust and reliable, they have unique features and use cases that make them distinct.
RabbitMQ is an open-source message broker. It's recognized for its flexibility and support for various messaging protocols. Apache Kafka is rapidly gaining popularity and is known for its ability to handle real-time data feeds with low latency.
In this tutorial, I'll focus on RabbitMQ, its core features, and how you can use it to effectively build scalable, loosely coupled applications.
Stay with me as we explore the world of RabbitMQ, its unique capabilities, and how it sets itself apart in the ever-evolving landscape of message queue technologies.
What is RabbitMQ?
RabbitMQ is an open-source message broker software (also called a message-oriented middleware) that implements the Advanced Message Queuing Protocol (AMQP). It provides a common platform for sending and receiving messages.
RabbitMQ supports multiple messaging protocols and can be deployed in distributed and federated configurations to meet high-scale, high-availability requirements.
When Should You Use RabbitMQ?
Consider an e-commerce website (like Amazon) where users can place orders that need to be processed.
The order processing system might involve several steps, such as inventory checks, payment processing, shipping, and so on, each of which can potentially take some time and are ideally handled asynchronously.
- Inventory Checks: When a user places an order, the system should check whether the ordered products are in stock. You can send a message to a queue that is consumed by a service responsible for checking inventory. This way, even if the inventory service is temporarily down or overloaded, the order messages won't be lost – they'll be processed as soon as the service is available.
- Payment Processing: The payment processing might be done by another microservice. Once the inventory check is completed, a message can be sent to a queue for the payment service. This decouples the payment processing from the inventory checking, allowing these operations to scale independently.
- Shipping: After payment confirmation, a message can be sent to another queue that's responsible for handling shipping. Again, this service might take some time, but because it's decoupled from the rest of the system, it won't slow down other operations.
- Notification system: After every successful order placement, payment, and shipment, notifications (Email or SMS) must be sent to the customer. This can be handled by separate services that listen to specific queues.
How to Install and Run RabbitMQ
In this example, I'll be showing you how to use Docker to run RabbitMQ. But if you prefer, you can install and run it manually on your system. The official documentation provides a detailed guide on how to do this.
I find Docker to be a convenient tool for running RabbitMQ because it simplifies the setup and management processes. If you're new to Docker, I recommend reading my previous tutorials related to Docker for a thorough understanding.
To get started, you'll need to pull the Docker image from Docker Hub.
docker pull rabbitmq
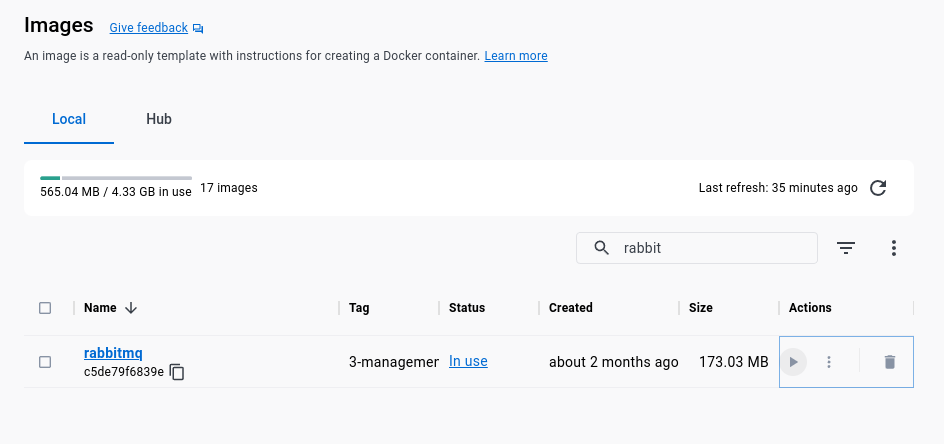 Official Docker image of RabbitMQ in Docker Desktop
Before running the image, you need to map the two port numbers (15672 and 5672).
- Port 5672: This is the default port for RabbitMQ when using AMQP (Advanced Message Queuing Protocol). Clients that connect with AMQP typically use this port. So, if you're using an AMQP client library to connect to RabbitMQ, it's likely to connect on port 5672.
- Port 15672: This is the default port for the RabbitMQ Management UI, when using the
rabbitmq_managementplugin. The Management UI is a web-based interface that allows you to monitor and control your RabbitMQ server.
I'm running RabbitMQ on the Docker by adding the above-mentioned ports. Refer the below screenshot for additional reference.
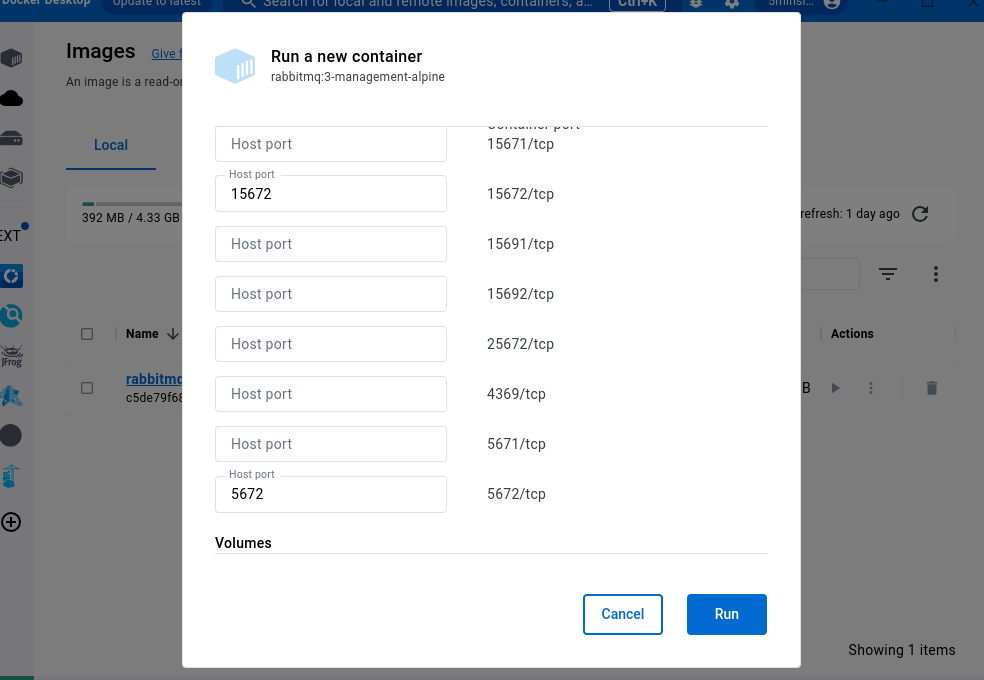 Port configuration to run the RabbitMQ Image.
Our RabbitMQ Server is up and running in Docker.
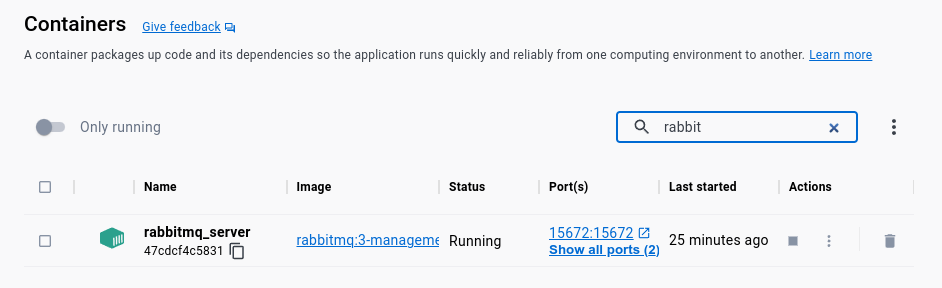 RabbitMQ Server container running in Docker
How to Implement a Message Queue in NodeJS
I'll using amqplib, which is a popular NodeJS library that provides an API for interacting with RabbitMQ. It supports all the features of RabbitMQ's AMQP 0-9-1 model, including things like confirm channels, exchanges, queues, bindings, and message properties.
I have been using the term AMQ Protocol in this tutorial and I feel like this is the right time to give a quick introduction to it.
What is AMQP?
AMQP stands for Advanced Message Queuing Protocol. It is an open-standard protocol for message-oriented middleware. The defining features of AMQP are message orientation, queuing, routing (including point-to-point and publish-and-subscribe), reliability, and security.
AMQP has the following components:
- Producer is an application that sends messages.
- Consumer is an application that receives messages.
- Queue is a buffer that stores the messages.
- Message is the information that is sent from the producer to a consumer.
- Exchange receives messages from producers and pushes them to queues depending on rules defined by the exchange type. The exchange type determines how messages are routed.
- Binding links the queue to the exchange.
The AMQP protocol enables standardized communication between different applications, making it a good choice for a messaging system in a microservices architecture. This protocol can ensure that a message is delivered not just to the messaging system, but all the way to the correct consumer.
You'll remember the example that I described at the beginning of this article about the high level implementation of message queues in a E-commerce site.
Let's go through the same but a bit deeper in the RabbitMQ context.
Order Placement
When a customer places an order on the e-commerce website, the order service produces a message to a RabbitMQ exchange. The message contains information about the product ID and the quantity ordered.
Inventory Update
An inventory service is set up as a consumer to receive messages from a queue bound to the exchange. Once it receives a message, it reduces the inventory for the specified product by the ordered quantity. If the inventory is insufficient, it can send a message back to the order service to indicate the problem.
Order Confirmation
Once the inventory service successfully updates the inventory, it'll send a message to the order service. The order service, set up as a consumer for this exchange, can then update the order status and notify the customer.
Benefits
Resilience
Let's assume your inventory service is down for some time. Then the messages in the RabbitMQ queue will stay there and won't be lost. Once the inventory service is back online, it'll continue processing the messages from where it left off.
Scalability
During high traffic periods, more instances of the inventory service can be launched, all consuming messages from the same queue. This enables load balancing and ensures that the system can handle the increased load.
Let's come back to our implementation. In this example, we'll send a message from sender to our receiver. On the receiver end, we print the message on the console.
How to Create the Sender (Producer)
This is the component or part of our application that creates and sends messages to the messaging queue.
The sender does not send messages directly to the consumer. Instead, it sends the messages to an exchange in RabbitMQ. The exchange then routes the messages to the appropriate queue based on certain criteria.
Here we're creating a queue called product_inventory. Alternatively, you can clone my repo from here.
We can send only byte arrays in the message, So I convert the message object to a string and send it to the queue. From the above code, you can understand that we're creating a channel and sending a message through it.
How to Create the Receiver (Consumer)
This is the component or part of our application that receives and processes the messages from the queue. A consumer can continuously poll the queue for new messages or be set up to automatically trigger when a new message is added to the queue.
Here we're listening for messages. Alternatively, you can clone my repo from here.
In the above code, we're listening for messages (consume) and print them on the console once we receive it.
In the context of our specific use case, the file containing the message sender (or producer) should typically be located in the root directory of our e-commerce site project. This is where we generate and send messages based on user actions, such as placing an order.
On the other hand, the file containing the message receiver (or consumer) should ideally be located in the inventory management service. This is because the inventory management service is responsible for processing these messages, such as updating the inventory when an order is placed.
Let's run our receiver service first:
yarn start
The initial output of the consumer service looks like this:
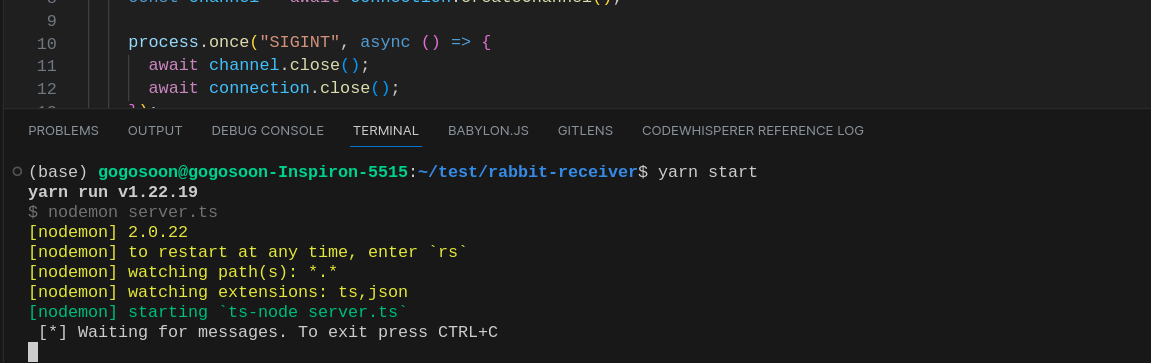 Initial output in the consumer service - Listening for messages
Once we run our sender, a message will be sent to the consumer. Run the same command yarn start on the sender repo.
Here's the output of it:
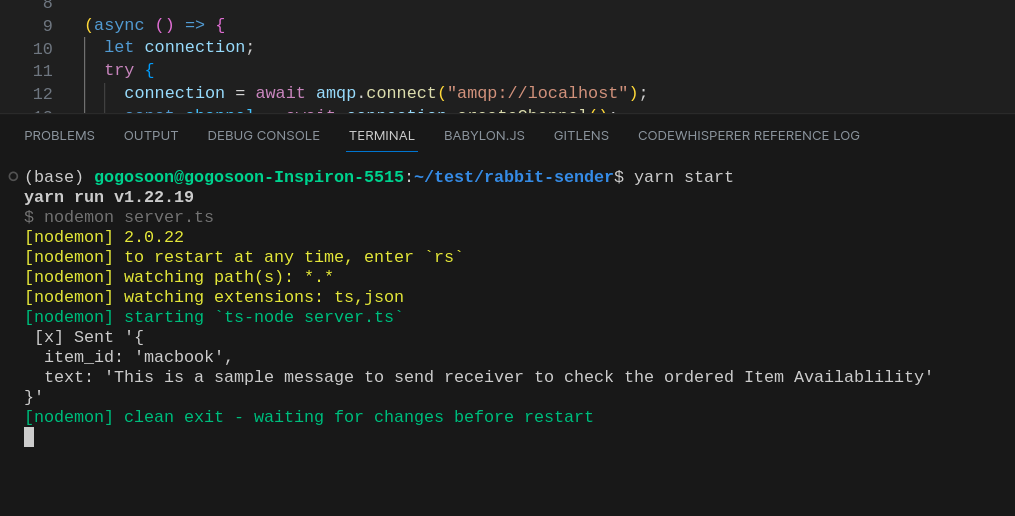 Sending a message from the producer to the consumer
Hurray! We received a message sent from the RabbitMQ producer in our consumer service.
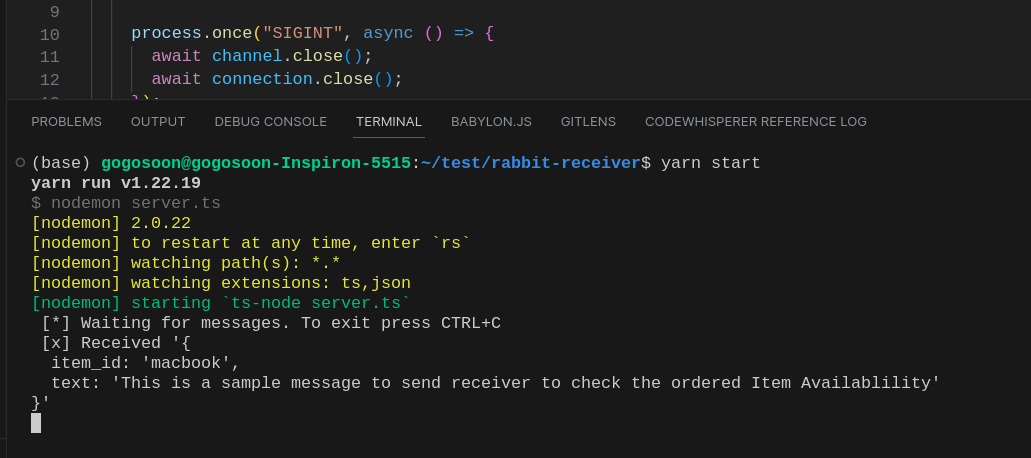 Received message from the RabbitMQ producer in our consumer service
Conclusion
In this article, we've explored the basics of RabbitMQ, a robust and efficient message broker, and demonstrated its application in a NodeJS environment.
Using a simple e-commerce scenario, we showcased how to set up a sender (producer) and a consumer to handle asynchronous messages between different components of our application. But in real-world applications, you will likely encounter more complex scenarios that require advanced integrations and the usage of RabbitMQ.
To navigate these complexities, it's crucial to have a solid understanding of RabbitMQ's underlying concepts and its AMQP protocol. As you delve deeper into RabbitMQ, you'll find it to be an incredibly versatile tool, capable of handling a wide range of messaging needs, and ultimately helping you build scalable, decoupled, and resilient applications.
Check out the source code of the project on GitHub: rabbit-sender, rabbit-receiver.
To learn more about RabbitMQ, subscribe to my email newsletter on my site (https://5minslearn.gogosoon.com) and follow me on social media.