
By Juliet Ofoegbu
One of the most common responsibilities for front-end developers is handling the data in their front-end applications. You’ll need to be able to retrieve data from an API, manipulate it, and then render it on the screen in a modern web application for user interactions.
Efficient communication between the front-end and back-end is crucial for creating seamless and responsive applications.
Now imagine a scenario where you're working with a backend developer on a project and you're waiting on the API endpoint in order to connect to your frontend. There's a great tool that front-end developers can use to create a mock or dummy API during the development phase. This tool is called a "JSON Server".
In this article, you’ll learn how to use JSON servers for data storage in your React applications. You'll learn about the features and benefits, and a practical implementation in a front-end project.
The application will enable users to view a list of users and their details. The user's data will be created using JSON Server in a JSON file in the frontend application.
What is JSON Server?
JSON is an acronym for JavaScript Object Notation. JSON Server is a lightweight and easy-to-use Node.js tool that simulates a RESTful API using a JSON file as the data source. With JSON Server, front-end developers can create mock APIs without the need to write complex server-side code, or when a backend API isn't ready yet.
This mock API sends requests to an endpoint that will be provided. It responds to HTTP requests, and this makes it ideal for rapid development for front-end developers. JSON Server also enables developers to perform CRUD operations and saves data in JSON files. JSON comes in a key-value pair and is written in this format:
{
  "name": "Jane",
  "age": 30,
  "gender": "Female"
}
The "name", "age", and "gender" are called properties and the "Jane", "30", and "female" are the values of each of the properties.
JSON data file can come in two formats — the array format and the object with nested objects format.
Array Format
[
  {
    "id": 1,
    "name": "John Doe",
    "age": 25
  },
  {
    "id": 2,
    "name": "Jane Smith",
    "age": 40
  }
]
Object with Nested Objects Format
{
  "users": {
    "1": {
      "name": "John Doe",
      "age": 25
    },
    "2": {
      "name": "Jane Smith",
      "age": 30
    }
  }
}
Features of JSON Server
Here are some of the features of JSON Server:
- It is easy and quick to set up. It is also user-friendly for front-end developers and newbie back-end developers.
- It supports common HTTP methods like the GET, POST, PUT, and DELETE methods, just like a real backend API server would.
- With JSON Server, you can perform Create, Read, Update, Delete (CRUD) operations on data to build an interactive application.
- JSON Server offers developers the ability to create custom routes to handle more complex scenarios.
Benefits of Using JSON Server
Here are some of the benefits of using JSON Server:
- JSON Server grants front-end developers the ability to quickly create functional API prototypes that can be tested and modified while waiting for the backend server to be ready.
- Front-end developers can use JSON Server to simulate different scenarios, and error cases during testing to enhance their application.
How to Set up JSON Server in an Application
You'll need Node.js and npm installed on your system, as they're both prerequisites for this setup.
Follow these steps to set up and use JSON Server in your frontend application:
Step #1 - Install JSON Server
To install JSON Server in your application, navigate to your project directory in your terminal or command prompt and type in this command: npm install -g json-server.
This will install the JSON server globally on your system. If you want to install it locally for just a particular project instead, use this command: npm i json-server.
Step #2 - Create a JSON File
Create a JSON file in your project directory that will act as the data source. This JSON file should have a .json file extension. What do I mean? Let's say you want your JSON file name to be 'db', it means you'll create a file called db.json.
Step #3 - Create Data
Define your data inside the JSON file. This JSON data can be an array of objects or an object with nested objects. Each object represents a data entity and should each have a unique id.
Step #4 - Start the Server
Start up the JSON Server by typing this command into your terminal: json-server --watch db.json. This will run on "https://localhost:3000" by default. You can change the port it's running on by specifying a different port number when starting the server using the --port flag.
For example, if you want your server to run on port 8000 instead of the default (3000), use this command while starting the server: json-server --watch db.json --port 8000. You can then view this in your browser on port 8000.
JSON Server will automatically generate RESTful endpoints based on the data you defined in your JSON file.
If you have a JSON file with an array of "users", this is the endpoint that will be automatically generated by the JSON Server:
- GET /users - This retrieves a list of all resource entities of users.
- GET /users/:id - This retrieves a specific user by its id.
- POST /users - This creates a new user.
- PUT /users/:id - This updates a user based on a specified id.
- DELETE /users/:id - This deletes a user based on the specified id.
This pattern makes it easy to interact with the mock API in a RESTful manner just like one would do with a real backend API.
How to Build a Simple Front-end Application Using JSON Server
To further understand how to use the JSON Server in a real project, let's take a look at an example. You'll build a simple React.js application that displays users' data from a JSON data file using the JSON server on the front end.
Ready? Let's get started. Here's a quick look at the app you'll build by the end of this article.
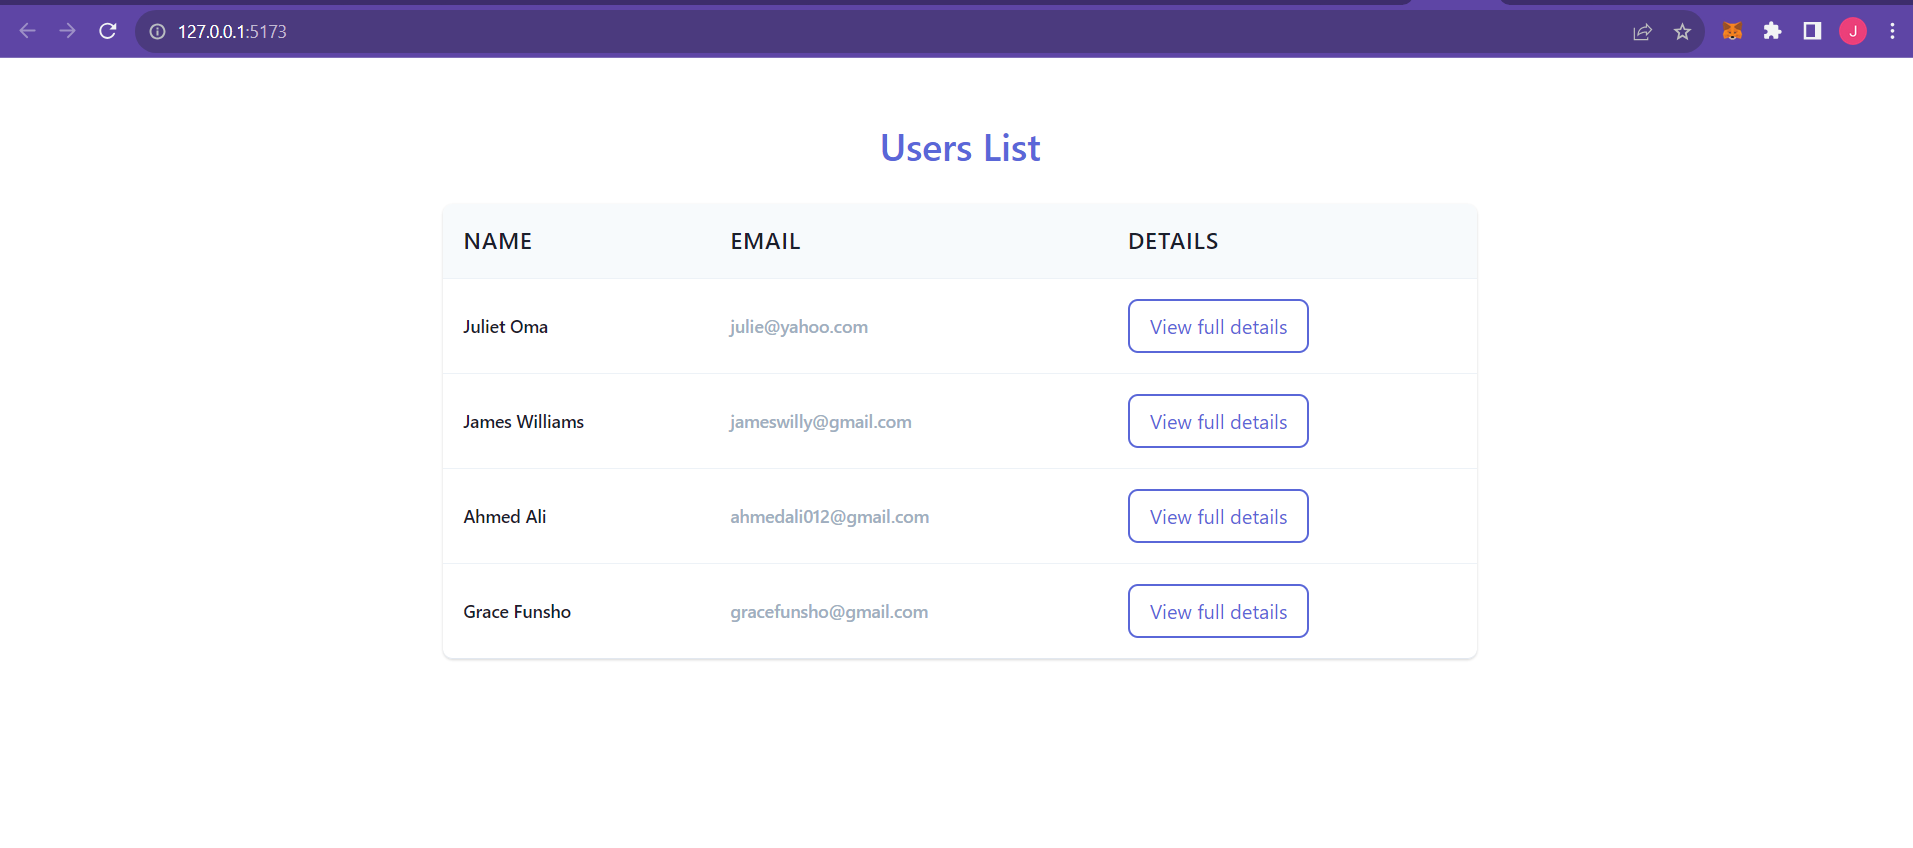 User data app home page
This app will have just two pages. The first page is displayed above, and it is a list of users with their names and email addresses. The other page will contain more details about each user based on the user id when the View full details button is clicked.
Installing Dependencies
Create a React app using CRA or Vite (recommended). I made use of the yarn package manager to create my app using this command: yarn create vite. Choose a project name and select "React" as the framework and "Typescript" as the variant. You can select JavaScript as your variant instead if you wish.
Once this is done, navigate to your project and use the yarn command to install the dependencies. After it has successfully installed the dependencies, run your development server with this command: yarn run dev. Open up your browser, paste the URL (http://127.0.0.1:5173/) and you'll see your app running on the browser.
Install the JSON server in your application by using this command: npm install -g json-server for global installation, or the npm i json-server command for local installation.
The last package to install is react-router to allow page navigation using this command: npm i react-router-dom.
Folder Structure
Now you want your application to have a neat folder structure so follow these guidelines:
First, create a data folder in the root directory of your project. Inside this data folder, you'll create a JSON file called db.json. This is where the JSON data will be defined.
Next, in the src directory, create a components folder. In this folder, you'll create 3 files: Home.tsx, UserDetails.tsx, and UserList.tsx. These are the components that will render the logic and UI of the application.
In the src directory, create a file named useFetch.tsx. This file will contain the code for the API implementation. The main component of your application — the App.tsx file — is where you'll handle pages routing.
Building the App
The first component you'll be modifying is the App.tsx file. Paste the following lines of code in the component:
import Home from './components/Home';
import UserDetails from './components/UserDetails';
import { BrowserRouter as Router, Routes, Route } from 'react-router-dom';

function App() {
  return (
    <Router>
      <Routes>
        <Route path="/" element={<Home />} />
        <Route path="/users/:id" element={<UserDetails />} />
      </Routes>
    </Router>
  )
}

export default App
This is just to provide routes for the application.
Go to your db.json file and define your JSON data inside. Paste these lines of code into the JSON file:
{
  "users": [
    {
      "id": 1,
      "name": "Juliet Oma",
      "email": "julie@yahoo.com",
      "number": "08100000000"
    },
    {
      "id": 2,
      "name": "James Williams",
      "email": "jameswilly@gmail.com",
      "number": "08111111111"
    },
    {
      "id": 3,
      "name": "Ahmed Ali",
      "email": "ahmedali012@gmail.com",
      "number": "09022222222"
    },
    {
      "id": 4,
      "name": "Grace Funsho",
      "email": "gracefunsho@gmail.com",
      "number": "09033333333"
    }
  ]
}
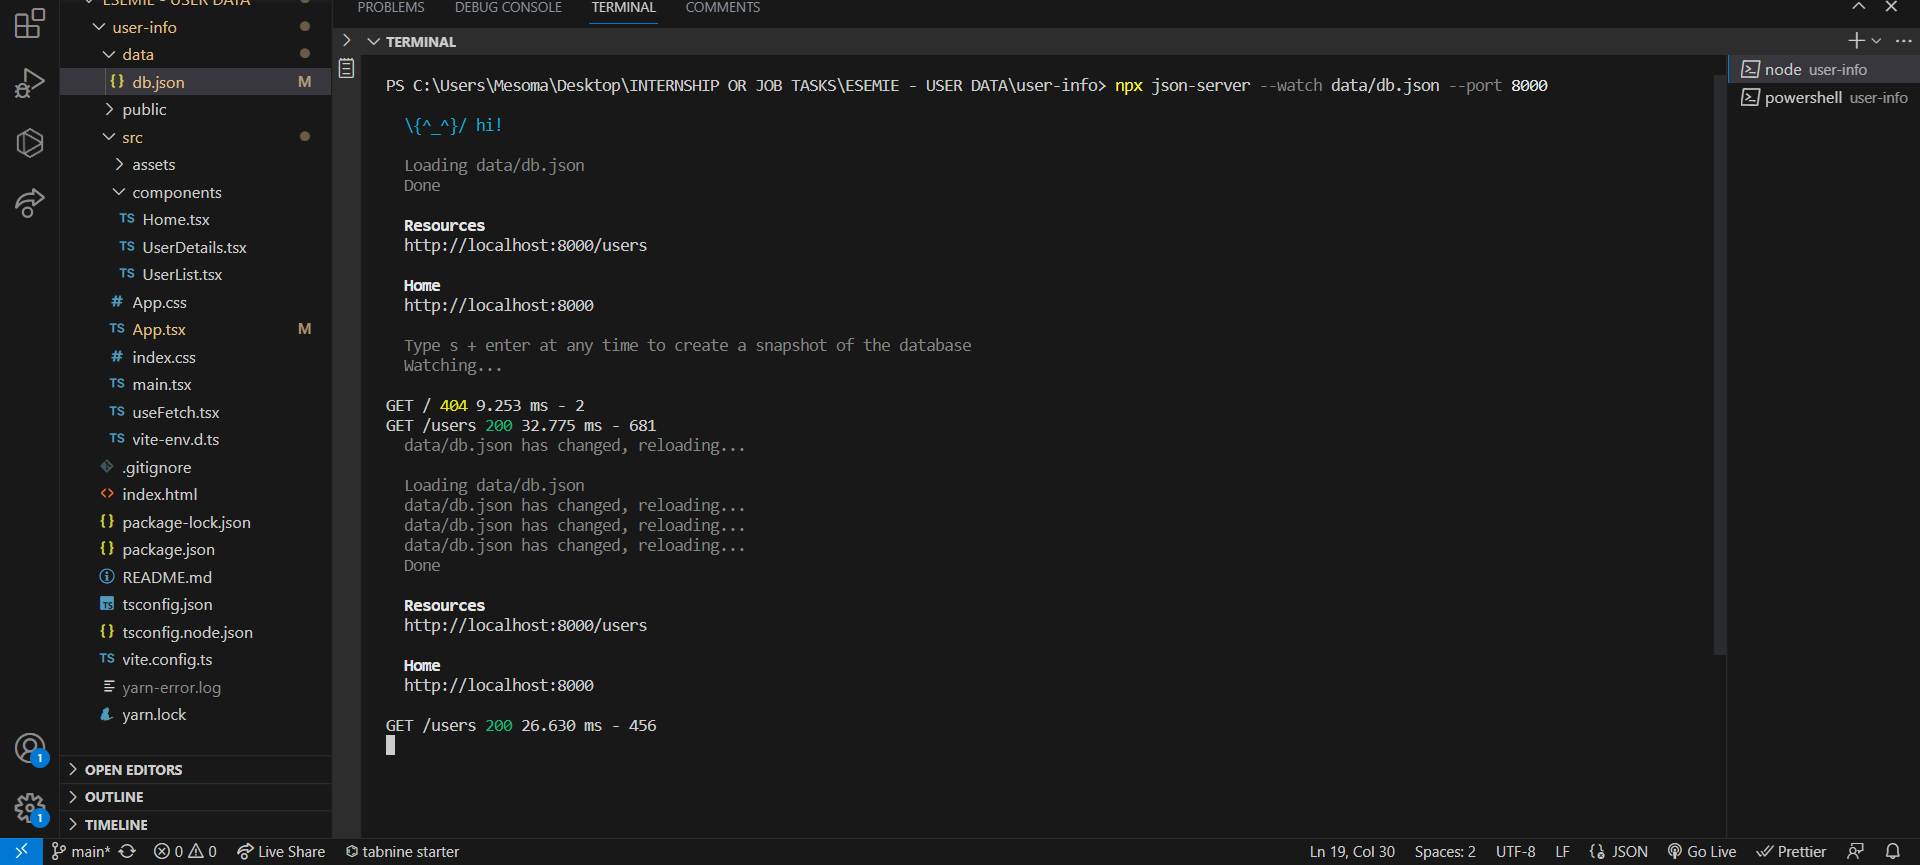
Start up your JSON server using this command: json-server --watch db.json --port 8000. This command will watch the db.json file and wrap the API endpoint running on port 8000. If you check your terminal, this is how it will look like:
If you copy out that Resources URL (http://localhost:8000/users) provided in the terminal and open it up on your browser, you'll see a JSON data displaying all the user data you defined in your db.json file.
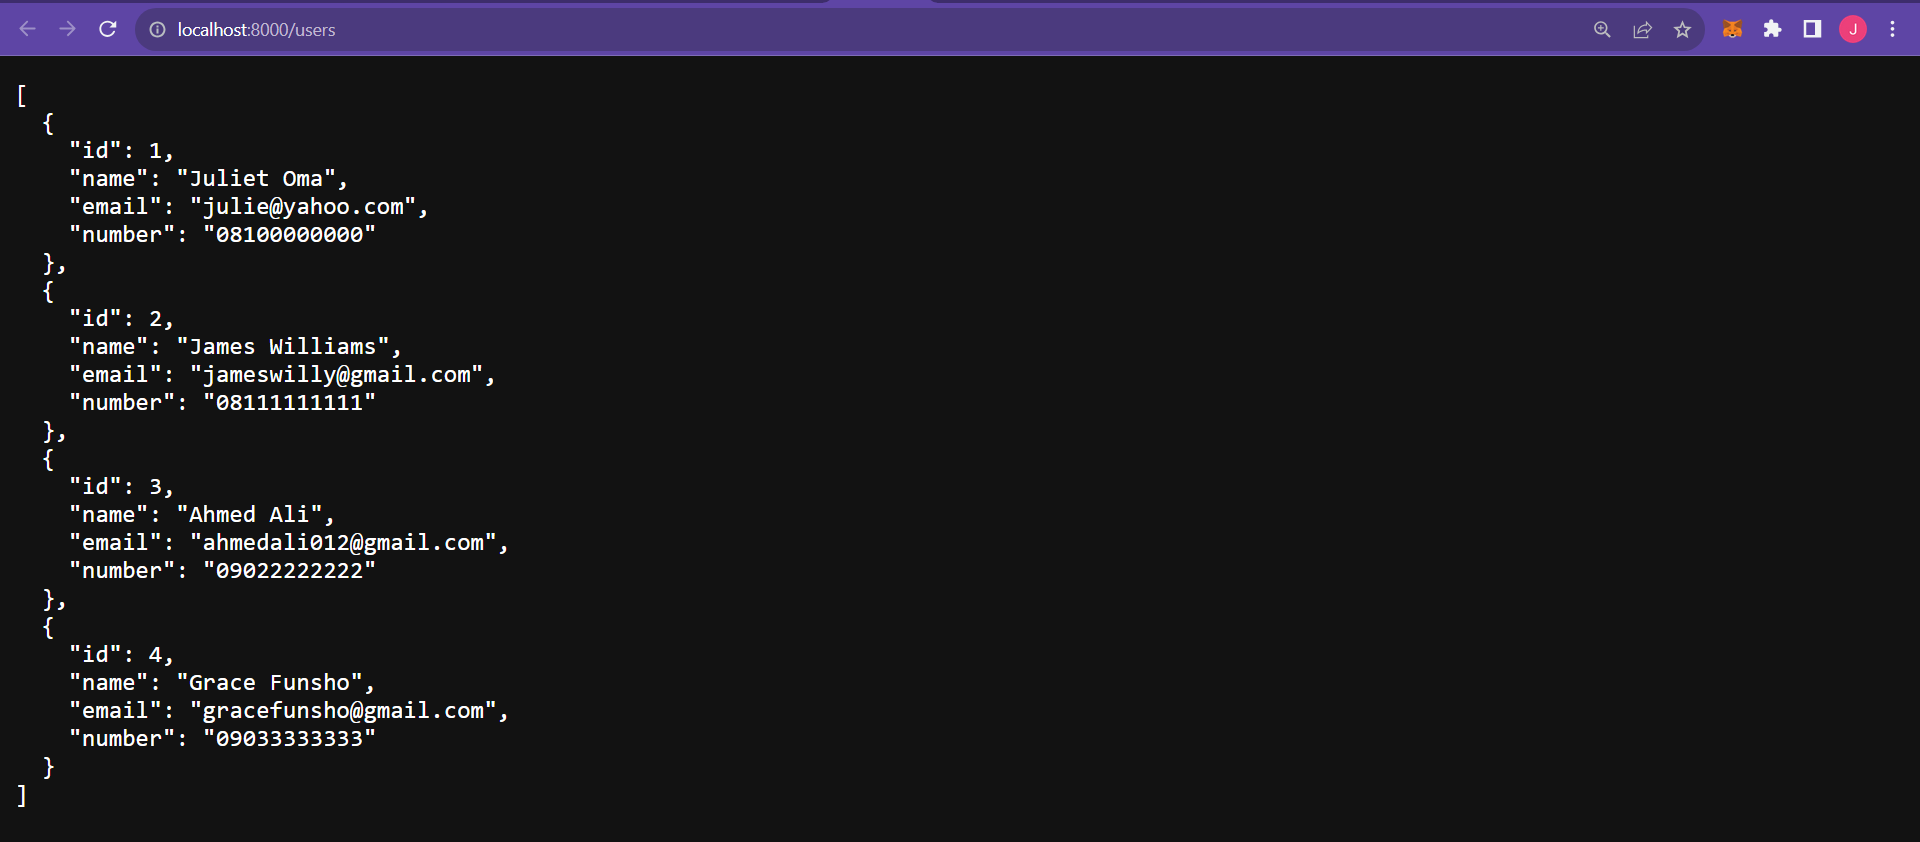 JSON file on the browser
Next, you'll need to write code to implement the API. This will be done in the useFetch.tsx file. This is basically a custom React Hook that you'll create to handle asynchronous data fetching from a given URL.
import { useState, useEffect } from 'react';

interface UseFetchResult {
    data: any | null;
    isPending: boolean;
    error: any | null;
}

const useFetch = (url: string): UseFetchResult => {
    const [data, setData] = useState<any | null>(null);
    const [isPending, setIsPending] = useState<boolean>(true);
    const [error, setError] = useState<any | null>(null);

    useEffect(() => {
        setTimeout(() => {
            fetch(url)
                .then(res => {
                    if (!res.ok) {
                        throw Error('Error fetching users data');
                    }
                    return res.json();
                })
                .then(data => {
                    setData(data);
                    setIsPending(false);
                    setError(null);
                })
                .catch(err => {
                    setIsPending(false);
                    setError(err.message);
                });
        }, 1000);
    }, [url]);

    return { data, isPending, error };
}

export default useFetch;
Let's breakdown the code above.
First, you'll need to import two hooks. The useState & useEffect hooks will be used to manage states and perform side effects in the custom hook.
While setting up my React project, I selected Typescript as a variant, so my app is using Typescript. If you did the same, you'll need to declare an interface named useFetchResult which specifies the structure of the result object that the useFetch hook will return. It contains three properties: data, isPending, and error.
The line of code const useFetch = (url: string): UseFetchResult => { ... } defines the useFetch custom hook. It takes a url parameter of type string and returns an object that complies with the UseFetchResult interface.
Next, you need to initialize three variables using the useState hook: data to store the fetched data, isPending to indicate whether the data fetching is in progress, and error state to store any error that occurs during the fetching process. Each has an initial value of null, true, and null respectively.
The useEffect hook is used to perform the data fetching when the URL changes. It runs after the initial render and whenever the URL dependency changes. Inside the useEffect function, a setTimeOut is defined to simulate a 1000 milliseconds (1 second) delay before initiating the data fetching.
The fetch method is used to make a GET request to the specified UR:. The response is checked using res.ok. If the response is not ok, it throws an error. The response is then converted to JSON using the res.json() method and stored in the data variable. The isPending state is set to false to indicate that the data fetching is complete, and the error state is set to null to clear previous error.
If any error occurs during the data fetching process, it is caught in the .catch block. isPending is set to false, and then the error state is updated with the error message.
The custom hook returns an object containing the data, isPending, and error states, allowing other components to access the fetched data and its state.
Creating the List of Users in Tabular form
This is basically the component that will display all user's info in a table. In your UserList.tsx file, paste these lines of code:
import React from 'react';
import { Link } from 'react-router-dom';

interface User {
    id: number;
    name: string;
    email: string;
    number: string;
}

interface UserListProps {
    users: User[];
    name: string;
}

const UserList: React.FC<UserListProps> = ({ users, name }) => {

    return (
        <>
            <section>
                    <section>
                        <h1>Users List</h1>
                    </section>
                    <section>
                        <table>
                            <thead>
                                <tr>
                                    <th>Name</th>
                                    <th>Email</th>
                                    <th>Details</th>
                                </tr>
                            </thead>
                            <tbody>
                                {users.map((user) => (
                                    <tr key={user.id}>
                                        <td>
                                          <p>{user.name}</p>
                                        </td>

                                        <td>
                                            <p>{user.email}</p>
                                        </td>

                                        <td>
                                            <Link to={`/users/${user.id}`}>
                                                <button>
                                                    View full details
                                                </button>
                                            </Link>
                                        </td>
                                    </tr>
                                ))}
                            </tbody>
                        </table>
                    </section>
            </section>
        </>
    );
};

export default UserList;
We started by importing Link from the react-router-dom library.
The next line of code is the interface User, a typescript interface that defines the structure of a user object which has four properties with each property having a specified data type.
Then comes the interface UserListProps which defines the structure of an object that has two properties — users and name. users is an array of objects that matches the User interface.
This component takes an object with the userListProps interface as an argument, destructures users from it, and uses it as props in the component.
Then you have the JSX element to display the list of users in tabular format. We mapped through the list using the map method to render each user in a row.
We then added a button to each row that triggers navigation to a specific route (/users/${user.id}). These routes will display the detailed information of the user whose id is provided as part of the URL.
We used a template literal to create a dynamic URL that includes the user.id value.
Your app is gradually taking shape.
Rendering User List on the Browser
The next component you'll be working on is the Home.tsx component. This is where the user list will be rendered on the screen and it's the home page of your application.
import UserList from './UserList';
import useFetch from '../useFetch';

const Home = (): JSX.Element => {
    const { data: users, isPending, error } = useFetch('http://localhost:8000/users')

    return (
        <section>
            {error && <p>{error}</p>}
            {isPending && <p>Loading users...</p>}
            {users && <UserList users={users} />}
        </section>
    );
};

export default Home;
We first imported the UserList component and the useFetch custom hook from where they're located in the project directory.
The const { data: users, isPending, error } = useFetch('http://localhost:8000/users') line of code calls the useFetch custom hook to fetch data from the specified URL (http://localhost:8000/users). The hook returns an object with three properties: data (the fetched users), isPending (loading status), and error (error message).
We rendered the UI with the JSX elements. If the error state has a value, it renders a paragraph element containing the error message. If the isPending state is true, it renders a paragraph element indicating that users are being loaded. If the users state has data (if it is not null), it renders the UserList component and passes the users data as a prop.
Displaying Users Full Details
We want to add an additional functionality where you can view more details about a particular user on another page by clicking on the View full details button that is in same row with their name.
To do that, paste these lines of code in the UserDetails.tsx component:
import { useParams } from 'react-router-dom';
import useFetch from '../useFetch';

const UserDetails = () => {
    const { id } = useParams();
    const { data: user, error, isPending } = useFetch("http://localhost:8000/users/" + id);

    return (
        <>
            <section>
                {isPending && <p>Loading user details...</p>}

                {error && <p>{error}</p>}

                {user && (
                    <>
                        <h1>User {user.id} details</h1>
                        <h2>{user.name}</h2>
                        <p>{user.email}</p>
                        <p>{user.number}</p>
                    </>
                )}
            </section>
        </>
    );
};

export default UserDetails;
From the code above, we imported the useParams hook from the react-router-dom library. This allows access to URL parameters. We also imported the useFetch custom hook.
The const { id } = useParams(); uses the useParams hook to extract the id parameter from the URL. This is typically used in routes like /users/:id.
The next line of code after that calls the useFetch custom hook to fetch data from a specific user's URL based on the extracted id parameter. The hook returns an object with data, error, and isPending properties.
Then comes the JSX elements to render the users' details. {isPending && <p>Loading user details...</p>} renders a paragraph indicating that the user details are being loaded if isPending is true.
{error && <p>{error}</p>} will render a paragraph displaying an error message, if there is an error. While {user && (...)} renders some user details like id, name, email, and number, if the data is available.
When you go back to your browser, you'll see a list of user data in a table. Each user row in the table will have a button that you can click to open up a page for you to see that specific user's full details.
Now this app won't look so good because it hasn't been styled. So go ahead and style your application using whatever styling technique you want to use. A quick view of my app after styling:
I know the UI isn't so great but the main focus here was the functionality. Notice how I added a loading animation that displays when the user list and details are waiting to be fetched? You can do this by using an animation library like Framer motion or creating a spinner component.
The loading animation or spinner will be rendered while data is waiting to be fetched instead of just a "Loading....' text. This can make your app look better and help you with user engagement.
You can modify the user data or add more details to your user list like users' job description, their title, and so on in your db.json file and you'll see the changes reflected in the list on the browser.
This app sends a request to the API endpoint provided when you start the JSON server and displays the response on the browser. That's basically how a real backend API server works. In this case, we were able to achieve our functionality using JSON Server.
It is important to know that this JSON mock API can't be used at the production stage. It can only be used in the development stage to create dummy JSON data. This means that you can't ship it to production as the JSON data file only runs on a localhost port.
Wrapping Up
That's all for this article. Here, you learned about the JSON server and how to use it in a front-end React.js application.
You can also perform full CRUD operations with this data from your JSON file on your front end. In this article, I only demonstrated the Read operation. This app can be further improved to enable people Create users, Update users, and Delete users from the JSON database.
If you're looking to learn how to implement a real third-party API in your React application, check out my previous article.