

Logs are records of the events happening with your application. Laravel, by default, writes log information into the laravel.log file that ships with a fresh Laravel installation. The file is housed within the storage > logs directory.
In this tutorial, you'll learn the following:
- Introduction to logging
- Understanding log configurations
- Channel drivers for log files
- Formatting log messages
 Log file image
Introduction to Logging
Laravel provides a log of what's happening in your application. The log service is built upon the Monolog open-source library.
The logging service is robust as it allows you to write log messages to files and send critical ones to teams on Slack (if configured), Socket, databases, and other web services.
The channel you wish to write your log information on is defined by the team, as there are a couple of channels supported by Laravel. Based on the severity of log information, the write information can also be done in multiple channels. You'll see how you can do this in the configuration section.
How to Configure Your Laravel Logs
Laravel log configuration is located in the config > logging.php file. Consider using a couple of log channels based on your preferences, such as stack, single, daily, syslogs, slack, papertail, and so on.
The channels are where you send log information. The default channel for every project is usually stack. You can change it by defining the LOG_CHANNEL in the env or specifying the channel name as the second parameter in the same logging.php file.
'default' => env('LOG_CHANNEL', 'stack')
The stack channel has a driver name set to stack. Channels set to single means you get all logs in a single log file. You can also use daily which means a new log is auto-generated every day. It is an array.
You can also use multiple channels, 'channels' => ['daily', 'slack'], and ignore_exception is a boolean (true, false).
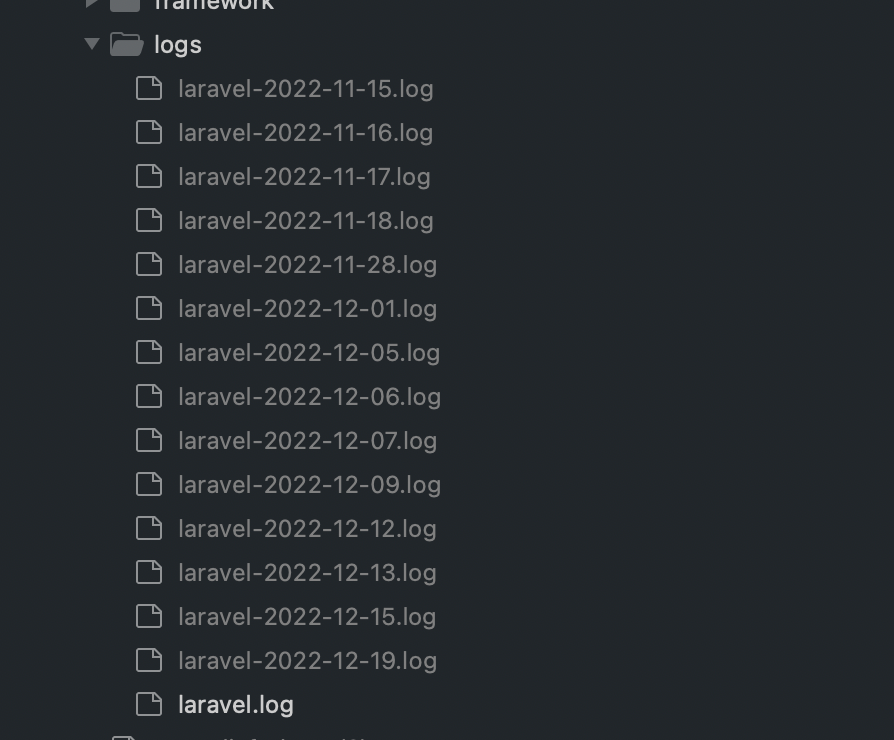
I highly recommend using the daily channel, as this helps you keep track of daily logs by auto-generating a new log file every day (laravel-2023-01-15.log, laravel-2023-01-16.log and so on) without having to clear logs for the previous day.
The daily options keep you updated each day with log info in your log files for as long as you want. It also enables you to monitor frequent errors within the application if they occur on different days.
 'channels' => [
    'stack' => [
        'driver' => 'stack',
        'channels' => ['daily'],
        'ignore_exceptions' => false,
        ],
....],
Channel Drivers for Log Files
Here’s the list of the channel drivers Laravel offers:
Single: The Single driver ensures log information is sent to a single file. The driver sends logs to storage > logs > laravel.log by default.daily: The driver ensures that logs are written daily. The beauty about this is that every day new log file is auto-generated. Compared to the Single driver, there's no need to clear up the previous day's log information frequently. But the drawback to this channel is that you might have several log files. Every week/month, you should clear up all unused files.
Within the logs directory, you often get logs like this:
 Daily log file
slack: The slack driver ensures that all logs are sent to Slack. Slack needs to be configured to get user credentials (username, webhook) to help with error logging. This is super helpful as it allows your team to stay updated about what's happening right in a Slack channel.
syslog: Logs using this driver will send log reports to the system log. The location of this log driver is dependent on the server operating system.errorlog: Logs set up to use this driver will send log reports to the error logs file setup on the web server operating system.monolog: This driver provides support for all Monolog handlers.custom: This driver helps create a custom channel based on user preference. It could be to a third-party service that needs log reports.stack: The stack driver is responsible for creating multiple channelsnull: All log messages get discarded by the driver.
How to Format Log Messages
If you need a refresher on how facades work or how to create one, you should refer to this article about how facades work in Laravel.
Laravel has a Log facade that helps with writing logs. Import the facade at the top of the file to use any log level.
<?php

use Illuminate\Support\Facades\Log;


Log::info($message);
You can also choose to escape the Log facade, so you won't need to import anything. This is suitable if you're logging a single instance of log info.
<?php

\Log::info($message);
In a recent Laravel release, logging has greatly improved. You can do away with the Log facade while logging info and reference the info from within your Laravel application.
<?php

info($message);
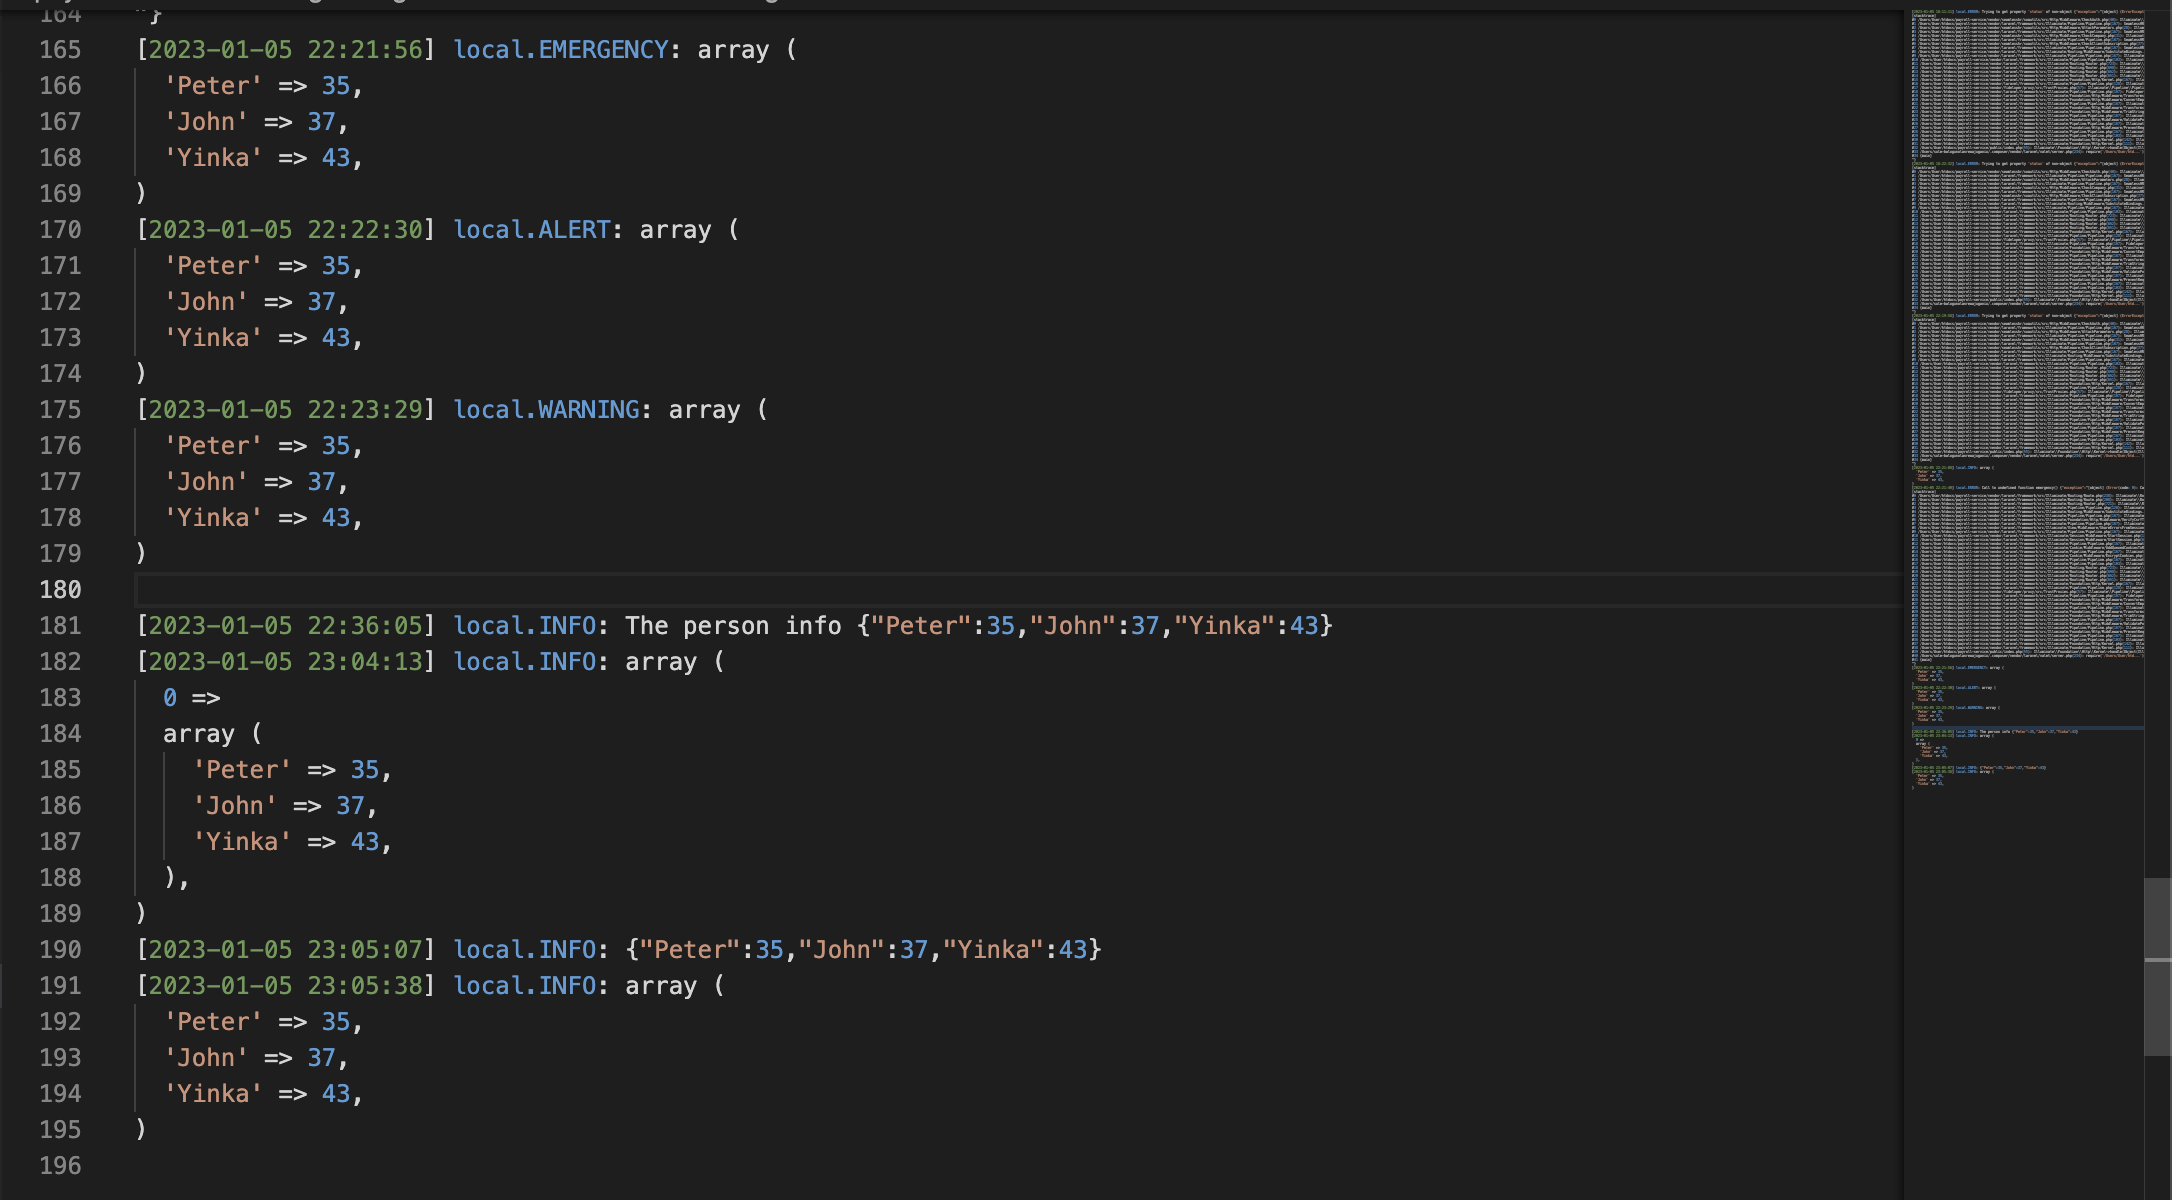
Other logging levels used to write information include alert, emergency, critical, warning, error, notice, and debug.
Within a file, you can log any of the data types or messages and even format the output of text you wish to write to the log file.
How to format strings, booleans, and integers:
<?php

use Illuminate\Support\Facades\Log;


Log::warning('There is a warning');

Log::error(false);

Log::notice(500);
How to format to an array:
You can also format to an array. With the array function, a new array is created. So we can write an array to the log file by passing the log info to the array function. The json_decode converts the JSON object to a PHP object, and the true ensure it returns associative arrays (key and value pairs).
<?php

$person = '{"Peter":35, "John":37, "Yinka":43}';

$data = json_decode($person, true);

info($data);
How to format to an object:
You can also write JSON objects to the log file when working with logs. Use the json_encode to encode values into JSON format.
<?php

$data = ["Peter"=> 35, "John"=> 37, "Yinka" => 43];

info(json_encode($data));
How to concatenate string with array or objects:
This is helpful when including a string to track the log information. You can do this using the concatenation operator (.)
<?php

$persons = ["Peter"=> 35, "John"=> 37, "Yinka" => 43];

info('The person info ' . json_encode($persons));
How to write to dedicated channels:
This method is helpful when you feel there's a need to write into specific channels aside from the default log channel. It would help if you had to specify the channel name when calling the Log facade.
<?php


\Log::channel('slack')->info('registeration successful');
The snippet above ensures the write operation is done on the Slack channel. Also, the stack method allows logging on multiple channels.
<?php


\Log::stack(['single', 'slack'])->info('registeration successful!');
You can learn more about custom channels via factories and monolog channel customization from the official documentation.
Wrapping up
In this article, you have learnt about logging, configuring logs in your Laravel application, available channel drivers, and how to write log files in different formats.
You should now have a better understanding of laravel logging. Keep learning, and Happy Coding!