

In this article, you will learn JavaScript object-oriented programming by creating a simple timer application.
Object-oriented programming is an important programming paradigm. It organizes code into objects which makes it easier to manage and maintain your applications.
Many articles explain in detail the benefits of object-oriented programming and how you can use it to build applications.
But beginners may have questions: Why should I apply object-oriented programming? When should I use it?
This article will help beginners understand these questions by building the same timer functionality based on both procedural and object-oriented programming methods.
What We Will Cover
- HTML basics, such as DOM methods and DOM events
- CSS basics, like flex layouts
- JavaScript knowledge, such as regular expressions,
classes,constructor()s, objects, thethiskeyword, thesetInterval()method, event mechanisms, and so on.
Table of Contents
- How to Create a Timer Interface with HTML and CSS
- How to Build a Timer using Procedural Programming
- How to Build a Timer using Object-Oriented Programming
- How to Add the Event Mechanism to Object-Oriented Programming
- Conclusion
How to Create a Timer Interface with HTML and CSS
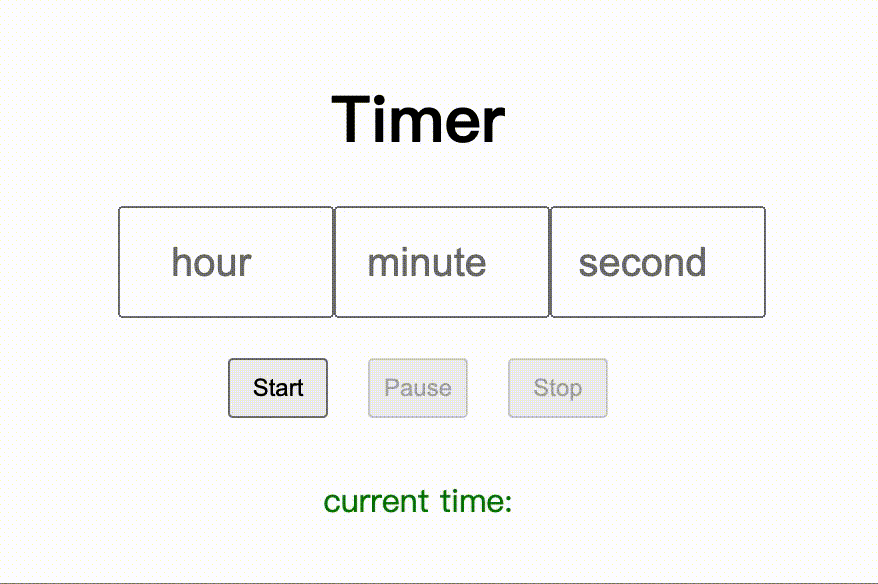
First, let's write a basic timer interface with HTML and CSS, including an input field to display the time and a few buttons.

The HTML looks like this:
<!DOCTYPE html>
<html>

<head>
    <title>Timer</title>
</head>

<body>
    <div class="container">
        <h1>Timer</h1>
        <div class="ipt">
            <input id="inputh" type="number" placeholder="hour">
            <input id="inputm" type="number" placeholder="minute">
            <input id="inputs" type="number" placeholder="second">
        </div>
        <div class="btn">
            <button id="btn-start" onclick="start_counting()">Start</button>
            <button id="btn-pause" onclick="pause_counting()">Pause</button>
            <button id="btn-stop" onclick="end_counting()">Stop</button>
        </div>
        <p id="currentTime">current time: </p>
    </div>
</body>
The timer contains three input elements, with ids of inputh, inputm and inputs, and types of number. These allow the user to enter the values of hours, minutes, and seconds.
Below the input field, three button elements start, pause, and stop the timer, respectively.
Each button has an onclick event. The property value of the onclick is a function, and we will write the code for this function in the JavaScript section. When the user clicks a button, the corresponding function is executed.
In JavaScript, we call the function by its name, so we need to put parentheses after the function name.
You can learn more about the onclick event in this article.
The p element below the button synchronizes the time in the input elements.
Let's add some simple CSS to the timer and style it:
<style>
    .container {
        margin: 0 auto;
        width: 300px;
        height: 300px;
        display: flex;
        flex-direction: column;
        justify-content: center;
        align-items: center;
    }

    .ipt {
        margin: 0 auto;
        display: flex;
        justify-content: center;
        align-items: center;
    }

    input {
        width: 100px;
        height: 50px;
        font-size: 20px;
        text-align: center;
    }

    .btn {
        margin: 10px;
        display: flex;
        justify-content: center;
        align-items: center;
    }

    button {
        margin: 10px 10px;
        width: 50px;
        height: 30px;
        font-size: 10px;
    }

    #currentTime {
        margin: 10px;
        color: green;
    }
</style>
We use Flexbox to center the elements. Add the CSS below to the parent element:
display: flex;
justify-content: center;
align-items: center;
This centers the child element horizontally and vertically, relative to the parent element.
You can see more information about CSS Layout in this article, or you can further style the timer as you like.
Next, we'll add the JavaScript code to start, pause, and stop the timer.
How to Build a Timer using Procedural Programming
Build the Basic Functions
This code shows a timer program designed with an event-driven, procedural-oriented mindset consisting of:
- 2 sets of global variables: the hour/minute/second variables and the return value of the
setInterval()function - 4 key functions: the event handlers for the start, pause, and stop buttons, and the execution function that is called in a loop during the countdown
First, initialize the button state with the DOM method document.getElementById().disabled.
// initialize button state
document.getElementById("btn-pause").disabled = true;
document.getElementById("btn-stop").disabled = true;
Next, we define global variables to store hour, minute, and second values.
// define global variables
var timer = null; // store the returned value of timer
var h = 0; // store the value of hour
var m = 0; // store the value of minute
var s = 0; // store the value of second
In the start_counting() function which starts the timer, we use document.getElementById().value to get the values of the elements with id of inputh, inputm, and inputs, respectively. These are the values of hours, minutes, and seconds entered by the user in the timer input field, and assign values to h, m and s.
Then we check the hour, minute, and second values entered by the user through the if statement. If the values are all equal to 0, or if one of the values is less than 0, it shows the popup message The time entered is illegal! and returns, and the program stops execution.
Assign the value setInterval() to the timer variable timer. This method takes two arguments, the first being a function and the second being a time in milliseconds. In this example, we specify that the timer executes a function counting every 1000 milliseconds (i.e., 1 second), which is described below.
For more information about the setInterval() method, you can see the MDN docs.
After that, change the state of buttons and input fields to prohibit users from re-entering numbers.
// define a function
// start the timer
function start_counting() {
    // get the time entered or set a default value
    h = +document.getElementById("inputh").value || h;
    m = +document.getElementById("inputm").value || m;
    s = +document.getElementById("inputs").value || s;

    // check for illegal input
    if (
        (h == 0 && m == 0 && s == 0) ||
        (h < 0 || m < 0 || s < 0)
    ) {
        alert("The time entered is illegal!");
        return;
    }

    // start the timer
    timer = setInterval(counting, 1000);

    // change the state of buttons and input fields to prohibit users from re-entering numbers
    document.getElementById("btn-start").disabled = true;
    document.getElementById("btn-pause").disabled = false;
    document.getElementById("btn-stop").disabled = false;
    document.getElementById("inputh").disabled = true;
    document.getElementById("inputm").disabled = true;
    document.getElementById("inputs").disabled = true;
}
Then, in the pause_counting() function, which is responsible for pausing the timer, you set the state of the buttons and input fields when the timer is paused, and call clearInterval() to remove the timer and stop the countdown.
// pause the timer
function pause_counting() {
    // change the state of buttons and input fields to allow users to re-enter numbers
    document.getElementById("btn-start").disabled = false;
    document.getElementById("btn-pause").disabled = true;
    document.getElementById("btn-stop").disabled = false;
    document.getElementById("inputh").disabled = false;
    document.getElementById("inputm").disabled = false;
    document.getElementById("inputs").disabled = false;

    // pause the timer
    clearInterval(timer);
}
The end_counting() function ends the timer. It also calls clearInterval(), and resets the hours, minutes, and seconds to 0. The text below, "Current time:", is updated to "Timer stopped".
// stop the timer
function end_counting() {
    // change the state of buttons and input fields to allow users to re-enter numbers
    document.getElementById("btn-start").disabled = false;
    document.getElementById("btn-pause").disabled = true;
    document.getElementById("btn-stop").disabled = true;
    document.getElementById("inputh").disabled = false;
    document.getElementById("inputm").disabled = false;
    document.getElementById("inputs").disabled = false;

    // stop the timer
    clearInterval(timer);

    // reset the time variables
    h = 0;
    m = 0;
    s = 0;
    document.getElementById("currentTime").innerHTML = "Timer stopped";
}
Next is the counting() function, which is the function called in setInterval(). It checks if the hour, minute, or second is 0 with an if statement, and performs the relative action.
This is the conventional implementation for timers, and it is easy to understand with our experience in daily life, for example, when the number of seconds hits 0, it then becomes 59 by "borrowing" 1 from the number of minutes – like this: 00:03:02, 00:03:01, 00:03:00, 00:02:59...
The setInterval() method updates the values of h, m and s once per second. We synchronize the updated time in the current time: text by using document.getElementById().innerHTML.
Finally, the if statement checks the hour, minute and second values, and when all three values are 0, the end_counting() function and the setTimeout() function are executed. In the setTimeout() function, execute the popup message "Time is up!".
Here's an interesting fact: you can try removing
setTimeout()and runningalert("Time is up!")directly afterend_counting(), you'll see that the popup blocks DOM rendering - that is, it pops up the "Time is up!" and then change the state of the button and input fields. When we usesetTimeout(), these two actions happen synchronously. You can think about the function ofsetTimeout()here.
If you want to learn more about the usage of setTimeout(), check out this article on freeCodeCamp.
// countdown
function counting() {
    // check if the second is 0
    if (s == 0) {
        // check if the minute is 0 when the second is 0
        if (m == 0) {
            // the entered time has already been checked for legality before starting the timer, so there is no need to check the value of the variable h again here
            h--;
            m = 59;
            s = 59;
        } else {
            // when the minute is not 0, the minute minus 1 and the second becomes 59
            m--;
            s = 59;
        }
    } else {
        // when the second is not 0, the second minus 1
        s--;
    }

    // display current time
    document.getElementById("currentTime").innerHTML = "current time: " + h + " h " + m + " m " + s + " s";
    document.getElementById("inputh").value = h;
    document.getElementById("inputm").value = m;
    document.getElementById("inputs").value = s;

    // check if the second is 0
    if (s == 0) {
        // when the second is 0, check if the minute is 0
        if (m == 0) {
            // when the minute is 0, check if the hour is 0
            if (h == 0) {
                // when the hour is 0, stop the timer
                // stop the timer
                end_counting();
                // execute popup in the next event loop to prevent it from blocking DOM rendering
                setTimeout(function () {
                    alert("The time is up!");
                }, 0);
                return;
            }
        }
    }
}
Sometimes the user may enter a negative number in the hour, minute, or second input fields, and the code alerts the user by popping up "The time entered is illegal!". Other times, the user may enter hours greater than 24, or minutes and seconds greater than 59, which doesn't work either.
In addition, to make the time display more beautiful, we may want to display the hours, minutes, and seconds as two digits.
We can improve the code above in two ways.
How to Restrict the Input Range of the Hours, Minutes, and Seconds
When the number of hours entered is greater than 24, we want to modify it to 24 automatically. Similarly, when it is less than 0, we want to modify it to 0.
And when the number of minutes and seconds entered is greater than 59, we want it to be automatically modified to 59. When it is less than 0, modify it to 0.
The event listener method addEventListener() is used here to execute the function when the input event occurs. parseInt() is also used to convert the input values to numeric types.
var inputh = document.getElementById("inputh");
inputh.addEventListener("input", function() {
    inputh.value = parseInt(inputh.value||0);
    if (inputh.value > 24) inputh.value = 24;
    if (inputh.value < 0) inputh.value = 0;
});

var inputm = document.getElementById("inputm");
inputm.addEventListener("input", function() {
    inputm.value = parseInt(inputm.value||0);
    if (inputm.value > 59) inputm.value = 59;
    if (inputm.value < 0) inputm.value = 0;
});

var inputs = document.getElementById("inputs");
inputs.addEventListener("input", function() {
    inputs.value = parseInt(inputs.value||0);
    if (inputs.value > 59) inputs.value = 59;
    if (inputs.value < 0) inputs.value = 0;
});
How to Optimize the Format of the Hours, Minutes, and Seconds
When the numbers of hours, minutes, or seconds are a single digit, we can prefix them with 0 by using a regular expression.
h = h.toString();
m = m.toString();
s = s.toString();
if (h.match(/^\d$/)) { // If the hour is a single digit, add 0 in the front
    h = "0" + h;
}
if (m.match(/^\d$/)) { // If the minute is a single digit, add 0 in the front
    m = "0" + m;
}
if (s.match(/^\d$/)) { // If the second is a single digit, add 0 in the front
    s = "0" + s;
}
You can view the online demo on CodePen:
See the Pen pp by miyaliu666 (@miyaliu666-the-styleful) on CodePen.
Alright, we've built a timer!
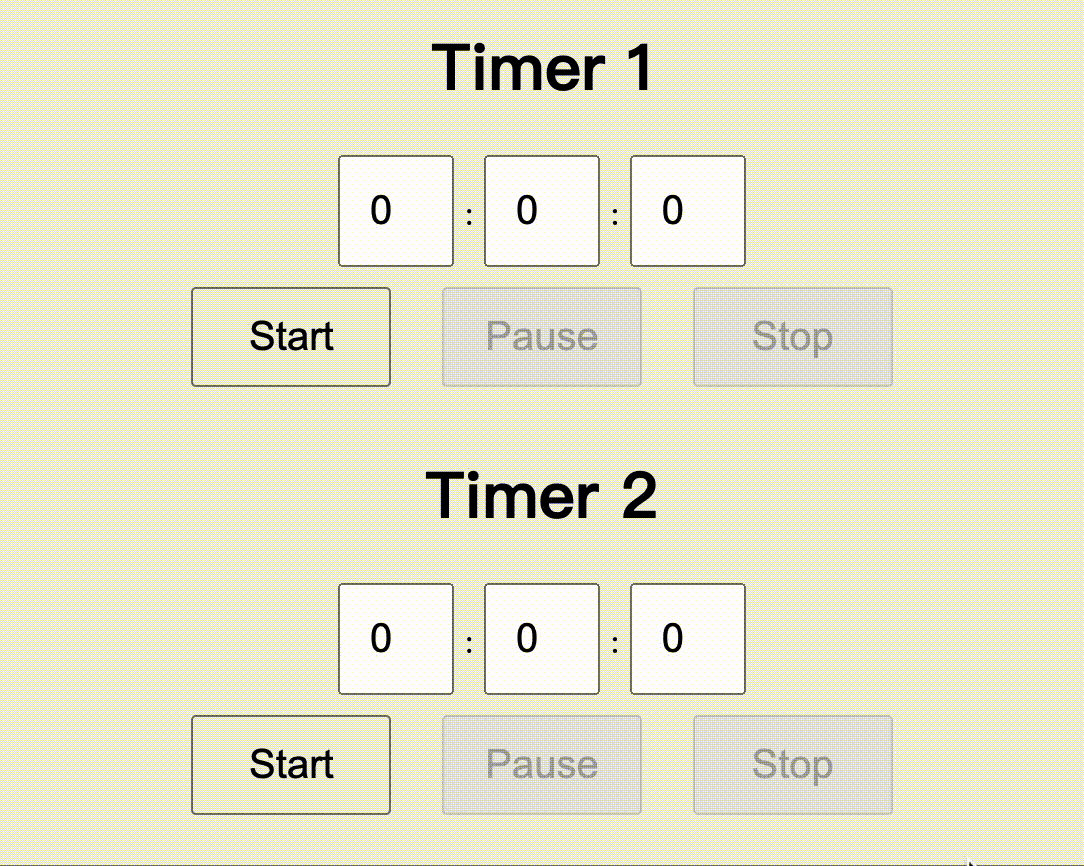
You might be thinking: what if I want to add multiple timers to a project?
In this case, you'll need to set different ids for each timer's input field so that document.getElementById().value gets the corresponding value.
For example, for timer No.1 with id inputh1, we assign h1 = +document.getElementById("inputh1").value to start_counting(). For timer No.2 with id inputh2, we assign h2 = +document.getElementById("inputh1").value, and so on.
The actual project business is usually not as simple as just creating a bunch of timers. As you can imagine, the code can easily become lengthy and messy.
So now it's time to introduce object-oriented programming.
How to Build a Timer using Object-Oriented Programming
You may have heard developers say they need to "new an object" on some occasions - as if you can get what you want by just using the new keyword. Behind this is the concept of object-oriented programming.
In this section, we'll refactor the timer in the previous section with object-oriented programming, separating the "timer function" from the "user interface interaction".
The HTML and CSS are similar to the previous section, so we won't go over them here. You can see the entire code in this CodePen demo.
See the Pen oop by miyaliu666 (@miyaliu666-the-styleful) on CodePen.
If you have gone through freeCodeCamp's Object-Oriented Programming course, you'll likely remember that "objects in JavaScript are used to model real-world objects, giving them properties and behavior just like their real-world counterparts", such as cars, shops, and birds.
So let's start by defining the properties and methods (behavior) of objects :)
New Timer Class
The class keyword creates a class named Timer that has a constructor() with _on_update(), start(), stop(), pause(), and show() methods.
<script>
    class Timmer {
        constructor() {
            this.name = 'undefined';
            this.timmer = undefined;
            this.h = 0;
            this.m = 0;
            this.s = 10;

            this._on_update_callback = undefined;
            this._on_stop_callback = undefined;
        }

        _on_update() {

        }

        start() {

        }

        stop() {

        }

        pause() {

        }

        show() {

        }
    }

</script>
According to the MDN,
The
constructormethod is a special method of a class for creating and initializing an object instance of that class.
In it, we initialize several variables – that is, properties of the object – with the this keyword.
In JavaScript, the value of this depends on context. In this case, it refers to the object that calls the function, that is an instance of Timer.
We also use this to initialize the callback function _on_update_callback when the timer is updated and the callback function _on_stop_callback when the timer is stopped.
The _on_update(), start(), stop(), pause(), and show() methods are used to update, start, stop and pause the timer, and display the current time, respectively. We will add code for them step by step.
Timer Update
We'll handle the timer update using the _on_update() method. As above, we'll still use the if statement to execute code when the hours, minutes, and seconds are 0.
Call the external callback function _on_update_callback if it exists.
_on_update() {
    if (0 === this.h && 0 === this.m && 0 === this.s) {
        this.stop();
        return;
    } else if (0 === this.s) {
        this.s = 59;
        if (0 === this.m) {
            this.m = 59;
            this.h = this.h - 1;
        } else {
            this.m = this.m - 1;
        }
    } else {
        this.s = this.s - 1;
    }

    this.show();
    if (0 === this.h && 0 === this.m && 0 === this.s) {
        this.stop();
    }

    // call the external callback function if it exists
    if (this._on_update_callback && typeof this._on_update_callback === 'function') {
        this._on_update_callback();
    }
}
Start the Timer
We're using the start() method to start the countdown – that is, it is executed after the user clicks the Start button. With the setInterval() method, _on_update() is executed once every second.
start() {
    if (this.timmer) {
        console.log(`[${this.name}] started`);
        return;
    }
    console.log(`[${this.name}] starts`);
    this.timmer = setInterval(() => {
        this._on_update();
    }, 1000);
    this.show();
}
Stop the Timer
The stop() method is used to stop the timer. Use clearInterval() to stop the countdown. Call the external callback function _on_stop_callback() if it exists.
stop() {
    console.log(`[${this.name}] stopped`);
    clearInterval(this.timmer);
    this.timmer = undefined;

    // smiliar to update, check for the stop callback function
    if (this._on_stop_callback && typeof this._on_stop_callback === 'function') {
        this._on_stop_callback();
    }
}
Pause the Timer
Use the pause() method to pause the timer and use clearInterval() to stop the countdown.
pause() {
    console.log(`[${this.name}] paused`);
    clearInterval(this.timmer);
    this.timmer = undefined;
}
Display Current Time
Use the show() method to print the current time on the console.
show() { // display the current time
    console.log(`[${this.name}] current time: ${this.h}:${this.m}:${this.s}`);
}
Create Object Instances
Next, use the new keyword to create two object instances, that is two timers, which have the properties and methods of the Timer object.
According to MDN,
The
newoperator lets developers create an instance of a user-defined object type or of one of the built-in object types that has a constructor function.
Assign two objects to t1 and t2 and put them into the array list_timmer. Also, create an array of sounds list_sound, which we will use later.
const t1 = new Timmer();
t1.name = 'Timer 1';
const t2 = new Timmer();
t2.name = 'Timer 2';
const list_timmer = [t1, t2];
const list_sound = ['meow', 'woof'];
User Interface Interaction with Functions
Next, we'll create 6 functions.
The first function, play_audio(), has one argument. The function creates an audio element in the DOM and assigns it to audio. Then it sets the value of the src property to a template literal and calls its play() method to play the sound.
function play_audio(sound) {
    // meow.mp3 and woof.mp3 are local files and should be in the same directory with HTML file
    const audio = document.createElement('audio');
    audio.src = `${sound}.mp3`;
    audio.play();
}
The second function, btn_start_onclick(), has one argument, i. This function is called when the "start" buttons of the two timers are clicked, passing either 1 or 2 as an argument:
<input id="tmr-1-btn-start" class=" btn" type="button" value="start" onclick="btn_start_onclick(1)" />
<input id="tmr-2-btn-start" class="btn" type="button" value="start" onclick="btn_start_onclick(2)" />
The function first gets the value of the input field and assigns it to the timer. Then it sets the state of the input field and the button with the dom_update_inputs() function. We will set dom_update_inputs() later.
Remember that we initialized two callback functions at the beginning? Here we will assign an arrow function to them.
_on_stop_callback executes the callback function dom_update_inputs, which we'll discuss below.
The callback function play_audio() is also executed here with the argument list_sound[i - 1], that is it takes the element meow or woof from the array list_sound defined earlier and passes it to the src property of audio to play the corresponding sound when the timer is stopped. For example, when i is 1, audio.src = meow.mp3;.
_on_update_callback executes the callback function dom_update_timmer(), which we will talk about shortly.
Take the corresponding timer from the timer array through const tmr = list_timmer[i - 1]; and execute the start() method to start the timer.
function btn_start_onclick(i) {
    // get the input value
    const ipt_h = document.getElementById(`ipt-${i}-h`);
    const ipt_m = document.getElementById(`ipt-${i}-m`);
    const ipt_s = document.getElementById(`ipt-${i}-s`);

    // set the state of input fields and buttons
    dom_update_inputs(i, "COUNTING");
    // take the corresponding timer from the timer array
    const tmr = list_timmer[i - 1];
    // assign the input value to timer
    tmr.h = Number(ipt_h.value);
    tmr.m = Number(ipt_m.value);
    tmr.s = Number(ipt_s.value);

    // set the callback function
    tmr._on_stop_callback = () => {
        // play the sound
        play_audio(list_sound[i - 1]);
        // set the state of input fields and buttons
        dom_update_inputs(i, "STOPPED");
    }
    tmr._on_update_callback = () => {
        dom_update_timmer(i);
    }
    // start the timer
    tmr.start();
}
The third function, btn_pause_onclick(), has one argument and is called when the pause buttons for both timers are clicked, passing in either 1 or 2. The callback function, dom_update_inputs, is executed to set the state of the input fields and buttons, and the pause() method is executed to pause the timer.
function btn_pause_onclick(i) {
    dom_update_inputs(i, "PAUSED");

    // take the corresponding timer from the timer array
    const tmr = list_timmer[i - 1];

    // pause the timer
    tmr.pause();
}
The fourth function, btn_stop_onclick(), is similar to the third function. It's called when the "stop" buttons of both timers are clicked, and sets the state of the input fields and buttons when the timer is stopped. Then the stop() method is executed to stop the timer.
function btn_stop_onclick(i) {
    dom_update_inputs(i, "STOPED");

    // take the corresponding timer from the timer array
    const tmr = list_timmer[i - 1];


    // stop the timer
    tmr.stop();
}
The fifth function dom_update_inputs() has two arguments, i and status. It sets the state of the input fields and buttons through if.... .else if... statements when status is met.
When this function is called in the second, third, and fourth functions above, it defines the state of the input fields and buttons when the timer is started, paused, and stopped.
function dom_update_inputs(i, status) {
    if ('COUNTING' === status) {
        // set the state of input fields
        document.getElementById(`ipt-${i}-h`).disabled = true;
        document.getElementById(`ipt-${i}-m`).disabled = true;
        document.getElementById(`ipt-${i}-s`).disabled = true;

        // set the state of buttons
        document.getElementById(`tmr-${i}-btn-start`).disabled = true;
        document.getElementById(`tmr-${i}-btn-pause`).disabled = false;
        document.getElementById(`tmr-${i}-btn-stop`).disabled = false;
    } else if ('PAUSED' === status) {
        // set the state of input fields
        document.getElementById(`ipt-${i}-h`).disabled = false;
        document.getElementById(`ipt-${i}-m`).disabled = false;
        document.getElementById(`ipt-${i}-s`).disabled = false;

        // set the state of buttons
        document.getElementById(`tmr-${i}-btn-start`).disabled = false;
        document.getElementById(`tmr-${i}-btn-pause`).disabled = true;
        document.getElementById(`tmr-${i}-btn-stop`).disabled = false;
    } else if ('STOPPED' === status) {
        // set the state of input fields
        document.getElementById(`ipt-${i}-h`).disabled = false;
        document.getElementById(`ipt-${i}-m`).disabled = false;
        document.getElementById(`ipt-${i}-s`).disabled = false;

        // set the state of buttons
        document.getElementById(`tmr-${i}-btn-start`).disabled = false;
        document.getElementById(`tmr-${i}-btn-pause`).disabled = true;
        document.getElementById(`tmr-${i}-btn-stop`).disabled = true;
    }
}
The sixth function dom_update_timmer() is used to synchronize the time to the page.
function dom_update_timmer(i) {
    // take the corresponding timer from the timer array
    const tmr = list_timmer[i - 1];

    // synchronize the time to the page
    document.getElementById(`ipt-${i}-h`).value = tmr.h;
    document.getElementById(`ipt-${i}-m`).value = tmr.m;
    document.getElementById(`ipt-${i}-s`).value = tmr.s;
}
Above, we have encapsulated the "timer function" in the Timmer class and kept the "user interface interaction" in the global scope, so that multiple timers as the Timmer class instances can run simultaneously.
In this section, I didn't set a limit on the range of hour, minute and second inputs or optimize their format. If you are interested, you can refer to the code in the previous section and do it yourself in the CodePen demo :)
Thinking further, what if our project has other functional modules besides this set of two timers - for example, two sets of timers, which are object instances of the same type Timer? When assigning values to the callback function _on_stop_callback, one set of instances needs to play a beep through the play_audio() function, while the other set needs to set the color of the timer by another function. Then the second assignment will overwrite the first one.
Here we'll introduce the event mechanism to solve this problem.
How to Add the Event Mechanism to Object-Oriented Programming
This section is similar to the previous section, except we'll add an event mechanism to replace the original callback function.
The benefit of the event mechanism is that multiple objects can be notified when the state of the timer changes. In our case, when the timer's state changes, it notifies the buttons on the page so that the buttons' states change in sync.
Again, the HTML and CSS are similar to the first section so I won't repeat them here.
You can see the full code in this CodePen demo.
See the Pen oop_with_events by miyaliu666 (@miyaliu666-the-styleful) on CodePen.
Create the Event Generator
First, we create a new class EventEmitter, which is an event emitter used to implement the event mechanism – in this case, to implement the timer state change notification.
on is used to listen (subscribe) to events. When an event occurs, a callback function is executed, and the parameters of the callback function are the parameters of the event. this in the callback function refers to the trigger of the event.
emit is used to emit (throw) the event.
removeListener is used to remove a listener from an event.
class EventEmitter {
    constructor() {
        this._events = {};
    }

    on(type, listener) {
        if (this._events[type]) {
            this._events[type].push(listener);
        } else {
            this._events[type] = [listener];
        }
    }

    emit(type, ...args) {
        if (this._events[type]) {
            this._events[type].forEach(listener => {
                listener(...args);
            });
        }
    }

    removeListener(type, listener) {
        if (this._events[type] && listener) {
            this._events[type] = this._events[type].filter(l => l !== listener);
        } else if (this._events[type] && !listener) {
            this._events[type] = [];
        }
    }
}
New Timer Class
Here, we create a new class Timmer. The extends keyword means that Timmer is a child class of the EventEmitter class. The child class inherits all the properties and methods of the parent class.
Check this doc for more information about the extends keyword.
class Timmer extends EventEmitter {
    constructor() {
        super();
        this.name = 'undefined';
        this.timmer = undefined;
        this.h = 0;
        this.m = 0;
        this.s = 10;
    }

    _on_update() {
        if (0 === this.h && 0 === this.m && 0 === this.s) {
            this.stop();
            return;
        } else if (0 === this.s) {
            this.s = 59;
            if (0 === this.m) {
                this.m = 59;
                this.h = this.h - 1;
            } else {
                this.m = this.m - 1;
            }
        } else {
            this.s = this.s - 1;
        }

        this.show()
        // emit an event
        this.emit('update', {
            h: this.h,
            m: this.m,
            s: this.s
        });
        if (0 === this.h && 0 === this.m && 0 === this.s) {
            this.stop();
        }
    }

    start() {
        if (this.timmer) {
            console.log(`[${this.name}] started`);
            return;
        }
        console.log(`[${this.name}] starts`);
        this.timmer = setInterval(() => {
            this._on_update();
        }, 1000);
        this.show();

        // emit an event
        this.emit('start', {
            h: this.h,
            m: this.m,
            s: this.s
        });
    }

    stop() {
        console.log(`[${this.name}] stoped`);
        clearInterval(this.timmer);
        this.timmer = undefined;

        // emit an event
        this.emit('stop', {
            h: this.h,
            m: this.m,
            s: this.s
        });
    }

    pause() {
        console.log(`[${this.name}] paused`);
        clearInterval(this.timmer);
        this.timmer = undefined;

        // emit an event
        this.emit('pause', {
            h: this.h,
            m: this.m,
            s: this.s
        });
    }

    show() {
        console.log(`[${this.name}]current time: ${this.h}:${this.m}:${this.s}`);
    }
}
In the above code, you can see in the comments that there are four "throw events". The emit method throws four events update, start, stop, and pause, which emit the changes inside the timer. All objects subscribed to these events will execute the corresponding callback functions.
Create Object Instances
Similarly, we create two new timer object instances t1 and t2, and arrays storing timers and sounds assigned to list_timmer and list_sound.
const t1 = new Timmer();
t1.name = 'Timer 1';
const t2 = new Timmer();
t2.name = 'Timer 2';
const list_timmer = [t1, t2];
const list_sound = ['meow', 'woof'];
const list_sound_str = ['🐱meow~~~', '🐶woof~woof~woof~'];
User Interface Interaction with Functions
In this case, we'll create 6 functions as well.
Among them, play_audio(), btn_pause_onclick, btn_stop_onclick, dom_update_inputs(), dom_update_timmer() are the same as the functions in the previous section.
Let's take the btn_start_onclick() function as an example to illustrate the mechanism of event subscription.
function btn_start_onclick(i) {
    // get the input value
    const ipt_h = document.getElementById(`ipt-${i}-h`);
    const ipt_m = document.getElementById(`ipt-${i}-m`);
    const ipt_s = document.getElementById(`ipt-${i}-s`);

    // set the state of input fields and buttons
    dom_update_inputs(i, "COUNTING");

    // take the corresponding timer from the timer array
    const tmr = list_timmer[i - 1];
    // assign the input value to the timer
    tmr.h = Number(ipt_h.value);
    tmr.m = Number(ipt_m.value);
    tmr.s = Number(ipt_s.value);

    // listen to the timer's update event and synchronize the time to the page
    tmr.removeListener('update');
    tmr.removeListener('stop');
    tmr.on('update', () => dom_update_timmer(i));
    tmr.on('stop', () => {
        console.log(list_sound_str[i - 1]);
    });
    tmr.on('stop', () => {
        // play the sound
        play_audio(list_sound[i - 1]);
        // set the state of input fields and buttons
        dom_update_inputs(i, "STOPPED");
    });

    // start the timer
    tmr.start();
}
This function is called when the user clicks the "Start" button. It listens to the update event via the on() method, and executes the dom_update_timmer() callback function.
It subscribes to the stop event twice, executing different function modules - first to print the sound text in the console, and then to play a sound and set the state of input fields and buttons (without interfering with each other).
This is the advantage of the event mechanism compared to the _on_stop_callback callback function in the previous section.
Note the tmr.removeListener('update'); and tmr.removeListener('stop'); at the beginning - this is to remove the event listener (if any) each time this.start() is executed.
Conclusion
In this article, we built timers based on both process-oriented and object-oriented programming. We also added an event mechanism to our app built with object-oriented programming and explored some best practices of the programming paradigm step by step.
If you want to discuss this article with me or give me suggestions, please send me a message on the freeCodeCamp Forum. My id is miyaliu.
Thank you for reading this article. Happy coding!
Cover image by Yogendra Singh on Unsplash