![Localization Guide – How to Translate Your Website Into Different World Languages [Full Book]](https://www.freecodecamp.org/news/content/images/size/w2000/2023/09/Localization-Course-Handbook-Cover-Version-4.png)
Welcome! In a global world where information is available to everyone in just a few clicks, adapting your website and resources to other languages and cultures is essential to succeed.
This book will teach you the fundamentals of localization and how to translate your website to reach a global community of users without any language barrier.
🔹 Where to Start
But where do you start?
That is an important question that managers often ask themselves when they decide to adapt their products and go multilingual.
In this book, you will learn all the fundamentals of localization from a conceptual and practical point of view.
You will learn how to localize files, websites, games, and any other type of resource on Crowdin, the cloud-based localization management platform that powers freeCodeCamp's localization effort.
We will cover the following:
- freeCodeCamp as a Real-World Example
- A Localization Effort by Humans, for Humans
- What are the Fundamentals of Localization?
- What is Localization?
- Translation vs Localization
- Importance of Localization
- Localization Terminologies
- Translating vs Proofreading
- What Types of Resources Can Be Localized?
- Common File Formats
- Localization Phases and Roles
- Crowdin Fundamentals for Localization Projects
- Important Terminologies for Crowdin
- Getting Started with Crowdin
- How to Create a Crowdin Account
- How to Customize your Crowdin Profile
- How to Create a Project on Crowdin
- Project Overview
- How to Customize your Project Settings in Crowdin
- How to Delete a Project in Crowdin
- How to Upload Files to your Crowdin Project
- How to Start Translating
- How to Use the Translation Editor
- Translation Editor Modes
- How to Switch to Another File
- How to View All Strings
- How to Translate RTL Languages
- How to Download the Translated File(s)
- How to Use Translation Memory (TM)
- Glossary
- Quality Assurance (QA) Checks in Crowdin
- How to Uploading Existing Translations
- How to Pre-Translate your Project
- Offline Translation
- Exploring Public Projects
- Crowdin for Teams and Organizations
- How to Invite Project Members and Contributors
- Project Roles
- How to Assign or Change Roles
- Project Managers
- Tasks
- Project Reports
- Conversations on Crowdin
- Crowdin Integrations and Productivity Tools
- How to Translate a Website on Crowdin
- freeCodeCamp's Translation Effort
Are you ready? Let's begin!
🔹 freeCodeCamp as a Real-World Example
freeCodeCamp.org is a real-world example of an organization and open-source project that has embraced the concept of localization for reaching a global community.
Our coding curriculum is available in many languages, including:
- English.
- Spanish.
- Chinese.
- Italian.
- Portuguese.
- Ukrainian.
- Japanese.
 How to Choose a Language on freeCodeCamp.
Our community is actively working on translating freeCodeCamp into many world languages, including:
- Arabic.
- Azerbaijani.
- Bengali.
- Chinese Simplified.
- Dutch.
- French.
- German.
- Hebrew.
- Hindi.
- Indonesian.
- Italian.
- Japanese.
- Korean.
- Nepali.
- Persian.
- Portuguese.
- Romanian.
- Spanish.
- Swahili.
- Turkish.
- Ukrainian.
- Urdu, and more.
We have many world languages available for localization and we also run localized publications, YouTube channels, forums, and so on.
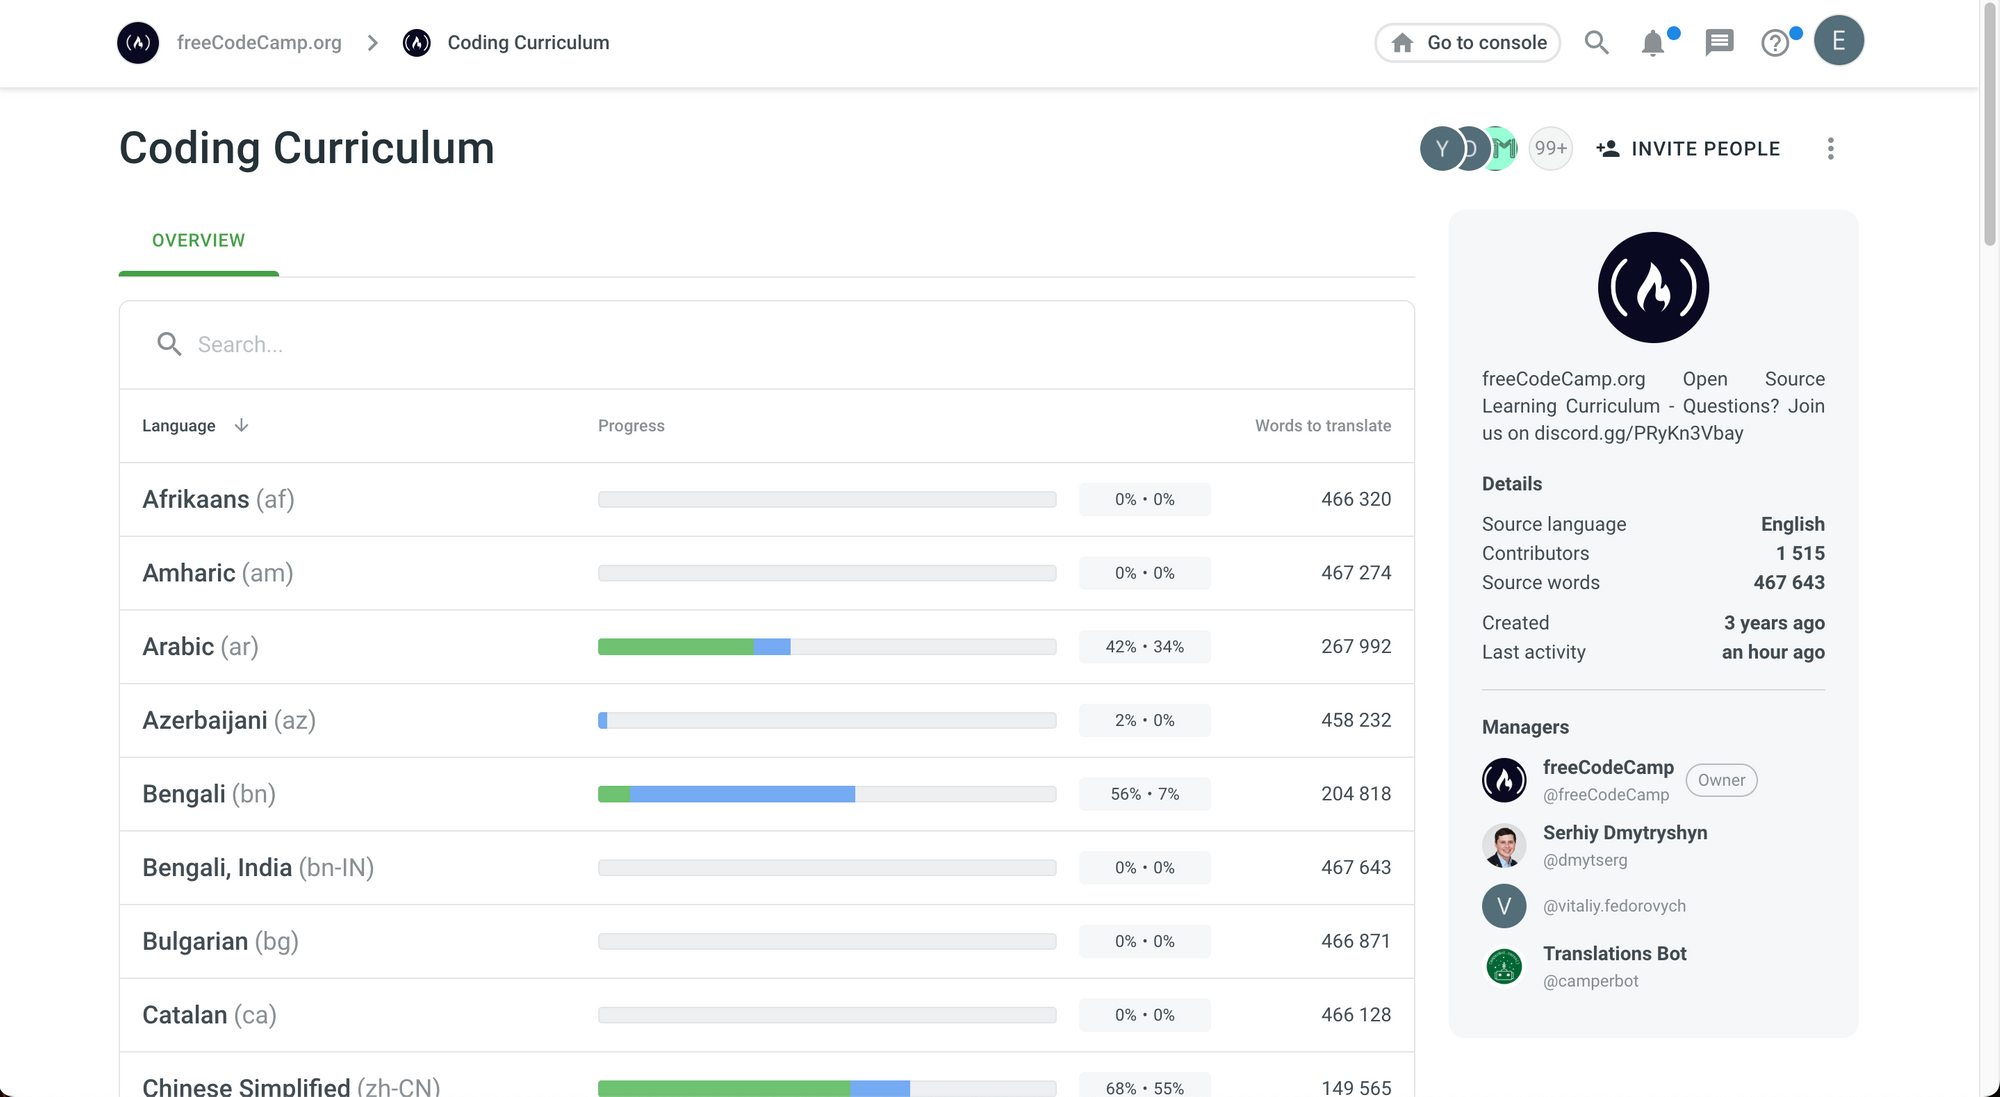 Coding Curriculum localization project and available languages.
🔹 A Localization Effort by Humans, for Humans
Our localization process is focused on what matters the most: our amazing community of learners who wake up every day excited about learning new skills.
We believe that language and culture should not be barriers to learning. Knowledge should be accessible worldwide.
This is why we started this process and why we'll continue our localization efforts until we reach our goal of guaranteeing access to knowledge around the world.
One of the key aspects of our localization process is that it is managed and run by humans, for humans. Translations are written and approved by members of our amazing community and staff.
Let's be honest, anyone can tell when a translation has been generated automatically. It's much more literal, it lacks the clarity, and it feels disconnected from the context and from the original tone of the text.
Human translators are much better at adapting languages, and translating sentences in a way that sounds more natural in different languages and cultures.
At freeCodeCamp, we have an amazing community of contributors who dedicate their time to translate our content and an amazing team of staff members who oversee the process with the ultimate goal of publishing high-quality translations for our learners.
Since we launched our localization effort, more than 2,000 translators and over 60 proofreaders have helped us accomplish our mission.
💡 Tip: If this sounds interesting to you and you would like to join freeCodeCamp's translation effort, please read our contributing guidelines. At the end of this article, you will find more information on our localization effort.
Managing such a large project with a worldwide community of contributors might seem complicated, right? How can we accomplish all of this as a non-profit organization?
You will get answers to those questions in this book.
We will cover all the fundamentals of localization, and the basic and advanced features of Crowdin.
Are you ready? Let's begin.
🔹 What are the Fundamentals of Localization?
We will start with an overview of the fundamentals of the localization process and the steps that you'll need to take to make sure that your product can be used without any language or cultural barriers.
What is Localization?
First of all, let's define localization.
According to the Cambridge Dictionary, localization is defined as:
The process of organizing a business or industry so that its main activities happen in local areas rather than nationally or internationally.
In the context of products and services, localization basically means adapting them to the language and culture of a specific population. This also applies to software products because they need to be adapted to different cultures as well.
Translation vs Localization
You may be surprised to know that the concept of localization is different from the concept of translation. It's actually broader.
The Cambridge Dictionary defines translation as:
The activity or process of changing the words of one language into the words in another language that have the same meaning.
Notice the key part of this definition: "changing the words to keep the same meaning."
Translation involves changing the words of a language into another language to keep their original meaning. It is very helpful but a bit limited because its goal is to say exactly the same thing in a different language.
However, localization can go beyond that to adapt the content better to another culture or country.
For example, localization is particularly helpful for marketing campaigns and ads that try to reach audiences and convince them to purchase their products. Certain cultures may accept certain colors better, or they may have local phrases or slangs that the local population is more familiar with.
In this case, localizing the campaign is better than writing a literal word-for-word translation.
Continuous localization takes this concept one step further. It involves localizing a product continuously as it is updated or expanded in an agile product development cycle. It is often used to localize software products.
Importance of Localization
Why should you localize your product or platform? Well, the world is very diverse, and different cultures have their distinctive customs and speak different languages.
Did you know that, according to the Linguistic Society of America, there are more than 6,000 languages in the world?
Among the top 20 most widely spoken languages in the world, we can find these:
- English.
- Mandarin Chinese.
- Hindi.
- Spanish.
- French.
- Arabic.
- Bengali.
- Portuguese.
- Urdu.
- German.
- Japanese.
💡 Tip: You can find more information on languages by total number of speakers in this article.
A large proportion of the world's population is not bilingual. Not everyone around the world has the opportunity to learn and master English as a second language but every single person around the world is a potential user of your product or platform.
That is why localization can be so important for you.
For example, if you are creating an educational platform, you will be able to reach people and accomplish your mission at a global scale by localizing your website and content.
If you are building a commercial product or platform, every single person around the world can be a potential user.
Don't let language become a barrier to reach your users. Localization can be your best ally.
Localization Terminologies
Now that you know why localization is so important, let's dive into some important terminologies that you'll come across very often in the context of translation and localization.
Internationalization
The action of becoming or making something become international.
— Cambridge Dictionary.
In the context of localization for a software product, it also involves adapting the user interface for working with other languages and making sure that it is ready to be translated.
Culturalized
Deriving from or imposed or conditioned by culture.
— Merriam-Webster Dictionary.
Every culture has different traditions and vocabulary. Culture can play a key role in how communities embrace products, campaigns, and platforms. Understanding how to adapt them is very important to succeed.
Pseudolocalization
The pseudo prefix is defined as:
Pretended and not real.
— Cambridge Dictionary.
That is exactly what pseudolocalization is all about. It is a process creating fake translations that act as placeholders for the real translations in a platform or product.
You may ask: "Why would we ever need to use fake translations?"
The answer is that we use them to check if our software is ready to handle multiple languages even before the translation process begins.
Checking if a language that tends to have longer or shorter words works well with our current user interface and checking if right-to-left languages are displayed correctly are common use cases.
This process is also helpful to find any strings that may still be hard-coded in the project source files. You may need to move them to the resources file where you keep all your project strings.
That is the main purpose of pseudolocalization: checking if everything is ready to start translating.
Machine Translation (MT)
The process of using artificial intelligence to automatically translate text from one language to another without human involvement.
— Amazon Web Services.
We will talk about this term in more detail because the localization management platform that we will use to translate our resources has this feature, and it can save us a lot time.
Translation Memory (TM)
A database that stores "segments", which can be sentences, paragraphs or sentence-like units (headings, titles or elements in a list) that have previously been translated, in order to aid human translators.
— Wikipedia.
With this feature, you can save previous translations and "reuse" them to save time.
💡 Tip: Note that the acronyms (MT and TM) are very similar and but they are different. Please take a moment to understand the differences between these two concepts because you'll see them in this book frequently.
Large Language Models (LLMs)
Deep learning algorithms that can recognize, summarize, translate, predict, and generate content using very large datasets.
— Nvidia.
These terms are fundamental if you are looking to dive into translation and localization.
You may also find words that use numbers to represent abbreviations. They are called numeronyms.
- L10n: this numeronym stands for Localization. The number 10 stands for the 10 letters between the l at the start and the n at the end.
- i18n: this numeronym stands for Internationalization (yes, it's a very long word!). The number 18 stands for the 18 letters between the i at the start and the n at the end.
💡 Tip: Sometimes, you may find L10n with the L capitalized or you may find it in lowercase, like this: l10n. Capitalizing the L is helpful to distinguish it from the i in the i18n numeronym (they can look very similar in certain types of fonts).
Translation vs Proofreading
Another important aspect that you should also know is the difference between translating and proofreading.
Translation involves changing the words from one language to another with the goal of keeping the same meaning.
But after translators have completed their work, the localization team will also need to review, edit, and approve the translations to make sure that everything is accurate and correct. This process of checking the translations is called proofreading.
Translating and proofreading are different stages of the localization process. We'll look these processes in more detail, and you will learn the steps involved and the role of team members in making sure that the content is localized correctly.
What Types of Resources Can Be Localized?
When we talk about translation and localization, the first thing that comes to mind is translating files with text, right?
But this is not the only type of resource that we can localize. We can localize documents, spreadsheets, websites, games, dialogues, scripts, audio, video, graphics, and so on.
Think about podcasts and videos. They can be localized with voiceovers. We just need to translate their transcripts, replace the original audio and synchronize the translated narration.
Captions and subtitles can also be localized. This is a form of text too but it comes from a video source. You can see how different types of files can be closely related in the localization process.
Finally, we can localize graphics such as image files, visual marketing campaigns, ads, and more.
The main point to highlight here is that localization and translation are not limited to written resources. There are wide variety of resources that we can localize to reach a wider audience.
Common File Formats
In the last section, we talked about different types of resources that can be translated. Now let's talk about the file formats that you'll usually find in the context of translation. You may also find them in the localization management platform that we will be working on.
💡 Tip: Even if you do not use these file formats right now, it's always helpful to understand what they do and what they represent. They may come in handy in the future, or in cases where you find them in the documentation of a localization tool you are using.
Comma-Separated Values (CSV) Files
- File extension:
**.csv** - This is a text file format in which the values are separated by commas.
- Stores tabular data such as numbers and text.
- Each line usually represents one record.
- Commonly used for data exchange and can be processed using programming languages.
HTML Files
- File extension:
**.html** - HTML stands for HyperText Markup Language.
- It is used to represent the structure and content of a website.
- If you open this file in a browser, you will see the content of the website.
JSON Files
- File extension:
**.json** - JSON stands for JavaScript Object Notation.
- Stores data in a simple plain text format based on key-value pairs.
- Used for data exchange, especially across the web because it is lightweight.
Markdown Files
- File extension:
**.md** - Used to create formatted text.
- It is a lightweight markup language with a specific syntax.
- Common applications include writing software documentation, blog posts, and articles.
PO (Portable Object) Files
- File extension:
**.po**. - Used by the
**gettext**system, which is commonly used for writing multilingual programs. It is also widely used in the implementation of**GNU gettext**. **gettext**is a standard in many game development engines, like the Unreal Engine. It is used in many programming languages, including C, C++, PHP, and Python.
Text File
- File extension:
**.txt** - Used to store plain text.
- It does not contain images or non-text characters.
Extensible Markup Language (XML)
- File extension:
**.xml** - Used to store, share, and reconstruct arbitrary data.
- Commonly used to exchange data over the internet.
- Many localization frameworks use XML. For example, Android uses an XML-based file format to store translatable text.
XLIFF Files
- File extension:
**.xliff** - XLIFF stands for XML Localization Interchange File Format.
- Uses XML-based format.
- Used to standardize the way the localizable data can be passed between localization tools.
XLSX Files
- File extension:
**.xlsx** - Used to store data in spreadsheets.
- It is an abbreviation of "Microsoft Excel Spreadsheet".
RESX Files
- File extension:
**.resx** - Used by .NET applications for storing resources that can be localized.
- Uses an XML-based file format.
These are the most widely used file formats that you may find in localization projects but there are over hundreds of file formats that you can use.
Crowdin, the localization management platform that we will use on this book, supports more than 100+ file formats.
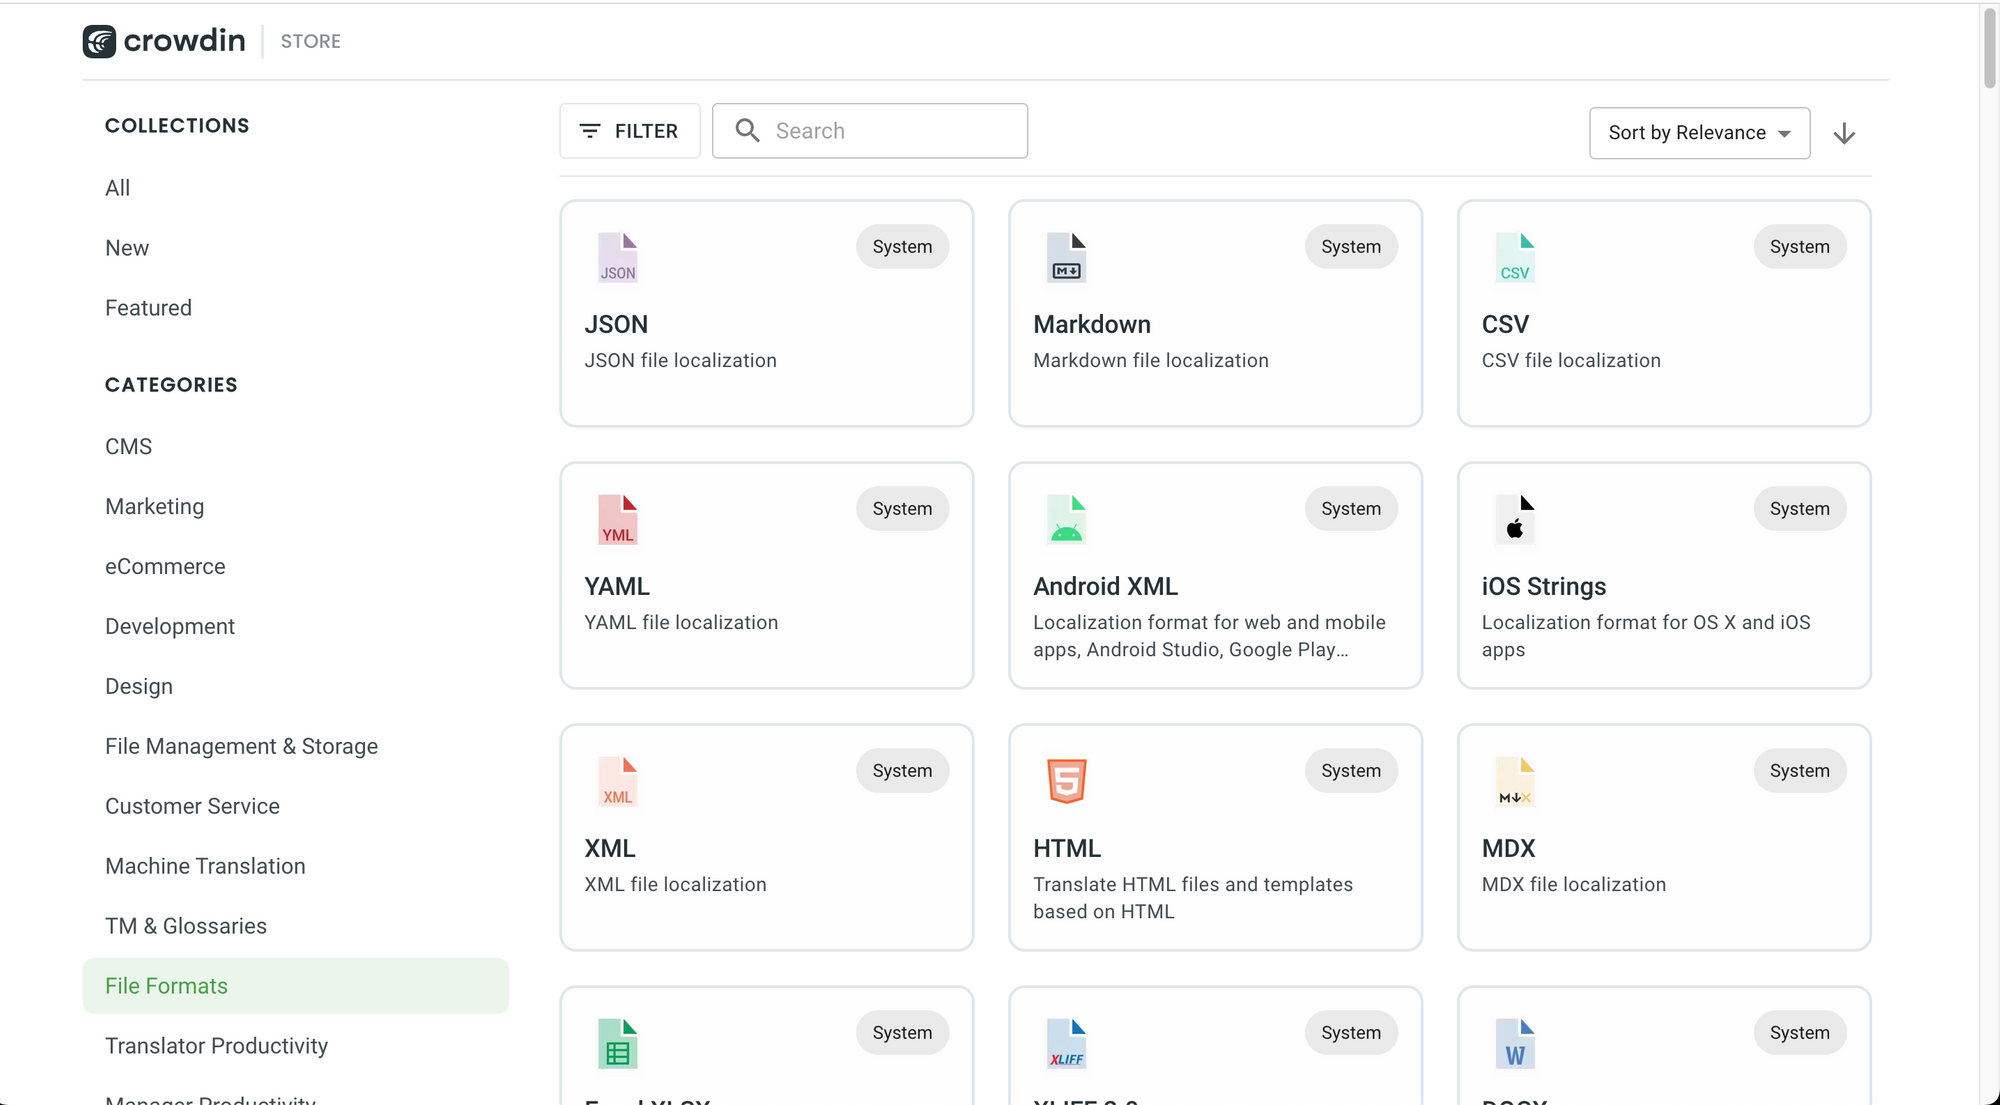 Overview of the supported formats in Crowdin.
Localization Phases and Roles
Awesome. Now that you know more about the types of files that you might find in a localization project, let's take a step further and see this process from a project management perspective.
What steps are required for localizing a project? Where should you start? Here are steps to help you answer those questions:
Step #1 - Define the project scope and goals
Before you start to localize any file, it's important to take a moment to analyze your project's scope and goals.
Ask yourself:
- What is your target audience?
- What are you trying to achieve by localizing your resources?
- How will you achieve those goals?
- What parts of your website, game, video, or resource do you need to localize?
- Do you need to translate it or localize it (adapt it)? Sometimes, translation can be good enough.
- If you need to adapt it to other cultures, how will you achieve this?
- Will you seek advice from people who understand these cultures? If yes, how will you contact them?
- If you speak other languages, can you translate the resources yourself or do you need to find help based on the complexities of your project?
- What is your available budget?
- Are your goals realistic given your current budget?
You should also determine who is going to translate your resources:
- Will you be translating the resources yourself?
- Will you involve your user-base or community in the translation effort?
- Will you hire a team or use the services of a translation vendor?
- Will you use automated processes like machine translation to translate or pre-translate resources with artificial intelligence?
💡 Tip: Crowdin has an option to hire their localization services and services from their partners in the Crowdin Marketplace.
Defining clear and realistic goals can be very helpful for avoiding any unexpected challenges during the process.
Write down your goals and make sure that you have an outline of the steps that you need to take to start, execute, and complete the localization process.
Step #2 - Create the source files to be localized
Now that you have clear goals and a clear project scope in mind, having the project source files is a must. These are the files that your localization team will localize.
You should make sure that you have all the necessary source files and resources before you start the localization process.
Of course, you can always add new resources and content later in the process, but having a clear initial idea of the complexities of a project will be helpful later on in terms of the time management and budget required.
Step #3 - Prepare your Software for Internationalization
Before the localization process begins, you need to prepare your product for internationalization, which is very technology-specific.
This is especially true for software products. The tools that you use to internationalize a React.js application may be very different from the tools that you use for an Android application, an iOS application, or a game.
However, the approaches and concepts that you will use are essentially the same.
You need to think about how you will adapt your user interface and services to other languages. For example, some languages may have longer or shorter words than the source language and this can change how elements are displayed.
Making sure that everything looks like you intend it to is very important, even before translators and proofreaders get involved in the process.
Another key step is making sure that you have all your translatable text separated from your code. When you translate software, all translatable text is extracted into a resource file that can be shared with translators or uploaded to a localization management platform.
The Crowdin team recommends storing larger files, such as HTML pages, and email templates, in a separate directory and keeping one directory per target locale. They suggest that "if you are translating your content into 5 target languages, you would have 5 copies of your resource files with "UI labels" and 5 directories with all other assets like HTML files."
If you are developing a web application, you will also need to implement multilingual routing. Your application should allow users to select their preferred language.
To do this, you have two options. You can:
- Add the language code as part of the domain name. For example:
**fr.example.com**. - Add the language code to the URL. For example:
example.com/fr.
This is recommended for Search Engine Optimization (SEO) purposes.
Your software should also be able to handle and display adapted numbers, dates, and currencies since localization may also involve adapting them to different formats for different cultures.
Context will also be very important. Many internationalization tools create resource files with only one key-value pair for each piece of text. They associate each piece of text in the source language with its corresponding translation.
But it is very important to make sure that the resource files of your project also include some contextual information of the content or elements around them. This can be very helpful for translators because they can choose the best translations possible based on the context around the string.
Finally, your application should also be able to handle pluralization correctly because different languages may have different plural forms.
💡 Tip: Some of these features may be available with the software development kit (SDK) that you are using, but you may need to add some of them using third-party libraries. It's always important to consider and check this.
Step #4 - Assemble a Team
If you analyze the scope of the project and decide that you cannot complete it by yourself, then it's time to assemble a team.
You may hire a team or, if you are a non-profit organization like freeCodeCamp, use crowdsourcing to ask your community for help with the translations. You may be surprised by the number of generous and kind members of your community who will be willing to help you achieve your goals.
Once you have your team, you can assign them roles:
- Translators use the localization management platform you choose to translate the resources.
- Proofreaders review, edit, and approve the translations. It's always helpful to review the translations to fix any typos or inconsistencies.
- Developers work on integrating the tools you choose to automate the localization process.
- Project Managers coordinate the tasks of the project. They assign translators and proofreaders to specific tasks to make sure that the project moves forward as fast as possible.
Step #5 - Choose the Localization Tools
Choosing the right localization tool can be essential for reaching your goals. In the world of localization, there is a tool called Translation Management System (TMS).
This type of system is designed to help you automate repetitive tasks with the goal of optimizing your team's workflow. Humans will still have a role to play in the localization process, but with the help of a translation management system, they can achieve their goals much faster.
Usually, these systems can be integrated with content management systems (CMS) to import content automatically from other platforms, such as blogging platforms. Once it is imported, you can localize it and export it in order to publish the translated versions.
With the proper integrations, translation management systems can also check if there have been changes in the source files and import the new content automatically to start localizing it.
A real-world example of this process is right next to us — freeCodeCamp translates its source files in Crowdin. When a file from freeCodeCamp's curriculum changes, the new content is updated automatically in the system, so contributors can translate it and publish it very quickly.
Automating this process can be very helpful, especially for large organizations with different projects and files, so you do not have to keep track of these changes manually.
Step #6 - Translate the Resources
If you already chose a translation management system or another helpful tool, then it's time to start translating the resources.
Usually, these platforms will divide the source content into what they call "strings", which are parts of the original text that you can translate. Translators will translate the strings and save their translations.
The software will take care of storing and combining the strings to replace them in the correct place in your file.
Step #7 - Proofread the Translations
Proofreading is one of the most important parts of the process because it's like the last quality assurance step made by humans.
Proofreaders should check if the translations are accurate, and if there is a better way to adapt them to the culture or language. They can also check if there are typos or misspelled words, and if the correct format is used. They can edit and approve the translated strings.
Sometimes they may find an extra comma, a missing emoji, an extra space, or a missing letter and those small details really count for the user experience, so this step should be taken very seriously.
Step #8 - Export the Localized Resources
After proofreading and approving all the translations, the next thing to do is to export the final localized resources.
If your project is small, you may choose to do this manually. But if your project is more complex, you may choose to automate this process with different integrations on your localization management system.
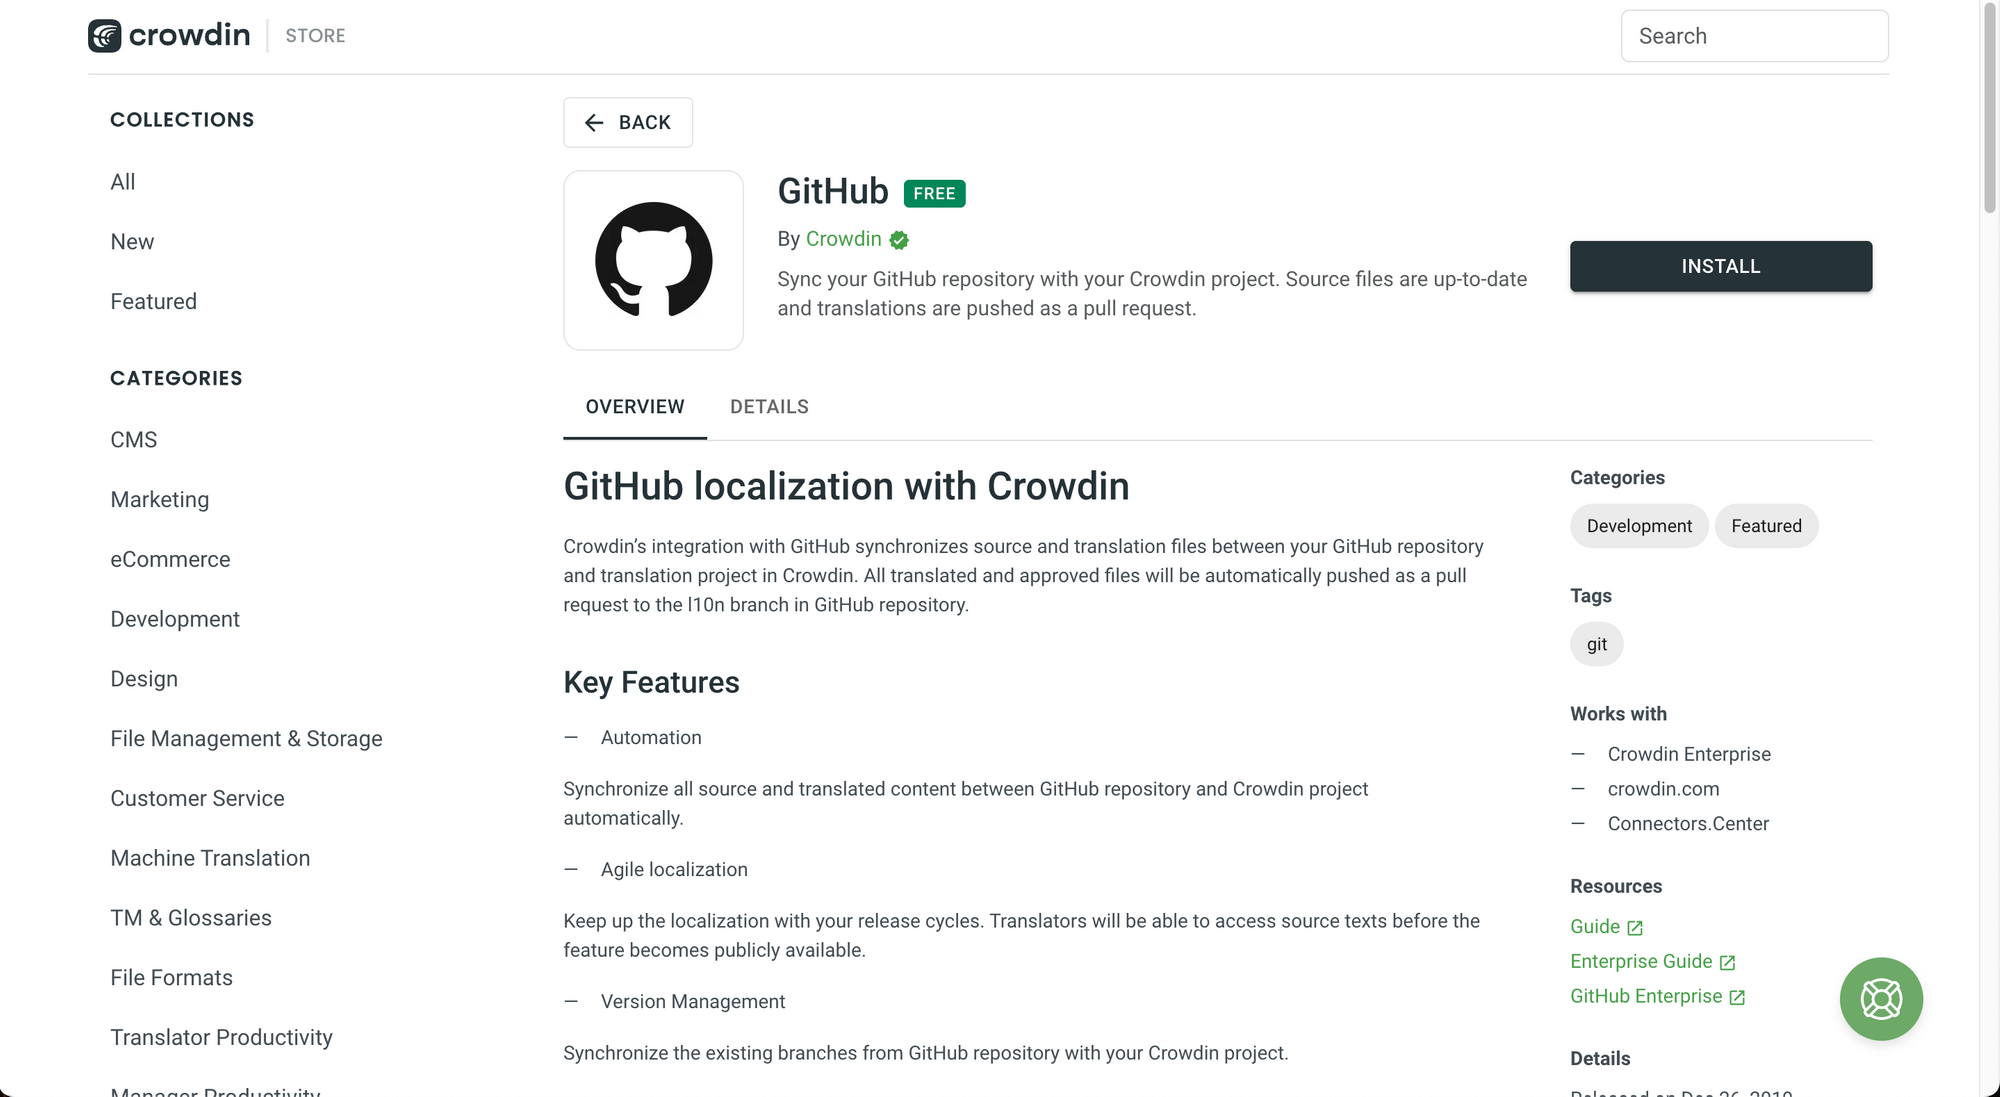
For example, Crowdin has integrations with different platforms, including GitHub, Google Drive, Google Sheets, Dropbox, MailChimp, and so on.
If your translations are ready and approved and you set up a GitHub integration, the translated files will be updated automatically in your project's repository. You can even configure where the translated files will be stored.
Step #9 - Check for Changes
Projects and platforms can evolve over time. Files can change as you add new features and content. This is especially true for freeCodeCamp since we add new content and update our existing content on a regular basis.
So how can we handle these changes and still keep our platform properly localized?
Thanks to Crowdin, we can use integrations to be notified of the changes made to files and we can know if we have new strings to be translated.
When this happens, our amazing team of contributors and staff members will start translating and proofreading the new strings, repeating this cycle every time we need to bring the translation percentage back to 100%.
🔹 Crowdin Fundamentals for Localization Projects
Now that we covered the fundamental concepts of localization, we'll use them in the localization management platform that powers freeCodeCamp's localization effort.
What is a Localization Management Platform?
This is a platform that helps you and your team to localize your resources, products, and platforms efficiently through automation, cloud-based services, and integrations with other platforms.
We talked about translation management platforms before, right?
Localization management platforms are very similar but they help you to localize your products, which is even broader than just translating the text word by word.
What is Crowdin?
Crowdin is a localization management platform that can be described as:
A cloud-based solution that streamlines localization management for your team. (Source: Crowdin)
 Crowdin's landing page.
The team mentions that, "It's the perfect place to effectively manage all of your multilingual content. It allows you to streamline the localization process and keep your workflow agile."
This platform is also great for teams and organizations who are planning to localize their content into multiple languages.
This is Crowdin's official website in case you would like to check it out:
You will be applying your knowledge of localization on this platform, and you'll even learn how to localize a website in just a few minutes with Crowdin's services and integrations.
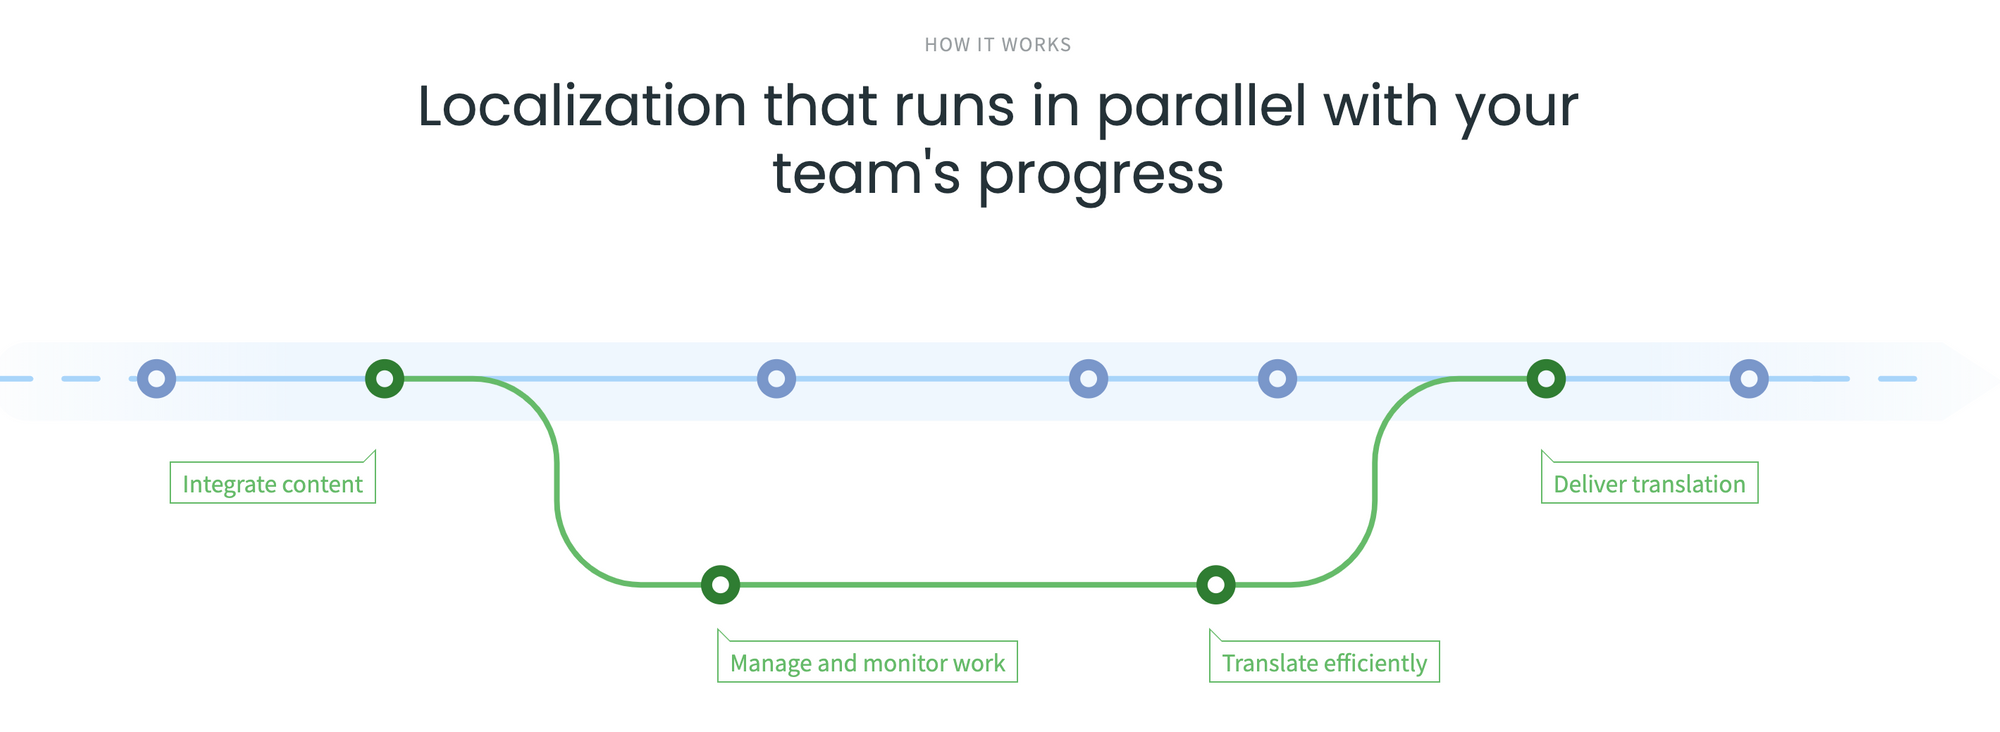 Crowdin Workflow. Image taken from Crowdin's official website.
The Founder of Crowdin
Serhiy Dmytryshyn is the founder and CEO of Crowdin. He launched the company in 2009 and it now has over 2 million registered users in over 160 countries.
 Serhiy Dmytryshyn, founder and CEO of Crowdin.
We had the opportunity to meet with him and ask him how he would describe Crowdin in five words. His answer was:
Continuous Localization for Modern Companies.
— Serhiy Dmytryshyn
His vision is for Crowdin to be the best platform for localizing products that are constantly evolving and for projects that may never have a final version because they will be continuously improved, expanded and updated, such as software products.
freeCodeCamp is an example of this. We are constantly adding and updating our content, which means that we also need an efficient and agile localization process to keep our platform accessible and updated for our global community.
The main goal of Crowdin is to:
Expand the potential of agile localization.
But what is agile localization? Let's see.
What is Agile Localization?
Agile localization is a process in which localization is incorporated into an agile product development cycle, with the goal of localizing the product as quickly as possible as it evolves.
💡 Tip: An agile product development cycle is a cycle in which a product is constantly being updated in an iterative approach.
An agile localization process differs from the traditional localization process in that the translations are not only written once and then added to the final product. They are continuously added and updated as the product changes.
This sound great, right?
But constant updates also require constant management, team work, file uploads and downloads, platform deployments, and so on.
This process could become complicated very quickly if your team does not have the right tools, but with a localization management platform like Crowdin, you and your team can save time and accomplish your goals more efficiently.
Advantages of Crowdin
Let's see some of the reasons why you should use Crowdin:
- You can connect your project with external services through integrations to automate part of the localization process.
- You can store your translations on their cloud-based services and grant access to team members and contributors from all around the world.
- You can generate machine translations automatically when a resource is created and ask translators to check and edit them to save time.
- Your team can check the quality and format of the translations with Crowdin's quality assurance, spellchecking, and proofreading features.
- You can generate reports, communicate with team members internally, assign roles and permissions, invite new members, and much more.
Basically, it's a platform that will make the localization process much easier for you and your team.
Crowdin's Free Plan
One great thing about Crowdin is that they offer a completely free plan with all the essential features for translators to start localizing their content.
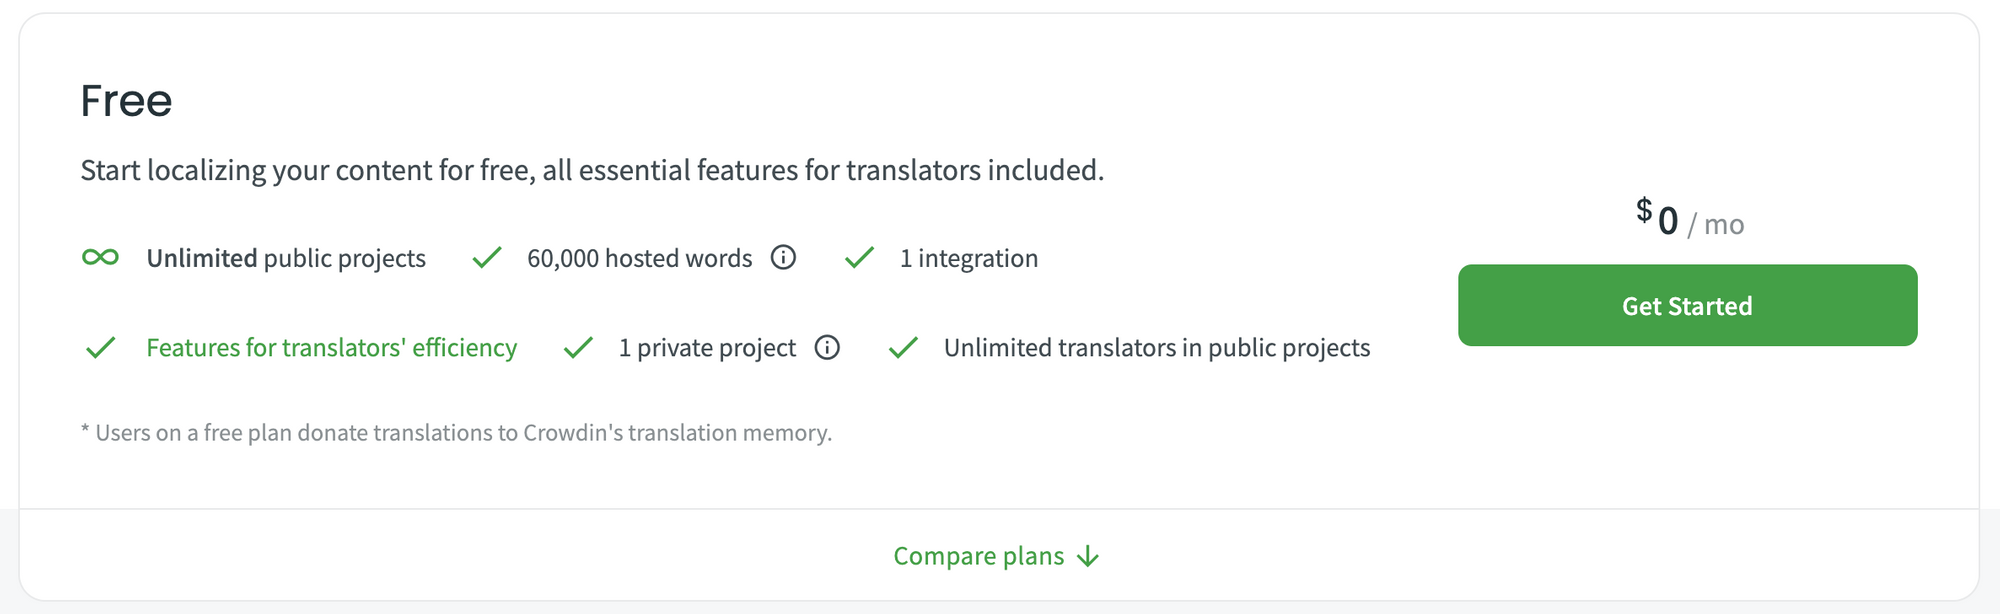 Crowdin's free features.
Yes, it's free! You only need to create an account and you will be able to:
- Create unlimited public projects that everyone can see and contribute to.
- Add unlimited translators to your public projects.
- Create one private project.
- Host up to 60,000 words in your translations.
- Use helpful features for improving translators' efficiency.
- Add one integration to your project (we will talk about integrations in just a moment).
When you sign up and create your account, you can also start a 14-day free trial of their Team plan and they also have a 30-day trial period for their Business plan.
 Frequently Asked Question (FAQ).
Crowdin also has other plans to fit your needs.
 The plans that you can choose from.
Crowdin for Open-Source Projects and Educational Institutions
As a non-profit organization, freeCodeCamp has a special license that Crowdin grants to open-source projects and educational institutions to support their mission.
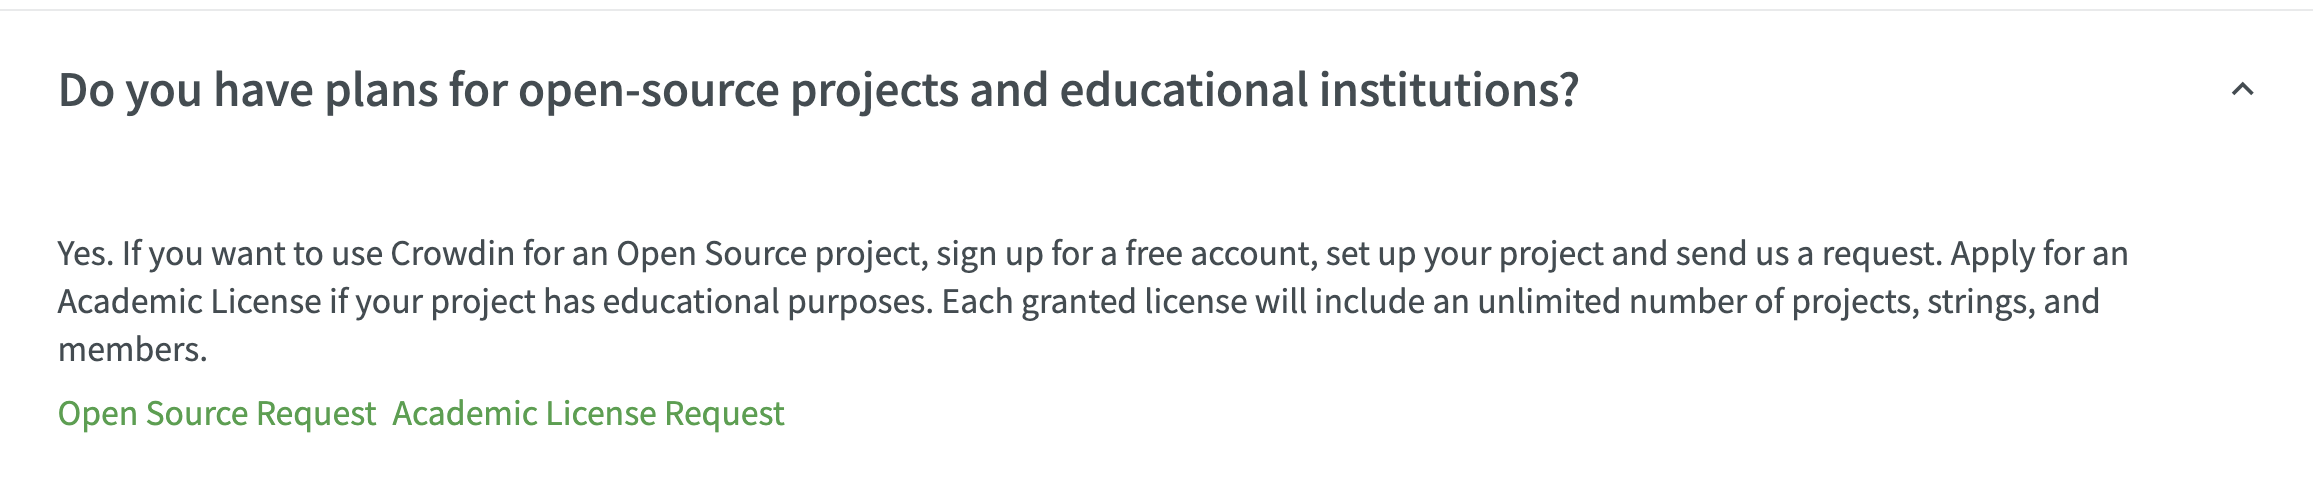 Frequently Asked Question (FAQ).
If you represent an open source project or an educational institution, you can contact Crowdin for an Open Source Request or an Academic License Request.
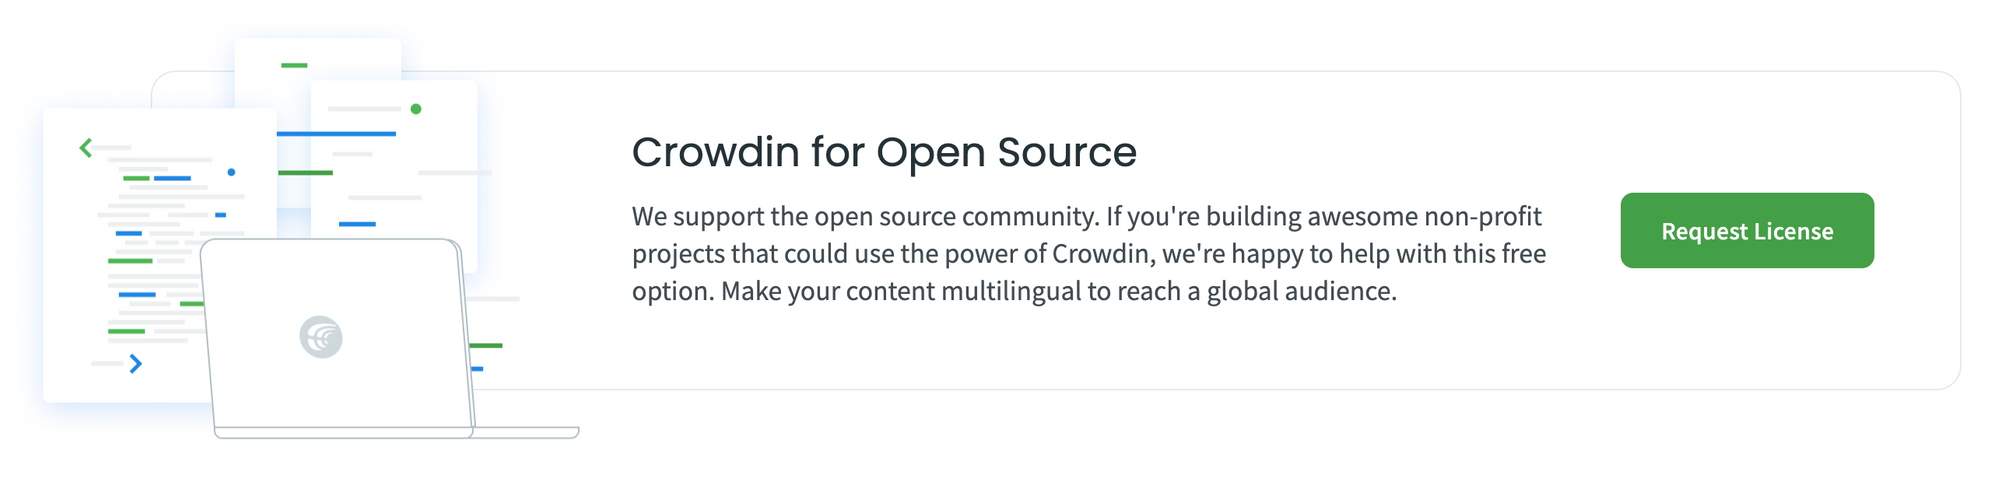 Crowdin for Open Source.
The Crowdin team will assist you and your organization.
Important Terminologies for Using Crowdin
Before we dive into practicing with the features of Crowdin, let's talk a little bit about important terminologies for working with localization management platforms.
You will find these terms very often in the sections that follow, so let's talk about them in detail.
Strings
When you upload a resource to Crowdin, the platform has to divide the text into smaller "segments" that can be translated and saved individually until all the translations are ready. These segments of the original text are what we call "strings". After they have been translated and approved, they cab be combined to generate the localized version of the resource.
💡 Tip: You can think of strings as the smallest units of the translation process. We do not translate the text word by word. We translate them string by string.
Source language
The source language is the original language of the resource. For example, freeCodeCamp's source language is English since the curriculum and documentation are created in English.
Target language
This is the language that our resources are translated into. For example, freeCodeCamp's projects has different target languages because we translate our resources into different languages.
Translation Memory (TM)
This is like a database where we store all the previously translated "segments" of our project. We may store sentences, paragraphs, or other units of the text with their matching source segments. The goal is to reuse the same translations later on in projects when we find them. It is a feature that can save you a lot of time because it only takes a few seconds to choose a saved translation. We can adapt them if we need to but we'll still have a foundation to work on.
Machine Translation (MT)
This process involves a computer software translating the resources of your project automatically without any human intervention. Usually, artificial intelligence and machine learning are part of this process. Translators and proofreaders can then take the computer-generated translations and adapt them or fix them as needed.
💡 Tip: Please note that translation memory (TM) and machine translation (MT) are very different even thought their acronyms are very similar. This may be a bit confusing at first, but always remember that "memory" refers to a translation's database and "machine" refers to an automated translation process.
QA Checks
QA means "Quality Assurance". This is the process of checking if the translations have the correct format and spelling. Crowdin has many QA features that can help your team find and fix any potential errors.
Glossary
This is a database of important terms in your project with their corresponding meanings. The goal of creating and maintaining a glossary is to give your translators more context about the terms and help them choose the most accurate translations.
Screenshot
A picture of what you can see on your computer screen at a particular moment. This is stored as an image file.
Crowdsourcing
This is a localization practice based on community cooperation. Basically, if you are an organization and your goal is to translate your resources into many languages, you can ask help from your community. freeCodeCamp's translation effort is an example of crowdsourcing.
Pre-translation
This is an automated technique that you can use in Crowdin to pre-translate your project automatically using either Machine Translation (MT) or Translation Memory (TM). Then, your translators can check the computer-generated translations and adapt them as needed.
Integrations
These are connections that you can make between Crowdin and other applications or services, such as GitHub, Google Drive, Google Sheets, and so on. This is how freeCodeCamp keeps its GitHub repository translated. When we add new strings, they are automatically uploaded to Crowdin and translators can start working on them.
Webhooks
These are automated "messages" that an application or platform will send to another application or platform when specific events happen. In Crowdin, you can send them when translations are completed, when files are proofread, and so on.
Command-line Interface (CLI)
This is a text-based user interface that we can use to interact with a computer program by entering commands. Crowdin has a command-line interface (CLI) called the Crowdin Console Client that allows you to synchronize localization resources with your project.
Application Programming Interface (API)
This is an intermediary that allows two applications to communicate with each other by sending information following specific protocols. Crowdin also has an API that can help you to integrate localization into your development process.
Custom Variables
In Crowdin, you can specify variables that should not be translated. They will be highlighted in the source strings that translators can see. To enable this feature, you will need to contact the support team at Crowdin.
Getting Started with Crowdin
After this detailed but super important introduction into the fundamentals of localization, now it's time to dive into practice and start working on Crowdin.
How to Create a Crowdin Account
If your goal is to create a project on Crowdin, you'll need to create an account if you don't have one already.
To do that, go to crowdin.com.
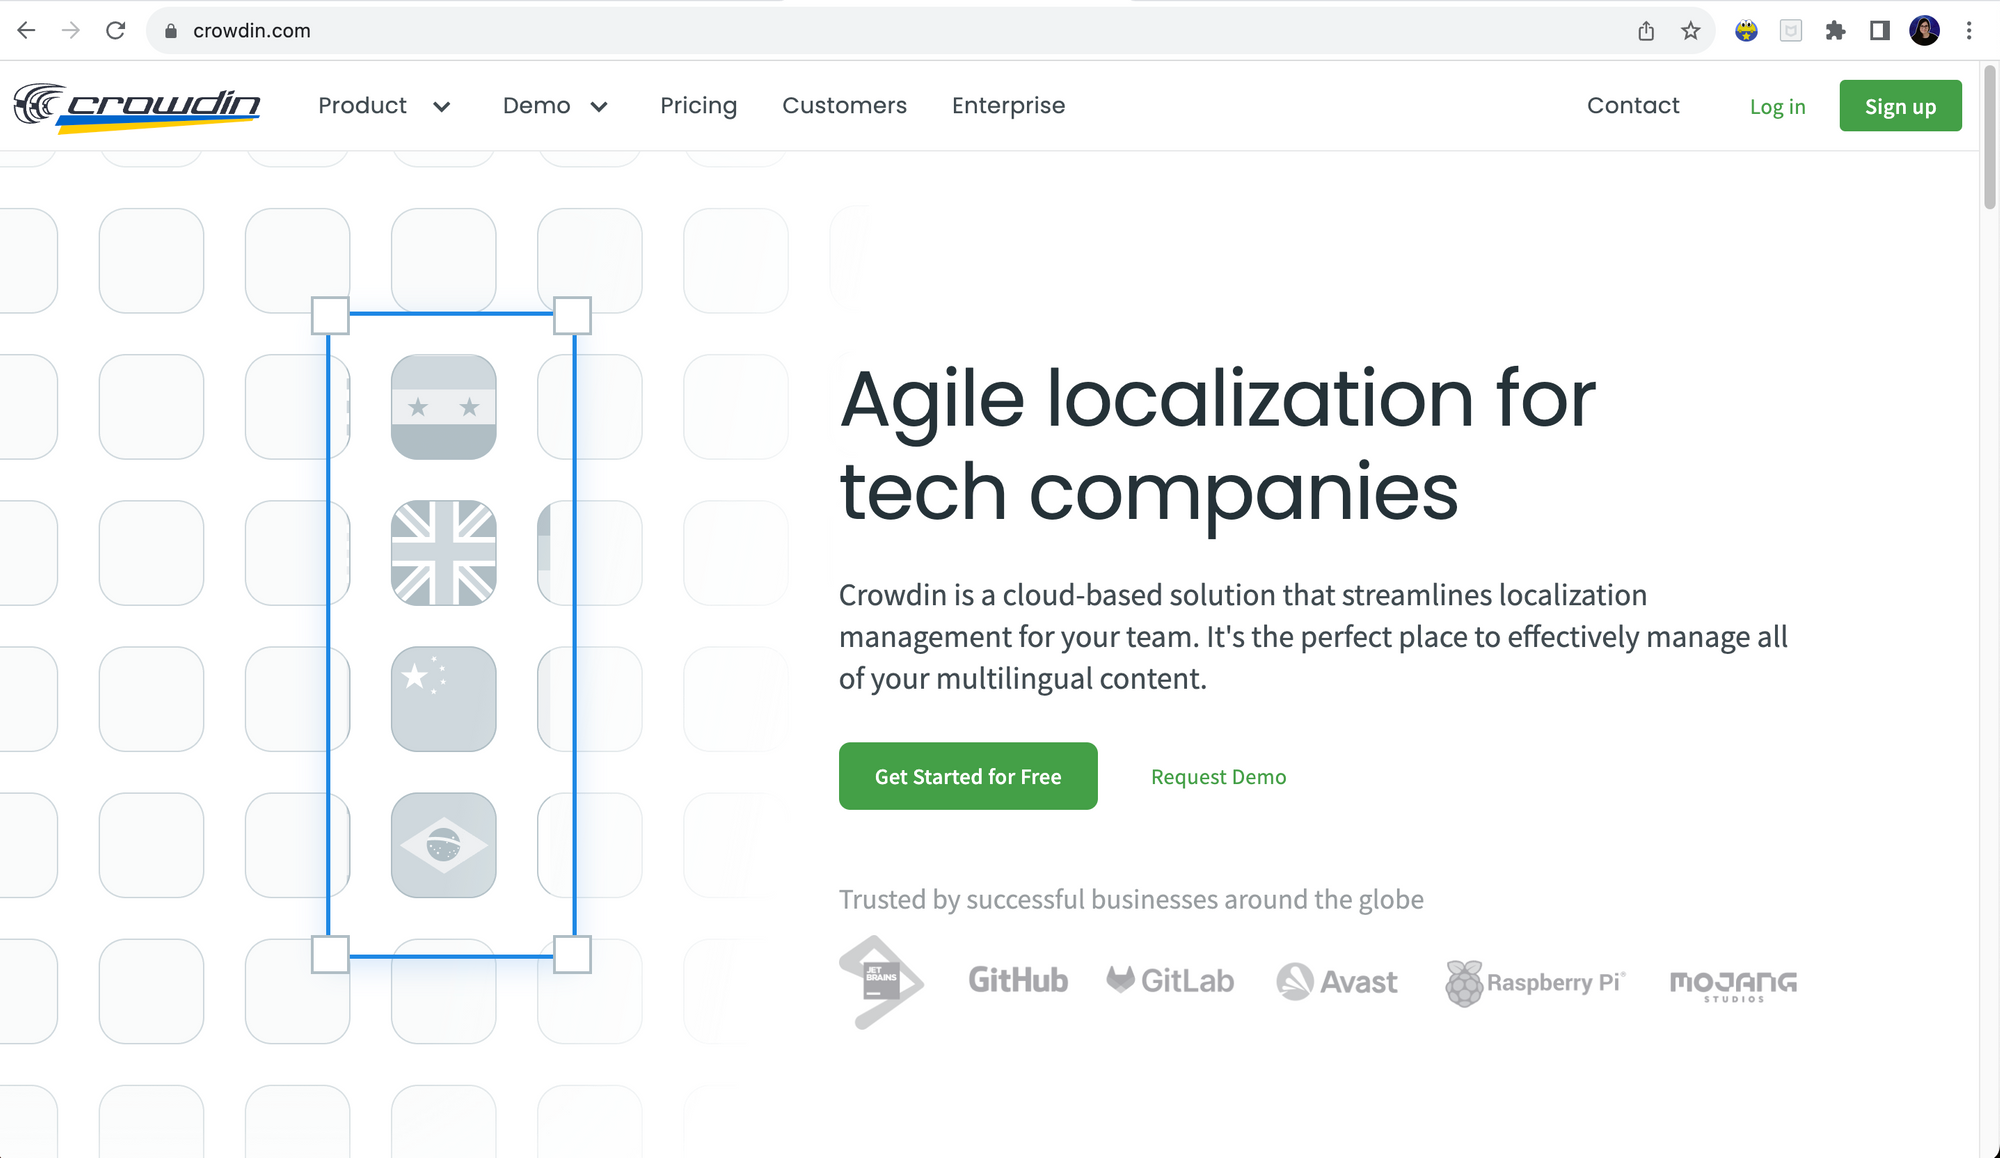 Crowdin Landing page.
Click on Sign up.
 Sign up Button.
- Create your account by filling and submitting the form. You will need to enter your email, username, and password. You will also have to agree to the terms by checking the checkbox.
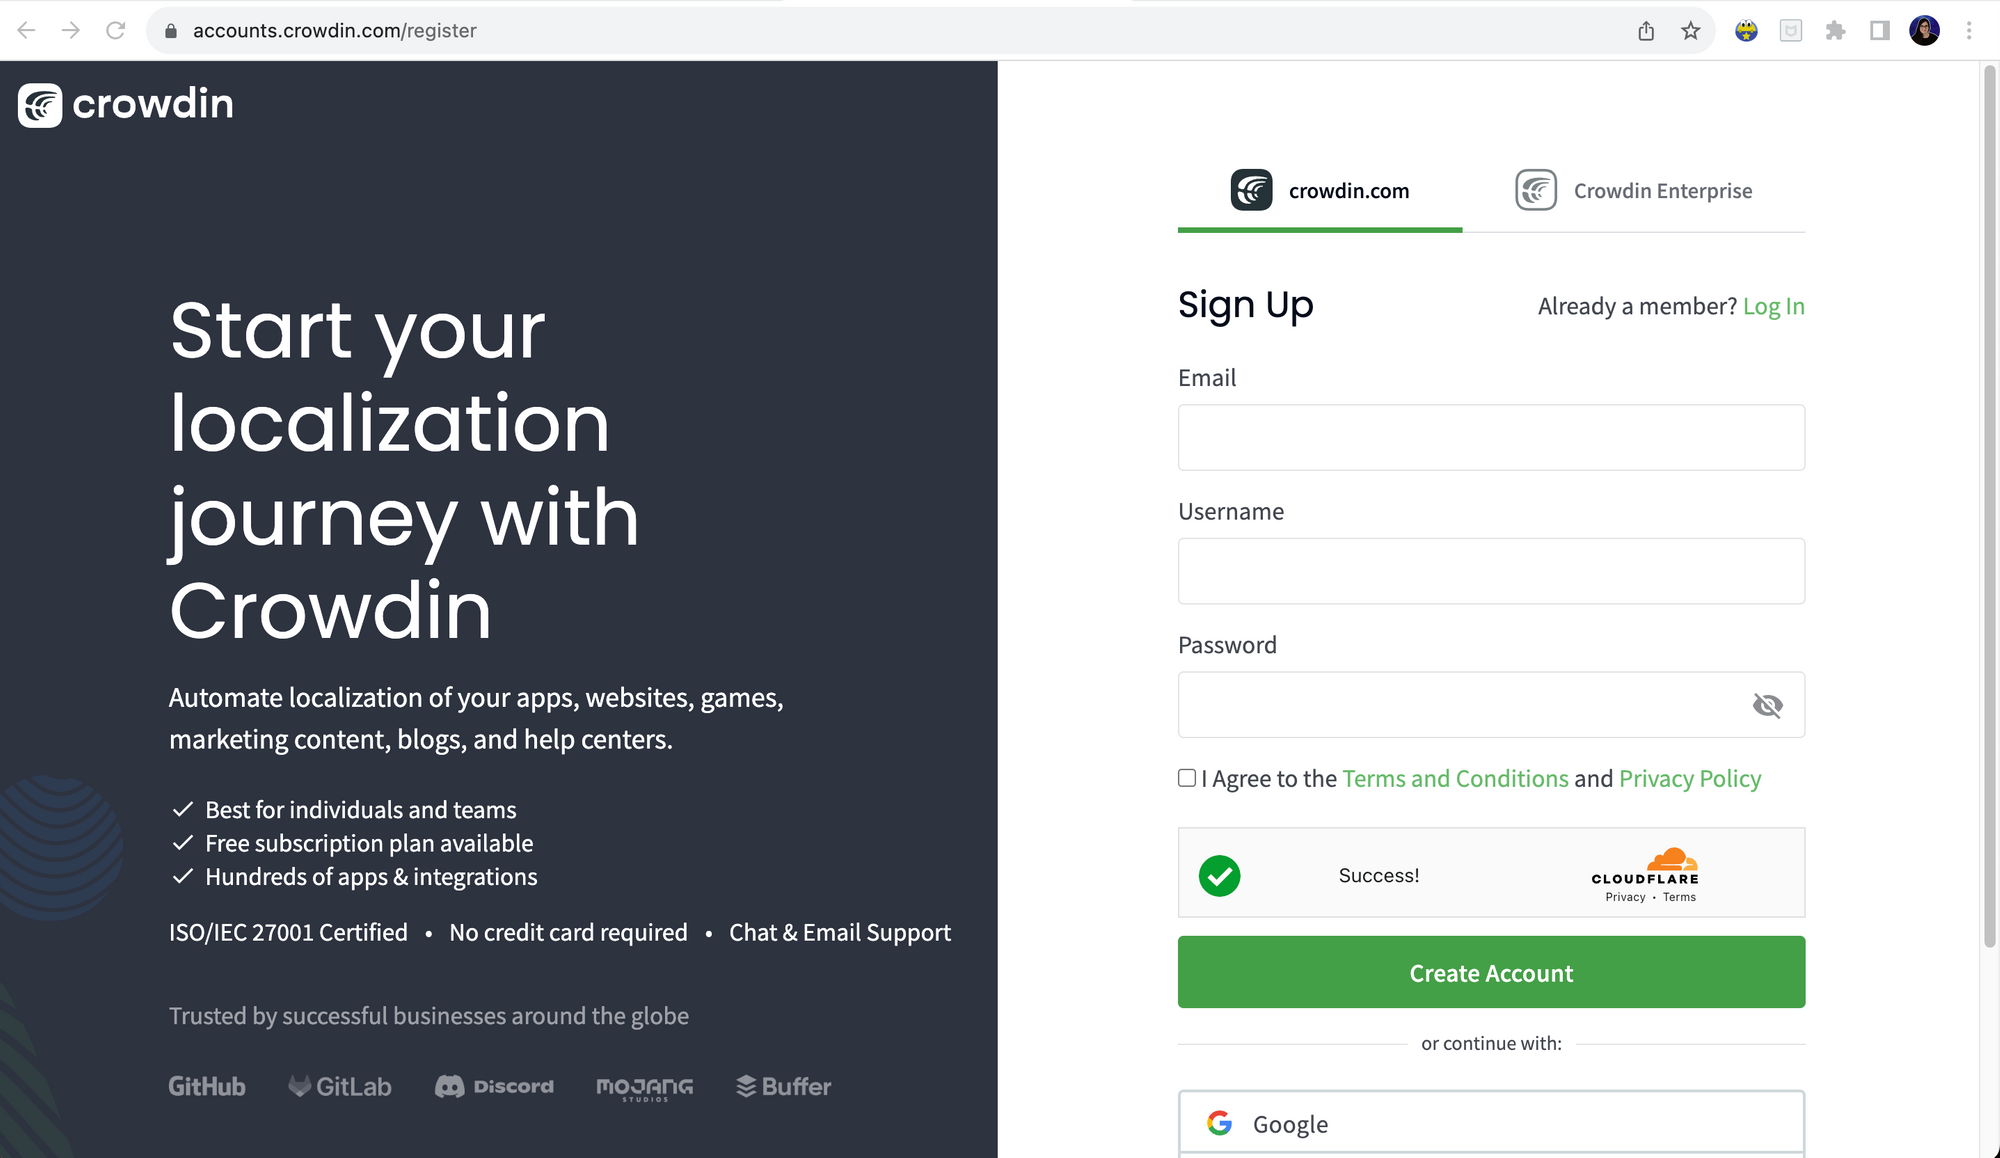 Sign up form.
💡 Tip: After signing up, you will need to confirm your email address. You will receive an email from Crowdin with a link that you can click on to go to your profile. You should see a confirmation message saying that your email was confirmed.
After signing up (or logging in if you already have an account), you will see your new Crowdin profile where you can manage your projects, team members, workflows, activity, and so on.
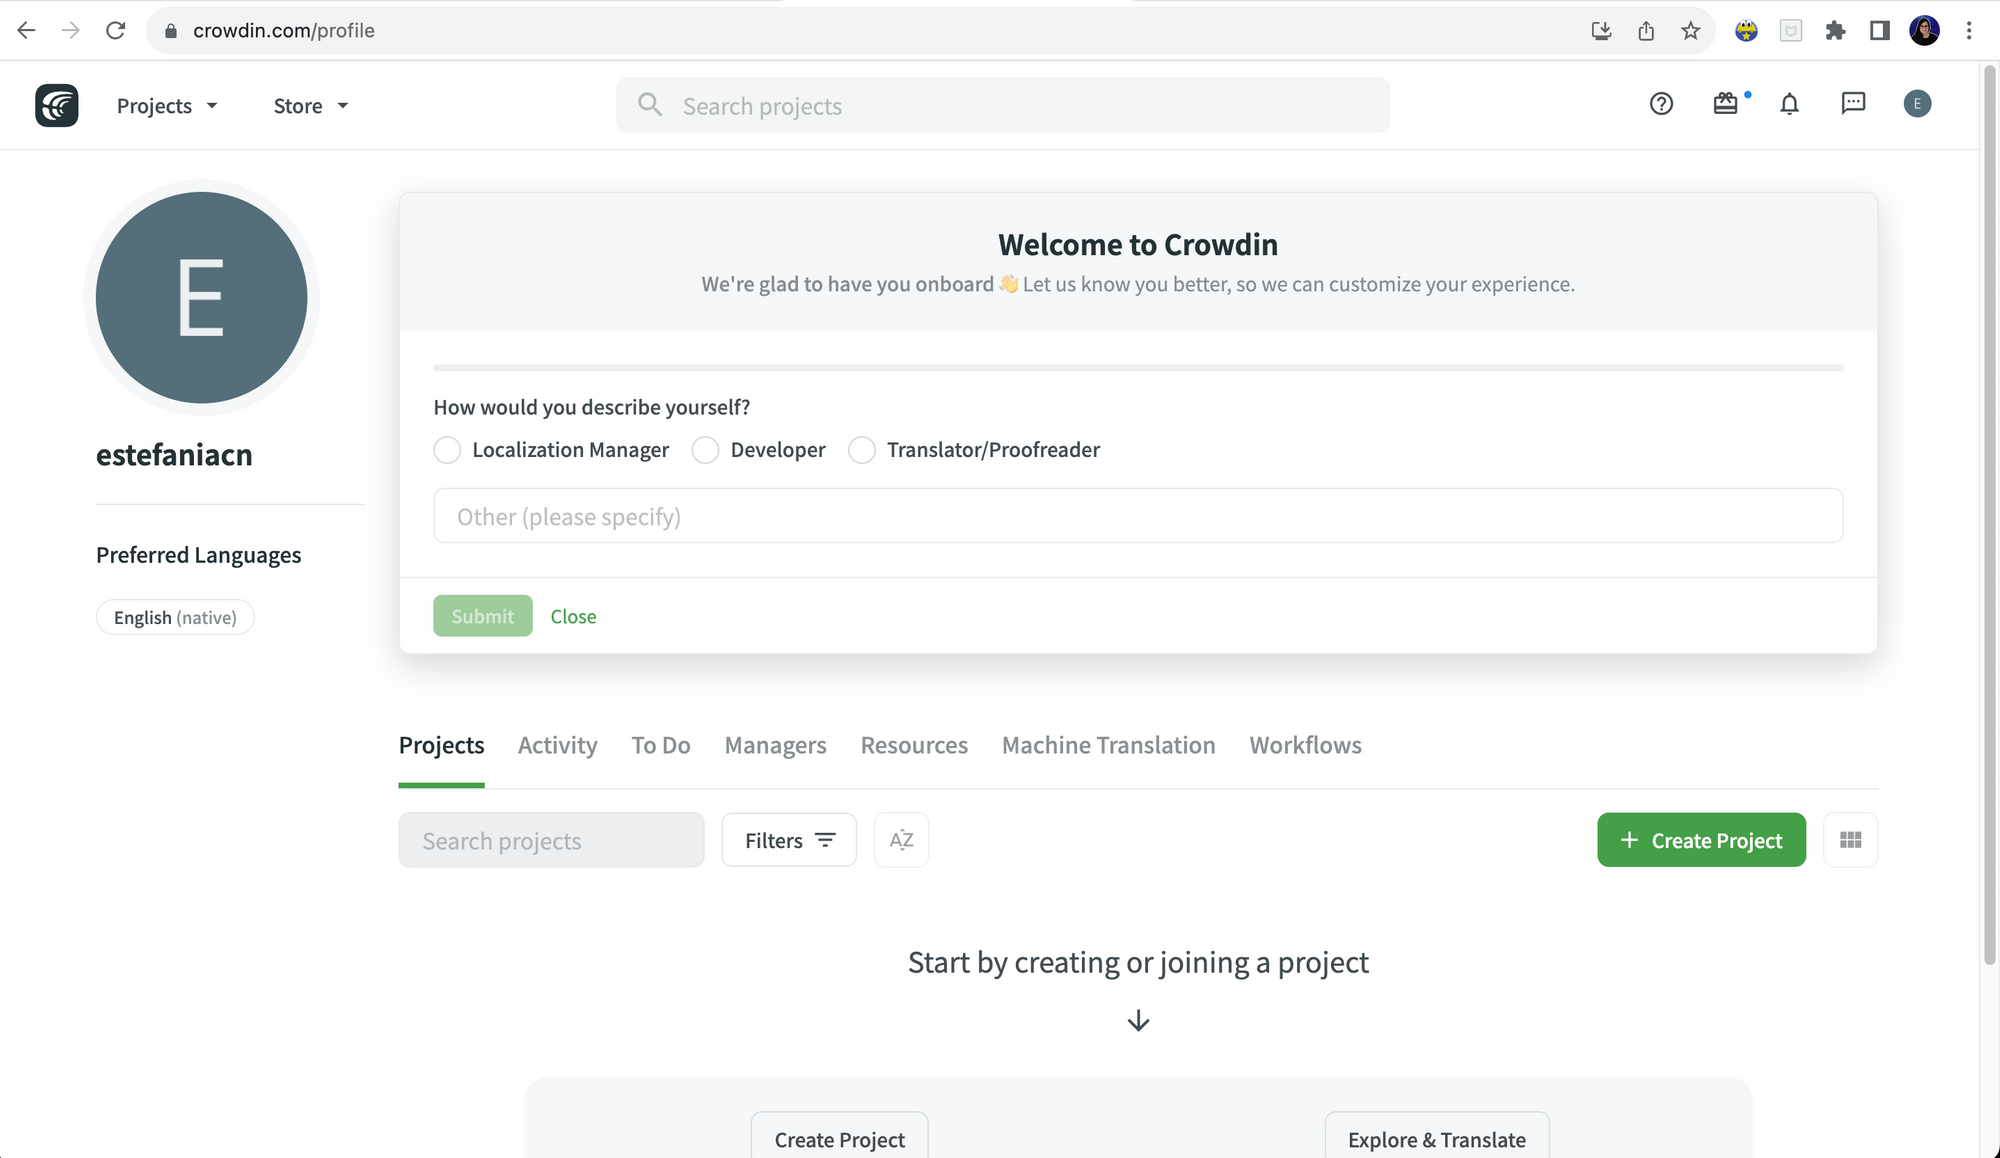 New Crowdin Profile.
🎉 Congratulations! Now you have your Crowdin account and you are ready to start customizing your profile.
How to Customize your Crowdin Profile
To customize your profile:
Click on the small profile image at the top right, and choose "Settings" from the dropdown menu.
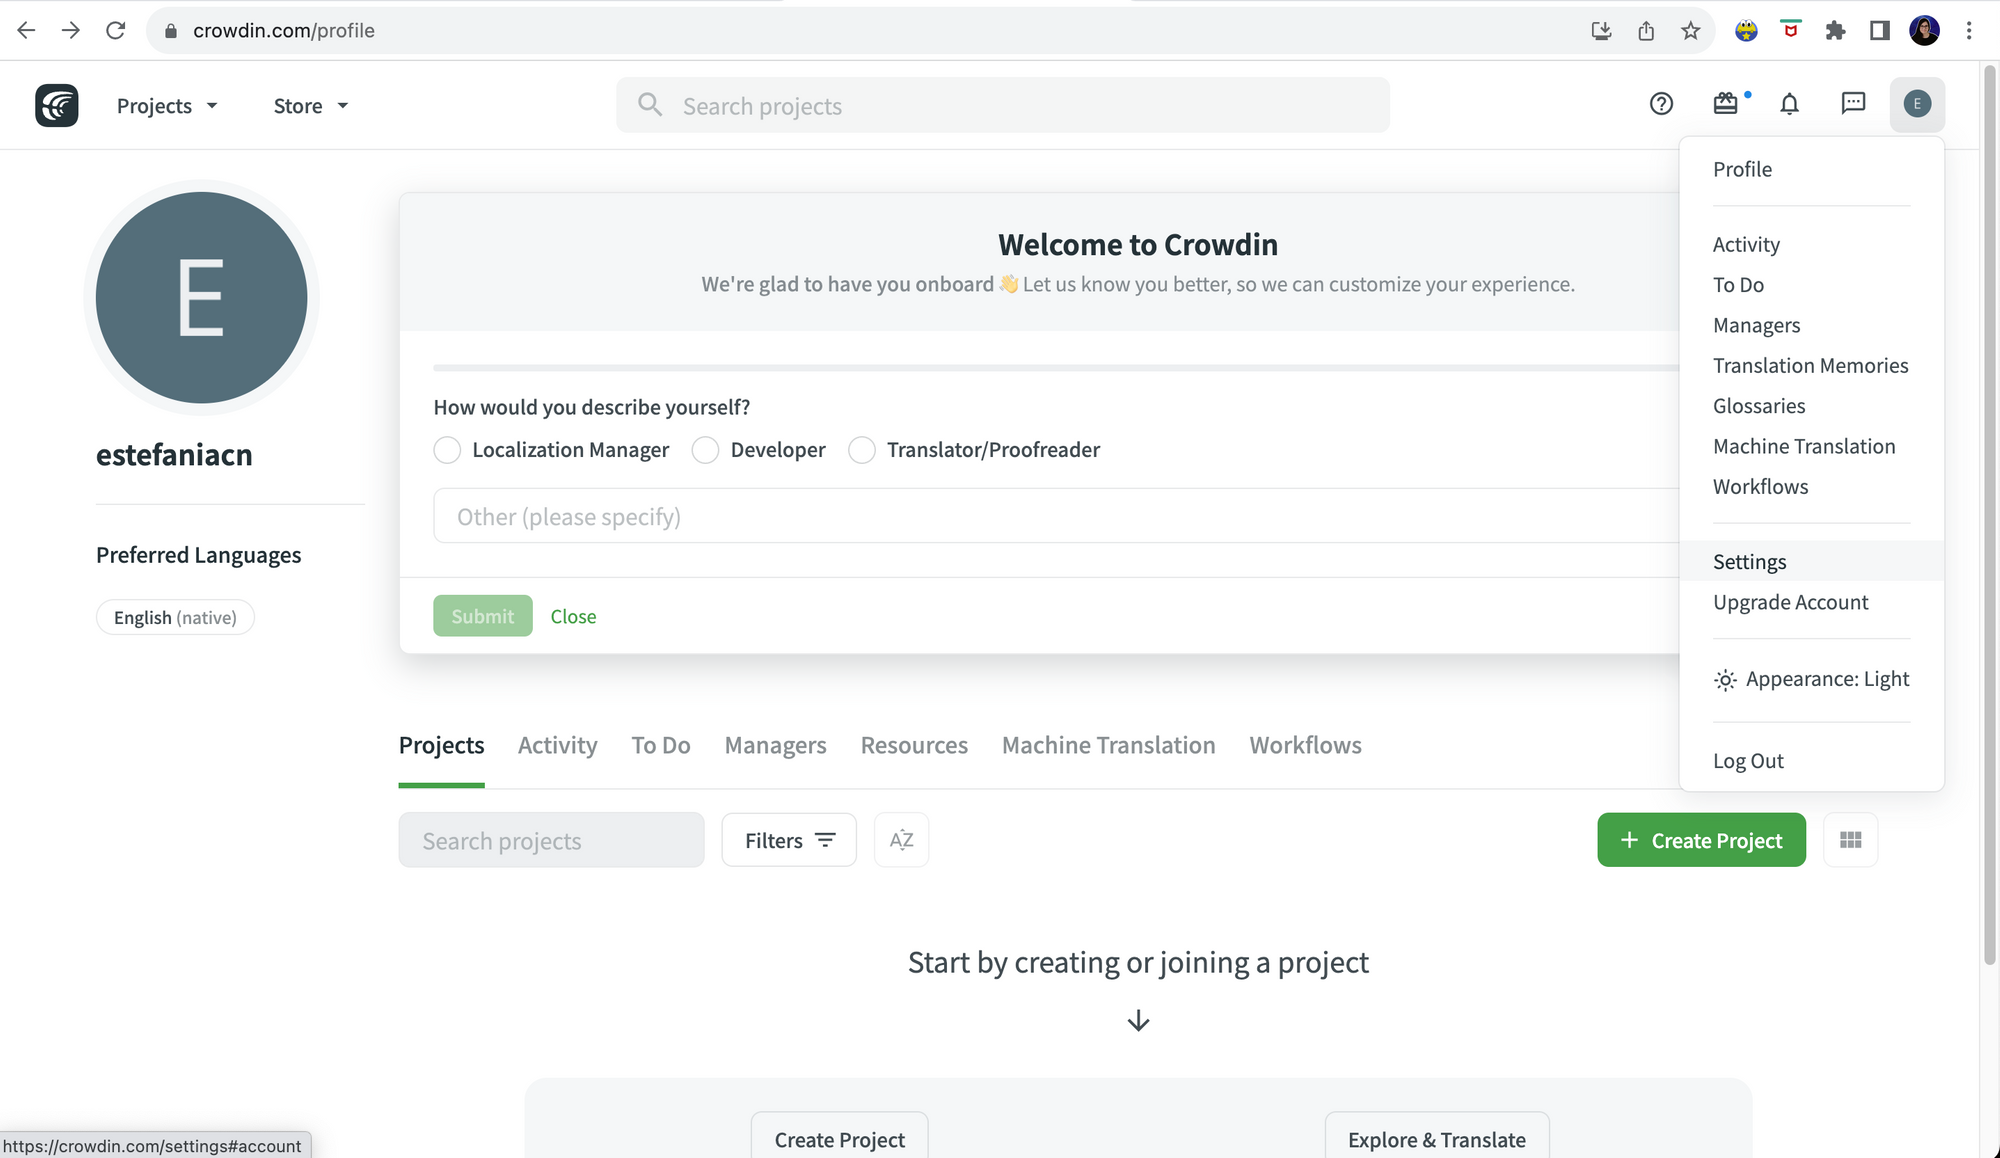 Customize your profile.
You will see your profile and the information that you can customize, such as your:
- Profile image.
- Full name, username, and email.
- Company and job title.
- Gender.
- A brief description of you.
- Language, timezone, and time format.
- Preferred languages.
- Appearance (light, dark, or based on your local time).
- Privacy. By default, your profile is public. Check this option if you would like to make your profile private.
 Account Settings > Profile.
💡 Tip: From this page, you can also delete your account. You will see a red button at the bottom and a warning of the consequences of doing so. You should only click this button if you are absolutely sure that you need to delete all your projects and the data associated with them.
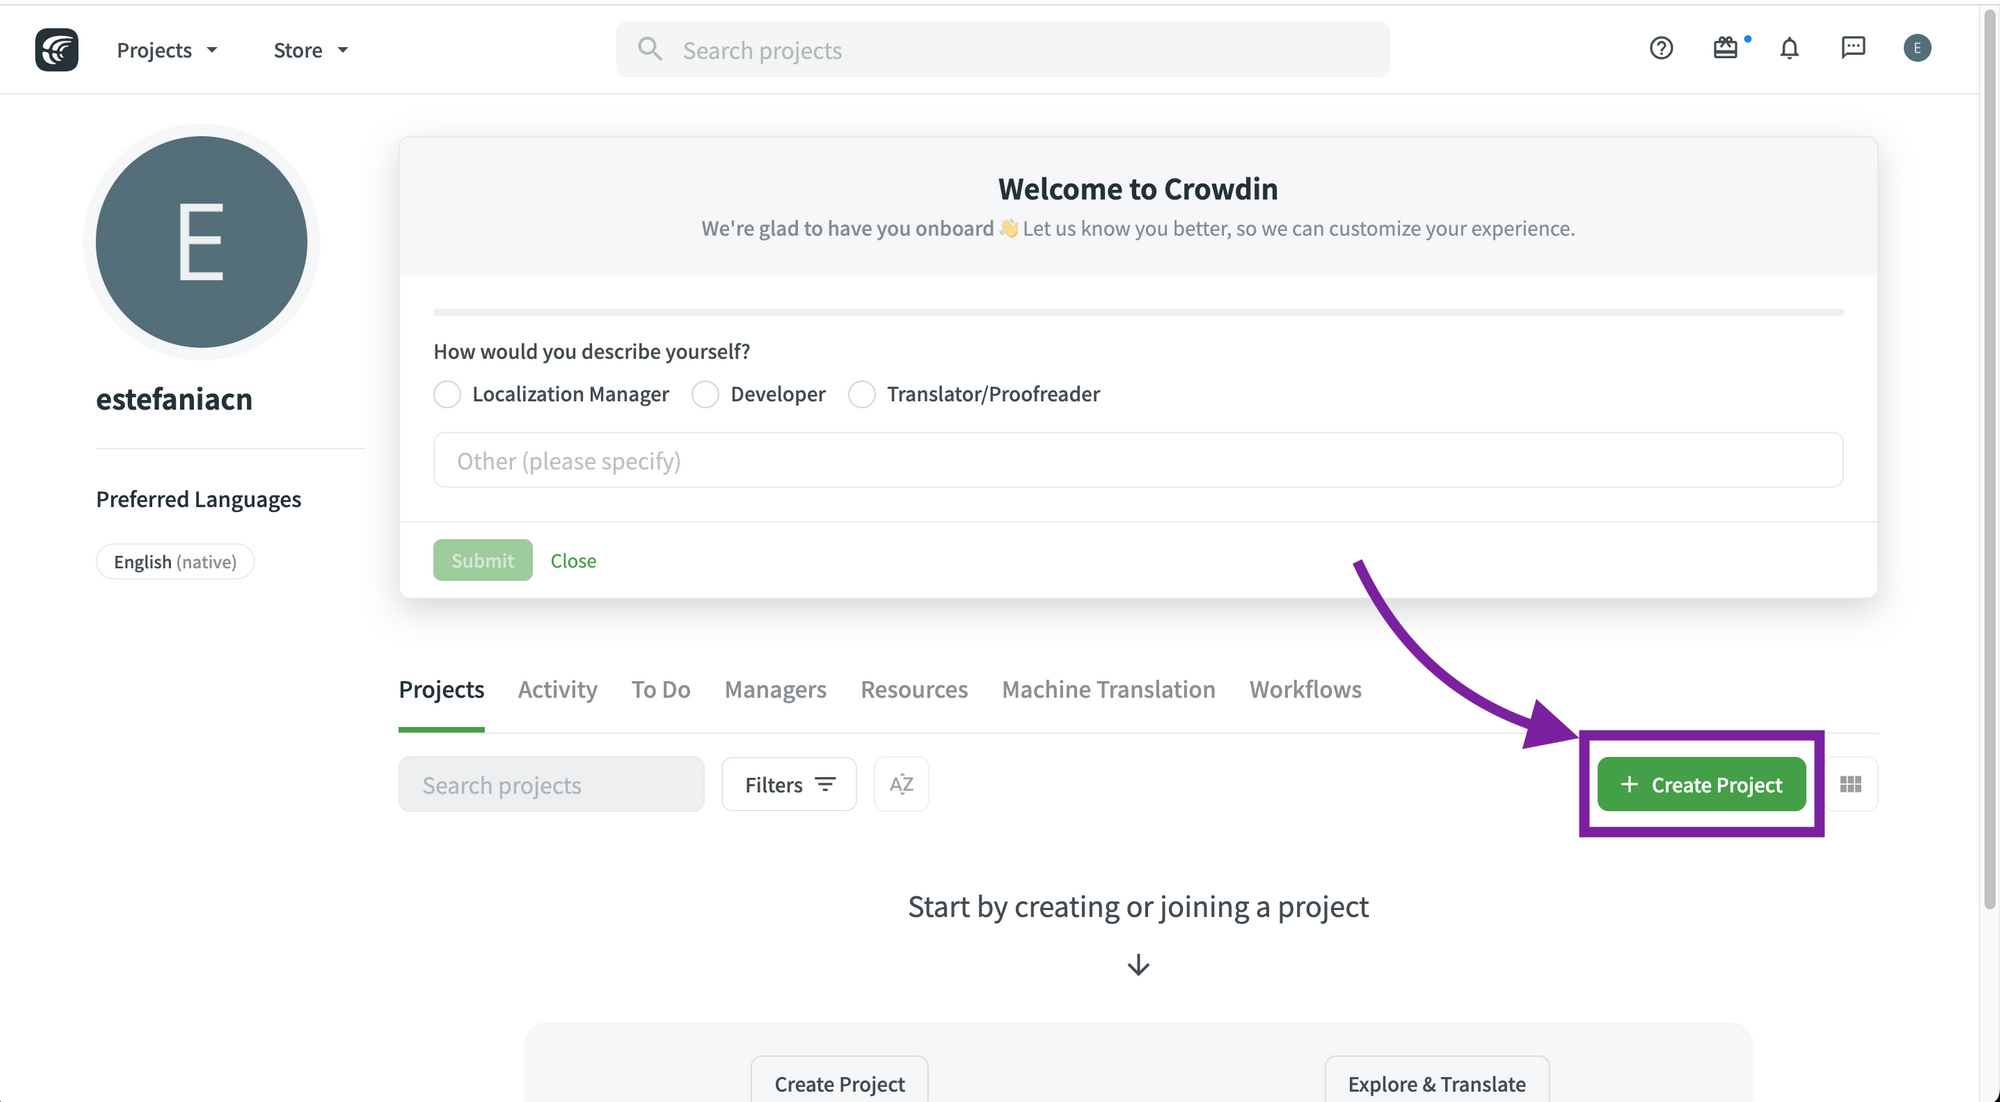
How to Create a Project on Crowdin
Now that you know how to customize your profile, let's create a project. You can create a project from your profile page.
If you are in a different part of the platform, you can go back to your profile by clicking on the your small profile image at the top right and click on "Profile", like you can see in the image below:
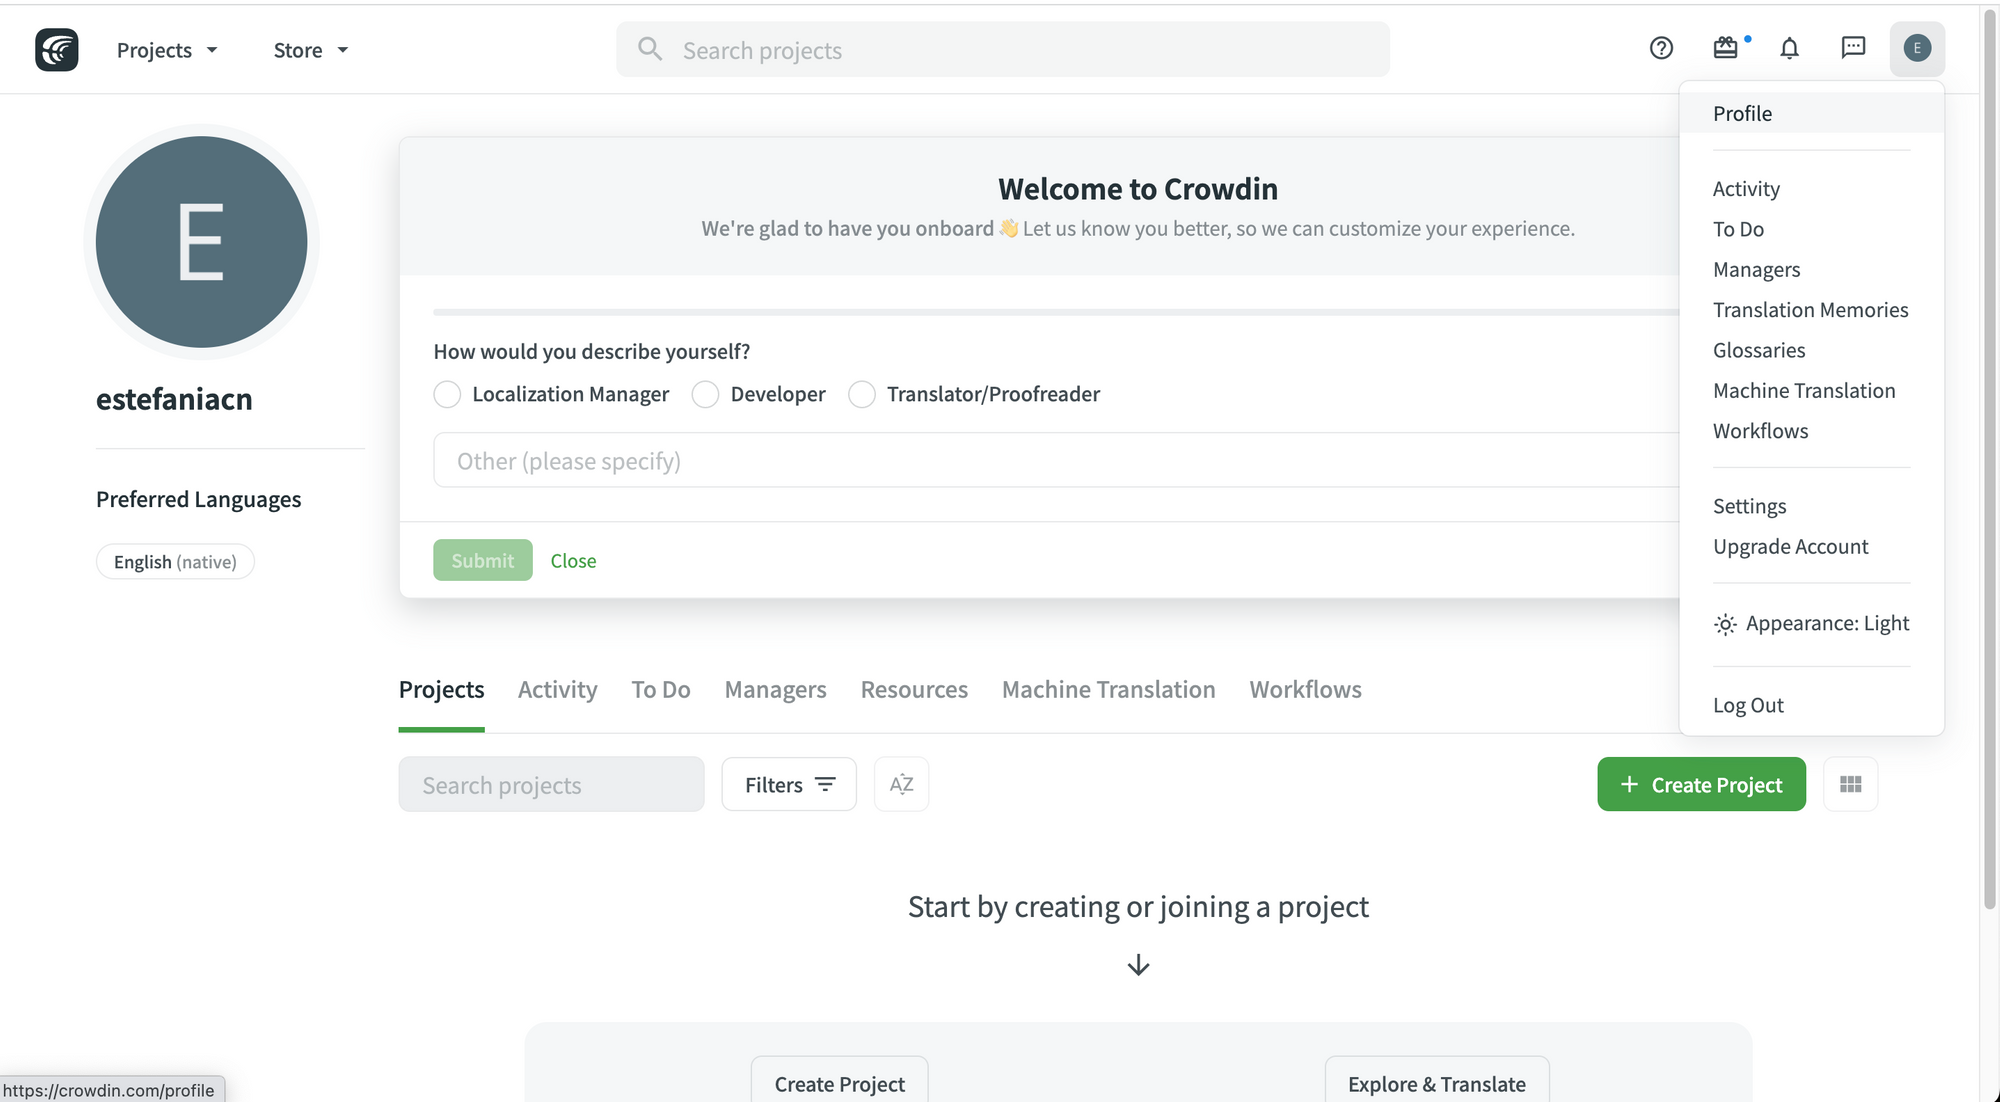 The Profile page.
To create a project, click on the "Create Project" button (the green one or the gray one, they are both equivalent).
 Create Project (green button).
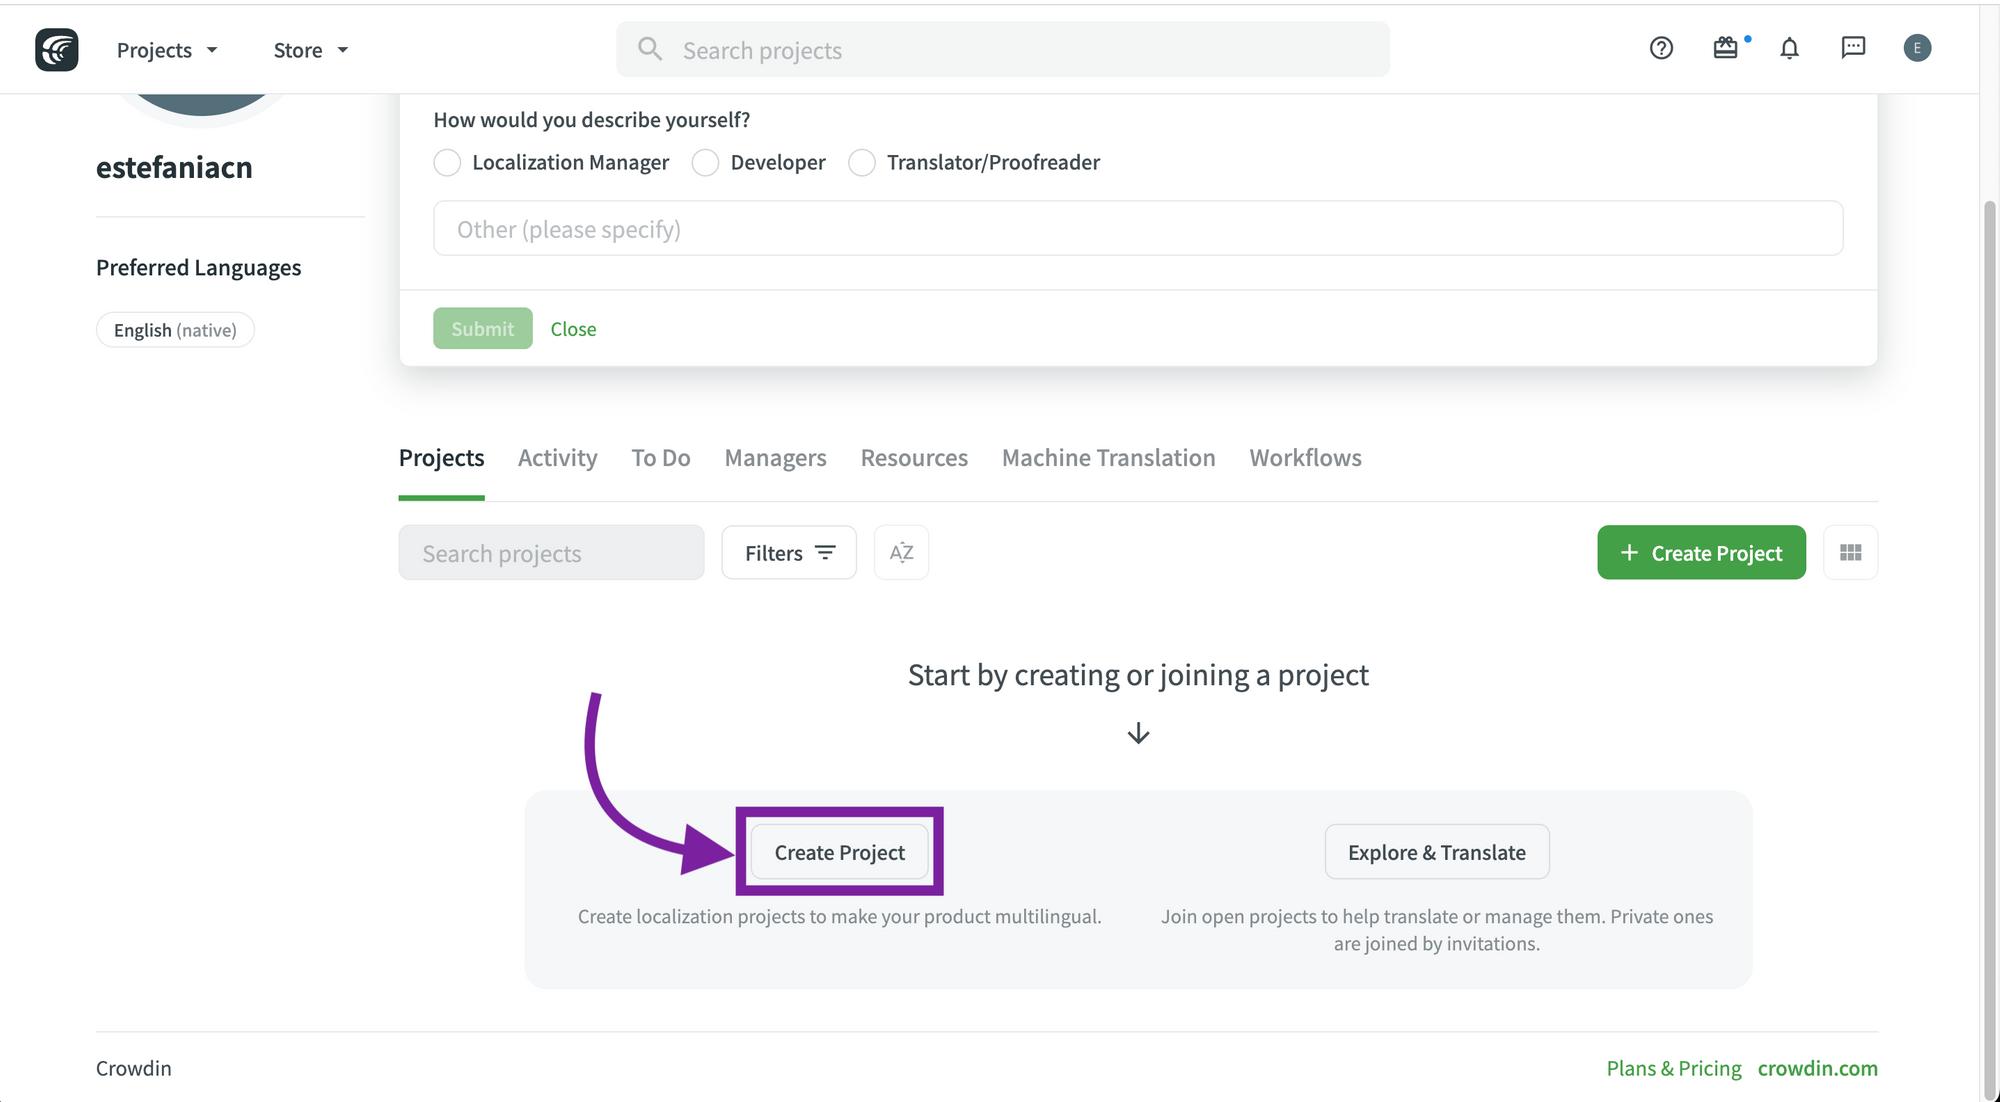 Create Project (gray button).
You will see a page where you can fill the basic information about your project, such as:
- Name.
- Project address. This is the URL for your project. If your project address has multiple words, separate them with dashes (-).
- Privacy settings (public or private).
- The source language.
- The target language(s).
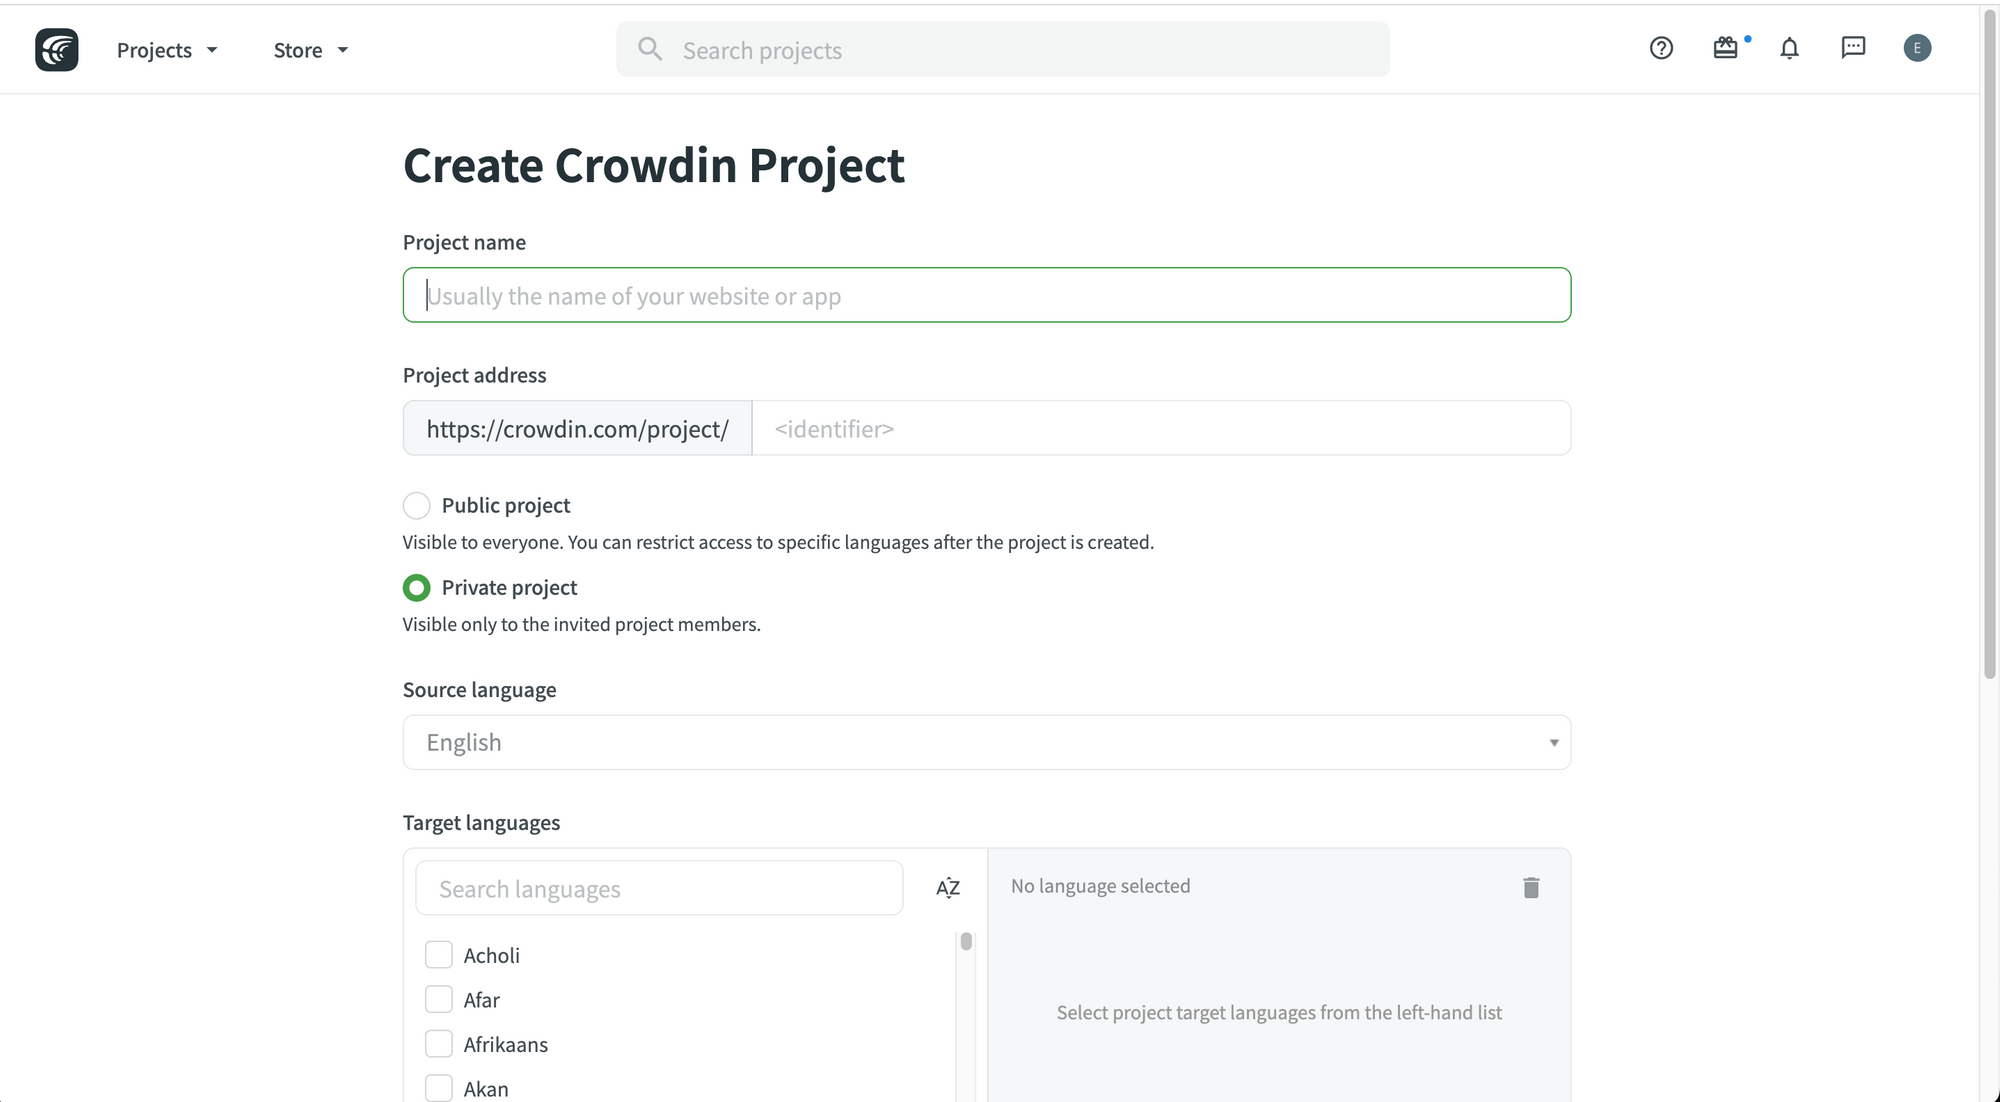 Creating a Project.
💡 Tip: Your project address must be unique. It will be filled automatically when you write your project name. If it is already taken by another user, you will see a red warning and you will need to choose a different one.
You can choose as many target languages as you need. Just check their checkboxes and they will be added.
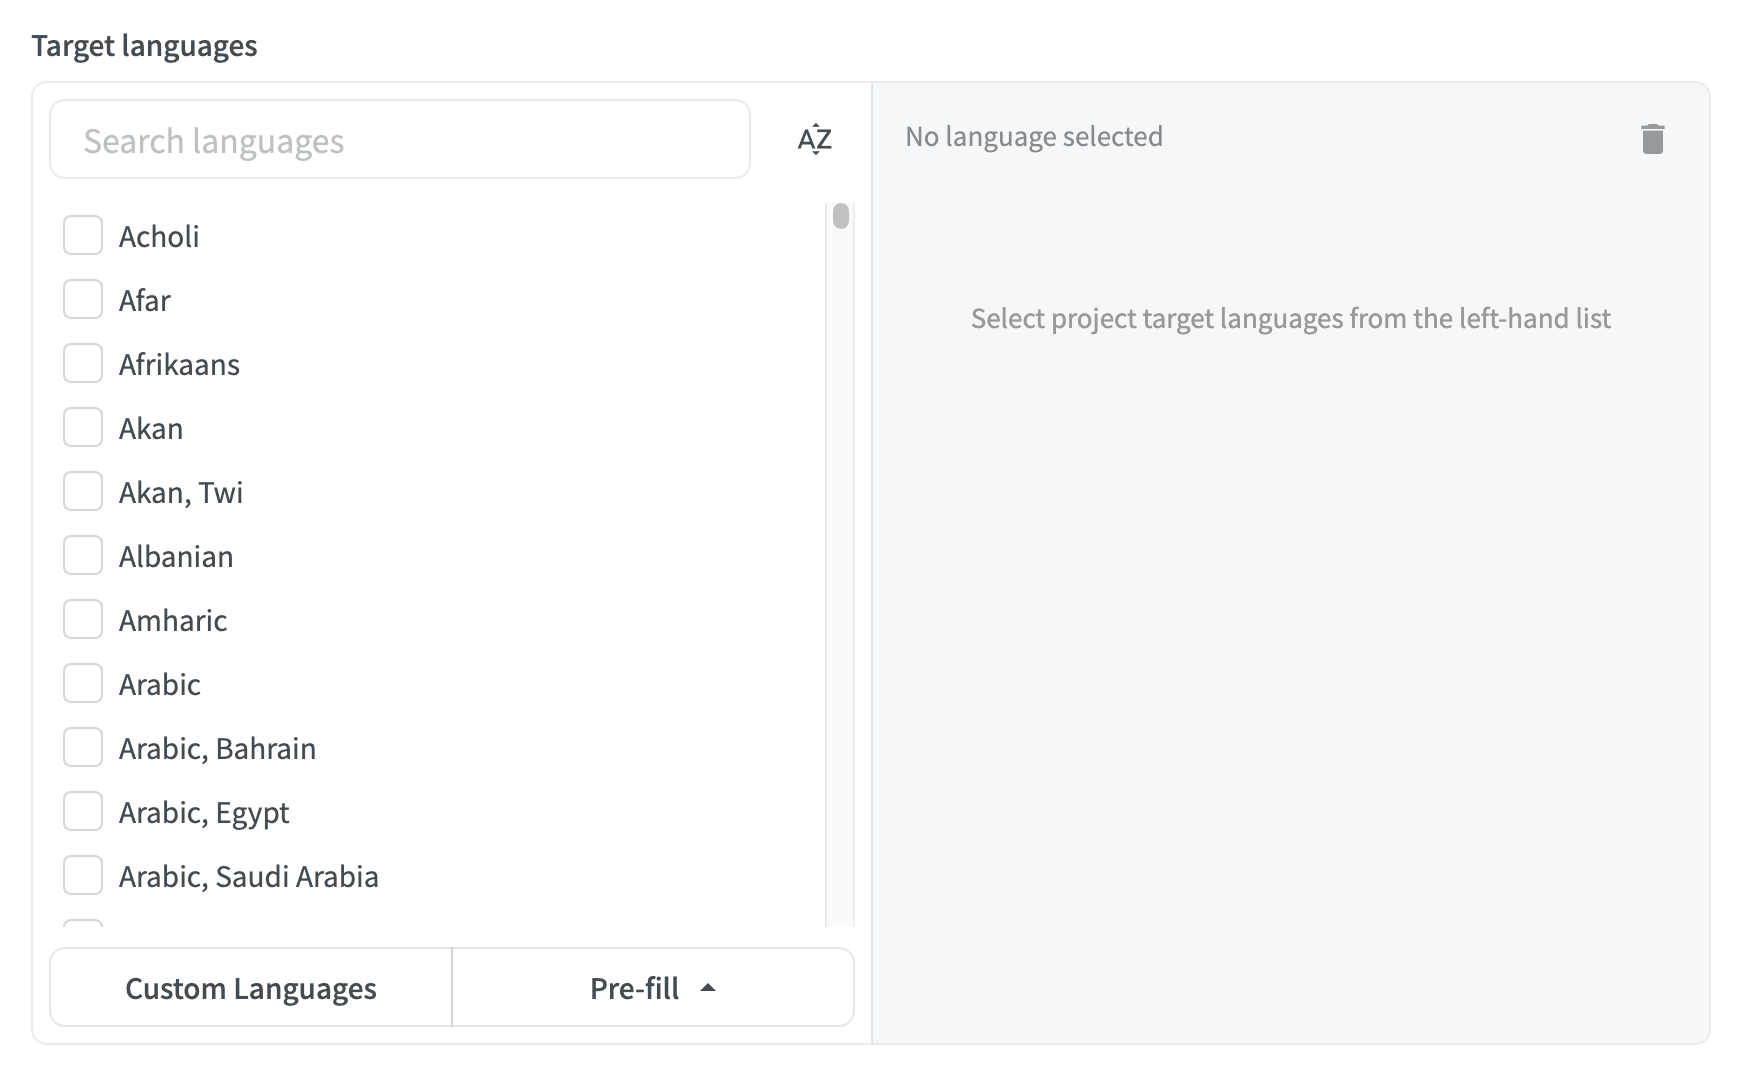 Target languages.
This what you should see when you start choosing your target languages:
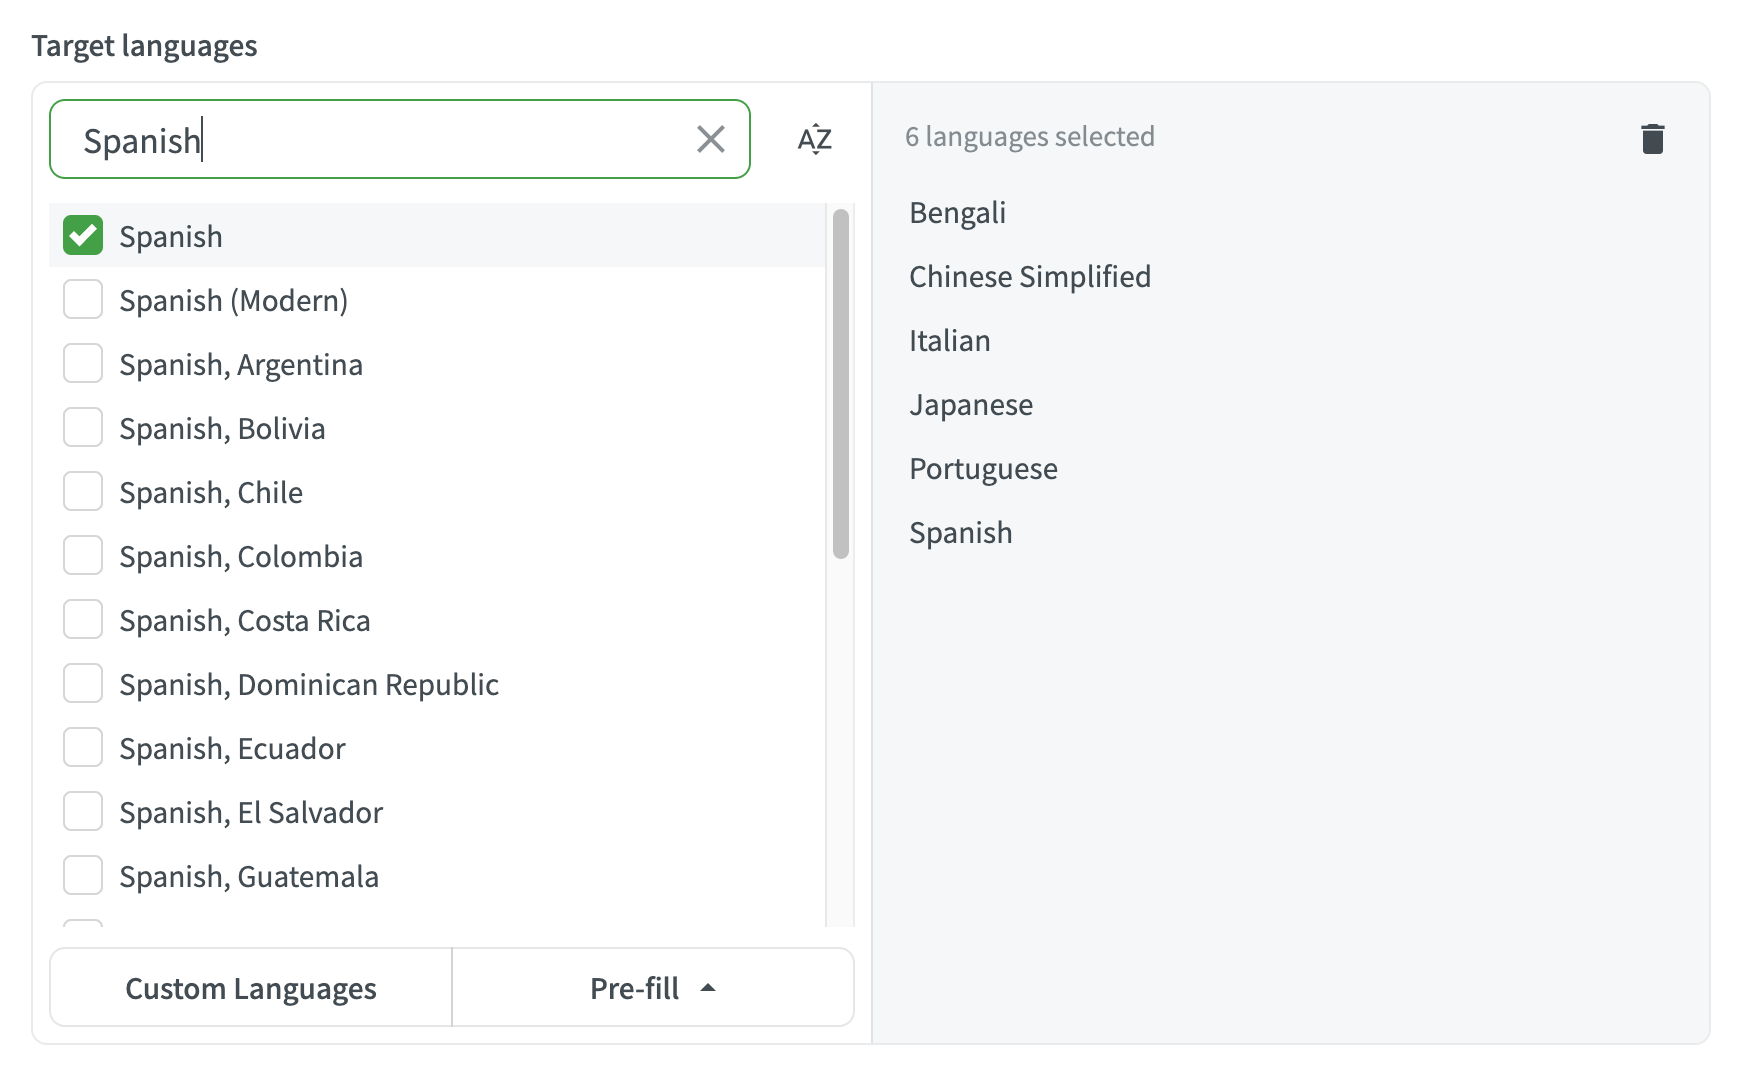 Choosing some target languages.
You also have an option to pre-fill the selection with the top 30 languages without selecting them manually:
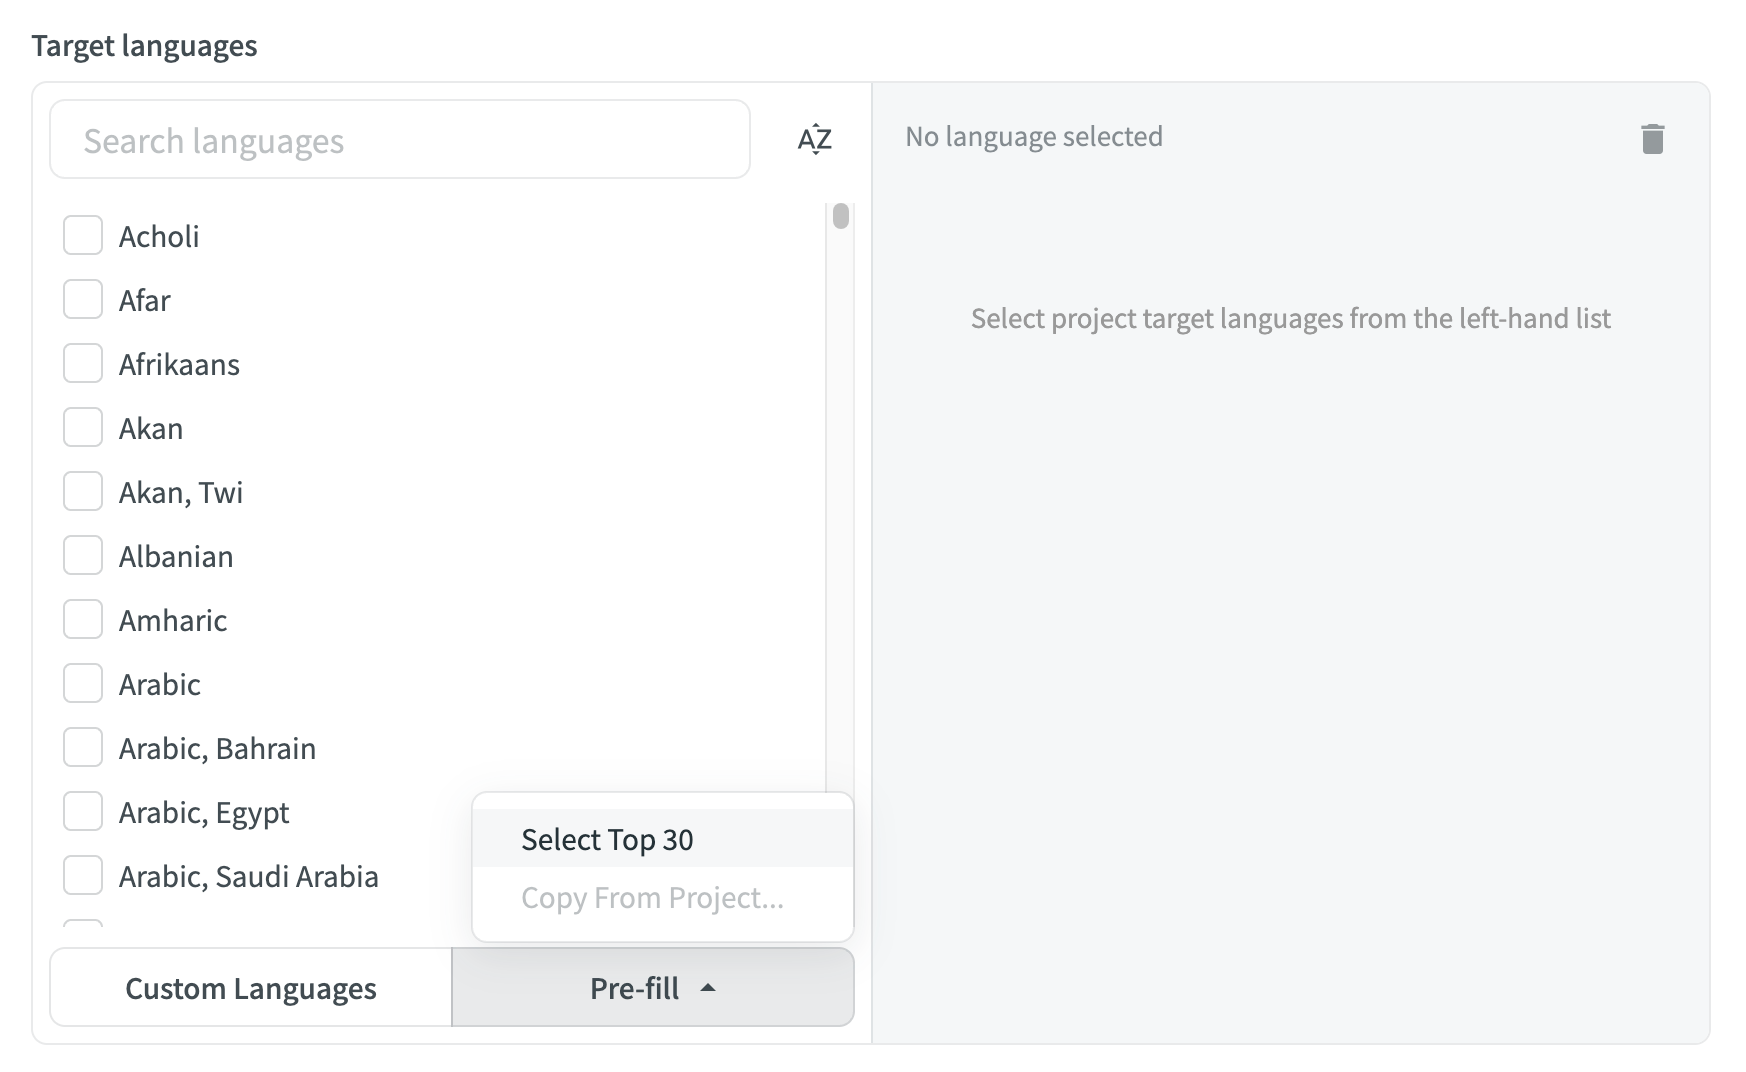 Select Top 30 languages.
💡 Tip: You can also create custom languages or copy the selection that you made for another project.
If you choose to add a custom language, you will see this:
 Adding custom languages.
Since this is a completely custom language, you will have to specify:
- The language name.
- If it is a dialect of another language.
- The code for that language on Crowdin.
- Its three-letter code.
- Its locale-code.
- If the text will be written from left to right or from right to left.
The plural form.
After filling all these information, you are ready to create your project. Just click on the "Create Project" button at the bottom of the page.

💡 Tip: You can also click "Cancel" and go back to this page if you want to start over.
Now you should able to see your project. Of course, it will be empty at first but don't worry. We will take care of that in just a moment. 😉
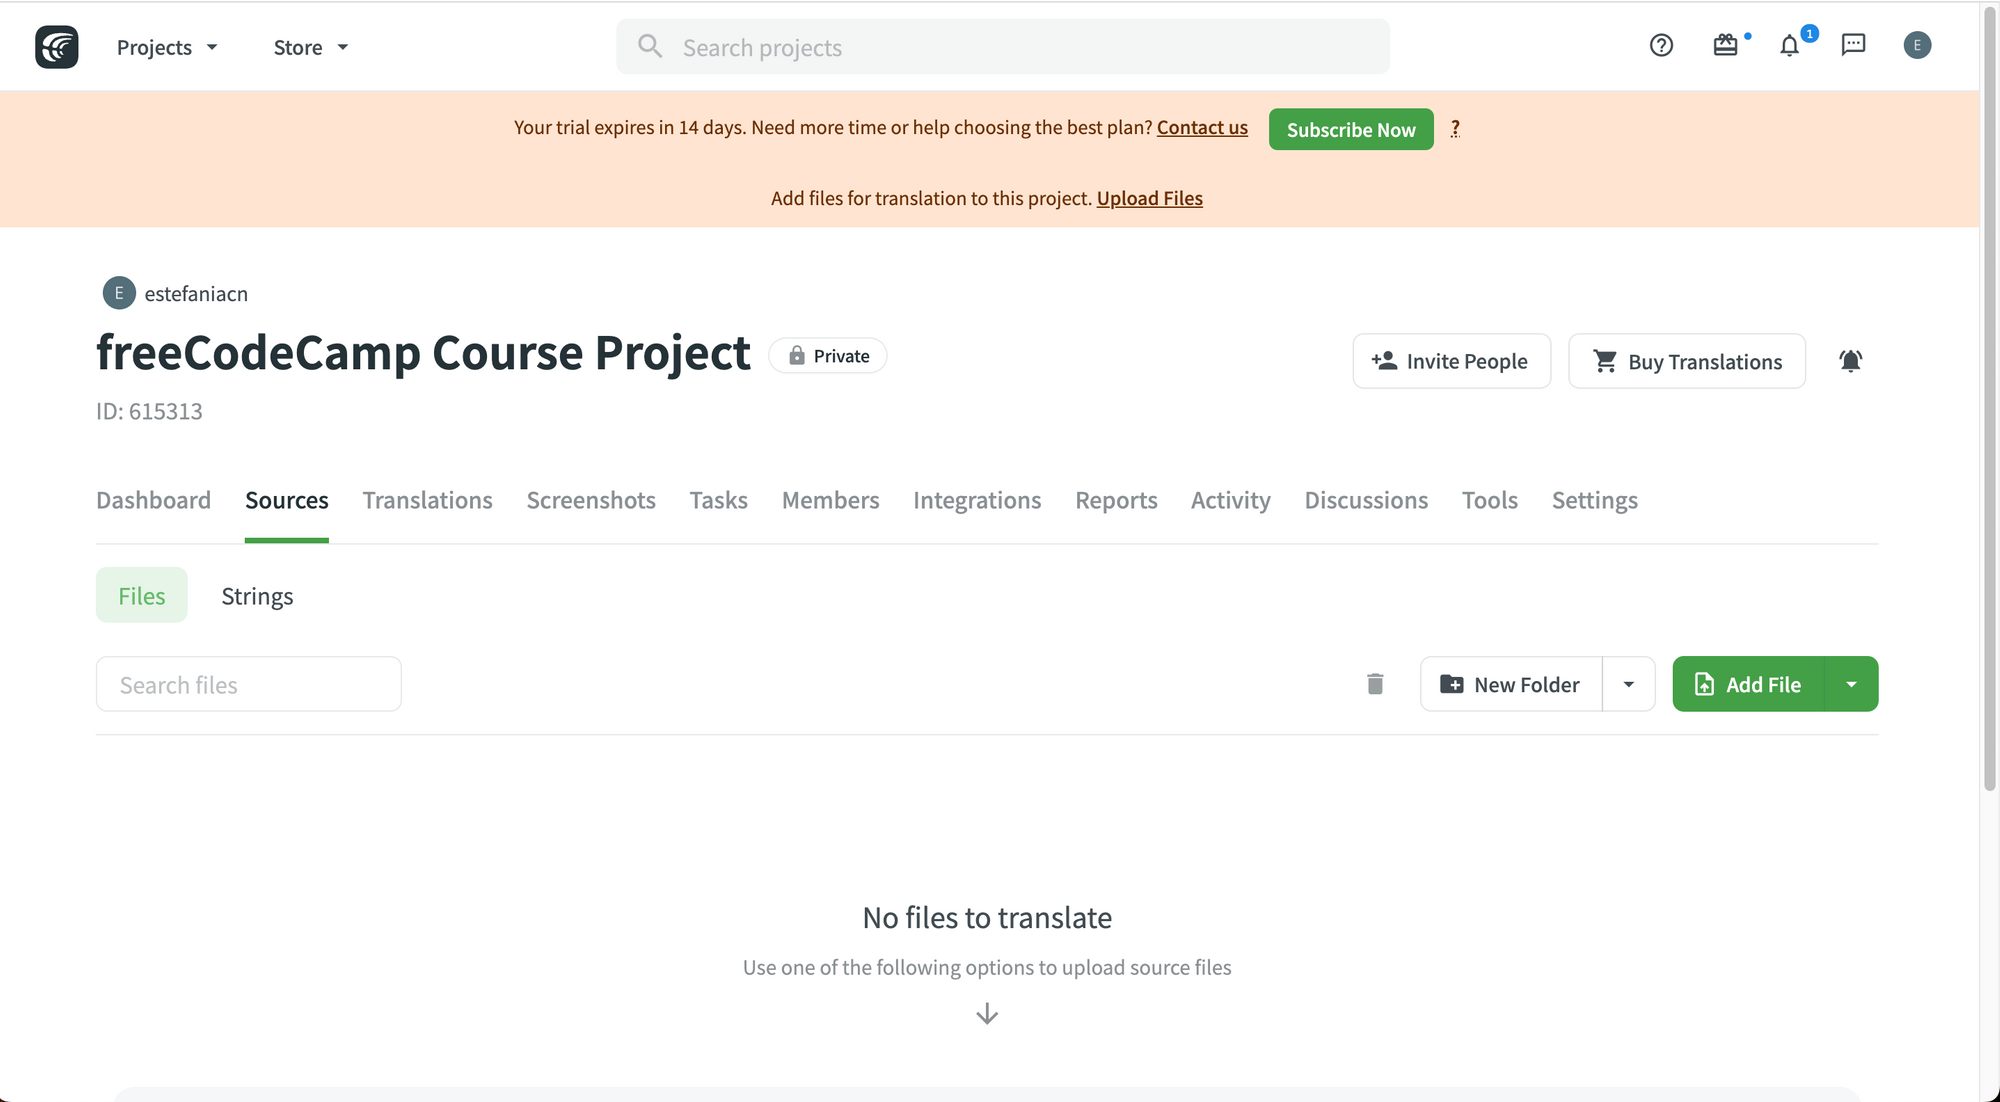 New Project.
Project Overview
Let's have a quick tour of the project.
First, you can see the name of the project with its current privacy settings. My demo project is private. You can create unlimited public projects or one private project with your free Crowdin account.
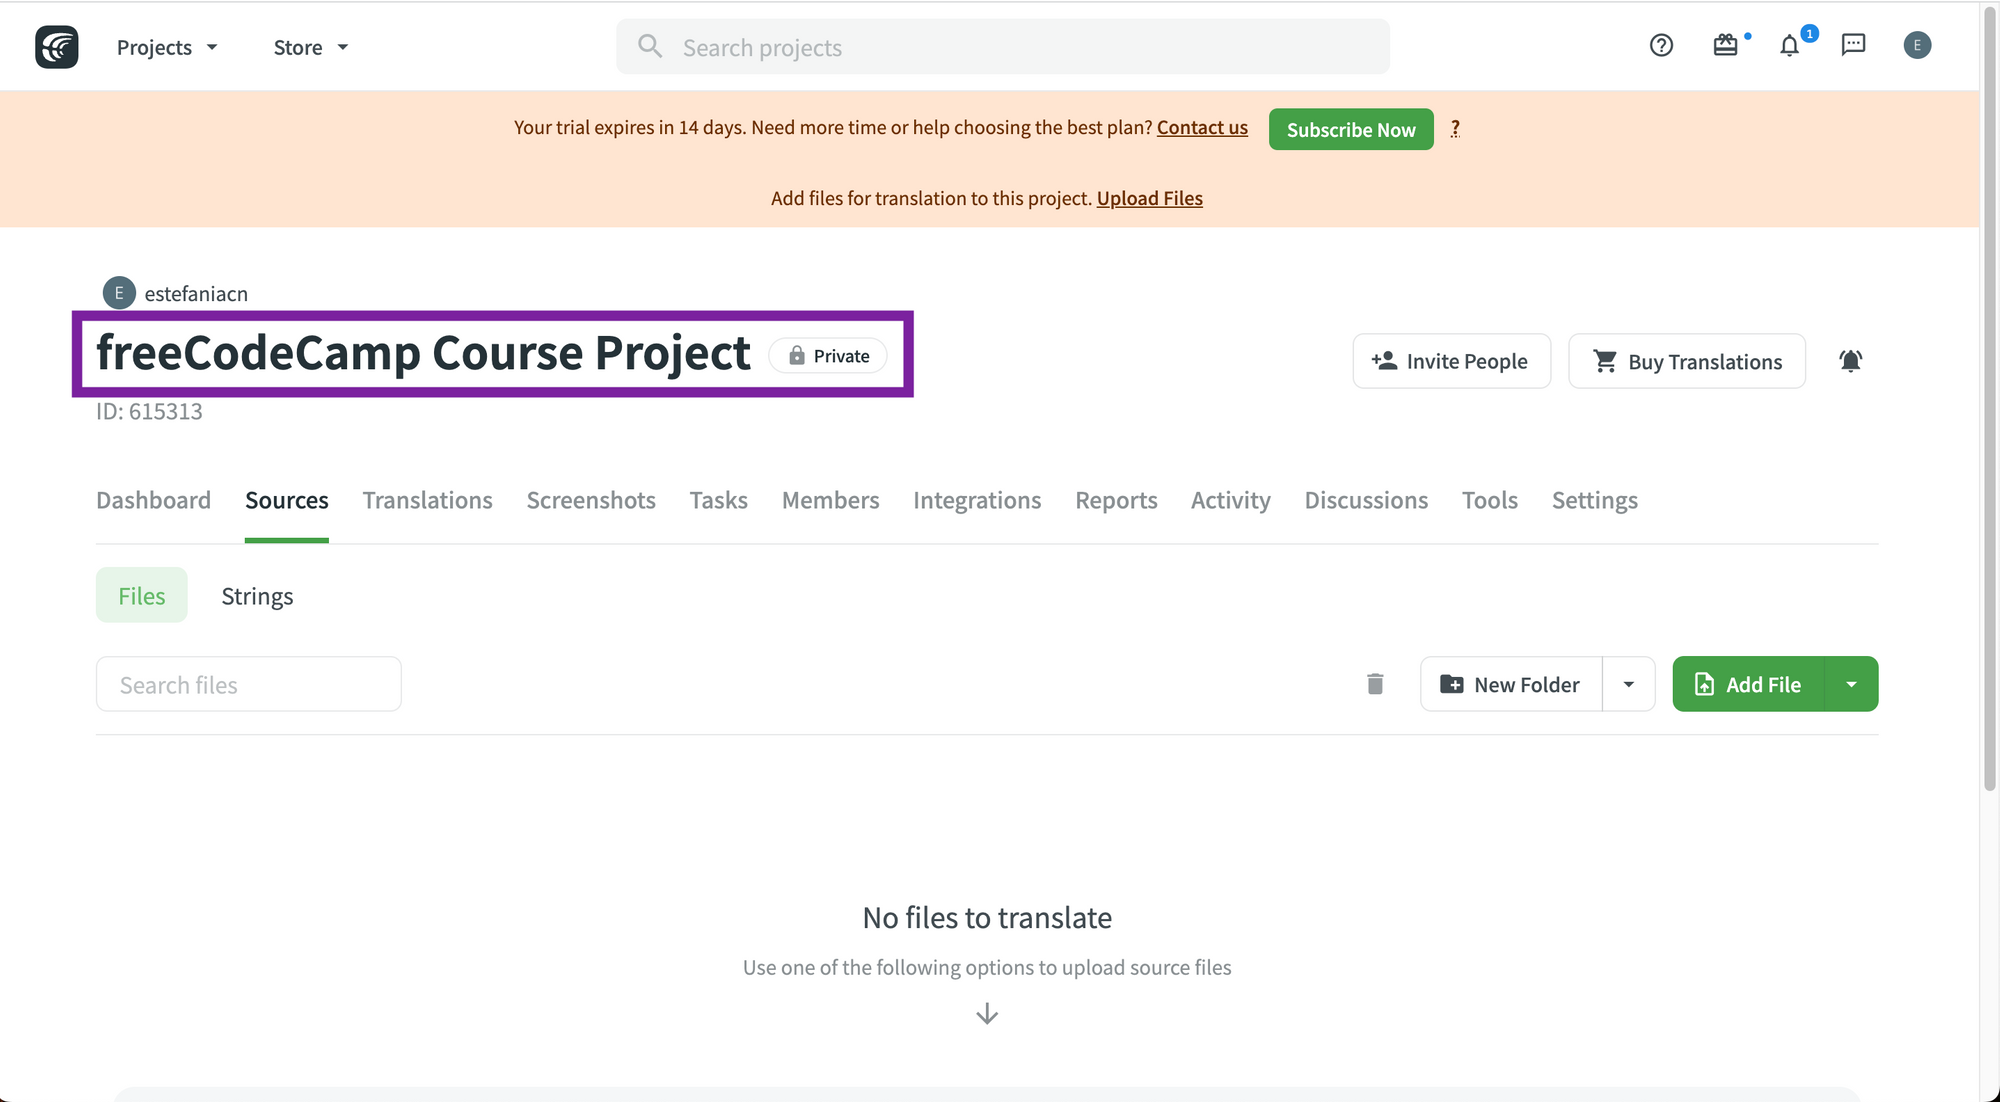
Next to the project name, you will see two buttons: "Invite People" and "Buy Translations".
You can invite team members to join your project (we'll cover how to do that in this book) and you can also buy translations from Crowdin.
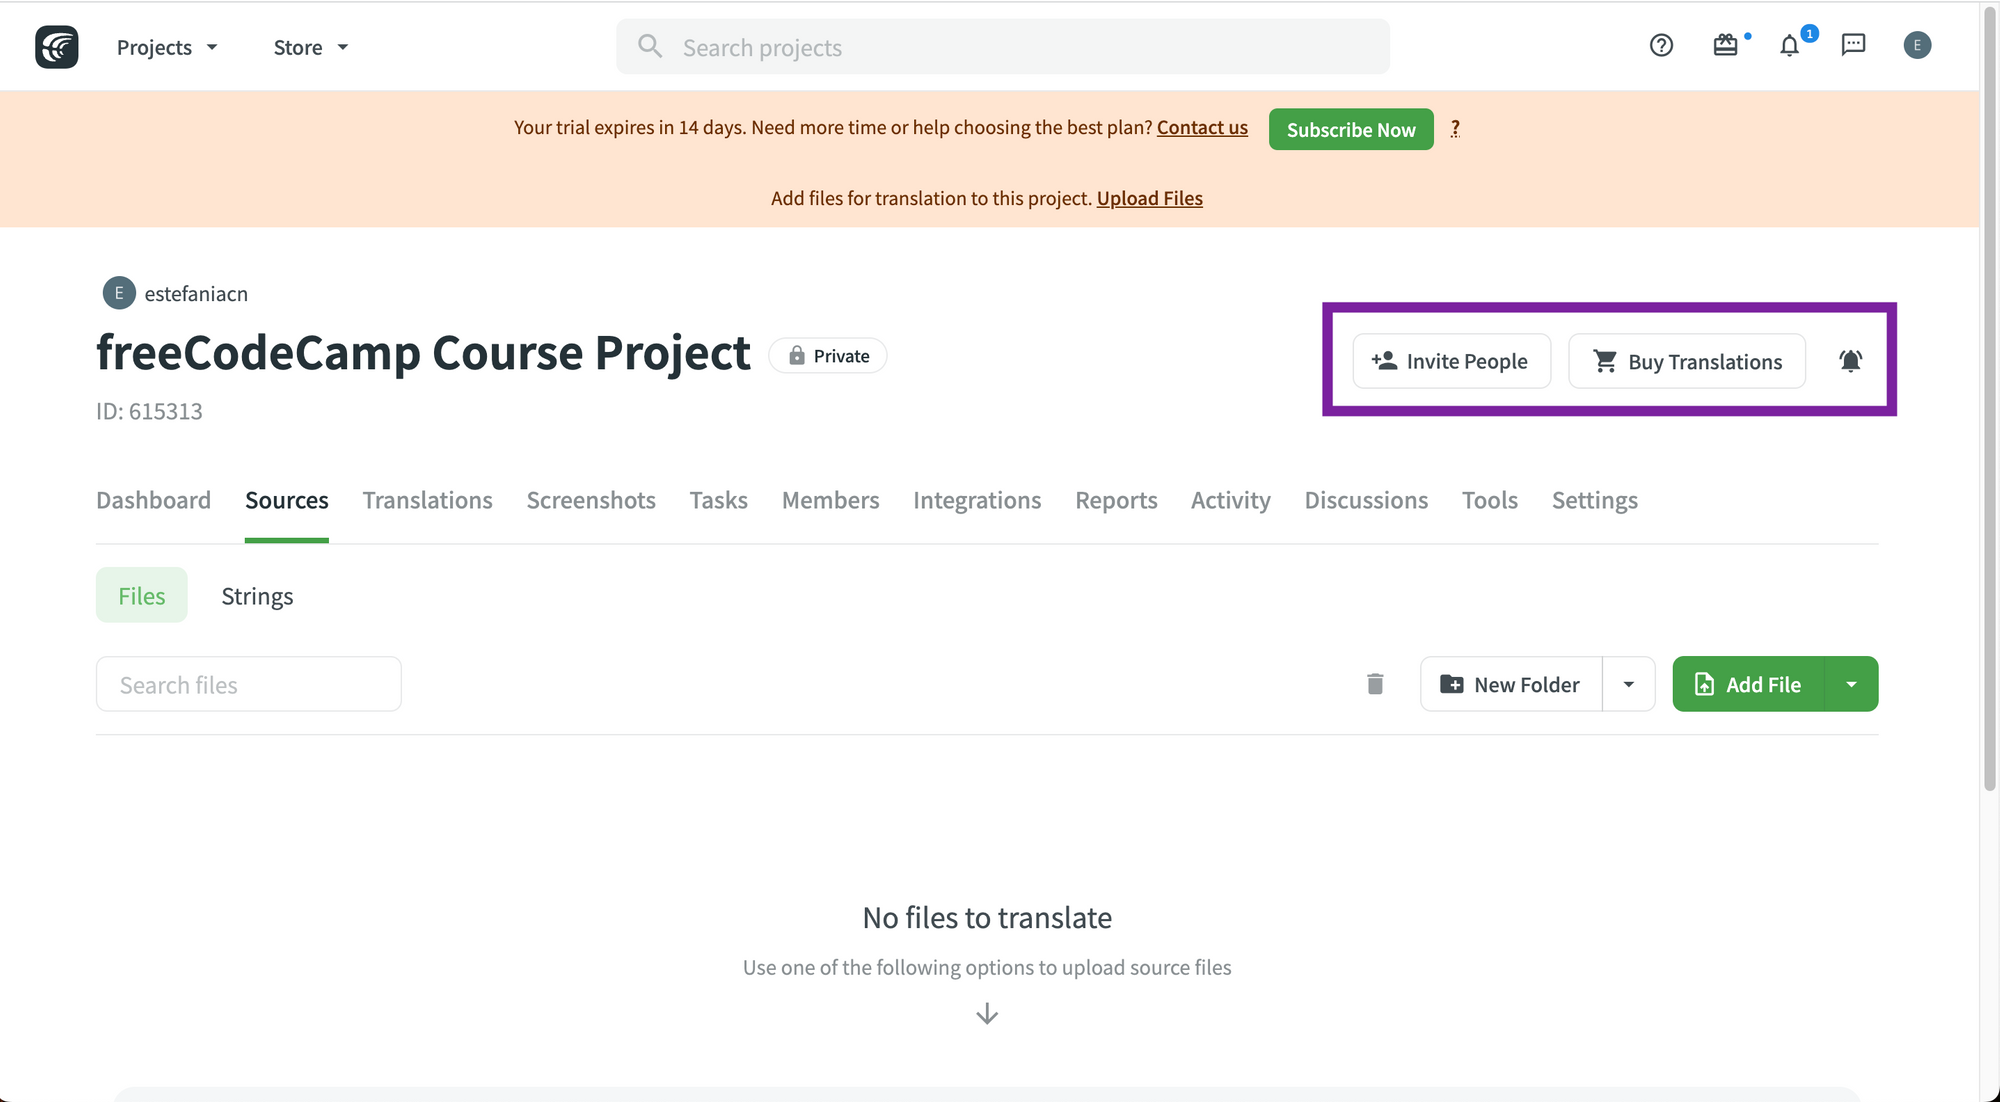
You can also find all the tabs you need to access the available tools for your project.

You will be in the "Sources" tab by default, where you can see the source files that you have uploaded and the strings of your project.
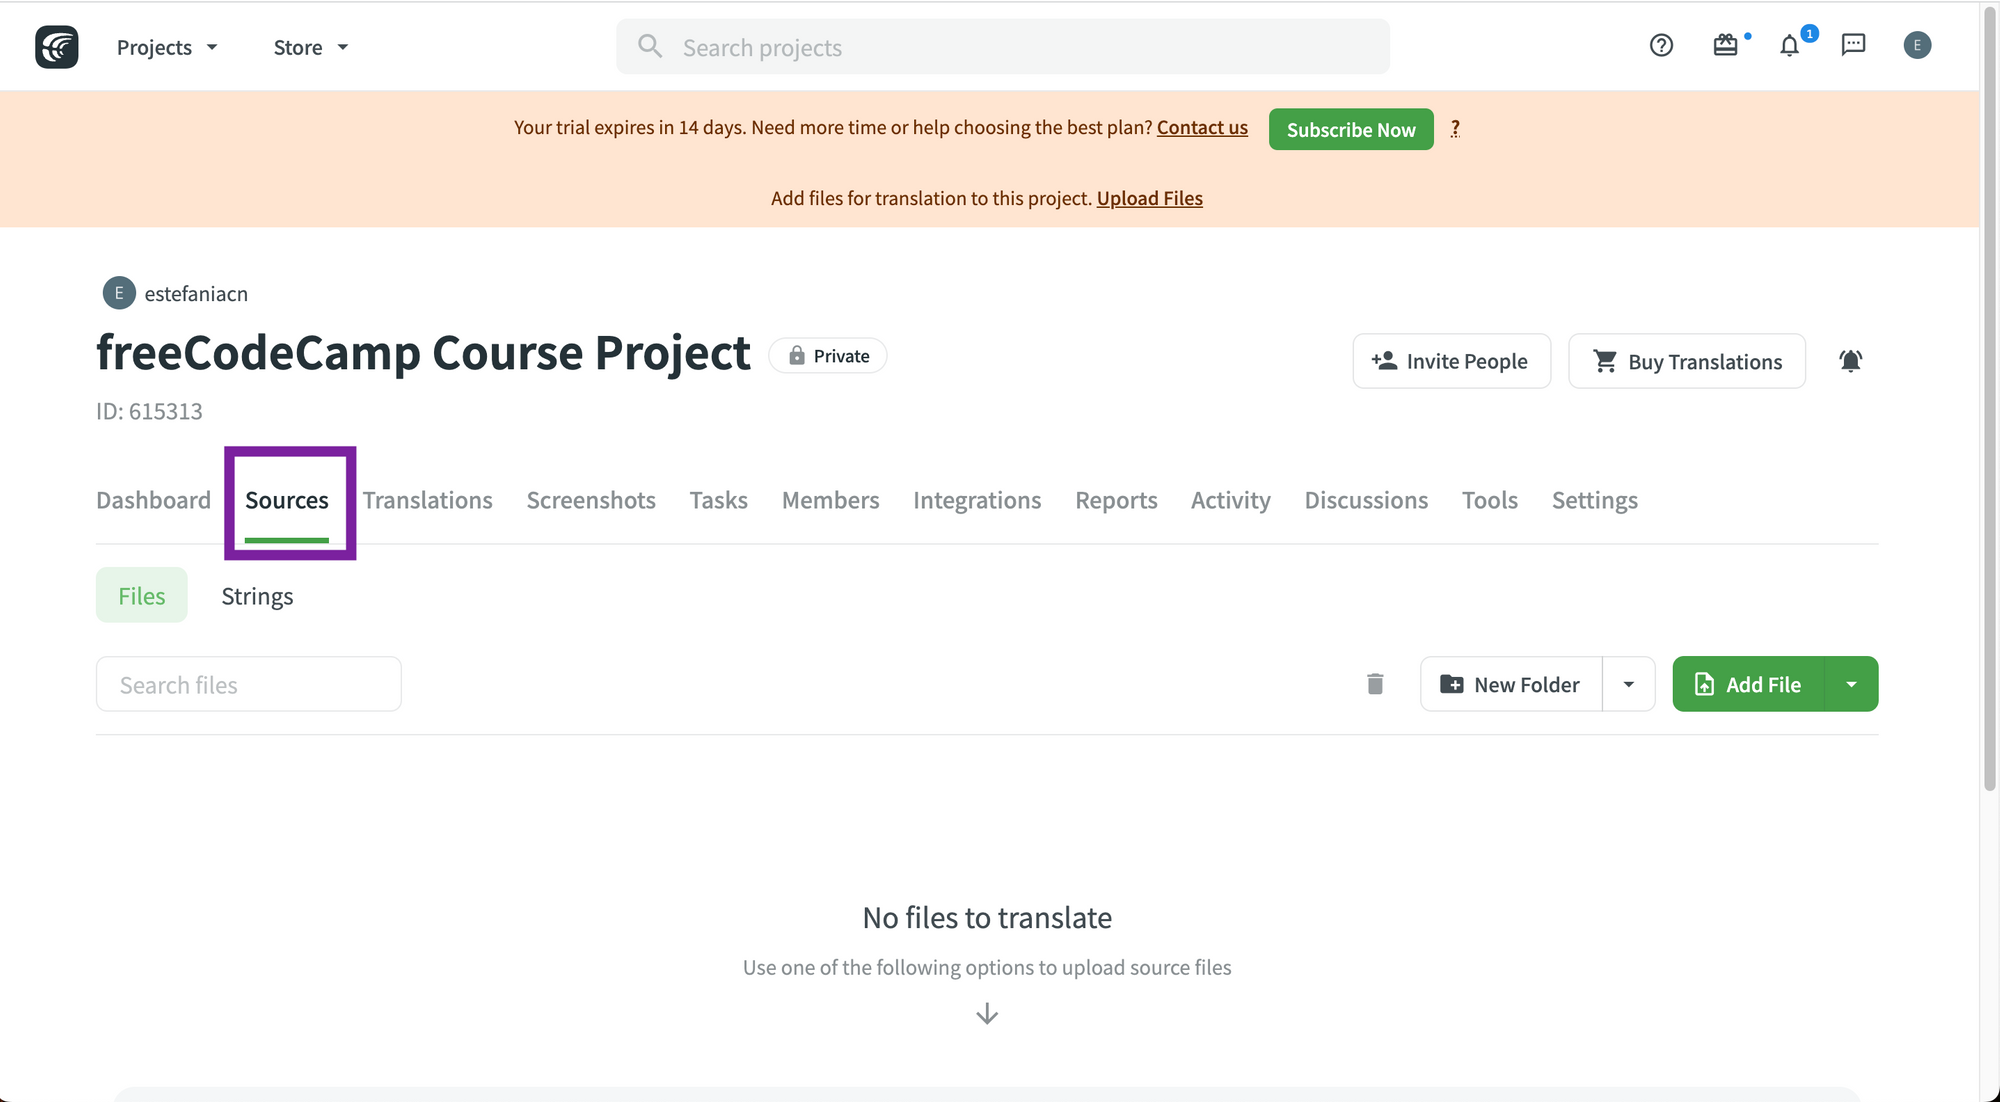
💡 Tip: You will also be able to create folders and add files.
Let's see the other tabs:
Dashboard Tab
This is where you will see a list of the project's target languages.
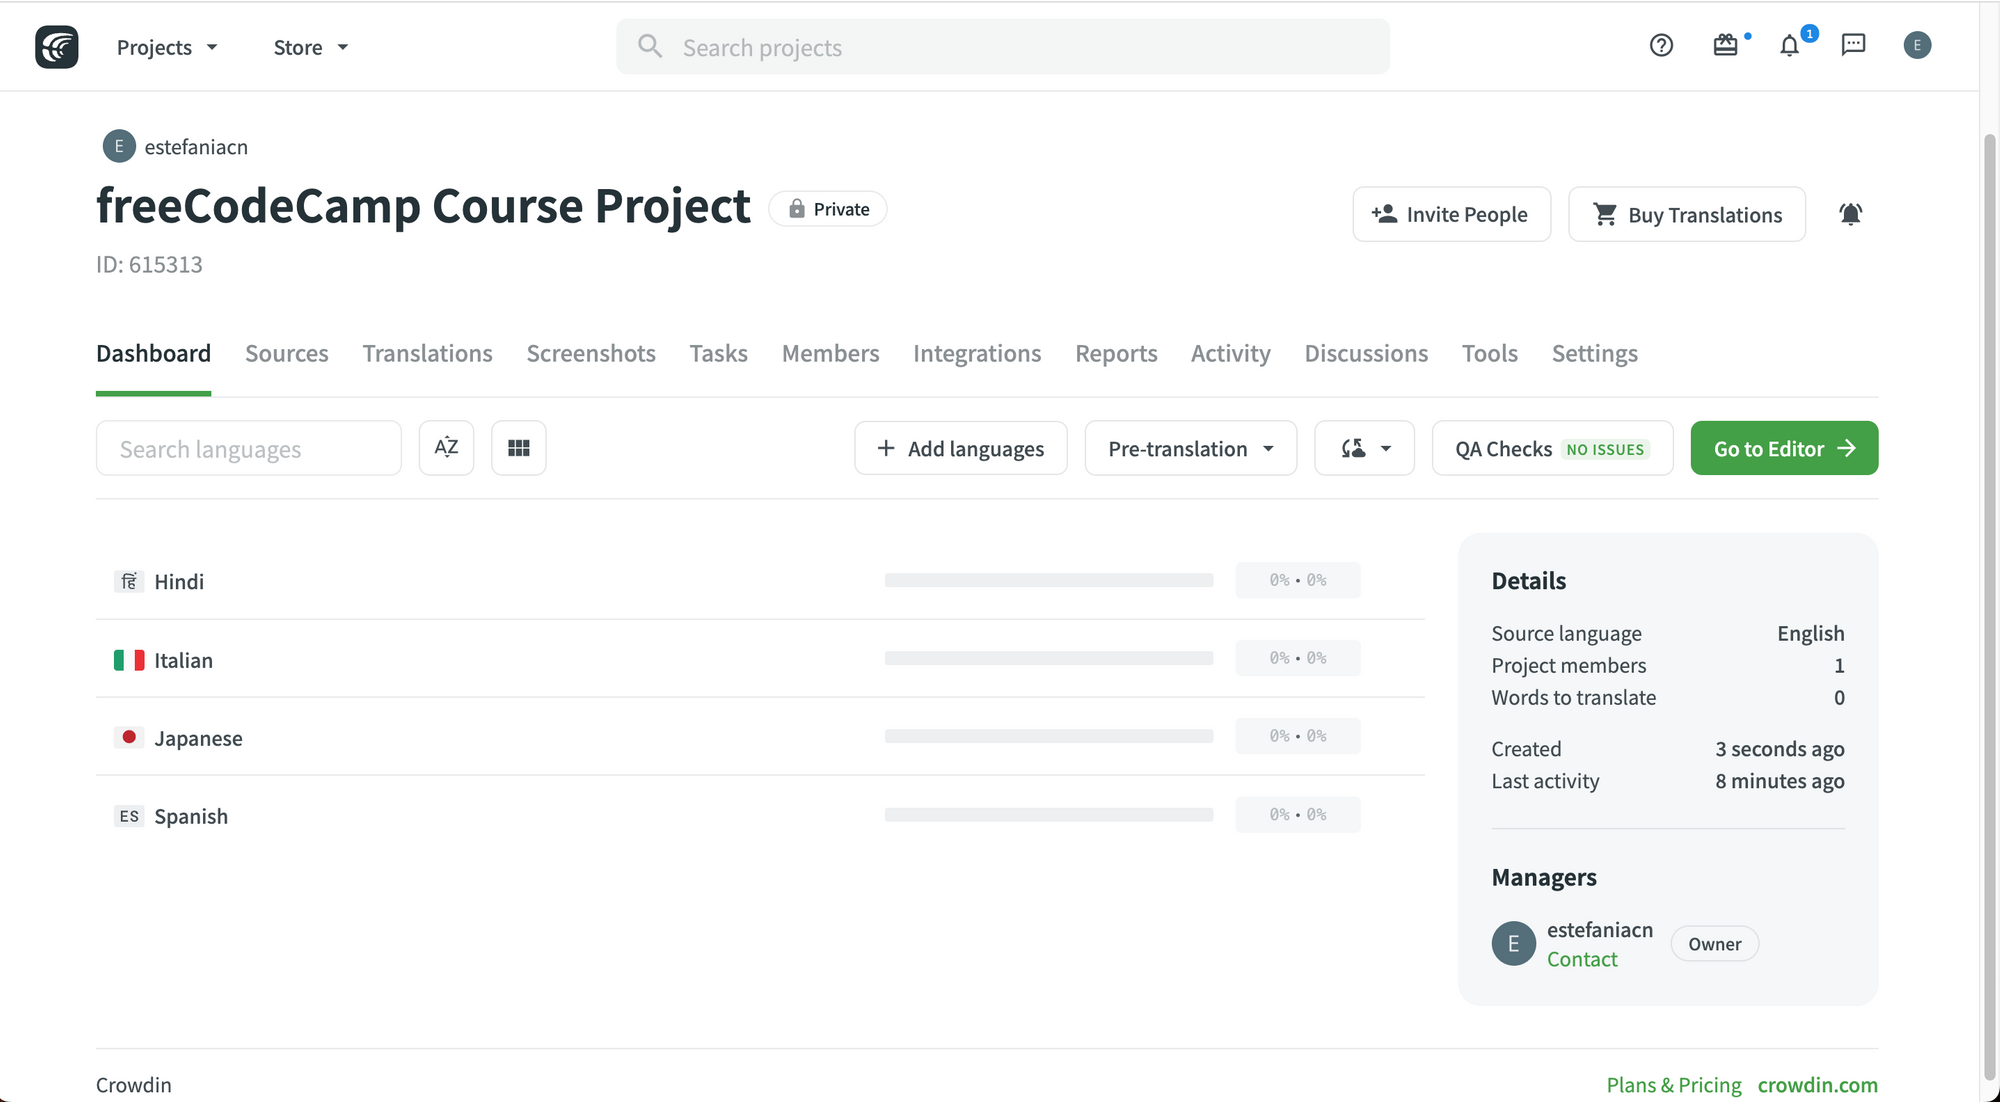 Dashboard tab.
Translations Tab
This is where you can upload existing translations, download your translations as a zip file, target file bundles, and set up over-the-air content delivery.
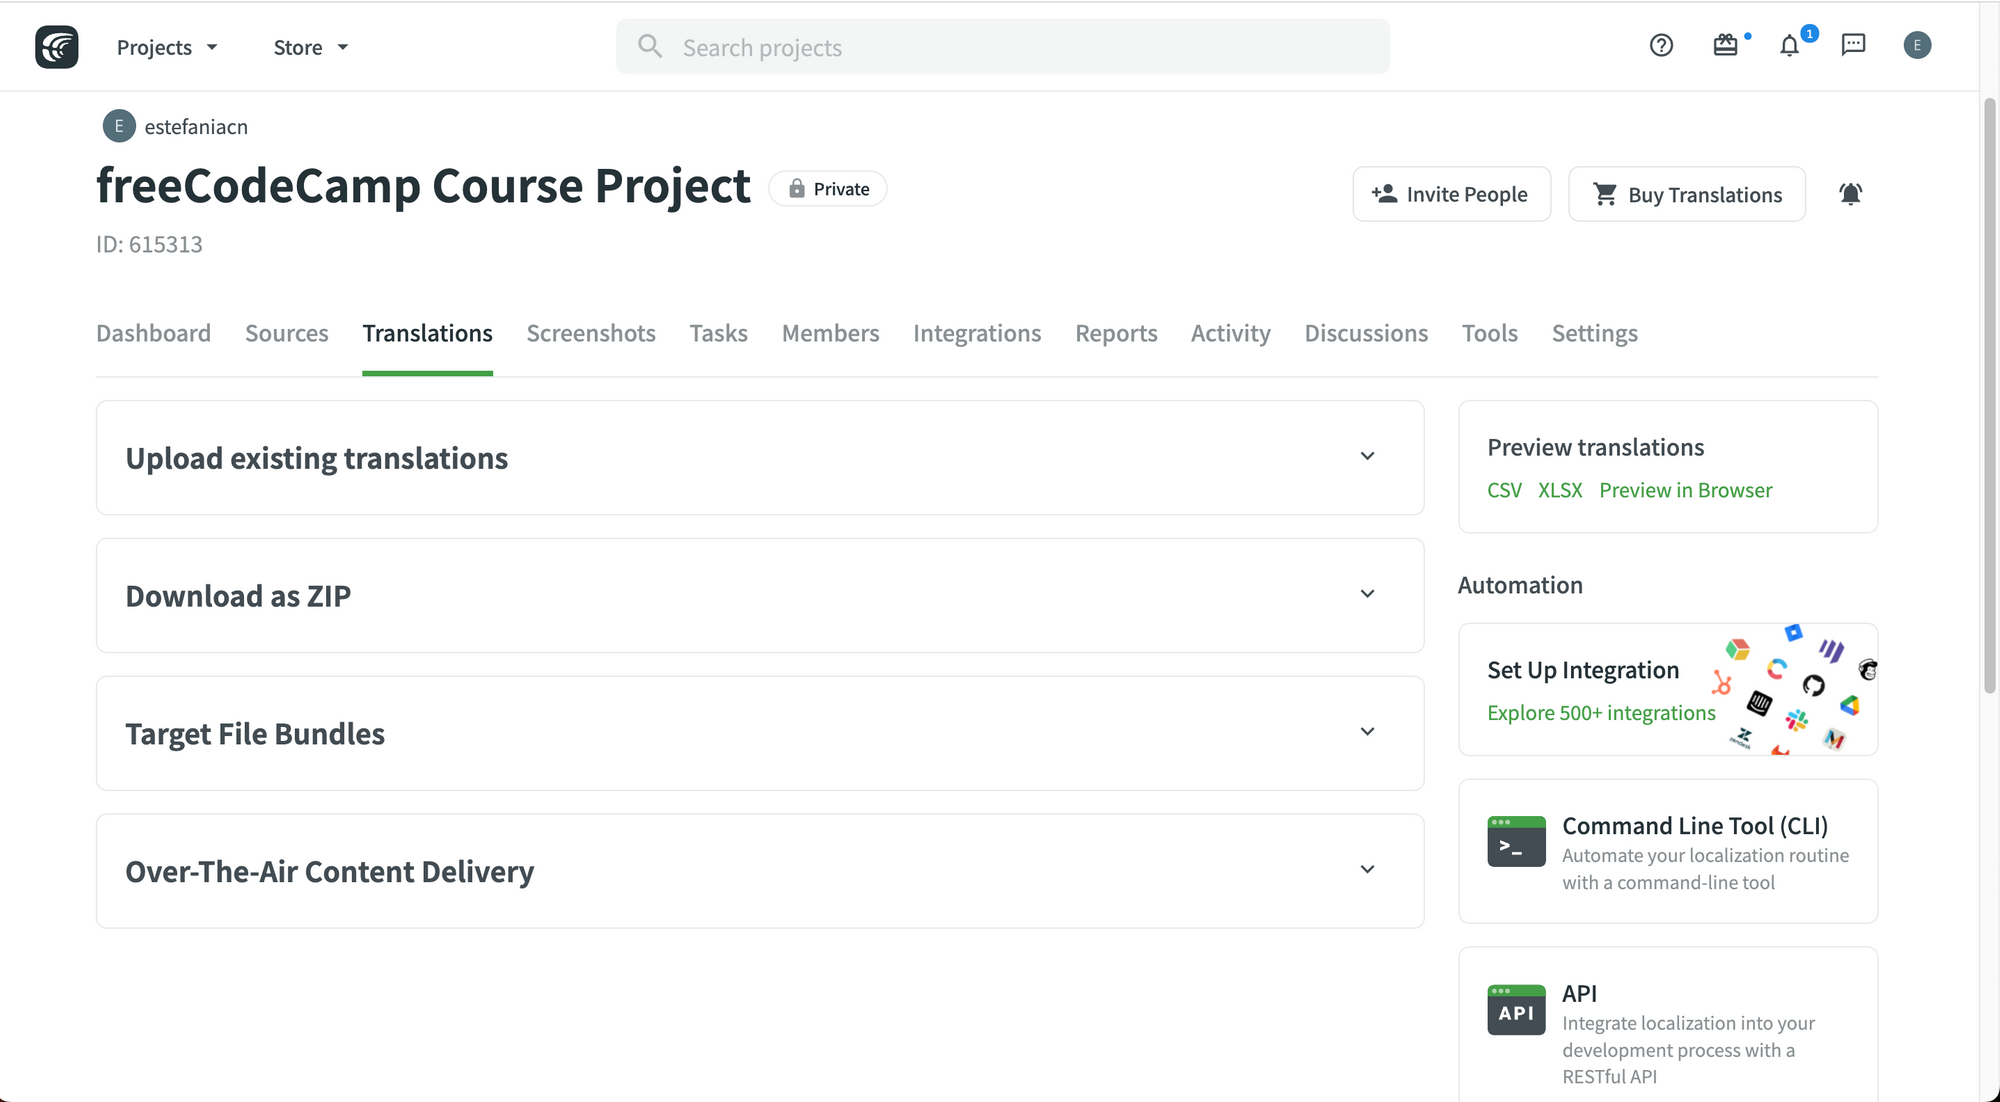 Translations tab.
Screenshots Tab
This is where you can upload screenshots of your project to help your translators with more context about the strings they are translating.
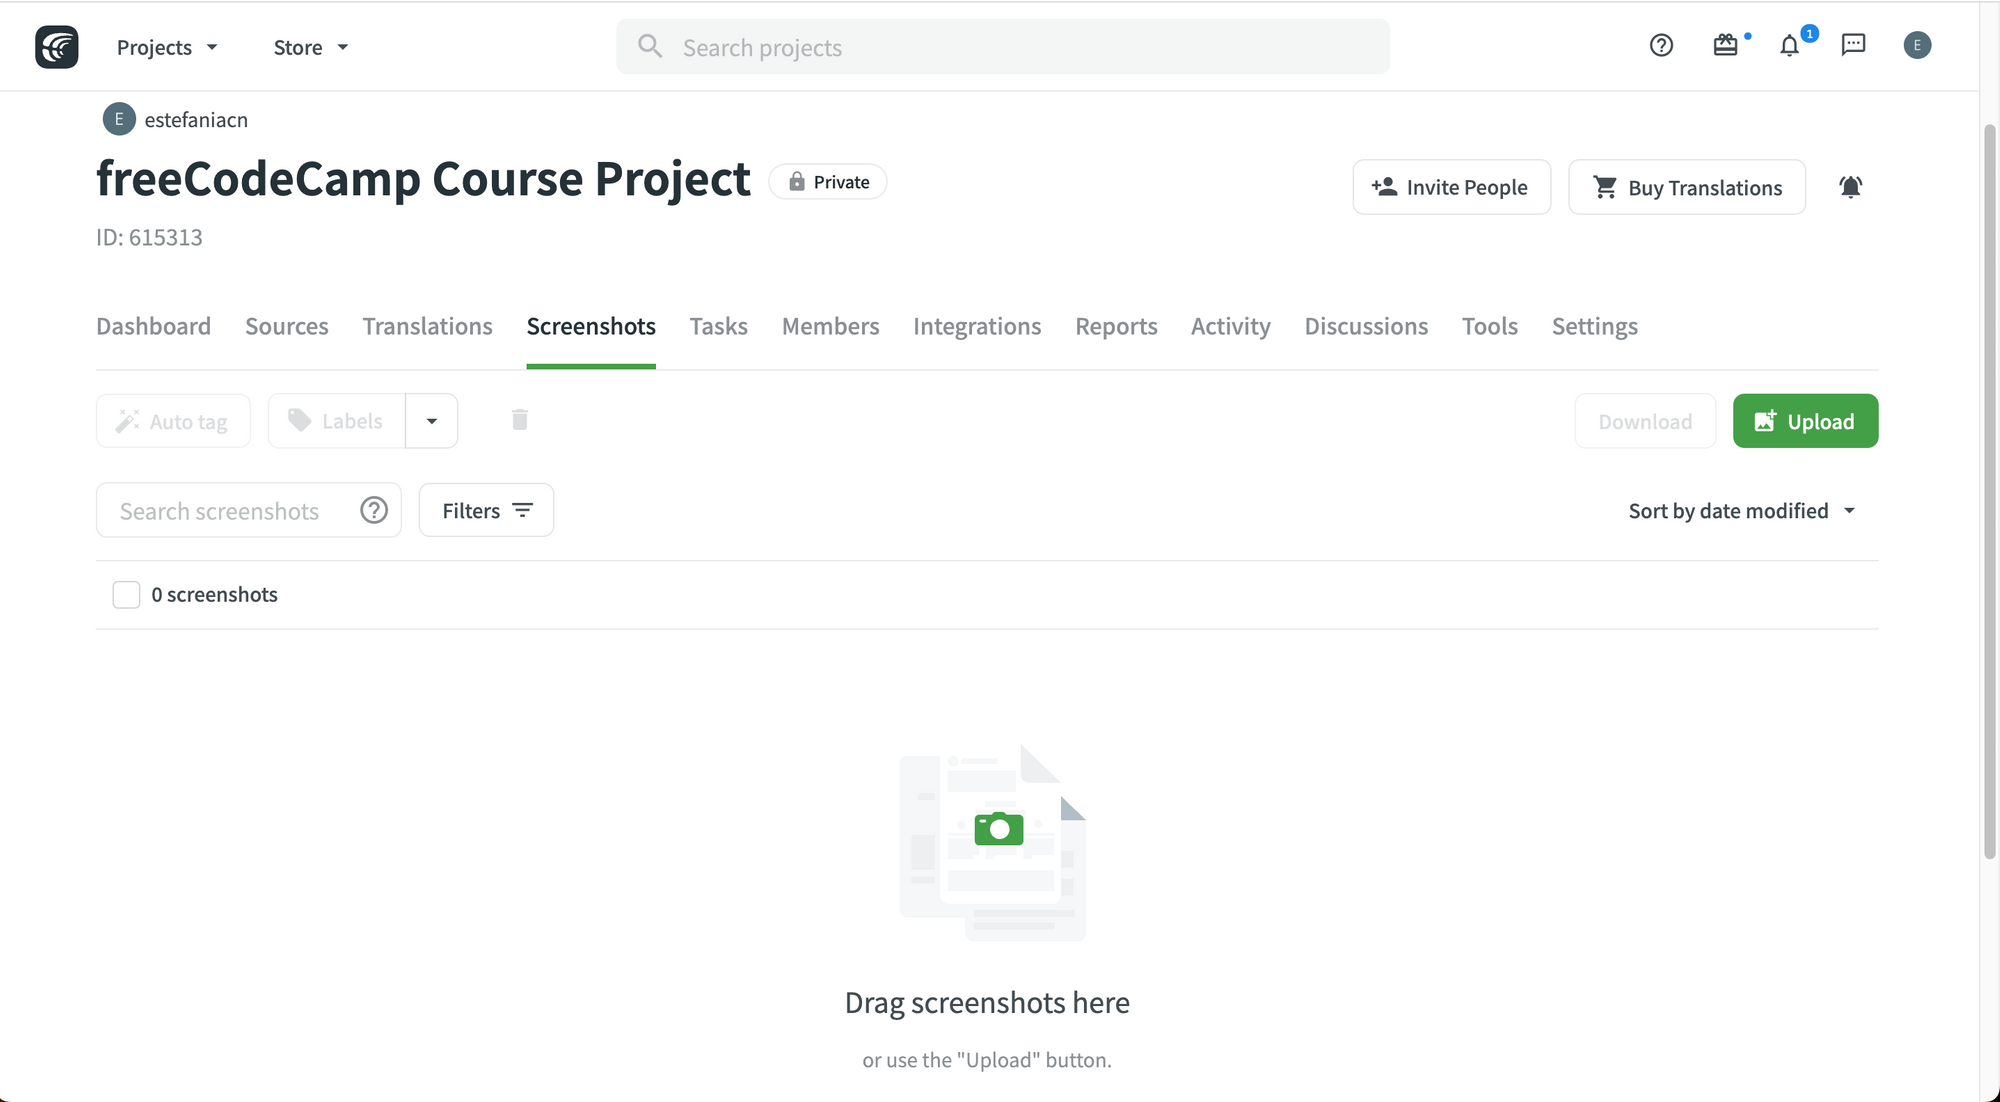 Screenshots tab.
Tasks Tab
This is where you can create and assign tasks to your team members.
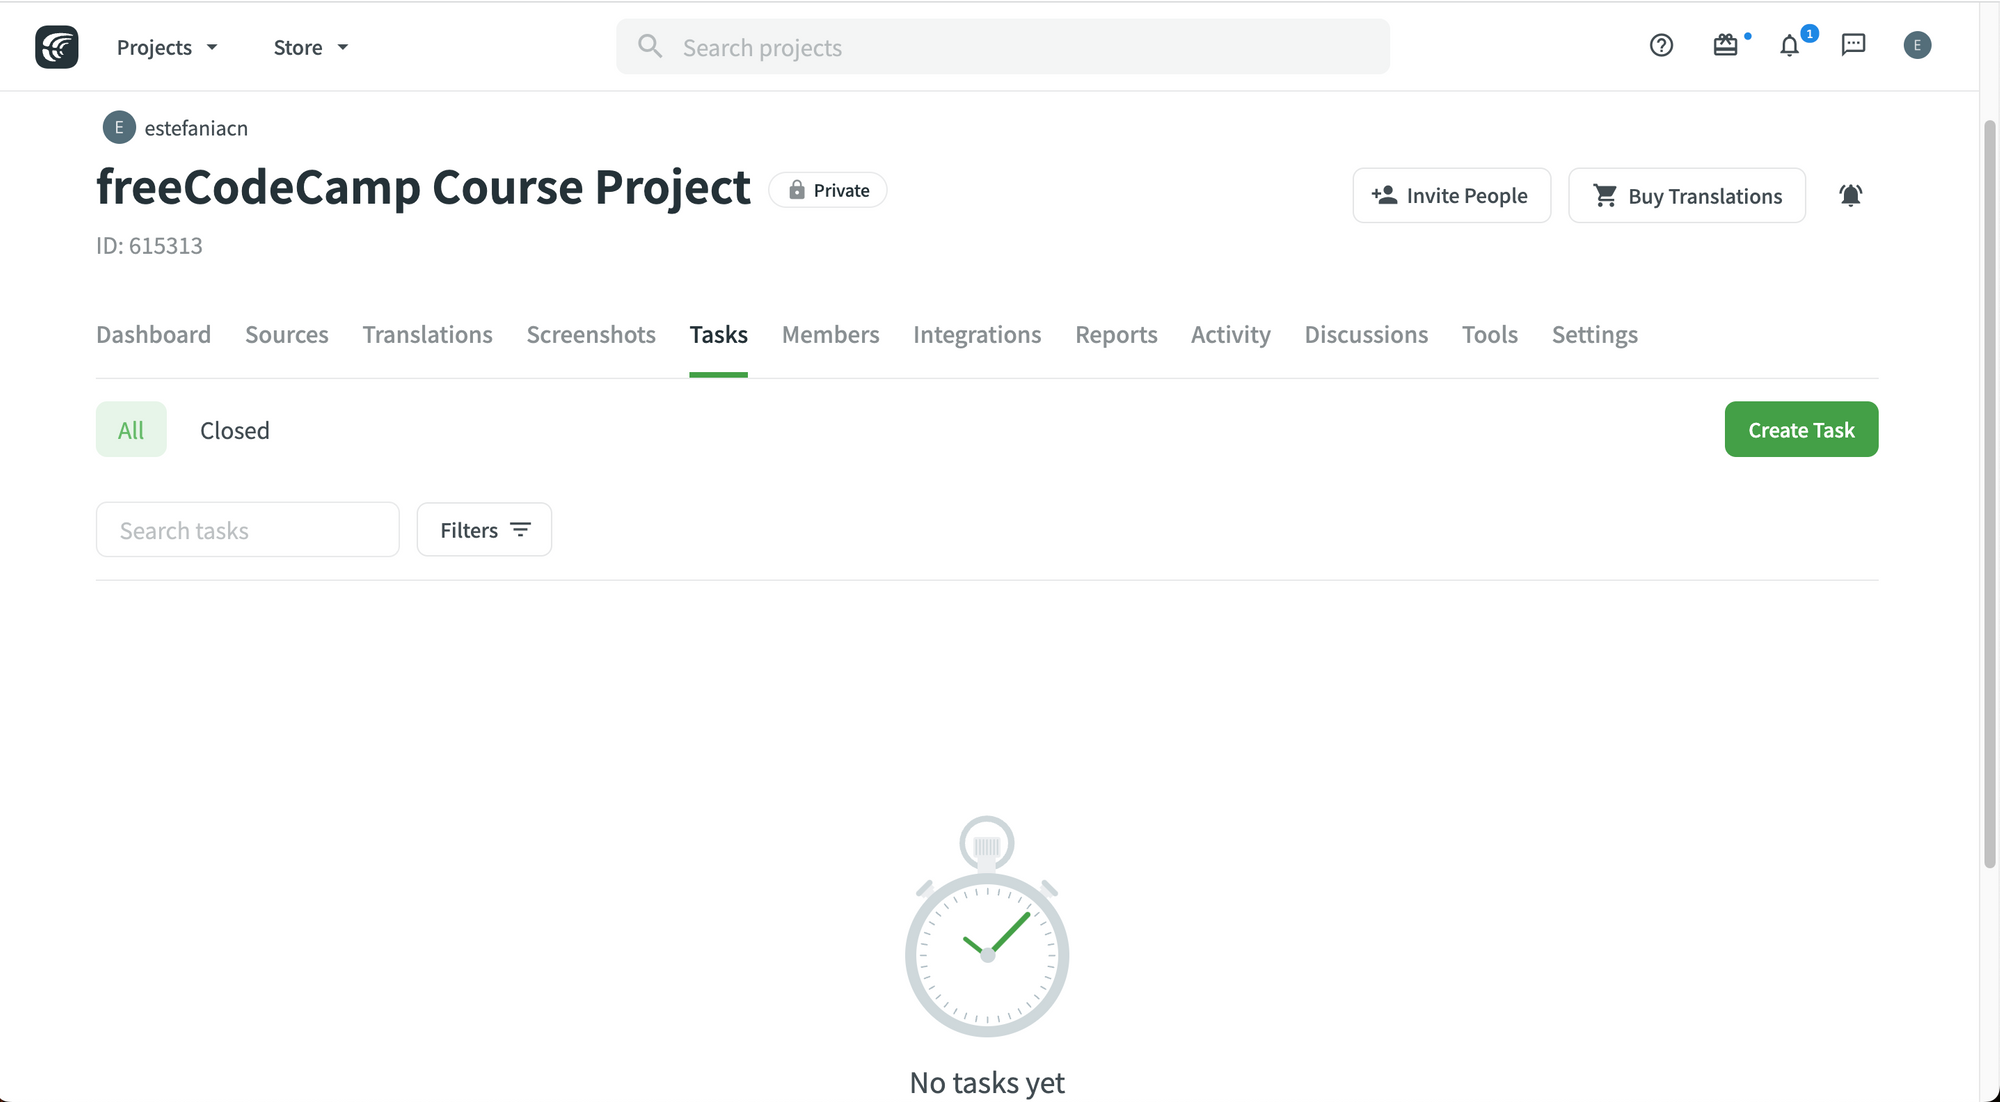 Tasks tab.
Members Tab
This is where you can see all the members of your project with their respective roles, when they joined the project, and the actions that you can take for each member.
 Members tab.
Integrations Tab
This is where you can add integrations to your project and see all the integrations that your project currently has.
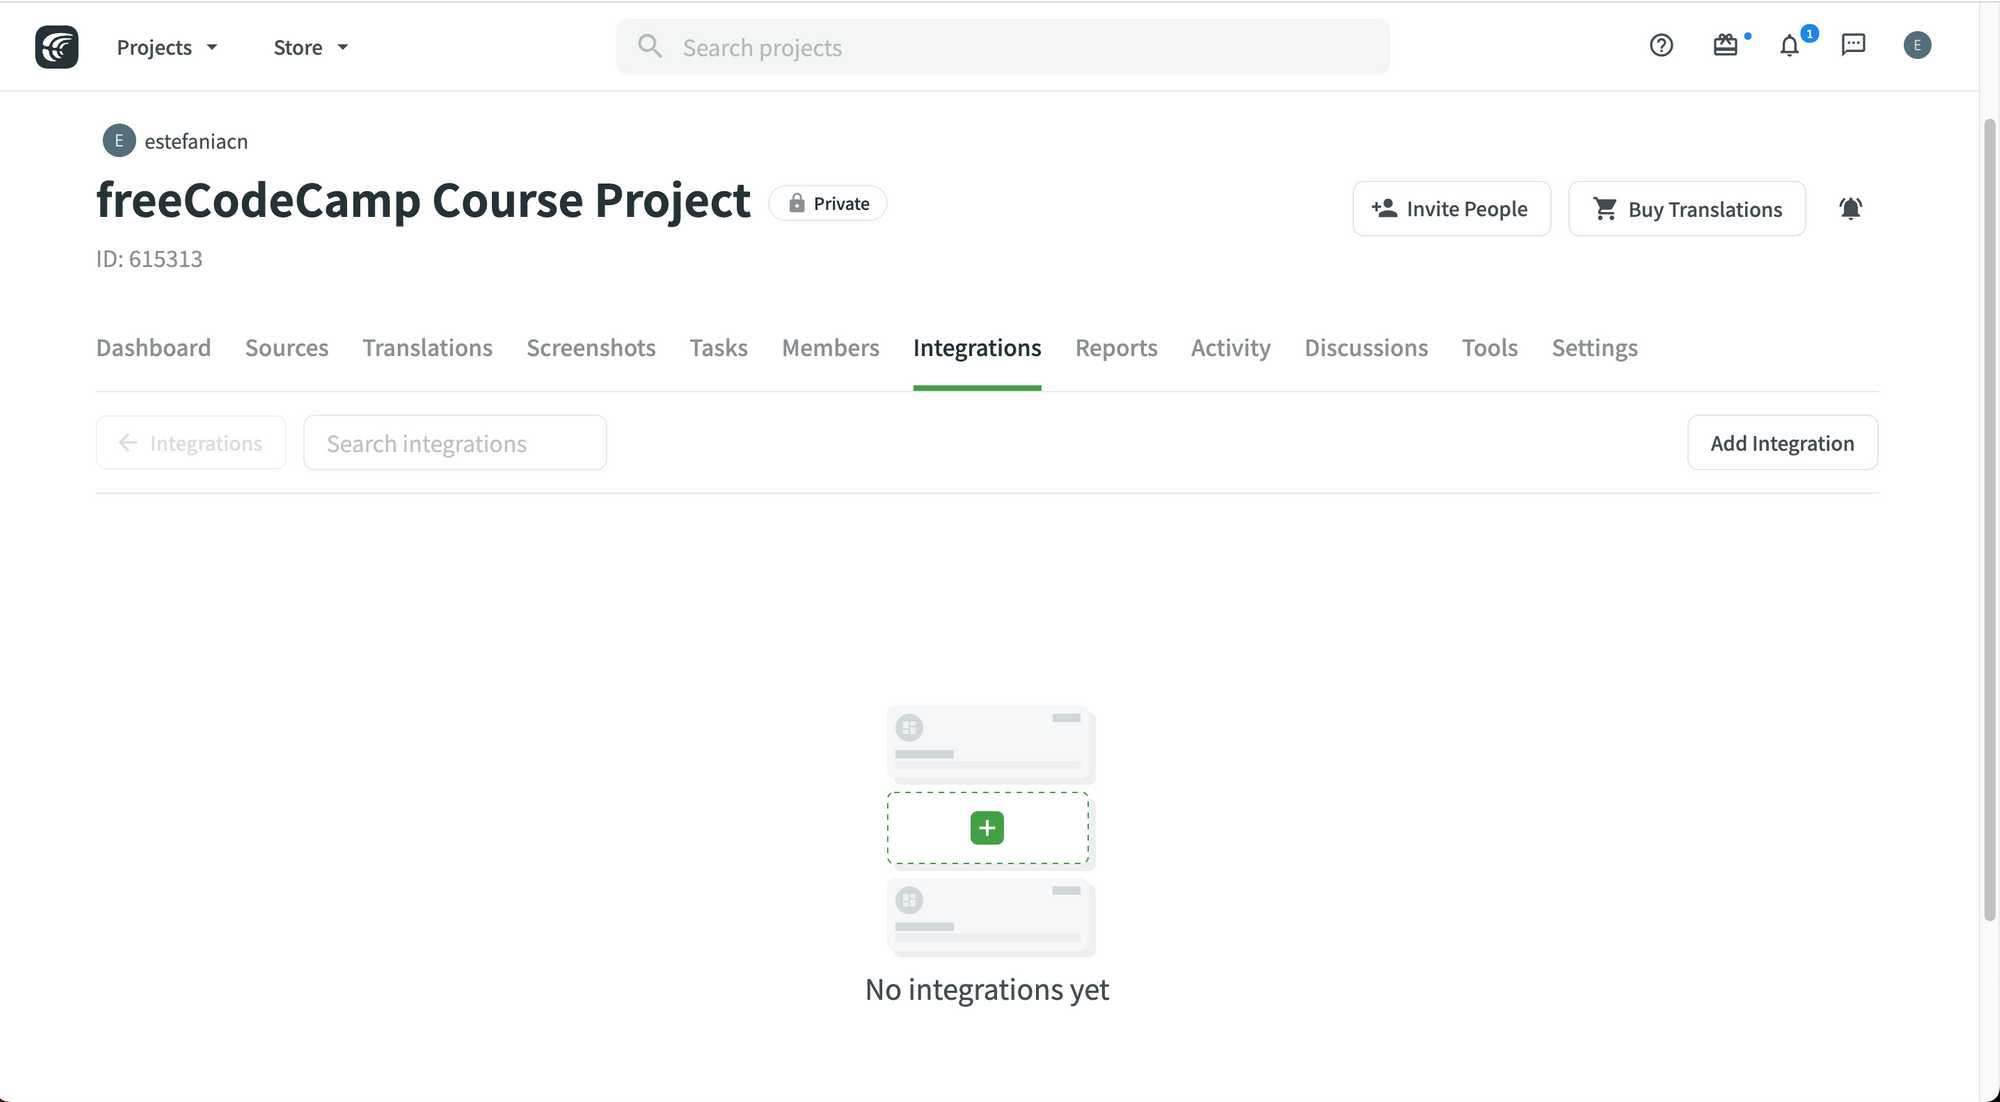 Integrations tab.
Reports Tab
This is where you can see and generate reports on the activity of your project, including translation and proofreading.
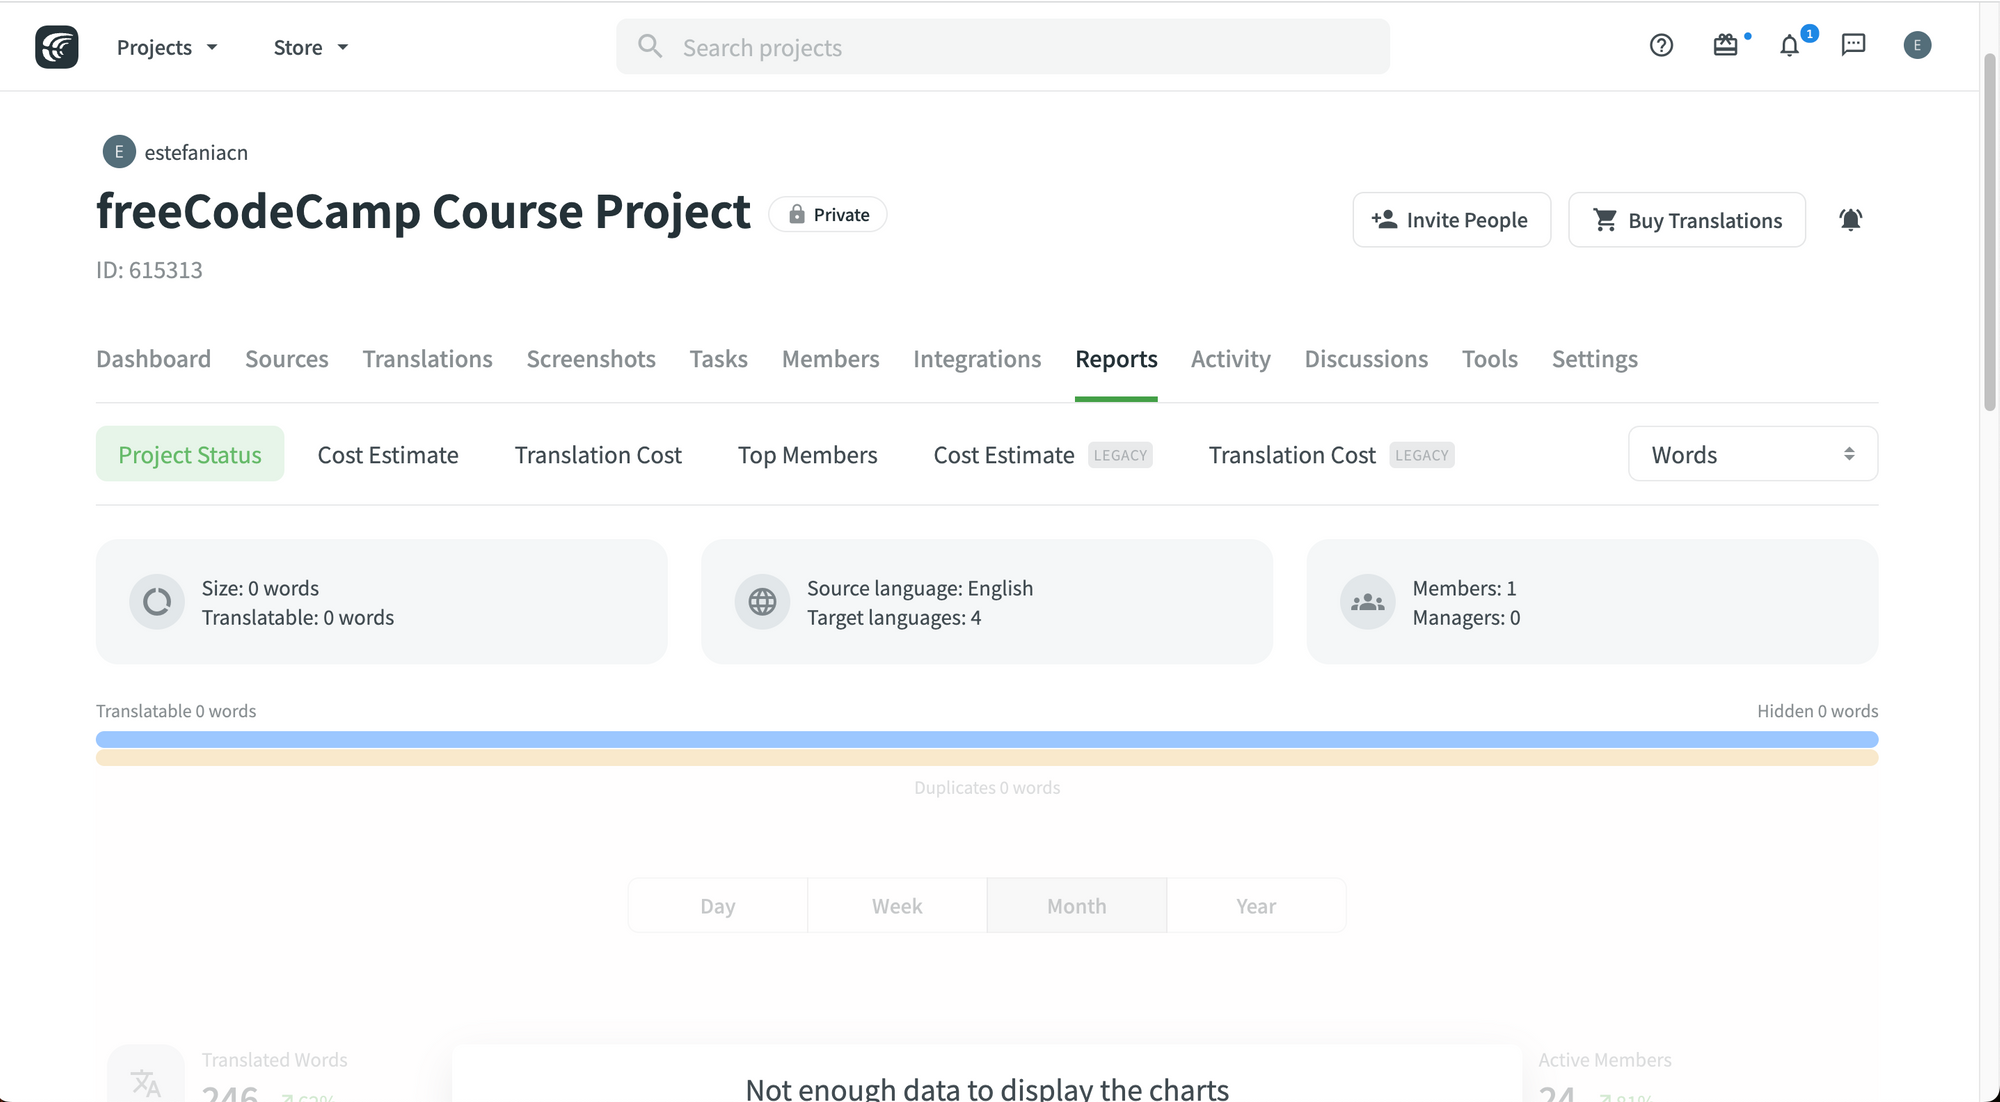 Reports tab.
Activity Tab
This is where you can see the project activity.
 Activity tab.
Discussions Tab
This is where you can open discussion topics to discuss aspects of the project with your team.
 Discussions tab.
Tools Tab
This is where you can find more information on the Command Line Tool, API, Webhooks, and Crowdin in-context (a tool to translate web applications with a real-time preview).
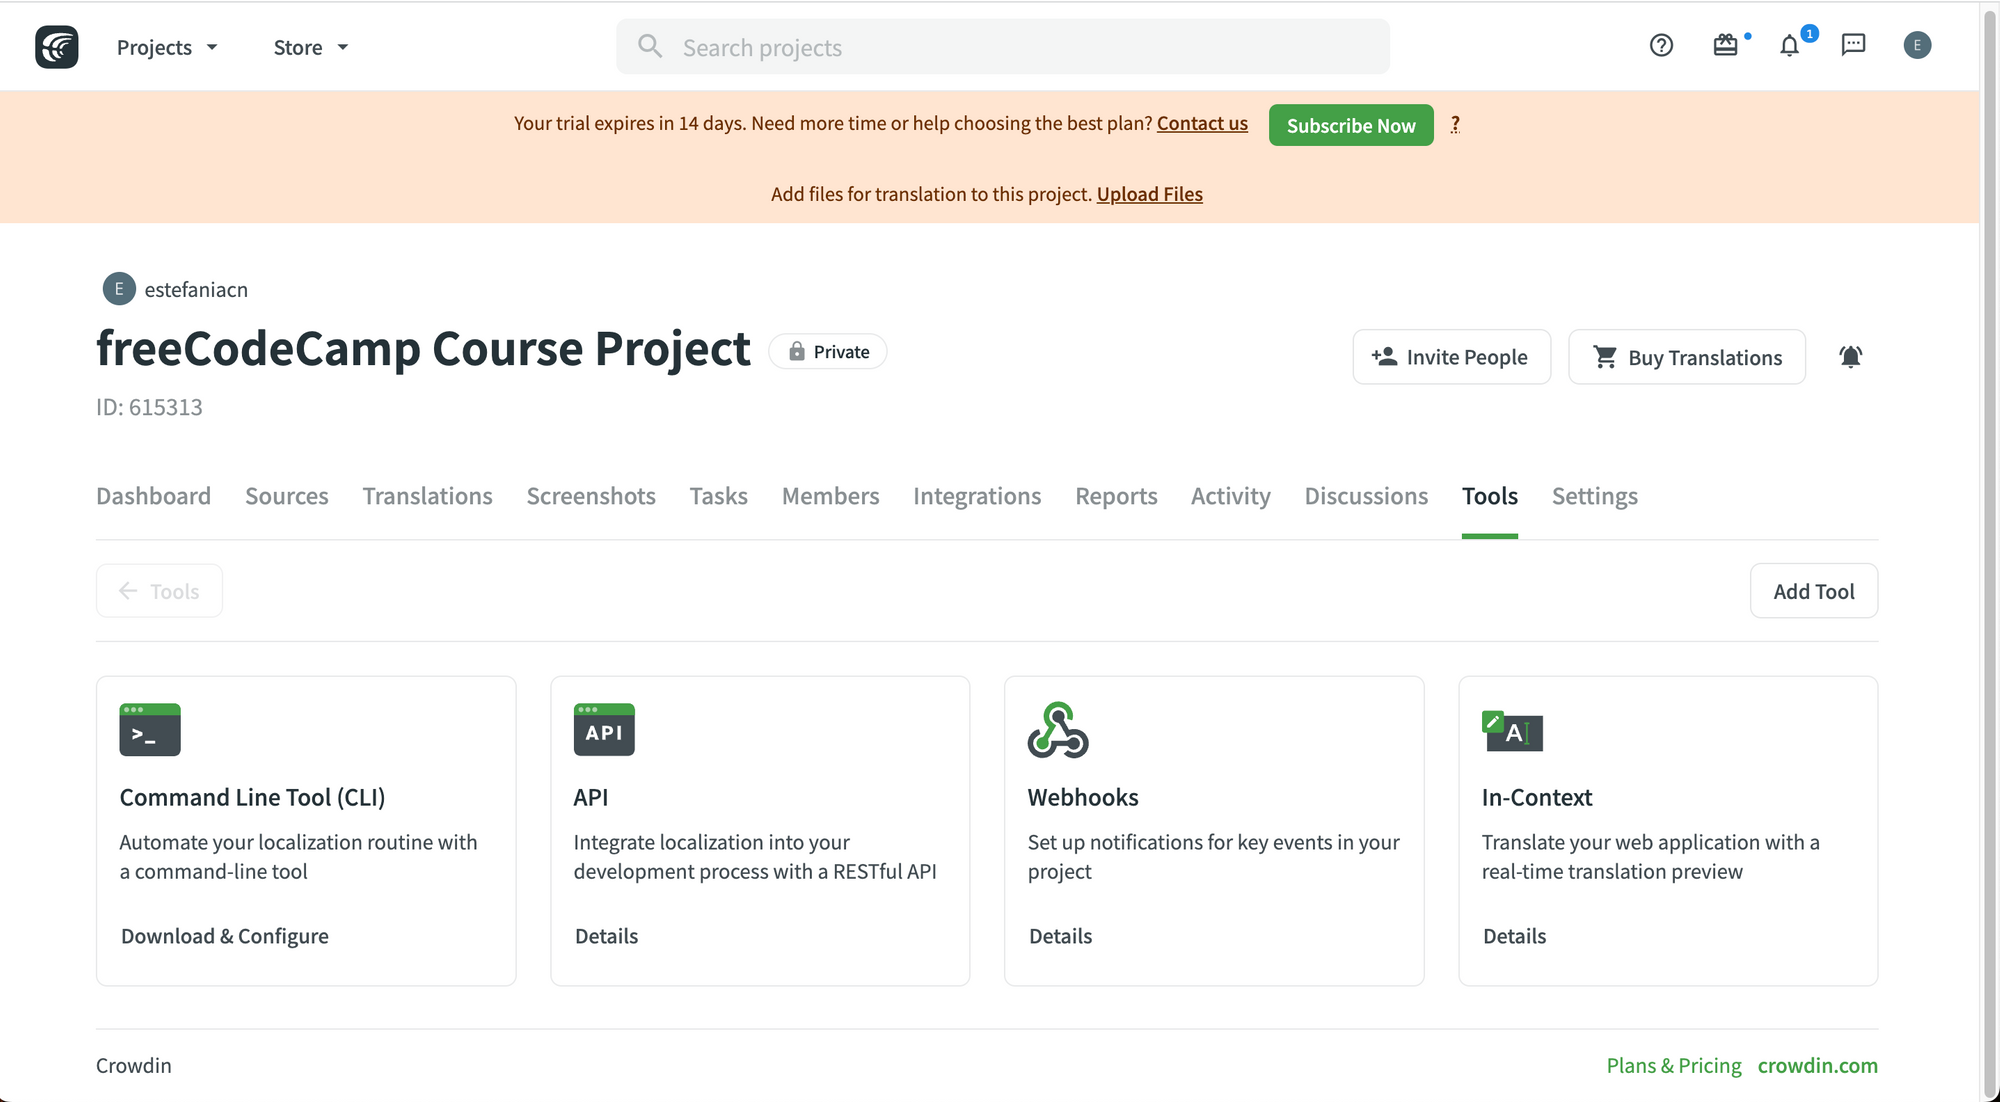 Tools tab.
Settings Tab
This is where you can customize the project settings.
 Settings tab.
Talking about project settings, let's dive into the settings that you can customize for your project.
How to Customize your Project Settings in Crowdin
You will find different categories of project settings.
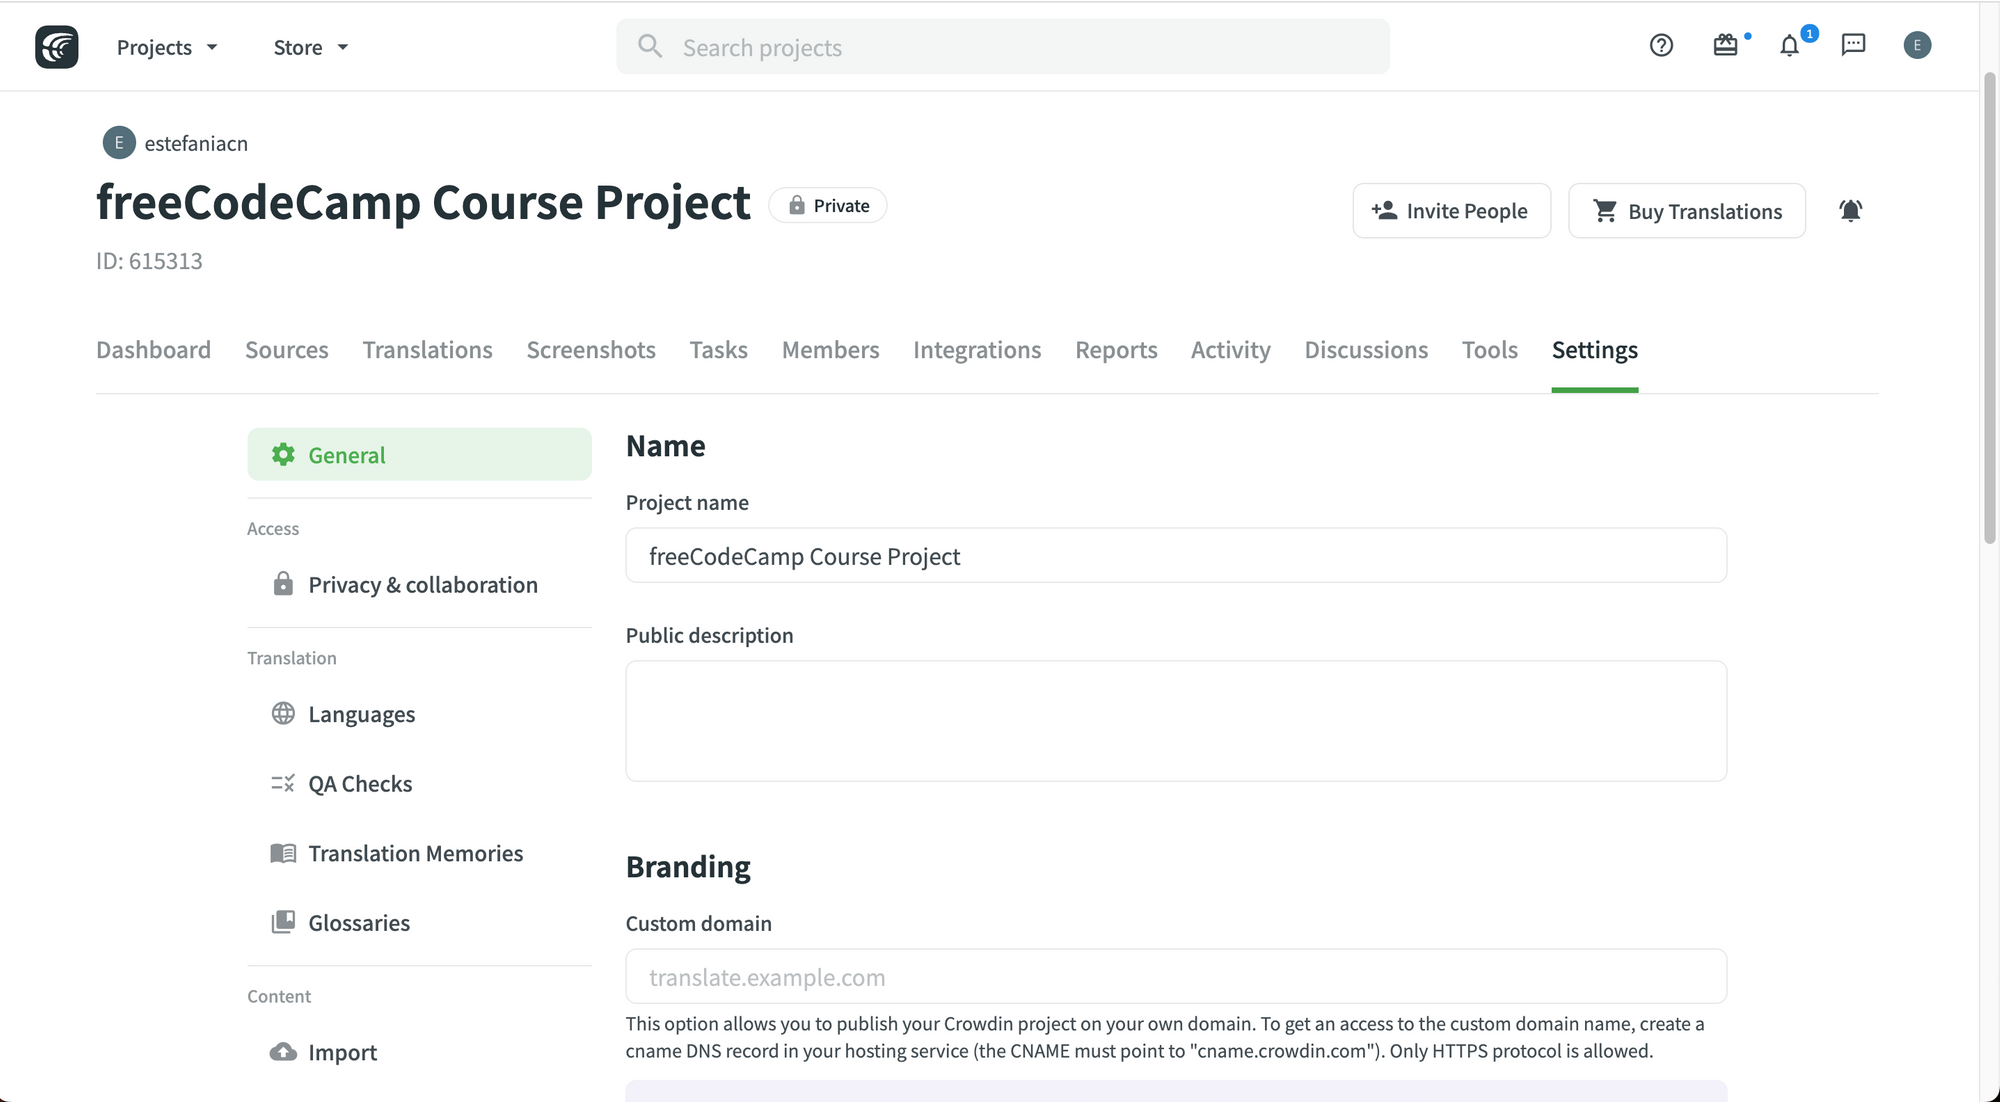 Settings tab.
General Settings
The general settings include:
- Name.
- Public description.
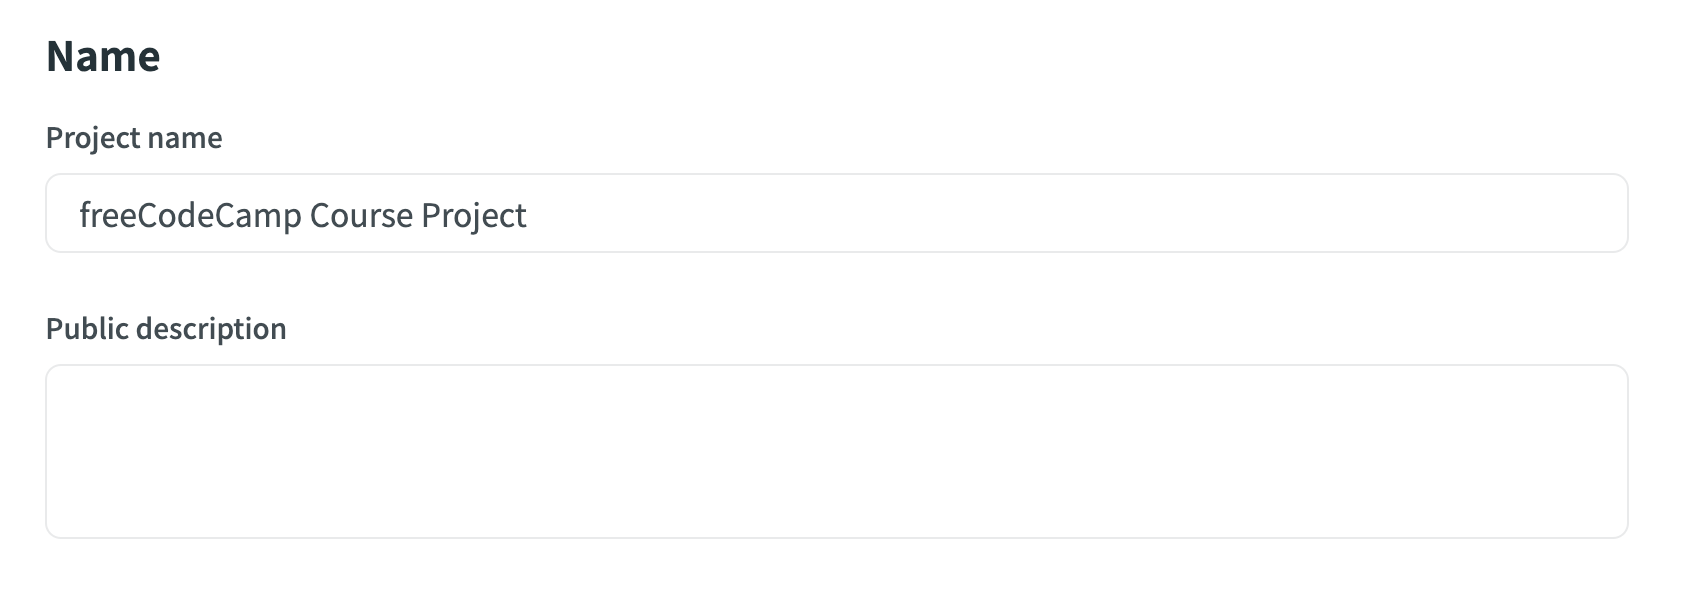 General Settings.
- Branding, including a custom domain and a project logo.
 Branding Settings.
- Badges to show the progress of the localization process.
- An option to delete the project.
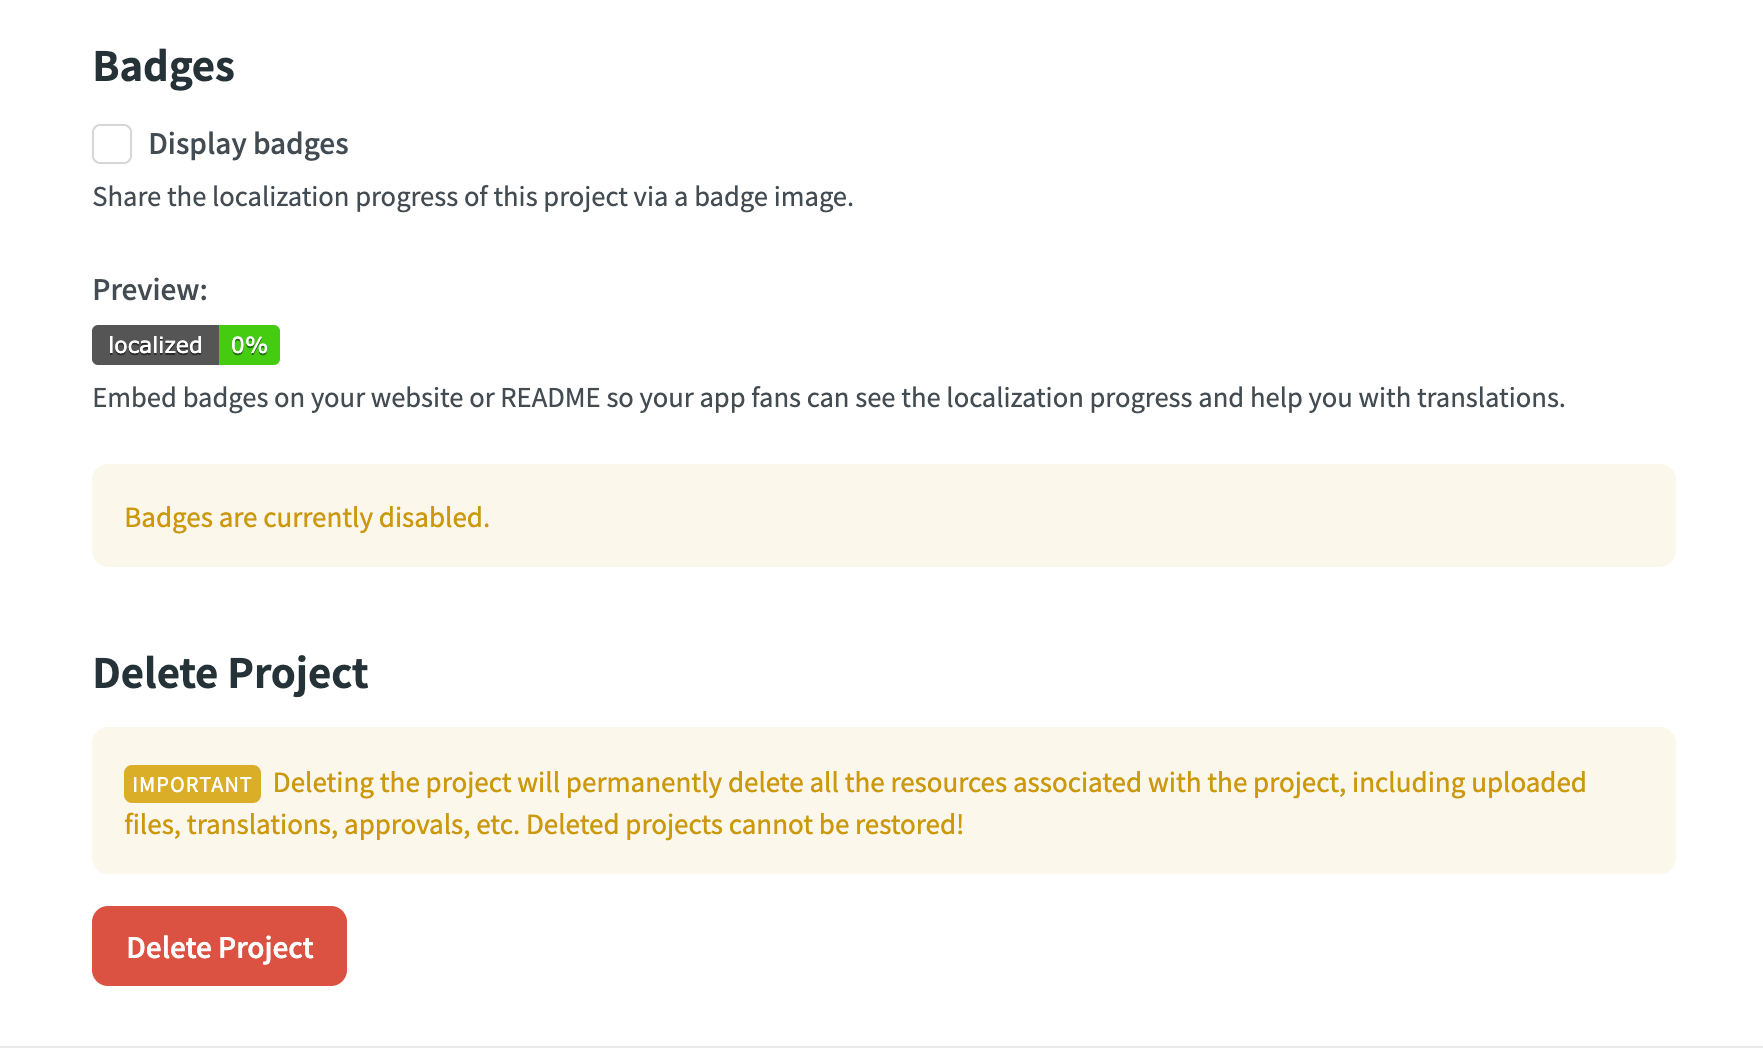 Badges and Deleting a Project.
Privacy and Collaboration
In this category, you will find settings to manage the privacy and notifications of your project.
 Privacy and Collaboration.
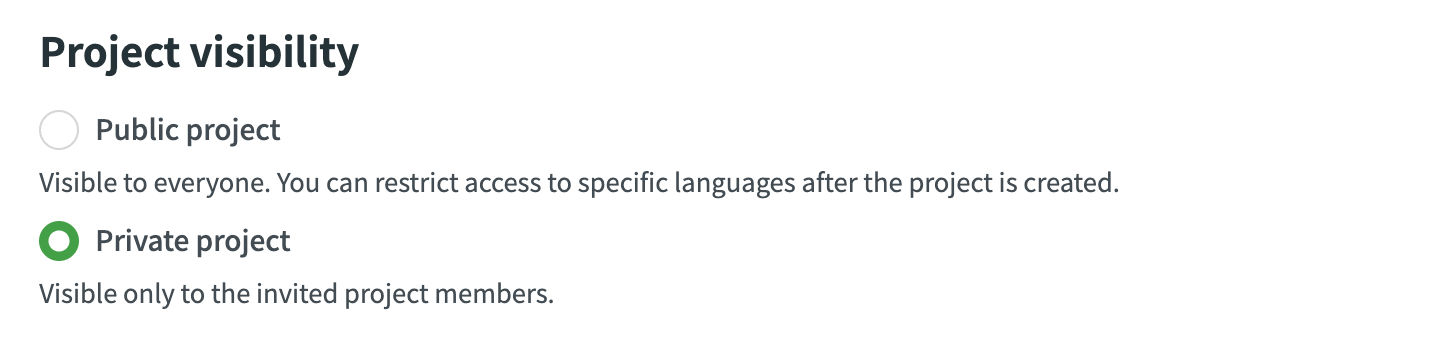
You can manage your project's visibility in the project visibility settings. You can set your project to be public or private.
Next, we have the privacy settings. You can read a short description of each one of these settings below each corresponding item. To enable a setting, check its checkbox.
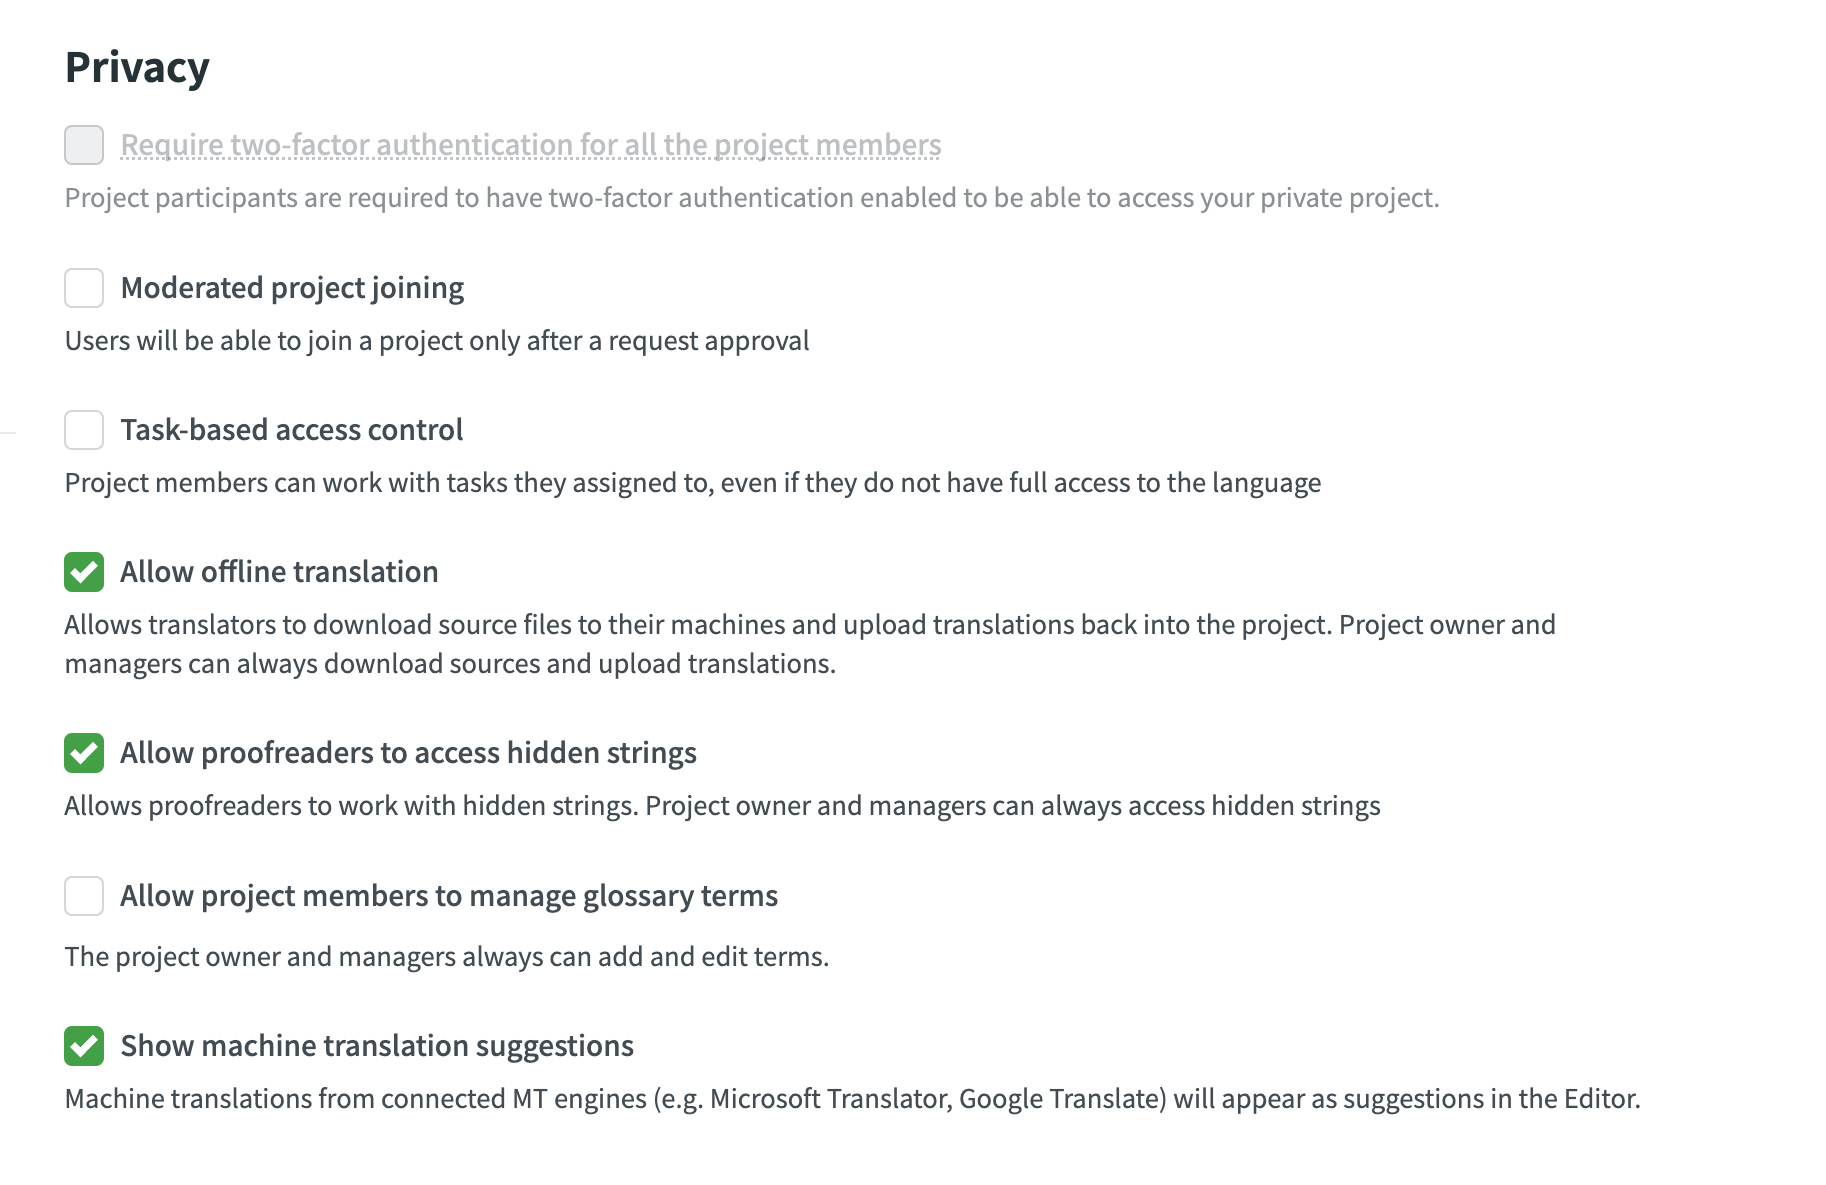 Default privacy settings. You can customize these to fit your needs.
Finally, the notifications settings for translators, project managers, and developers can also be customized. Just check the notifications that you would like to enable.
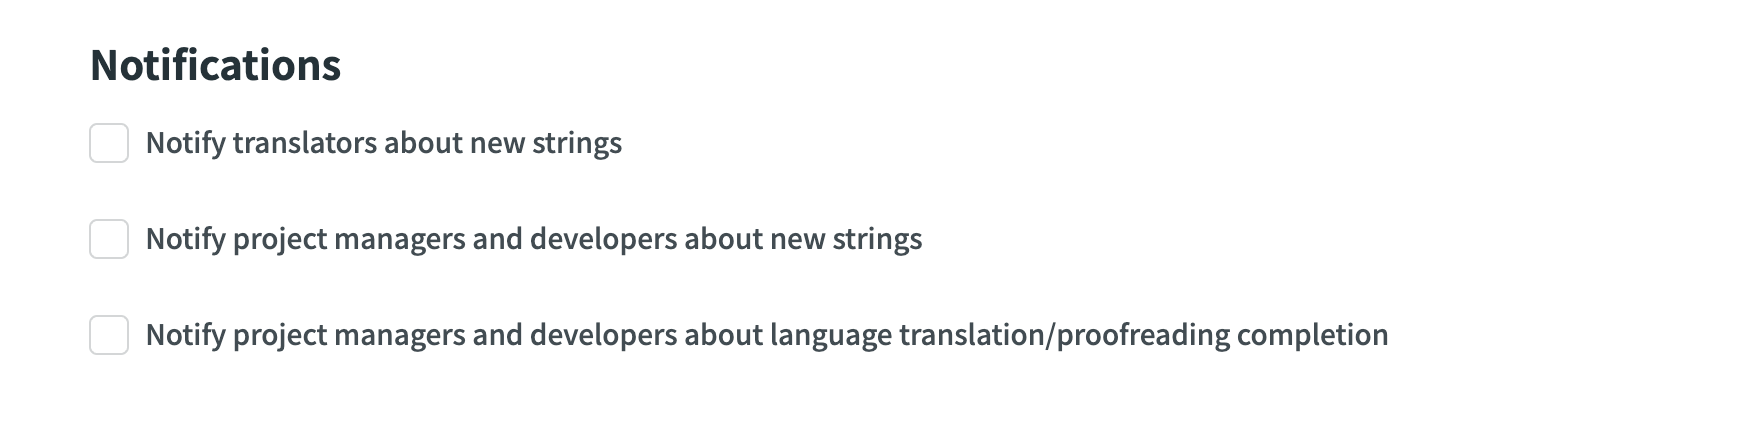 Notifications settings.
Languages
In the languages category, you can change the source and target languages of your project.
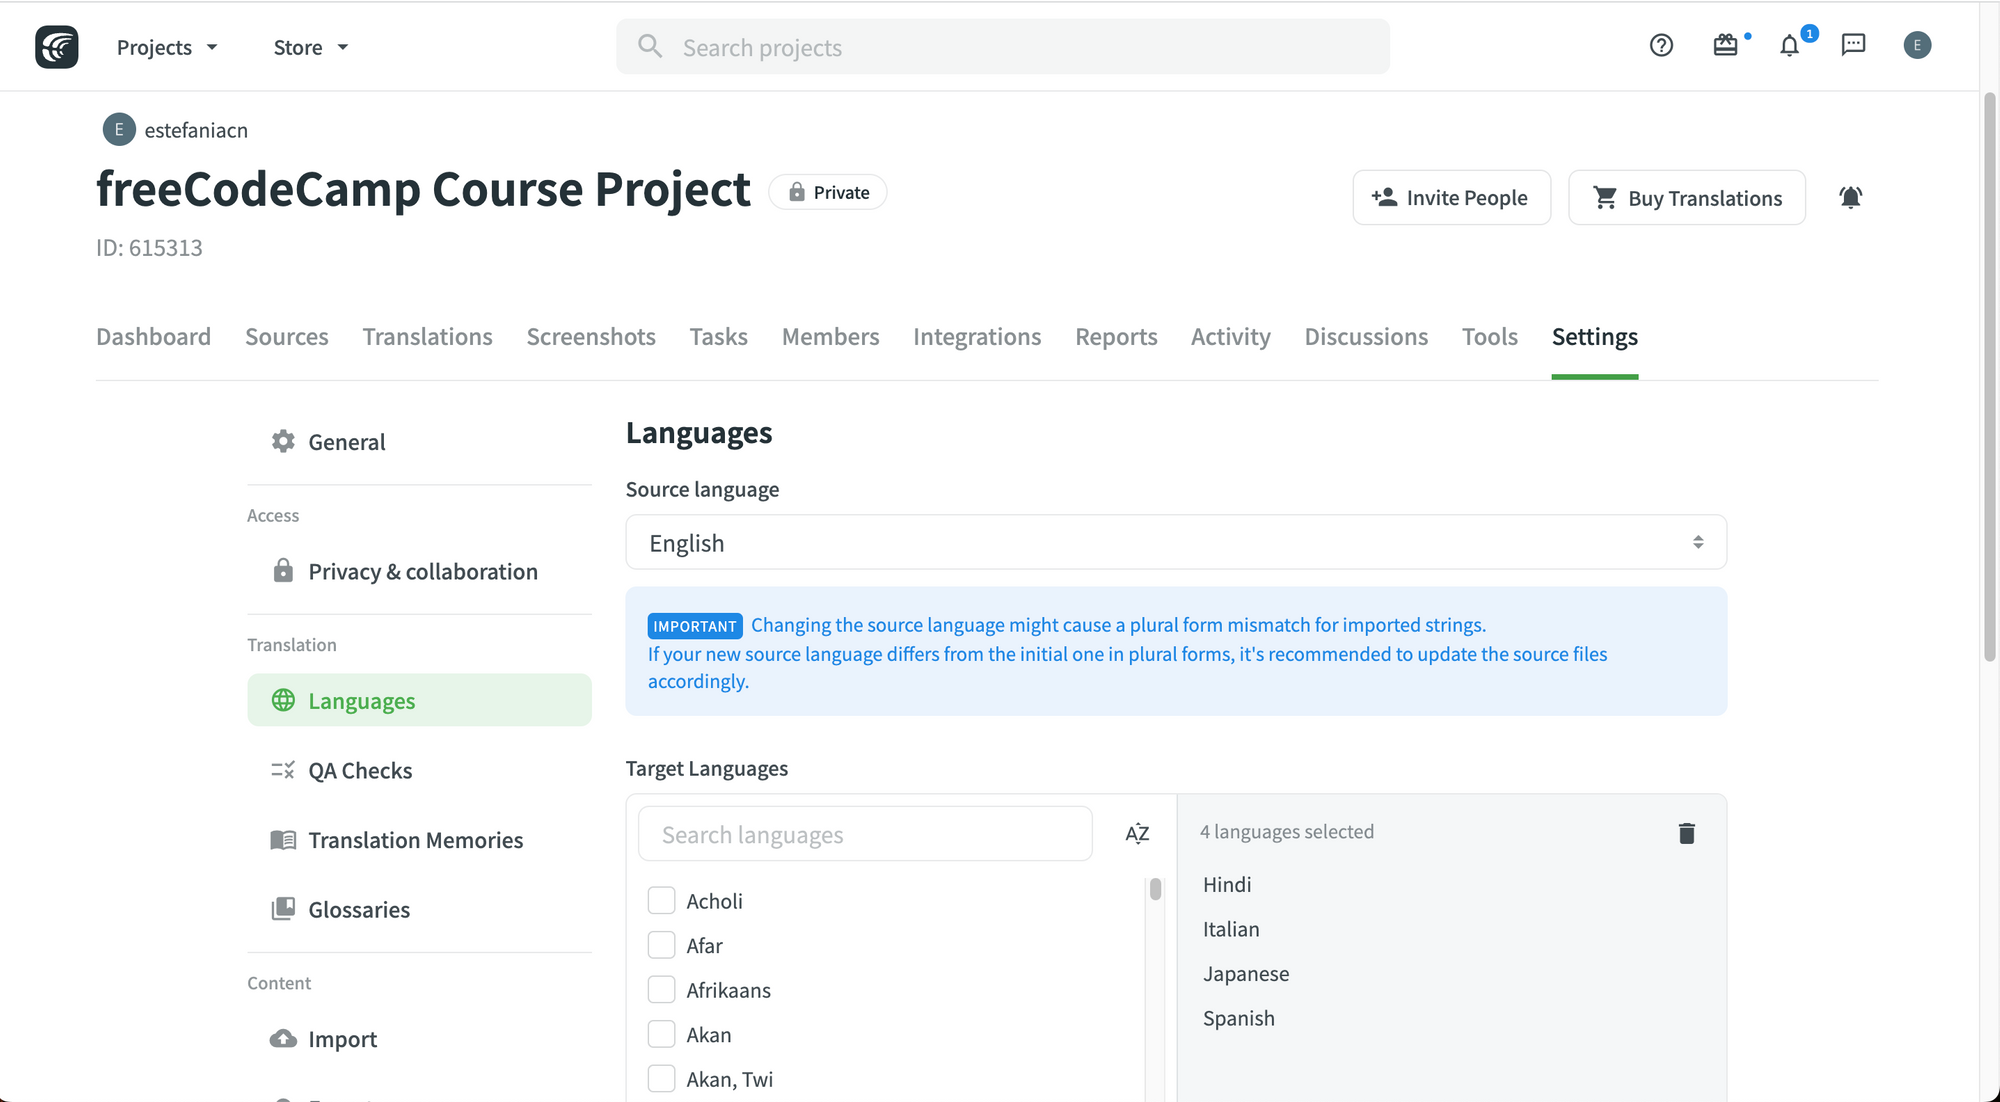 Languages settings.
Quality Assurance (QA) Checks
I promised you that this would be important, right? Here we are. In the quality assurance (QA) category, you can enable QA Checks and choose which specific QA checks you would like to have in your project.
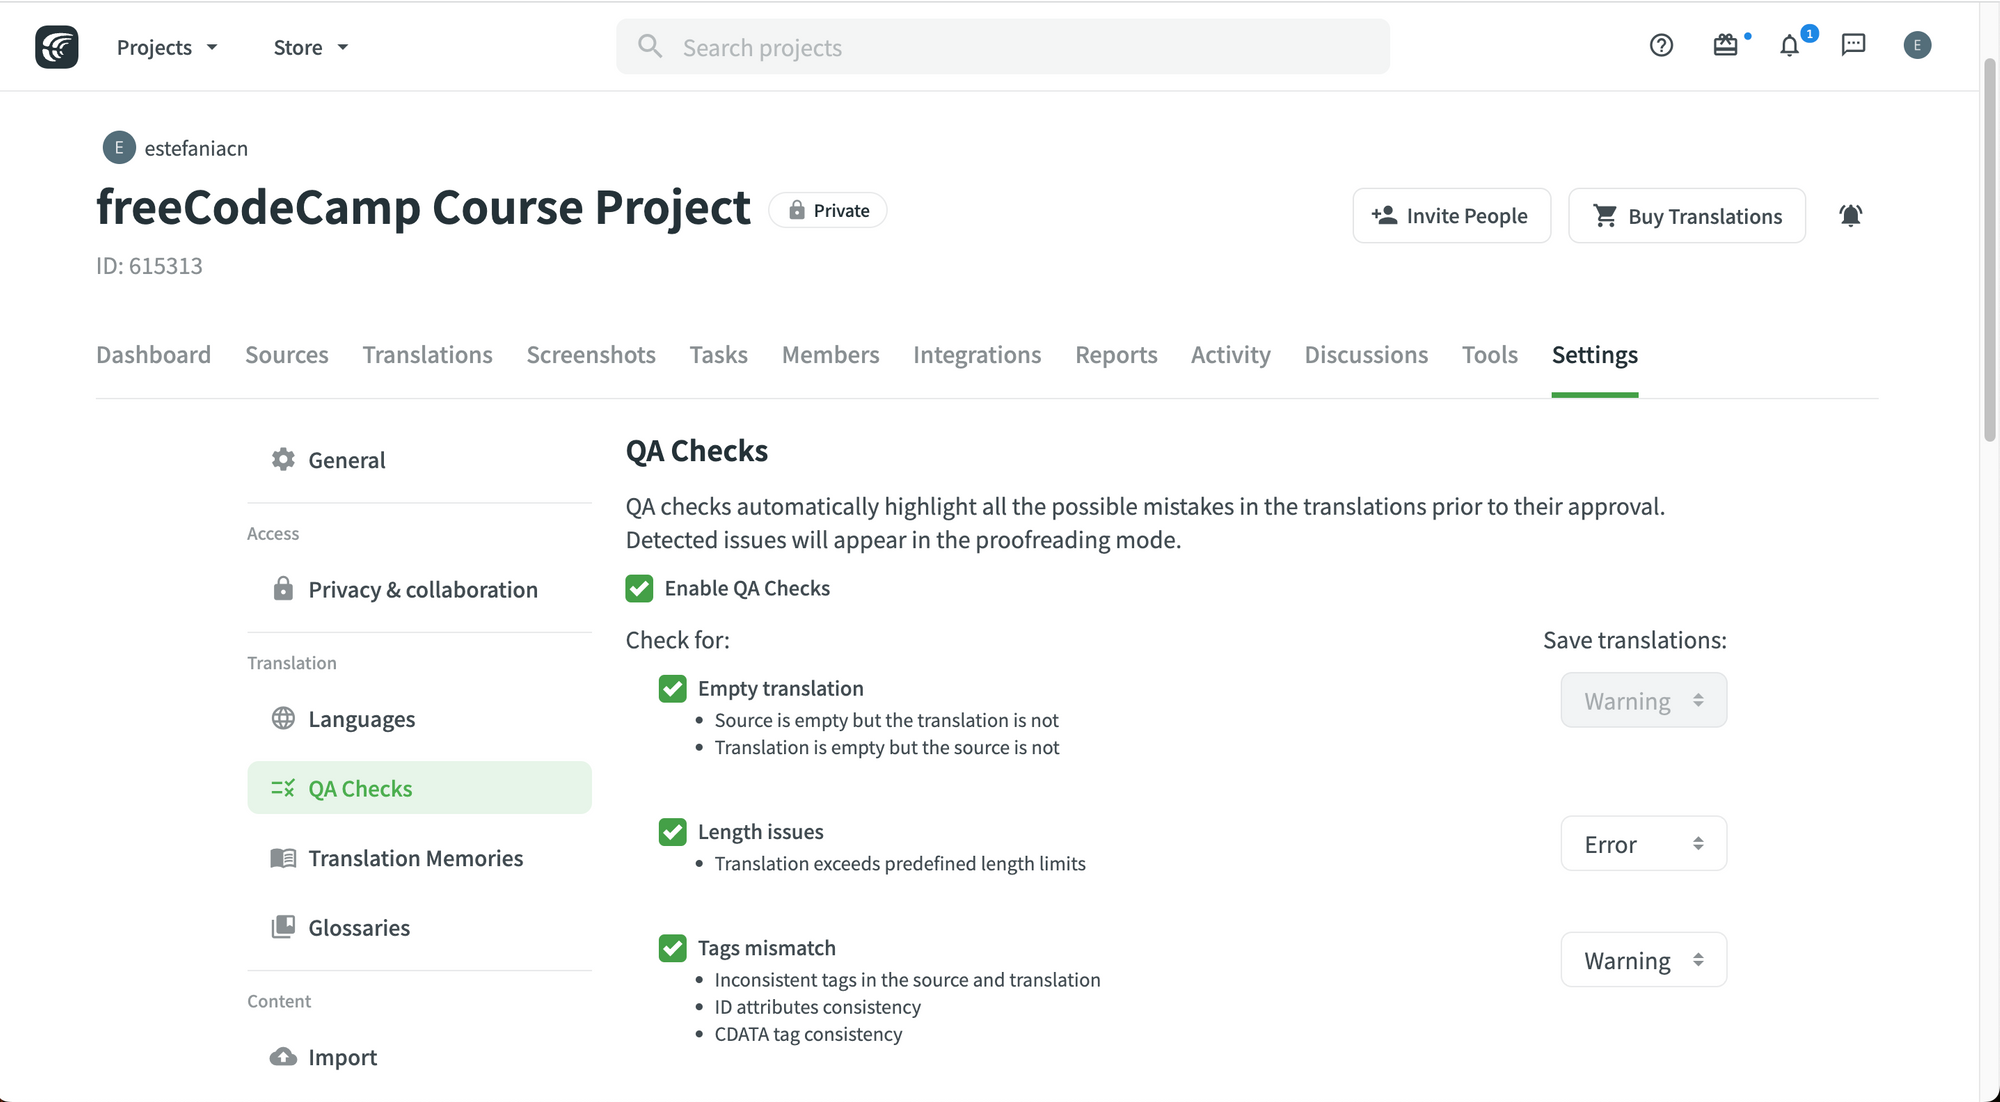 QA Checks category.
Crowdin mentions that:
The main aim of quality assurance (QA) checks is to help you efficiently handle different language-specific aspects in translations and ensure they are formatted the same way as the source strings and will fit the UI just as well. Some typical QA check issues include missed commas, extra spaces, or typos.
It’s recommended to review and resolve all QA check issues before building your project and downloading translations.
These quality assurance checks include:
- Empty translations.
- Length issues.
- Tags mismatch.
- Spaces mismatch.
- Variables mismatch.
- Punctuation mismatch.
- Character case mismatch.
- Special characters mismatch.
- "Incorrect translation" issues marked by project members.
- Spelling mistakes.
- ICU (International Components for Unicode) Syntax Errors.
- Consistent terminology that follows the project glossary.
- Duplicate translation.
- FTL syntax.
- Android syntax.
After you select the QA Checks that you would like to enable, just click on the "Save" button and your changes will be saved.
 Save Button.
Translation Memories
You will also find a category for Translation Memories settings.
 Translation Memories category.
We will talk about Translation Memories in detail later on, but know that this is where you can customize all the settings of this helpful feature.
Glossaries
You can also manage your glossaries from the Glossaries category.
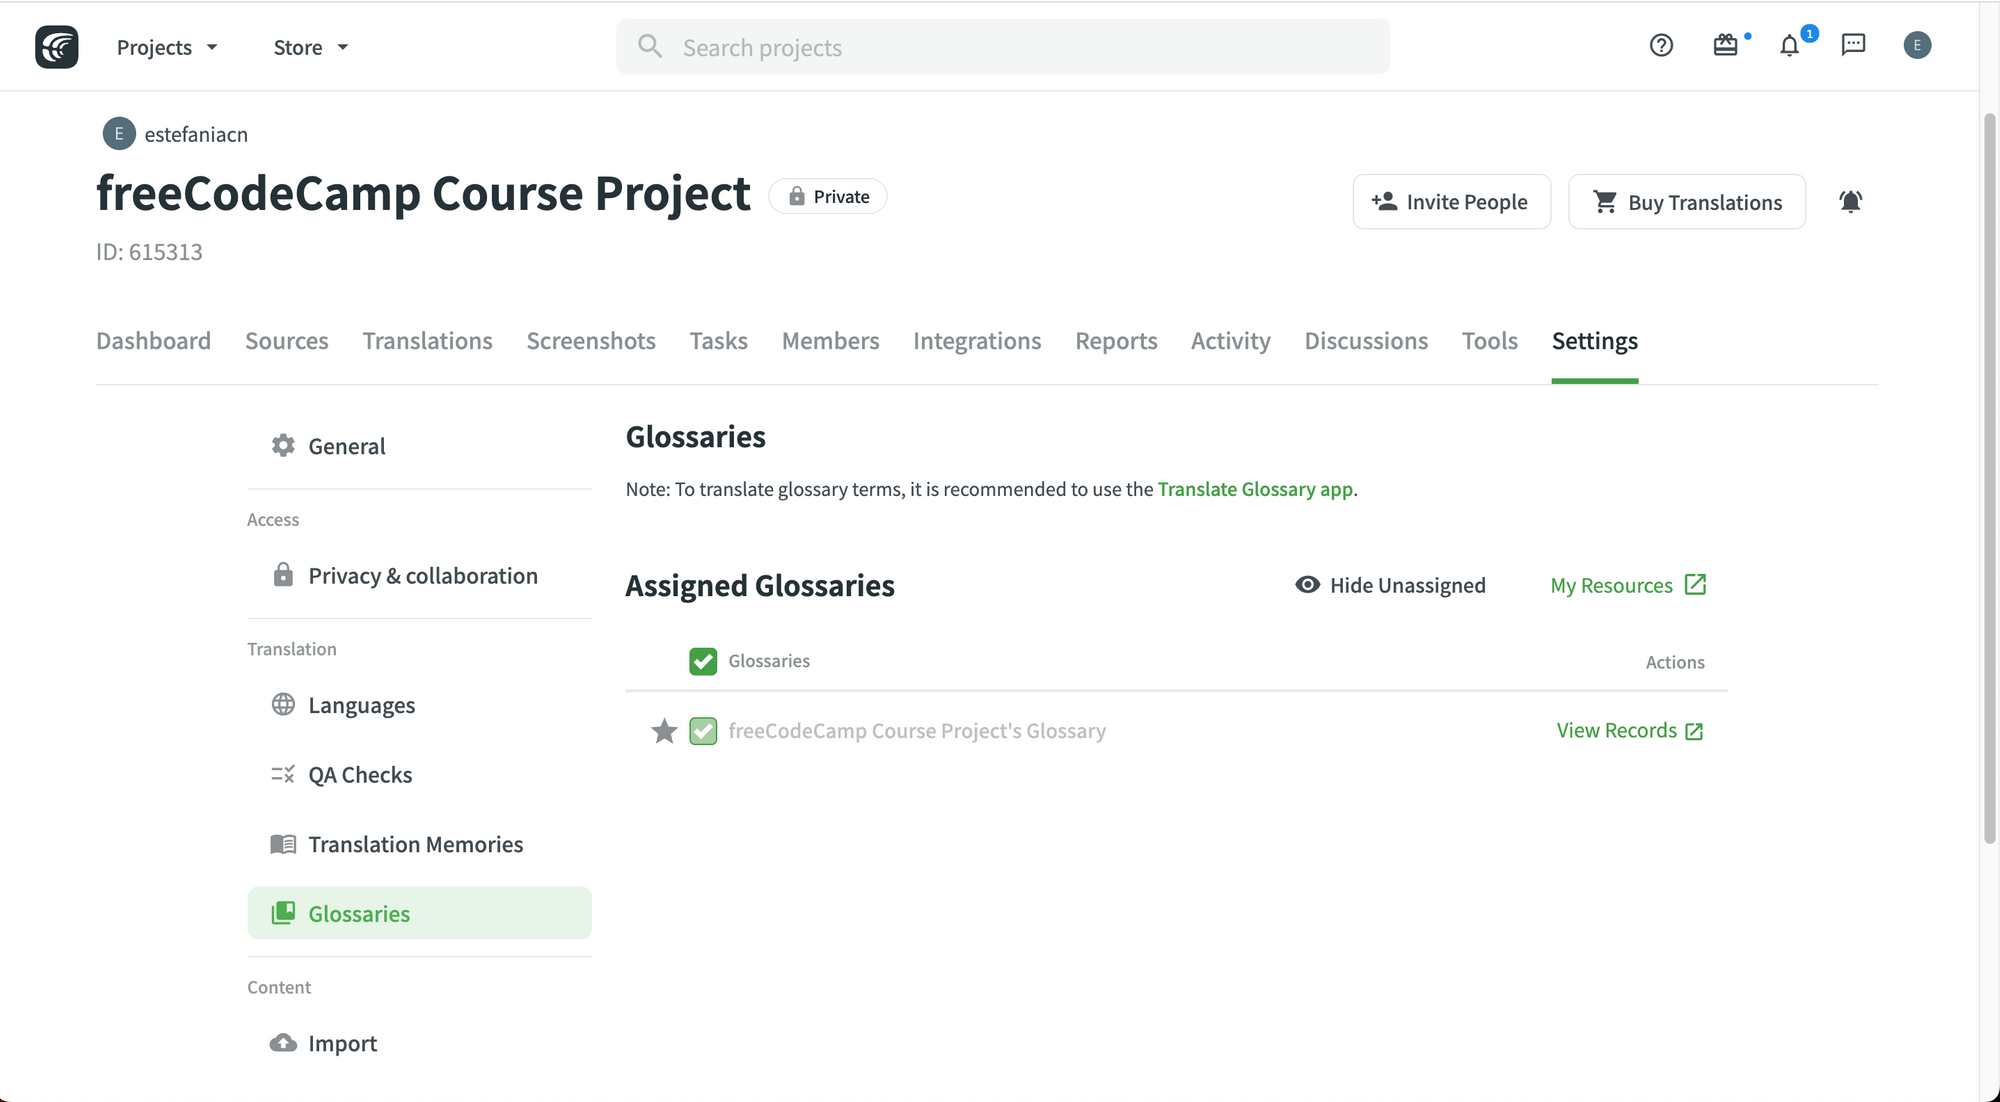 Glossaries category.
You can check your assigned glossaries and click on links to view the records of each glossary. At the top, you will also find a link to the Translate Glossary App.
Import
In Crowdin, you can import source strings and you can customize settings such as how to handle duplicate strings and how to count the words.
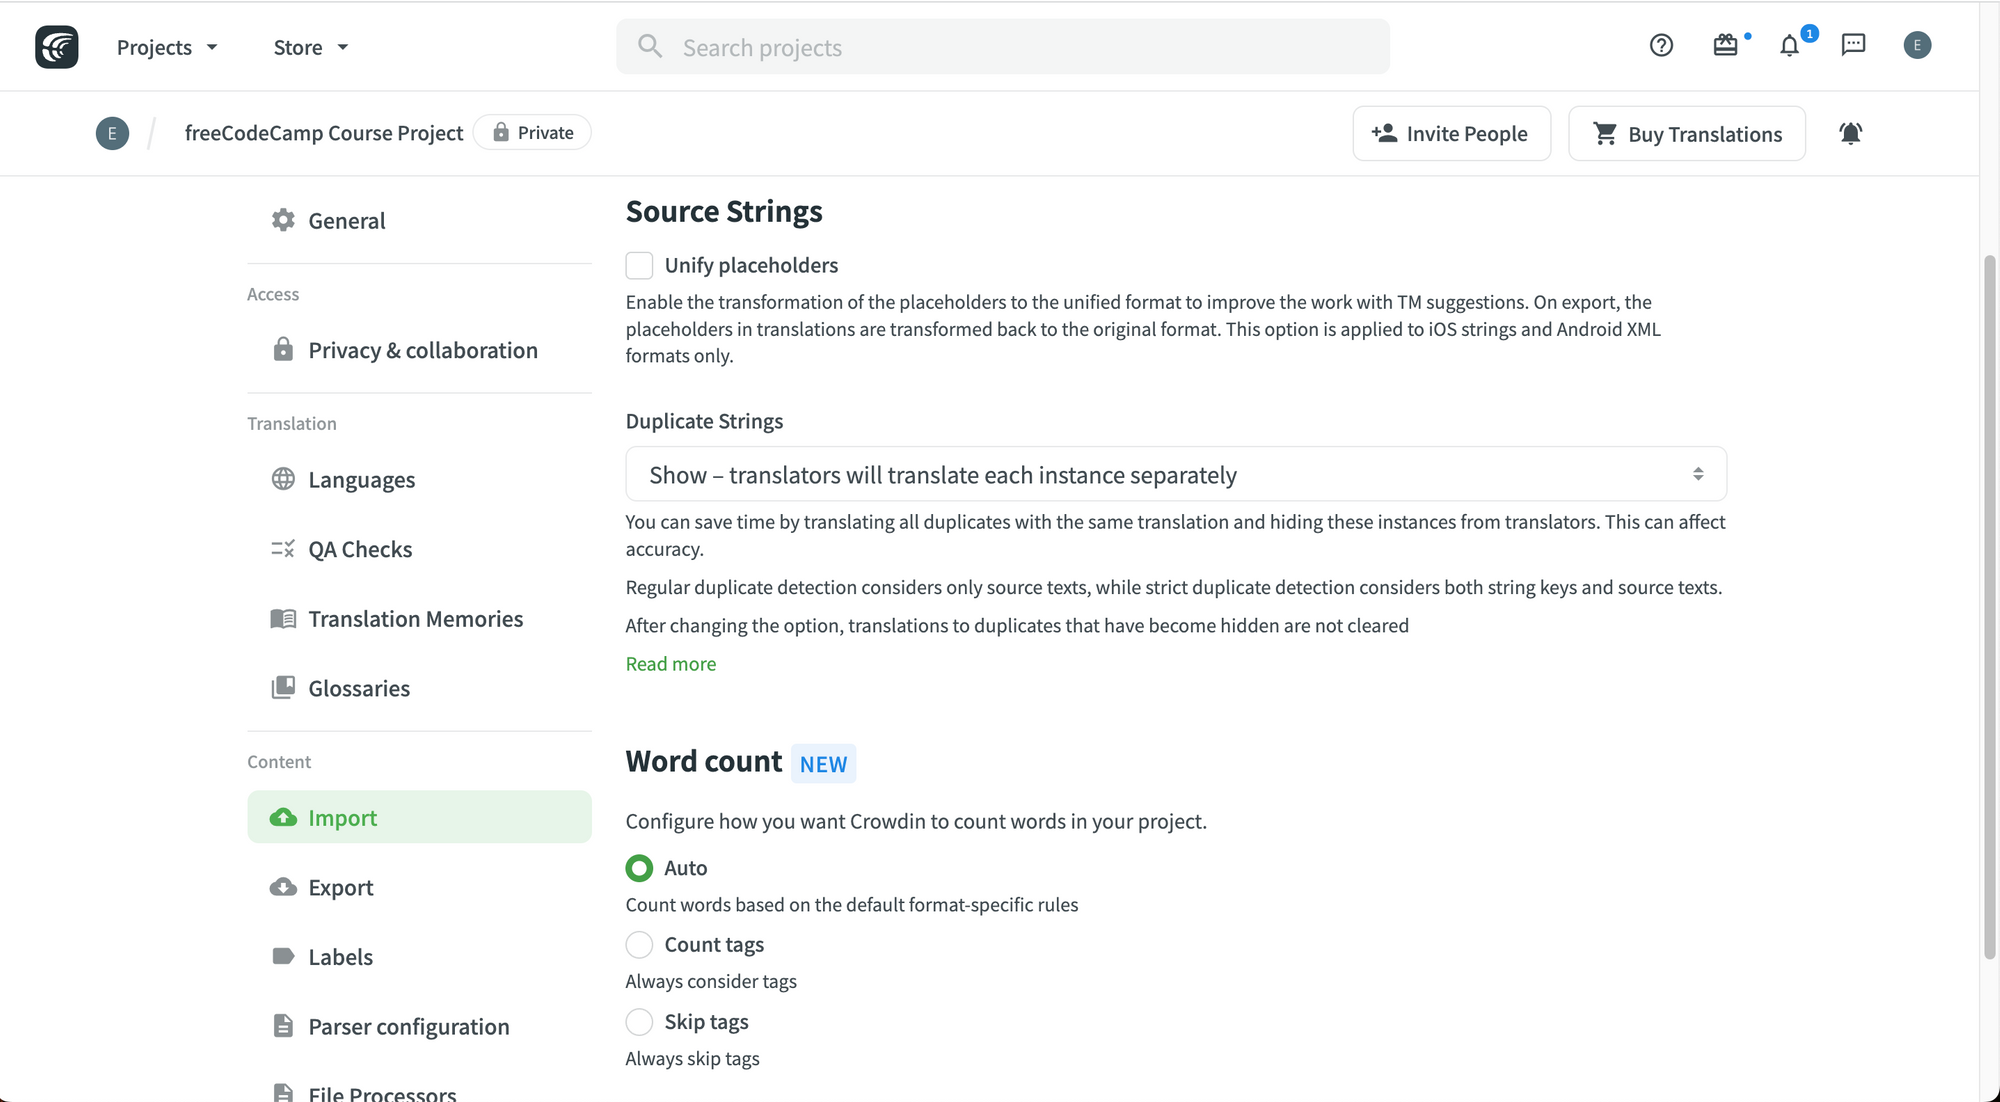 Import settings.
Export
The export category has helpful settings for exporting your translated files.
You can choose to:
- Save context information in the files.
- Skip untranslated strings.
- Skip untranslated files.
- Export only approved translations.
- Automatically fill in regional dialects.
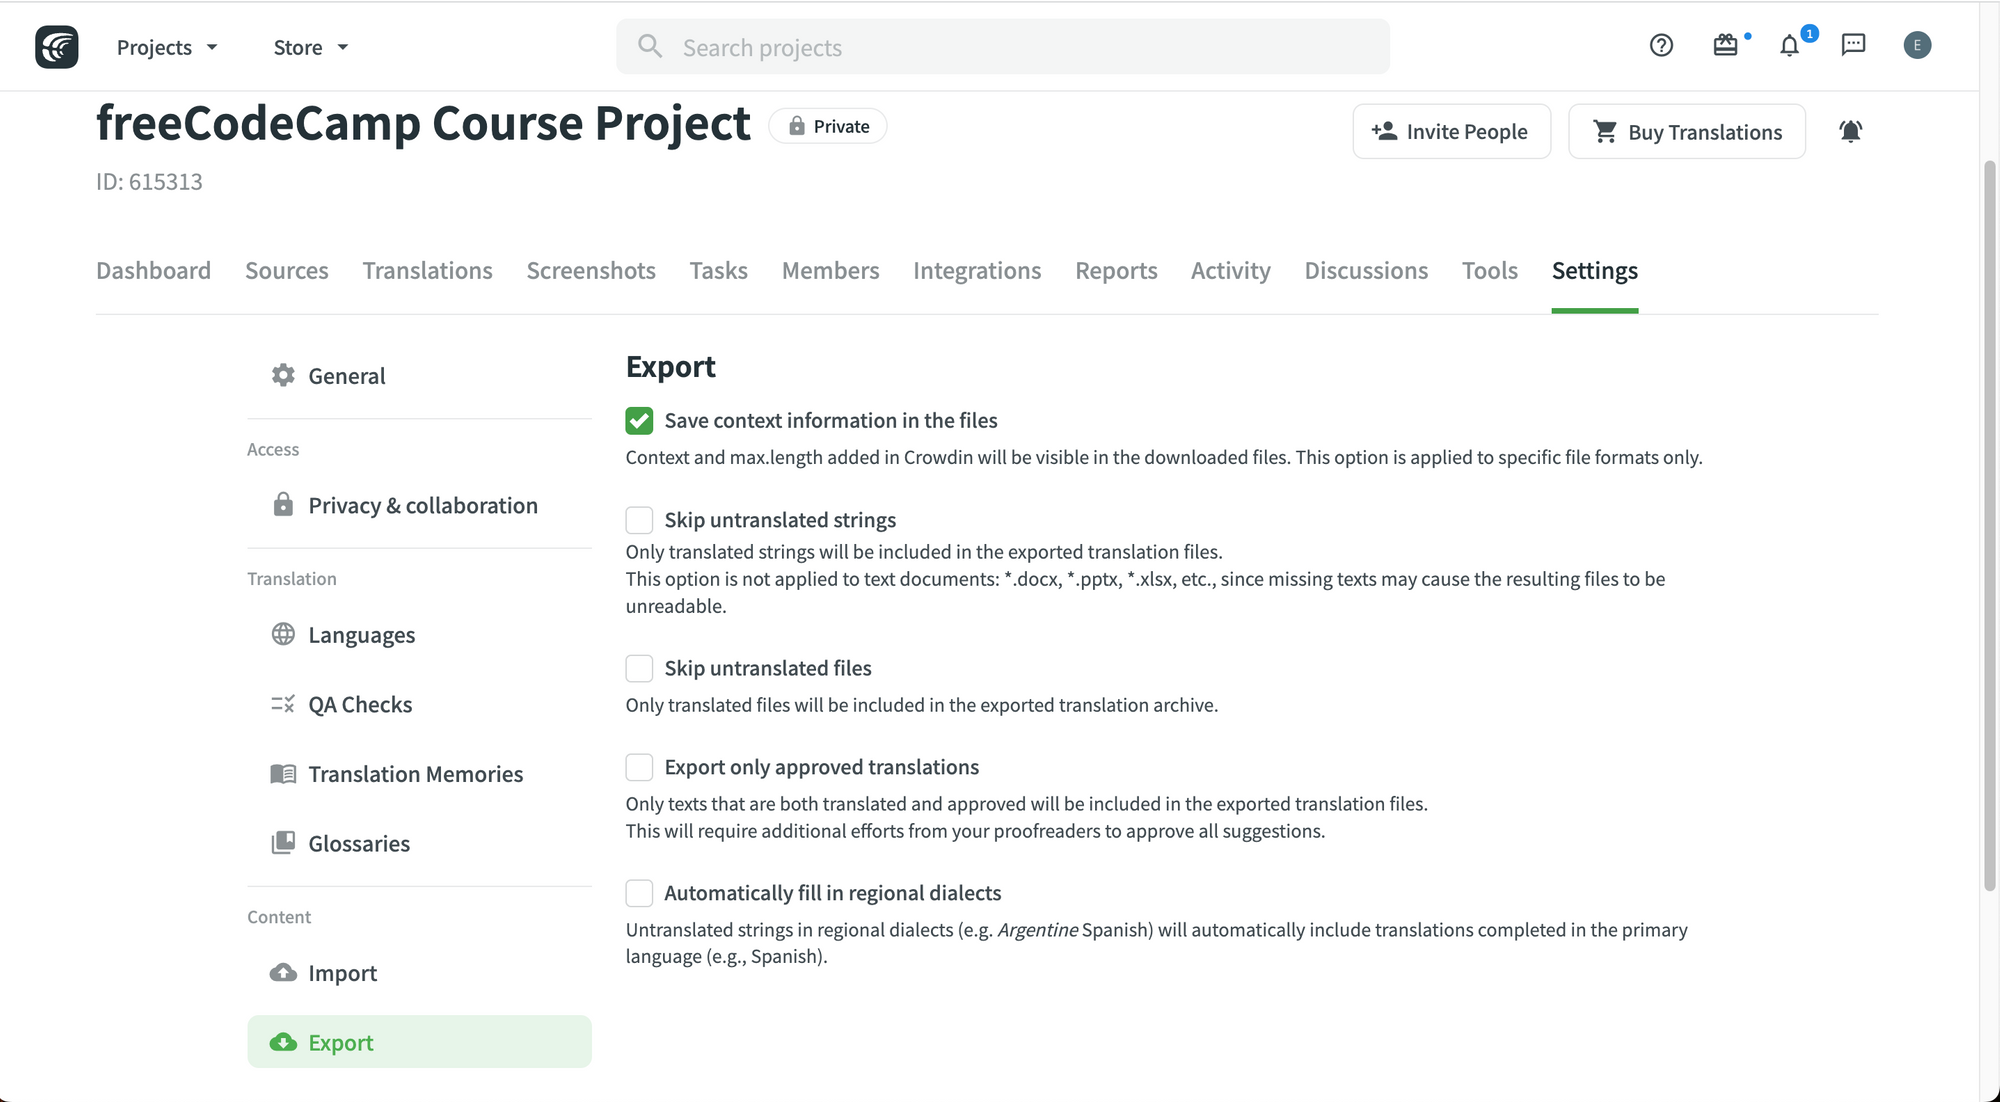 Export settings.
Labels
Labels can be helpful for adding context to strings and organizing them by topics. They can be useful when you want to search for specific strings.
You can add labels from this category in the settings:
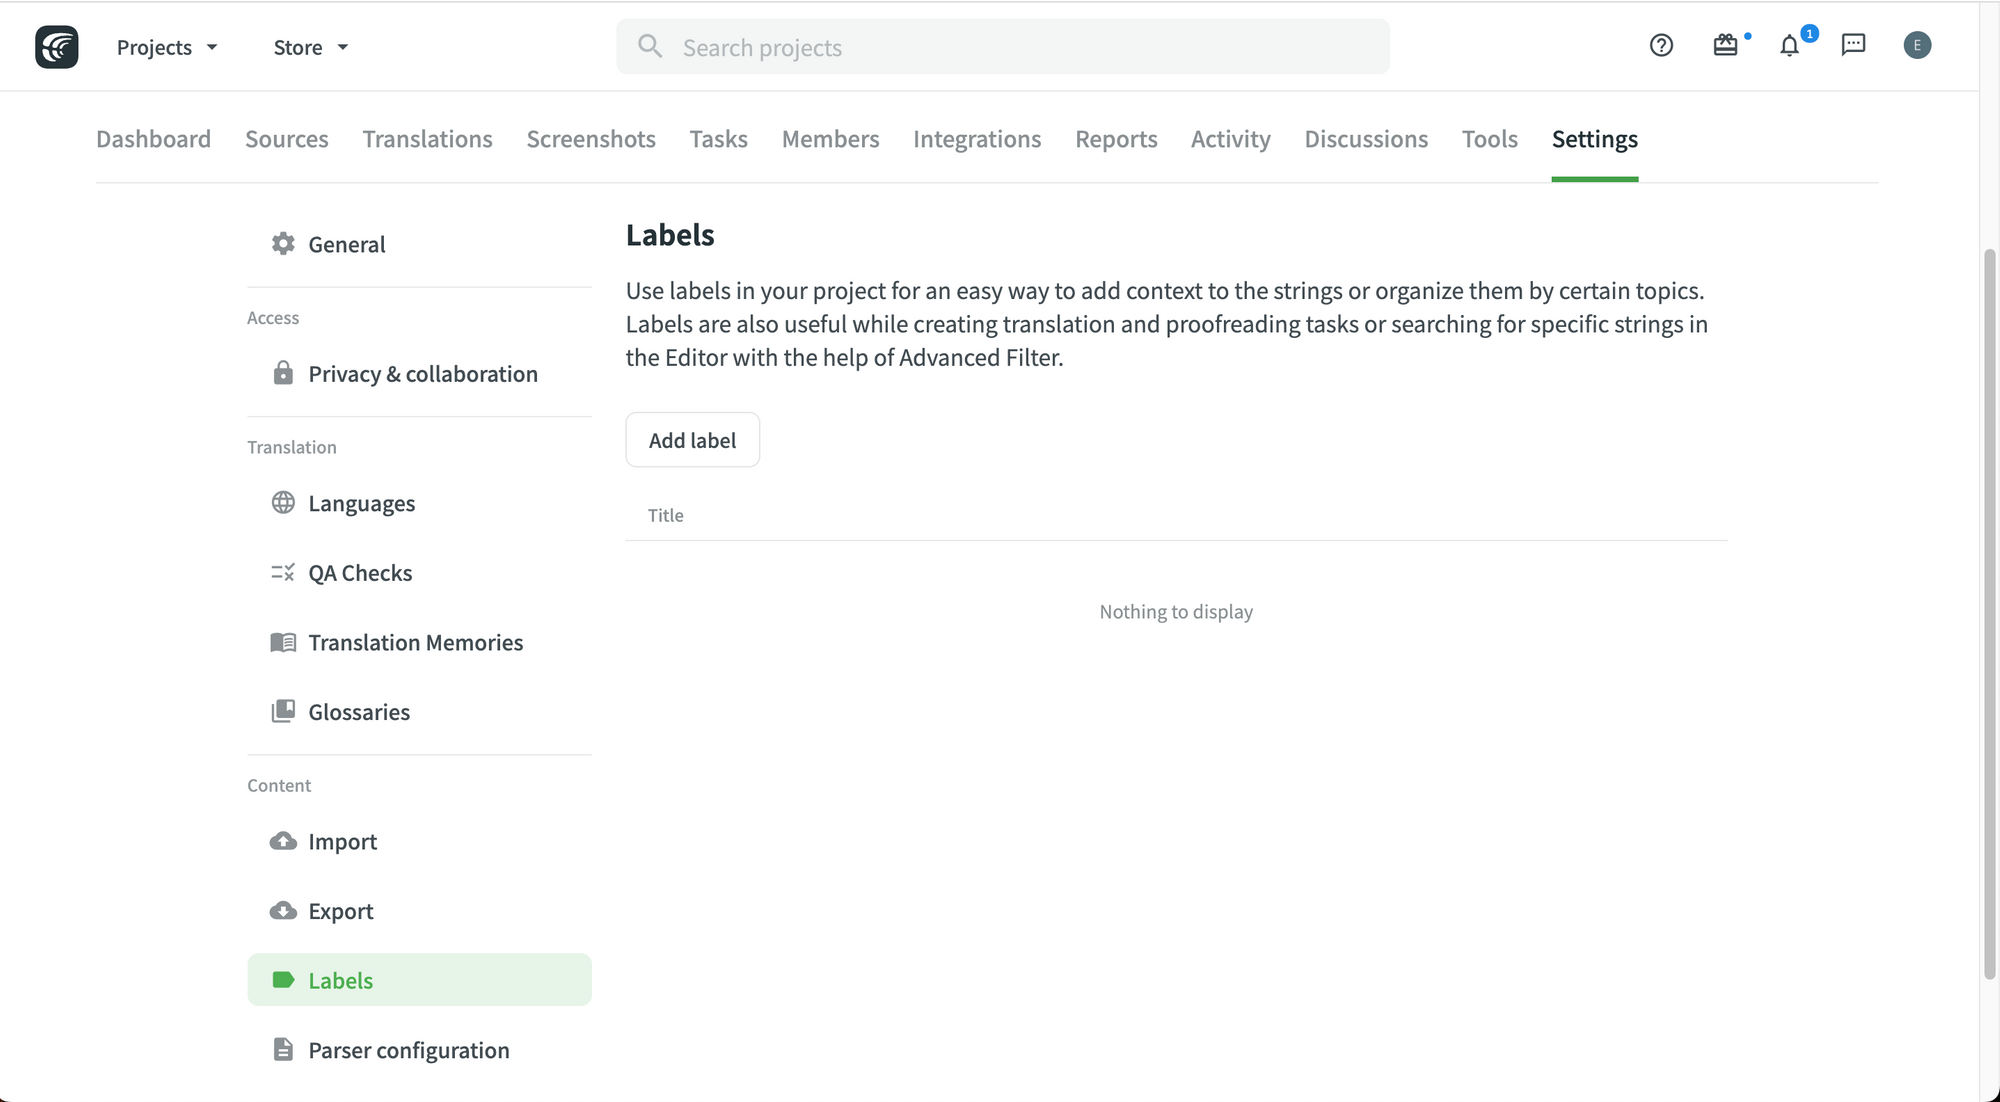 Labels settings.
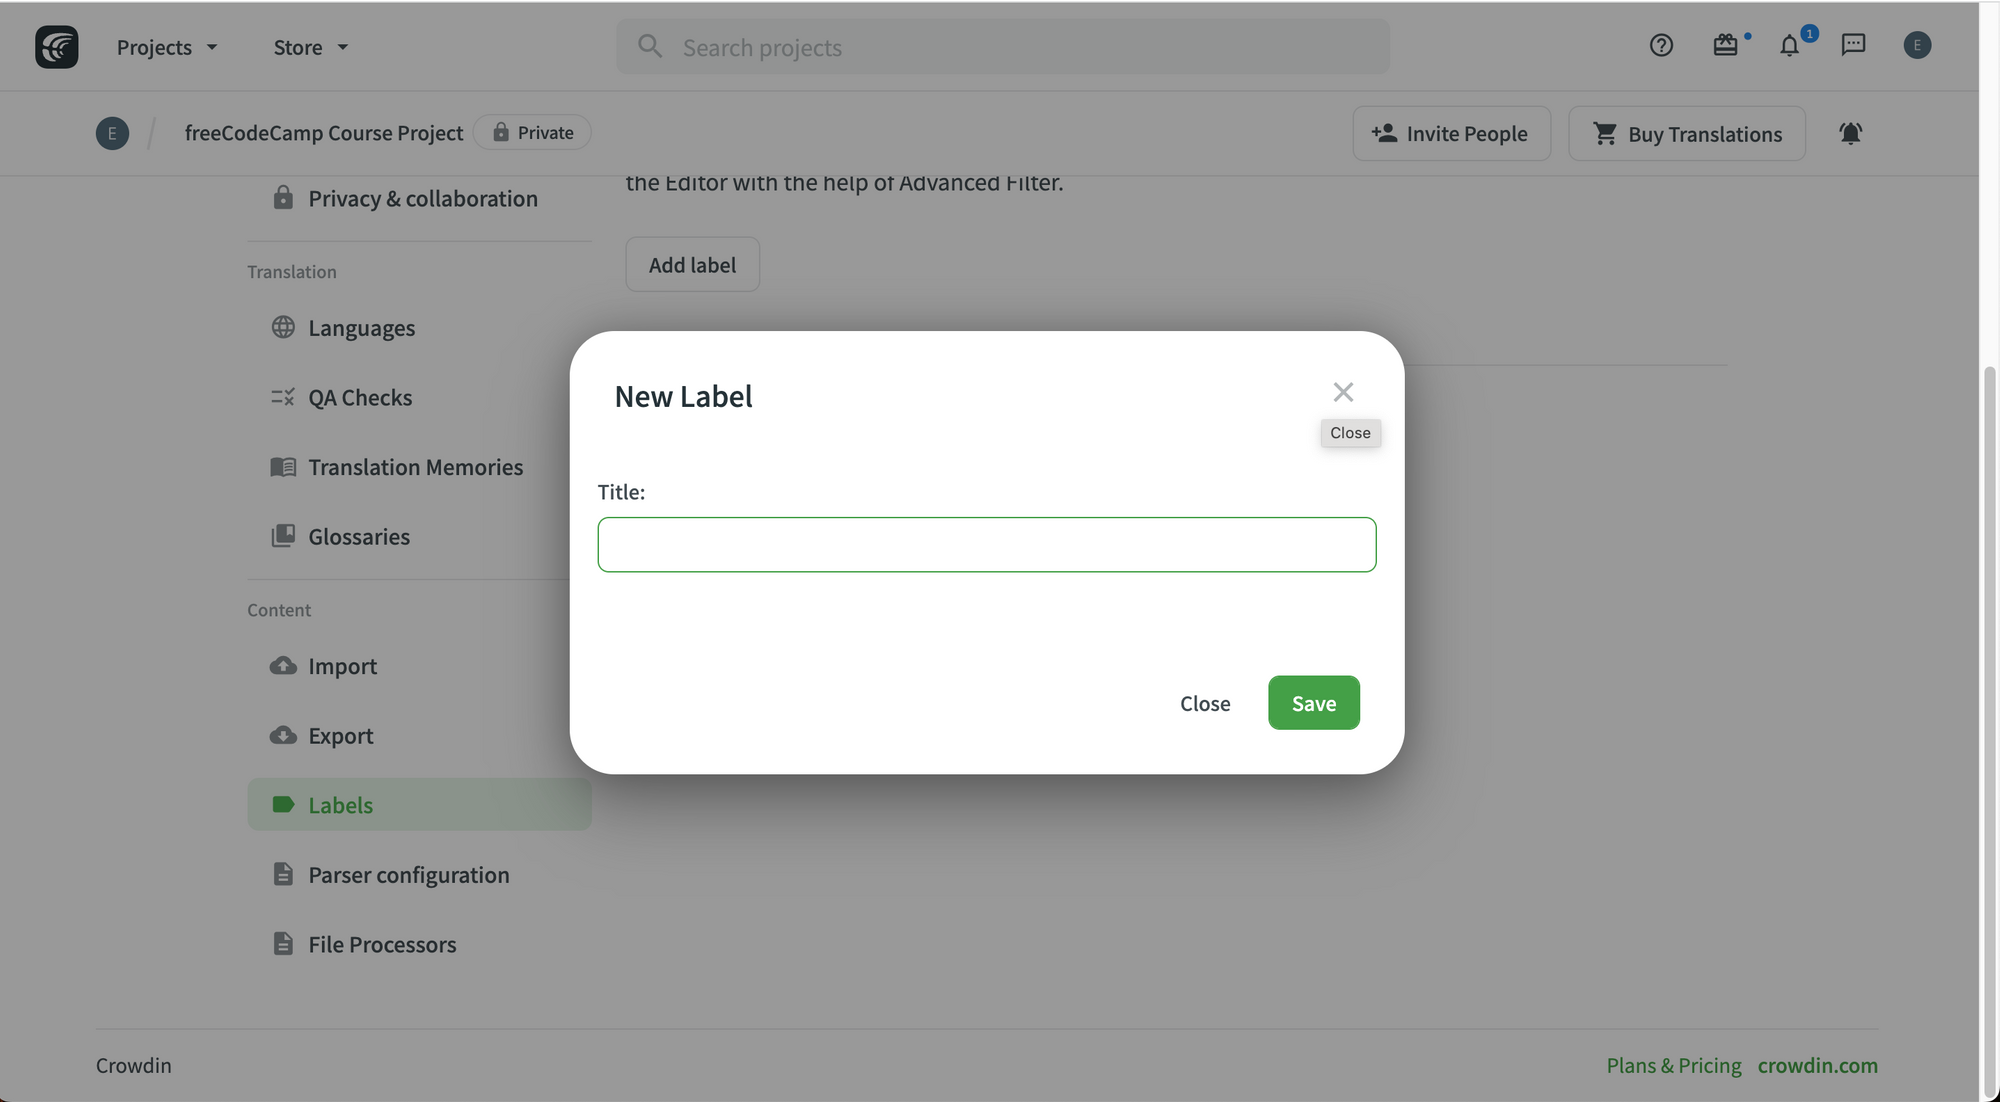 Creating a New Label.
Parser Configuration
With the Parser Configuration, you can configure how Crowdin imports and exports selected file types to fit your needs.
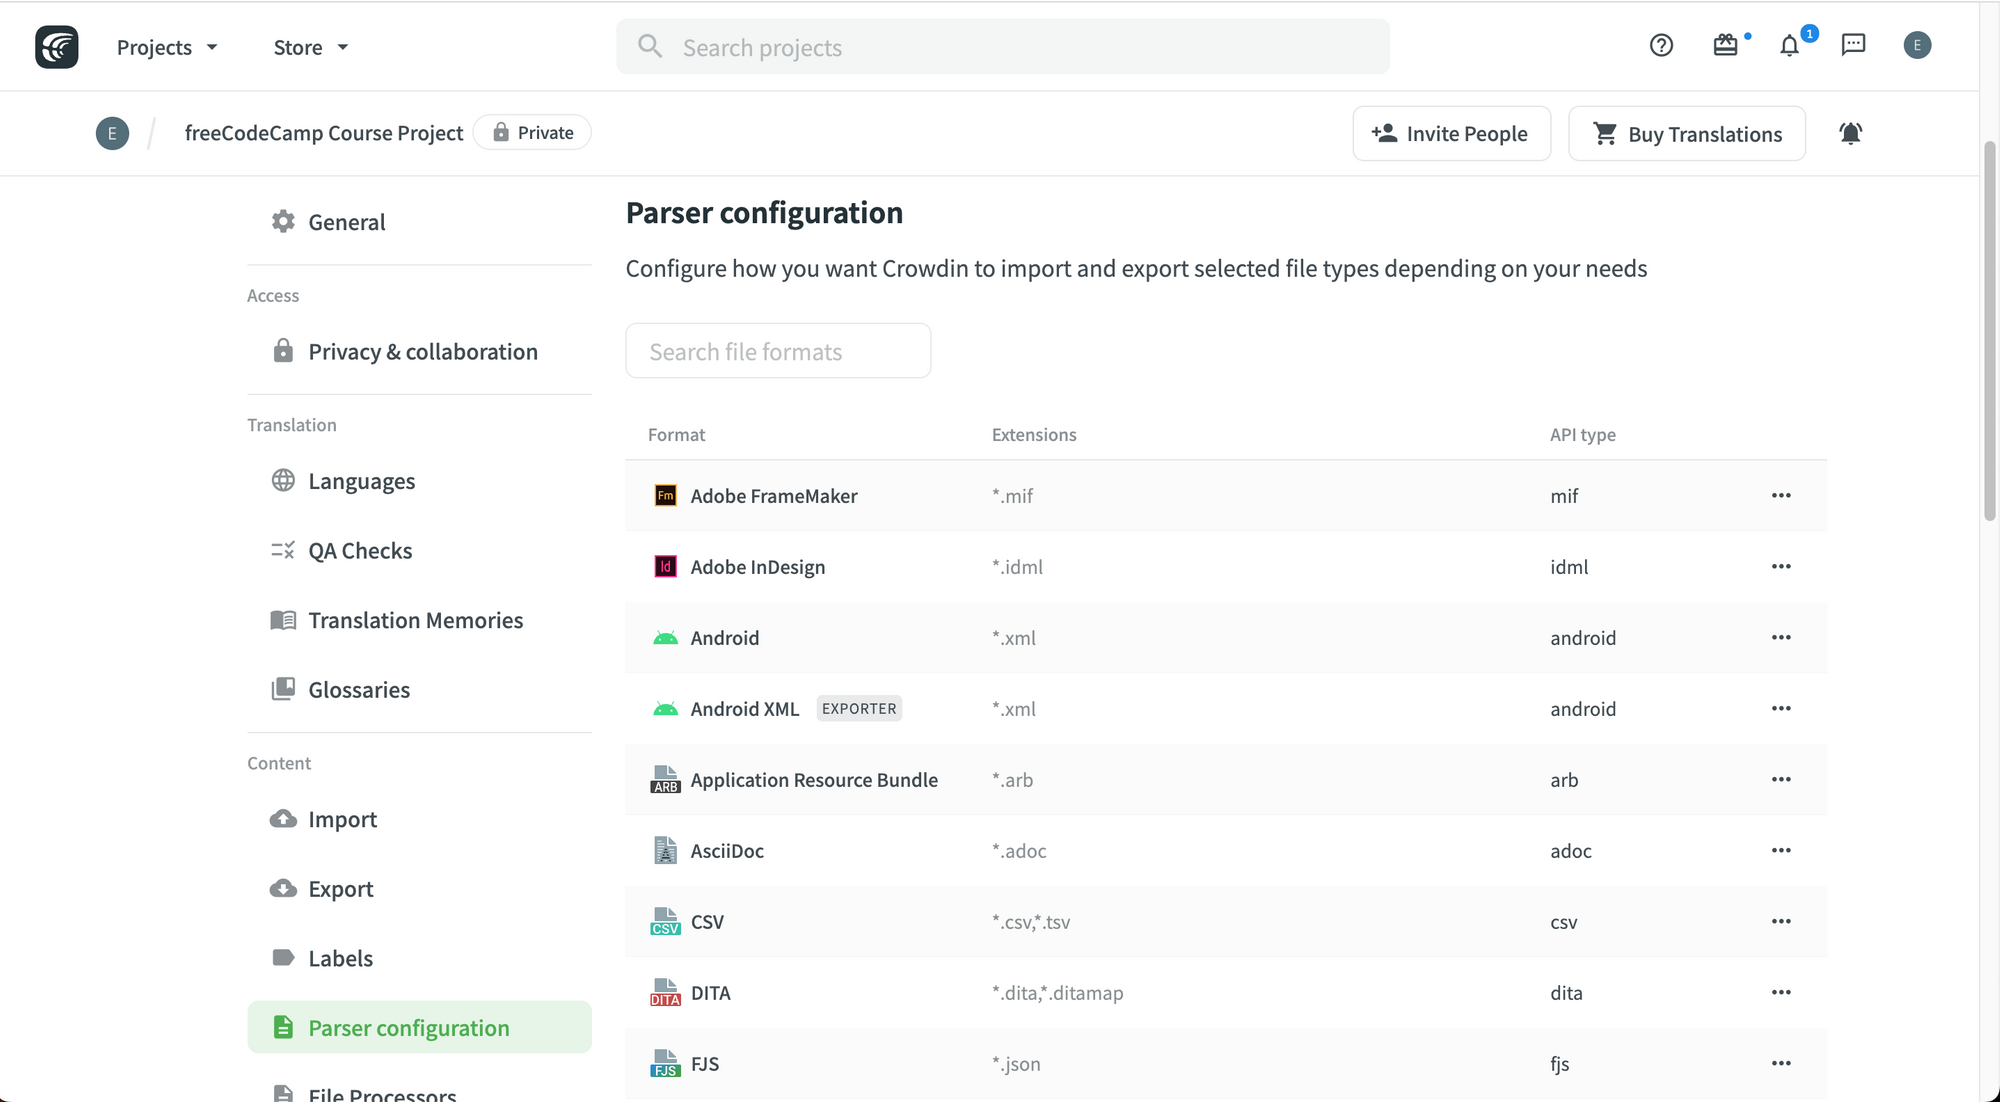 Parser Configuration category.
File Processors
The last group in the settings is File Processors, which allows you to customize how to process supported file formats.
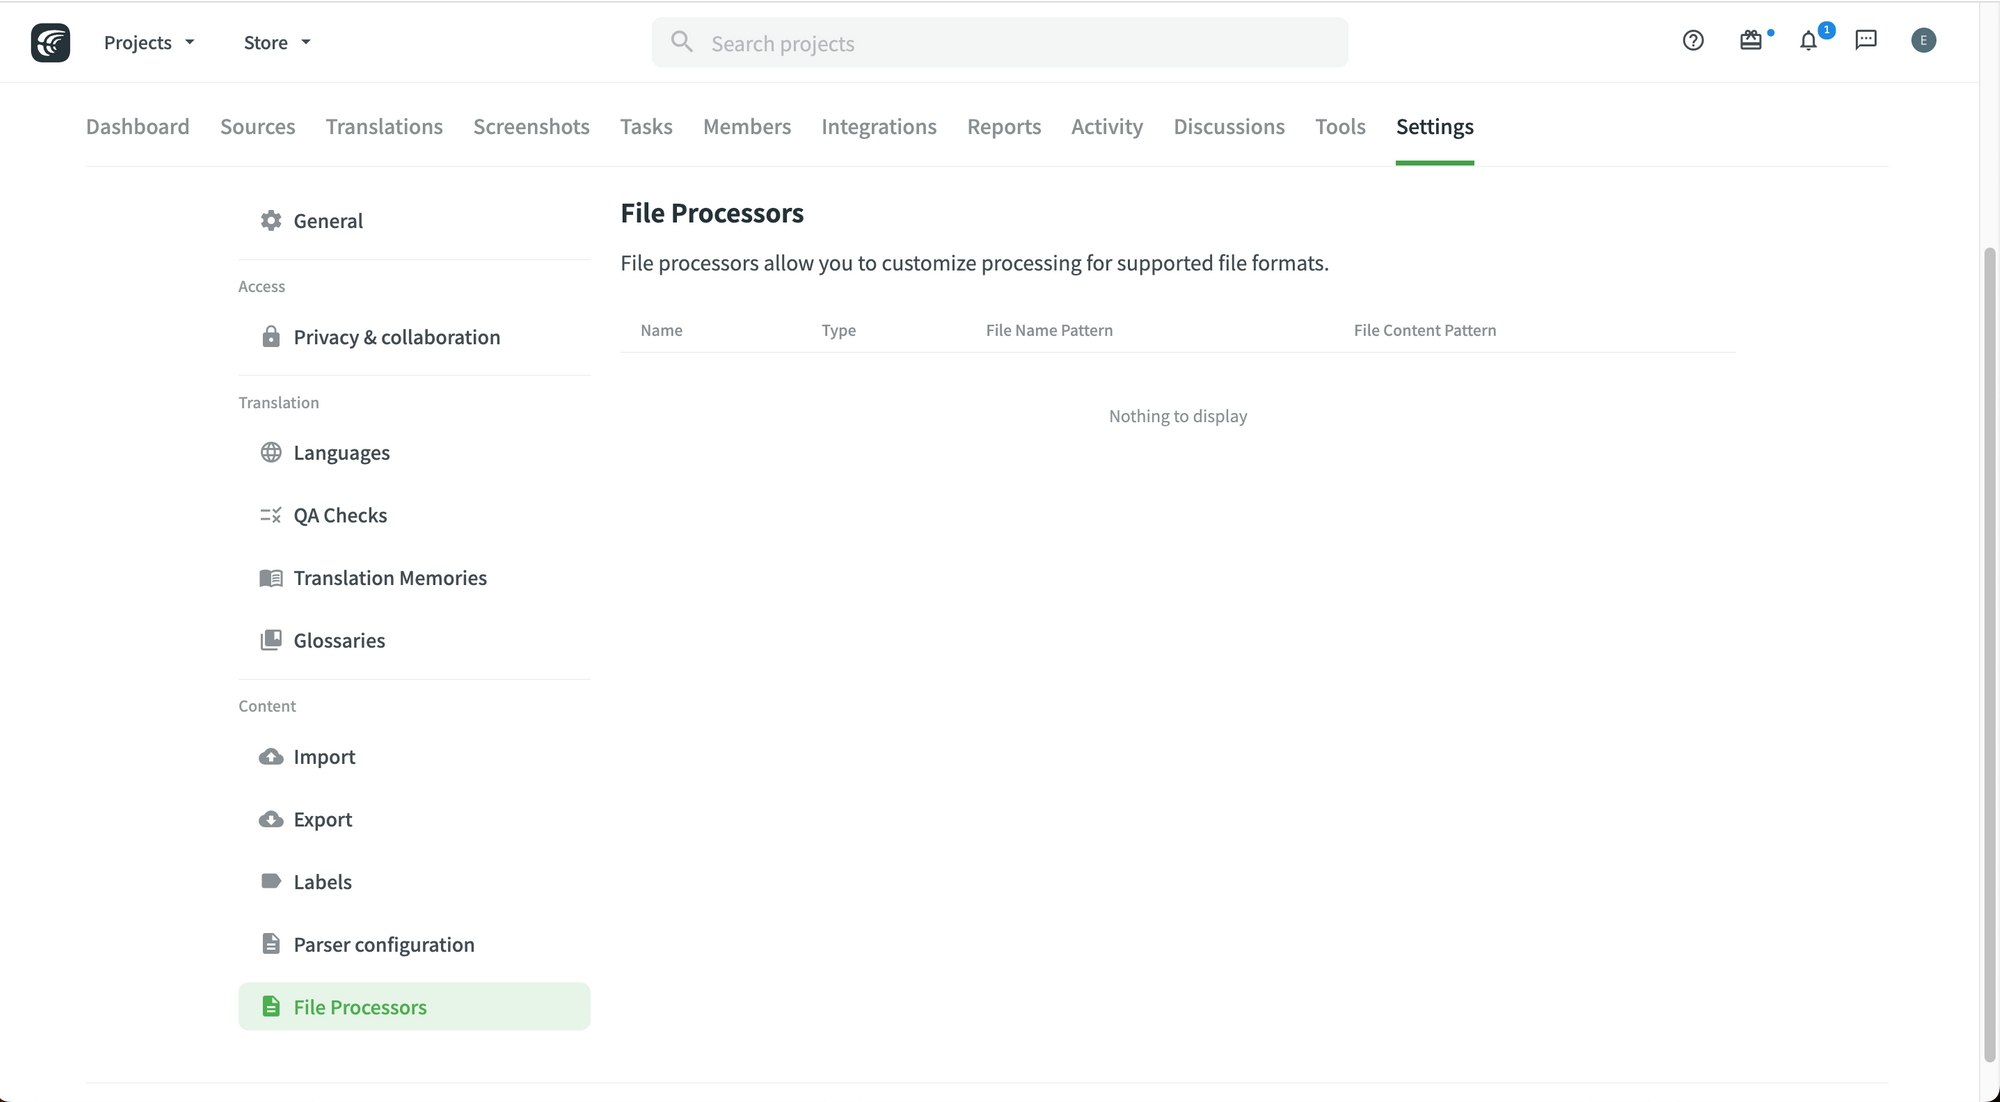 File Processors category.
How to Delete a Project in Crowdin
If you ever need to delete a project, remember that you can do so by going to the "Setting" tab and click on the "General" tab.
Settings > General.
At the bottom, you will find a red "Delete Project" button.
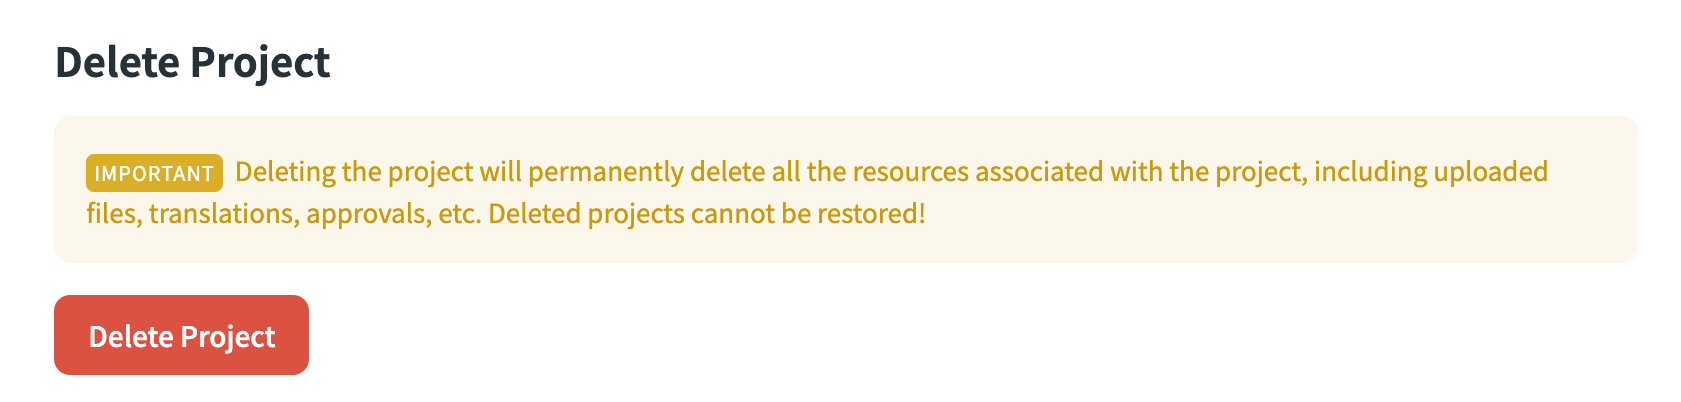 Delete project.
How to Upload Files to your Crowdin Project
Now that you know how to customize your project settings, let's actually add a file to the project. You can either upload your project files manually or automate this process through integrations.
How to Upload Files Manually
Let's upload a sample PDF file with text and images.
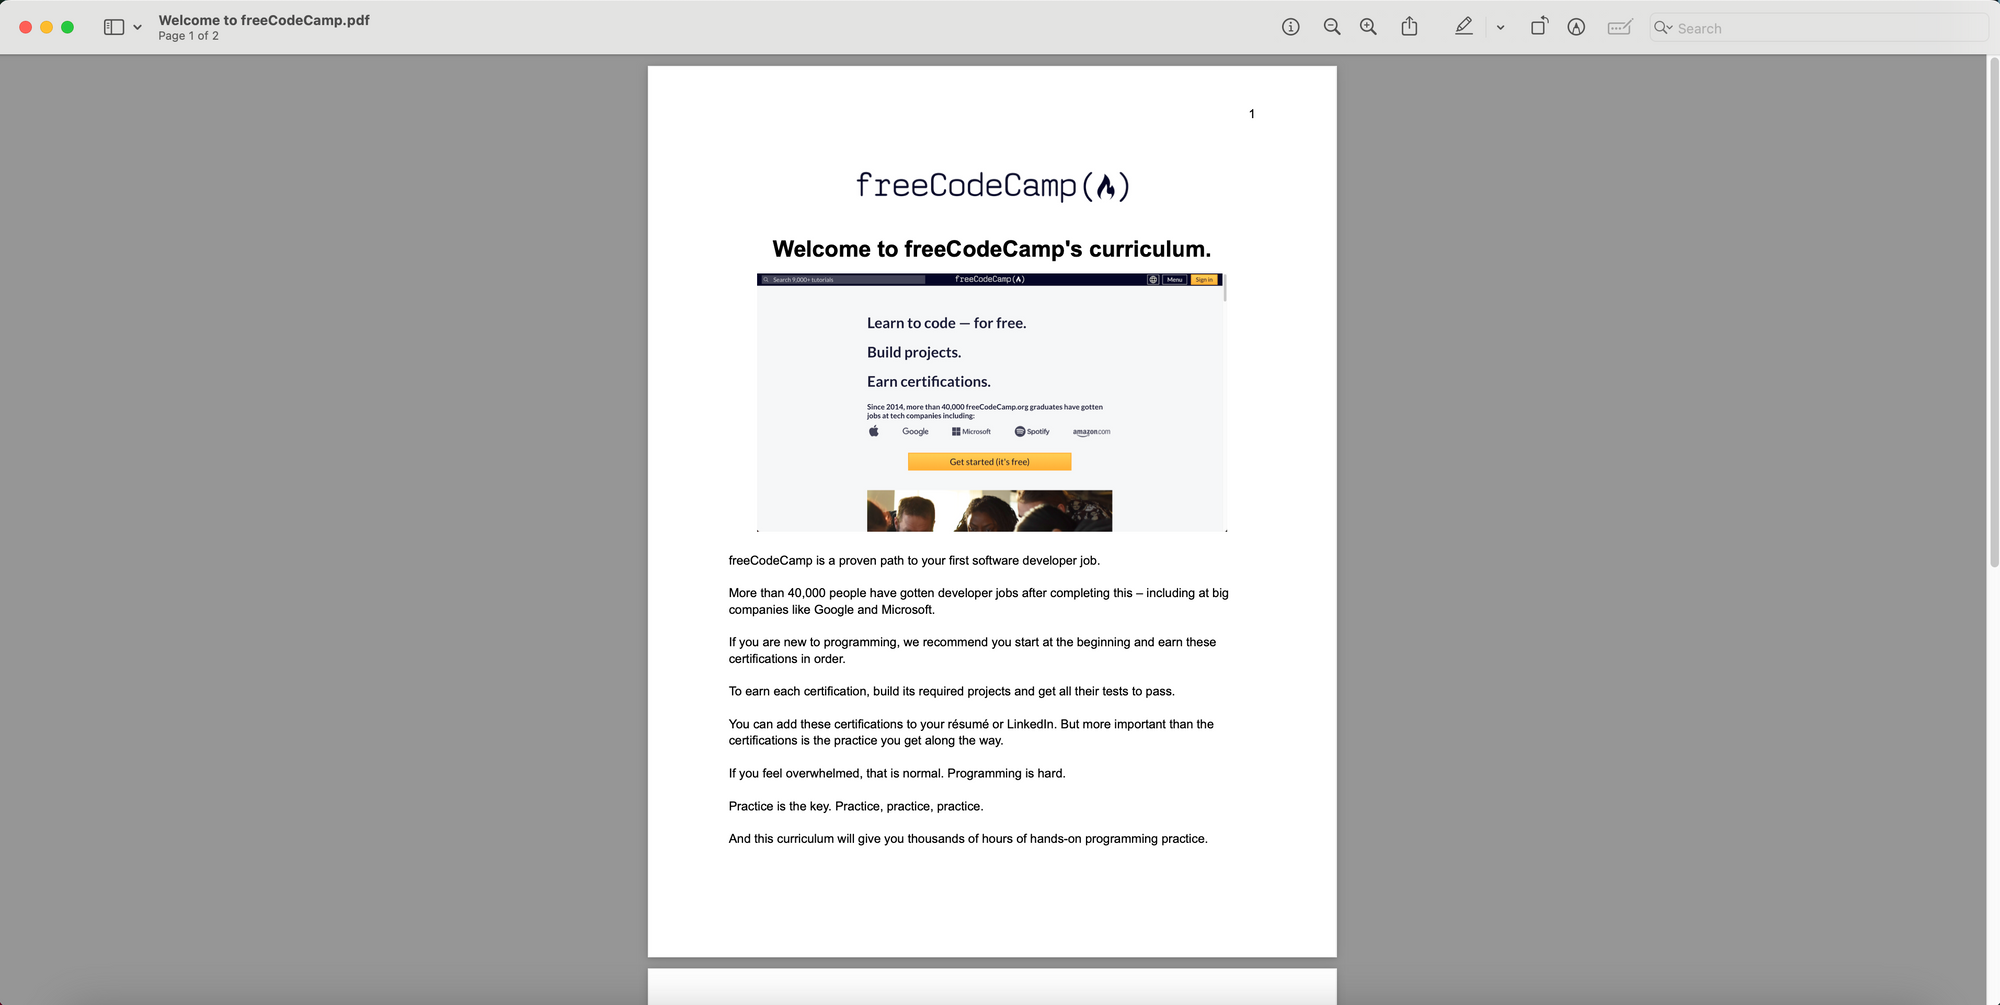 Our Demo PDF File. We will translate this in Crowdin.
To upload files:
- Go to your project.
- Go to the "Sources" tab.
- Click on the green "Add File" button or on the gray "Upload Files" button (please see the screenshot below).
- Choose the file that you need to upload from your file system.
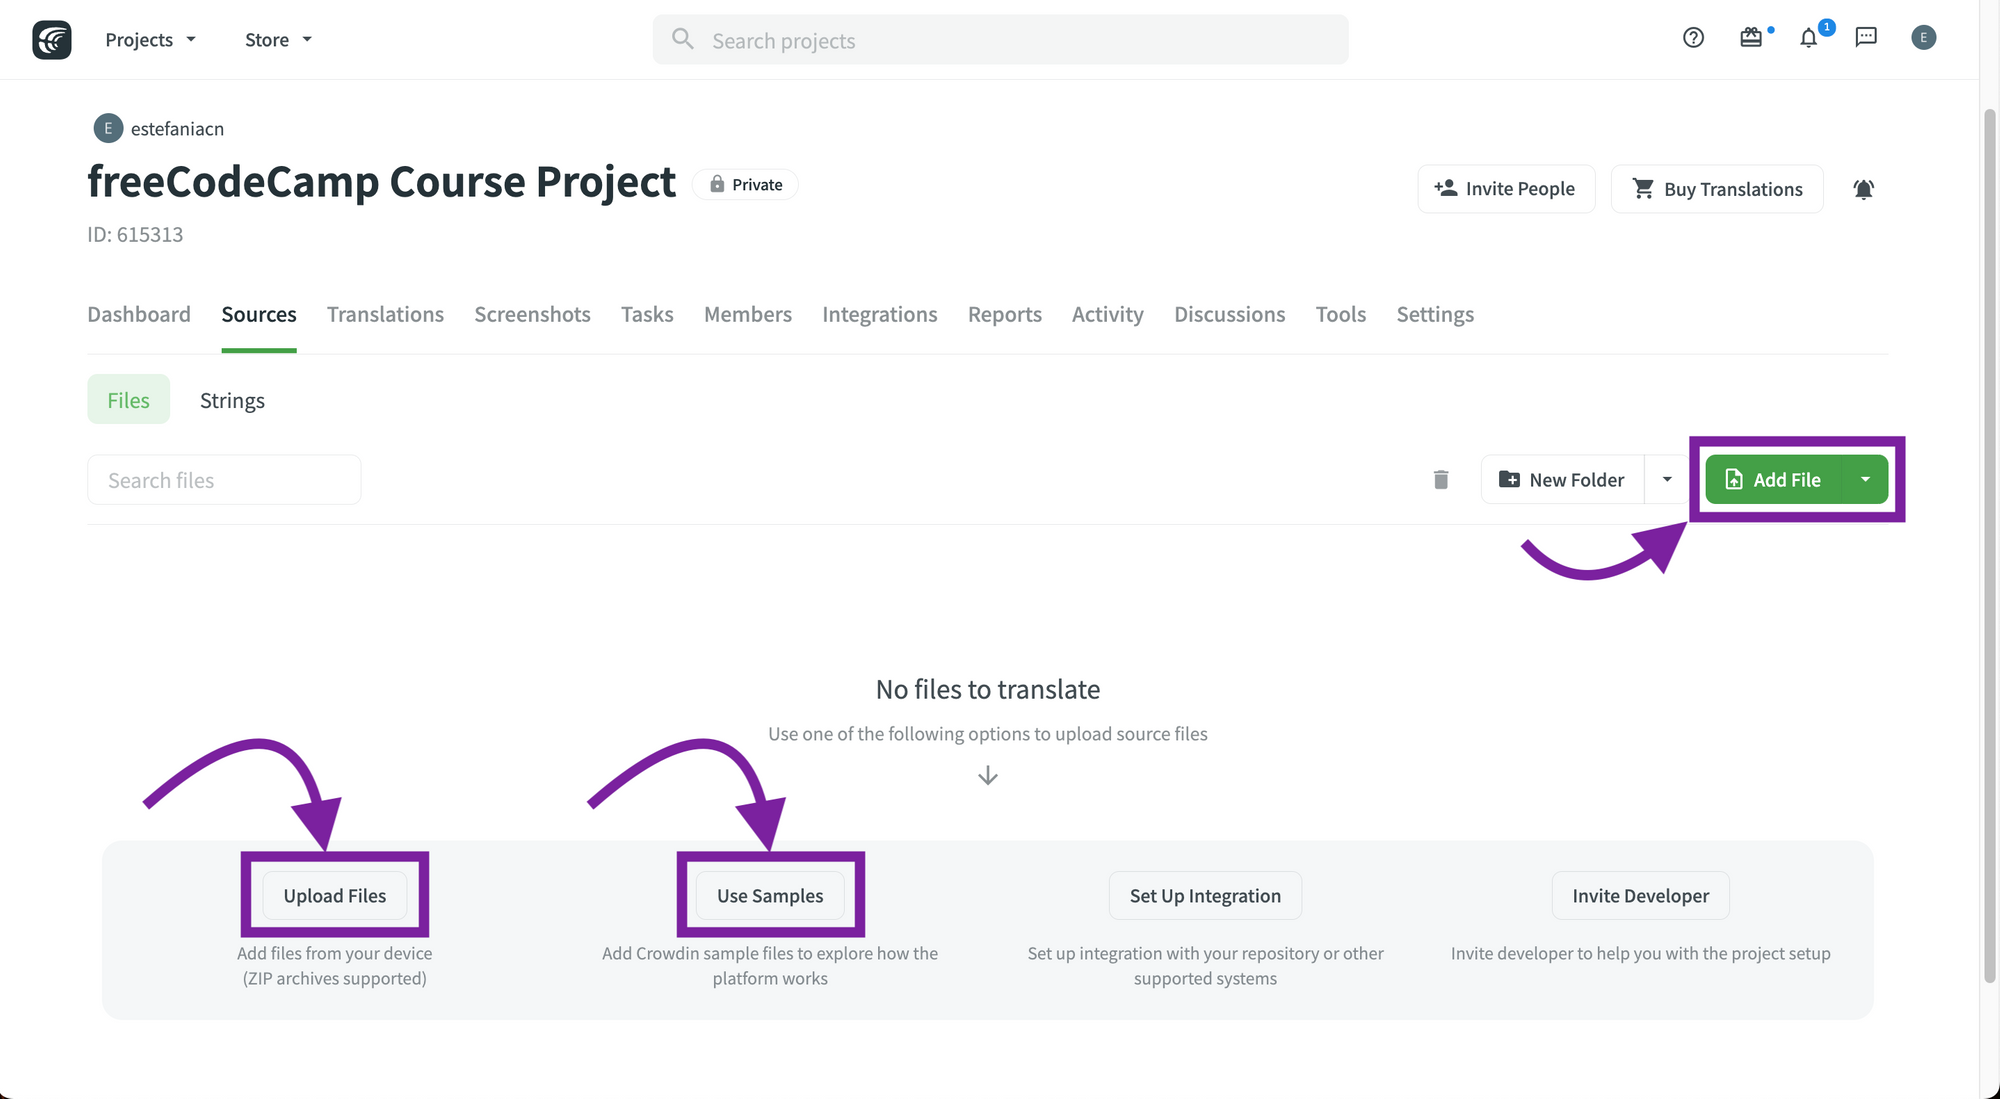 Upload files or use sample files.
💡 Tip: To explore how Crowdin works, you can also add Crowdin sample files by clicking on the "Use Samples" button.
After uploading your file, you will see it listed:
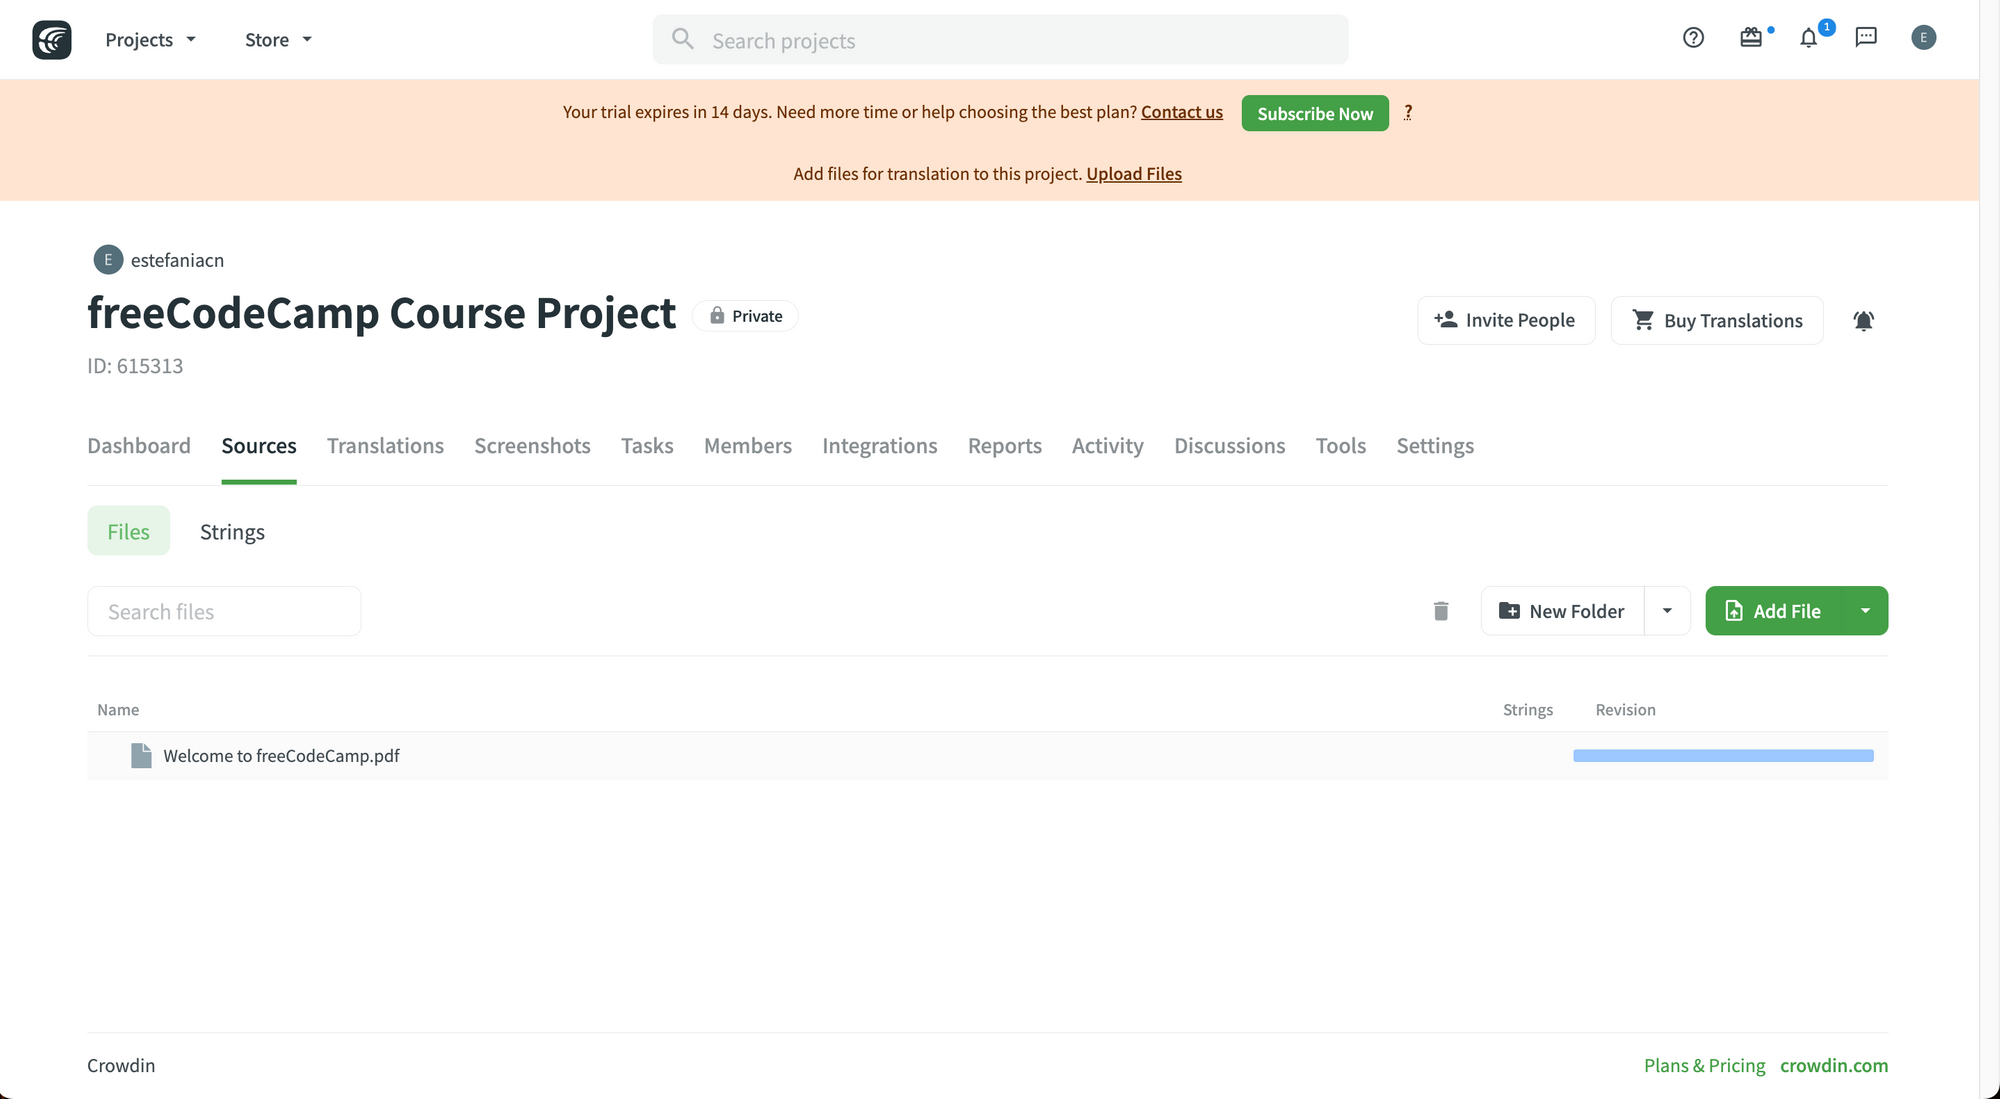 Uploading a file.
You may need to wait a few seconds before the file is processed. Then, you will see the total string count for your file.
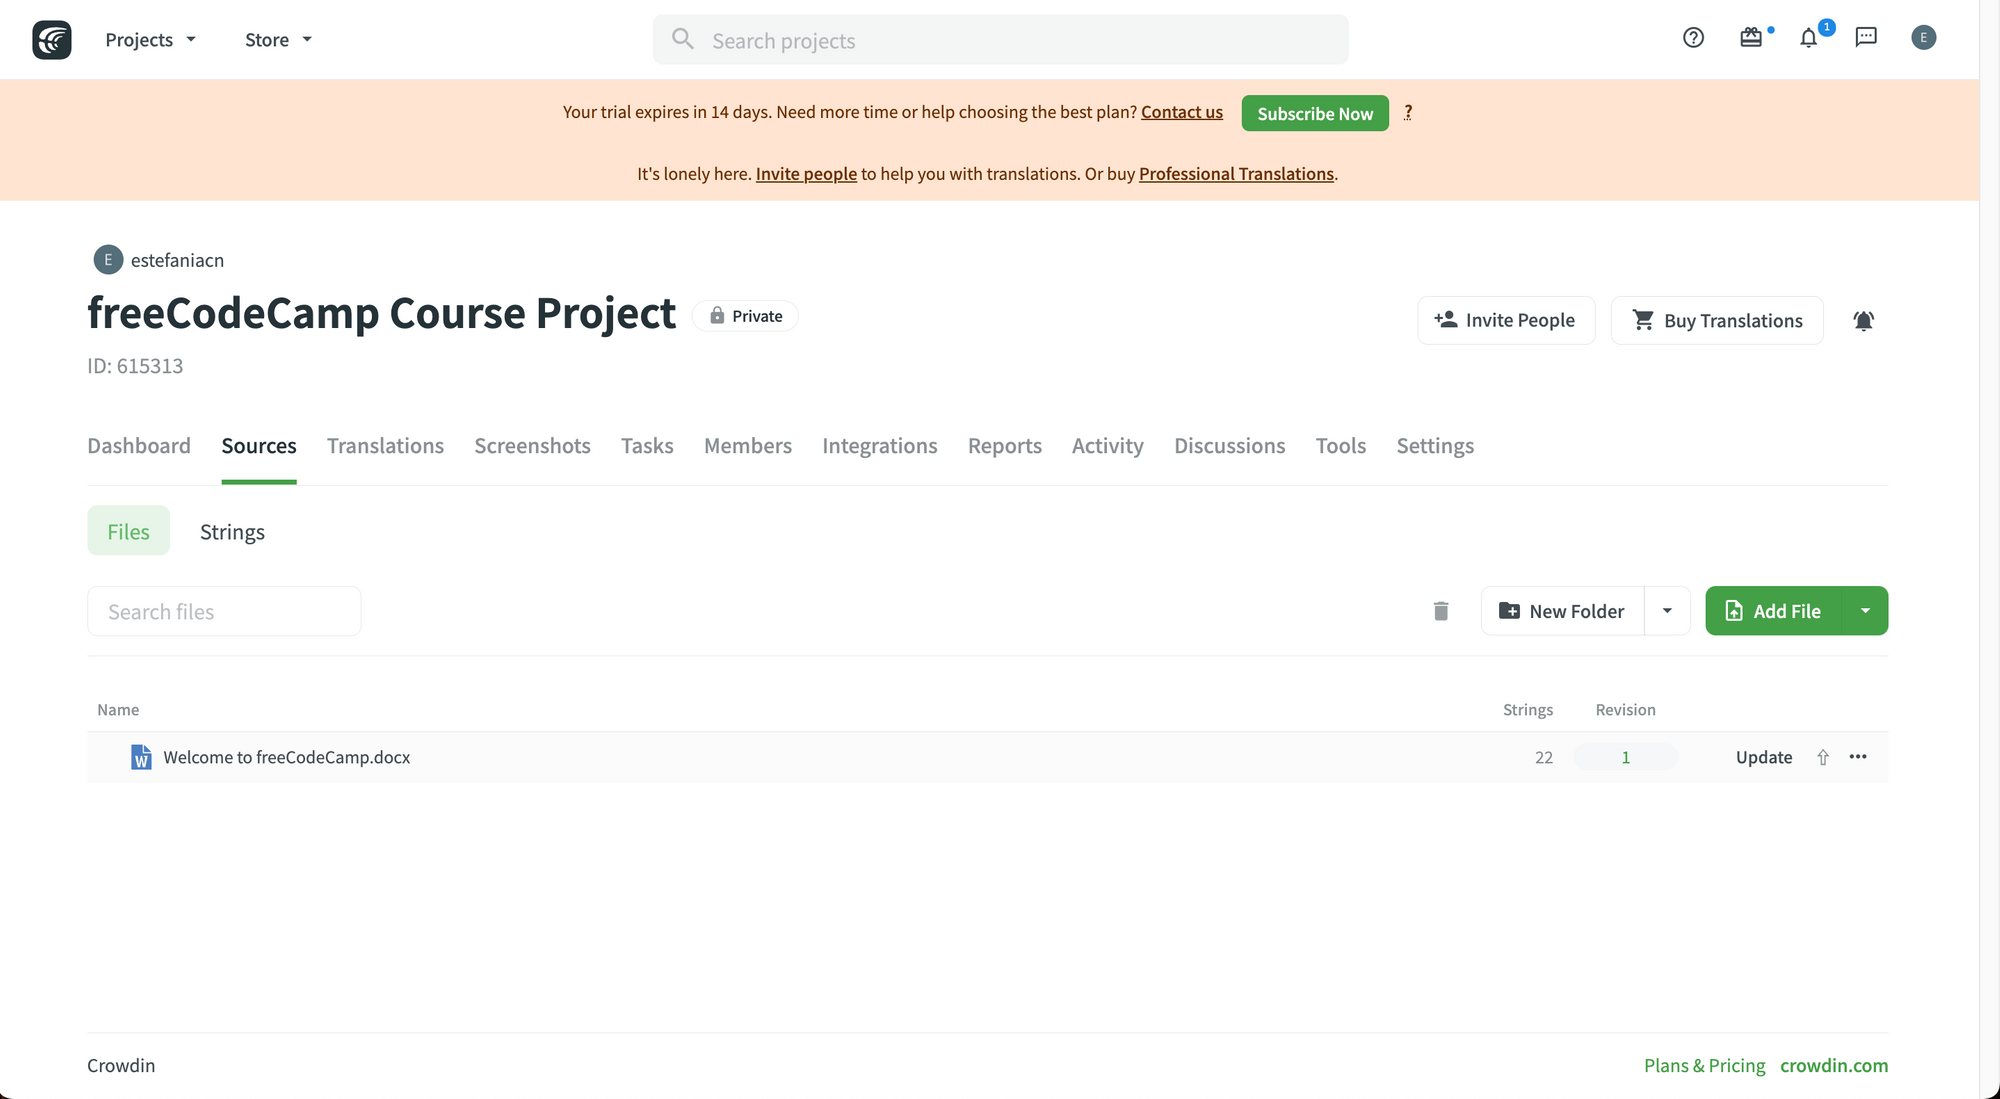 Upload finished.
💡 Tip: You can also drag and drop your file into the files area in the "Sources" tab and your file will be uploaded automatically.
If you click on the three small dots on the right, you will see more options for that file, including:
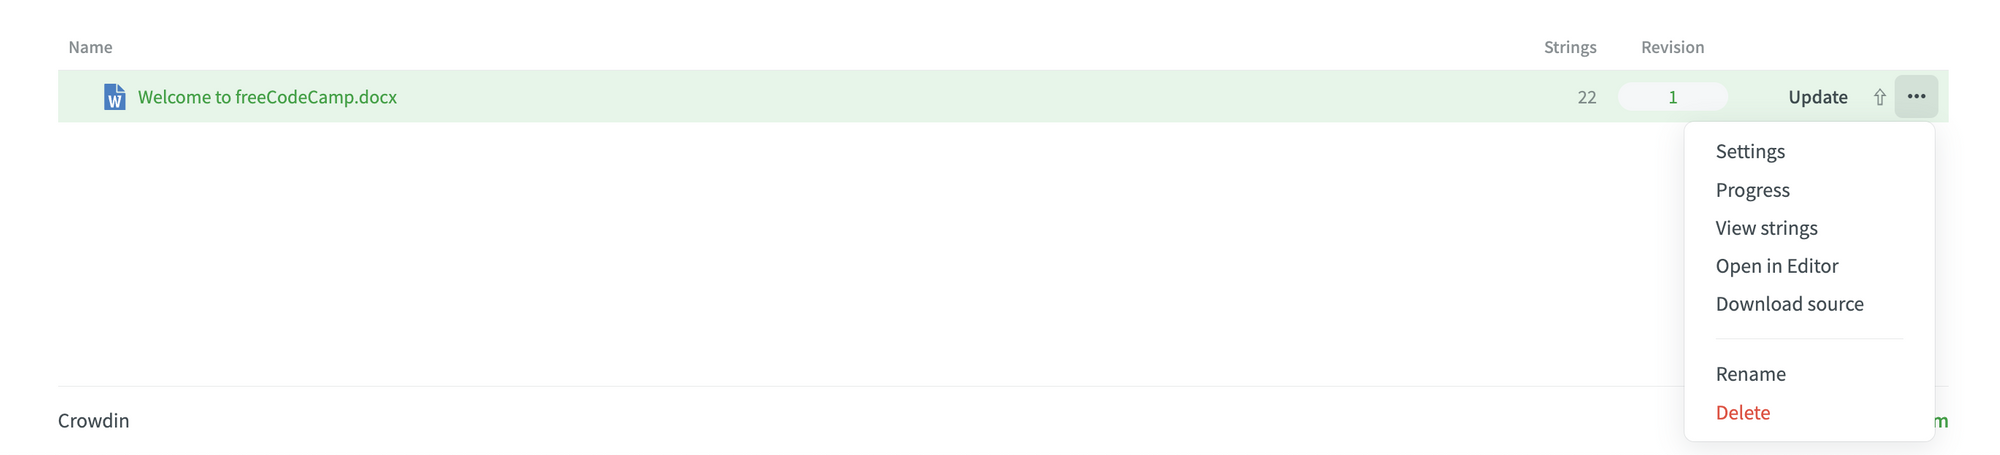 Additional Options.
- Settings.
- Progress.
- View strings.
- Open in Editor.
- Download source.
- Rename.
- Delete.
How to Upload Files Automatically
One of the key aspects of Crowdin is how easy it is to connect it to other services through integrations, to automatically upload your files and synchronize your translations.
For example, freeCodeCamp has a GitHub integration set up, so we can automatically synchronize the files of our project when we add new strings that have to be translated on Crowdin.
 GitHub integration.
You can also find hundreds of integrations on the Crowdin store to connect your project to external services.
Crowdin also has an Application Programming Interface (API) for developers.
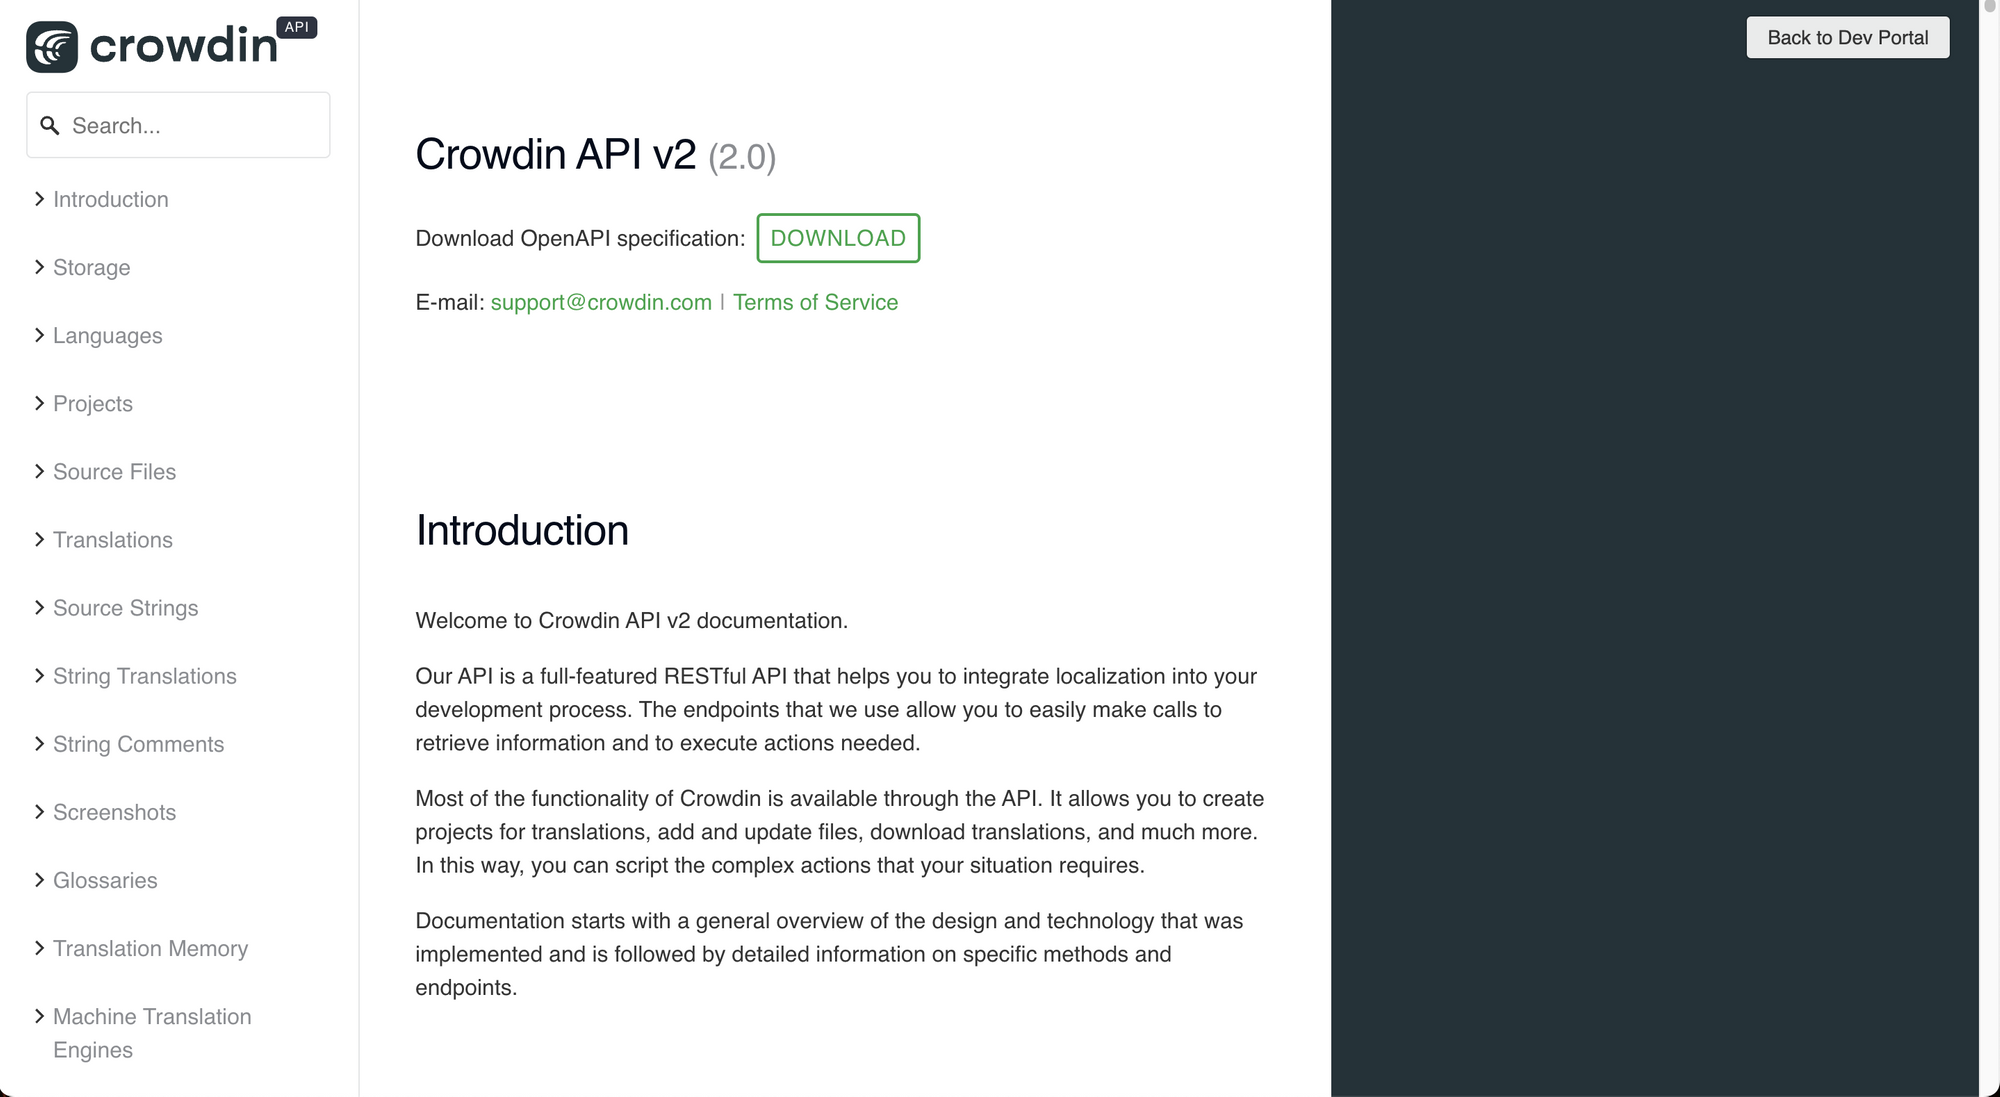 The Crowdin API Documentation.
The Crowdin team describes it as:
A full-featured RESTful API that helps you to integrate localization into your development process. The endpoints that we use allow you to easily make calls to retrieve information and to execute actions needed.
With this API, you can:
- Create projects for translation.
- Add and update files.
- Download translations, and more.
It is a great way to automate your localization process. You can learn more about the Crowdin API on the official documentation.
And the third option to upload files automatically is to use the Command-Line Interface (CLI).
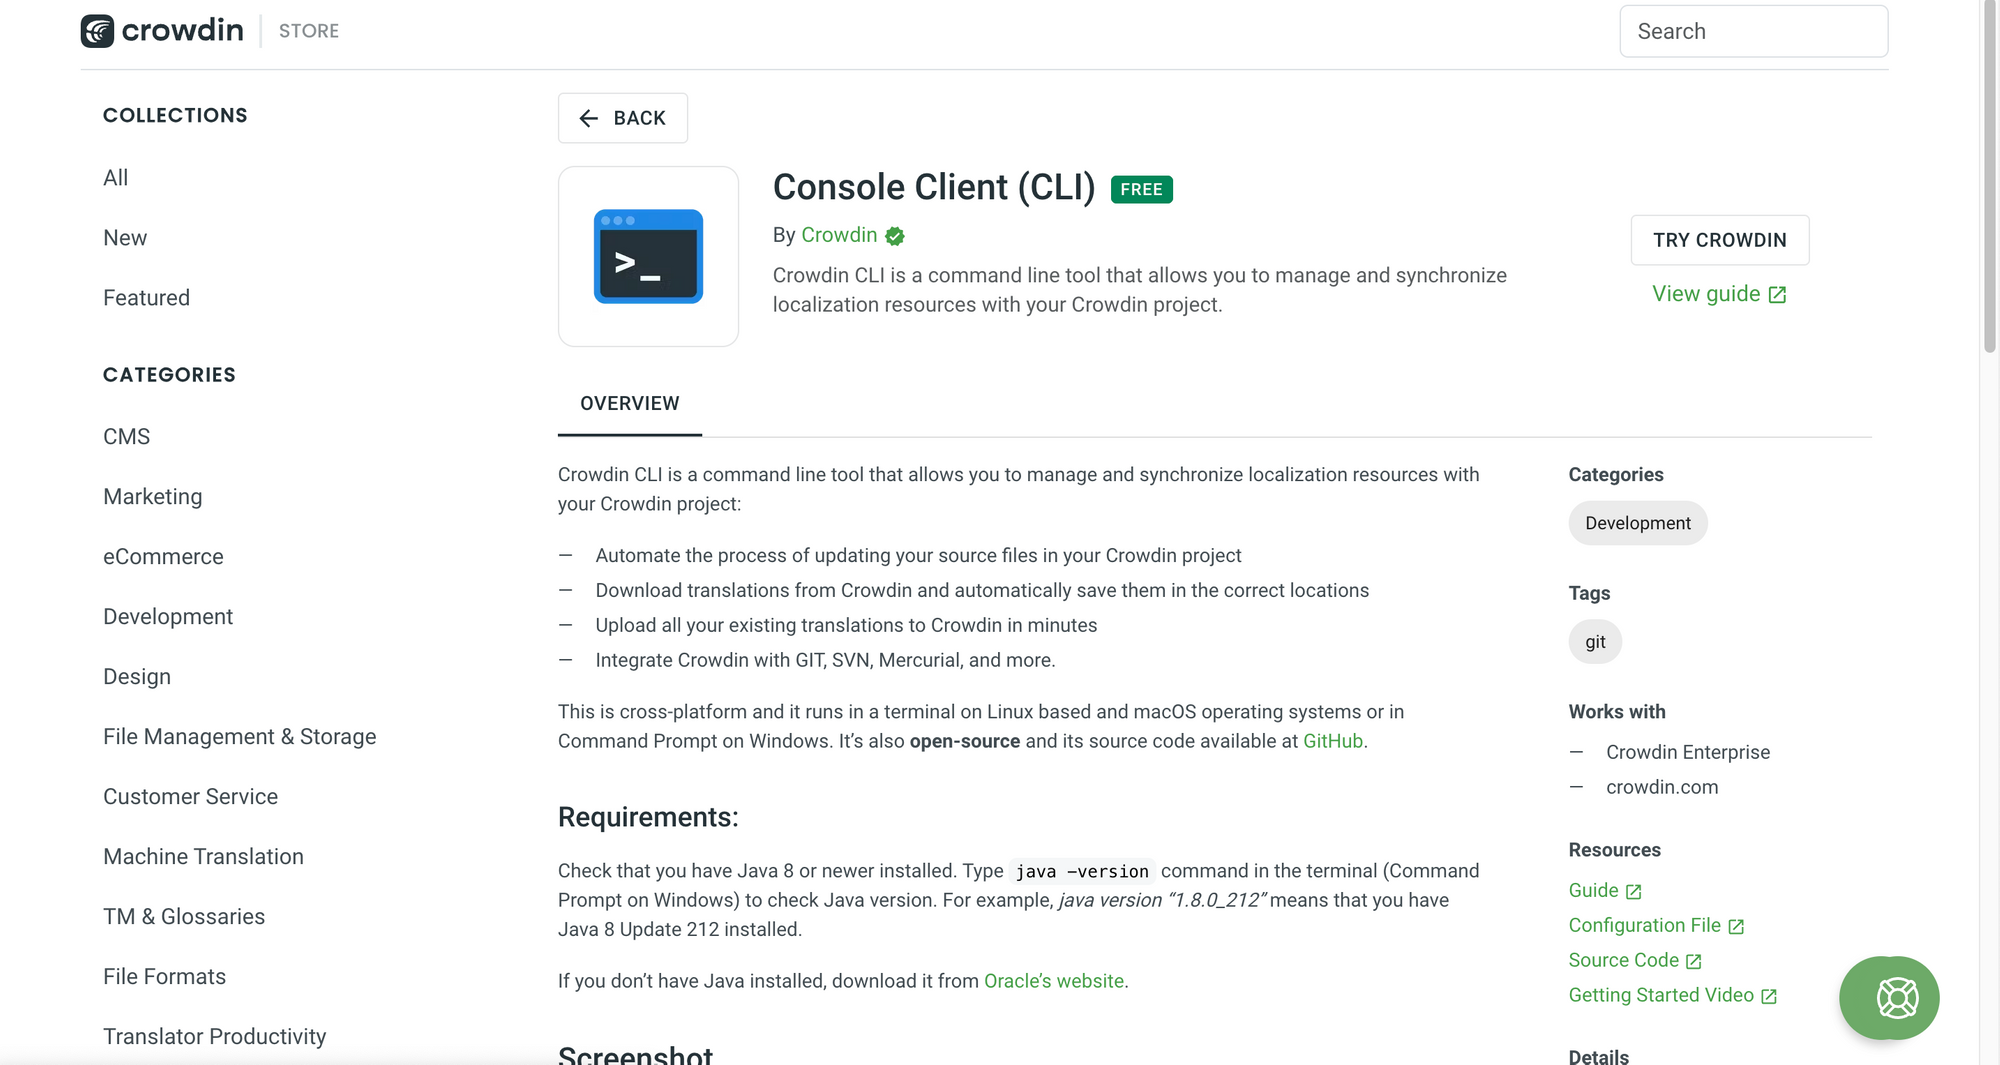 The Crowdin Command-line Interface (CLI).
With this interface, you can:
- Automate the process of uploading files.
- Download translations automatically and save them in the correct locations.
- Upload existing translations.
- Integrate Crowdin with other tools like Git.
To learn more about the Crowdin CLI, check out this tutorial created by the Crowdin team.
Now that you know how to upload your files to Crowdin manually and automatically, let's see how you and your team can start translating.
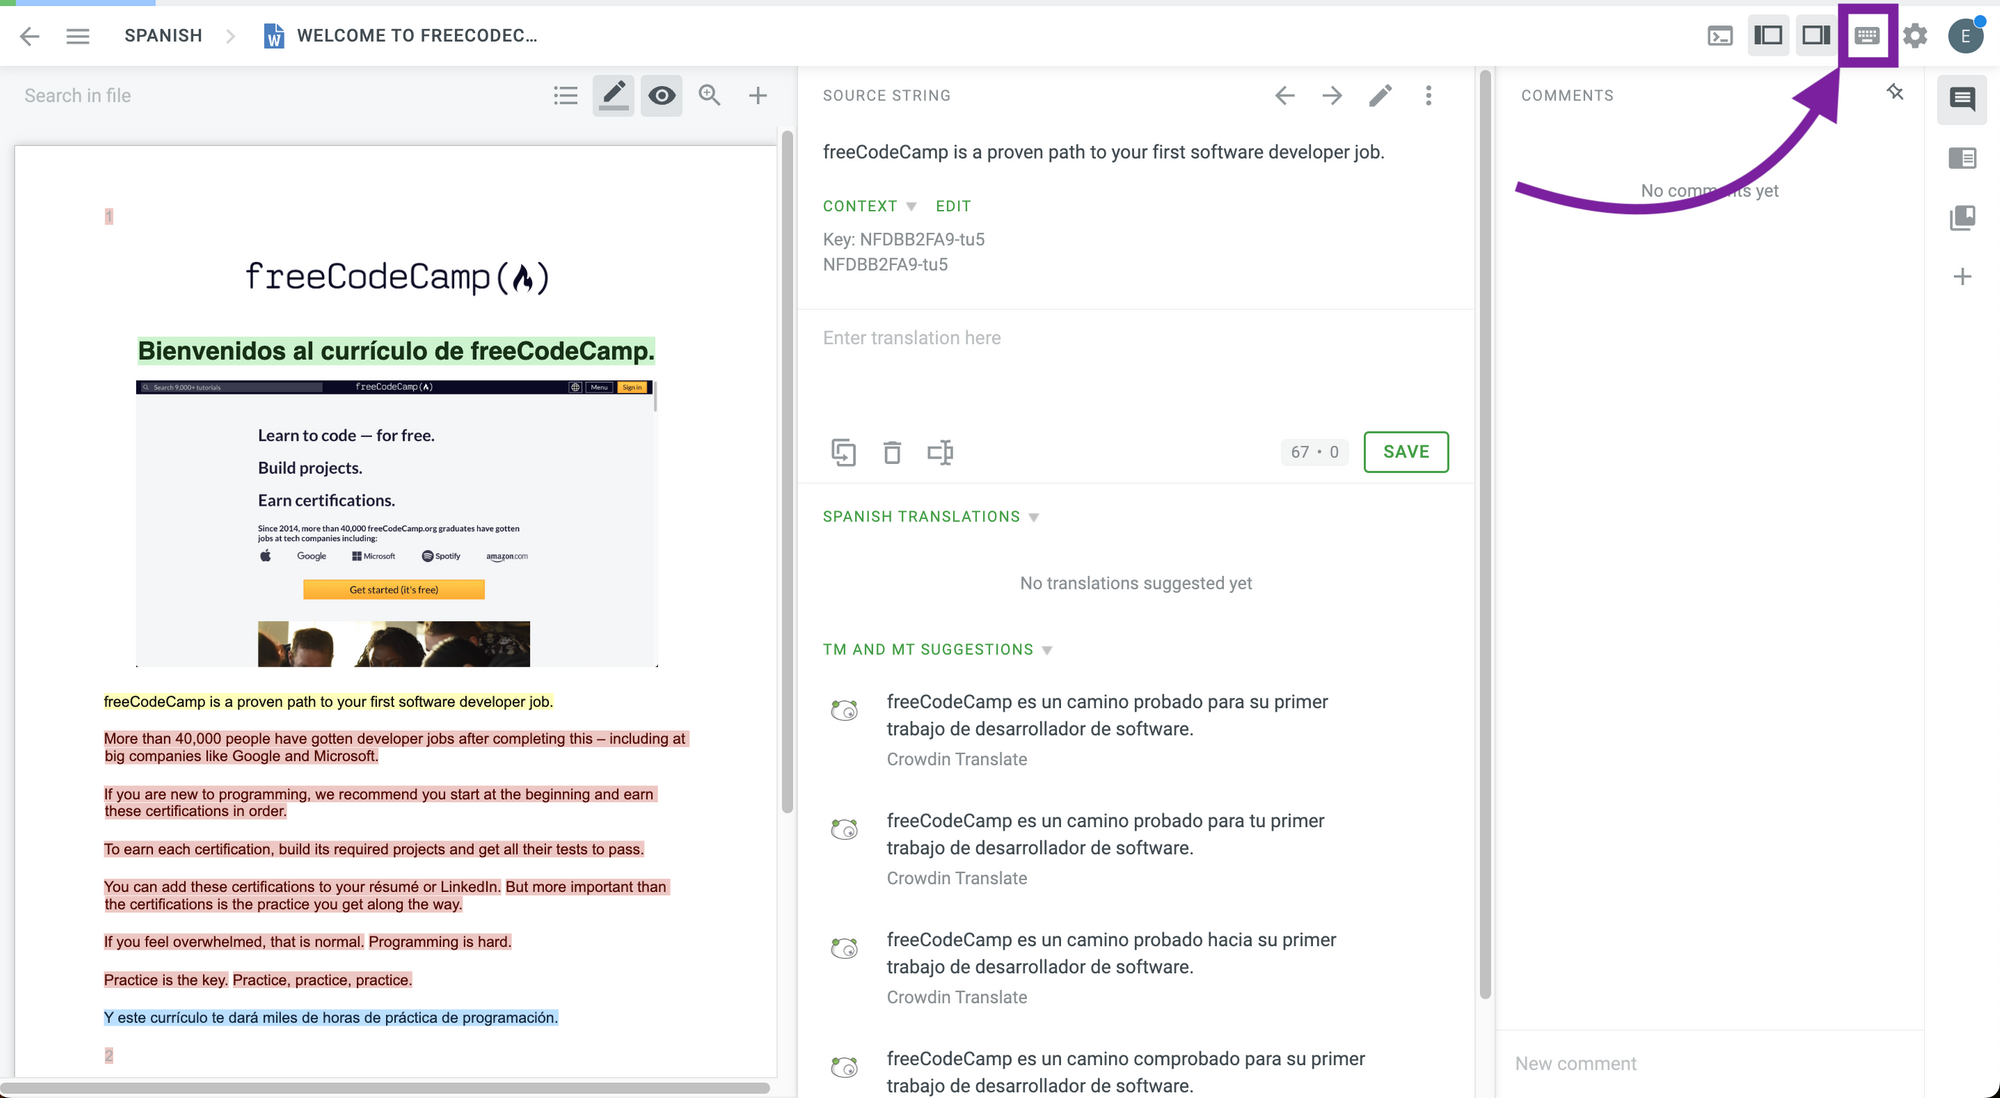
How to Start Translating
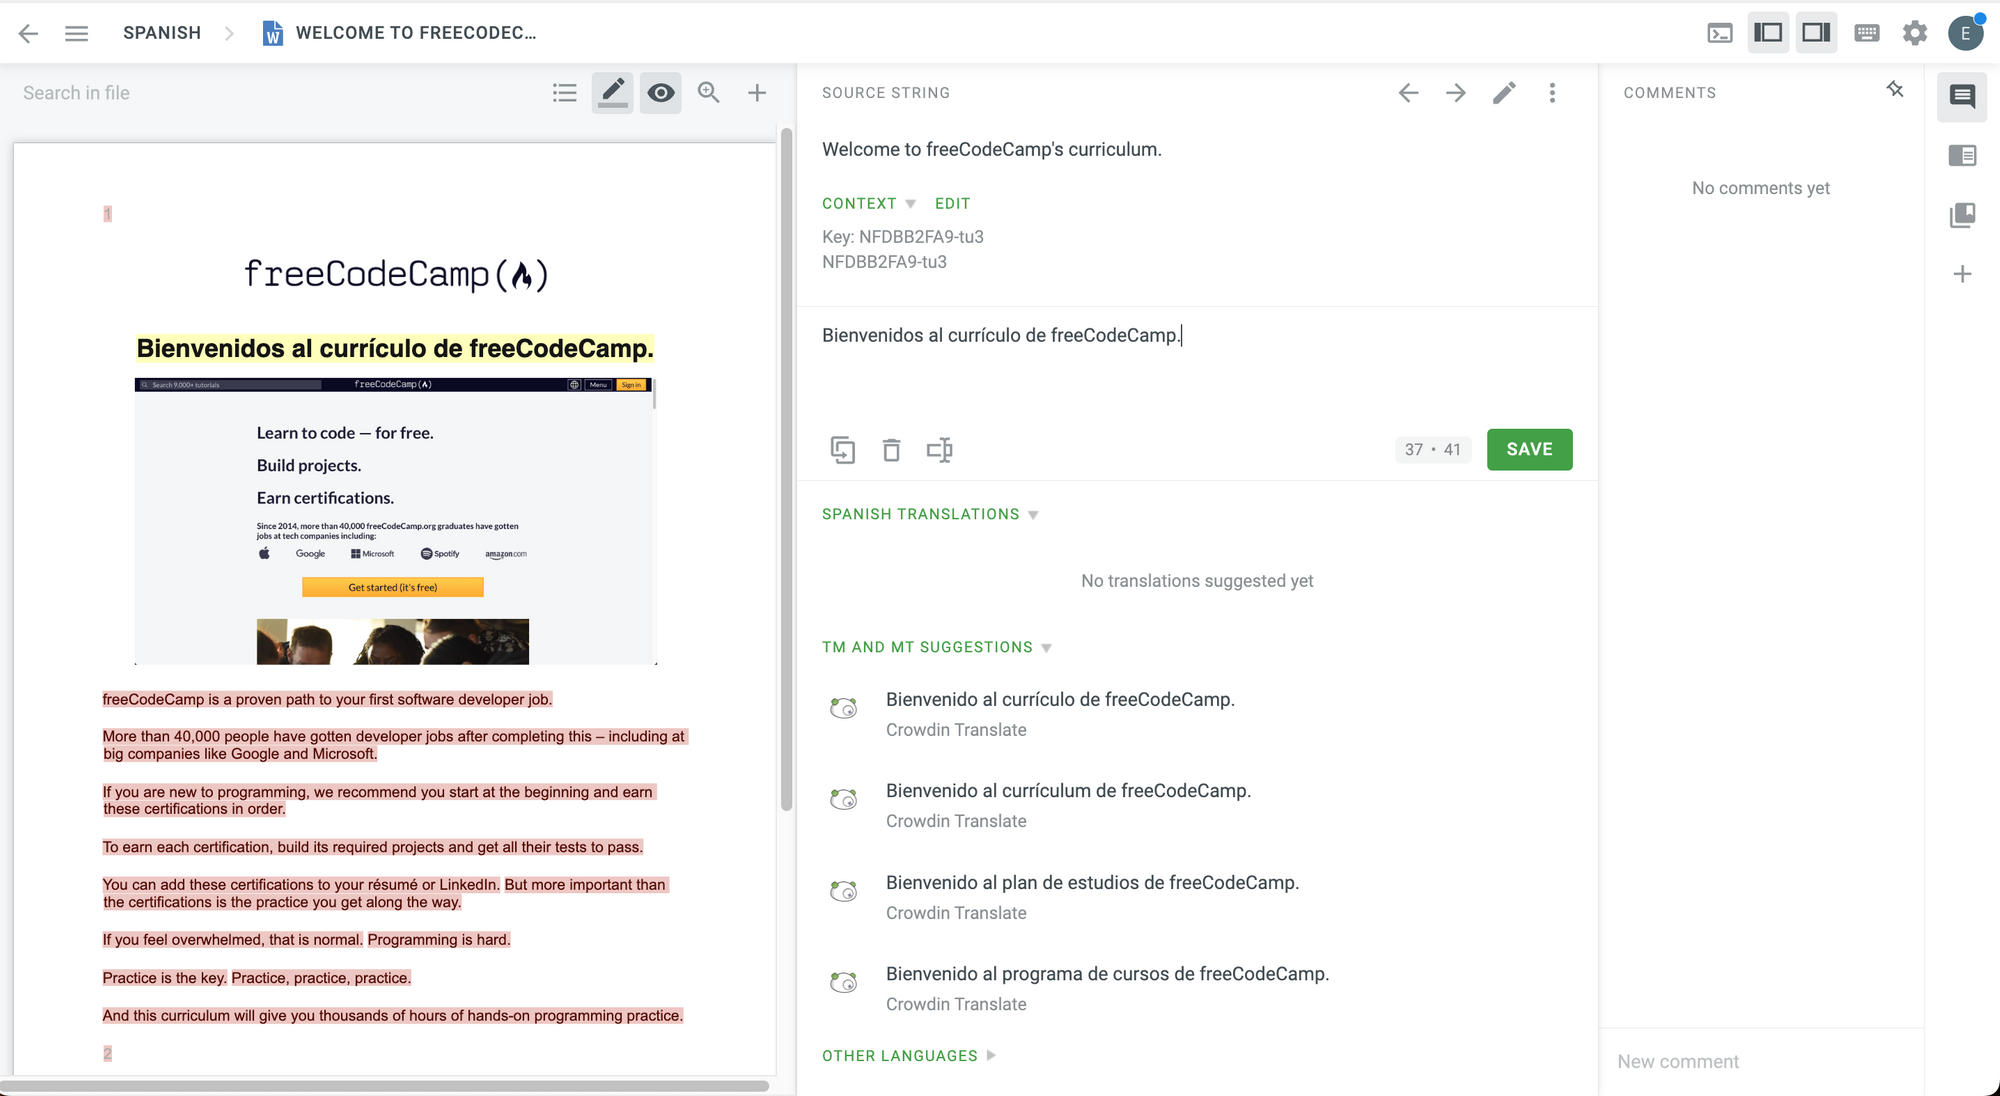
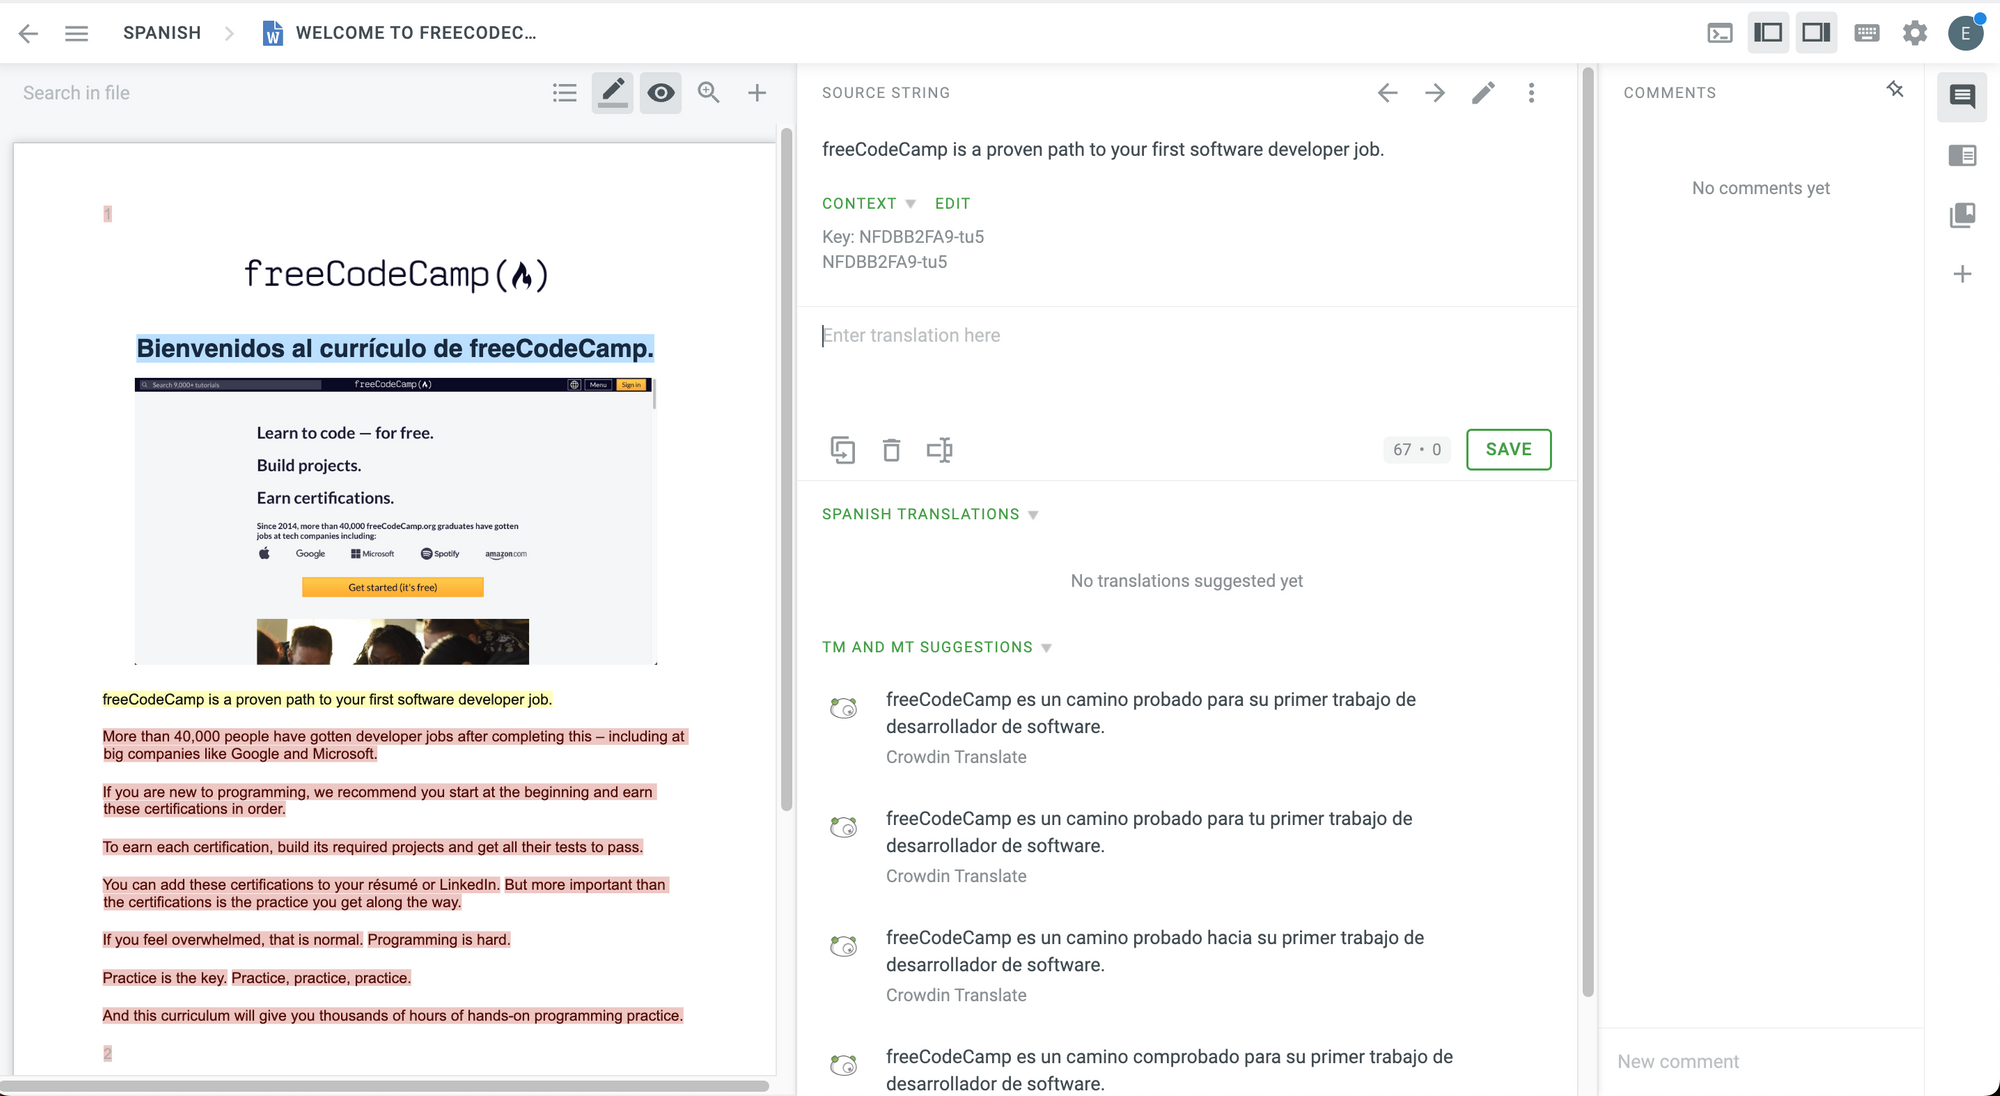
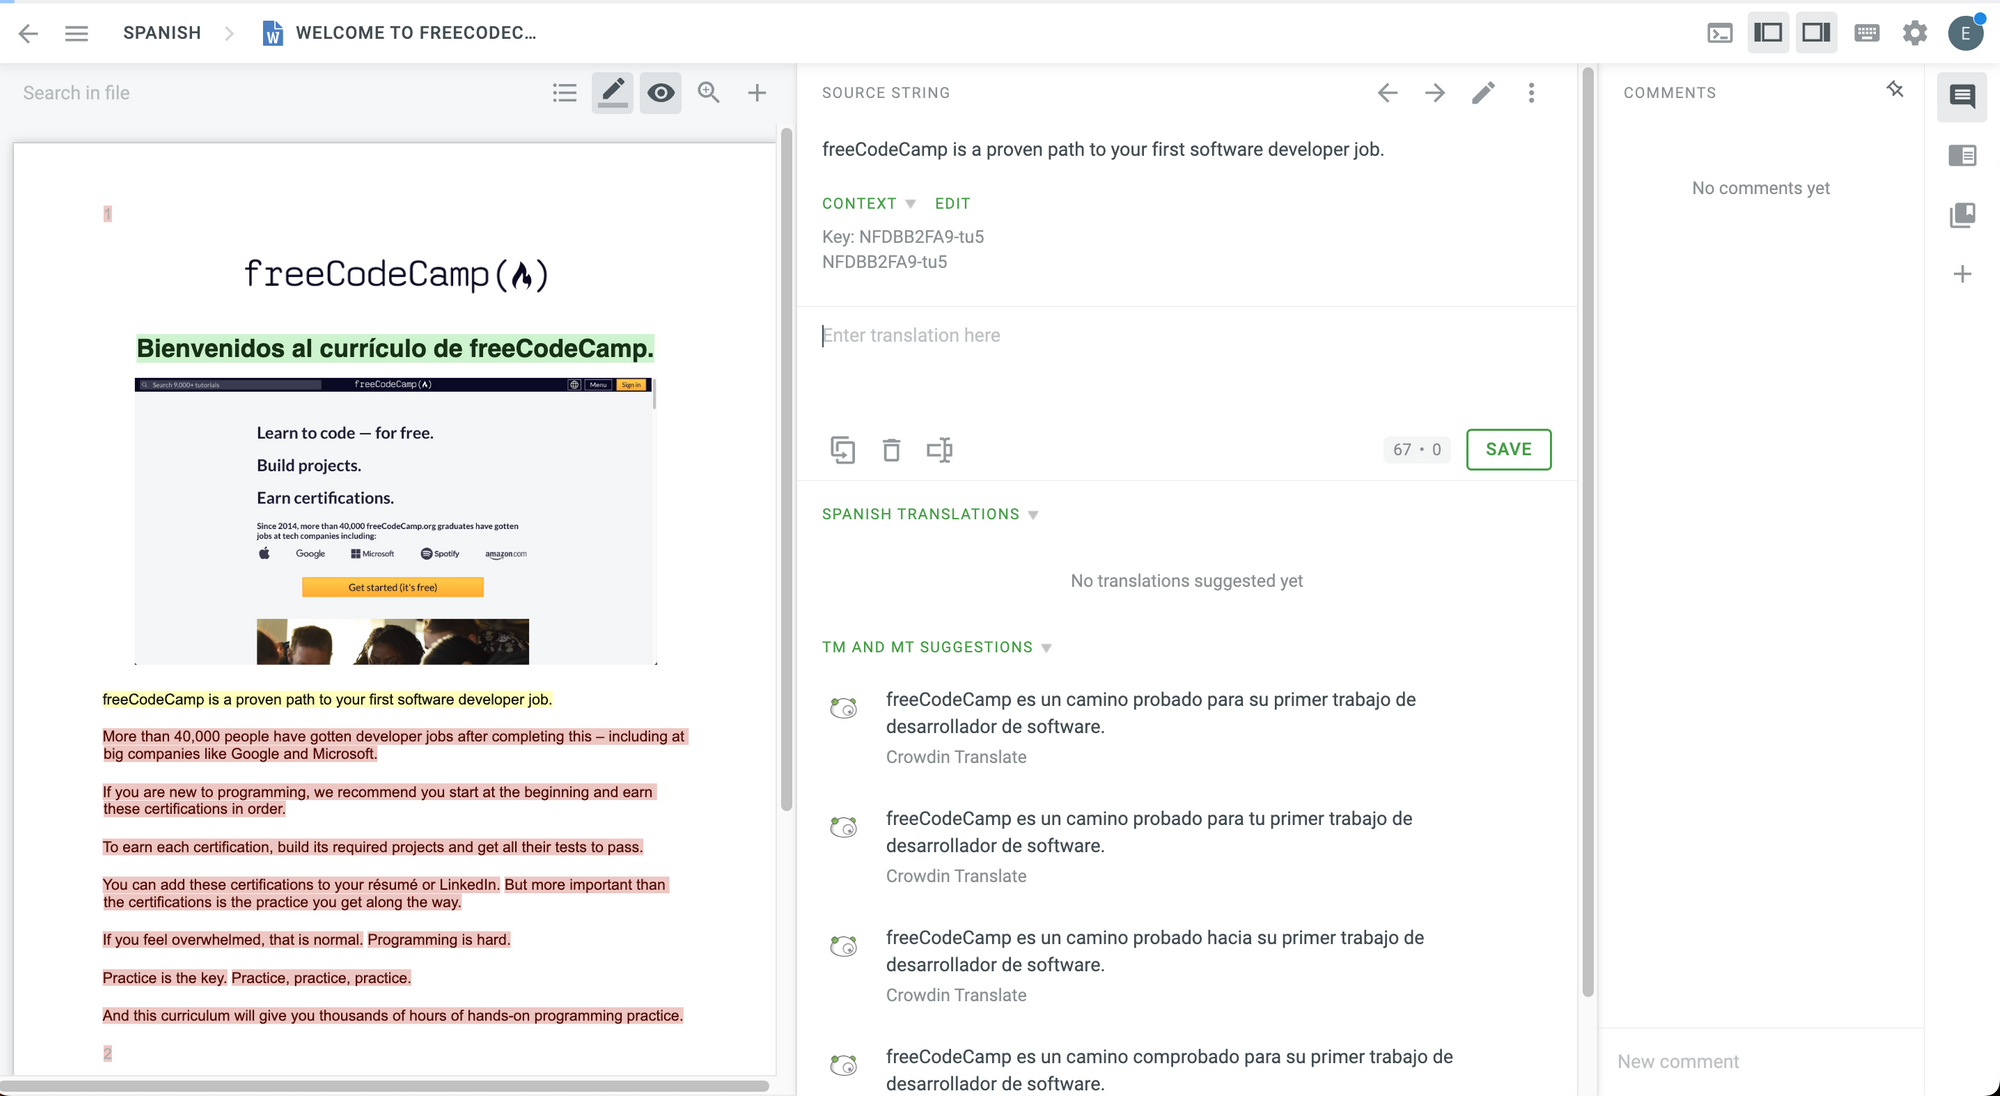
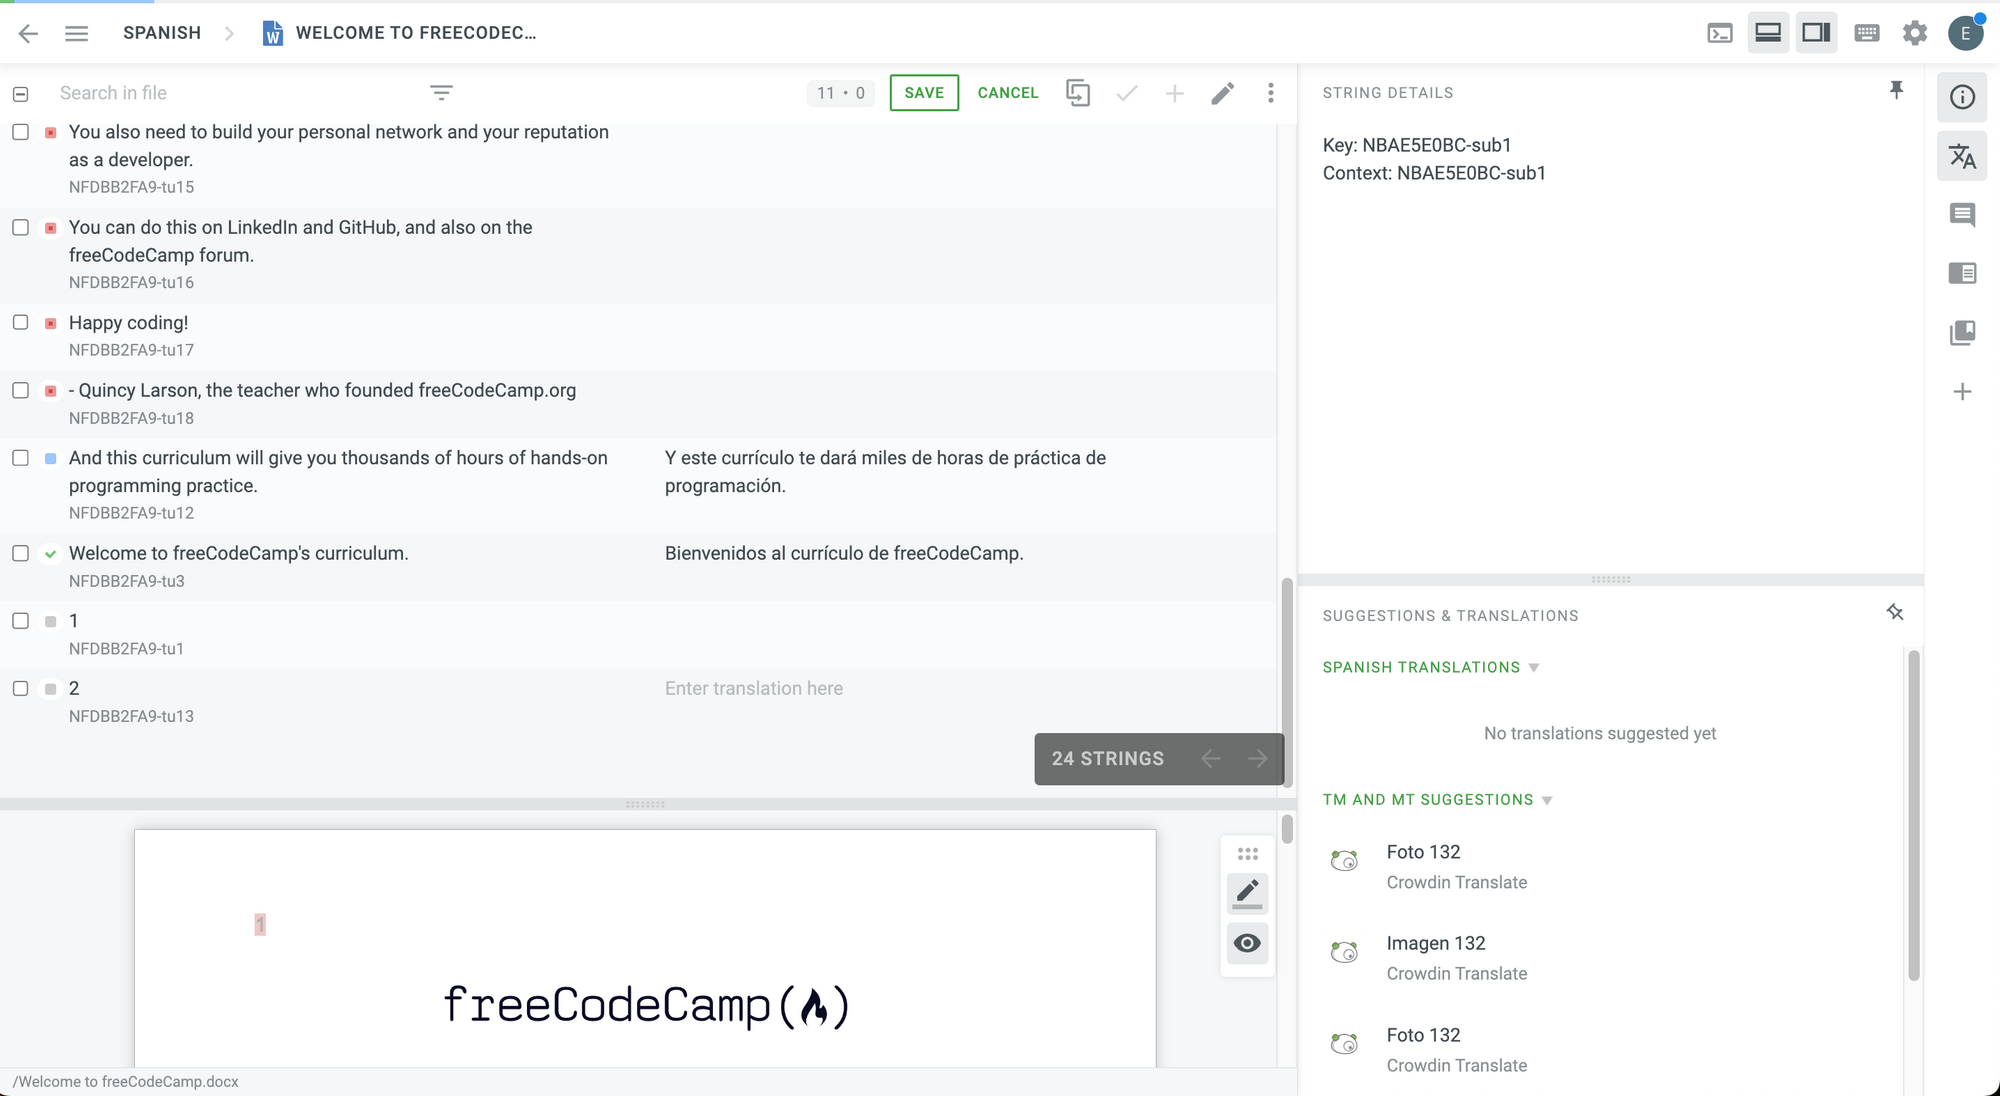
Once your file is uploaded, it's time to start translating. You may start translating it yourself or you ask your team to start working on the translations.
💡 Tip: You can assign specific files to your translators and proofreaders with the tasks feature.
Let's assume that you are translating the files yourself.
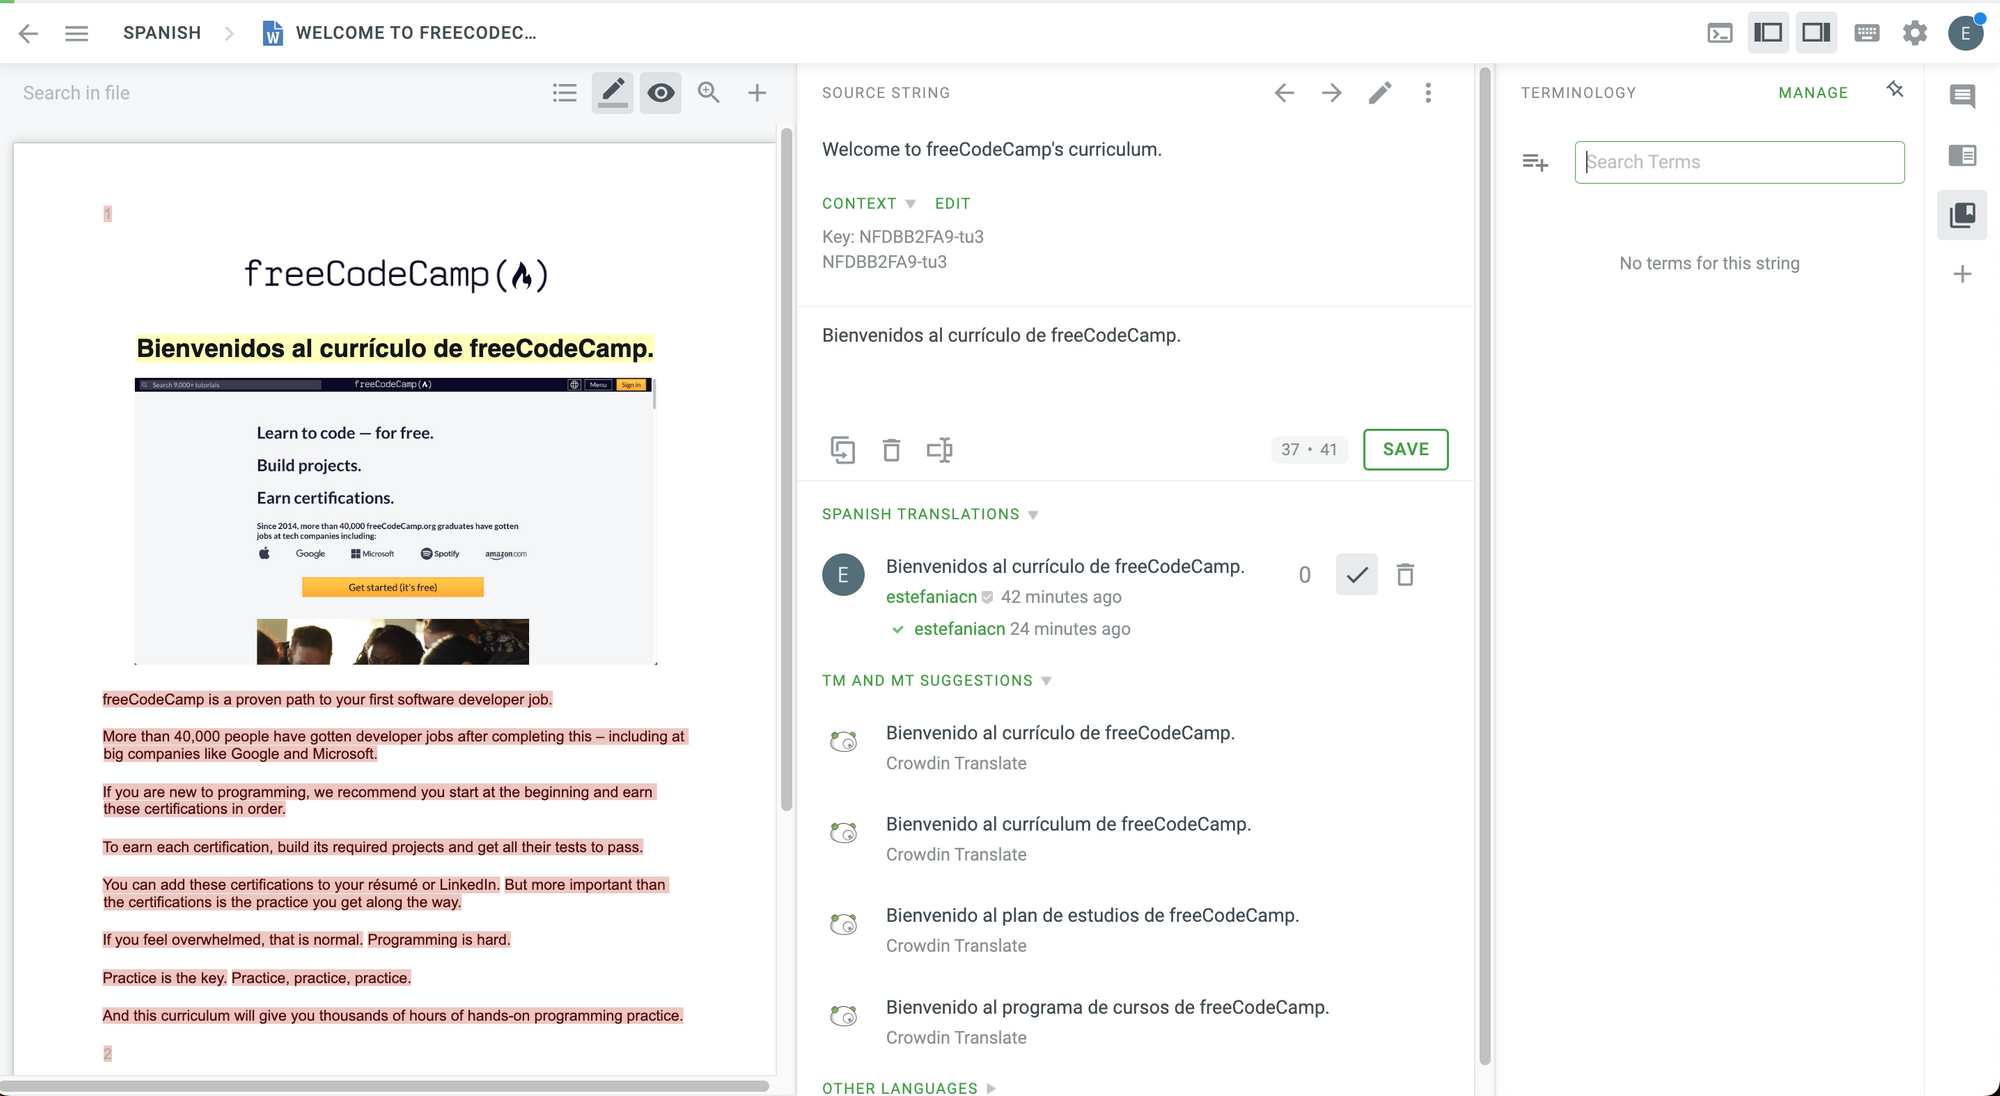
To start, you need to go to the project's Dashboard tab and select the language that you will be translating your file into from the list of target languages that you chose when you created the project.
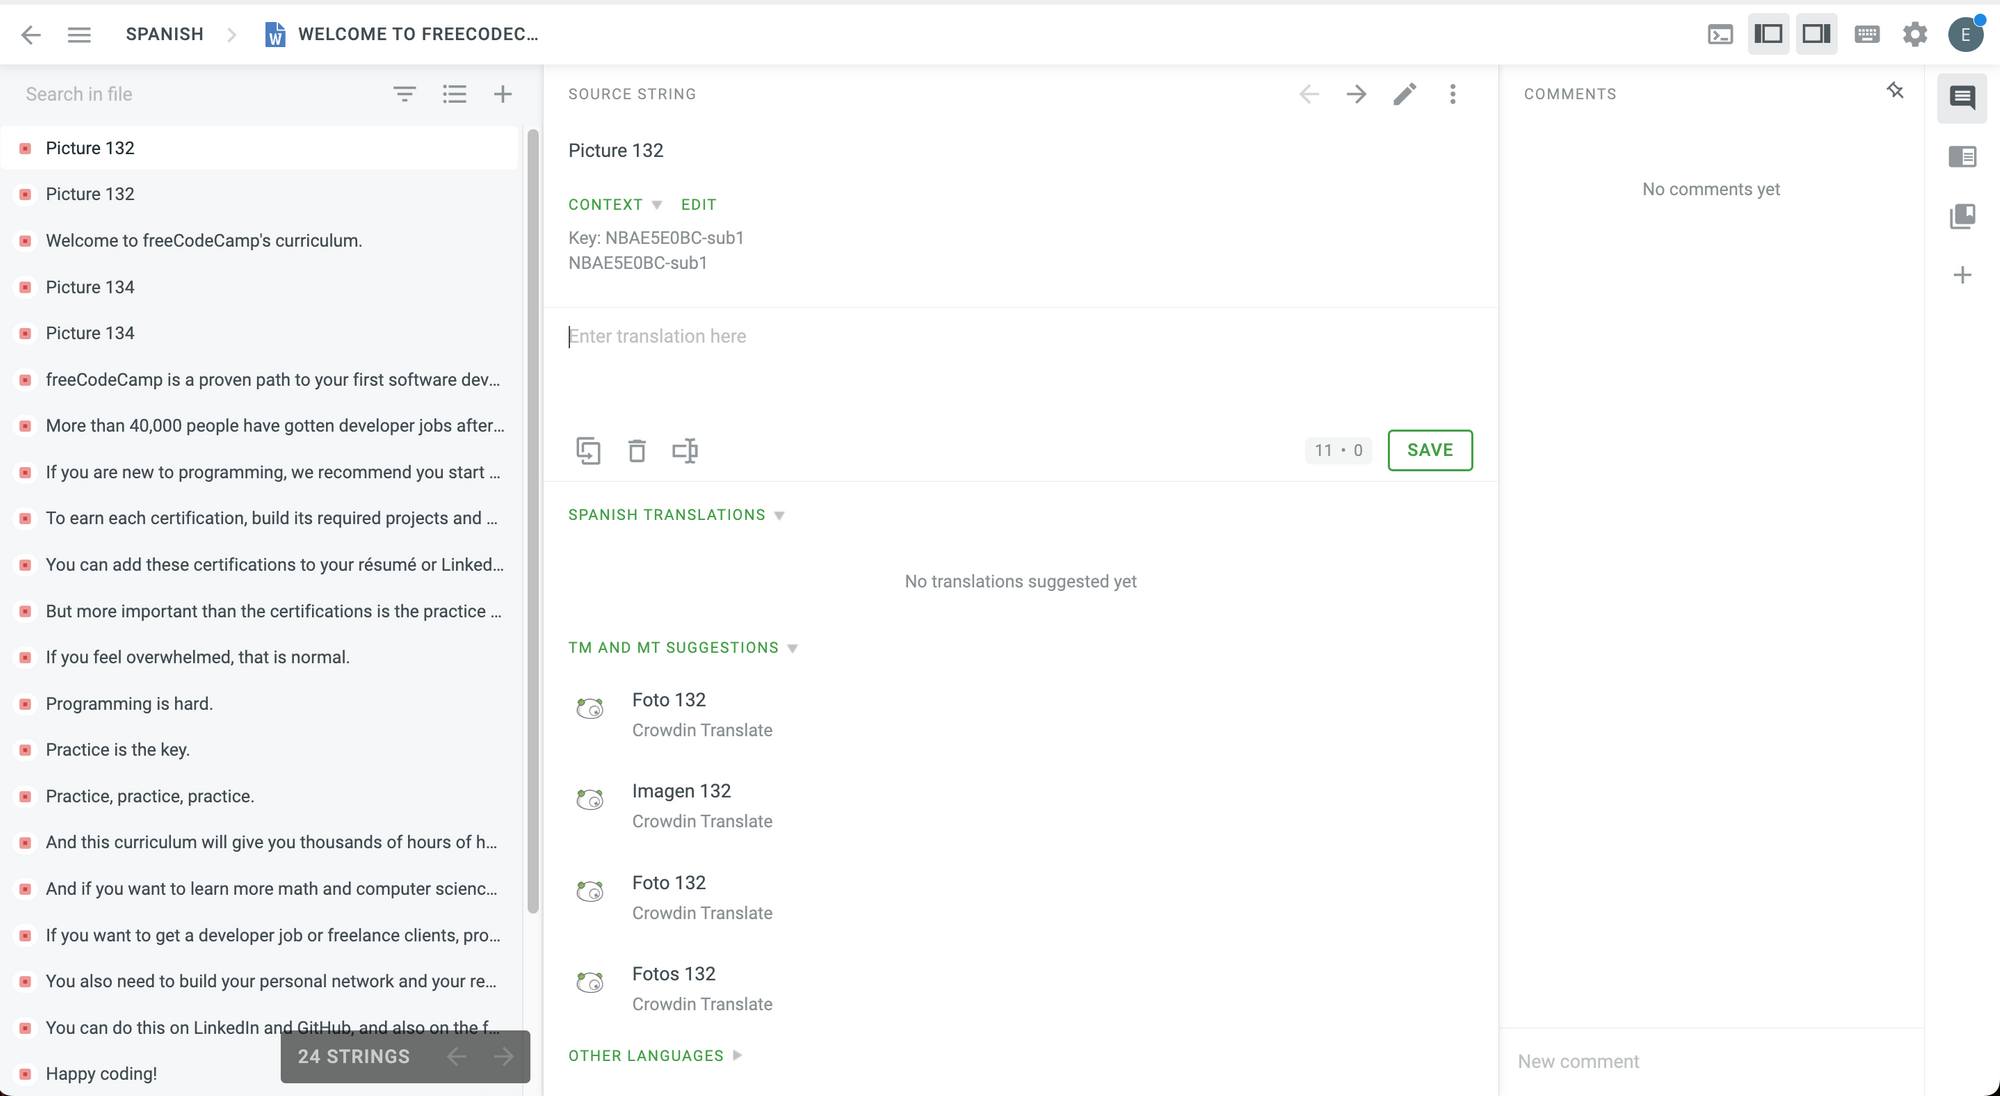
I will choose Spanish for this demo.
 Dashboard.
You will see all your project files for that specific target language.
On the language page, you can check the translation and proofreading progress of each file, translate and proofread, and upload or download your translations and source files.
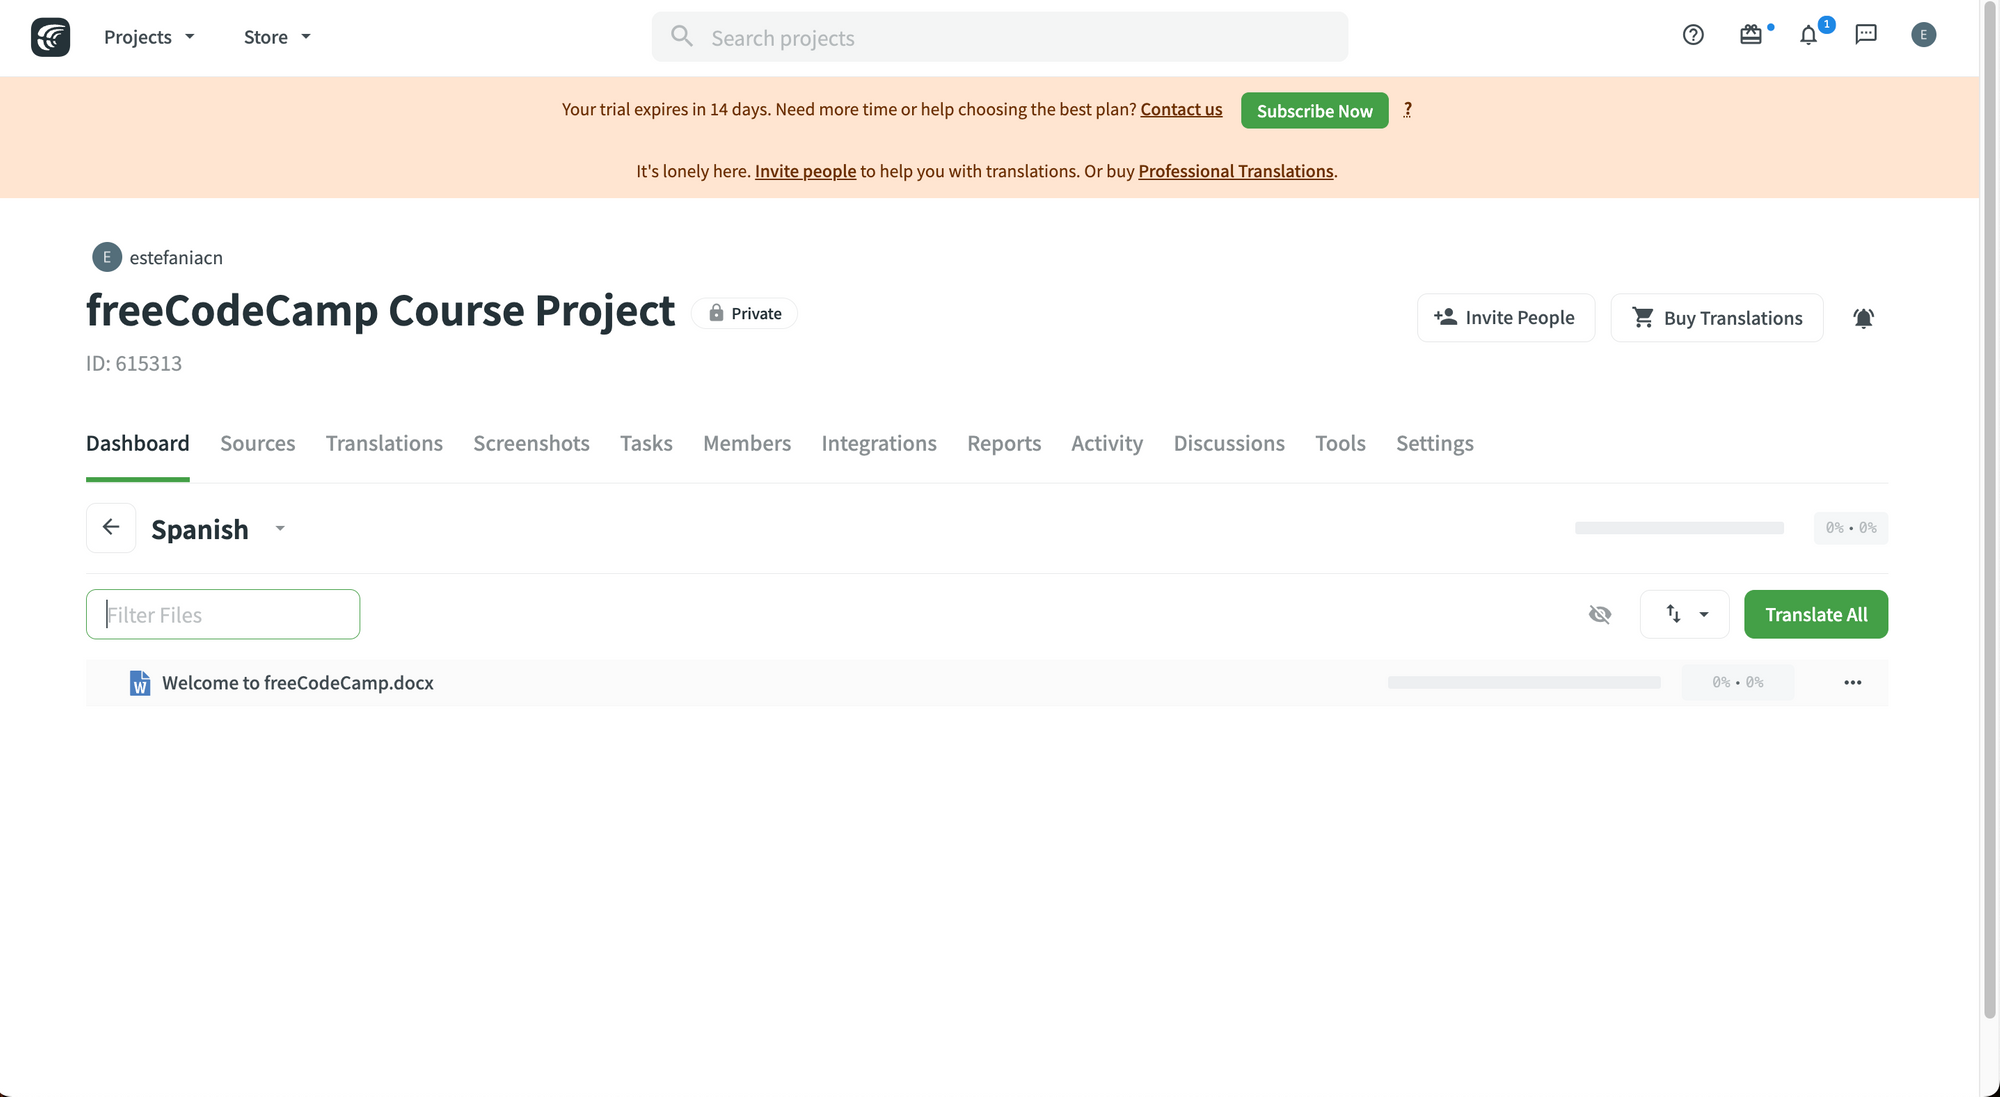 List of files to be translated into Spanish.
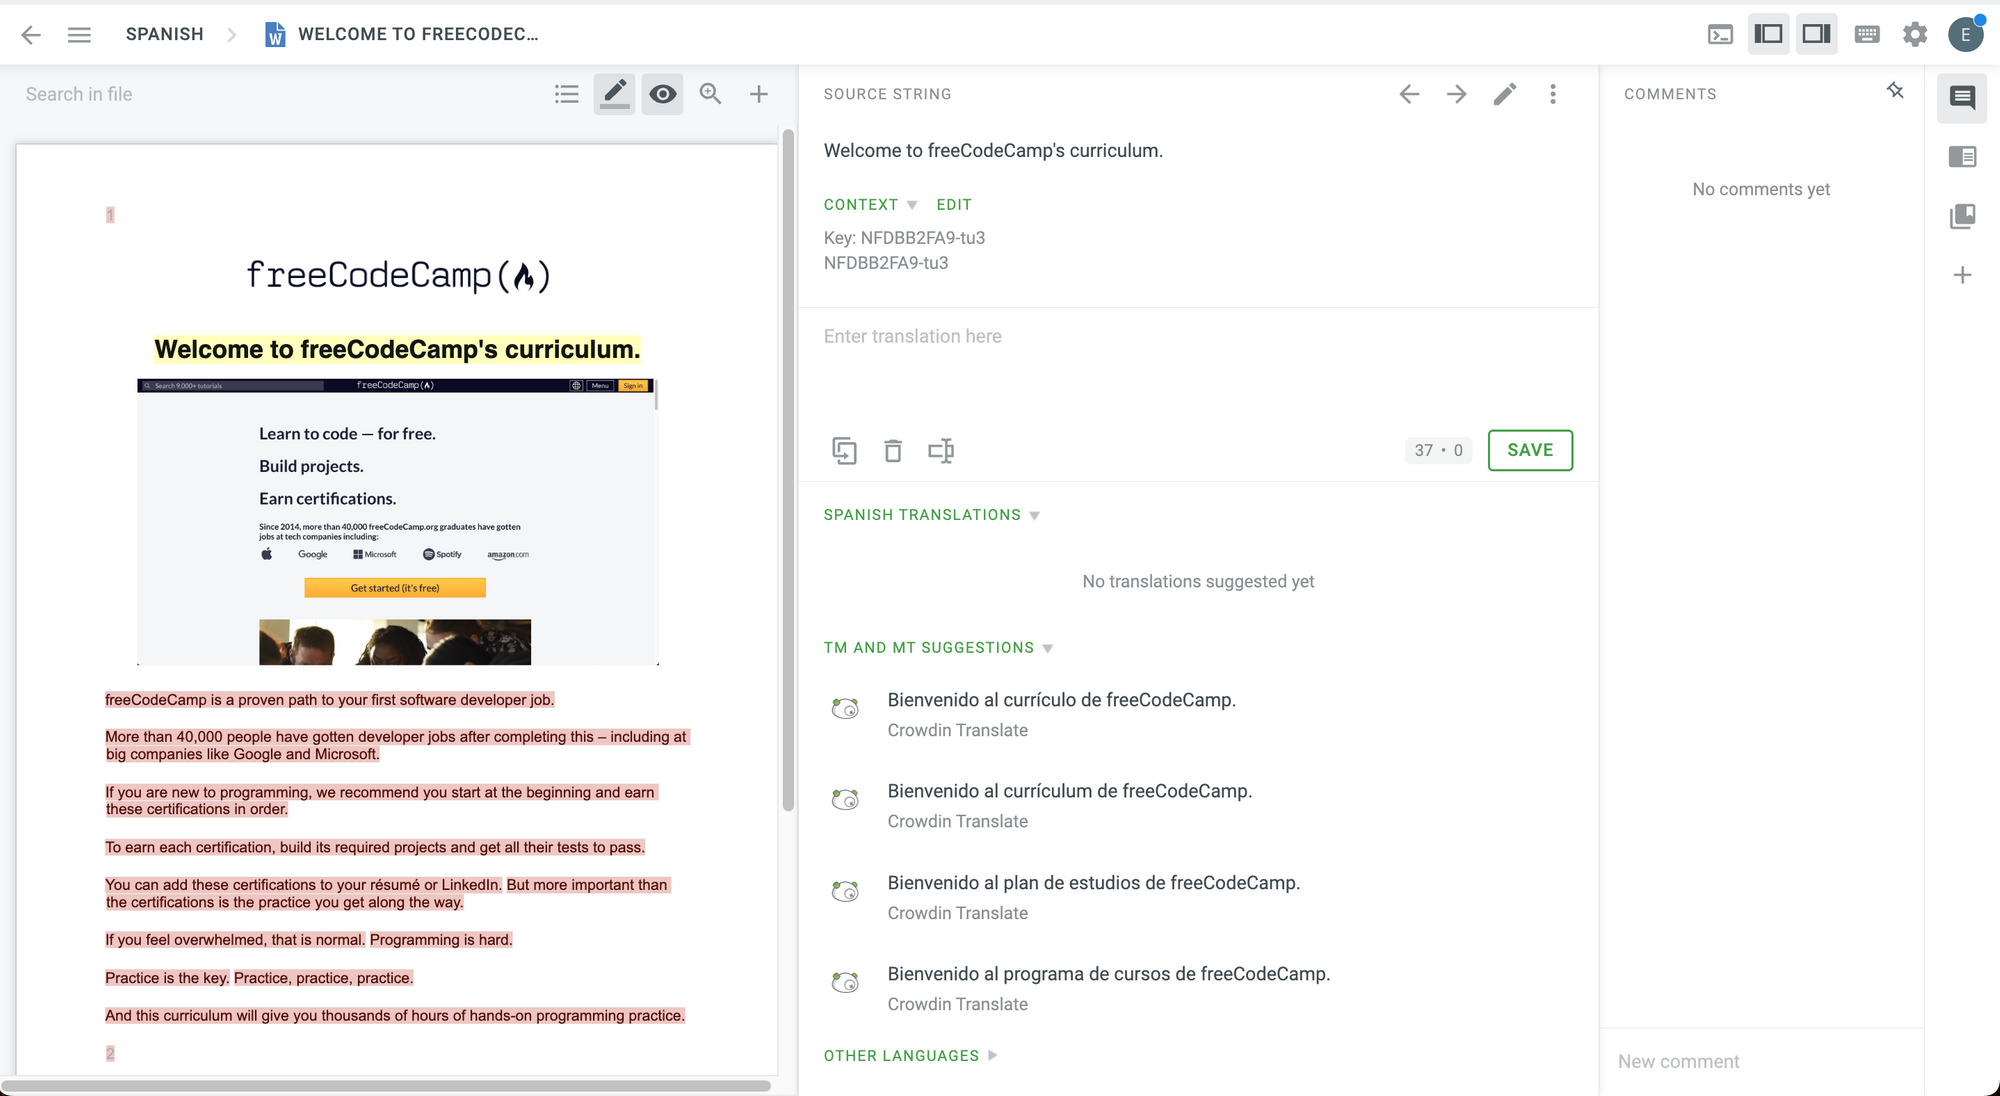
You can click on the name of the file that you would like to translate. This will take you to the Translation Editor and you will see your file in the preview.
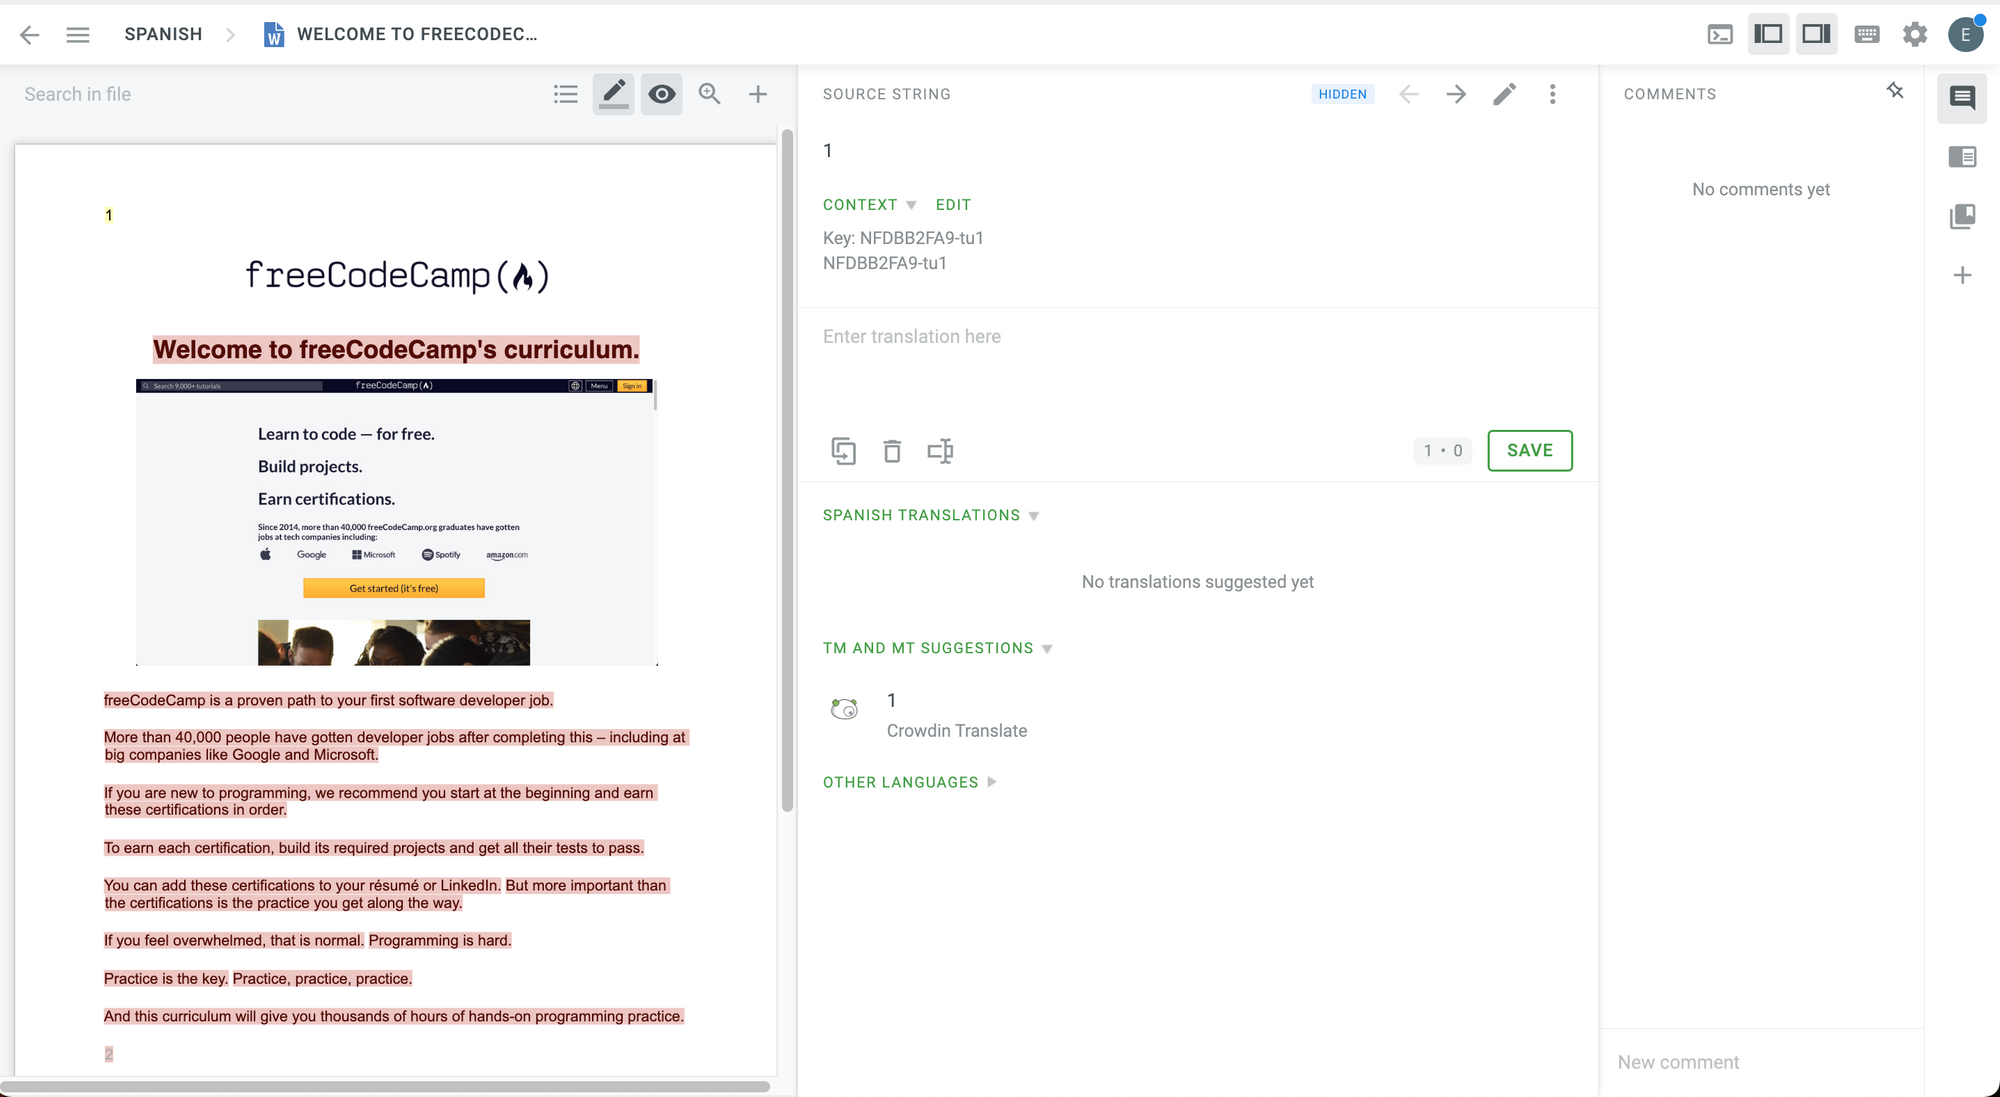 The Translation Editor.
When upload a file, Crowdin divides it into strings. This process may require certain format conversions based on the type of file that you are uploading.
According to the Crowdin documentation:
On import, some file formats are automatically converted into other formats to be further parsed and processed.
You can see the list of the initial file formats and the file formats they’re being converted into in the table below.
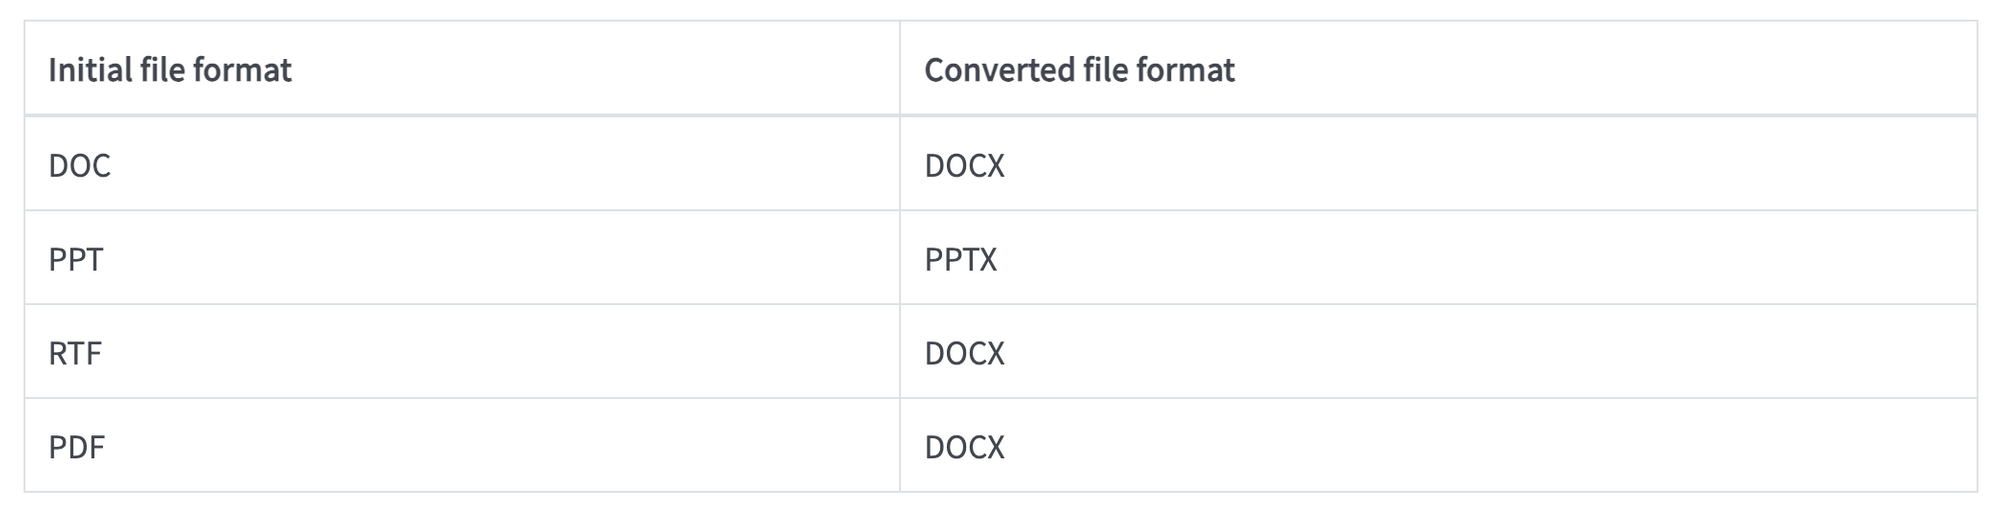 File formats conversion. Image taken from the Crowdin documentation.
We can see that PDF files are converted into DOCX files, the type of file that we usually create in a text editor.
Then, to export the file, Crowdin also mentions that:
By default, we export the translations in the same format as the source files. For example, if you upload an XML file to Crowdin, you’ll have the XML file exported.
How to Use The Translation Editor
This is the layout of the translation editor that you will see by default when you click on a file. It is called the Comfortable Mode.
The Translation Editor.
It has four main sections:
- The left sidebar (in purple below).
- Middle-top area (in yellow below).
- Middle-bottom area (in orange below).
- Right sidebar (in blue below).
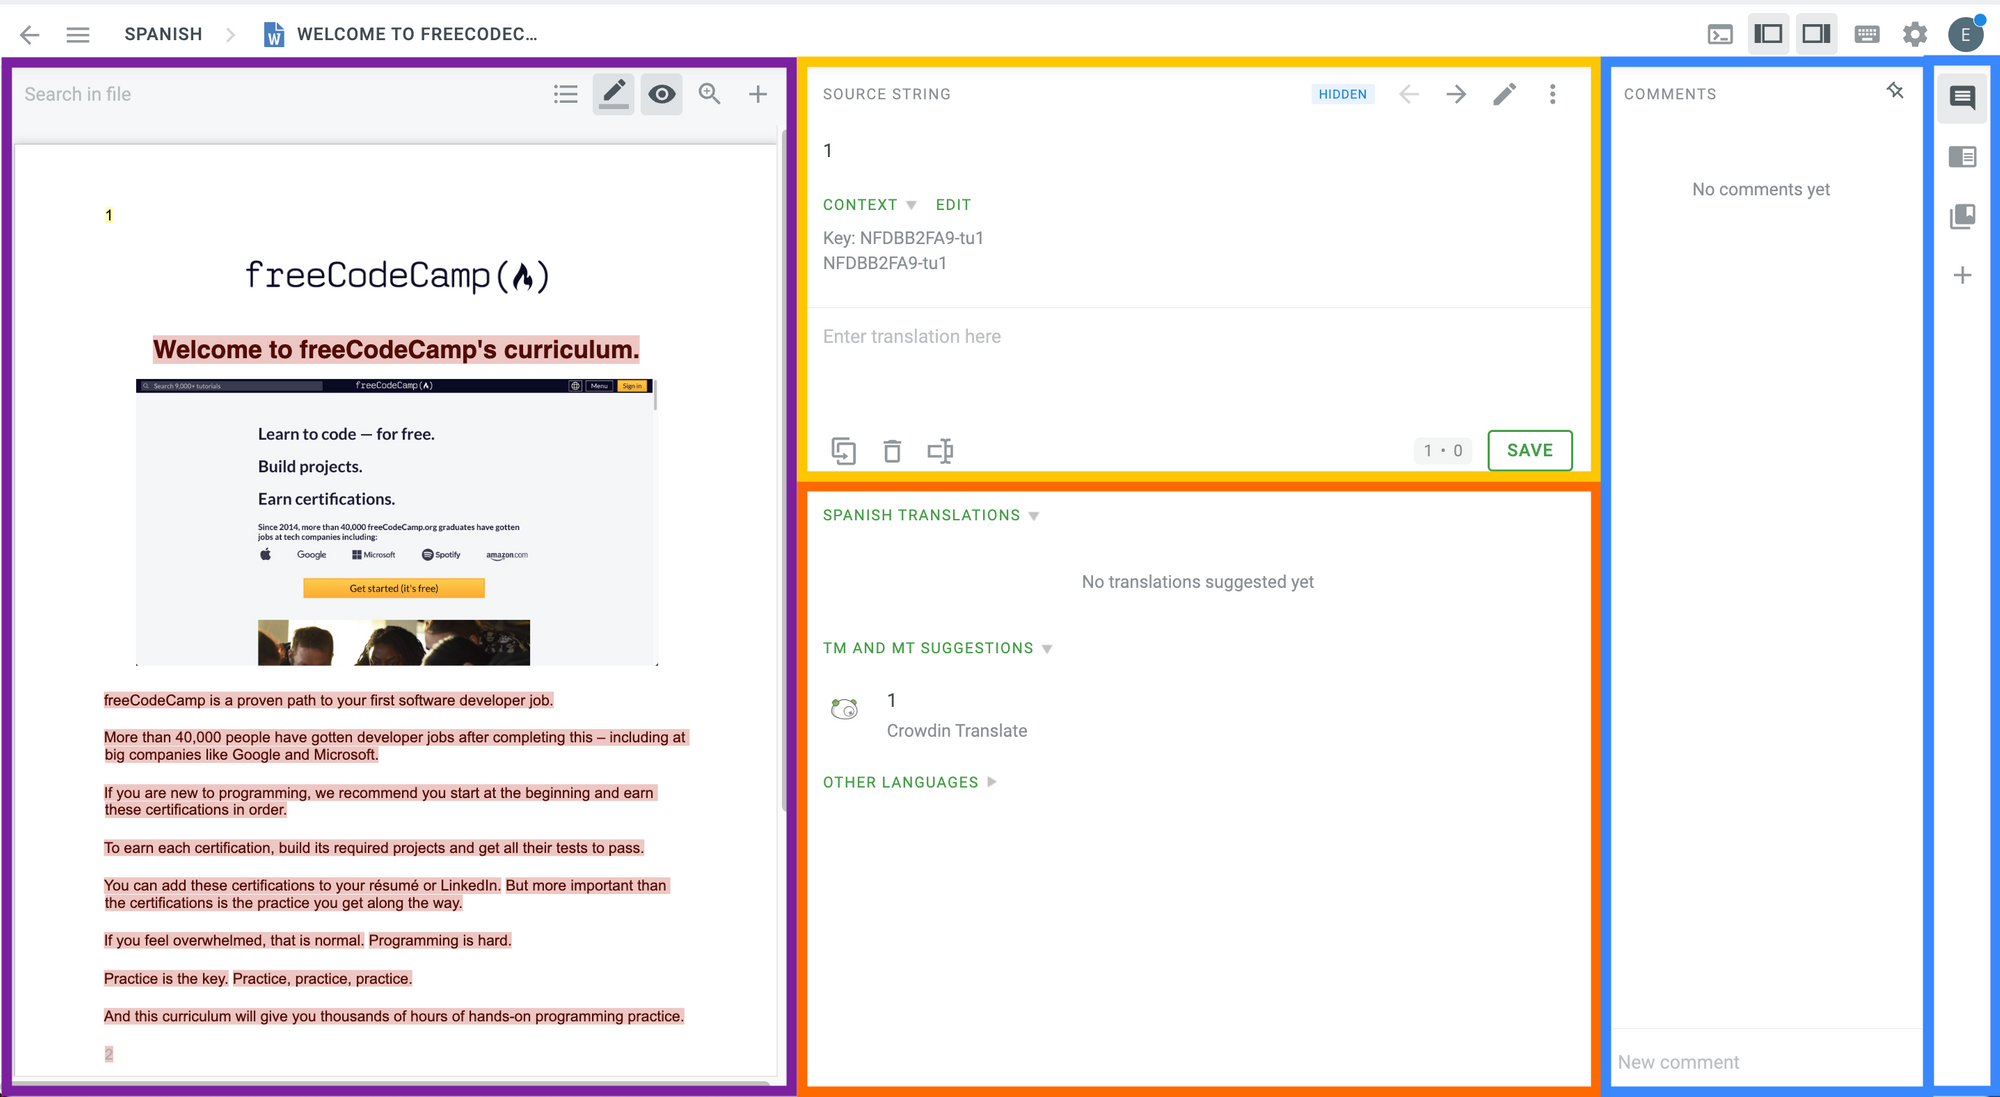 The Translation Editor in Comfortable Mode.
Let's talk about each section.
Left Sidebar
- Highlighted in a purple box in the previous diagram.
- Shows you all the strings in your document and a preview of your source file.
- You will find helpful tools at the top such as (from left to right): searching strings in the file, changing the view to a list of all the strings, highlighting translated and untranslated strings, showing the translation preview, scale toggle, and adding a string.
 Left Sidebar - Toolbar at the top.
If you click on the first button (from left to right) after the search file field, you can change the view to see a list of all the strings instead of the file preview.
Now you will see a list of all the strings on the left:
 Basic list view.
You can always click on this button again to go back to the previous mode, where you can see the strings in the original context and layout of the source file, like this:
WYSIWYG ("What You See Is What You Get") Translation Mode.
Here, you will see that strings are highlighted in different colors.
- Red means that the string has not been translated.
- Yellow means that the string is partially translated.
- Blue means that the string has been translated.
- Gray means that the string is hidden and only visible to project managers and proofreaders.
When you start proofreading the strings, you will also see:
- A yellow checkmark if the string is partially approved (if some plural forms are not approved).
- A green checkmark if the string has been approved.
You may also see a comment icon if a contributor has left a comment on a string or if it has marked the comment as an issue.
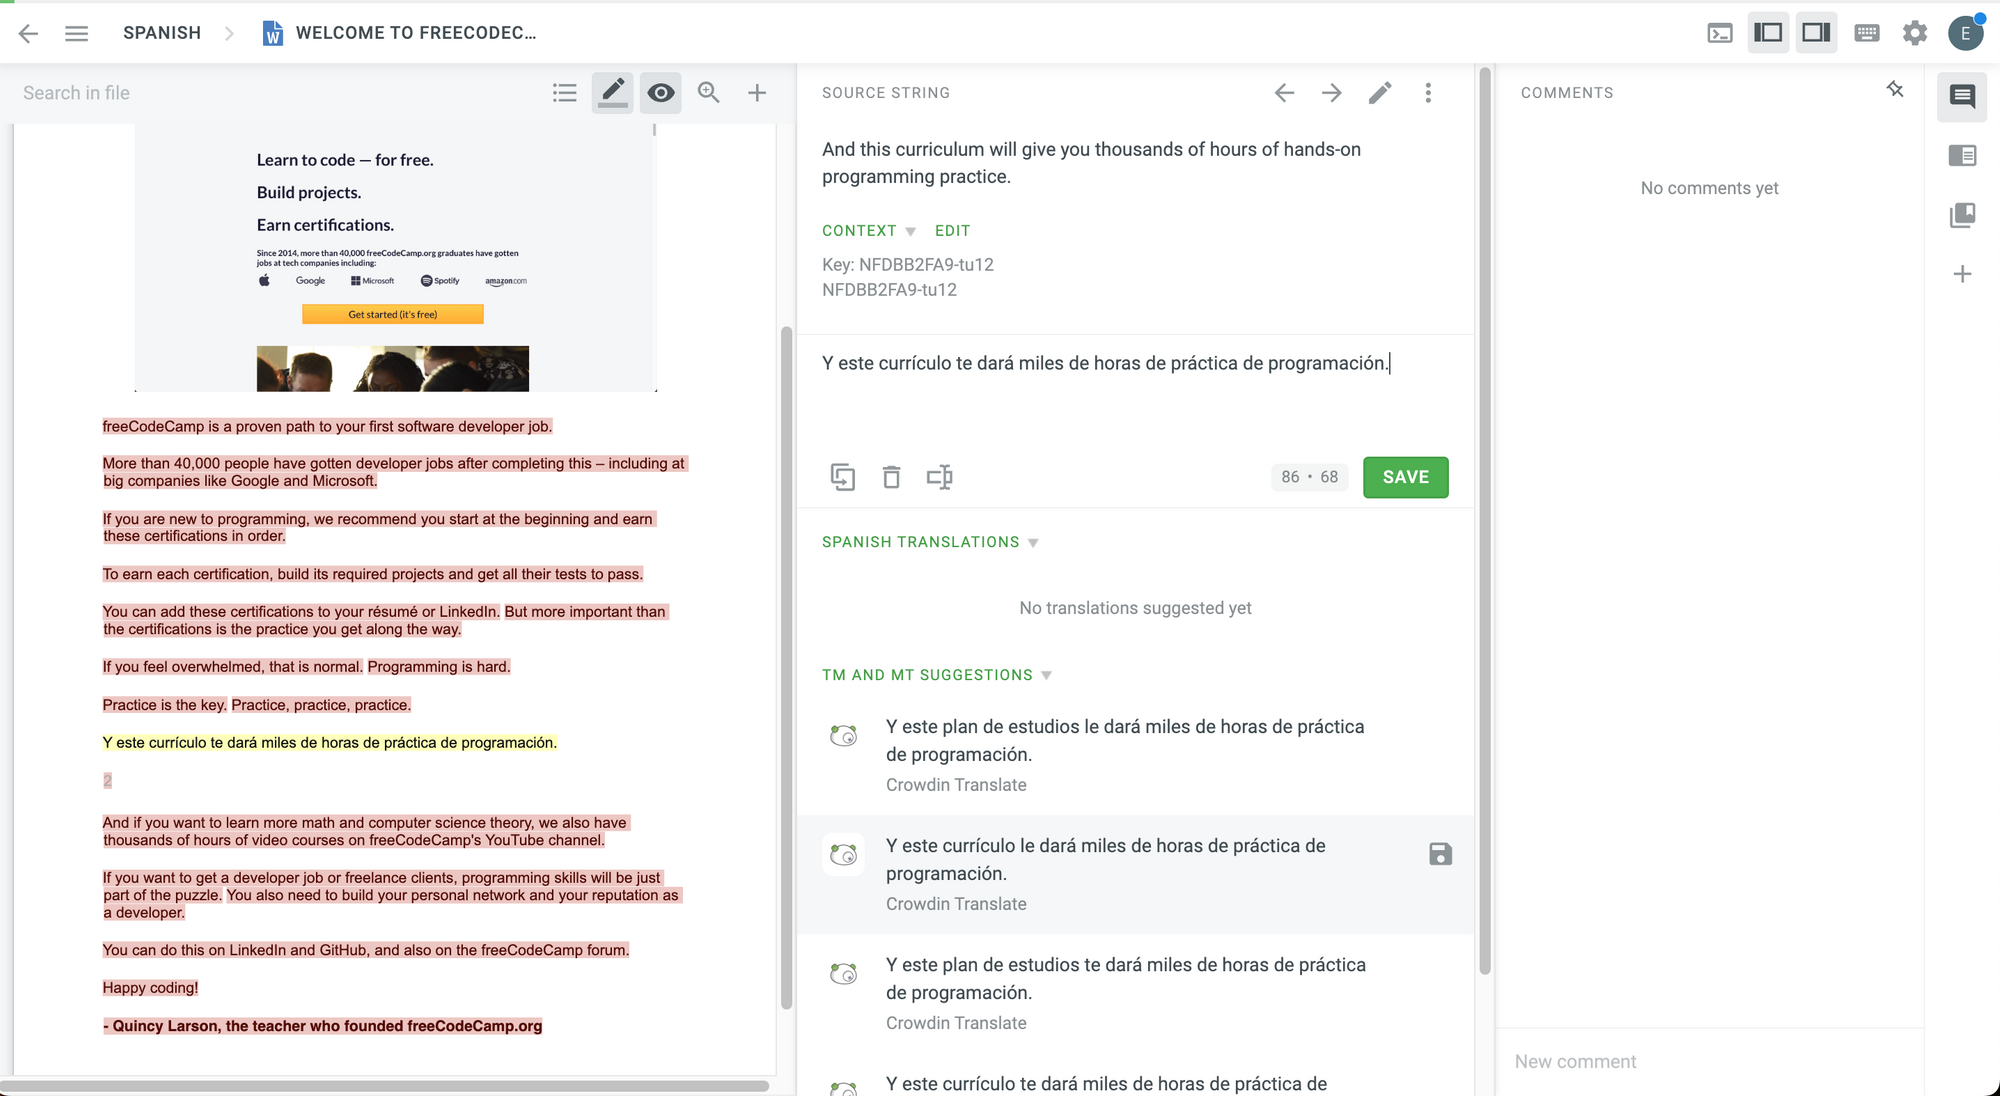
Middle-Top Area
- Highlighted in a yellow box in the diagram below.
- This is where you can translate a string. You just need to select it from the left sidebar and it will appear in this area.
The Translation Editor in Comfortable Mode.
Let's click on a string and see what happens:
 Selecting a string.
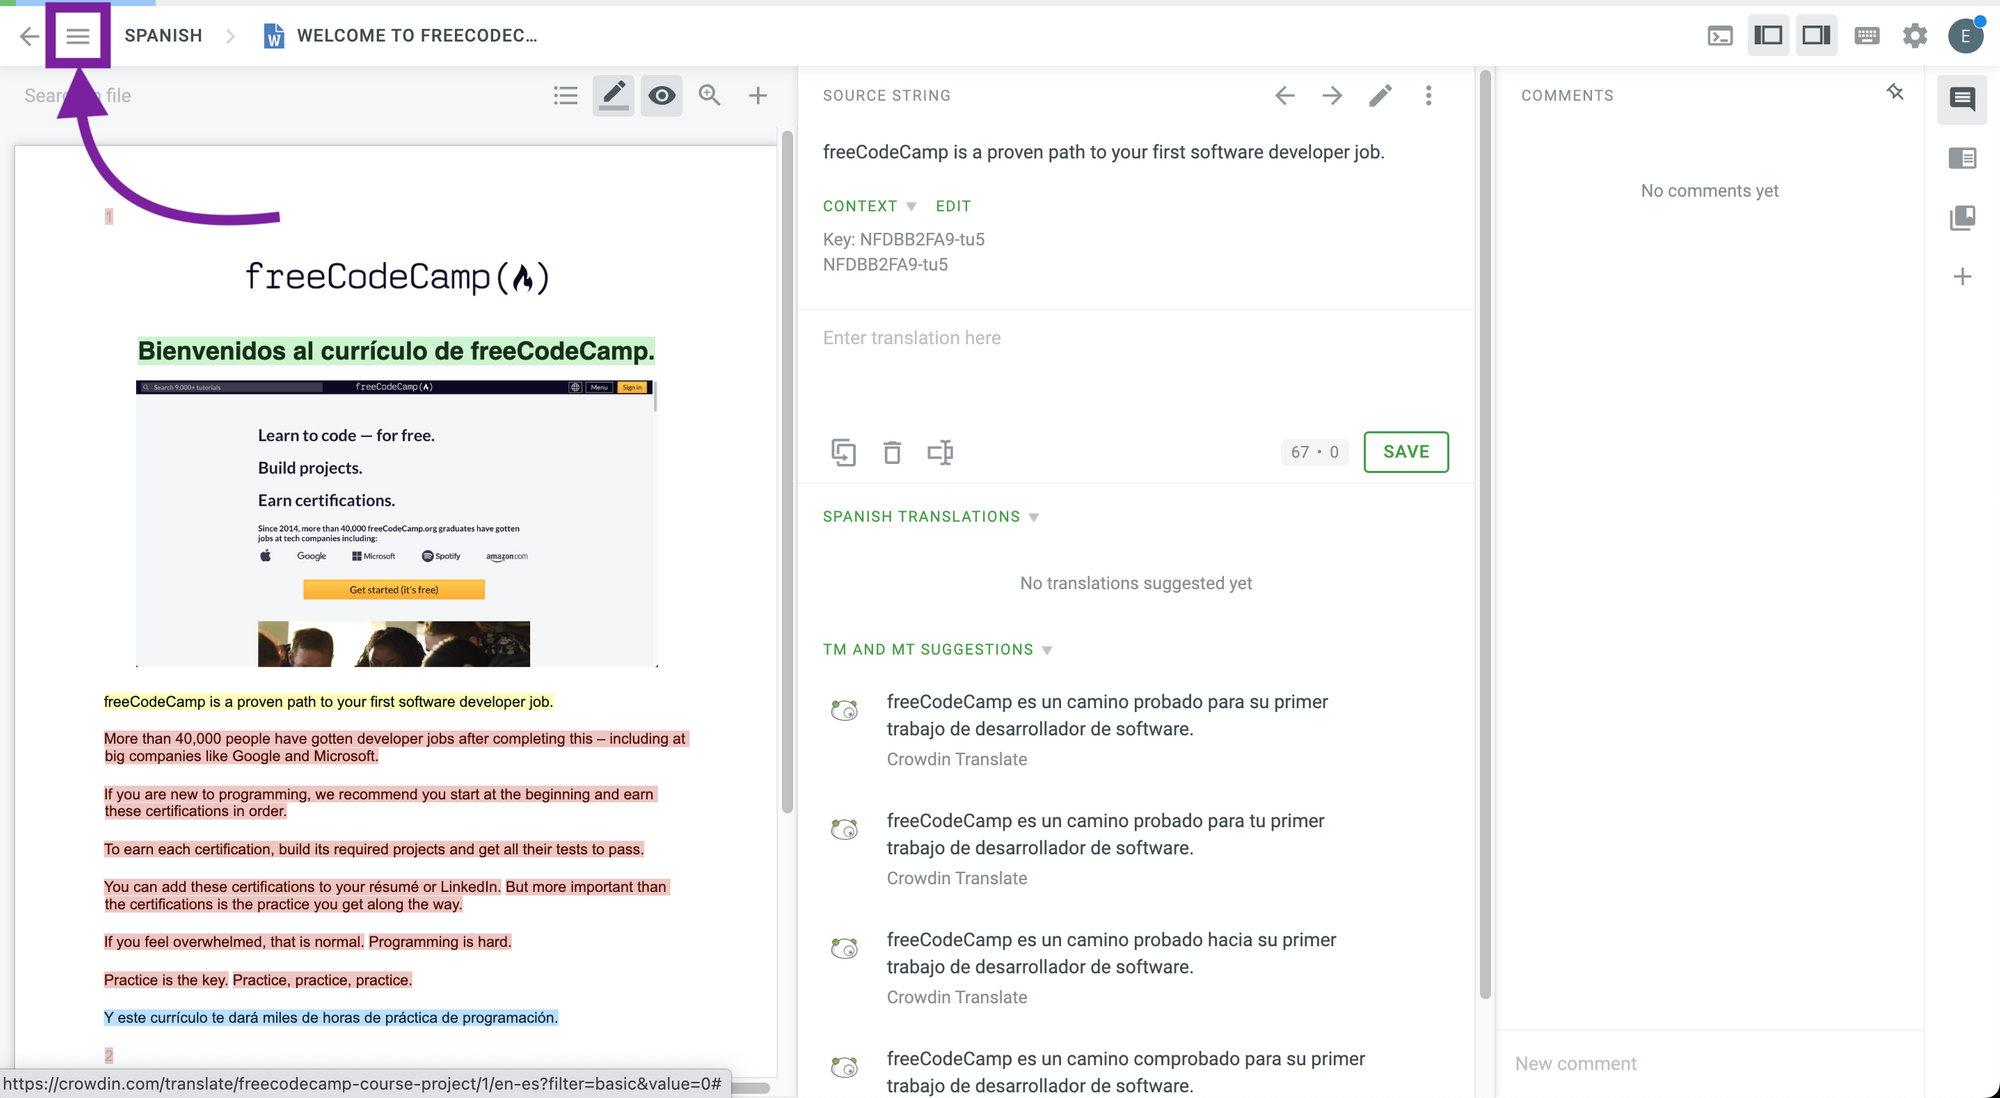
Awesome! The string is now selected as the "Source String" and we can start translating it:
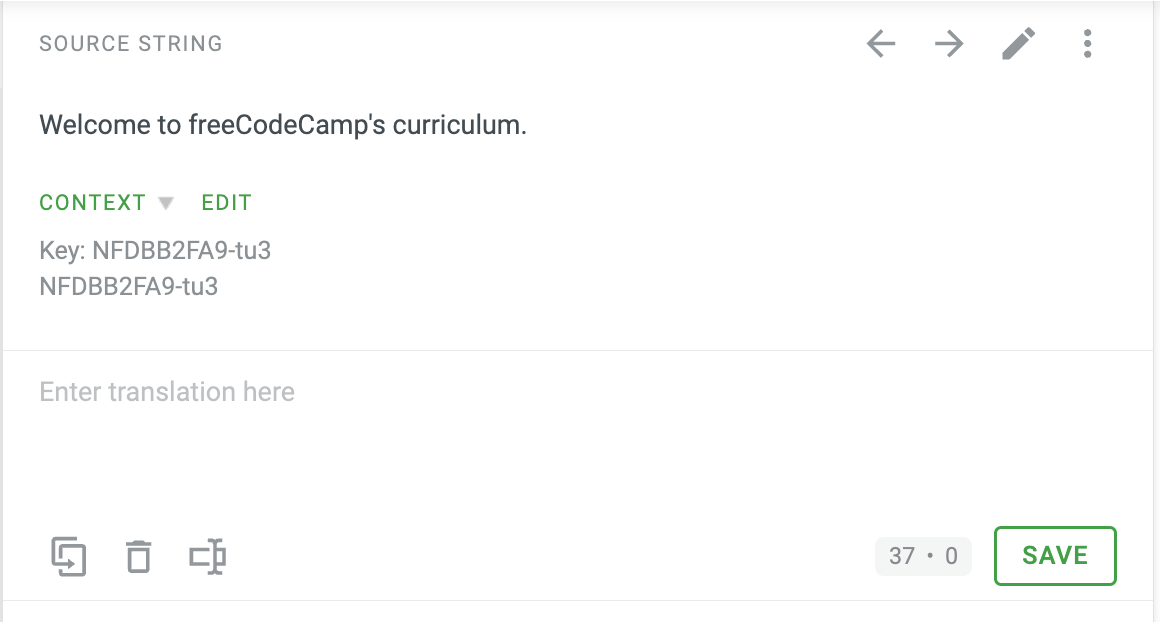 Translate a string.
The three tools that you can see at the bottom are (from left to right):
- Copy Source: to keep the initial string structure.
- Clear: to erase the translation quickly.
- Text Selection Mode: to copy a part of the translation from Translation Memory (TM) or Machine Translations (MT).
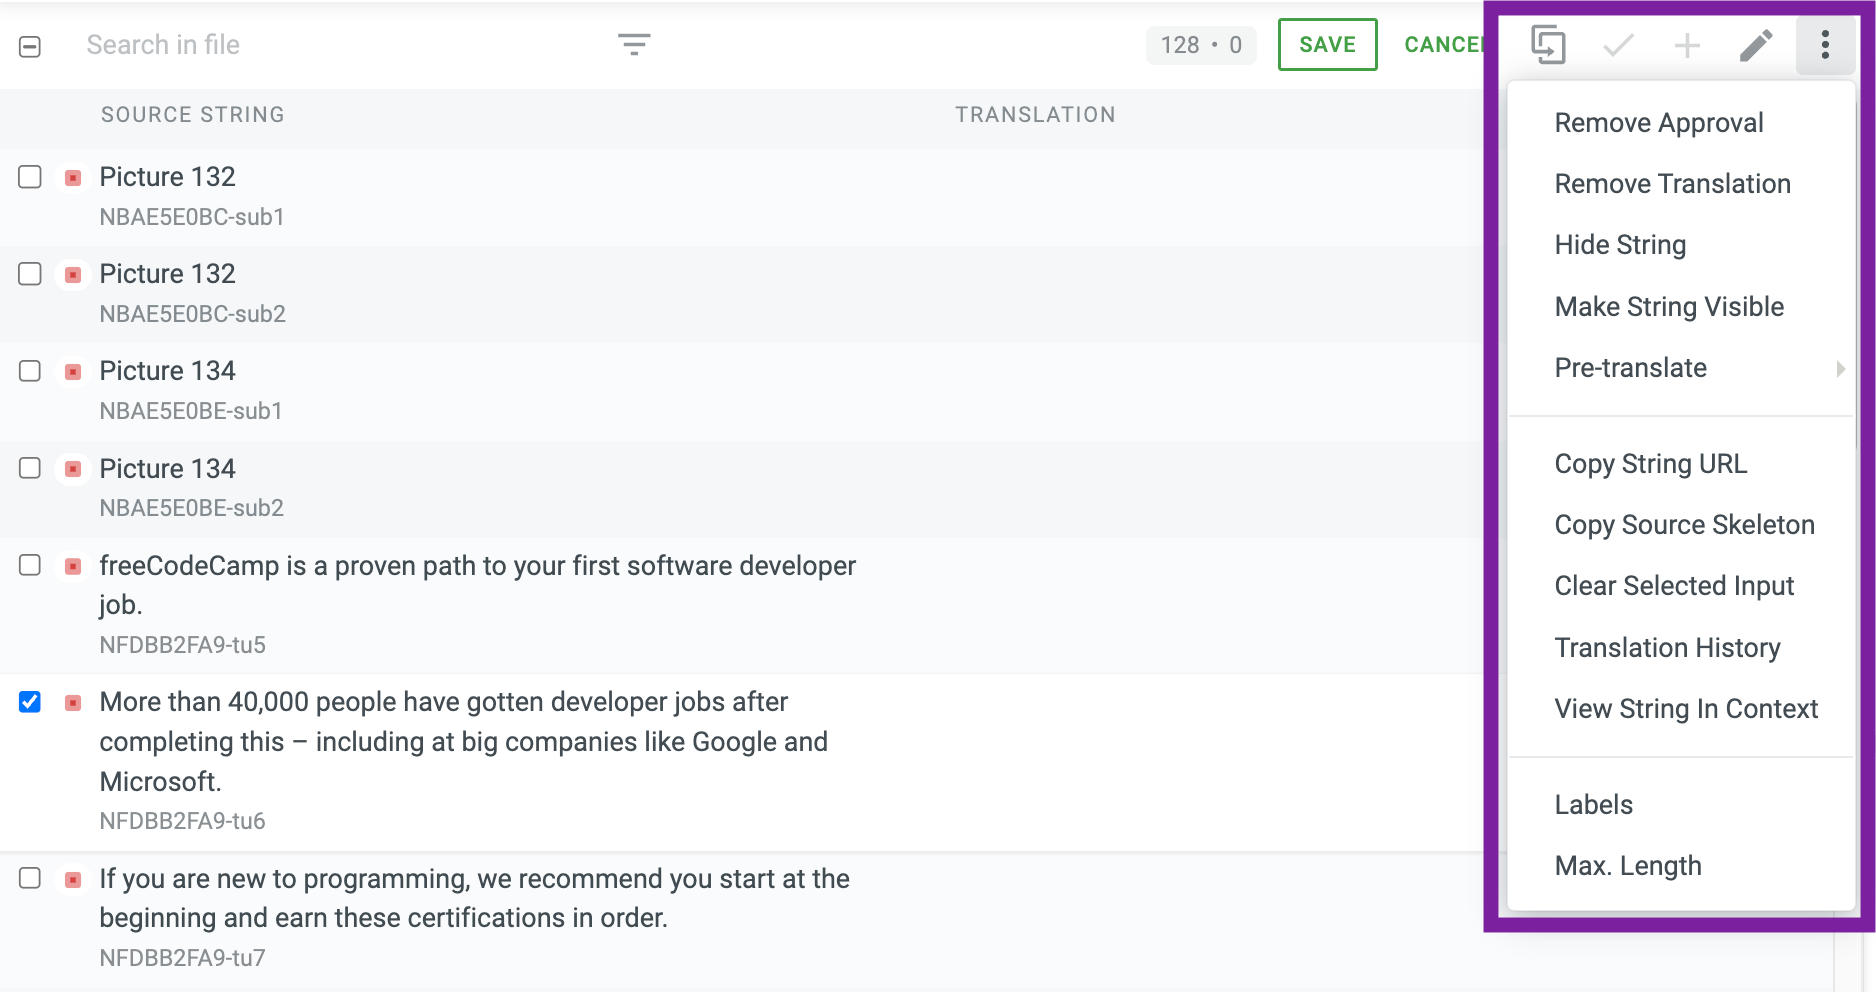
If you click on the three dots at the top, you will see additional options for the string, including:
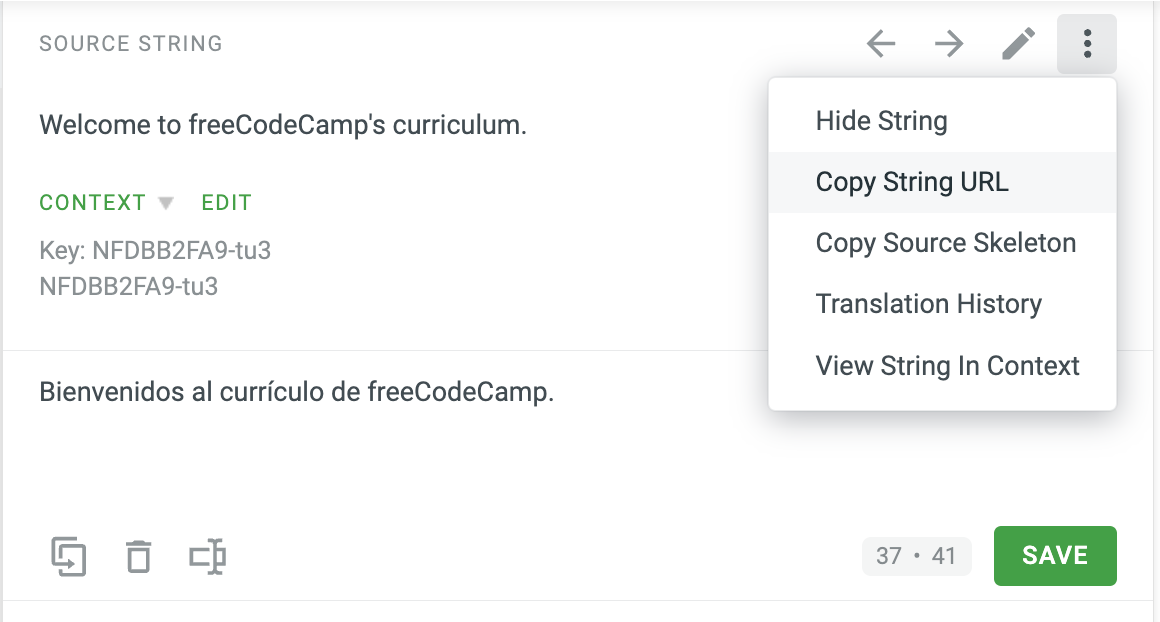 String translation options.
- Hide String.
- Copy String URL.
- Copy Source Skeleton.
- Translation History.
- View String in Context.
When you write your translation, you will see your translations in the preview. The string will be highlighted in yellow if it is the selected string.
 Translation in the preview (sidebar). The translated string is in Spanish in the preview.
To save your translation, click on the green "Save" button.
After this, you can go to the next string and you will see the previously translated string highlighted in a different color (blue).
 Saved translation.
To go back to the previous string, just click on it or click on the left arrow next to "Source String".
If you go back to the string, you will see something new in the middle-bottom area.
Let's talk about the middle-bottom area.
Middle-Bottom Area
- Highlighted in an orange box in the diagram below.
- This section has translations made by other contributors (if applicable), translation memory (TM) suggestions, machine translation (MT) suggestions, and translations to other languages.
The Translation Editor in Comfortable Mode.
💡 Tip: If you click on a suggestion, it will automatically appear in the translation input field.
This is the current state of our project. We have this translated string and you can see the Spanish Translation in the middle-bottom section (orange box below).
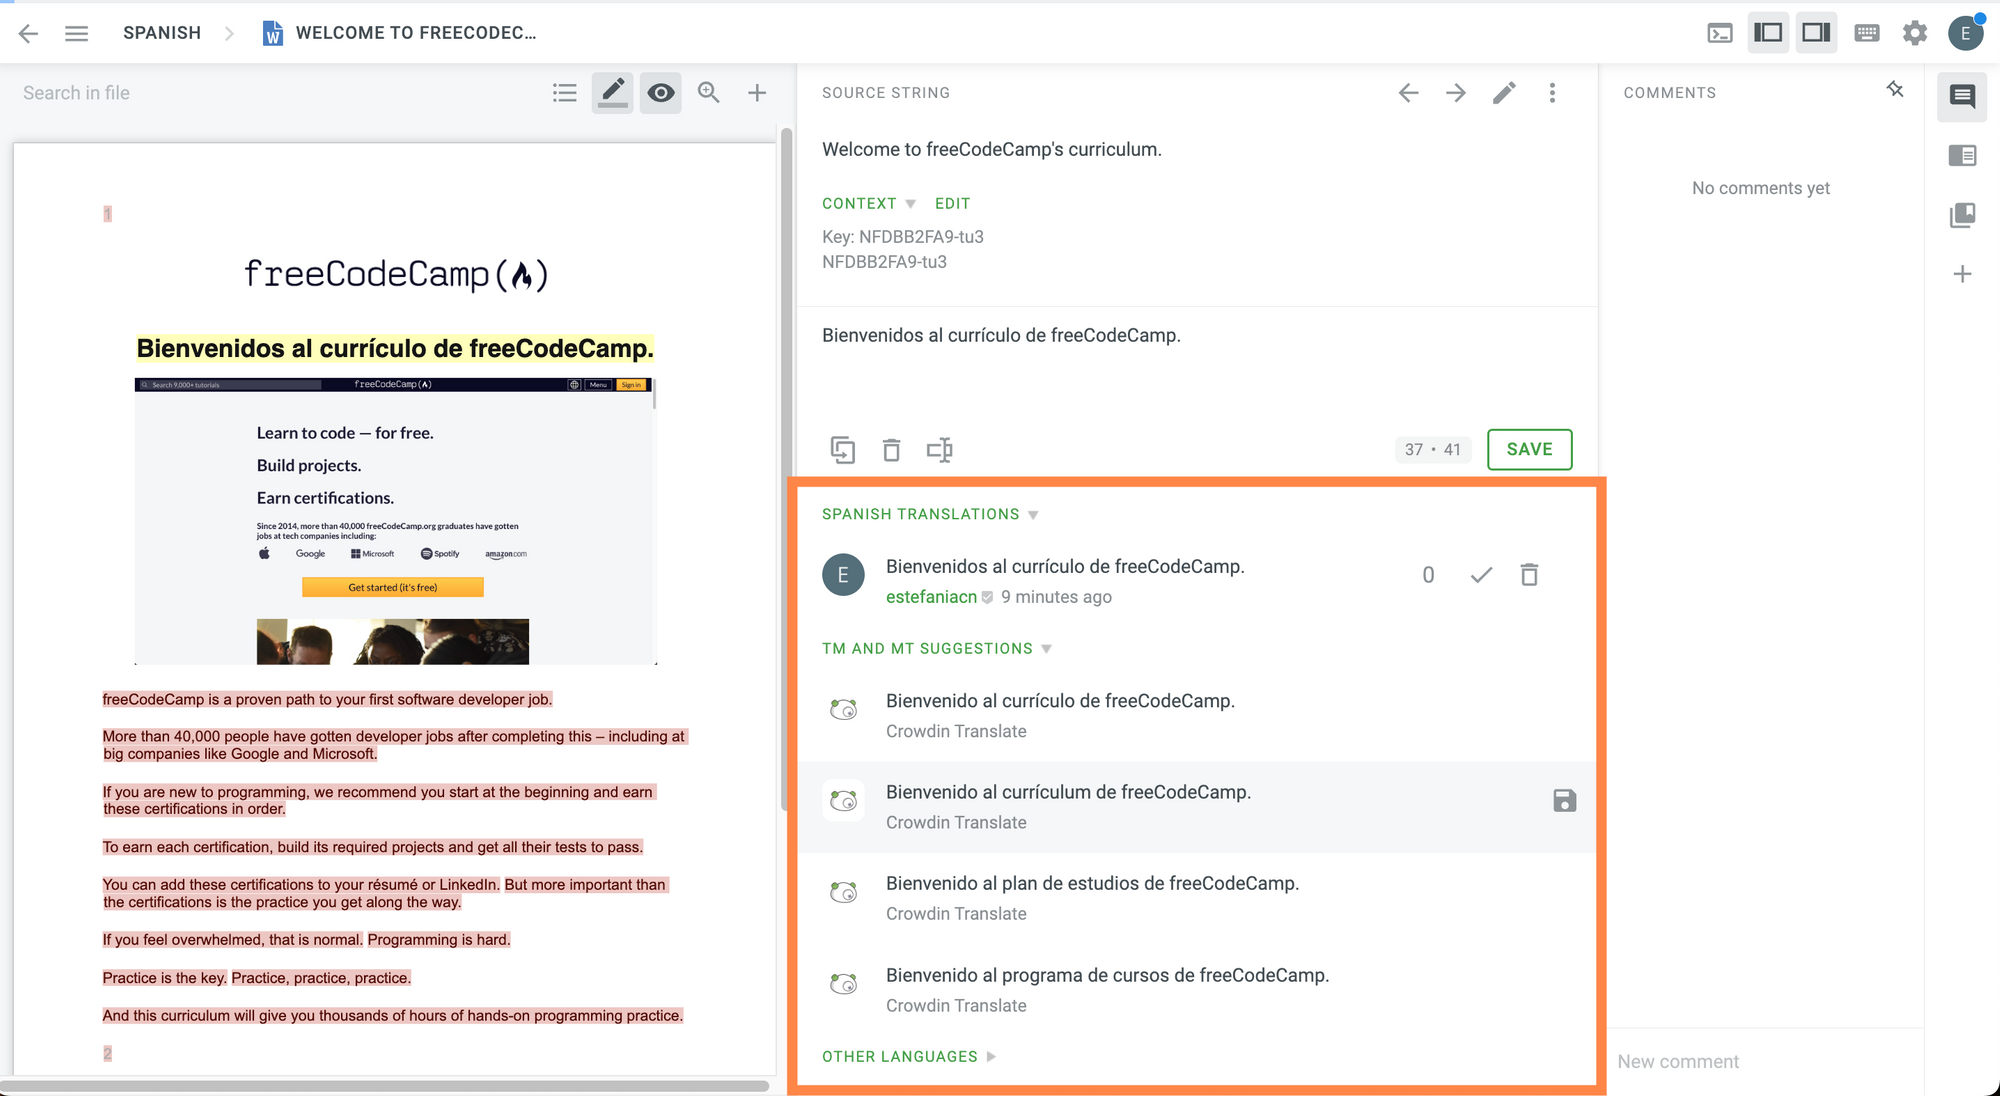 Middle-Bottom Section.
For each translation, you will see:
 Translation.
- The translation in the target language.
- The Crowdin user who saved the translation.
- When it was saved.
- Its current rating (other project members can upvote or downvote a translation).
- A checkmark button to approve the translation (like a proofreader).
- A trash button to delete the translation.
If you are the project owner or you have proofreading permissions, you can approve the string translation yourself. However, it is always recommended to have another team member check your string to avoid any common issues.
To approve the translation, just click on the checkmark button next to the translation.
Now you will see the approved string highlighted in green in the preview:
 Approved string highlighted in green.
The translated string will now show who approved it and when it was approved:

Right Sidebar
And last (but not least!) we have the right sidebar.
- Highlighted in blue in the diagram below.
- This is where you can write comments, search the TM, search for terms on your glossary, add new apps, and find the apps you added through the Crowdin Store.
The Translation Editor in Comfortable Mode.
To write a comment, just go to the comments on the sidebar and write your comment on the text input field at the bottom. You can mark the comment as an issue if you need to.
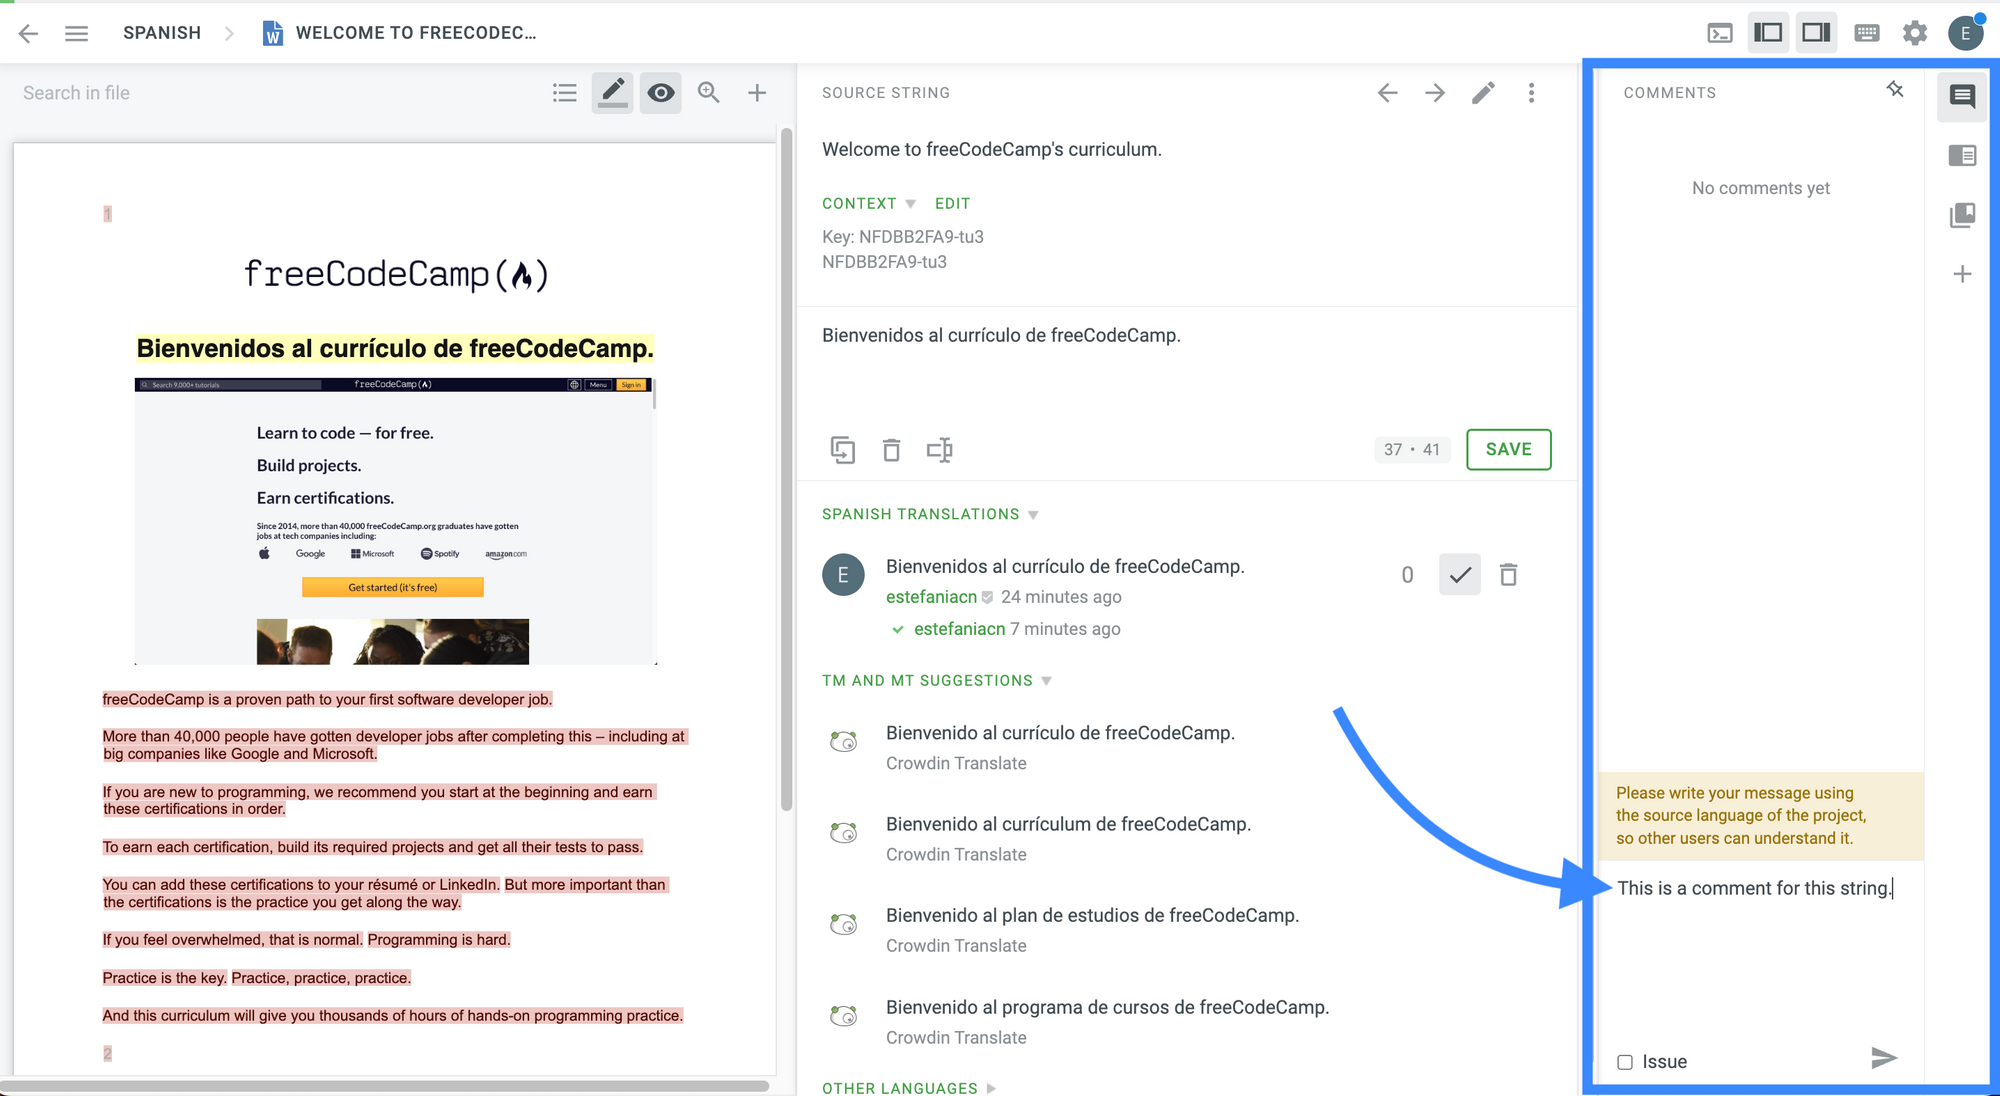 Writing a comment.
💡 Tip: You should write your comment using the source language of the project, so other team members and project managers can understand it.
If you click on the second option on this sidebar, you will be able to search your translation memory for previous translations.
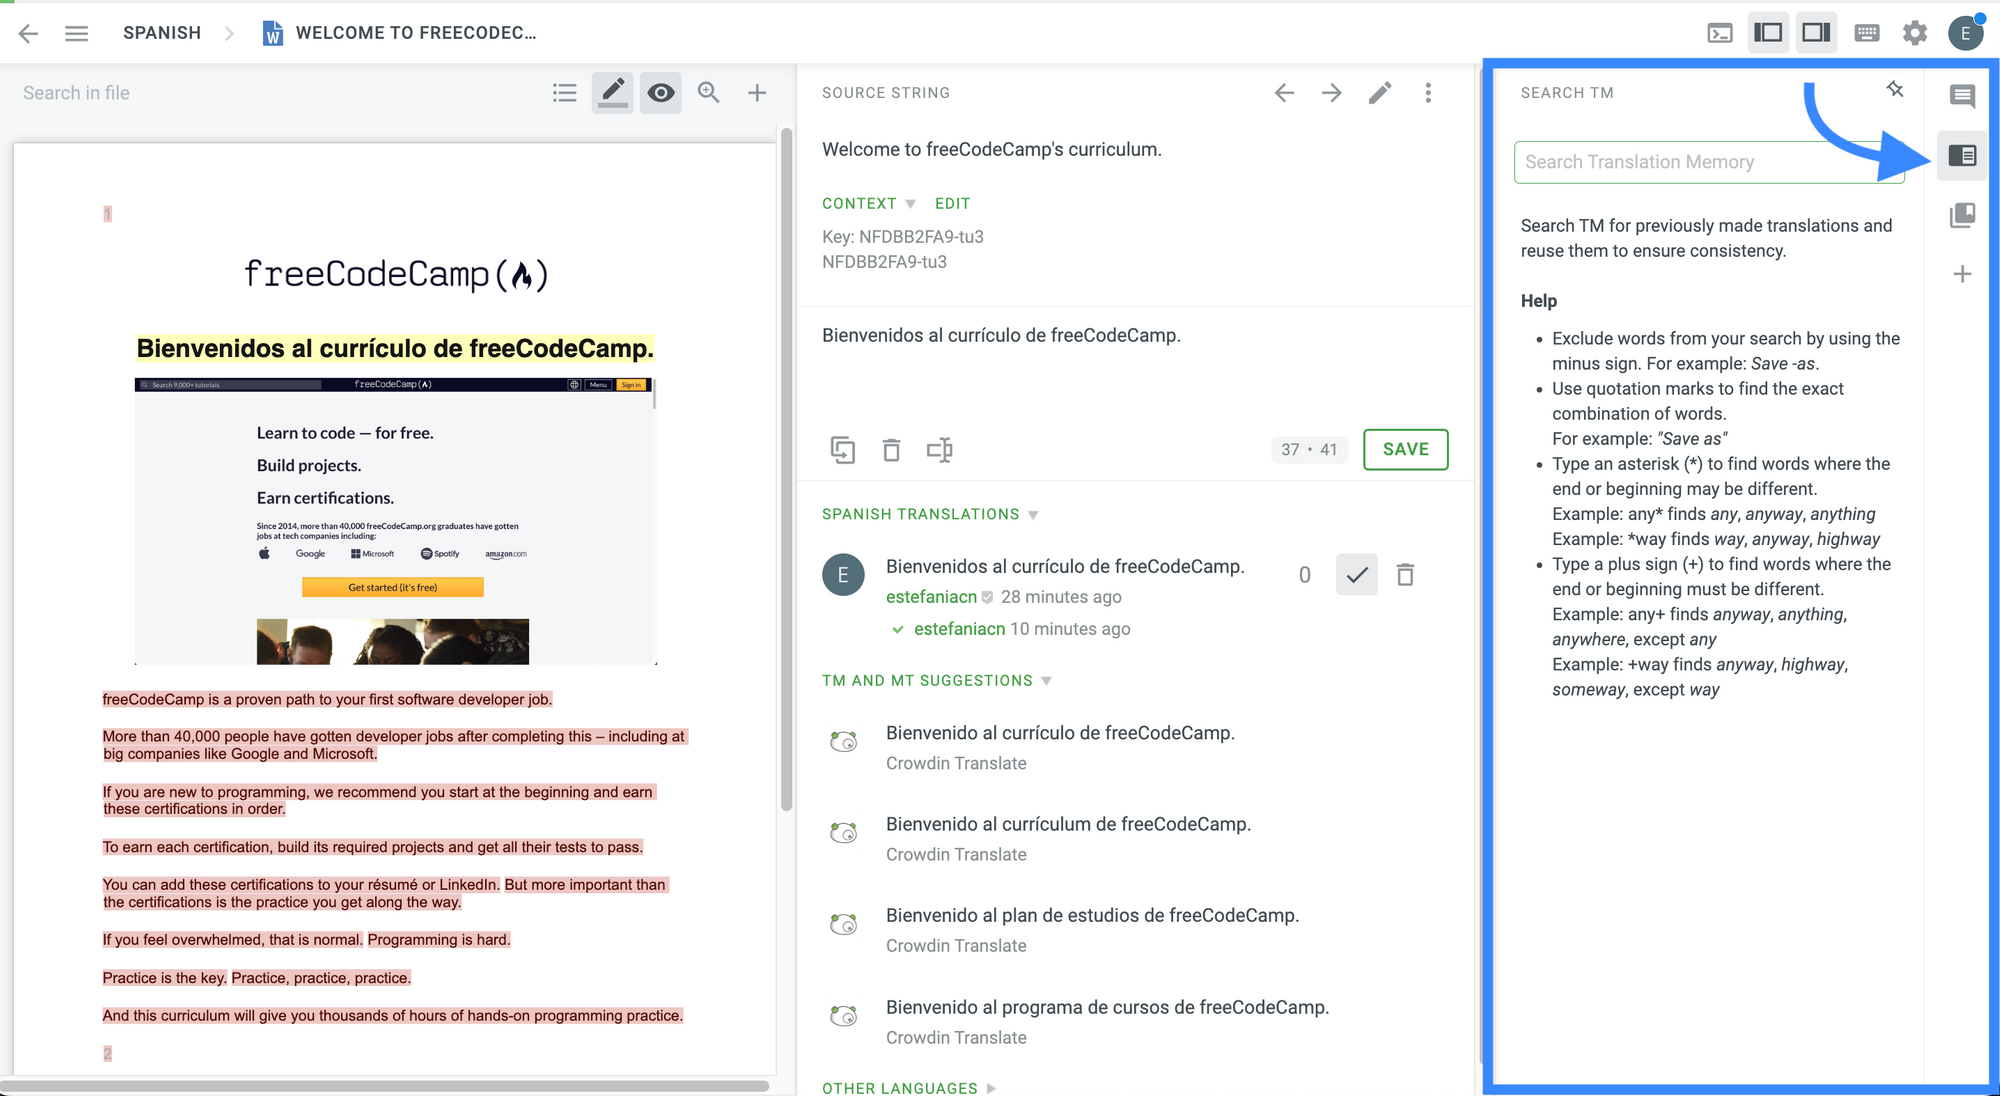 Search Translation Memory (TM).
In the third option, you can search for terms related to the currently selected string in your glossary.
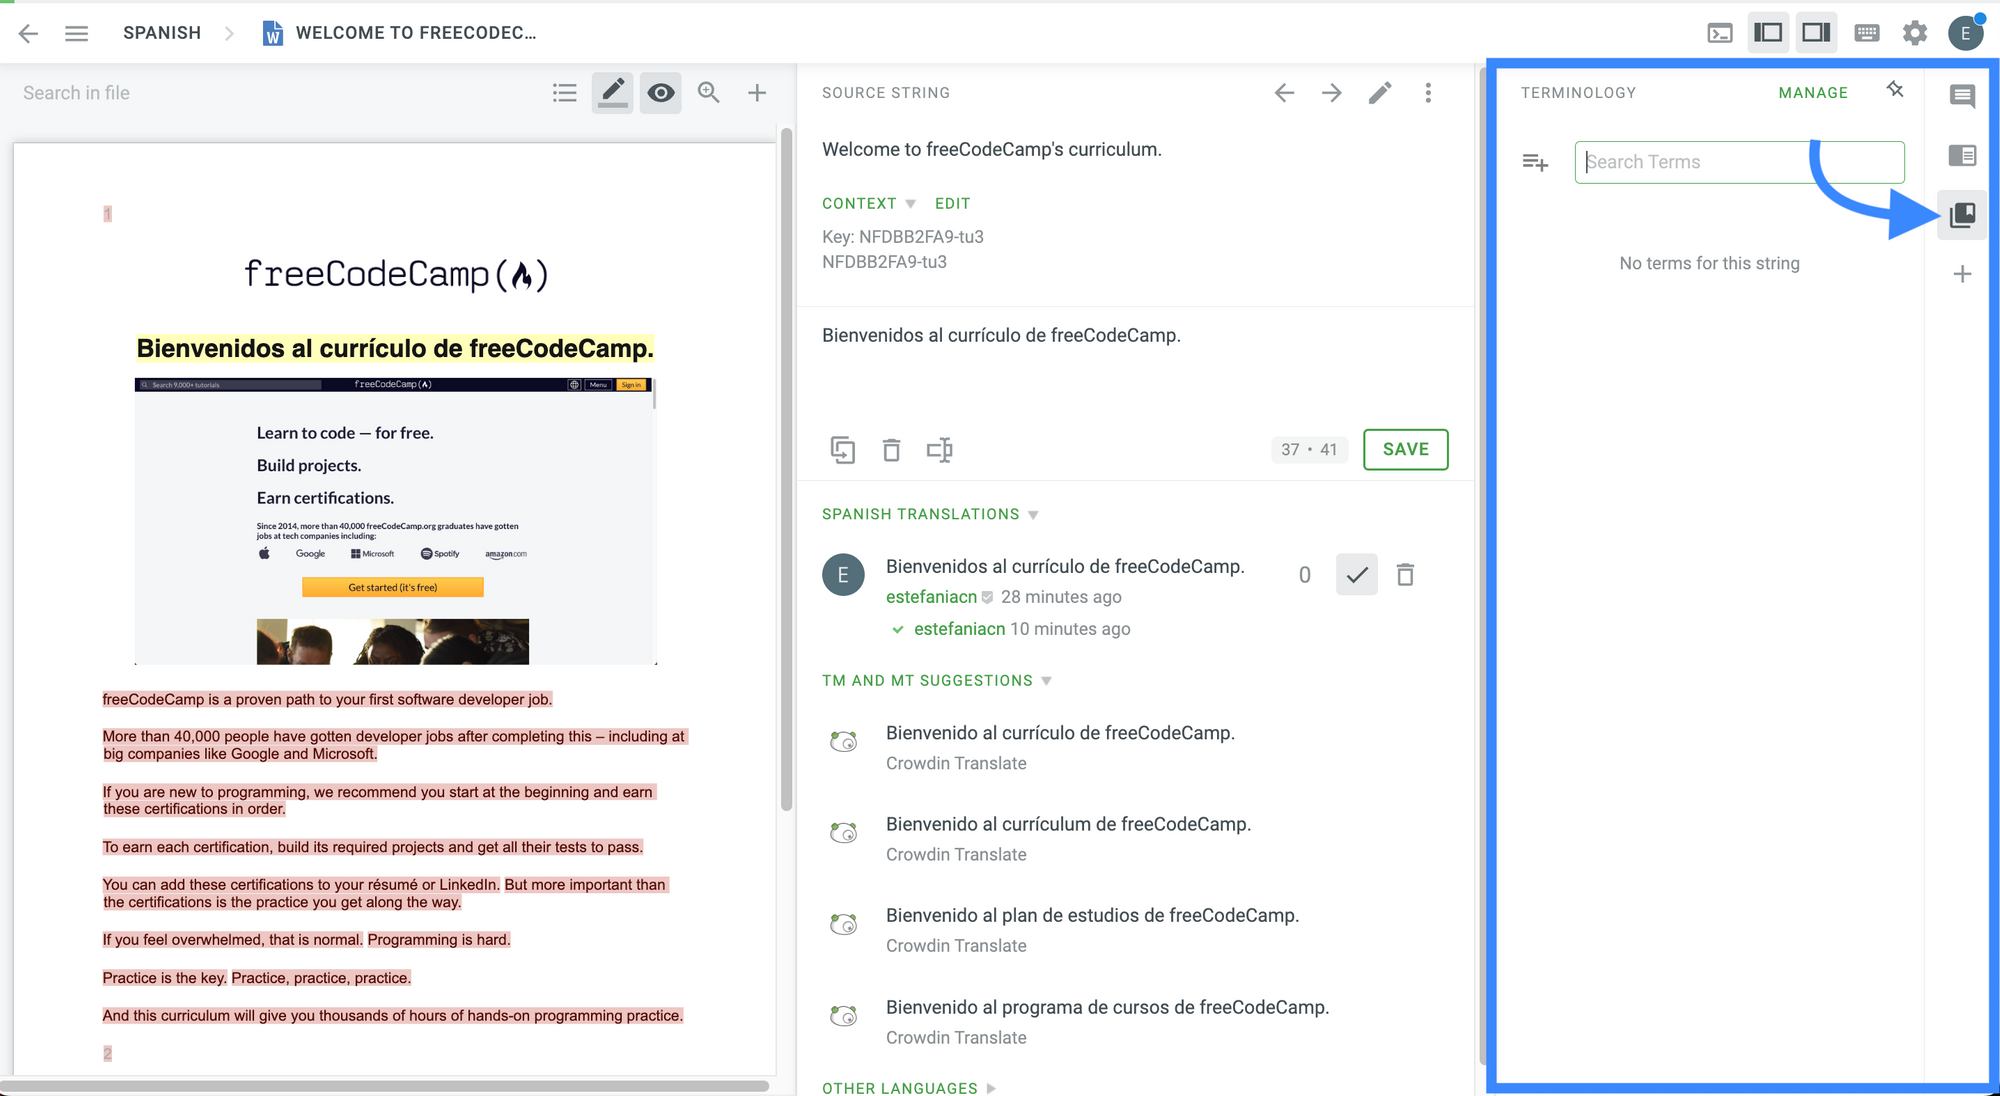 Search Terms.
What is really great about this search term feature is that, according to Crowdin:
If the specific term is not available in the project’s glossary, the system will show you Wikipedia explanations.
This can be very helpful to understand more about the context of a term when you are translating a resource.
And the last option is a plus icon that will take you to the Crowdin Store, where you can find apps and integrations for your project and you will be able to access them on the sidebar.
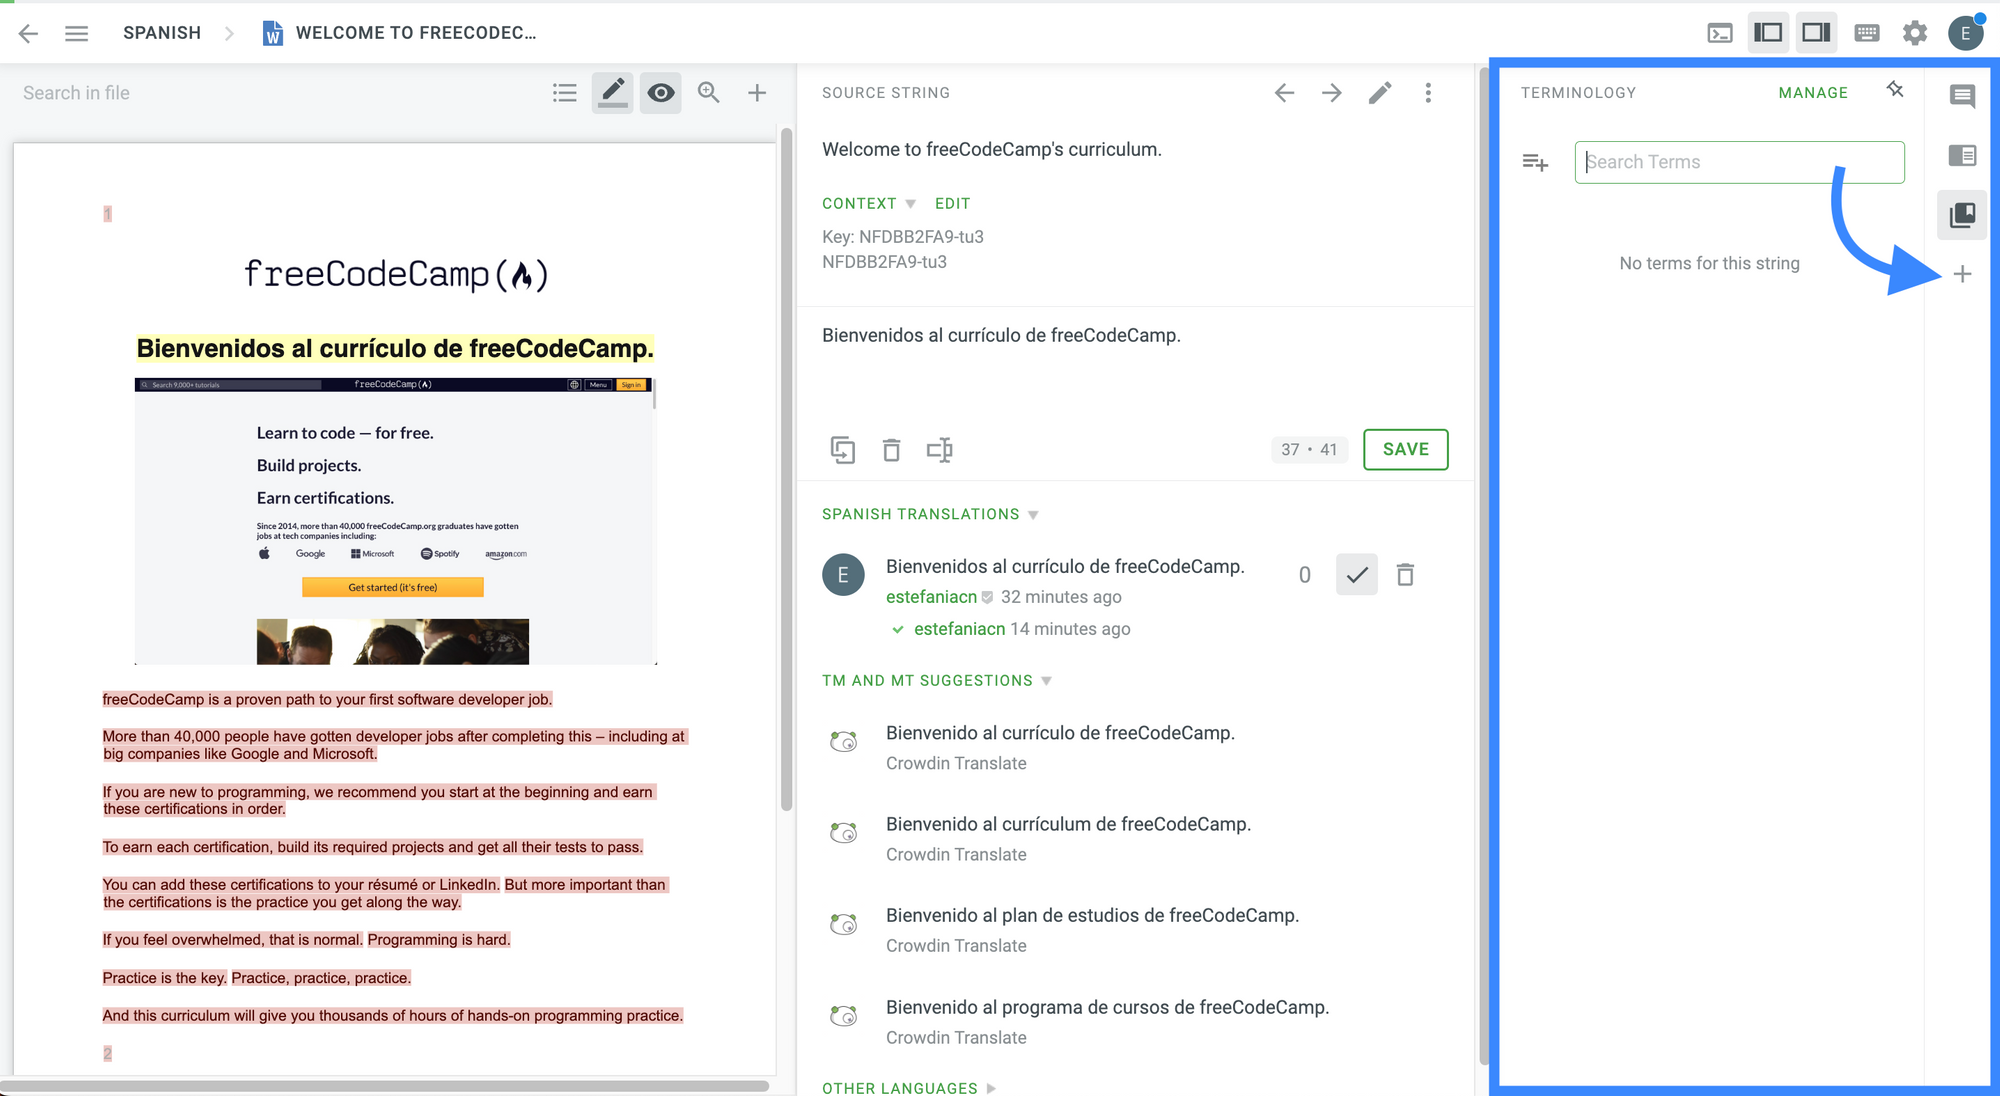 Go to the Crowdin Store.
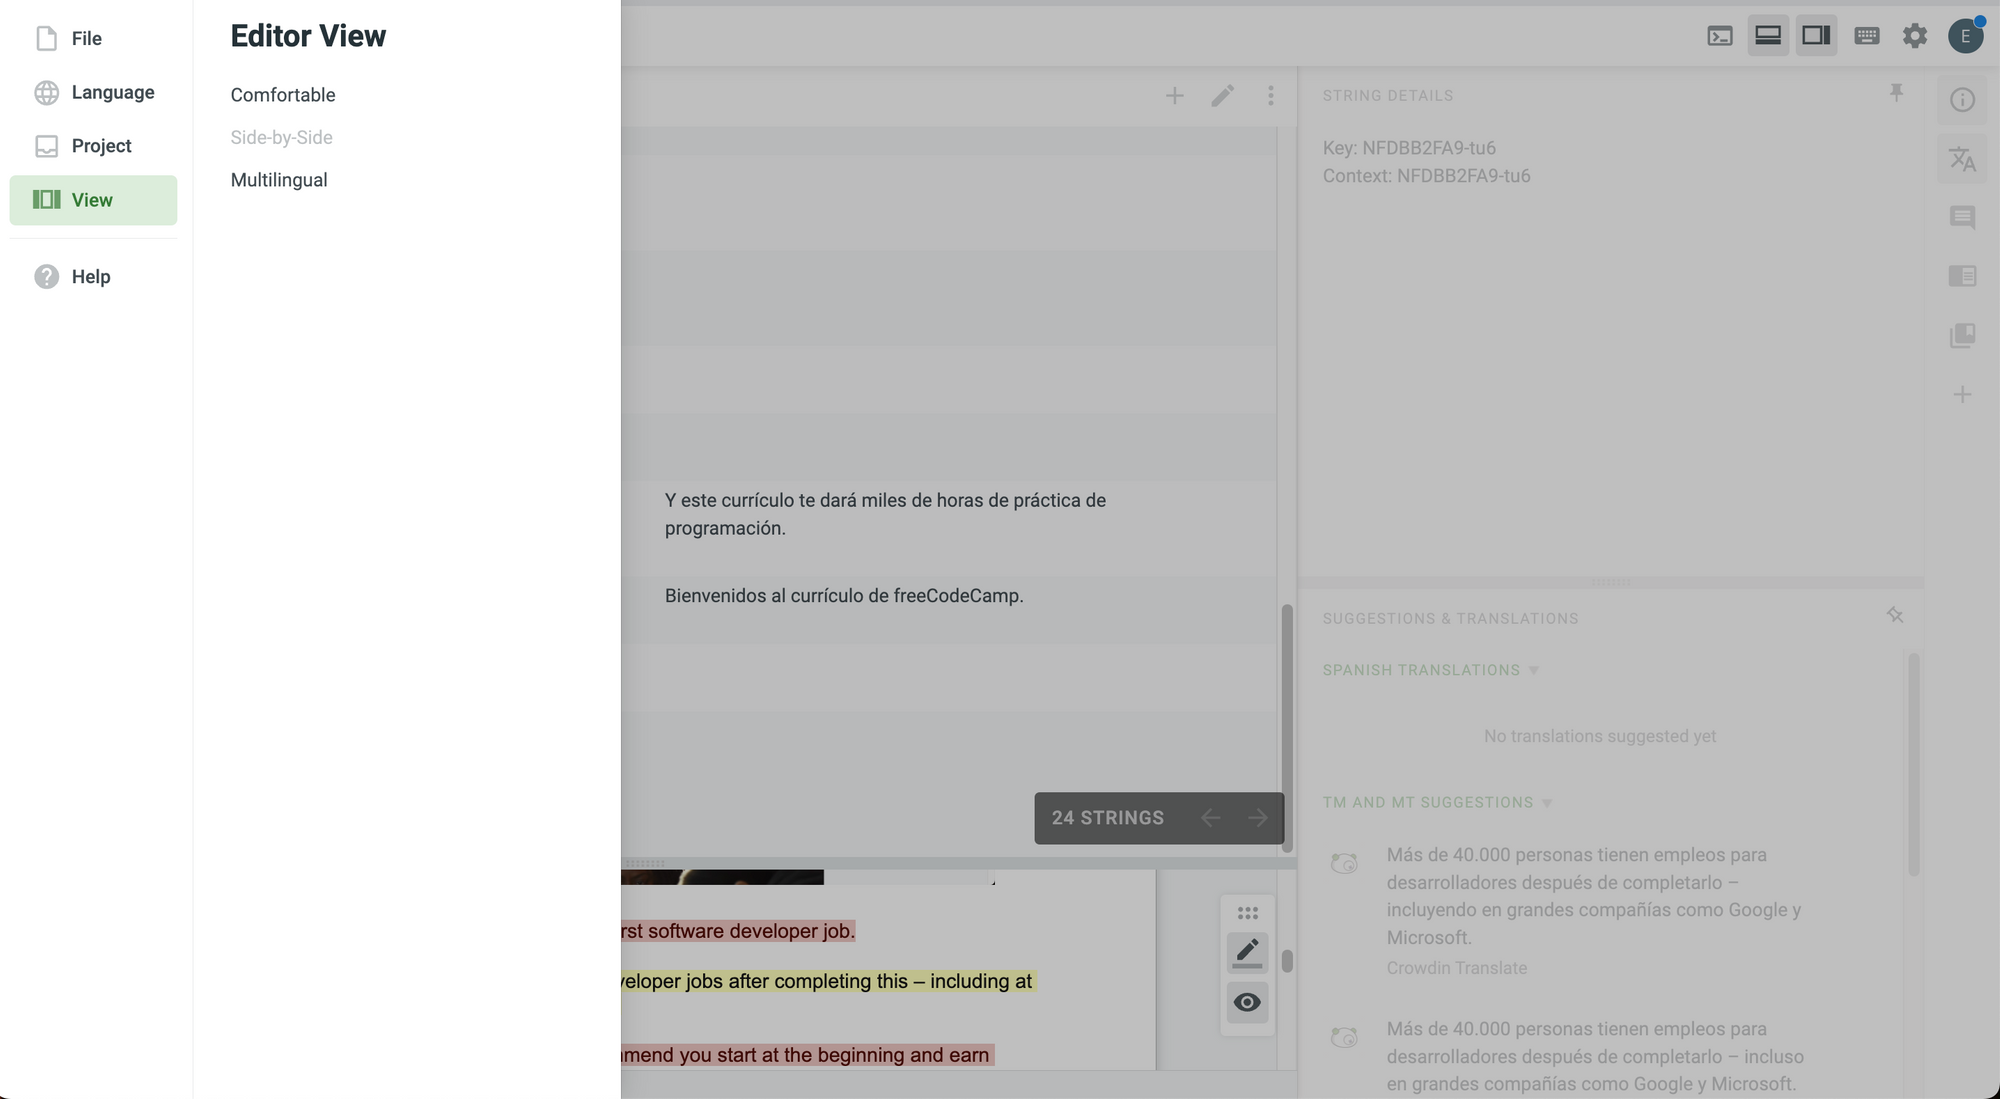
Translation Editor Modes
The translation editor has three modes to customize the layout in a way that fits your needs — Comfortable Mode, Side-by-Side Mode, and Multilingual Mode.
Comfortable Mode
- Primarily used for translations.
- It has the four main sections that we saw in the previous section.
 Layout in the Comfortable Mode.
How to Switch Modes
To switch to another mode, you need to click on the menu icon at the top left of the translation editor:
 Click on this menu icon.
Then, click on "View" and choose the mode that you would like to see:
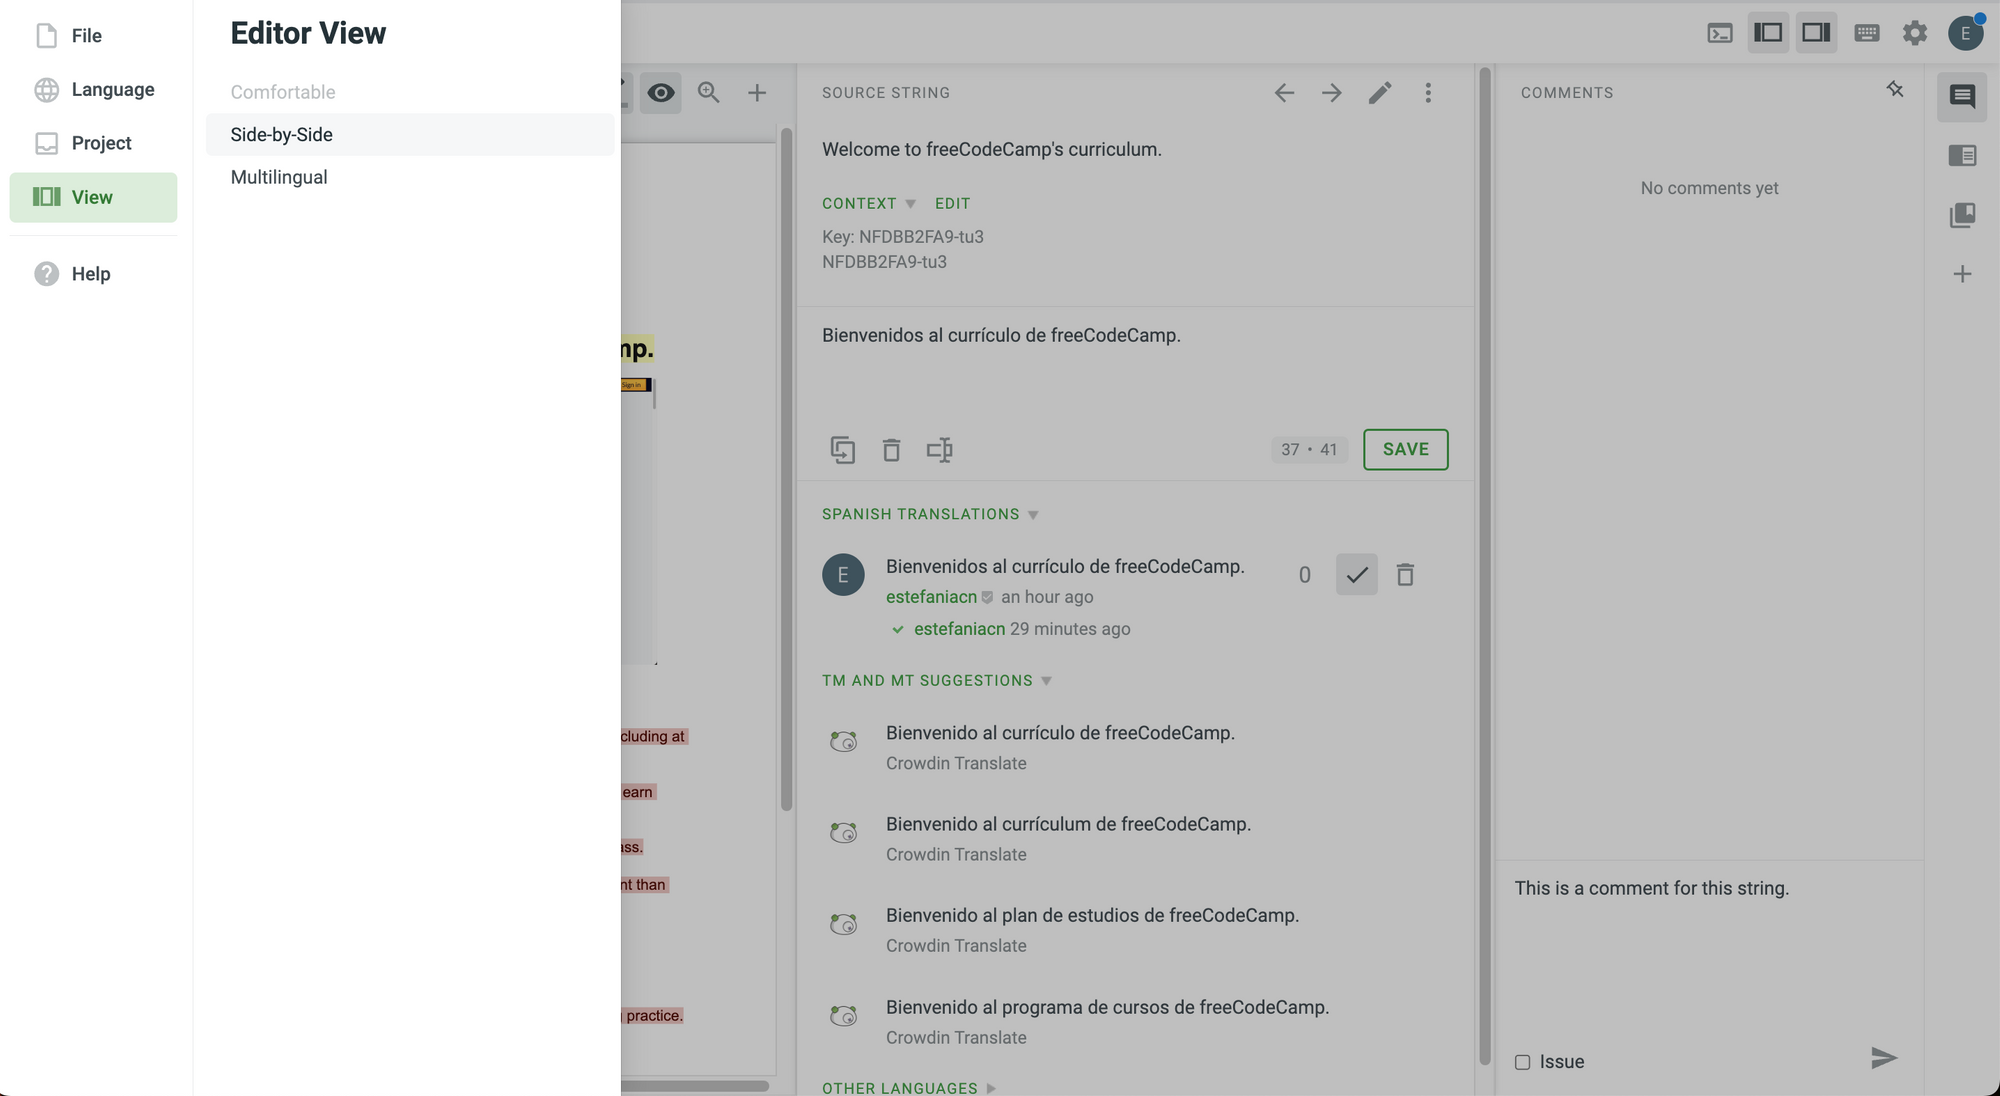 Change Editor View.
Side-by-Side Mode
- Primarily used by managers and proofreaders to approve the best translations and by translators to vote translations in a row.
The first time you switch to this view, you will see some helpful tips:
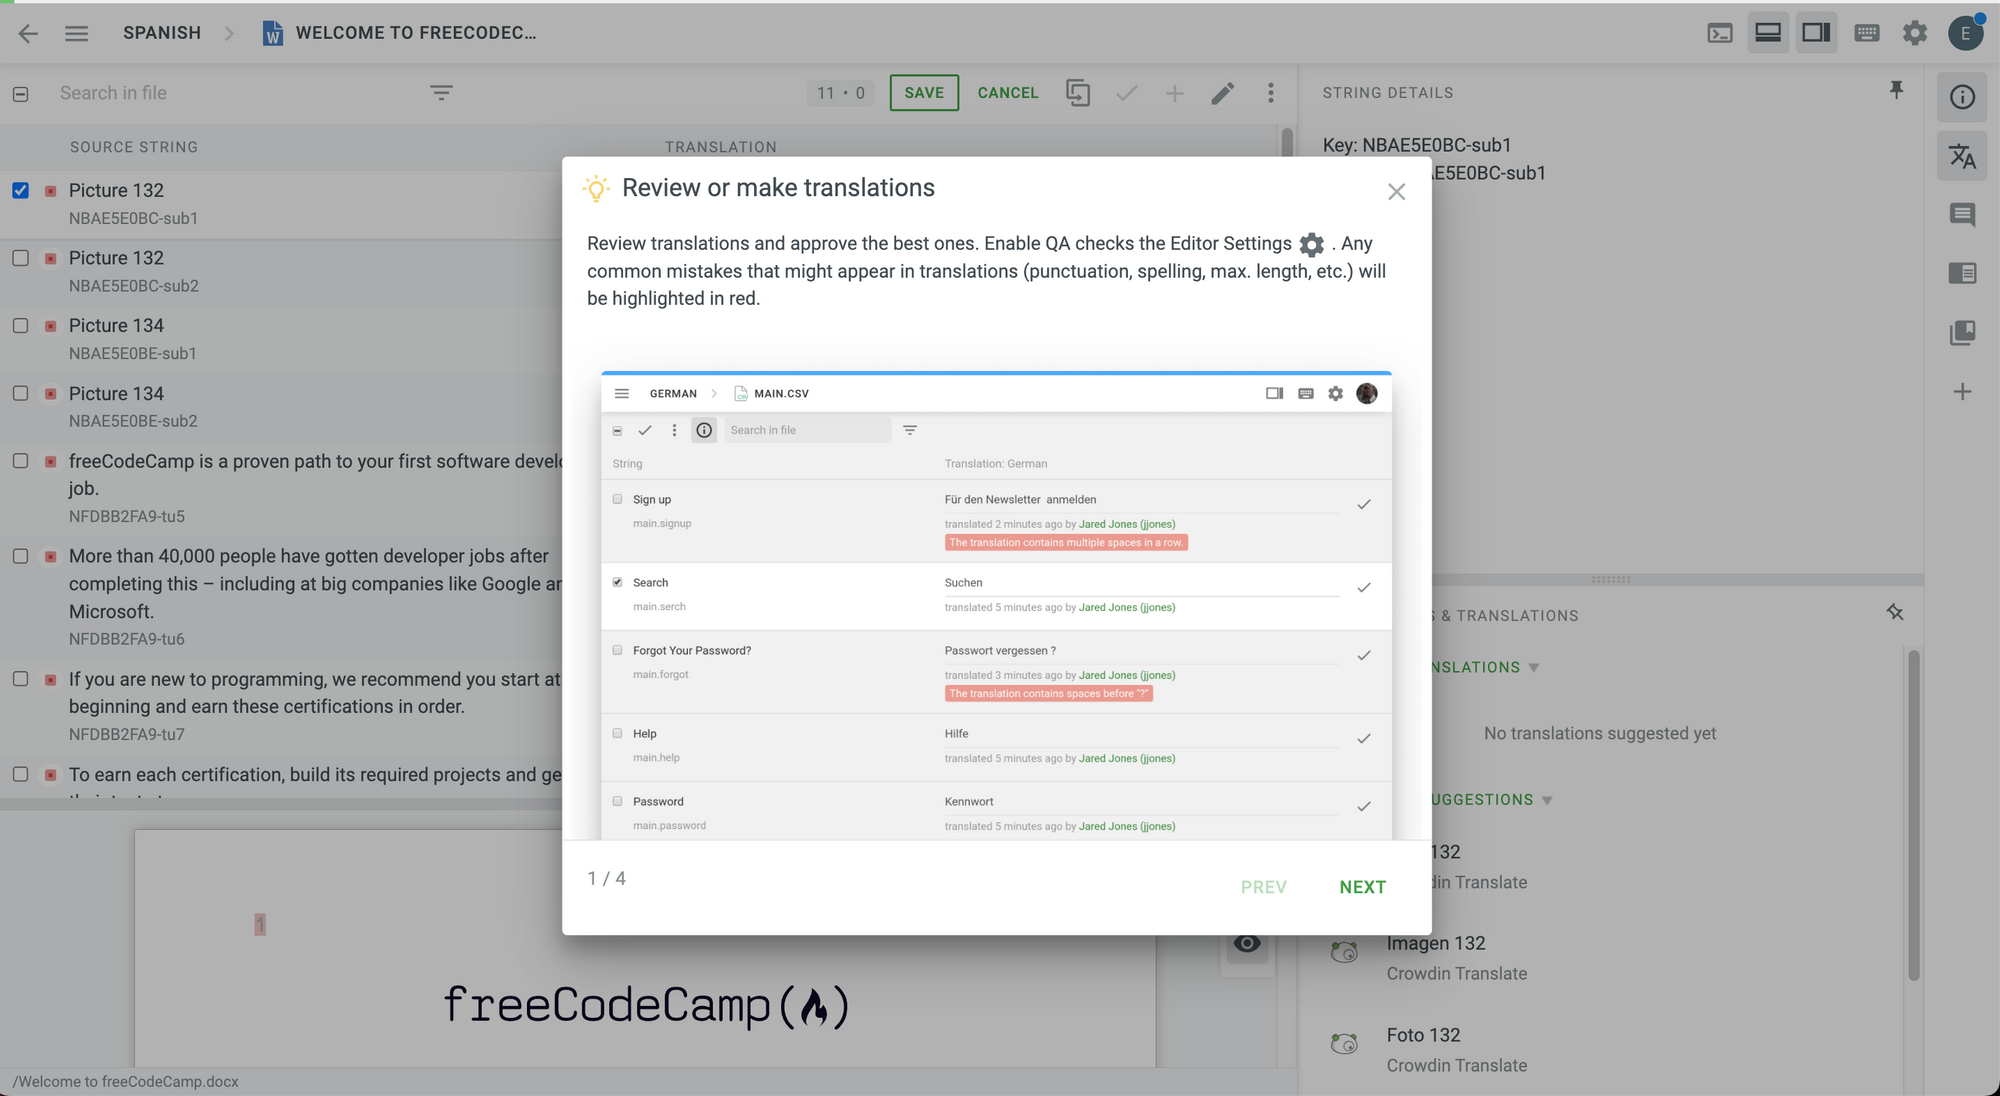 Review or make translations.
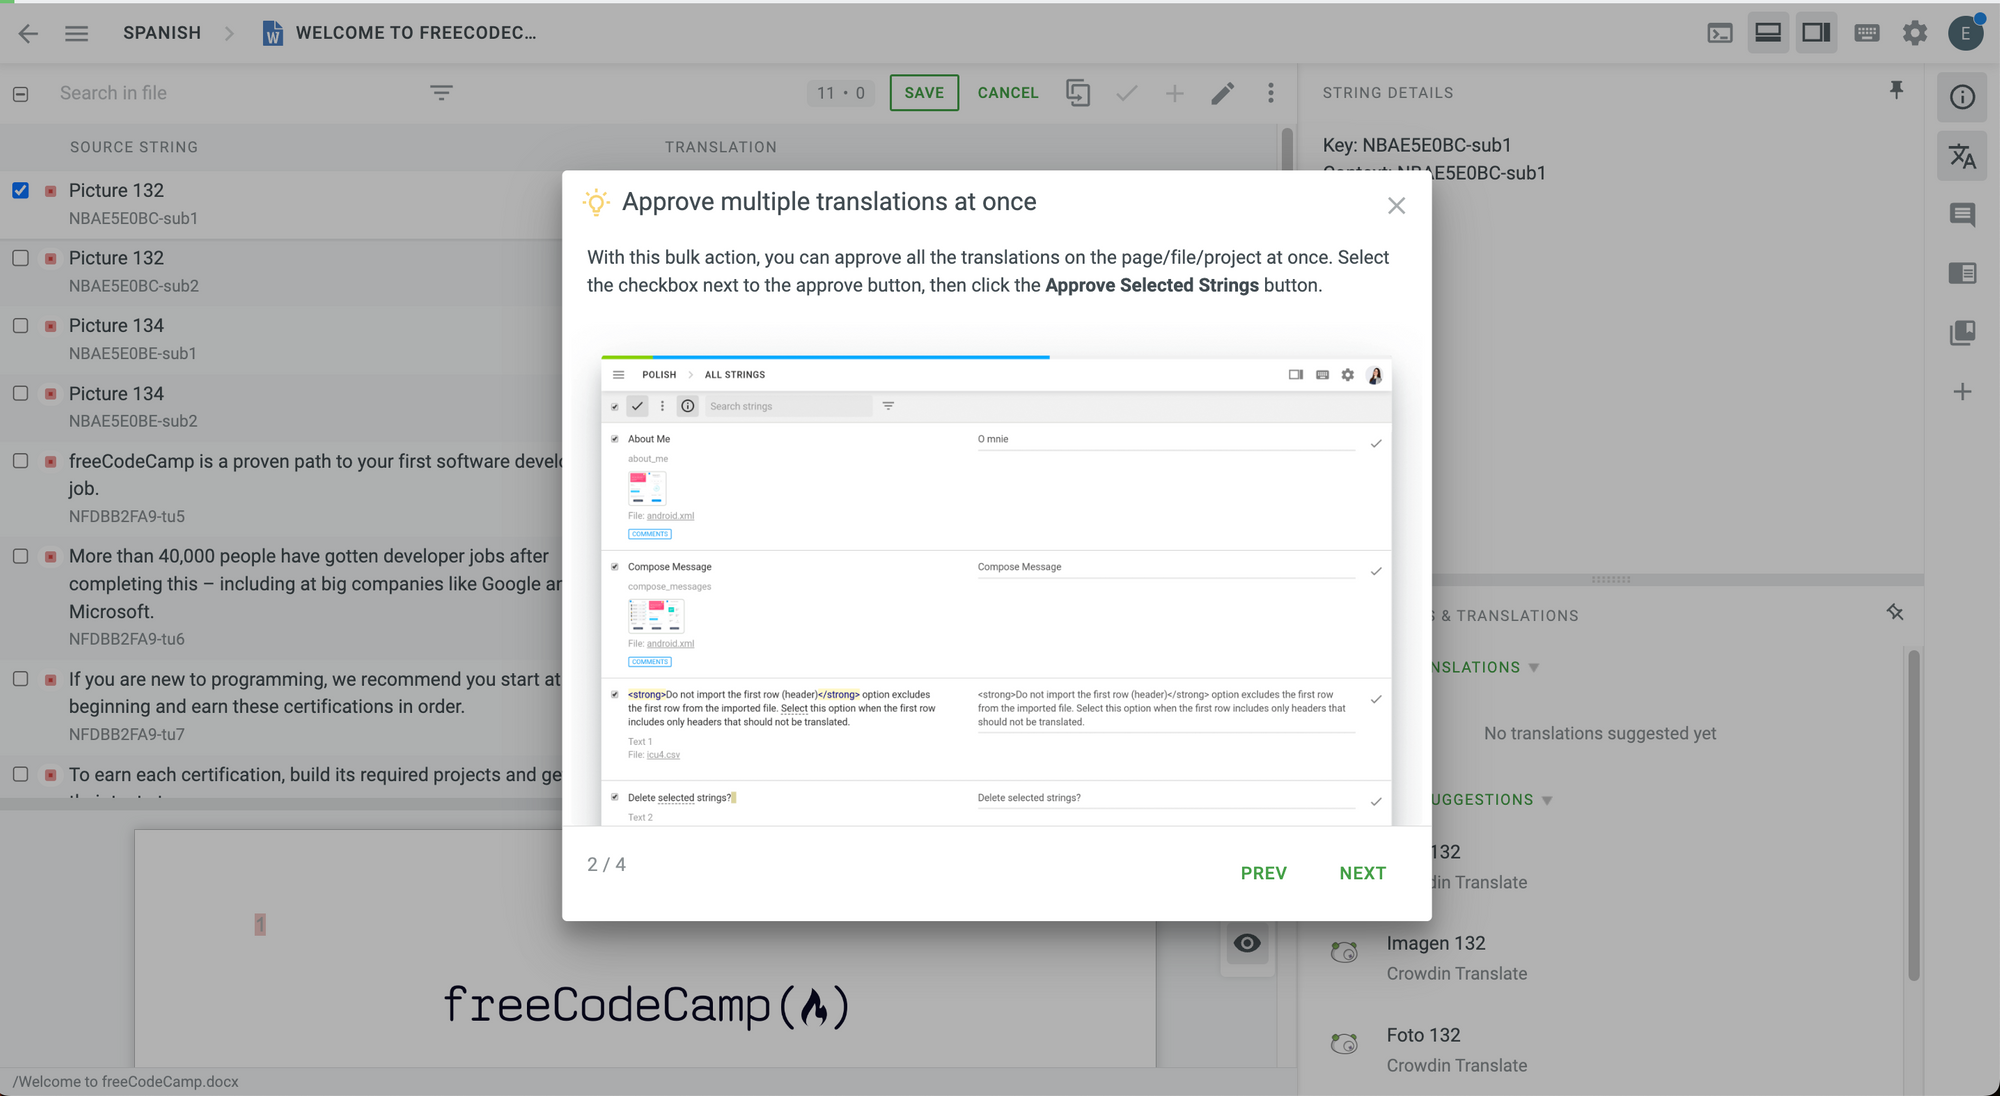 Approve multiple translations at once.
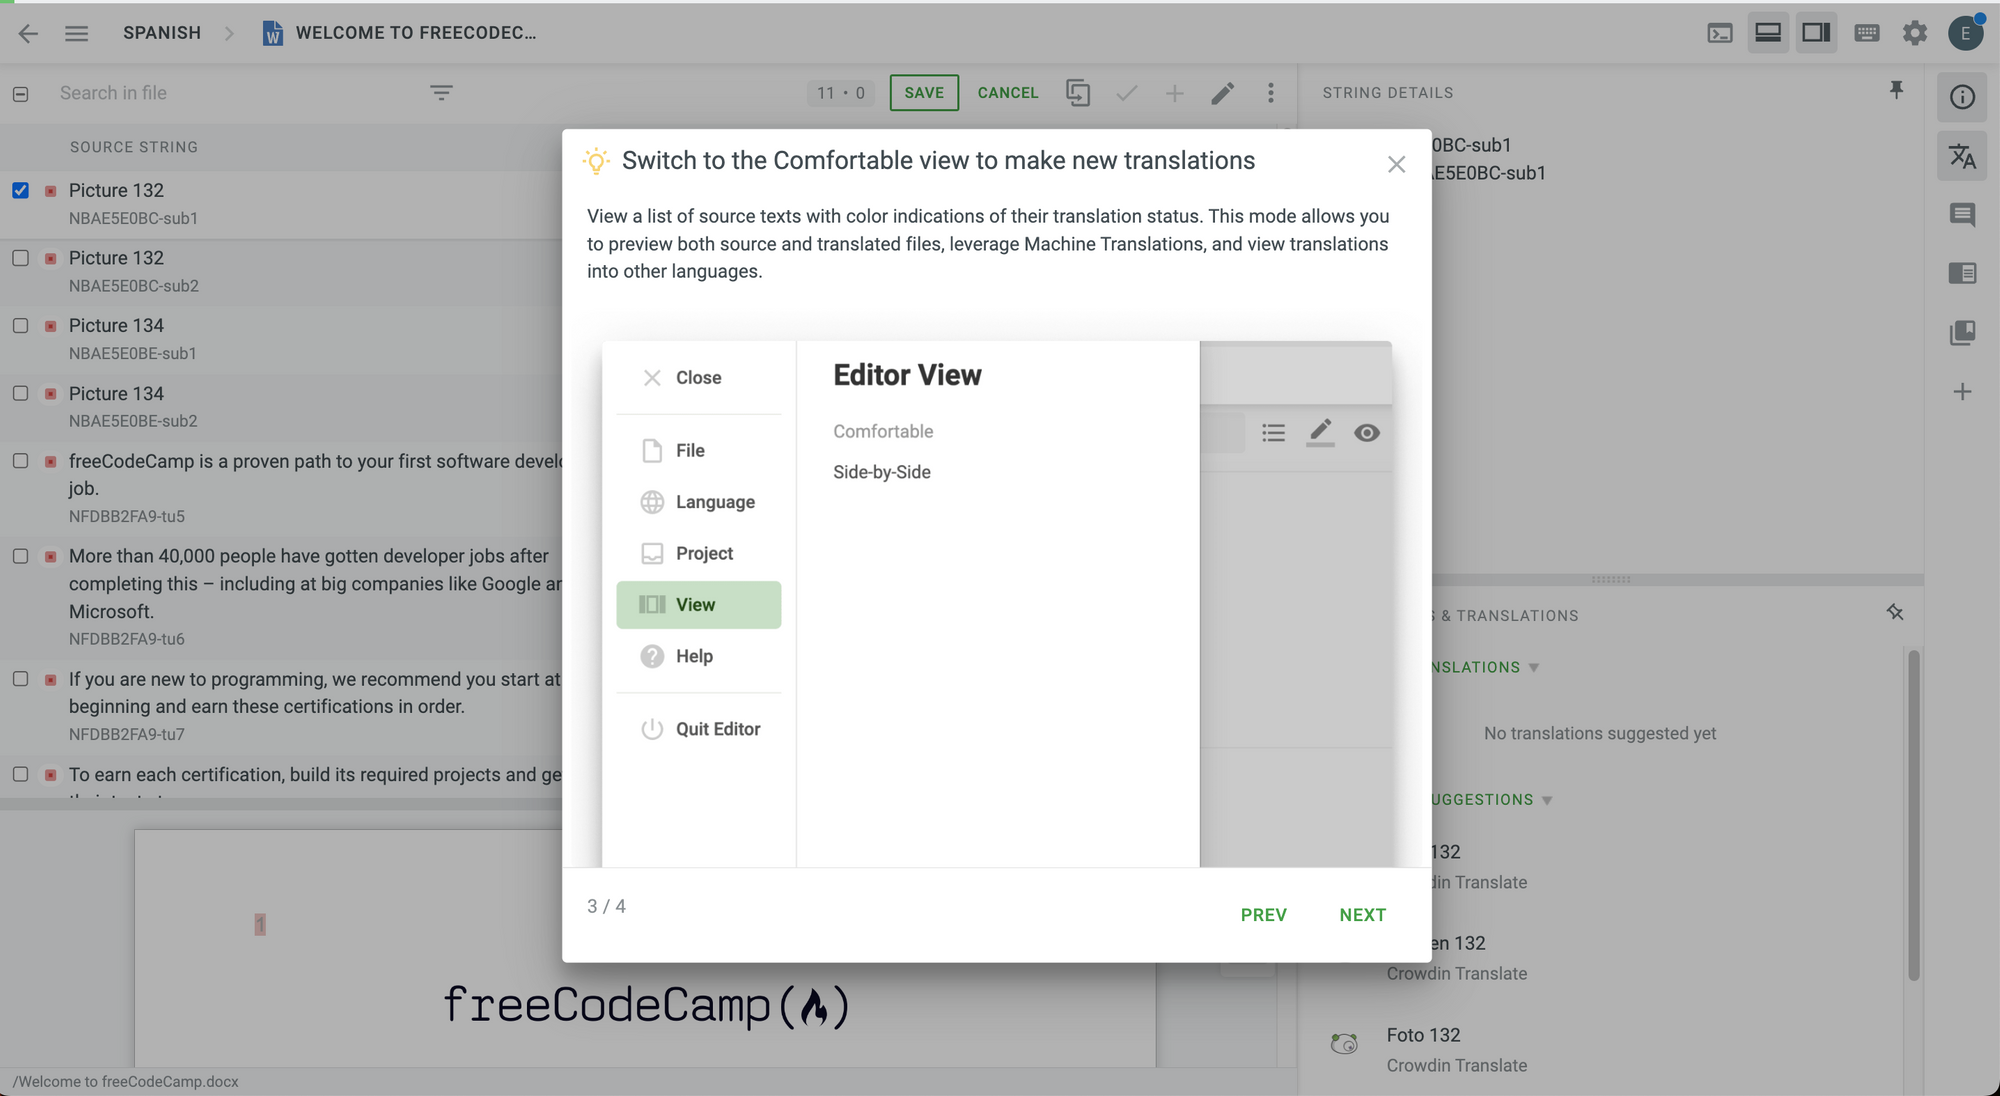 Switch to Comfortable view to make new translations.
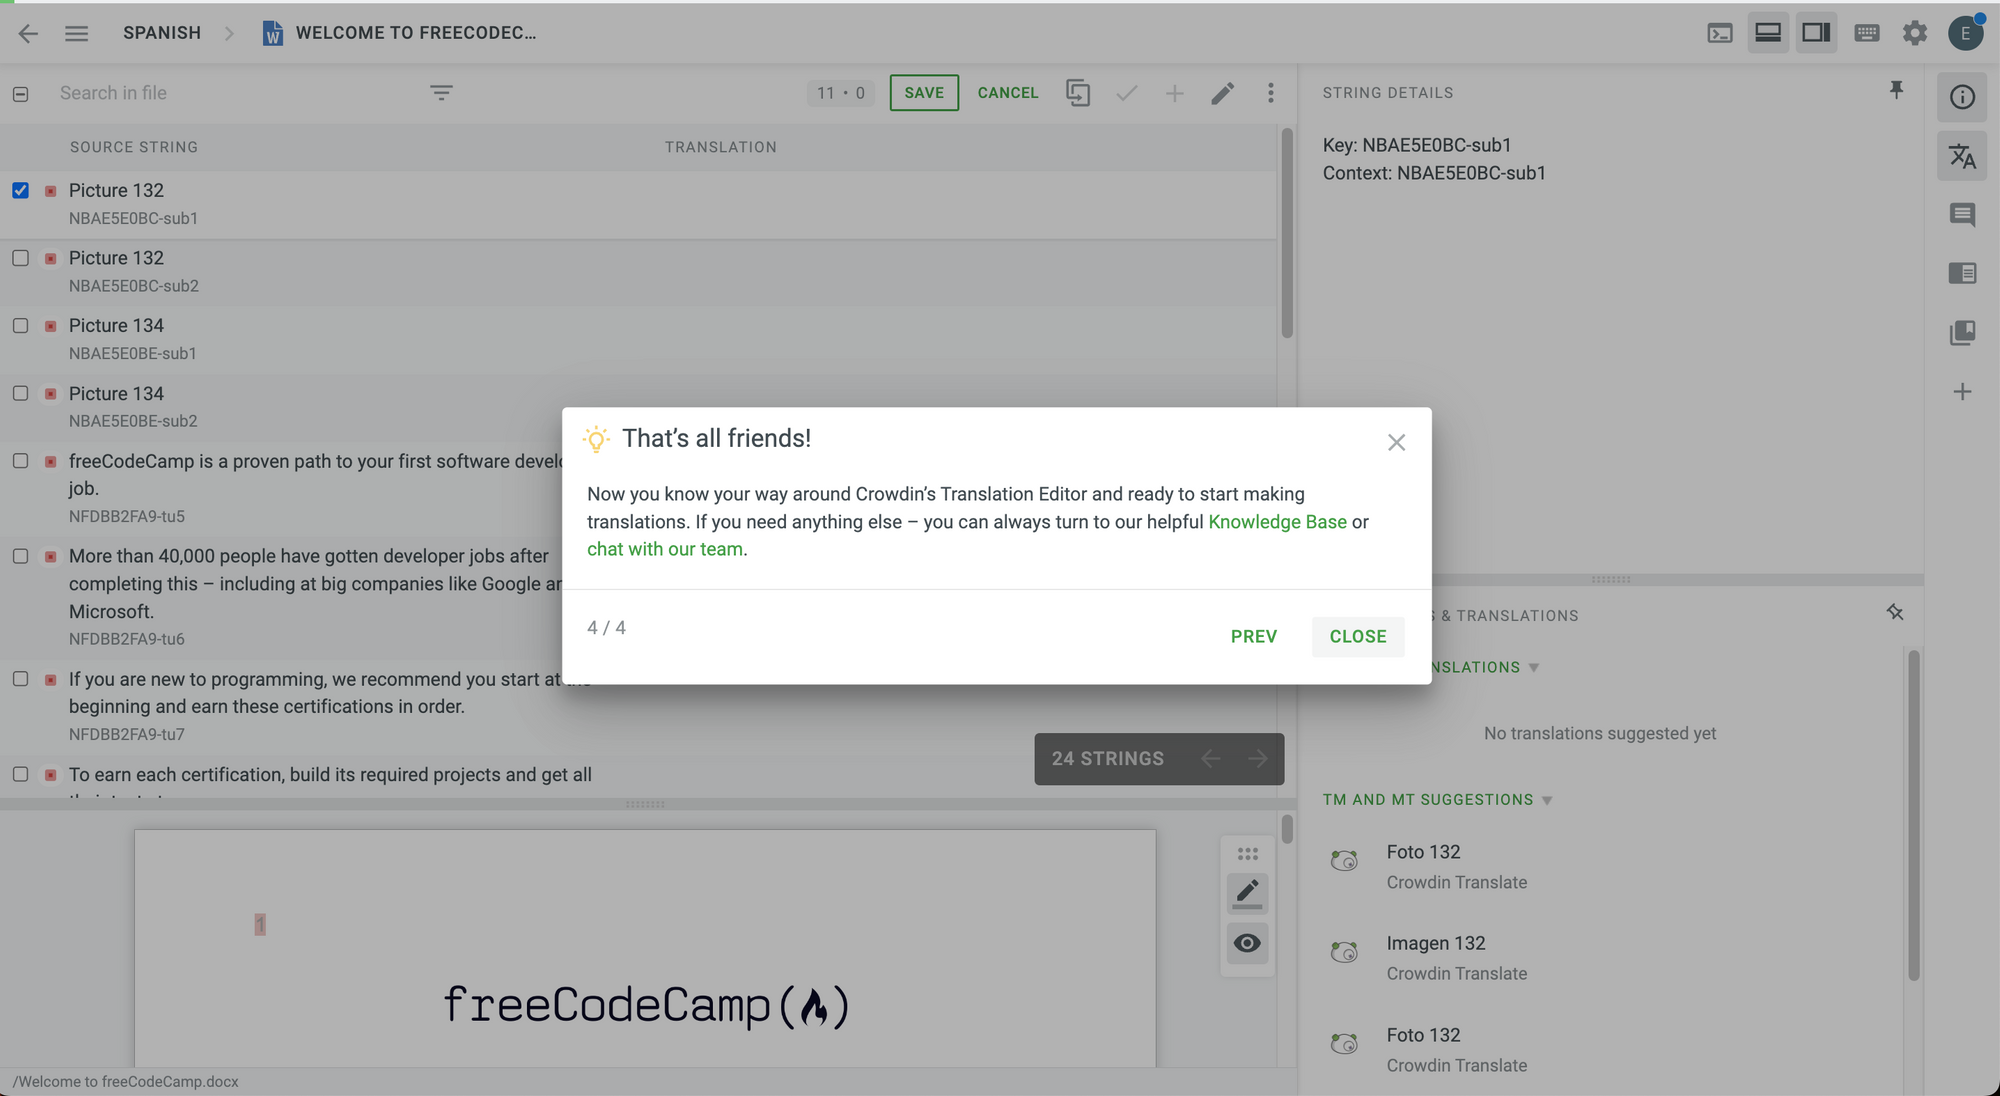 That's all friends!
This is what you will see when you enter side-by-side mode. Please take a moment to see it in detail and explore the changes:
 Side-by-Side Mode
To see all the possible string status in the side-by-side mode, let's go back to the Comfortable Mode to translate and save another string (but we will not approve the string this time).
 Translating another string.
In the side-by-side view, we now have a translated string, an approved string, and strings that we still need to translate.
 Side-by-Side Mode.
Let's start with a quick tour. You have four areas that you can resize to fit your needs:
- At the top left, we find the list of strings. You can select multiple string for bulk operations such as approving multiple strings with just one click.
- At the bottom left, we find the preview of the source file.
- At the top right, we find the string details.
- At the bottom right, we find the current translations and suggestions. This is very similar to what you see in the Comfortable mode.
Toolbar
 Toolbar.
At the top of the list of string, you will see multiple tools, including (from left to right):
- Search for a string.
- Change sorting criteria.
- String length in the source file and in the translated version.
- Save button.
- Cancel button.
- Copy source.
- Approve string.
- Add string.
- Edit string.
- More options.
If you open the "More options" menu by clicking on the three dots, you will see more helpful options for the selected string(s).
 More options.
How to Sort the Strings
You will notice that, by default, the strings will be sorted by their status.
💡 Tip: Untranslated strings will be displayed first, so you will not see the strings in the order in which they appear in the source file.
You can change the sorting criteria by clicking on the filter icon next to the search field.
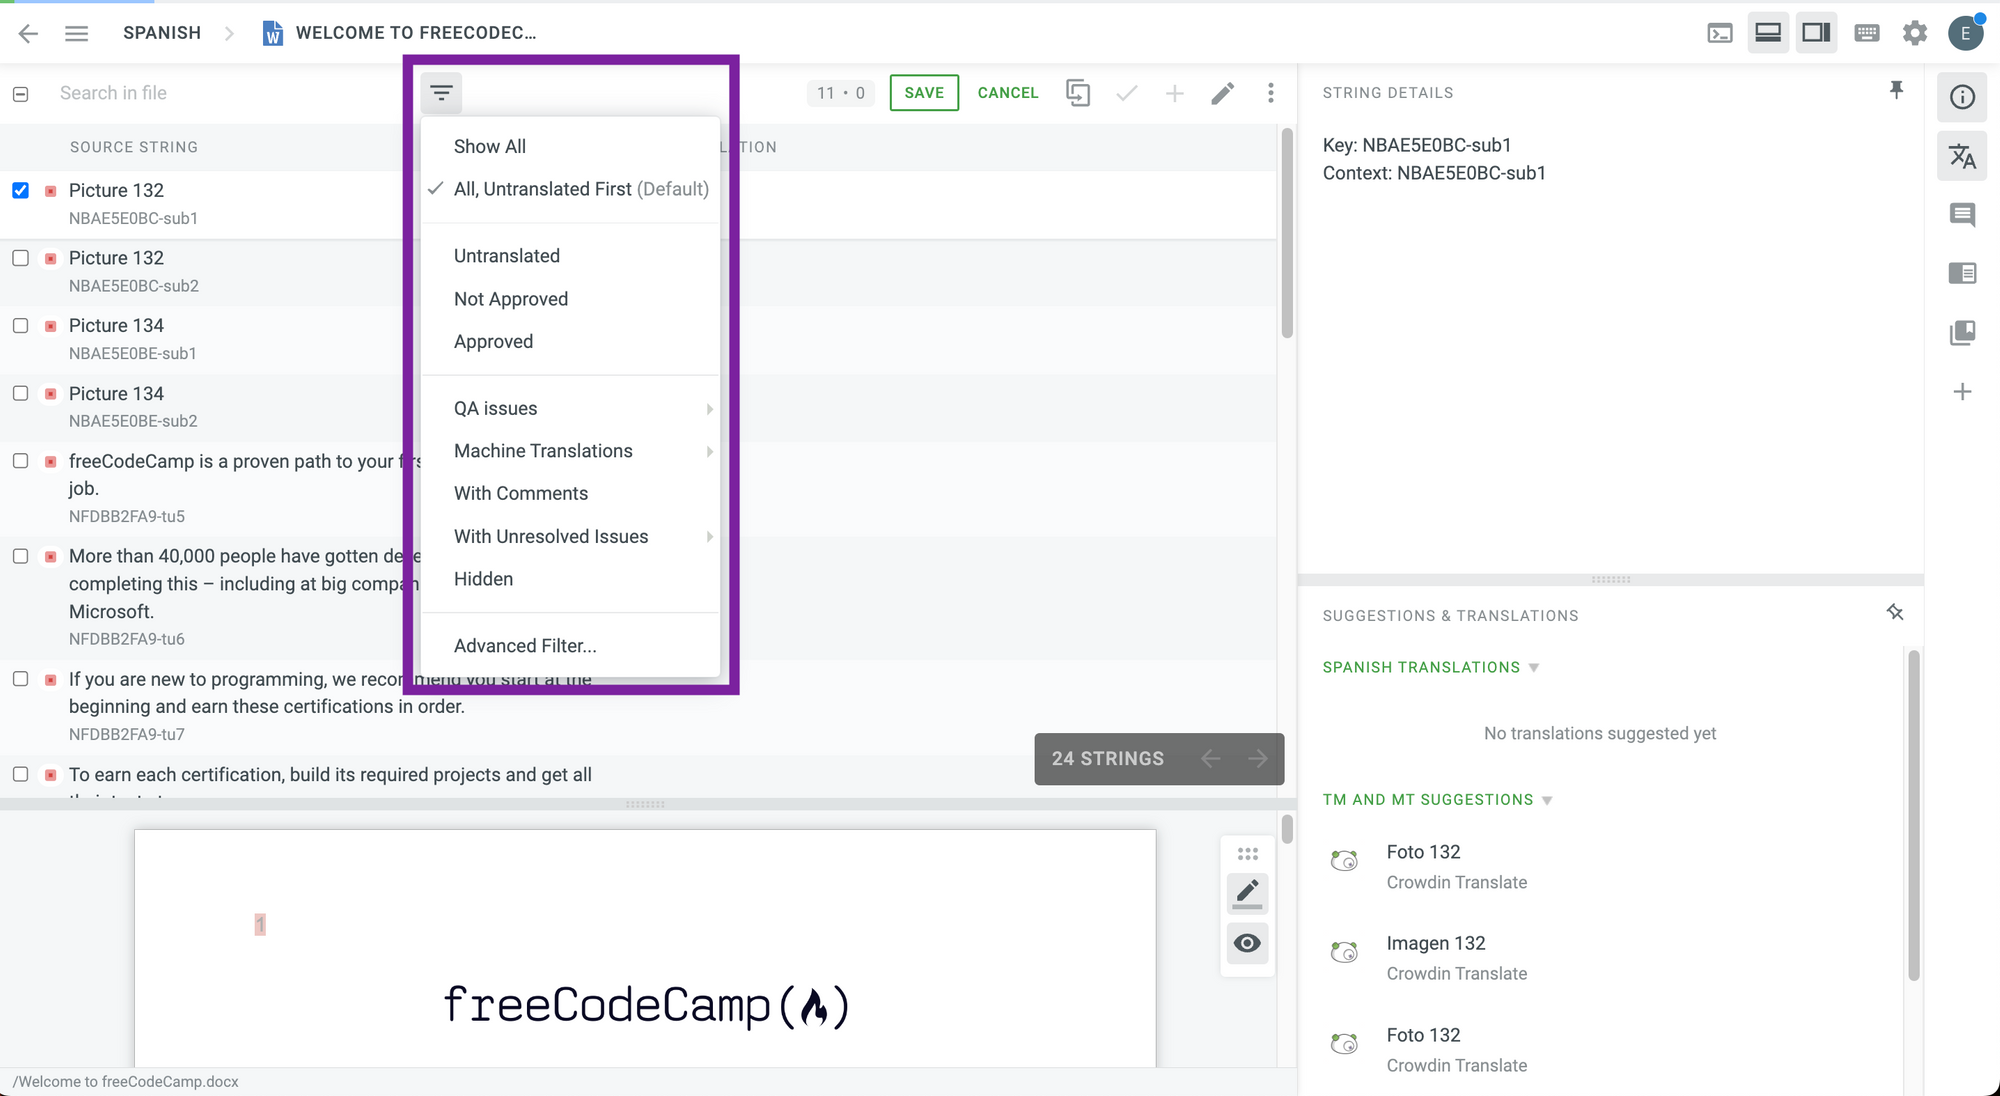 Filtering the Strings.
In this mode, you will also see different visual references of the status of each string.
Here, we can see:
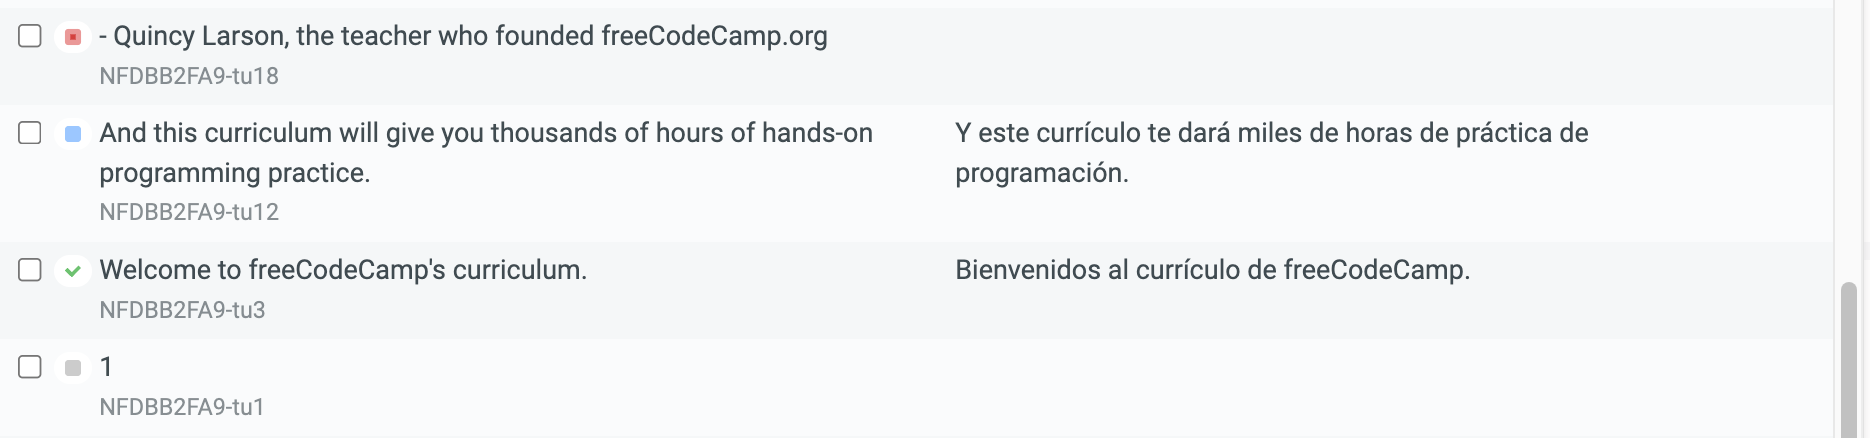 String status.
- An untranslated string in red.
- A translated string in blue.
- An approved string with a green checkmark.
- A hidden string in gray.
Multilingual Mode
Awesome. Now let's go to the multilingual mode. This mode is primarily used by translators and proofreaders to work with multiple languages at the same time.
💡 Tip: You can work on up to ten languages simultaneously.
To switch to this mode, click on the main menu icon at the top. Then select "View" and choose "Multilingual".
 Go to the Multilingual Mode.
When you choose "Multilingual", you will need to choose the languages that you are planning to work with.
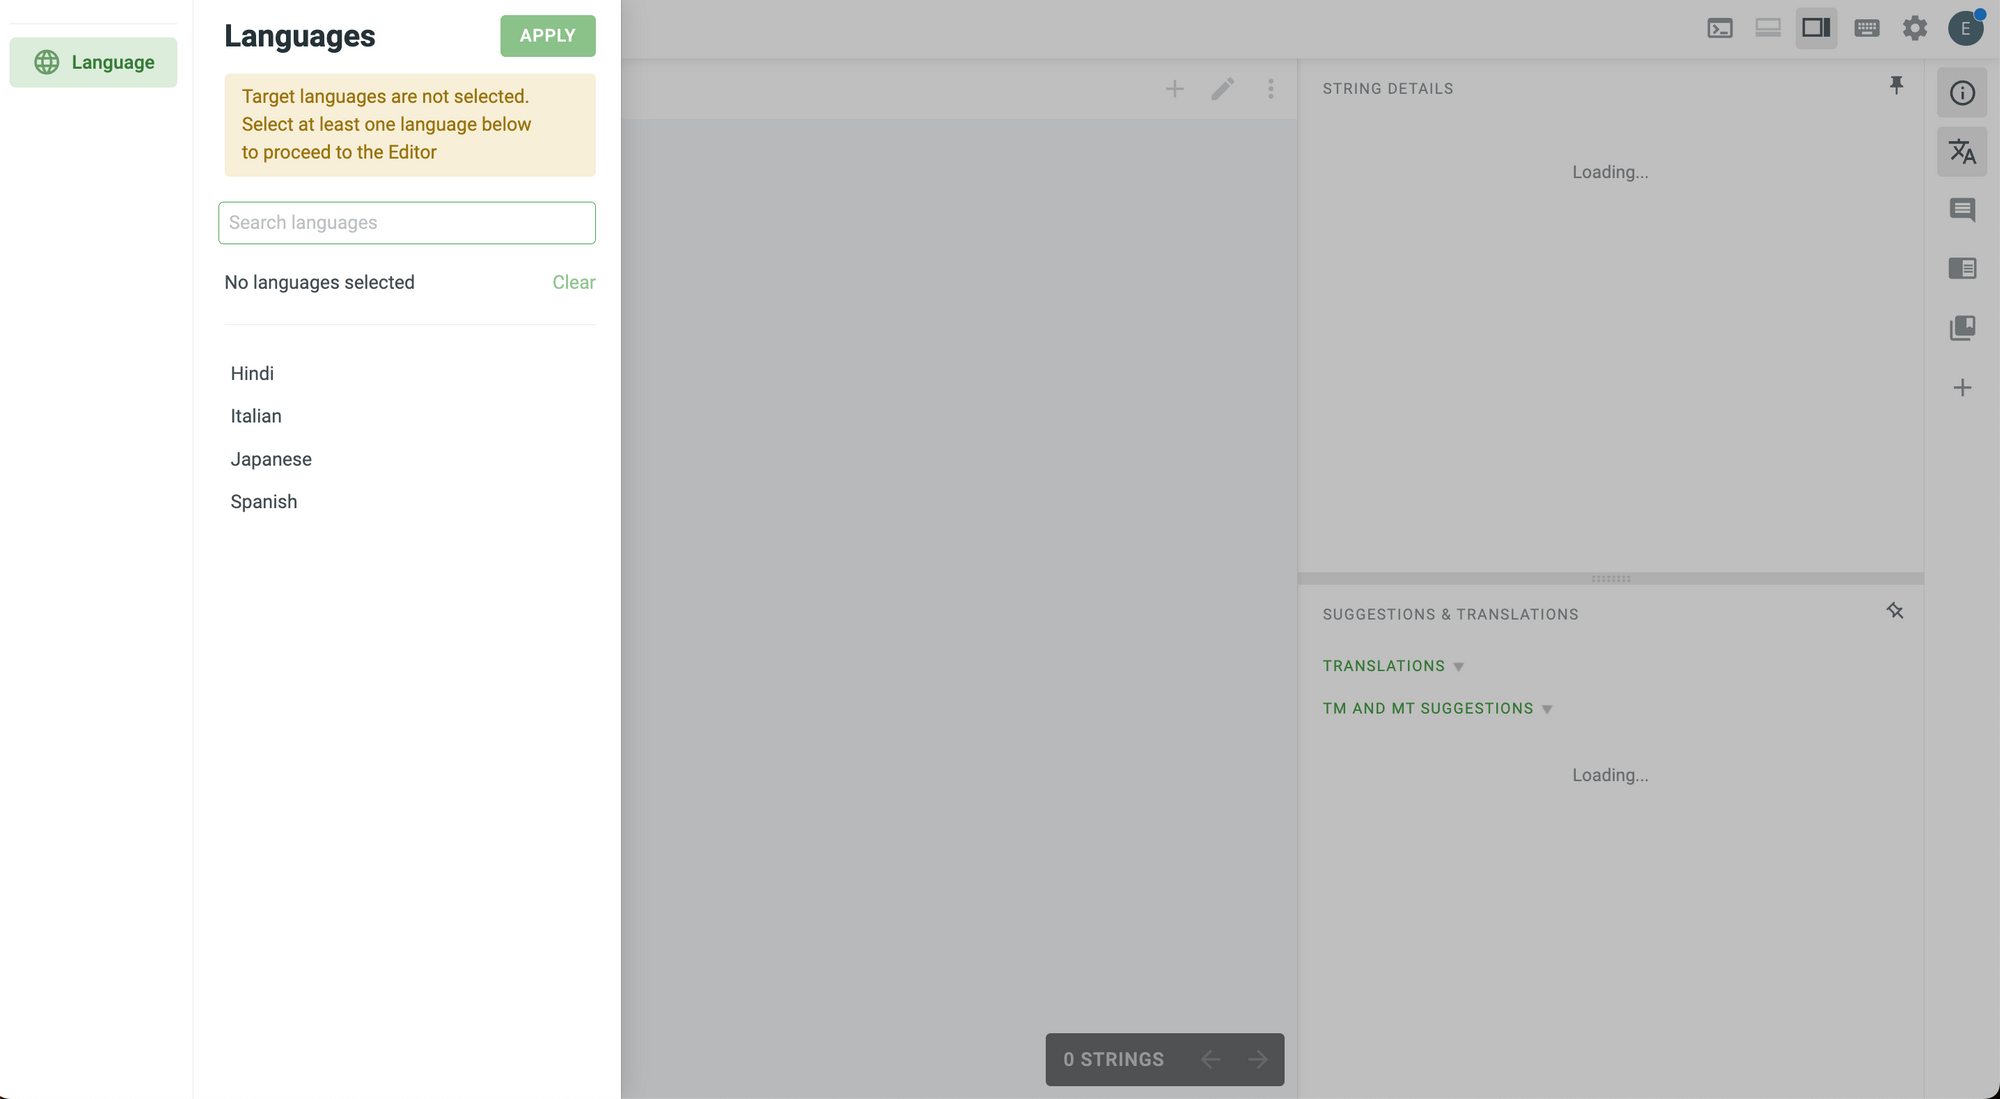 Languages for the Multilingual Mode.
Let's choose Spanish and Japanese just to see how this mode works. Click on them and then click on the "Apply" button.
You should see this:
 Multilingual Mode.
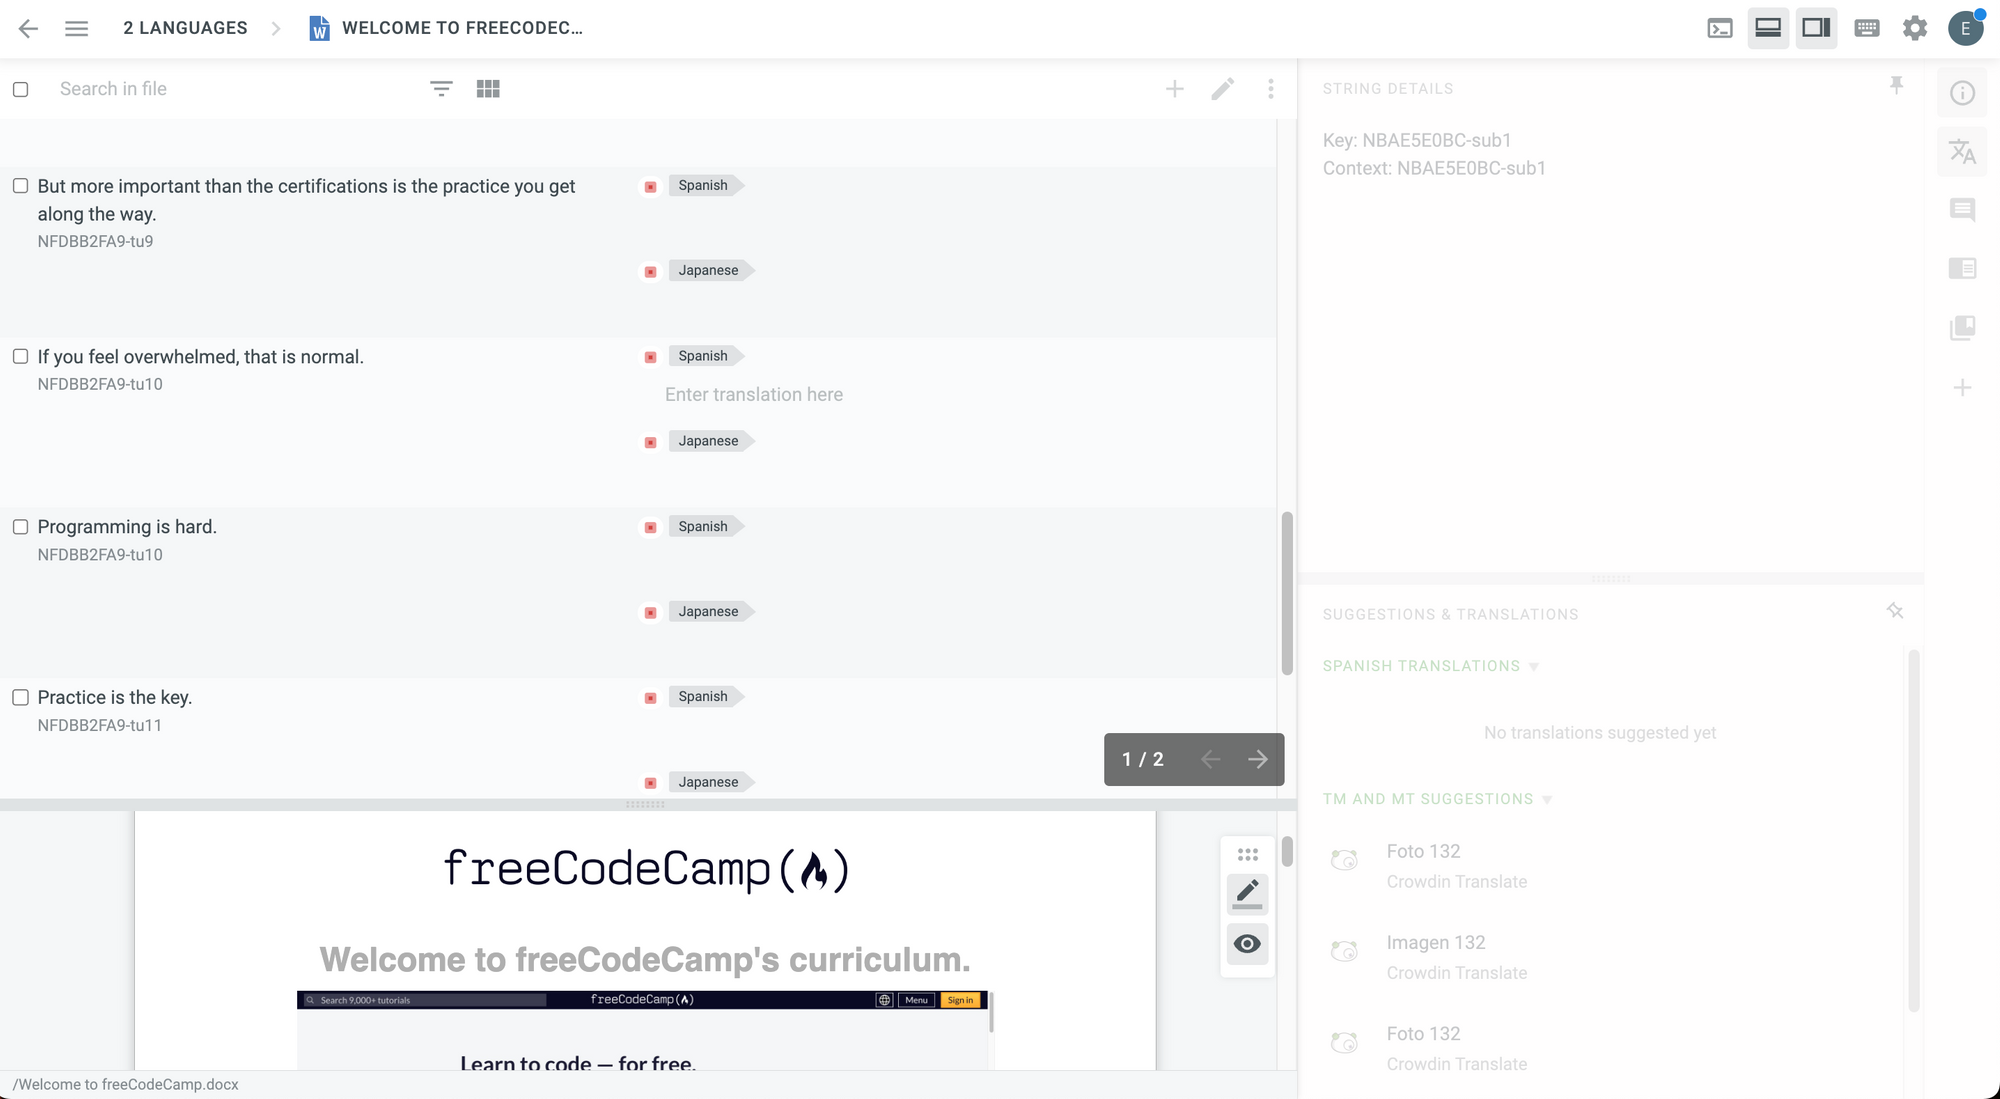
Each string will have a text field where you can write the translation for each of the target languages selected.

When you are working on the multilingual mode, you can switch between two possible views:
- List View.
- Grid View.
This is an example of the list view:
List view in Multilingual Mode.
To switch to Grid View, you need to click on the button in the toolbar at the top:
 Switch between list and grid view.
The other parts of the editor and the tools in this mode are very similar to the Side-by-Side view that you are already familiar with.
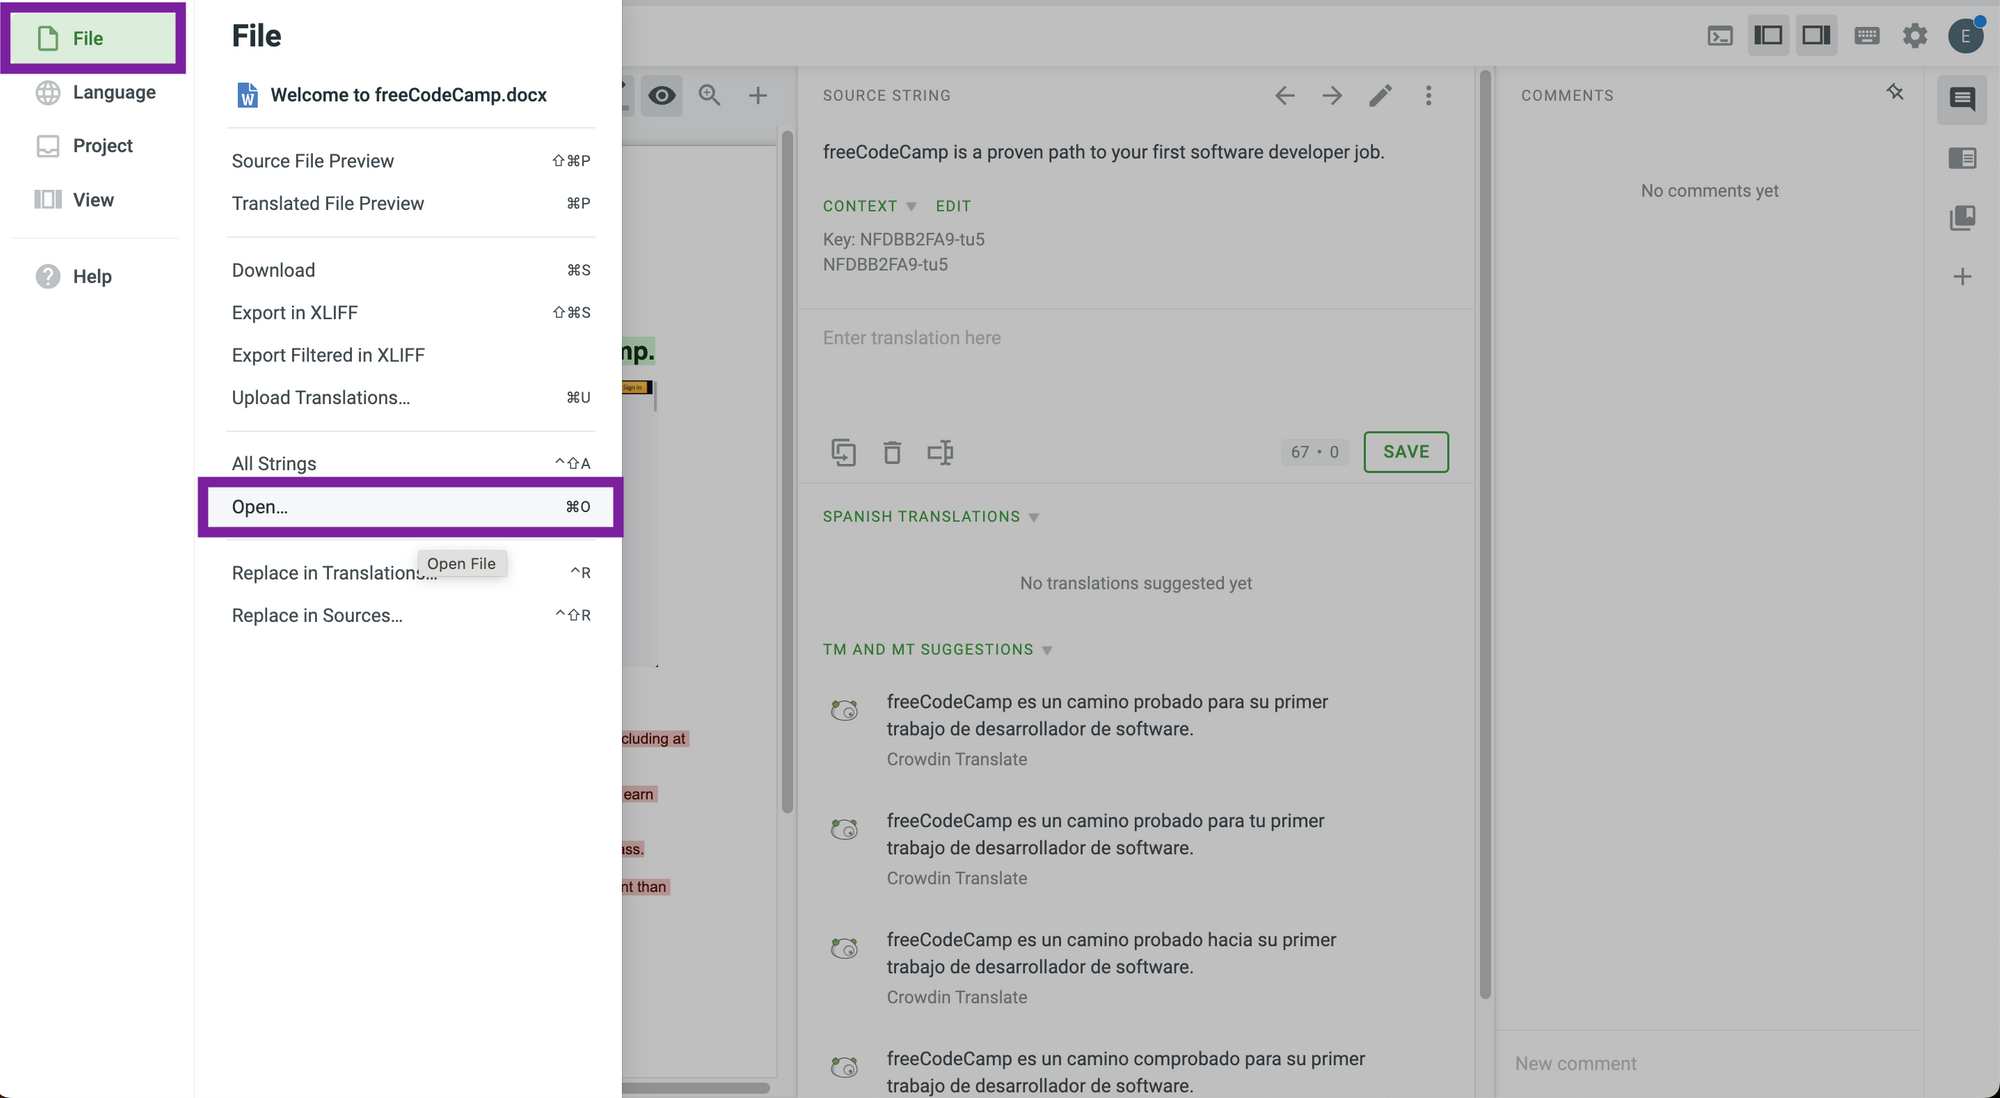
How to Switch to Another File
You may want to go to another file after translating all the strings in a different file. This is very easy to do.
To do that:
Click on the main menu at the top left.
 Main Menu.
Go to File and then choose "Open...".
 Open a File.
Choose the file that you would like to open and click on "Open" (or double-click on the file name).
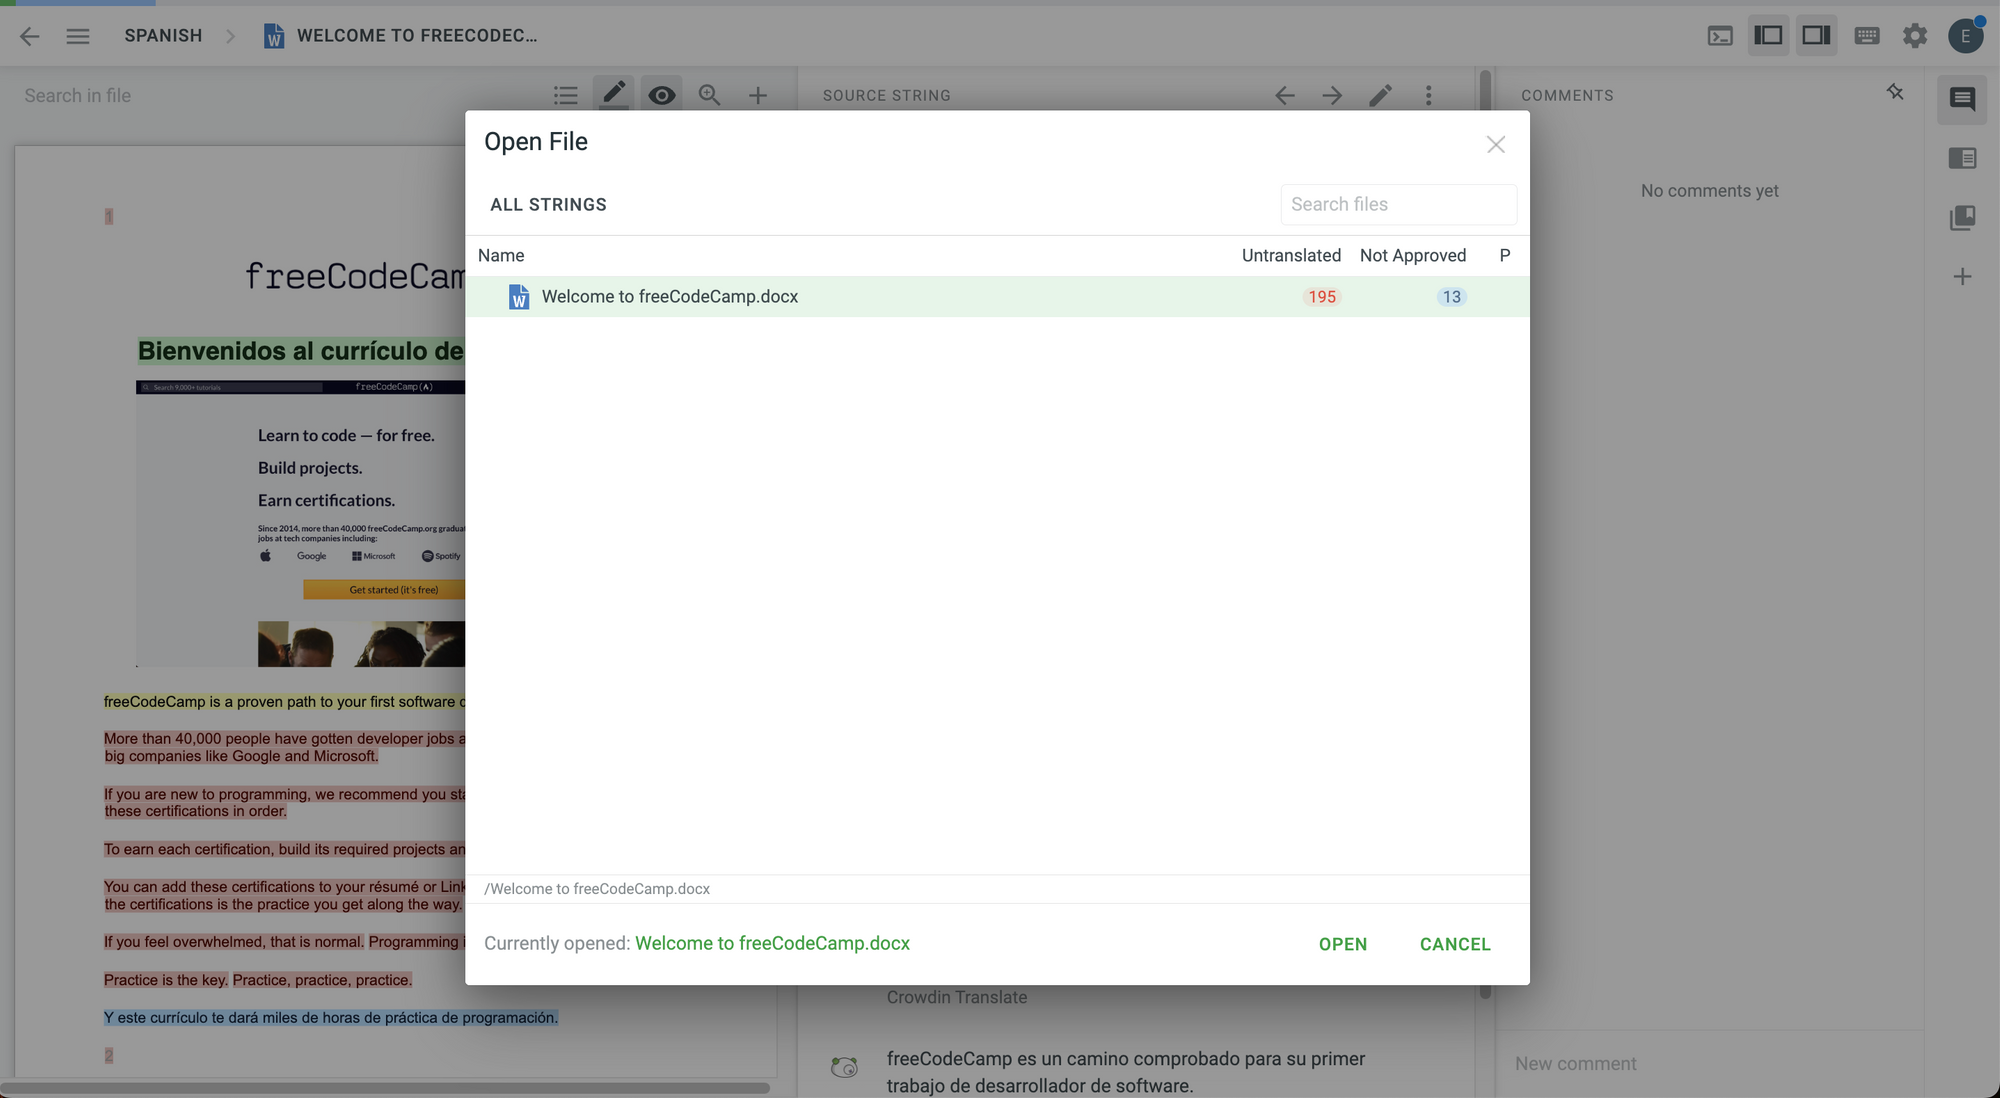 List of files.
💡 Tip: You can also get to the list of files much faster by clicking on the file name directly.
 Click on the file name.
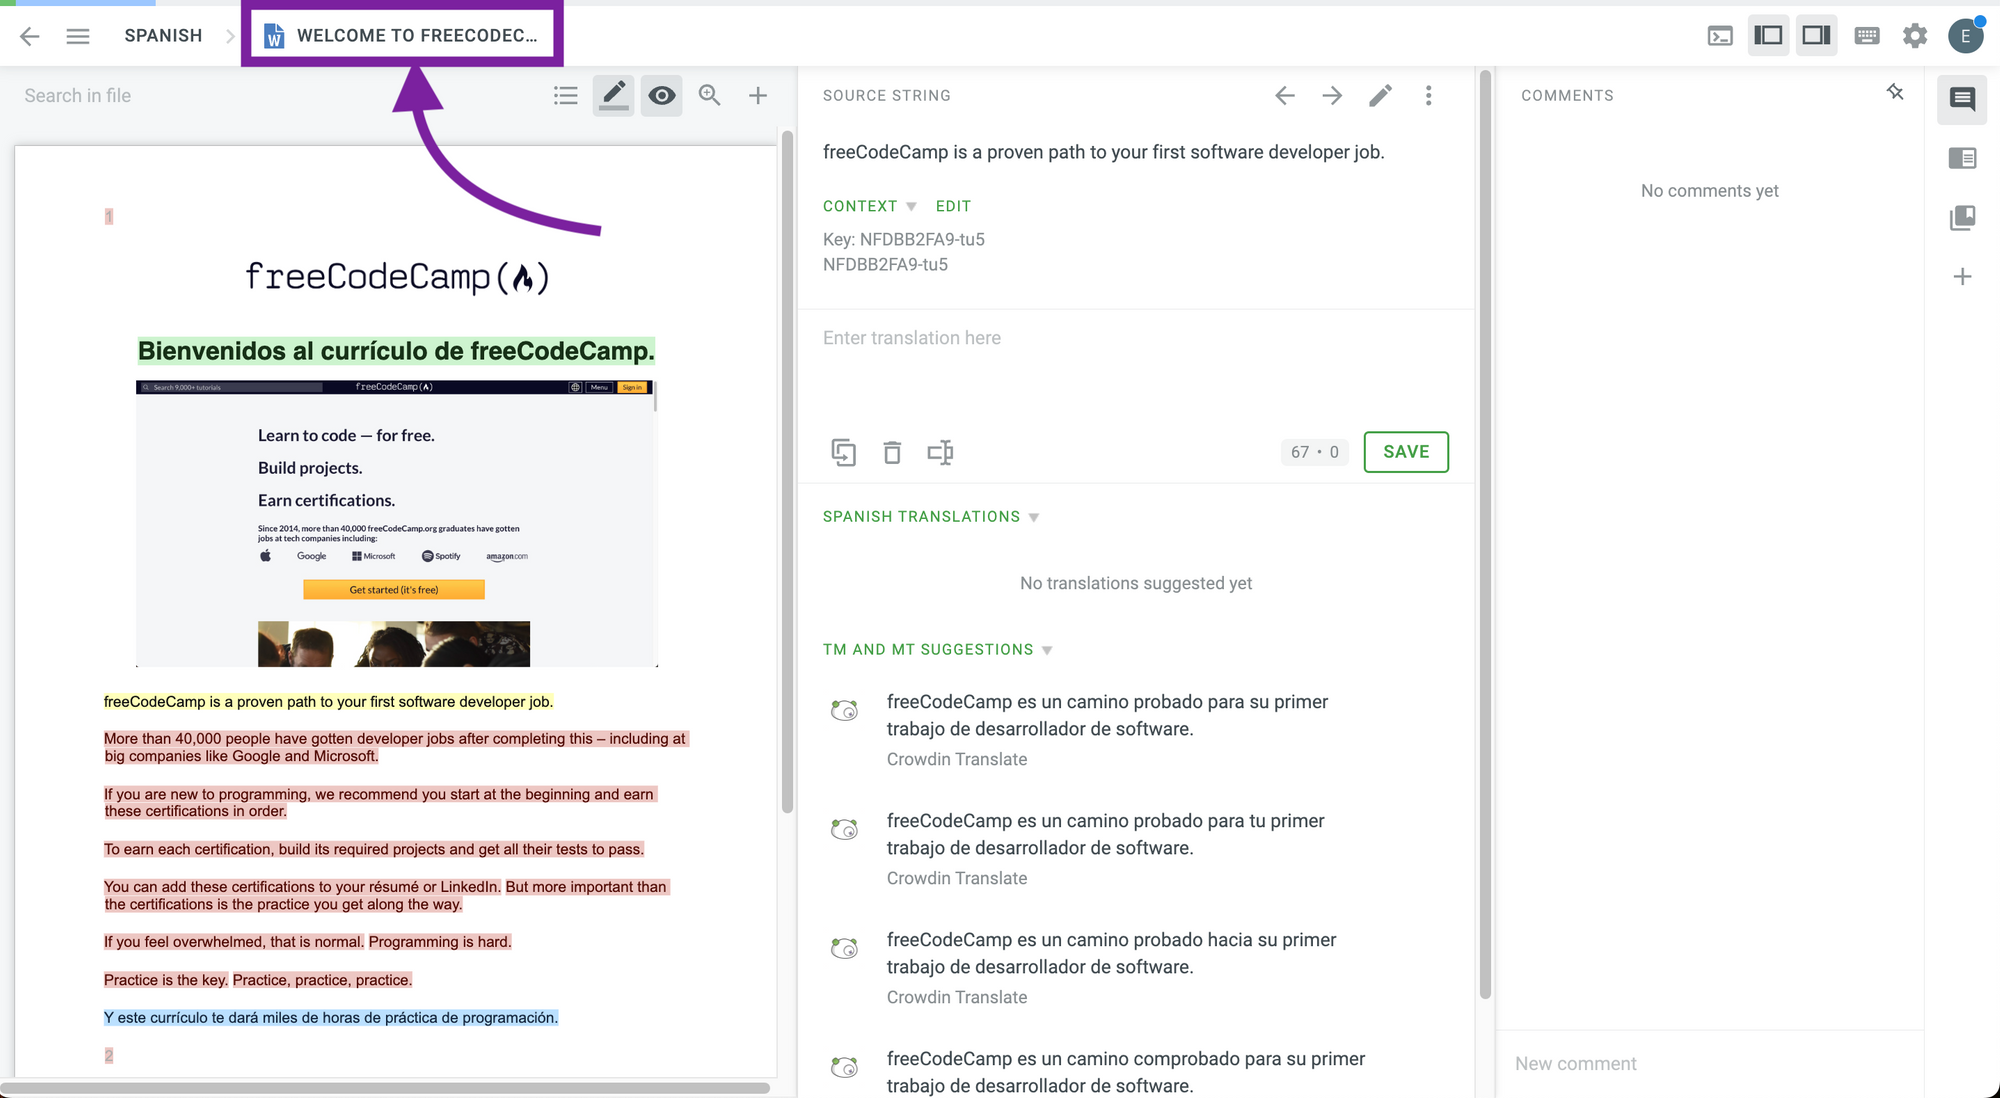
You will be taken to the file you've chosen.
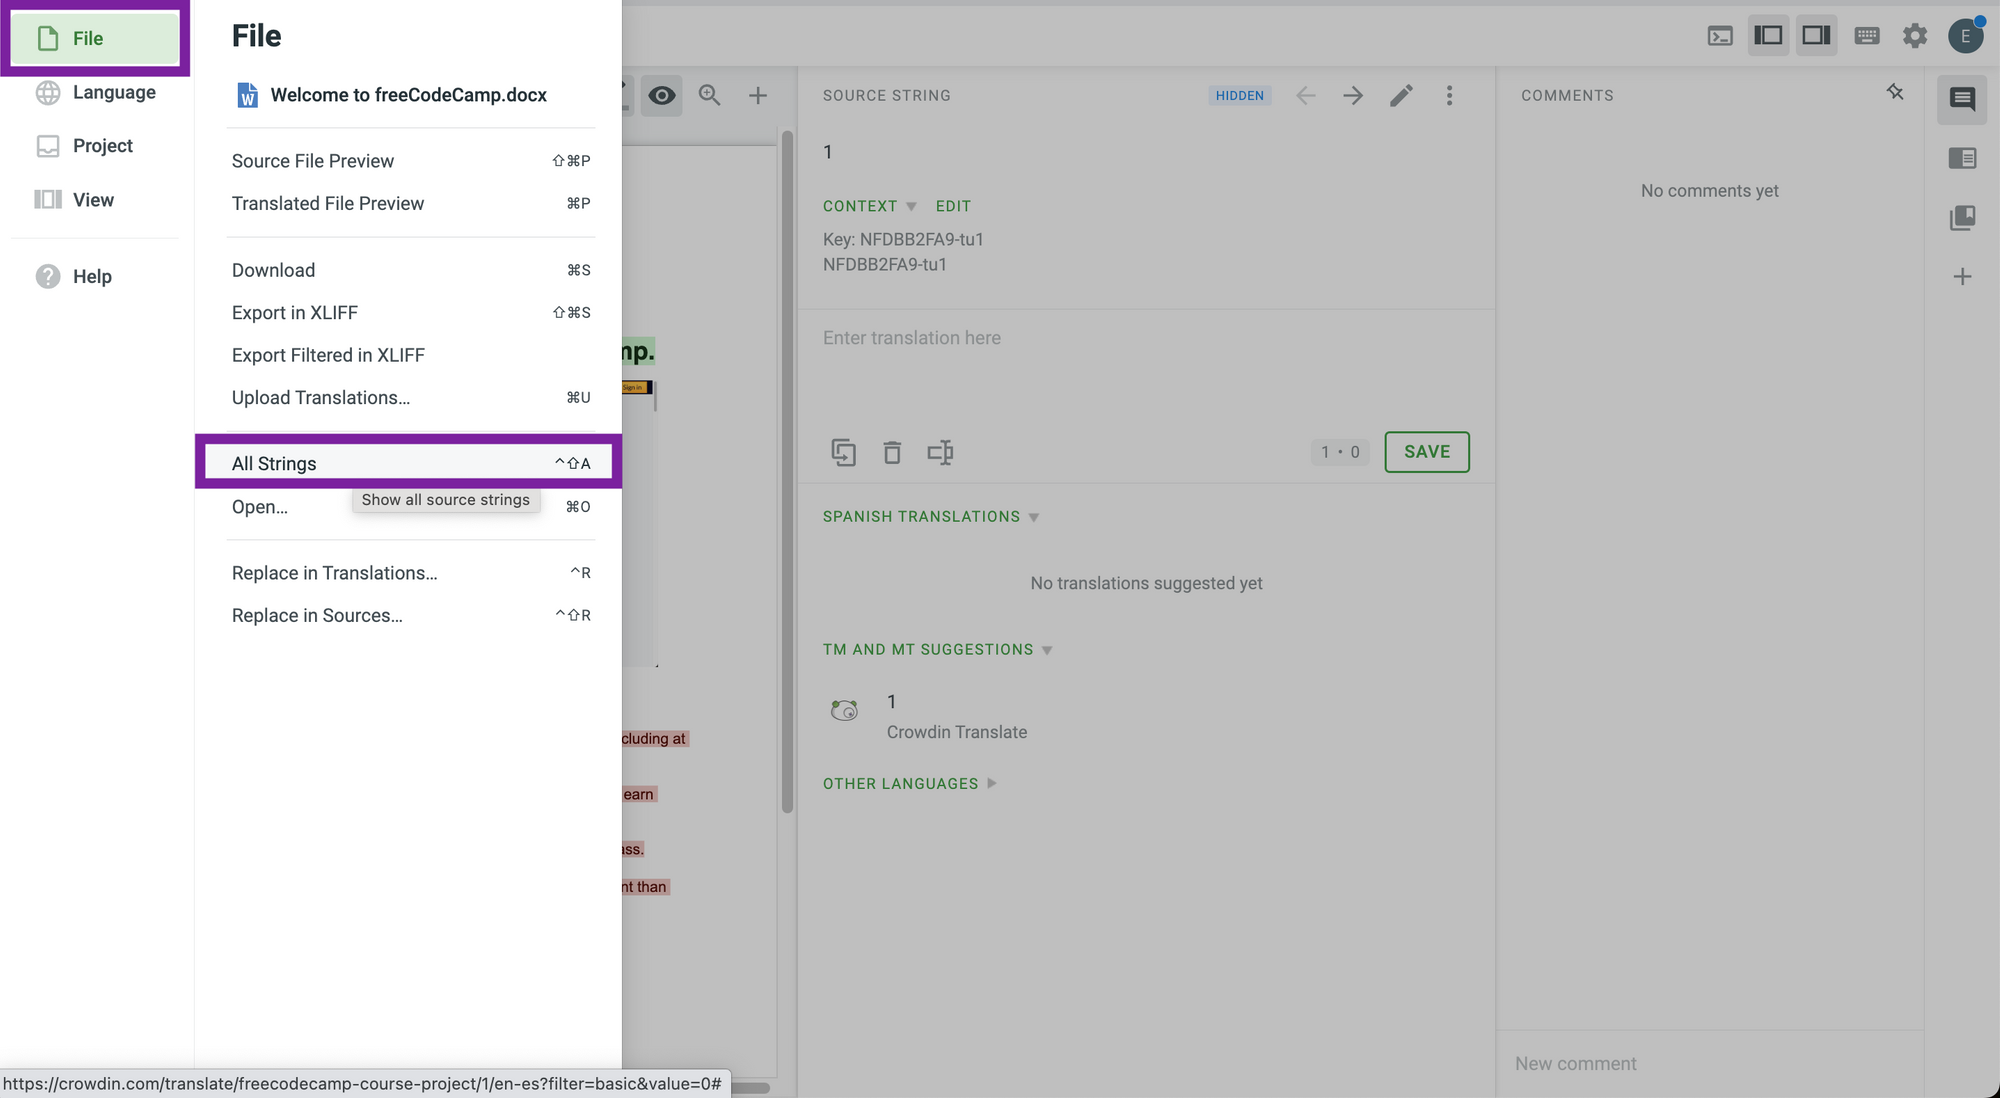
How to View All Strings
If you ever need to see a list of all the strings in a project, you just need to:
Go to the main menu at the top left.
Main Menu.
Go to "File", and then select "All Strings".
 See All Strings.
You will see a list of all the strings in the project, their status, and translations.
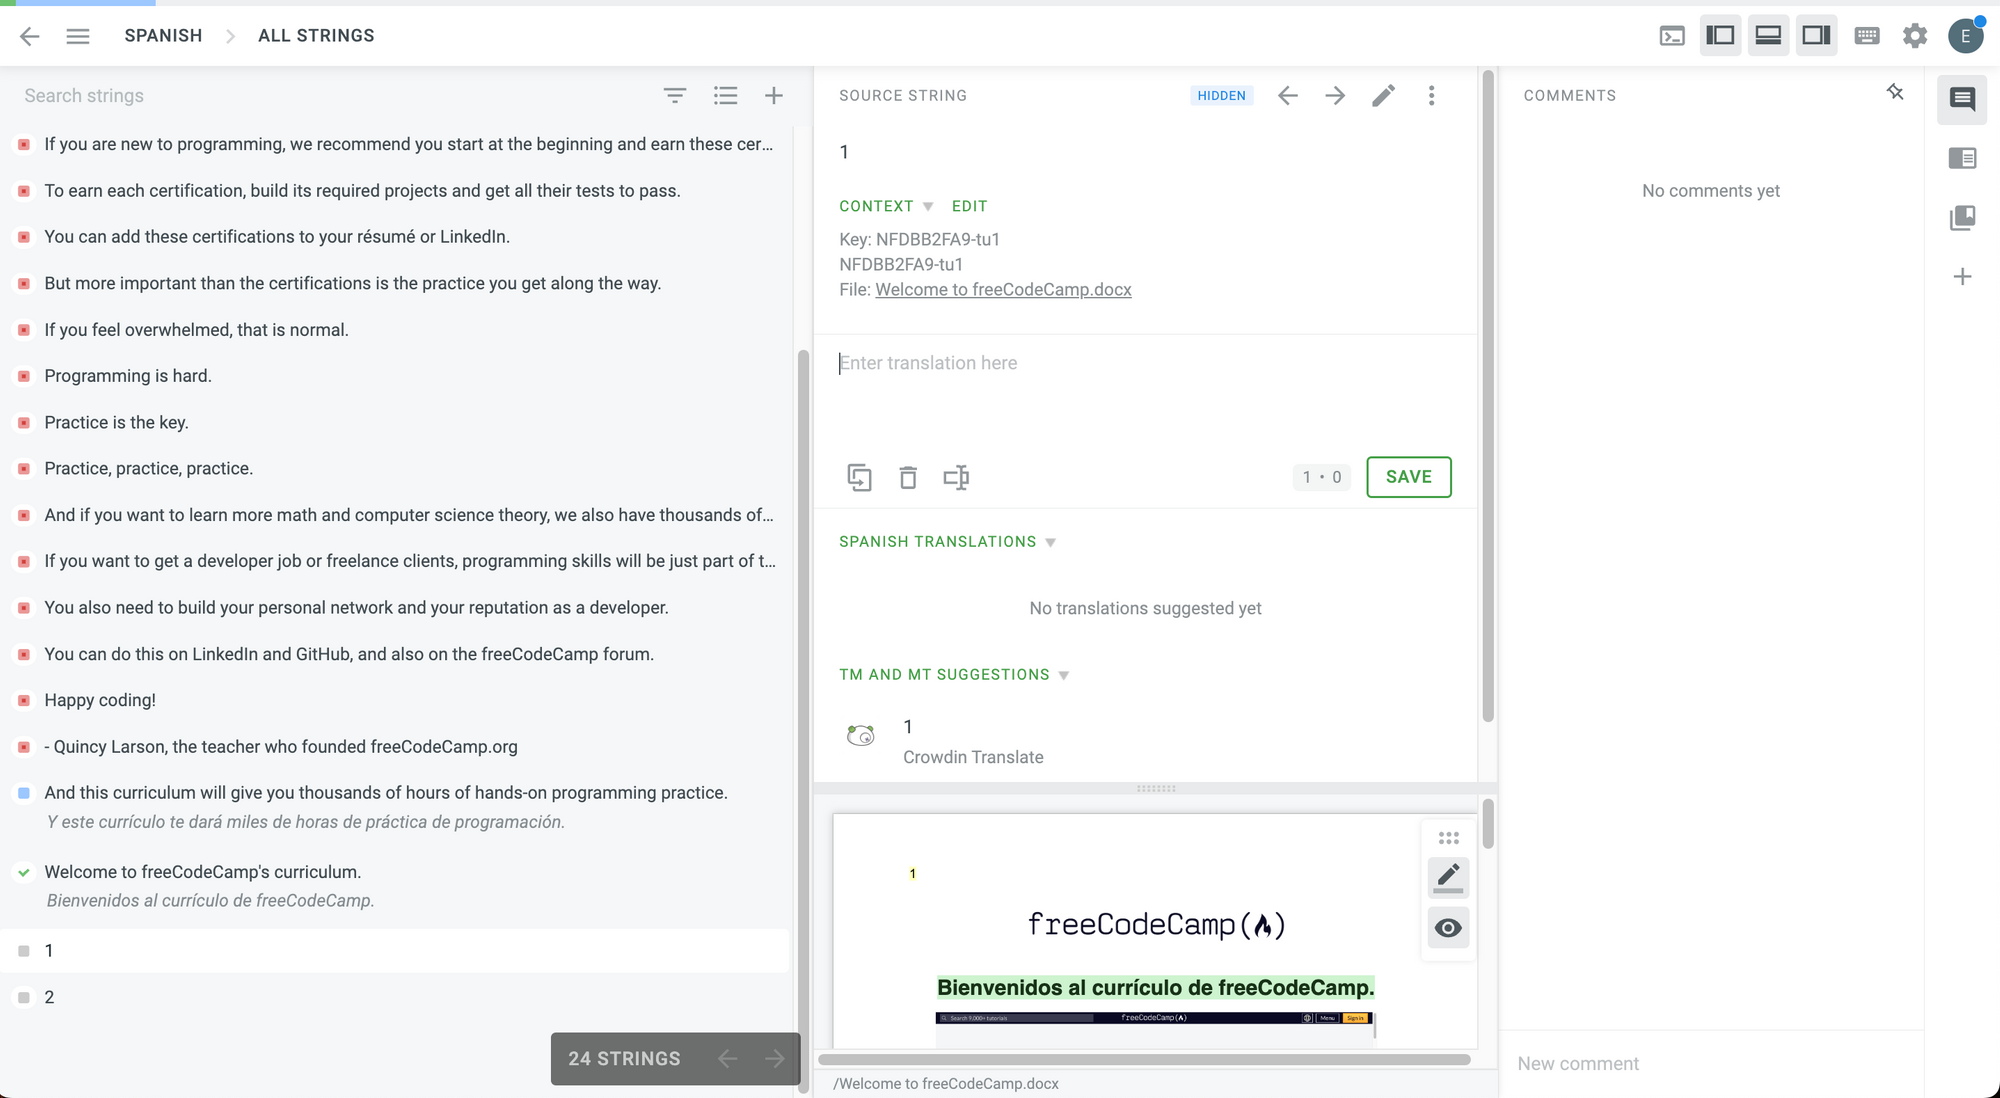 All Strings.
How to Translate RTL Languages
While some languages like Spanish and Italian are written from left to right (LTR), other languages like Arabic and Urdu are written from right to left (RTL).
Crowdin mentions that:
When translating between LTR and RTL languages, some elements in the translation field in the Editor might not be displayed the same way as they will be once exported.
To make sure that the translations will be displayed correctly in the exported file, Crowdin recommends:
- Clicking the "Copy Source" button when writing the translations. This is the first button on the toolbar.
 The "Copy Source" Button.
Translating the text into your target language.
Leaving any variables or tags exactly the same, even if they do not look the same. They will be in the right position when you export a file.
💡 Tip: Crowdin suggests using the Unicode Table app to copy and paste right-to-left and left-to-right marks, changing the direction of the text where needed.
 Example of translating a RTL language from the Crowdin documentation.
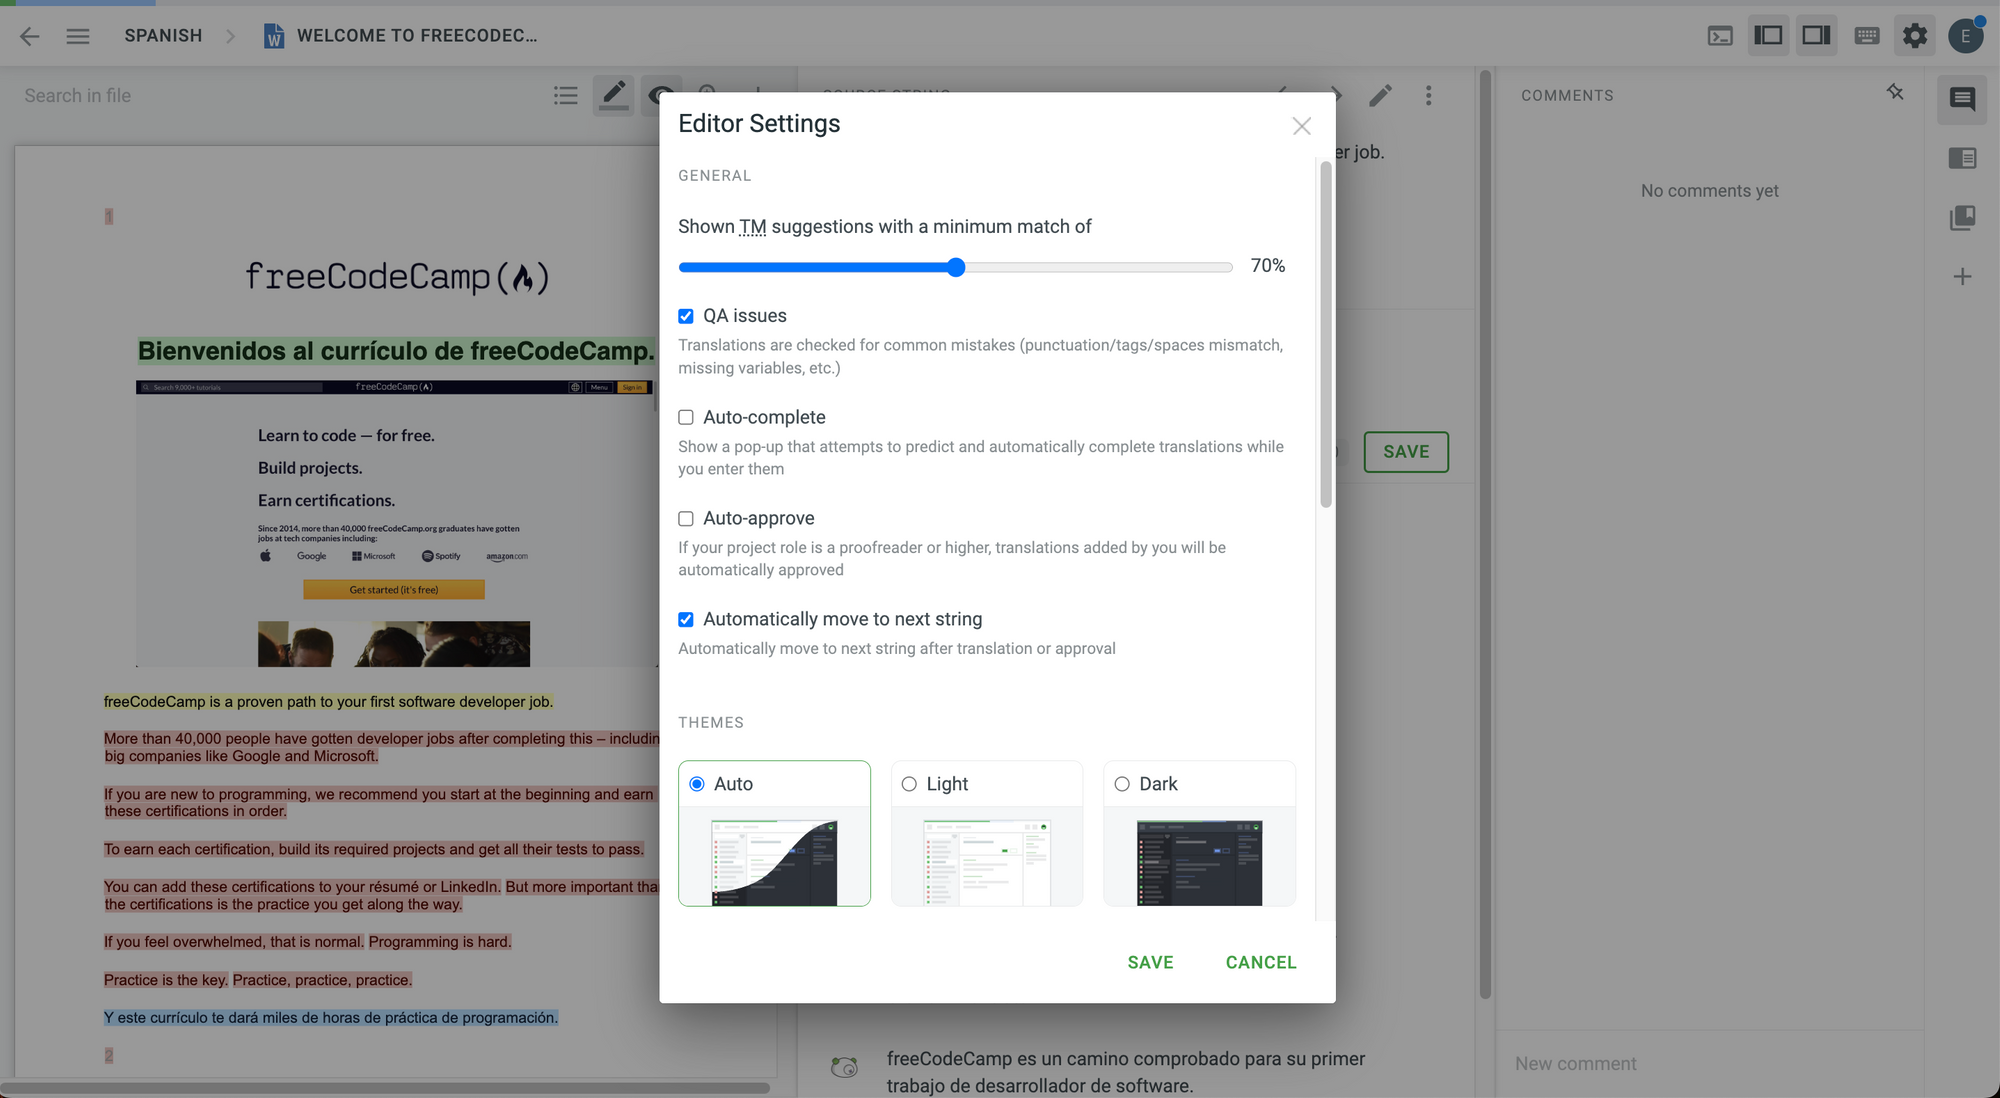
Translation Editor Settings
You can also customize the settings of the translation editor.
To access these settings, click on the gear icon at the top right of the translation editor.
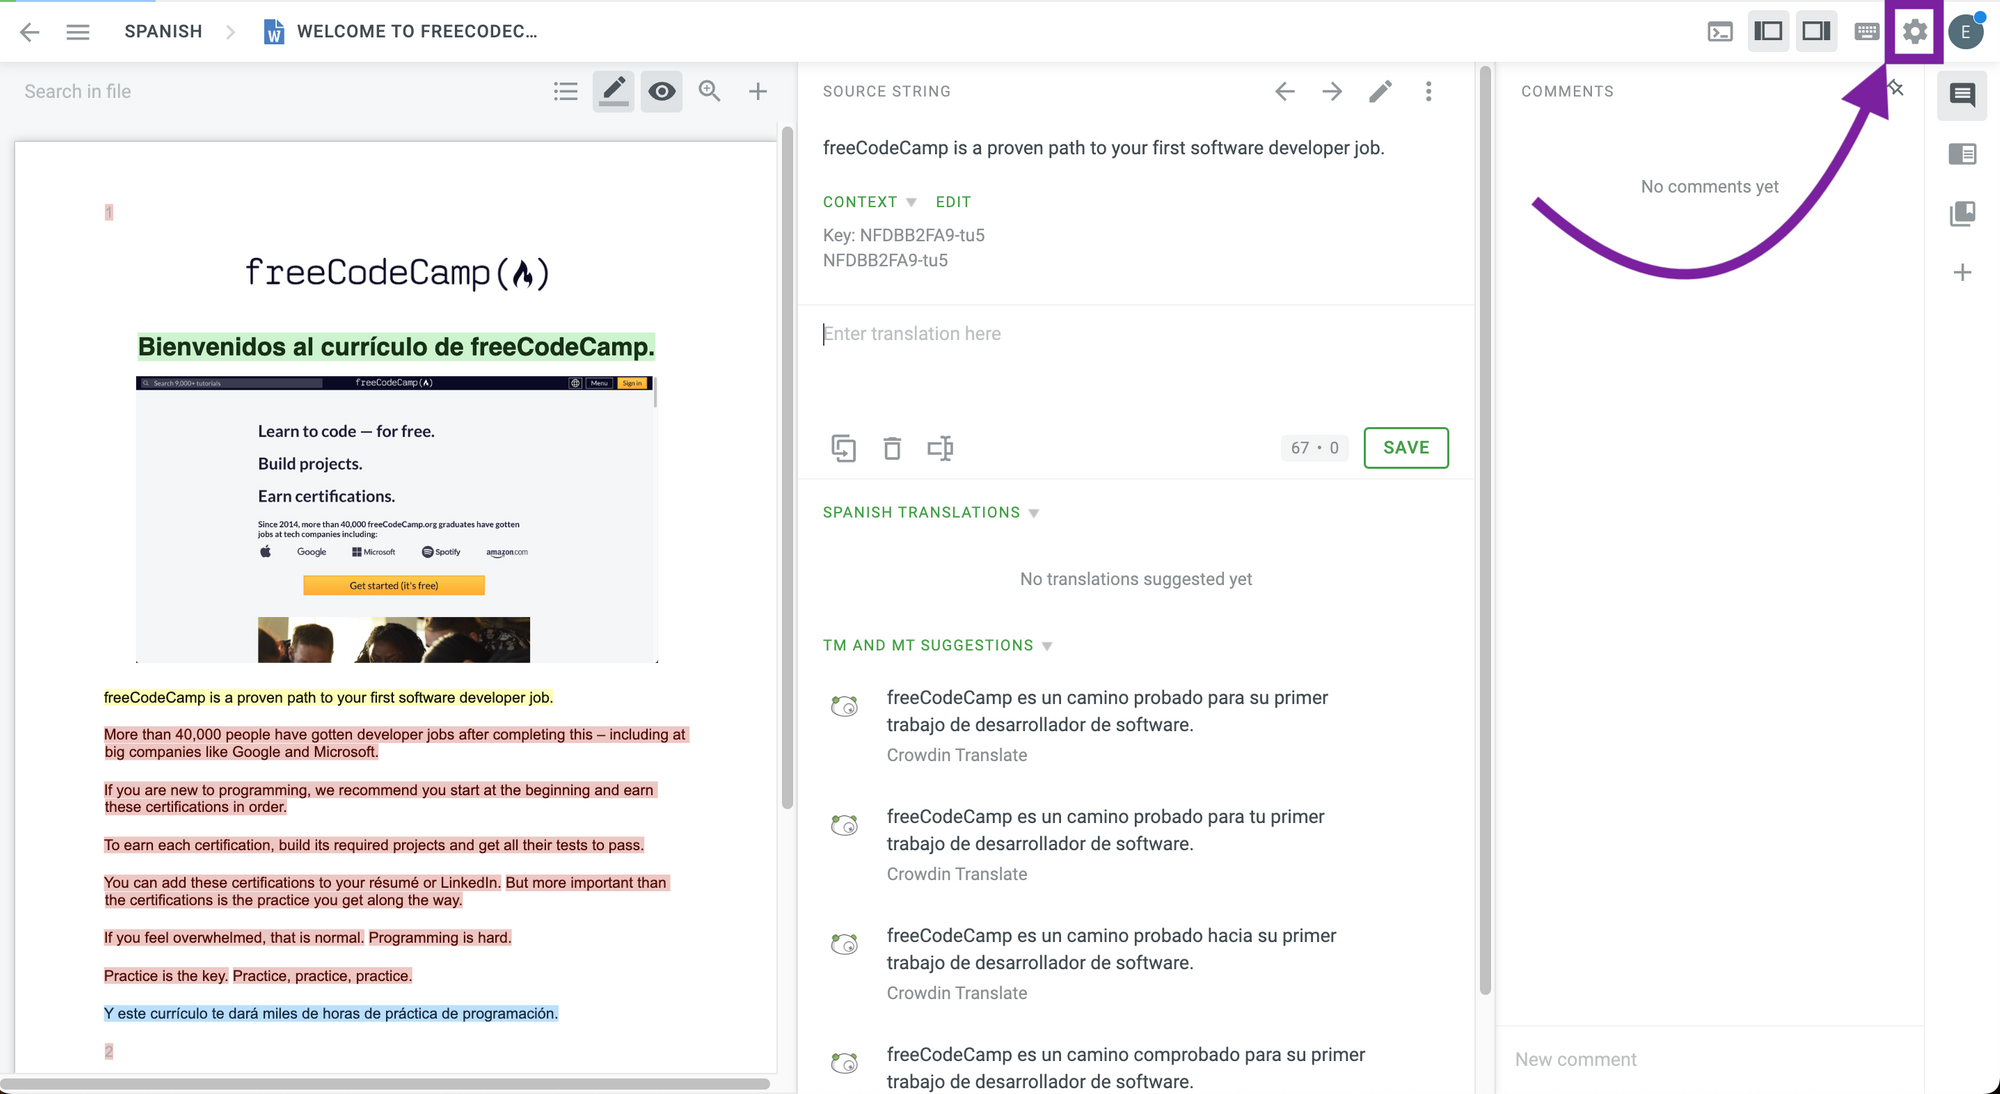 Translation Editor Settings.
You will see a list of the settings that you can customize.
 Editor Settings (Part 1)
The first part of these settings includes:
- The minimum match percentage for showing Translation Memory suggestions.
- If translations should be checked for quality assurance (QA) issues.
- If the editor should auto-complete what you are writing and show you a list of predictions.
- If you would like to approve the translations automatically. This can be helpful if you are translating and proofreading the project yourself.
- If you would like to move to the next string automatically.
- The color theme for the translation editor (light, dark, or automatic).
 Editor Settings (Part 2).
If you scroll down, you will find more settings, such as:
- If the editor should show only the beginning of the source string in a compact view.
- If you would like to show the translation preview for translated strings.
- How HTML tags should be displayed. You can show them or hide them.
- If non-printable characters should be displayed or not.
- If the translation field should be highlighted.
- If you would like to enable real-time spellchecking.
- The language of the user interface of your translation editor.
You can customize these settings to fit your needs.
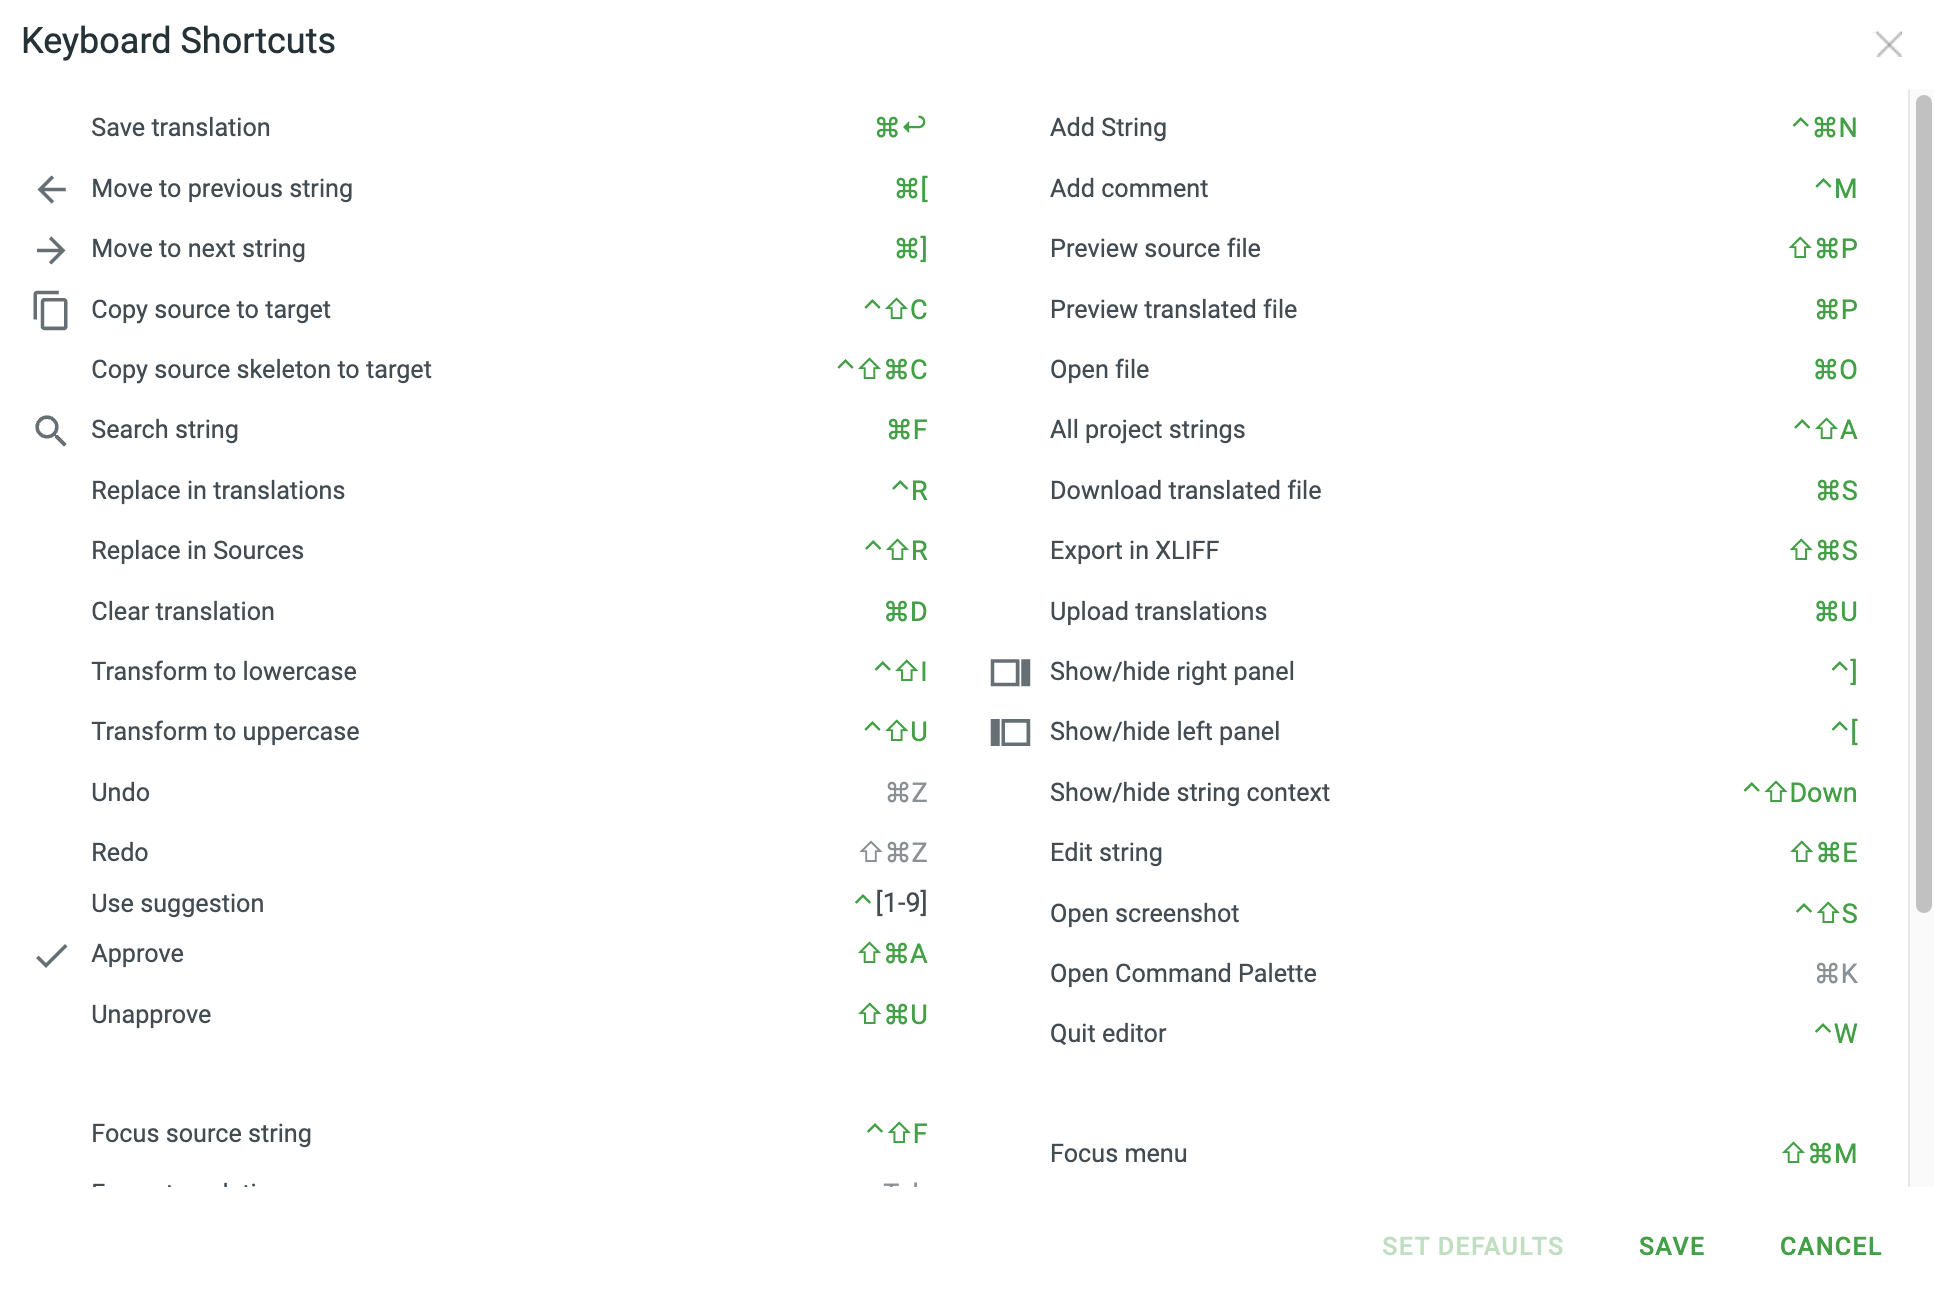
Keyboard Shortcuts
Another key productivity feature for translators and proofreaders on Crowdin is that they can use keyboard shortcuts.
To see all the keyboard shortcuts available for your operating system, just click on the keyboard icon at the top right.
 Open Keyboard Shortcuts.
These are the keyboard shortcuts for Windows:
 Keyboard Shortcuts (Windows). Screenshot from the Crowdin Documentation.
And these are the keyboard shortcuts for macOS:
 Keyboard Shortcuts (macOS).
If you scroll down, you will find more keyboard shortcuts for macOS.
How to Download the Translated File(s)
Once your project is translated and approved, you will need to download it.
In Crowdin, you have three different options for downloading files. You can download the entire project, download all the project files in a specific language, or download a specific file in a specific language.
Let's see these options in more detail.
How to Download the Entire Project
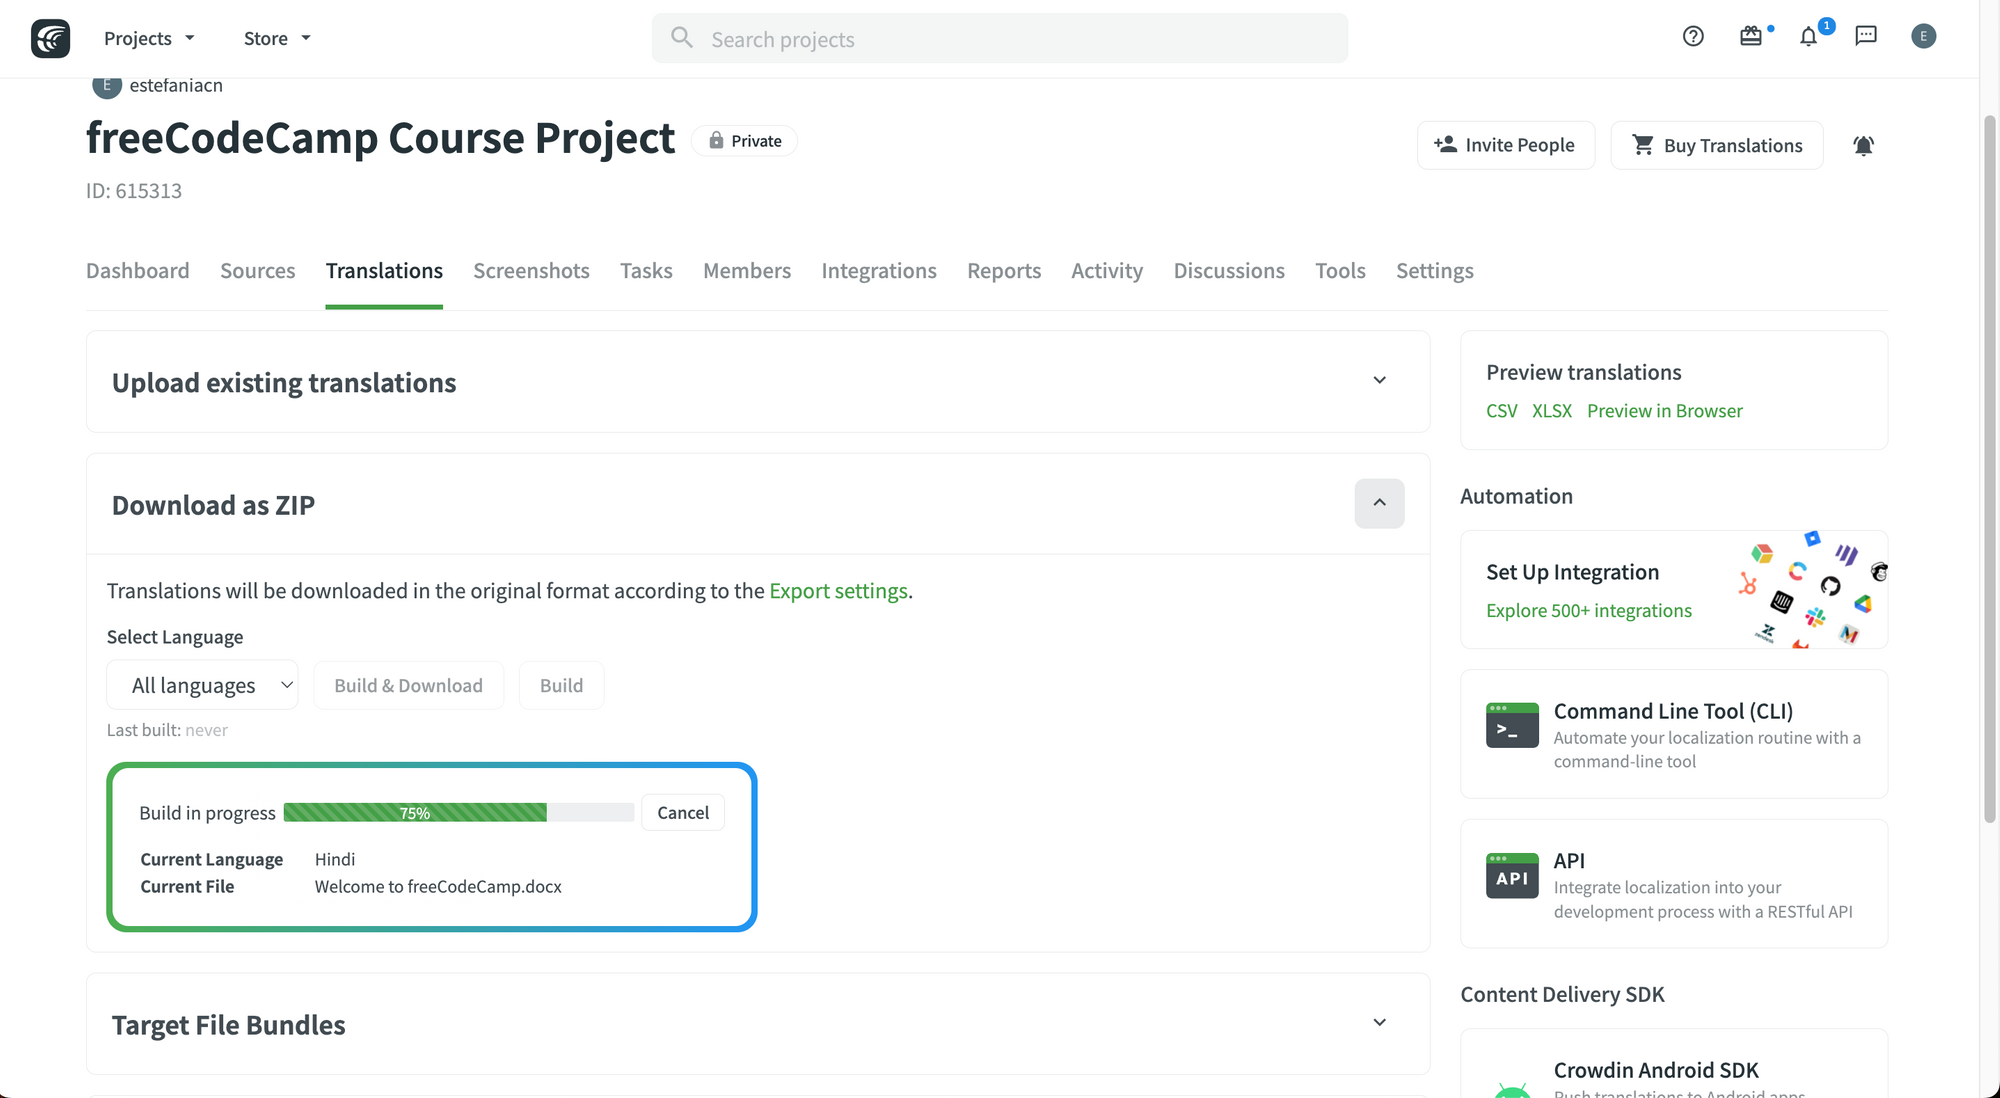
If you need to download the entire project:
- Go to your project.
- Go to the "Translations" tab.
- On "Download as ZIP" section, click on the "Build & Download" button.
 Download as ZIP.
You will see a progress bar while Crowdin builds the project and then your download will start.
 Build & Download.
The ZIP file will have folders for each language. The names of the folders will be their corresponding language codes.
How to Download All Files in a Target Language
This option is helpful if you need to download all the translated files in a specific target language.
- Go to your project.
- Go to the "Translations" tab.
- On "Download as ZIP" section, select the language.
- Click on the "Build & Download" button.
 Download as ZIP.
How to Download a File in a Target Language
The third option is to download just one file in a specific target language.
To do this:
- Go to your project.
- Go to the Dashboard tab.
- Choose the target language.
- Click on the file.
- Click on the three dots to the right to see the additional options (see the screenshot below).
- Click on "Download".
 Download a File in a Target Language.
The download should start and you should have your translated file ready in just a few seconds or minutes.
You can also automate the process of exporting or downloading your translated files with Crowdin integrations.
How to Use Translation Memory (TM)
Great work so far. Now that you know the basic features of the translation editor, let's talk about more advanced features such as the Translation Memory.
We will see how you can:
- Create translation memory.
- Manage translation memory.
- Download and upload translation memory.
- Assign translation memory to a project.
💡 Tip: Remember that TM is like a database of strings that we have translated previously in our project and their corresponding translations. Reusing previous translations can save us a lot of time.
Are you ready? Let's begin.
How to Create a Translation Memory (TM)
To create a TM for your project, you need to:
- Go to your profile. You can do this by clicking on "Profile" in the dropdown menu that is displayed when you click on your profile image at the top right.
- Go to the "Resources" tab.
 Resource tab in Profile.
- If you already have a project created, you will see a TM for that project. You can also create a new TM, independently from a project (you can assign it to a project later on).
Crowdin mentions that:
Besides the project TMs that are automatically created along the respective projects, you can also create separate TMs, fill them with the appropriate content by uploading your existing TMs in TMX, XLSX, or CSV format, and then assign these TMs to the needed projects.
- To create a new TM, click on the green "Create TM" button.
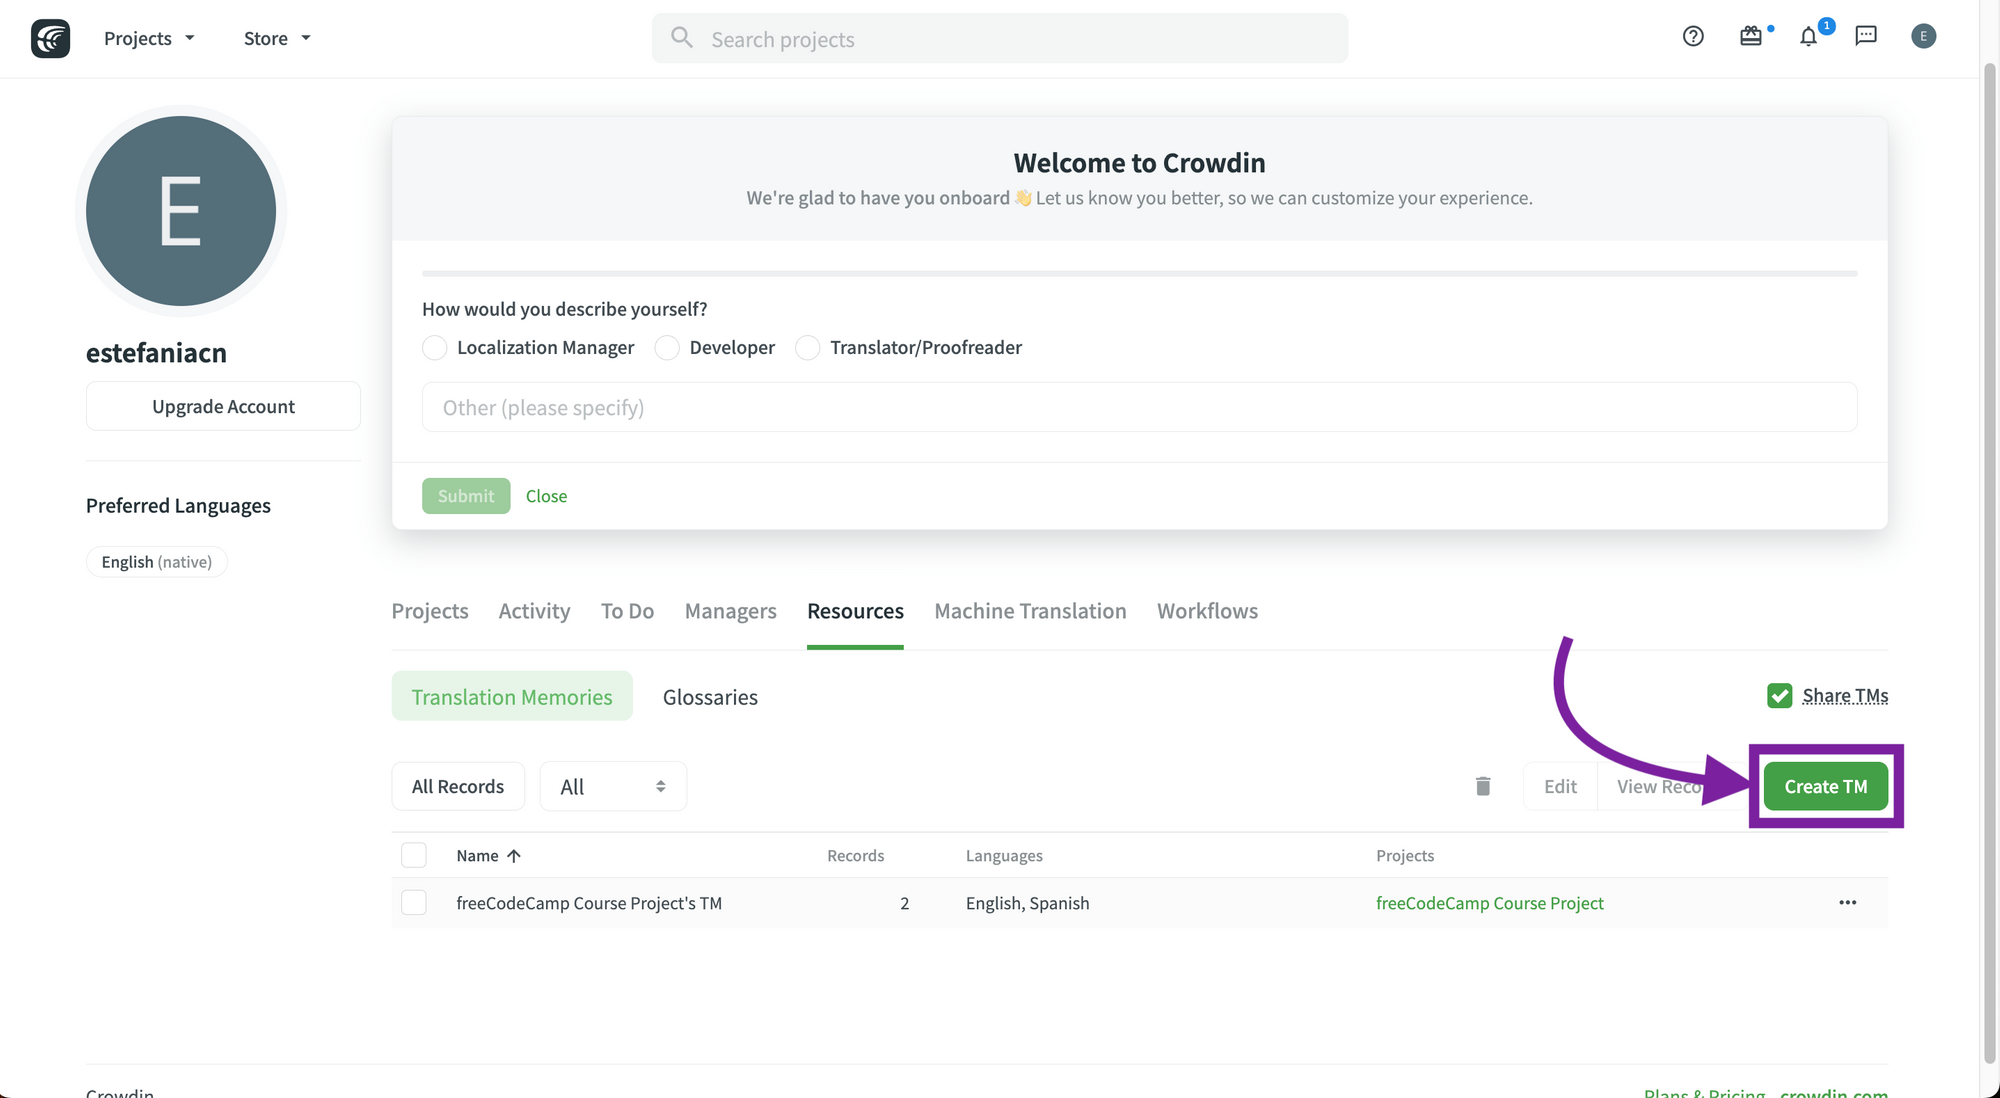 Create TM.
- Complete the information for your new TM, such as its name, language, and if you would like to assign it to an existing project.
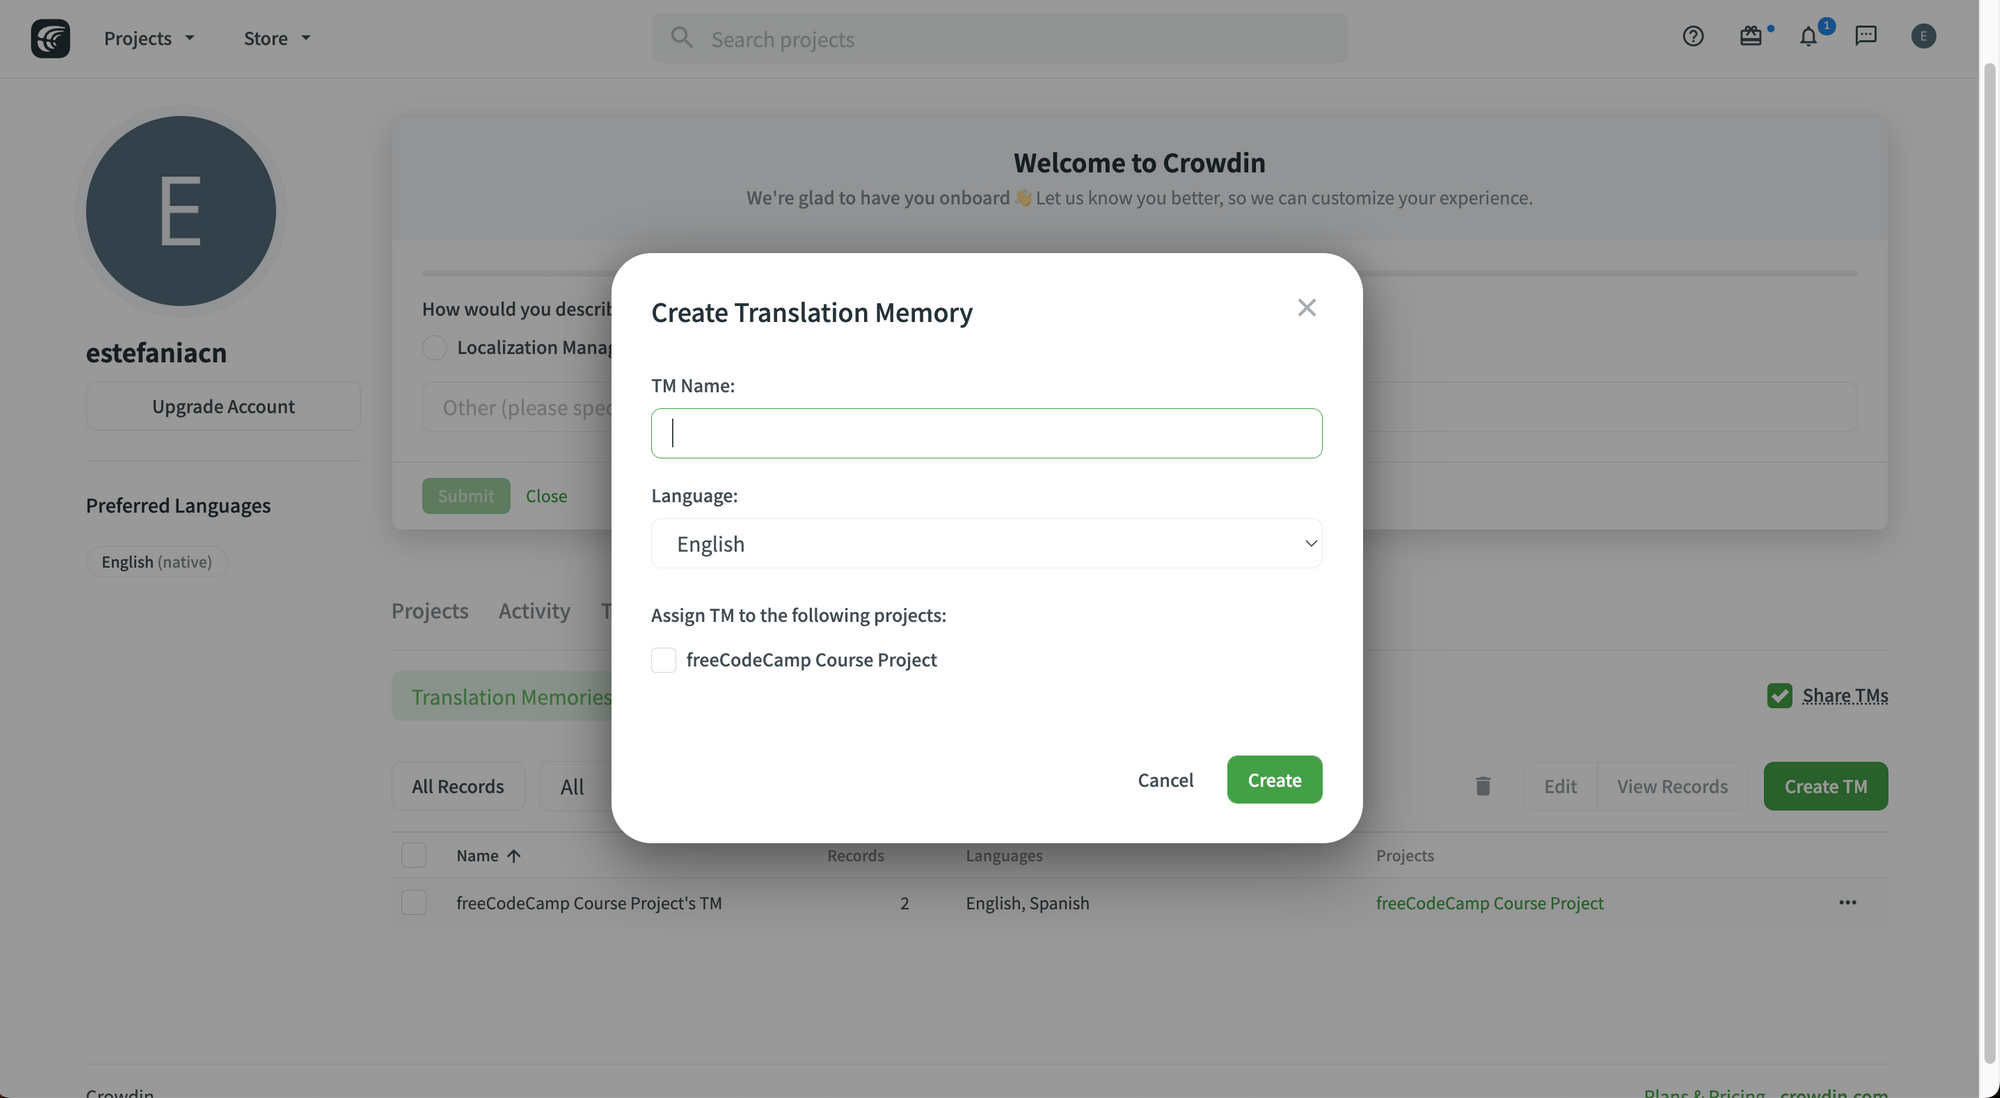 Create Translation Memory.
I'm going to create a new TM called "Demo TM" in English. For now, I will not assign it to any project.
Let's see what happens:
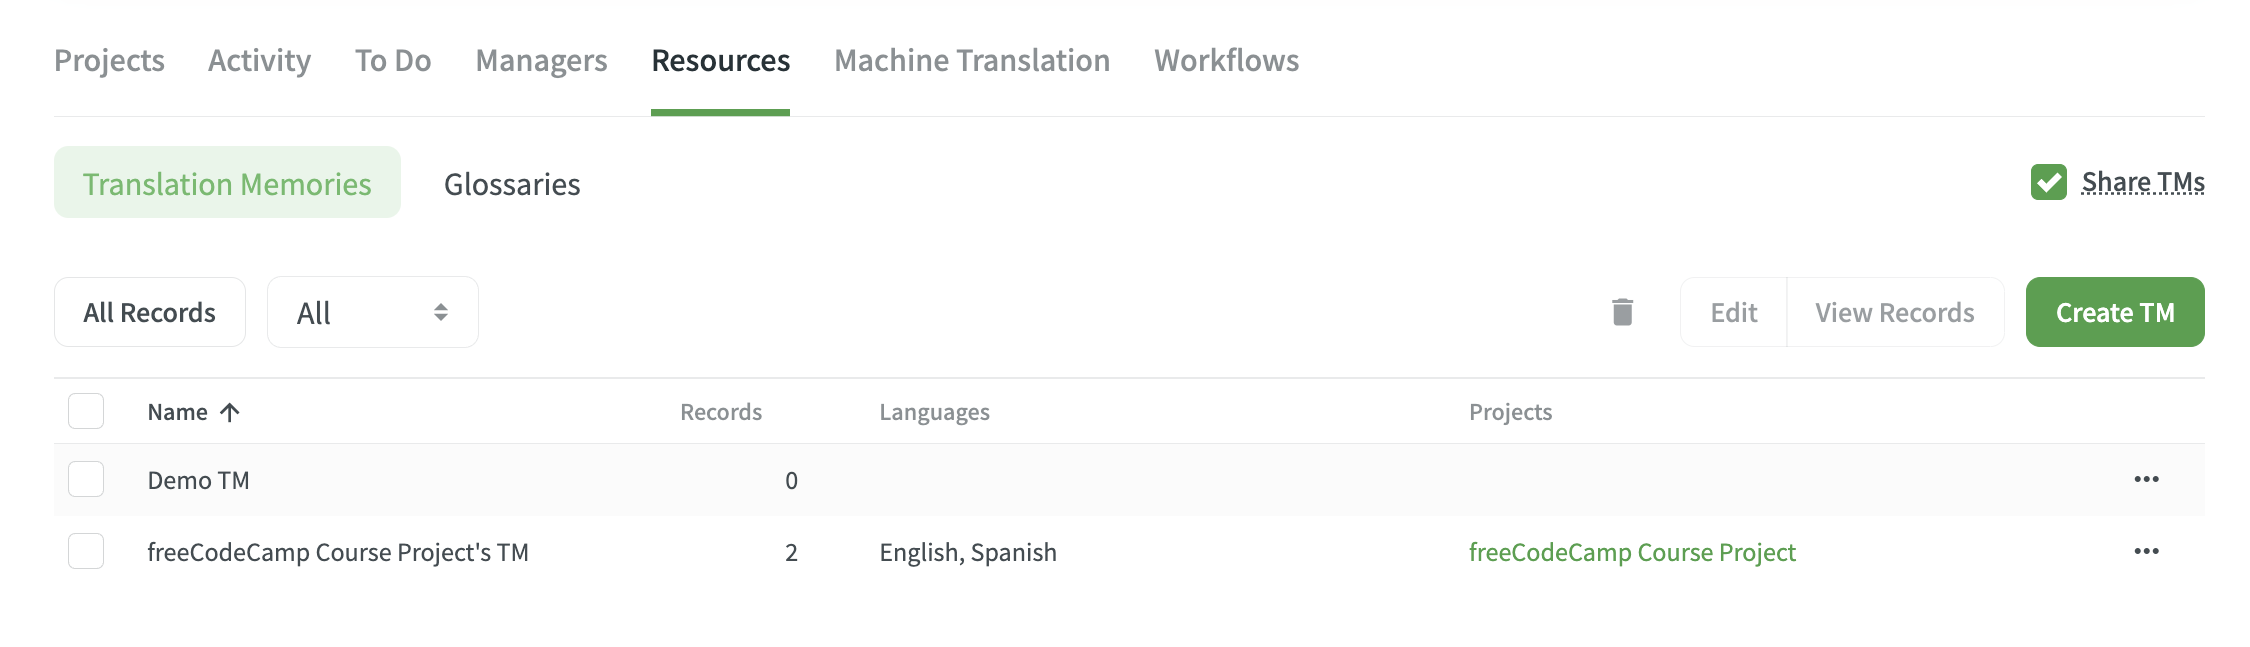 New TM.
🎉 Awesome. Now we see the new TM in the list.
How to Manage Translation Memory (TM)
If you click on the three dots to the right of the TM to show additional options, you will see the following options:
- Upload.
- Download.
- Edit.
- View Records.
- Delete.
 Additional Options for a Translation Memory.
If you select a TM by checking its checkbox, you can delete it, edit it, or view its records.
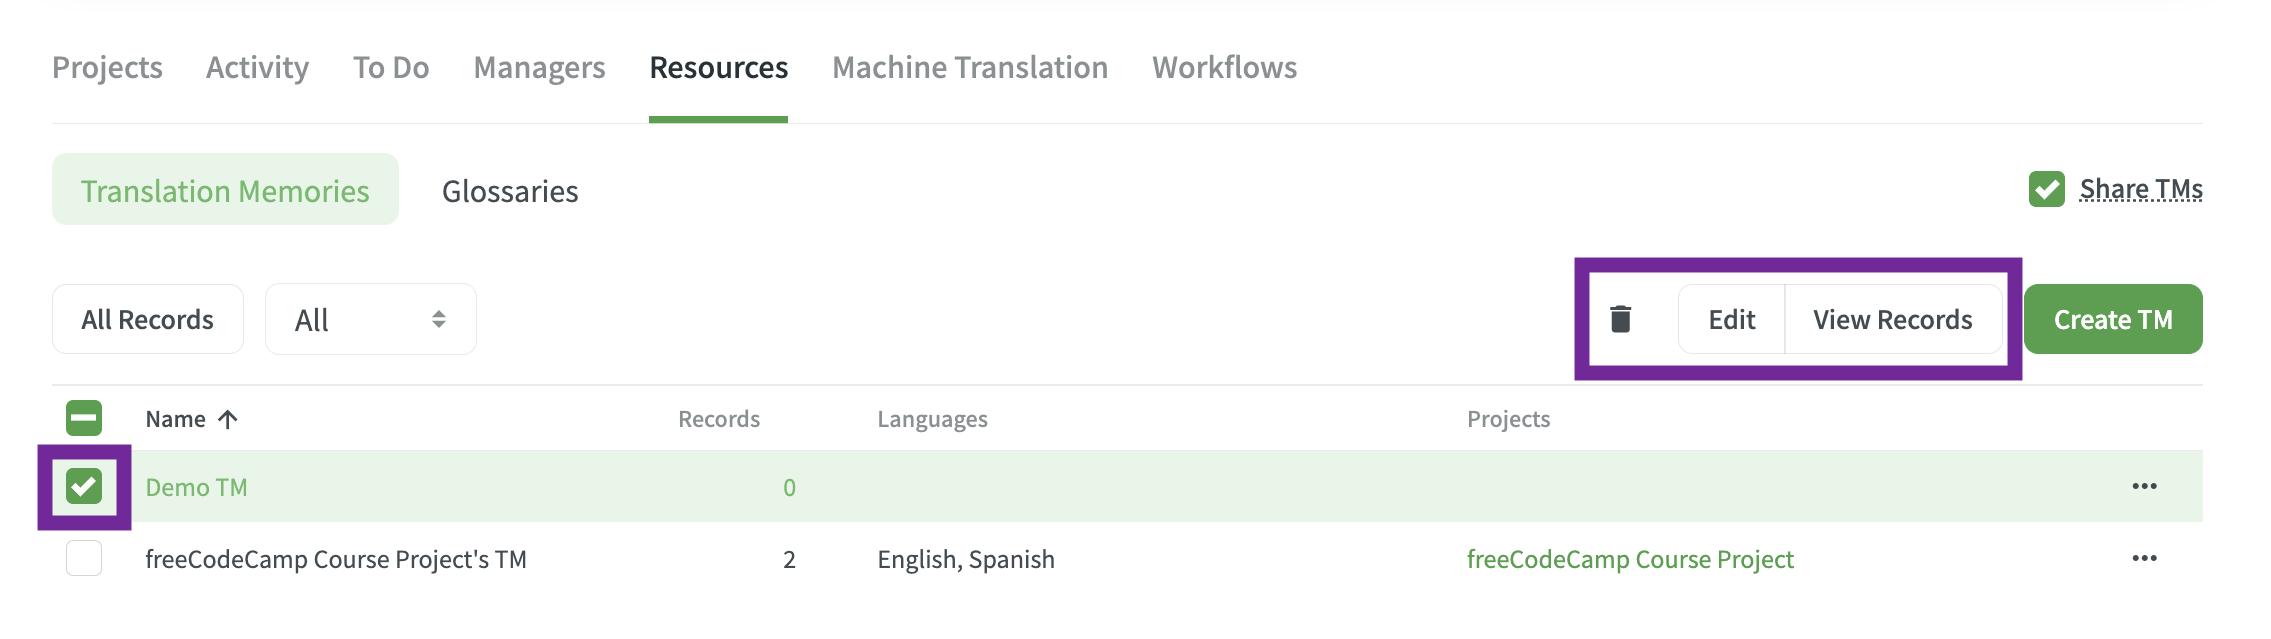
Since our new TM is new (and therefore, empty), let's see the records of the TM for our freeCodeCamp Course Project.
If you click on it, you'll see a list of all the records stored in the TM:
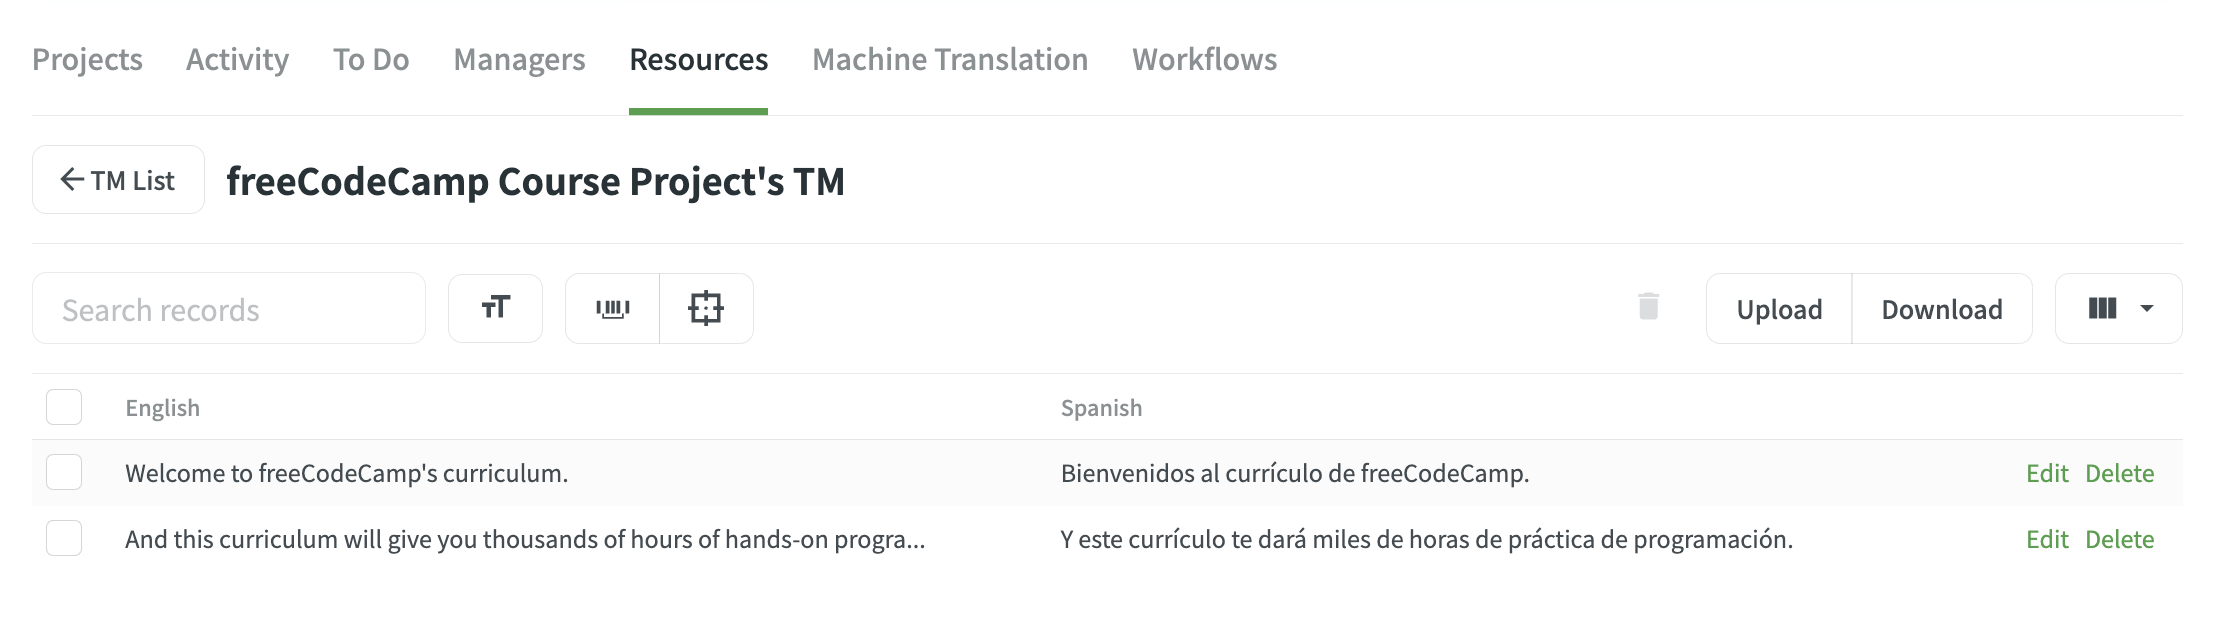 Translation Memory (TM).
From here, you can:
- Edit the records.
- Delete the records.
- Search for specific records matching case, whole phrase, and finding an exact match.
- Hide or show specific columns.
How to Upload and Download Translation Memory (TM)
In the "Resources" tab of your project, you can also upload and download TM.
 Resources toolbar.
The file must be in one of the following formats:
- TMX
- XLSX
- CSV
To upload a TM:
- Click on the "Upload" button.
- Choose your file in your file system.
- Match each column to the corresponding language.
The "Upload" button.
 Matching columns to their corresponding languages. Image taken from the Crowdin Documentation.
To download translation memory:
- Click on the "Download" button.
- Select the file format (either TMX, XLSX, or CSV).
- Choose if you would like to download all languages or only a specific language pair.
The "Download" button.
 Download TM.
The download should start after you click on the green "Download" button.
This is the CSV file that we get when we export the Translation Memory of our freeCodeCamp Course Project:
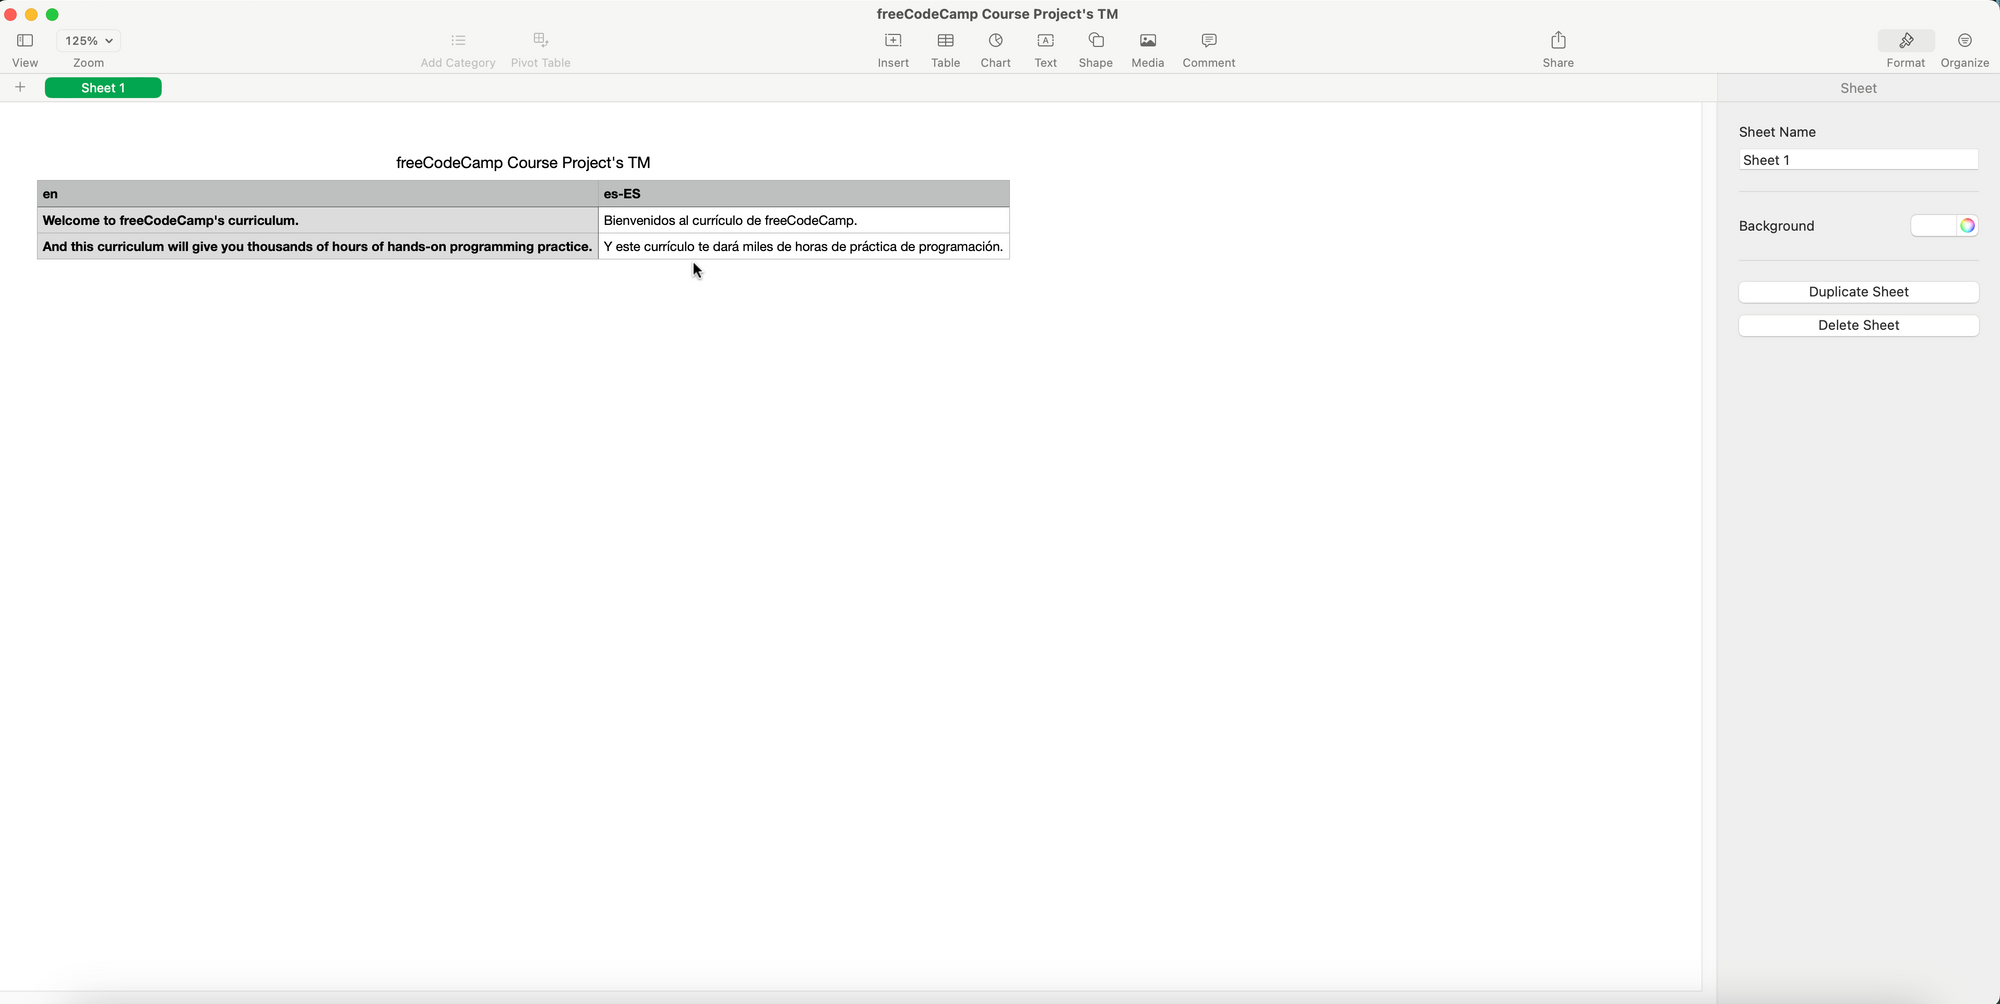 Exported CSV File.
How to Assign Translation Memory to a Project
To assign an existing TM to a project:
- Go to your project.
- Go to the "Settings" tab.
- Go to "Translation Memories".
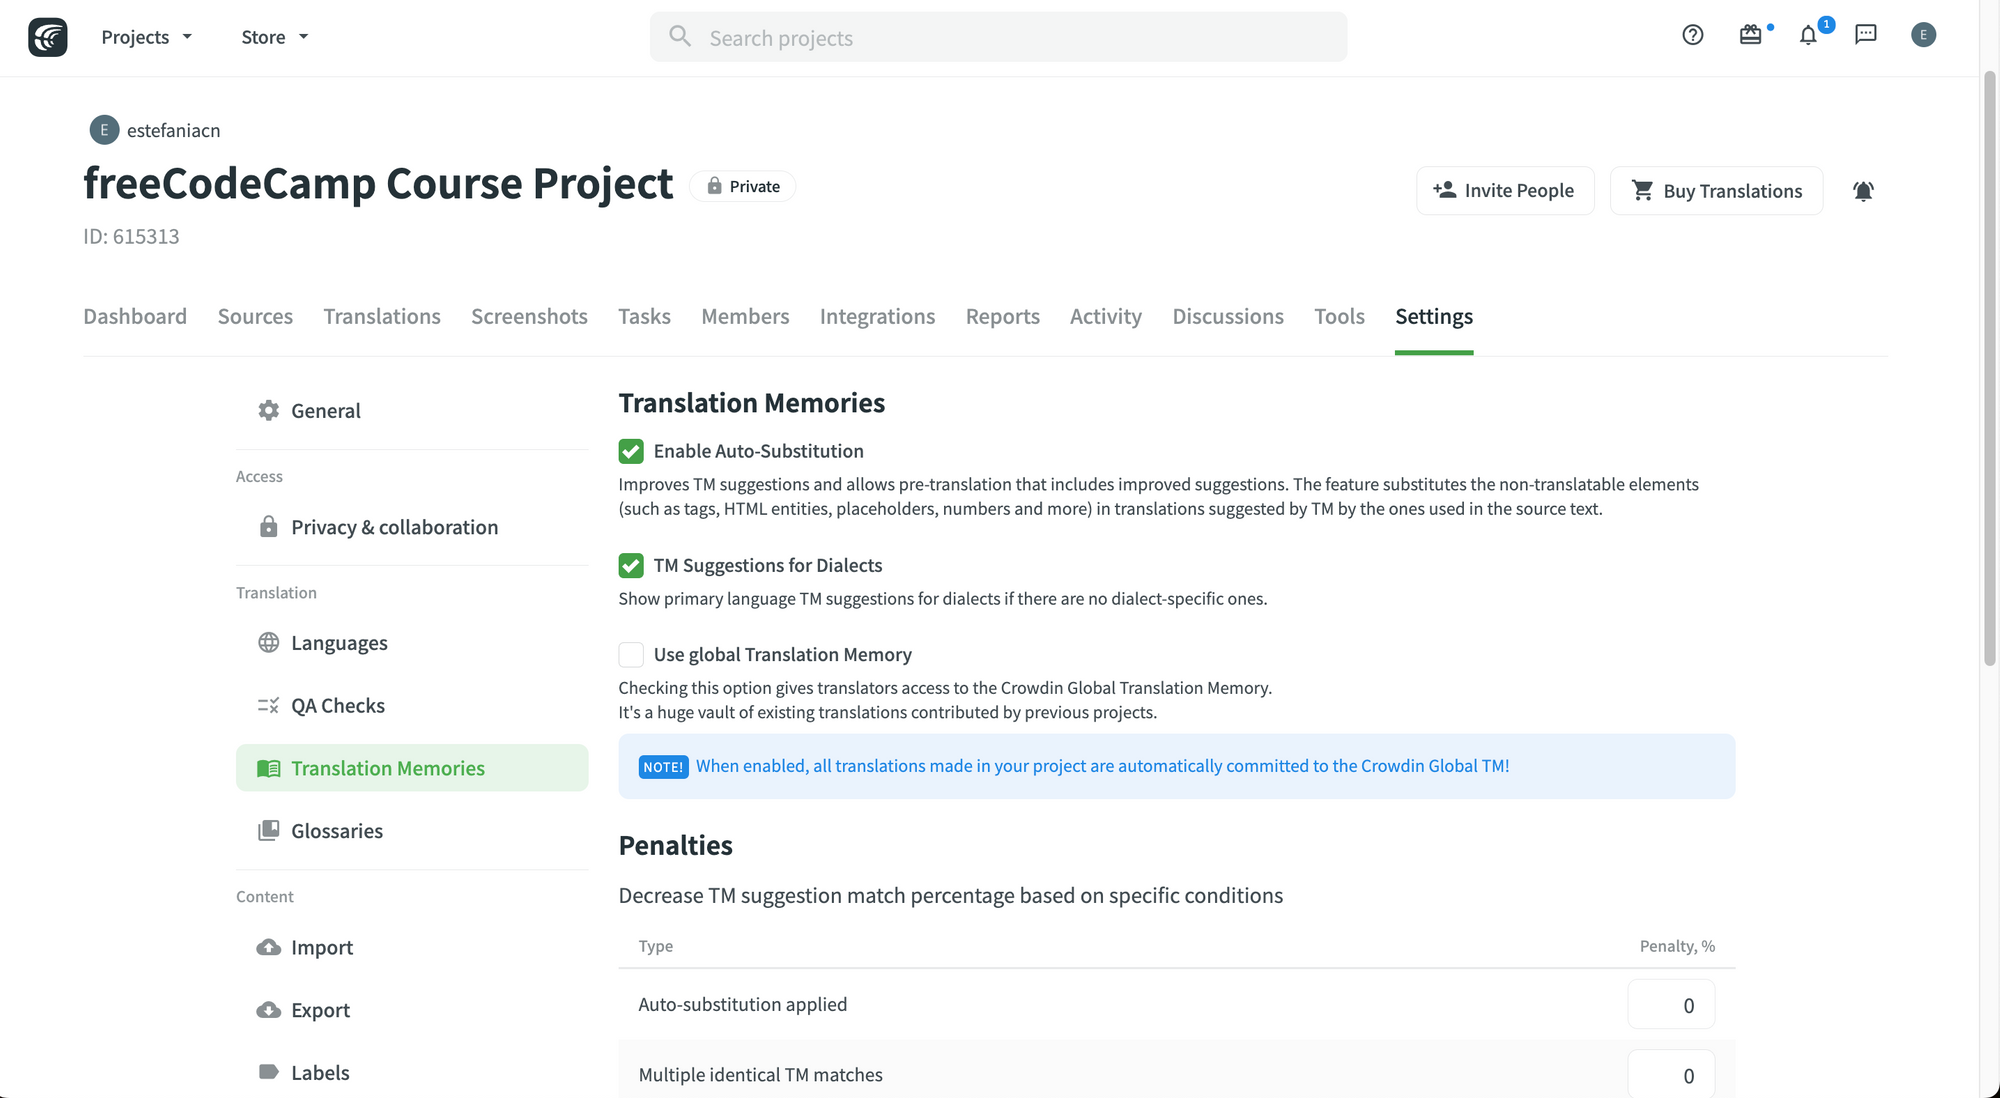 Settings tab.
- Scroll down to find "Assigned Translation Memories".
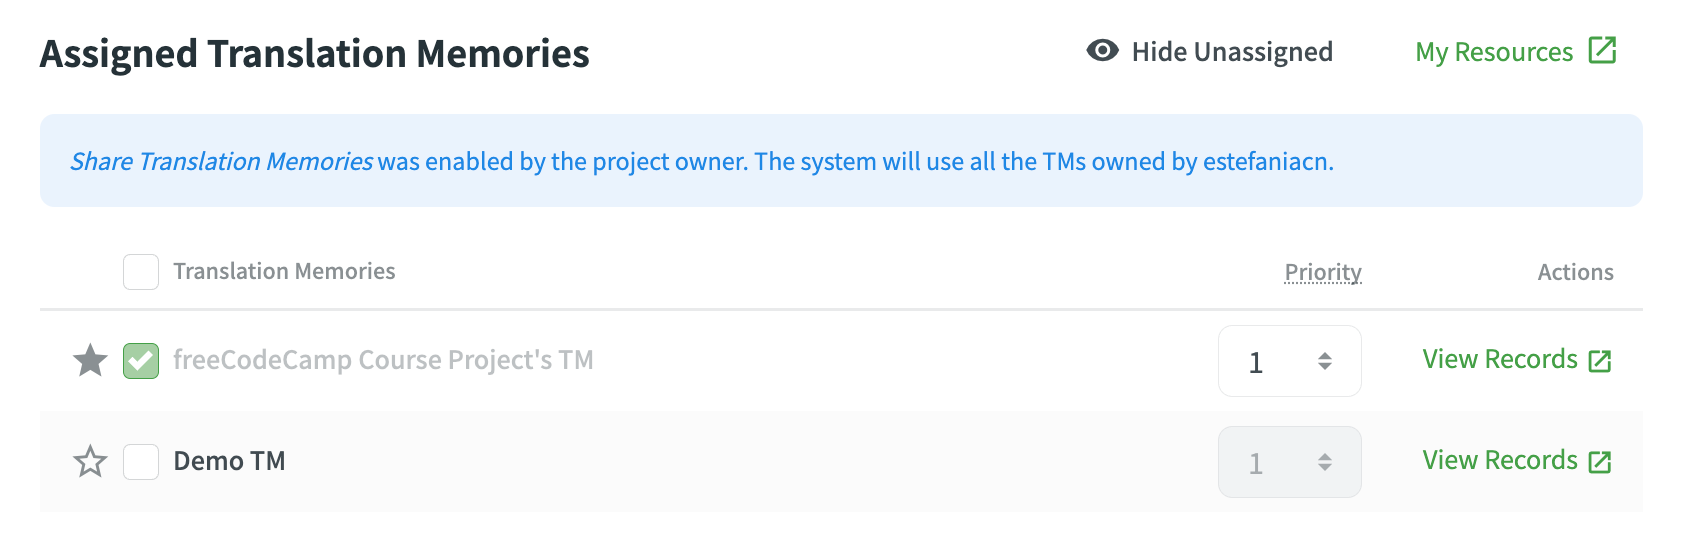
- Select the Translation Memories that you would like to assign to your project.
Crowdin mentions that:
When you assign a few TMs to the project, you can set the needed priority for each of them. As a result, TM suggestions from the TM with the higher priority will be displayed in the first place.
💡 Tip: A higher number represents a higher priority. If a TM has a priority of 5, that would be higher than a priority of 1.
You can also change the default TM by clicking on the corresponding star icon.
Important: Please note that Crowdin recently eliminated the need to use custom workflows to automatically apply Translation Memory matches. Now you can enable Translation Memory on the project settings, like you can see below:
 How to Enable Translation Memory Pre-Translation for New Content in the Project Settings. Screenshot provided by the Crowdin team.
Glossary
Awesome! Now you know the most important aspects of TM on Crowdin, so let's check out the glossaries.
💡 Tip: Remember that a glossary allows you to store and manage your project's terminology to help your translators with more context and definitions.
How to Create a Glossary
When you create a project, a glossary is automatically created but you can also create new ones that are independent from any project.
To create a glossary:
- Go to your profile.
- Go to "Resources".
- Click on "Glossaries".
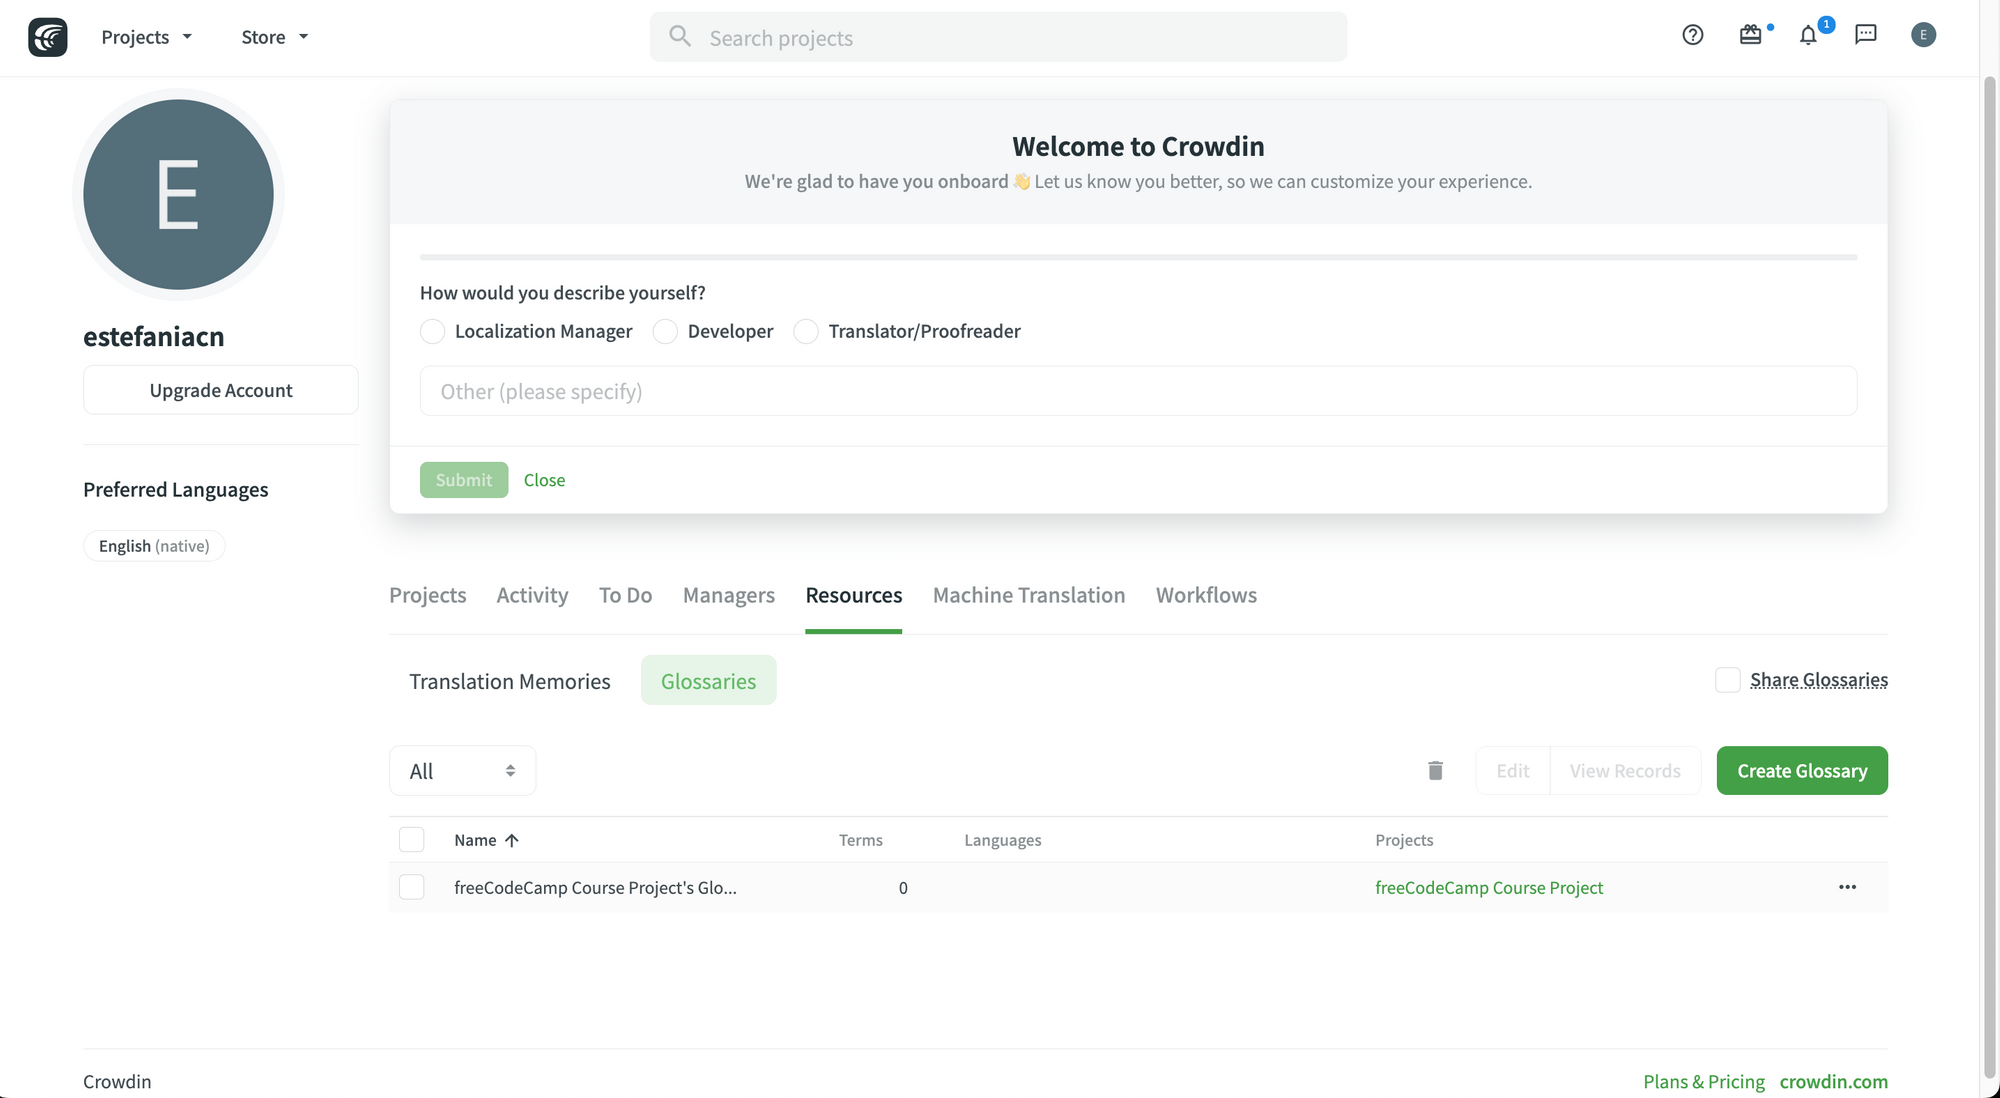 Glossaries
You will see a glossary for each project that you have created on Crowdin.
- Click on the green "Create Glossary" button.
- Choose a name and a language for your glossary.
- If you need to, assign it to a project.
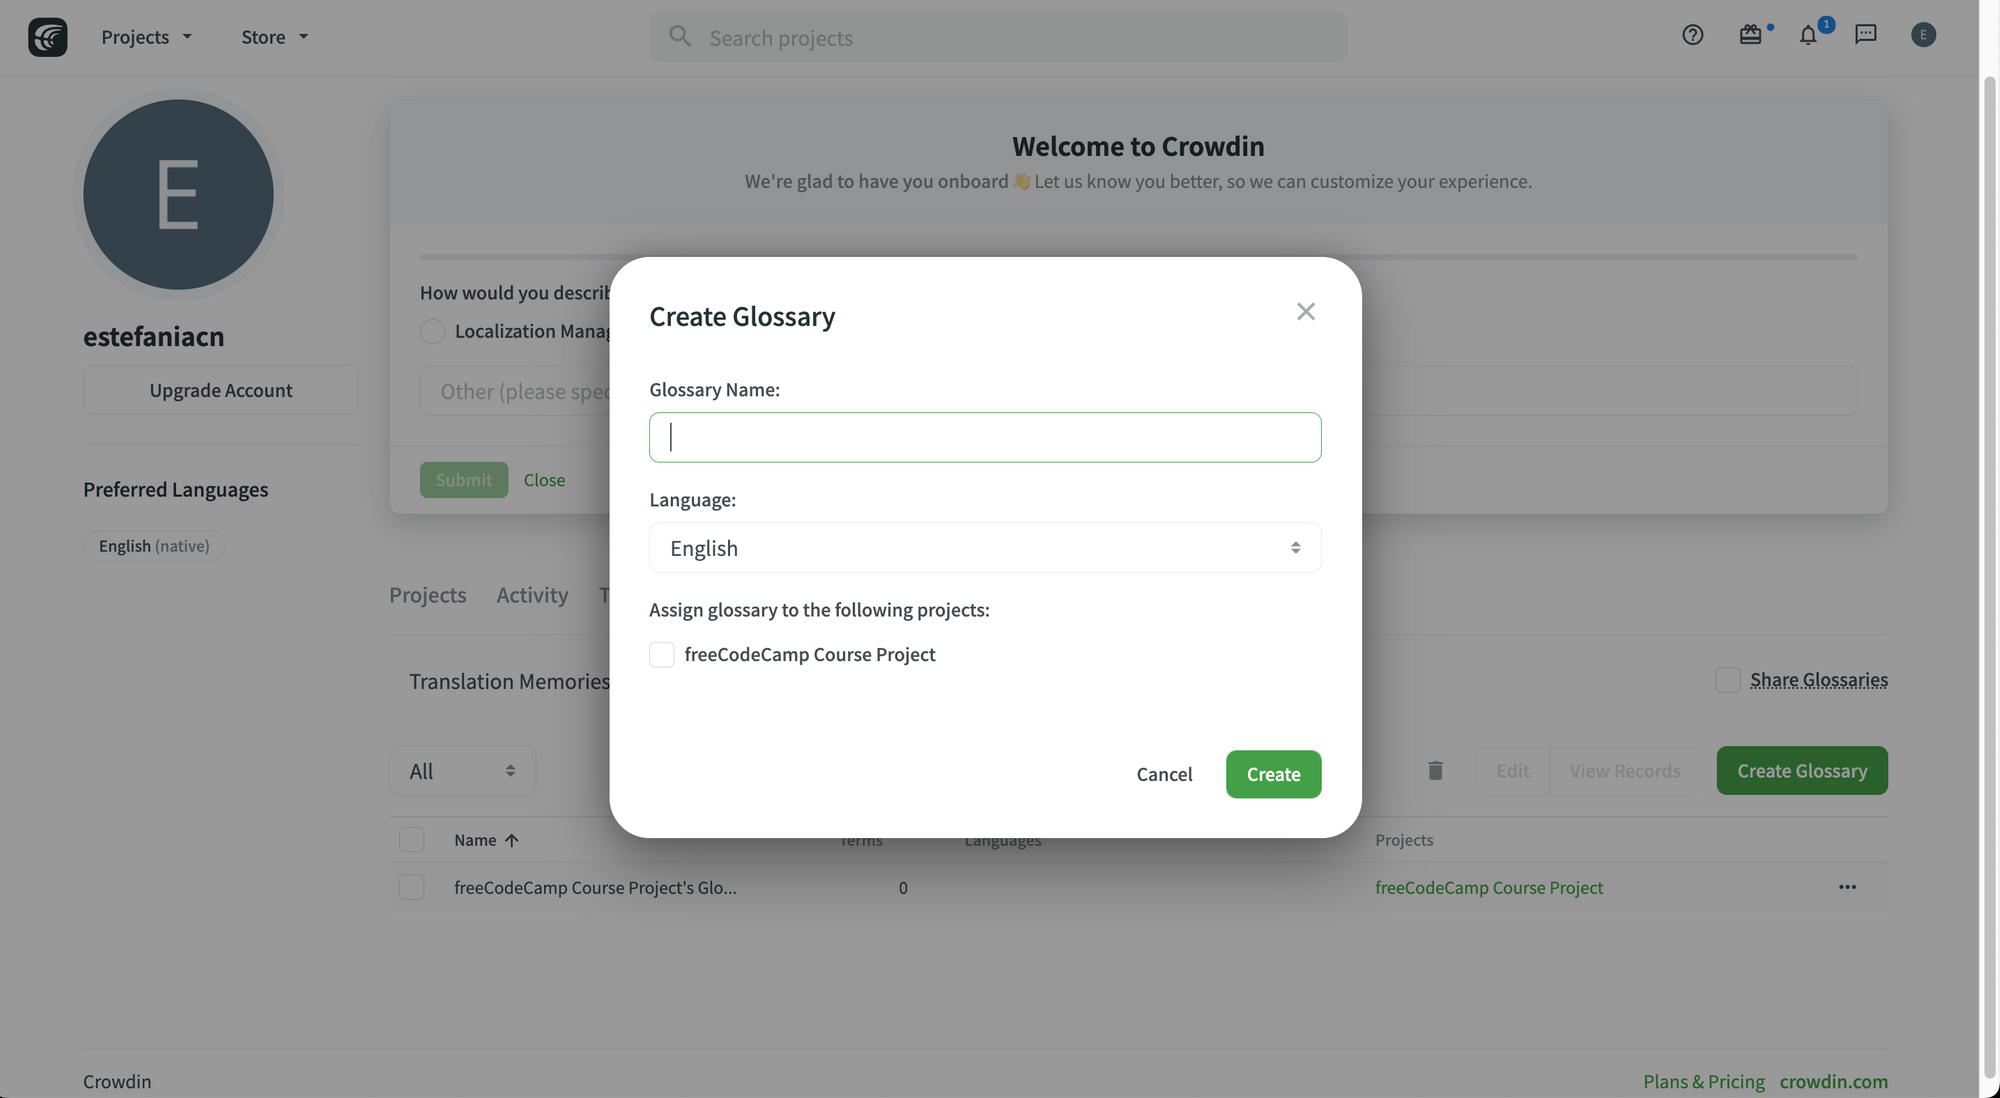 Assign to a Glossary.
After this, you will see your new glossary in the list of glossaries. I created a new glossary called "Demo Glossary".
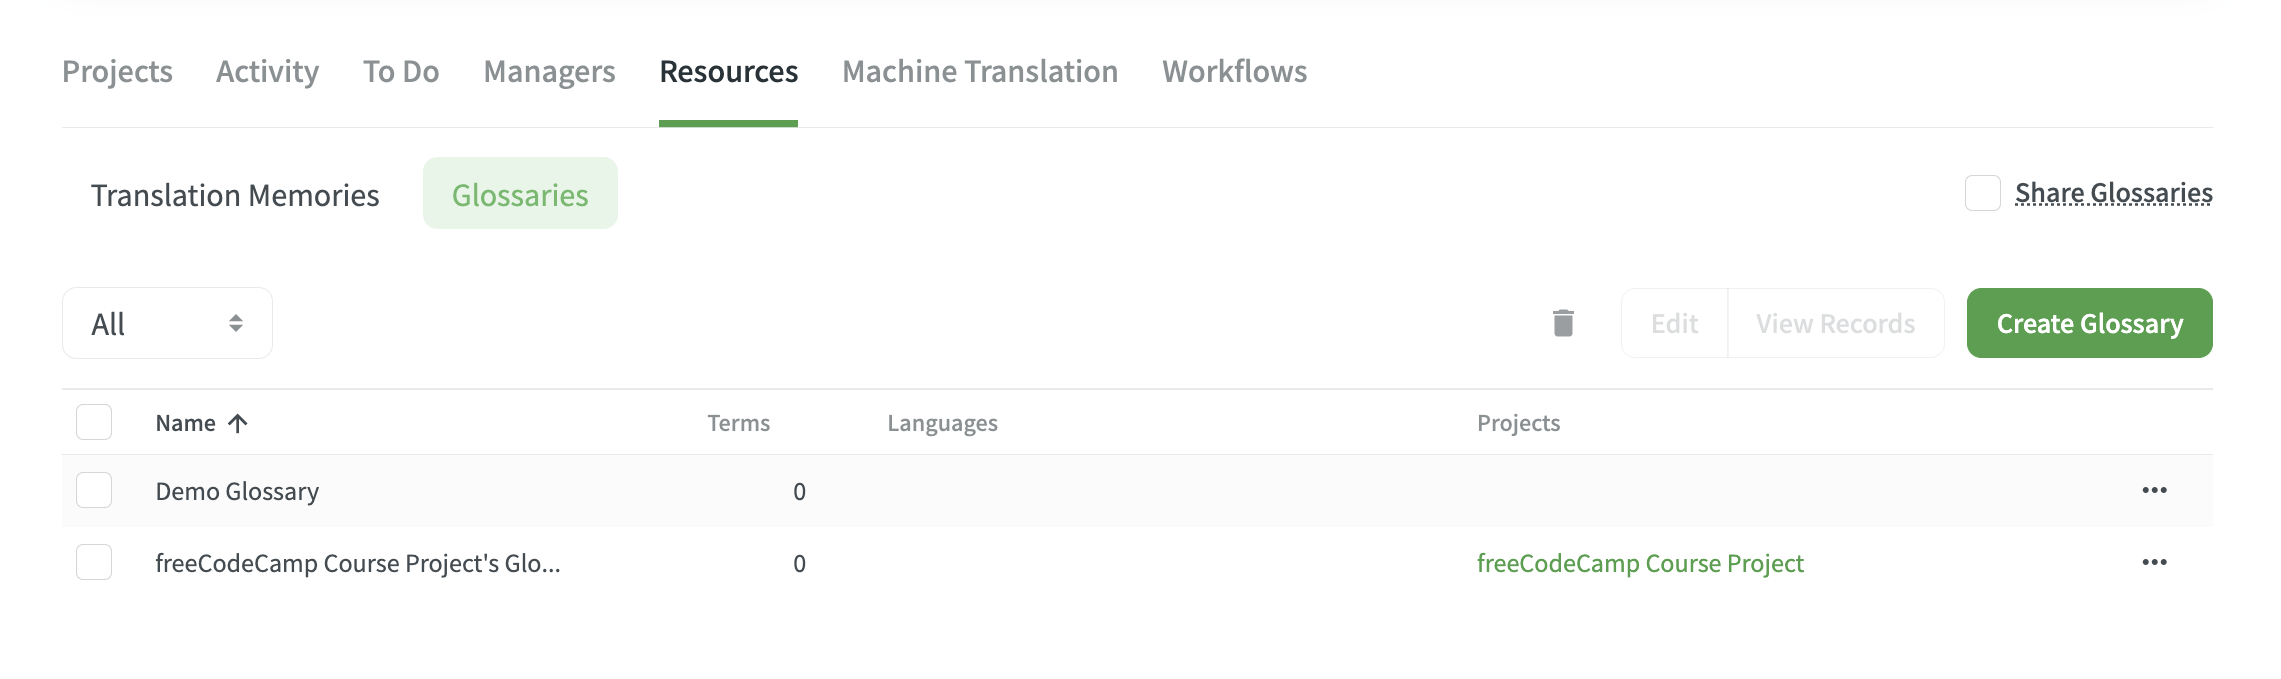 List of Glossaries.
How to Manage Glossary Terms
You can add, edit, and delete concepts and terms from your glossaries. Let's see how you can do this step by step.
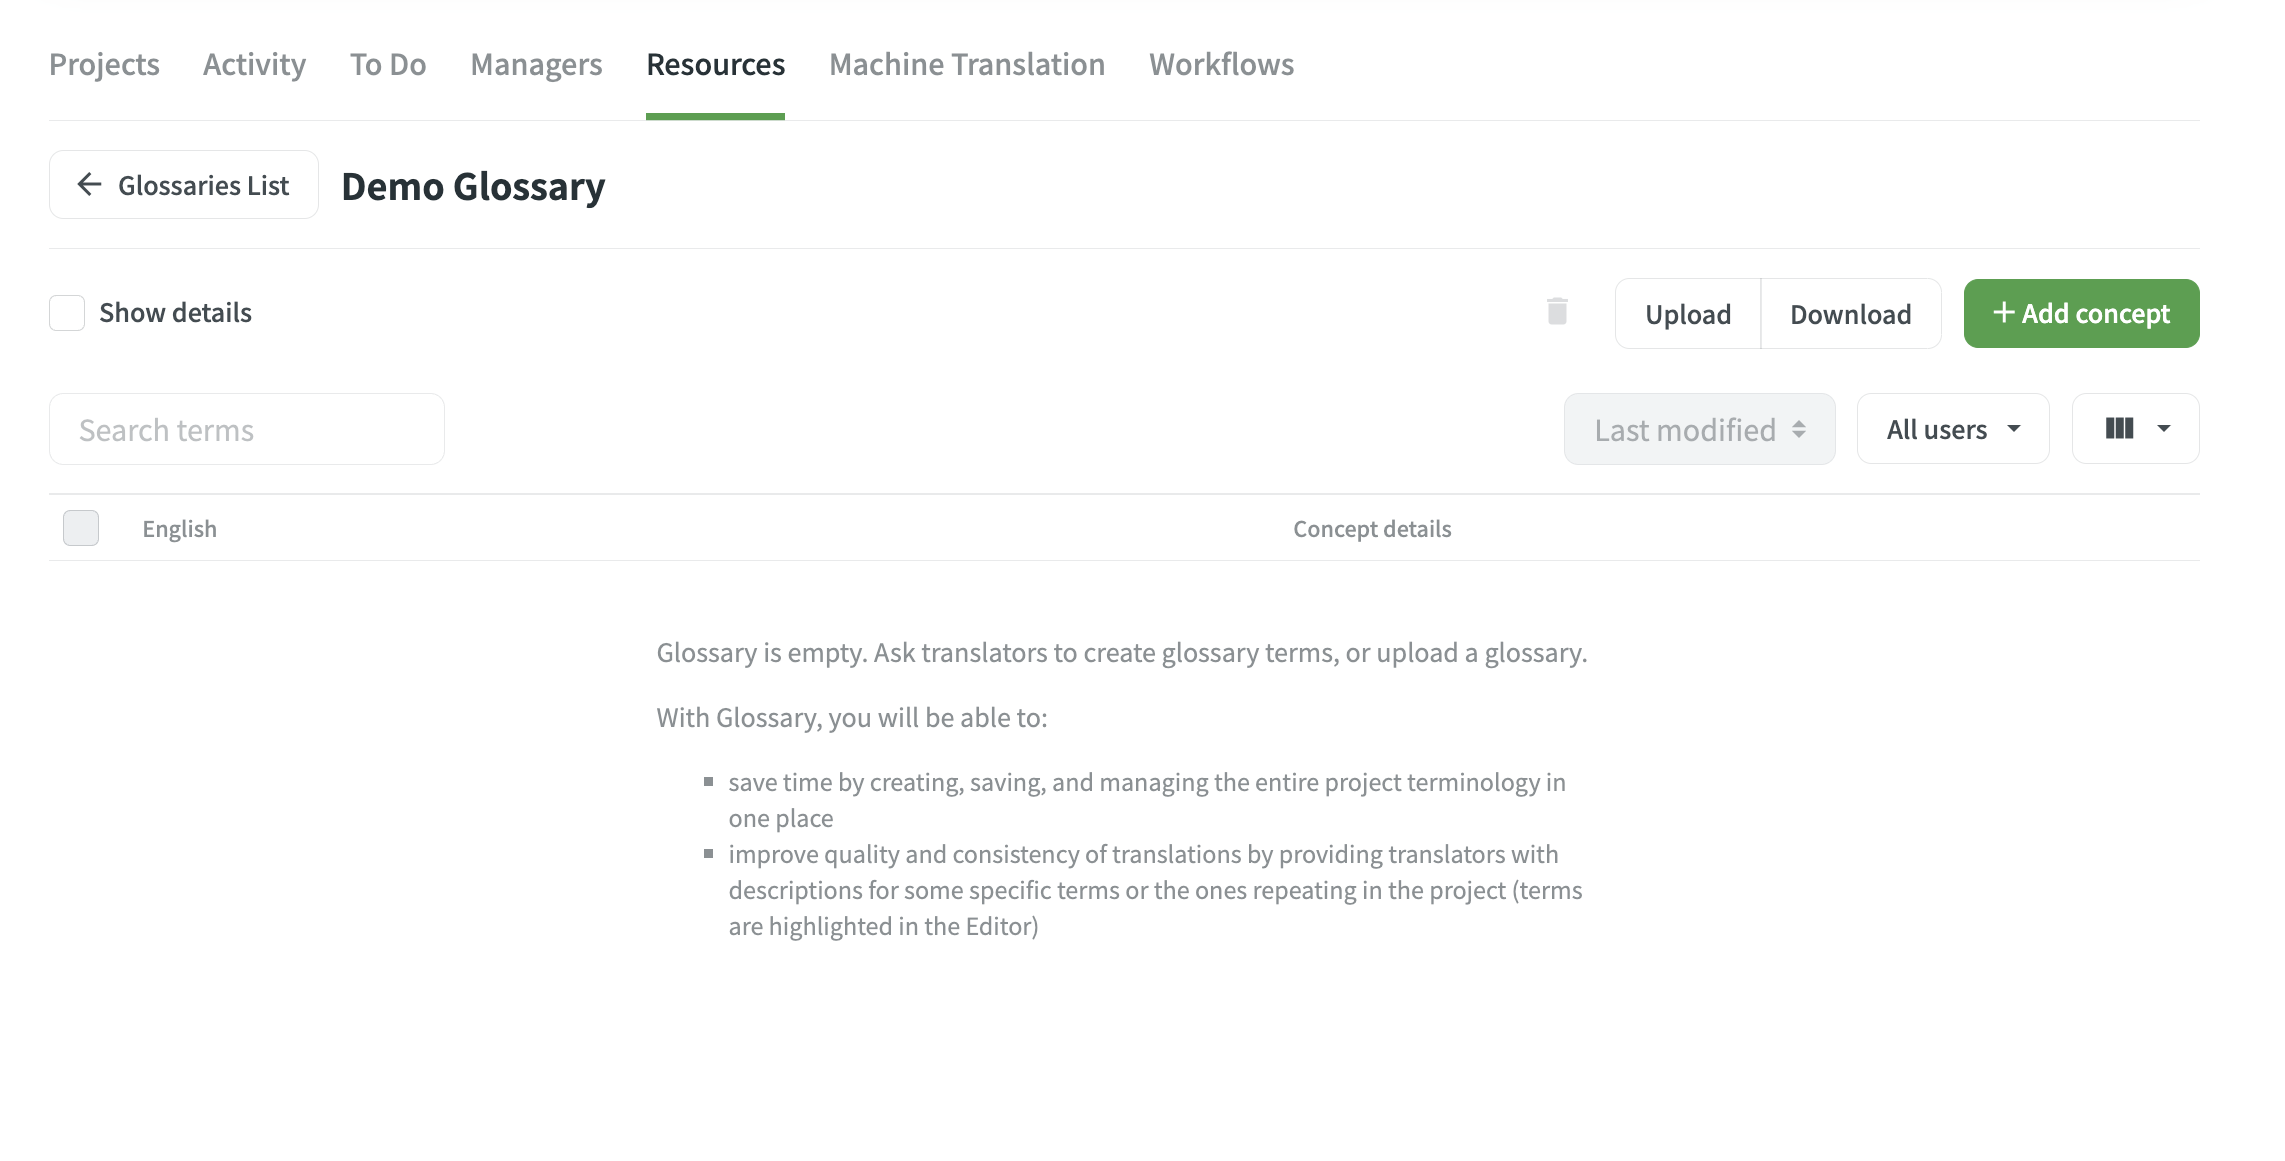 New Empty Glossary.
💡 Tip: On Crowdin, concepts is not the same as a term. A concept is broader than a term. This is what the documentation says about their difference:
A concept incorporates glossary terms and their variations with multiple translations and other relevant information.
To add a concept, click on the green "Add concept" button:
 Add concept.
You will need to write information about the new concept:
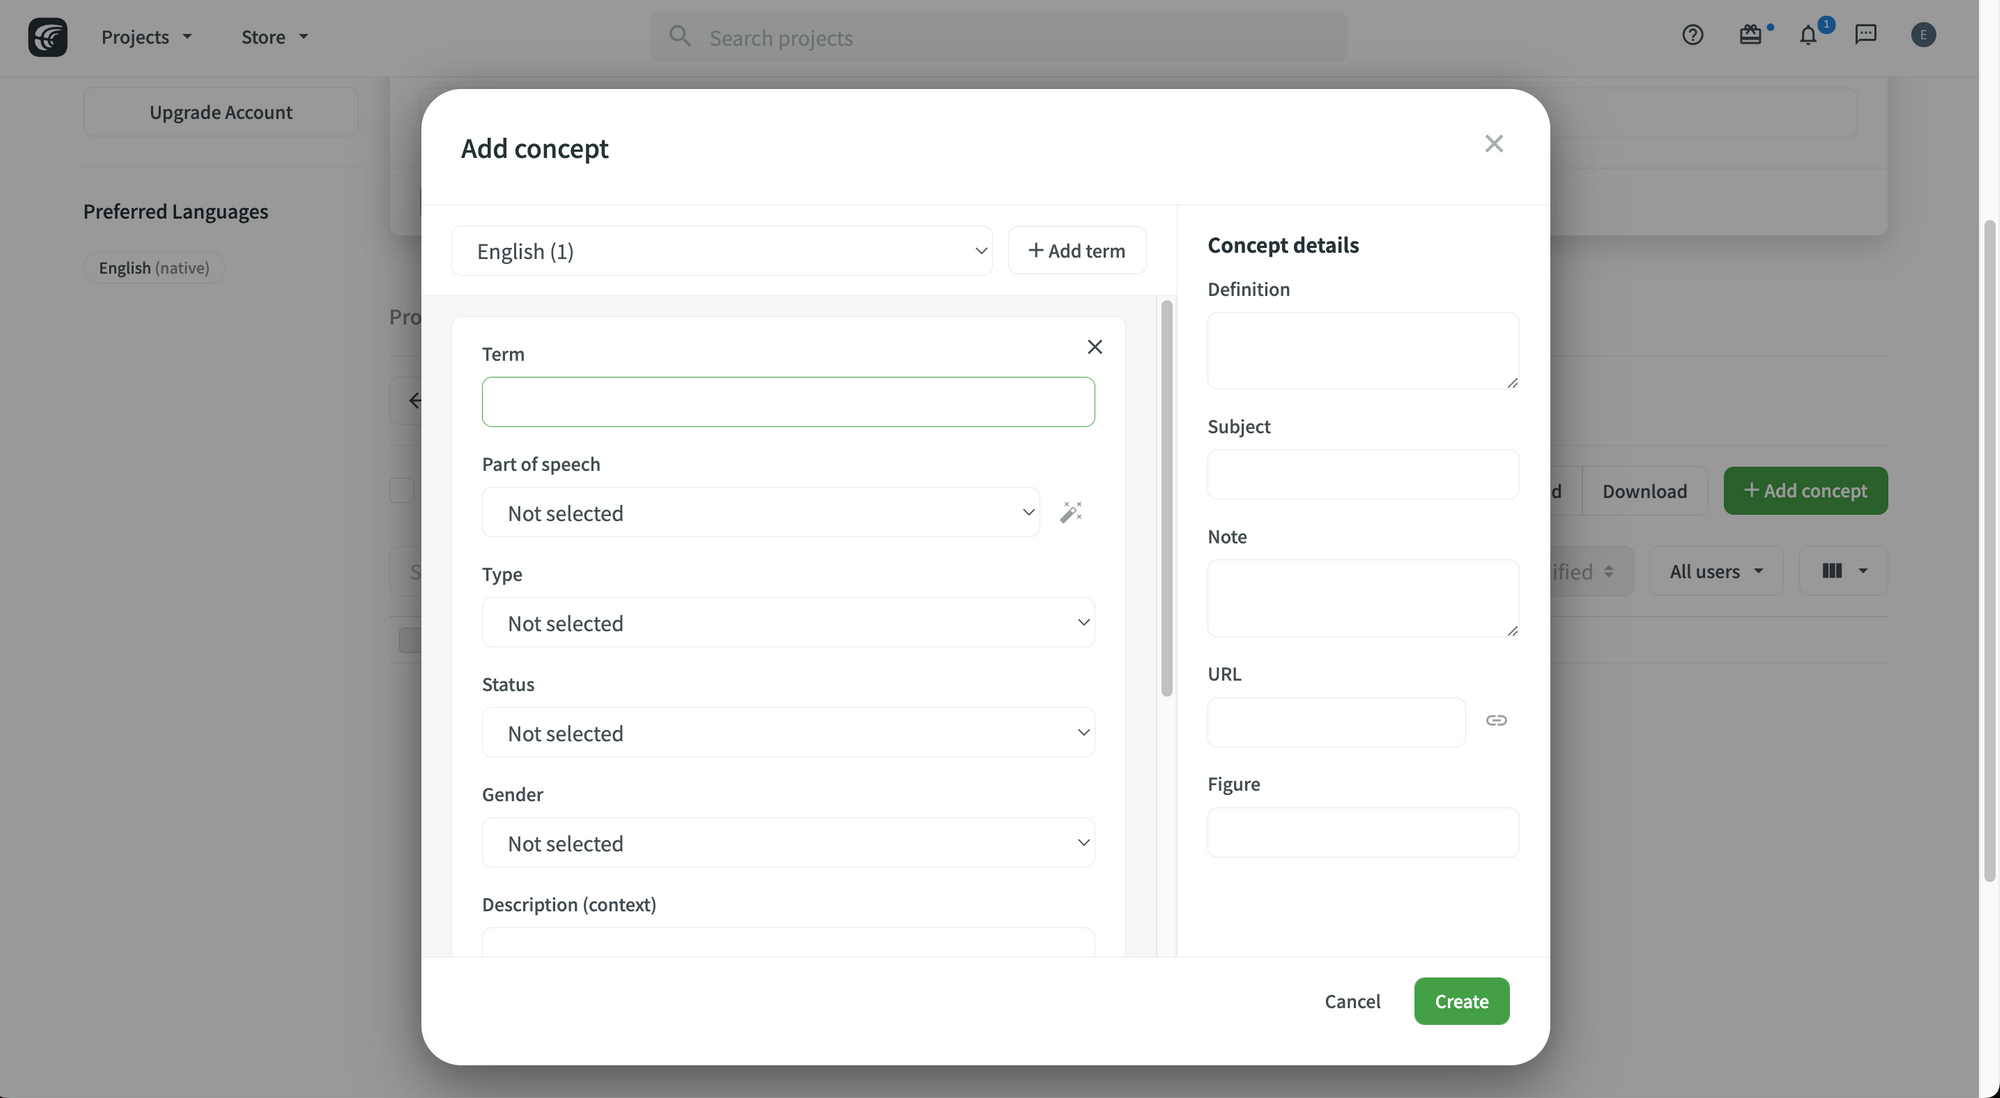 Add concept dialog.
The Crowdin documentation describes the following concept details:
Definition: concept definition.
Subject: a branch of knowledge the concept is related to.
Note: short notes about a concept that might be helpful to translators.
URL: URL to the web page with relevant information about a concept.
Figure: URL to the relevant image.
It also mentions the following term details:
Part of speech: e.g., noun, verb, adjective, etc.
Type: e.g., full form, acronym, abbreviation, etc.
Status: preferred, admitted, not recommended, obsolete.
Gender: term gender.
Description: term description.
Note: short notes about a term that might be helpful to translators.
URL: URL to the web page with relevant information about a term.
After you create the term, you will see it in the list of terms for the glossary:
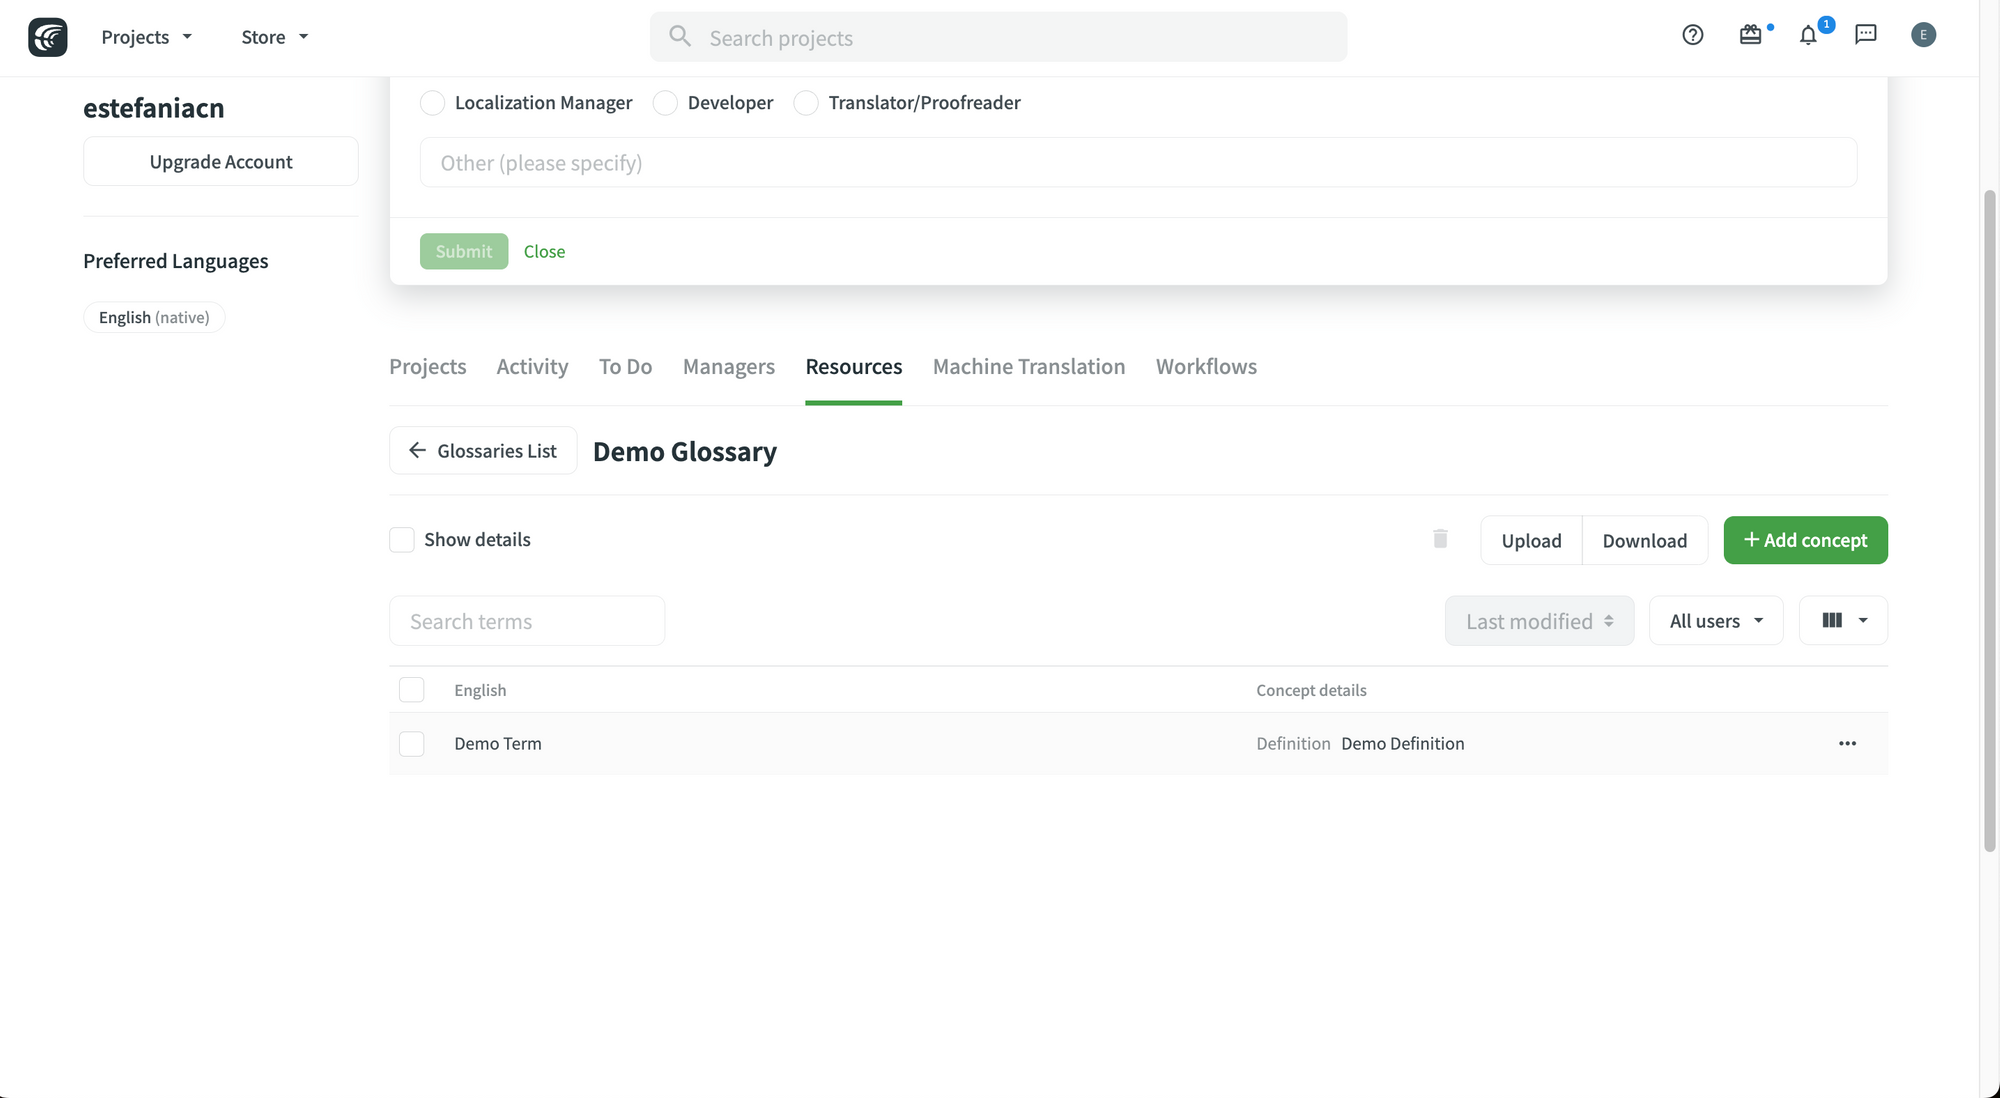
To edit or delete a glossary term, click on the three dots to the right to see additional options and choose an option.
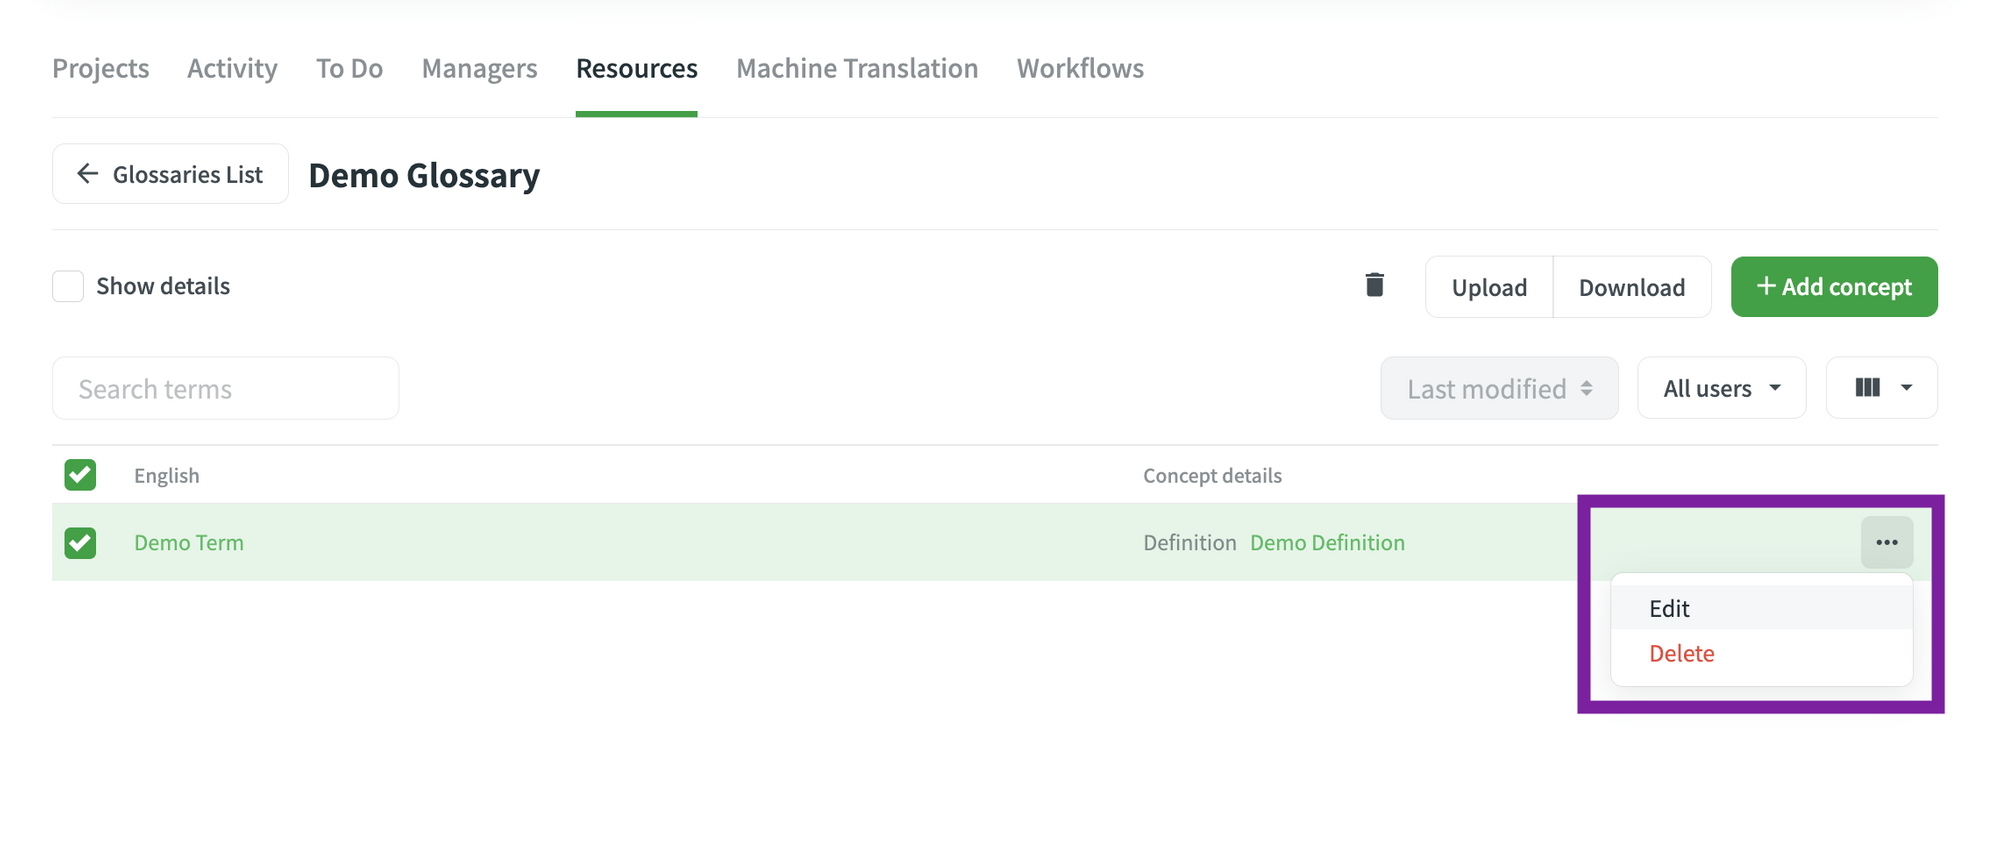 Glossary Term.
You can download or upload a glossary in the following formats:
- TBX (v2)
- TBX (v3)
- CSV
- XLSX
Just click on the corresponding button and you will be able to choose a file to upload or the format of the file to download.
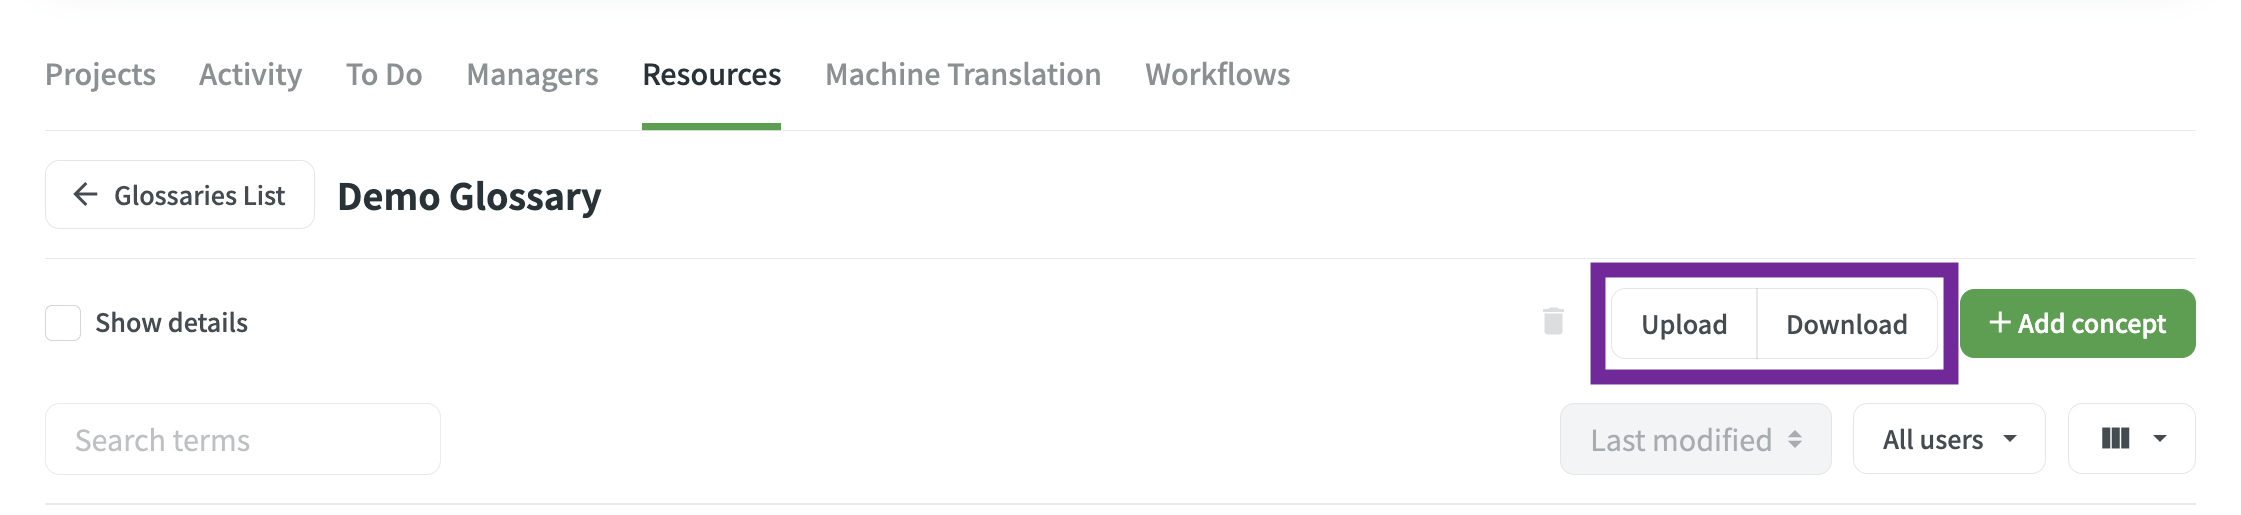 Upload and Download a Glossary.
Crowdin suggests that:
If you upload a glossary in CSV or XLS/XLSX file formats, select the language for each column and the column value (term, description, or part of speech) in the configuration dialog.
 Selecting the columns. Image taken from the Crowdin documentation.
How to Assign a Glossary to a Project
It is very easy to assign a glossary to a project on Crowdin.
You just need to:
- Go to your project.
- Go to the "Settings" tab.
- Go to "Glossaries".
- Select the glossary (or glossaries) that you would like to assign to your project.
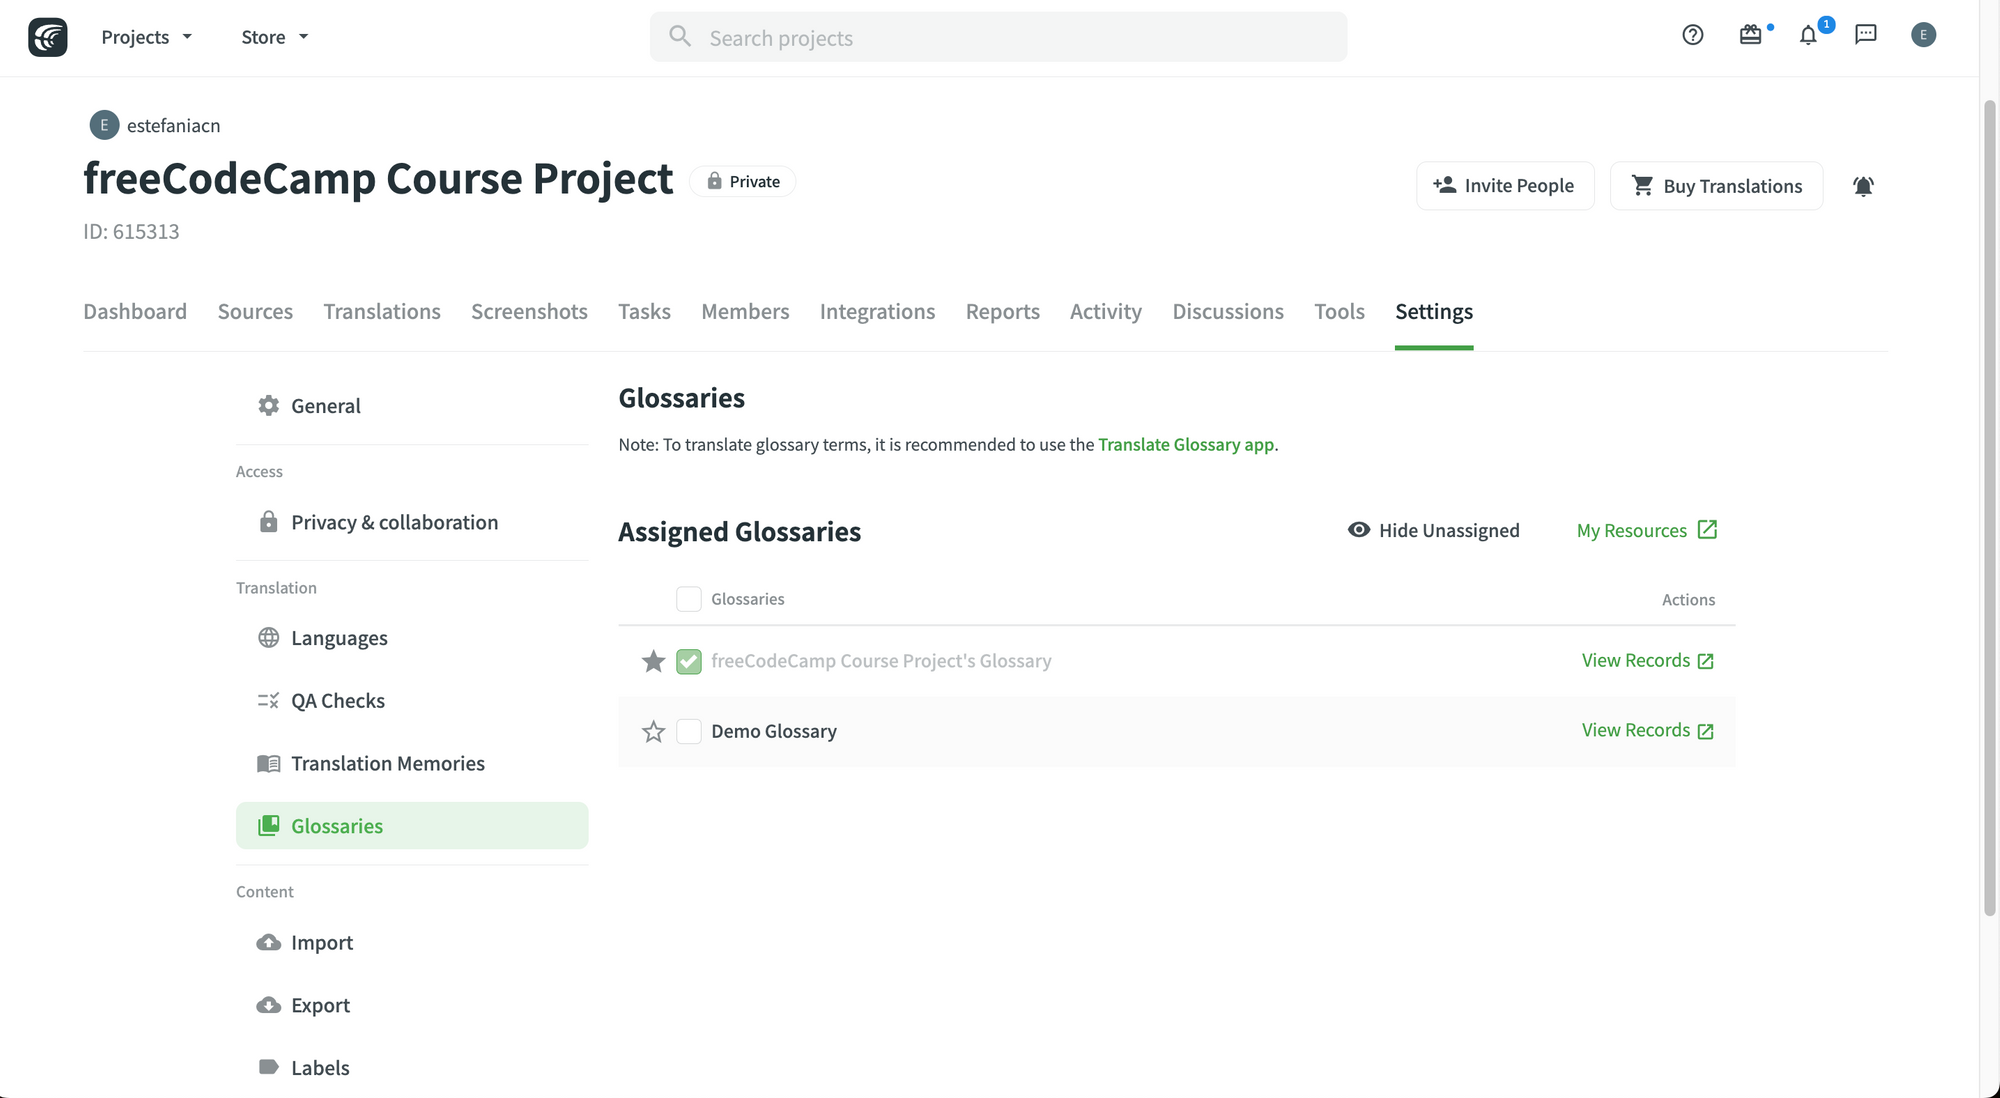 Project Glossaries.
💡 Tip: To change the default glossary of a project, just click on the star icon of the corresponding glossary. The dark gray star marks the current default glossary.
You can also share glossaries across all your projects by checking the option "Share Glossaries" in your profile:
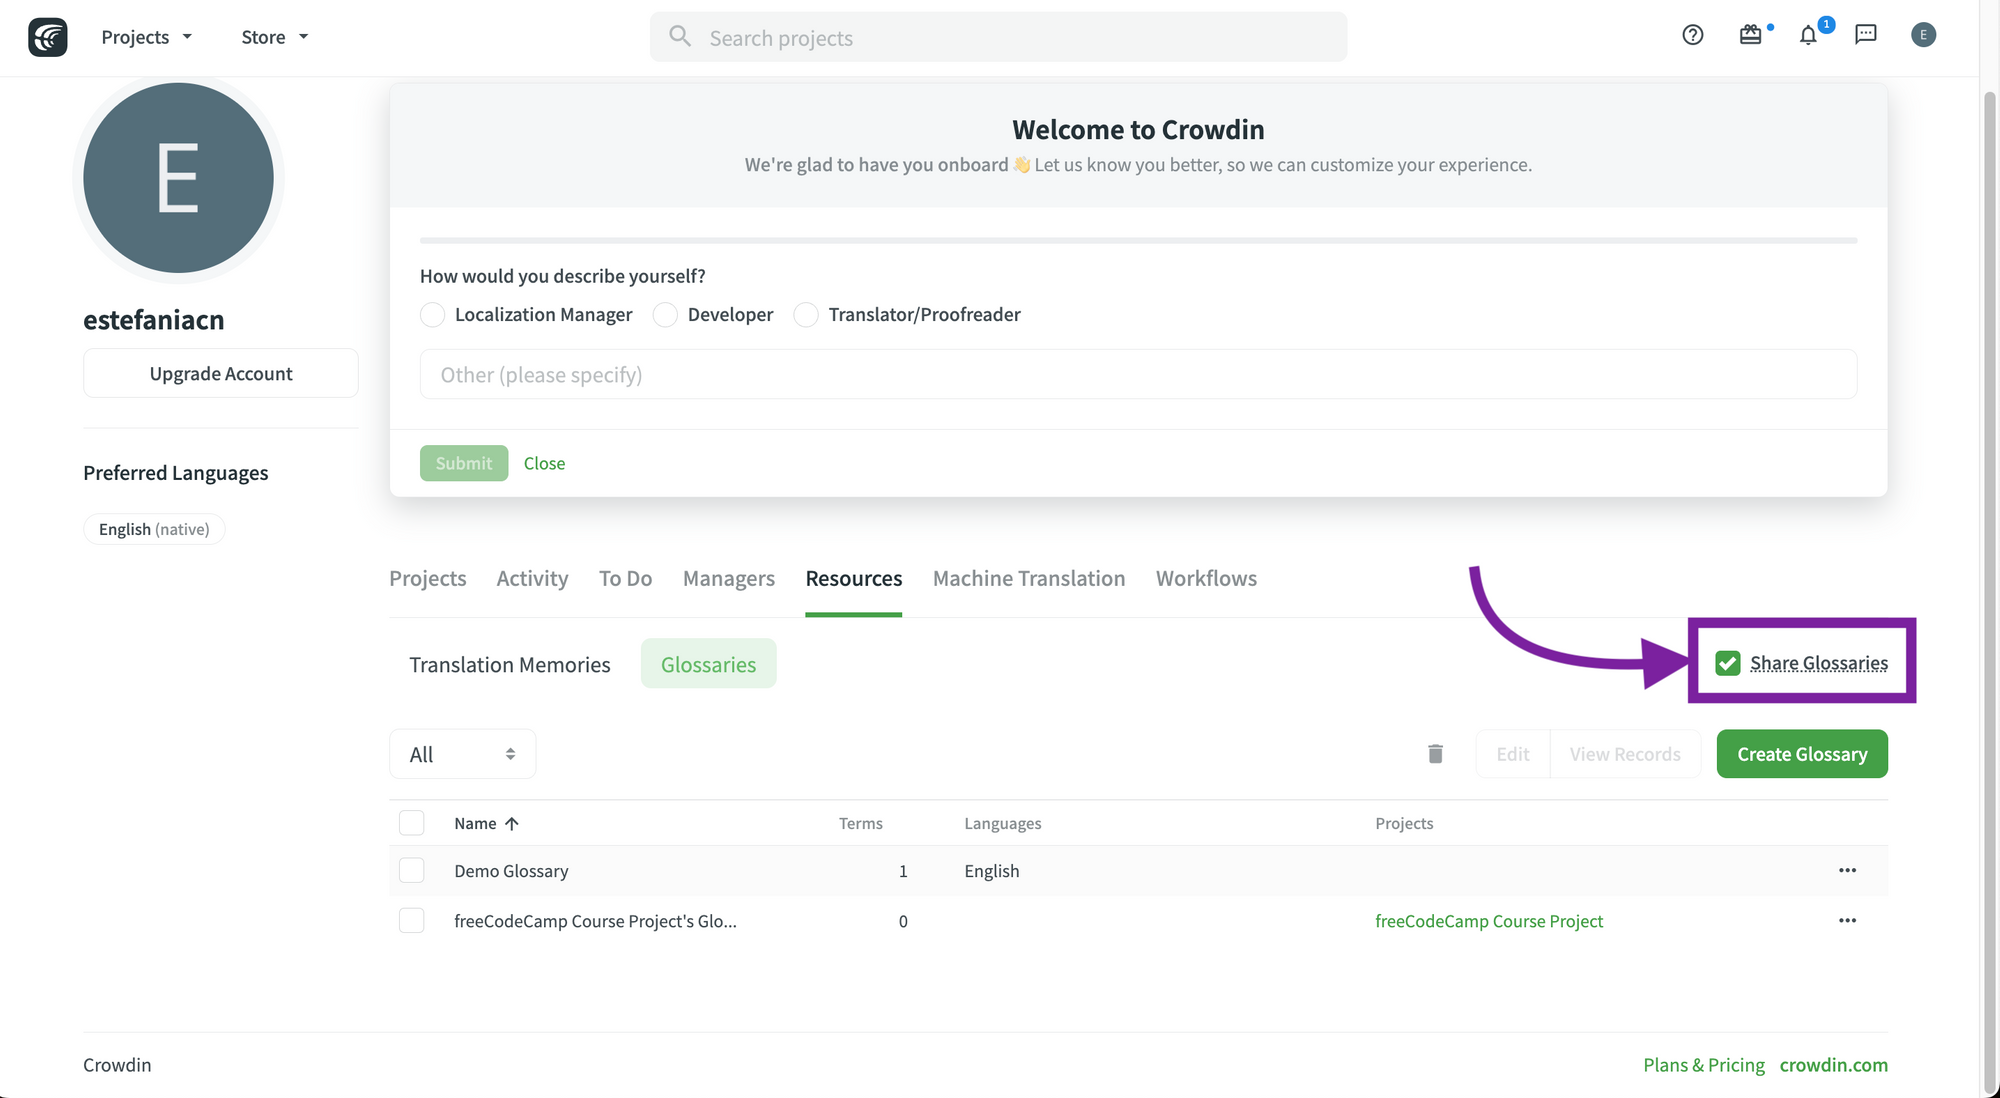 Share Glossaries.
How to Translate the Glossary
Translating your glossary can be very helpful to use terms consistently in your target languages.
To translate your glossary, Crowdin recommends using the free Translate Glossary app.
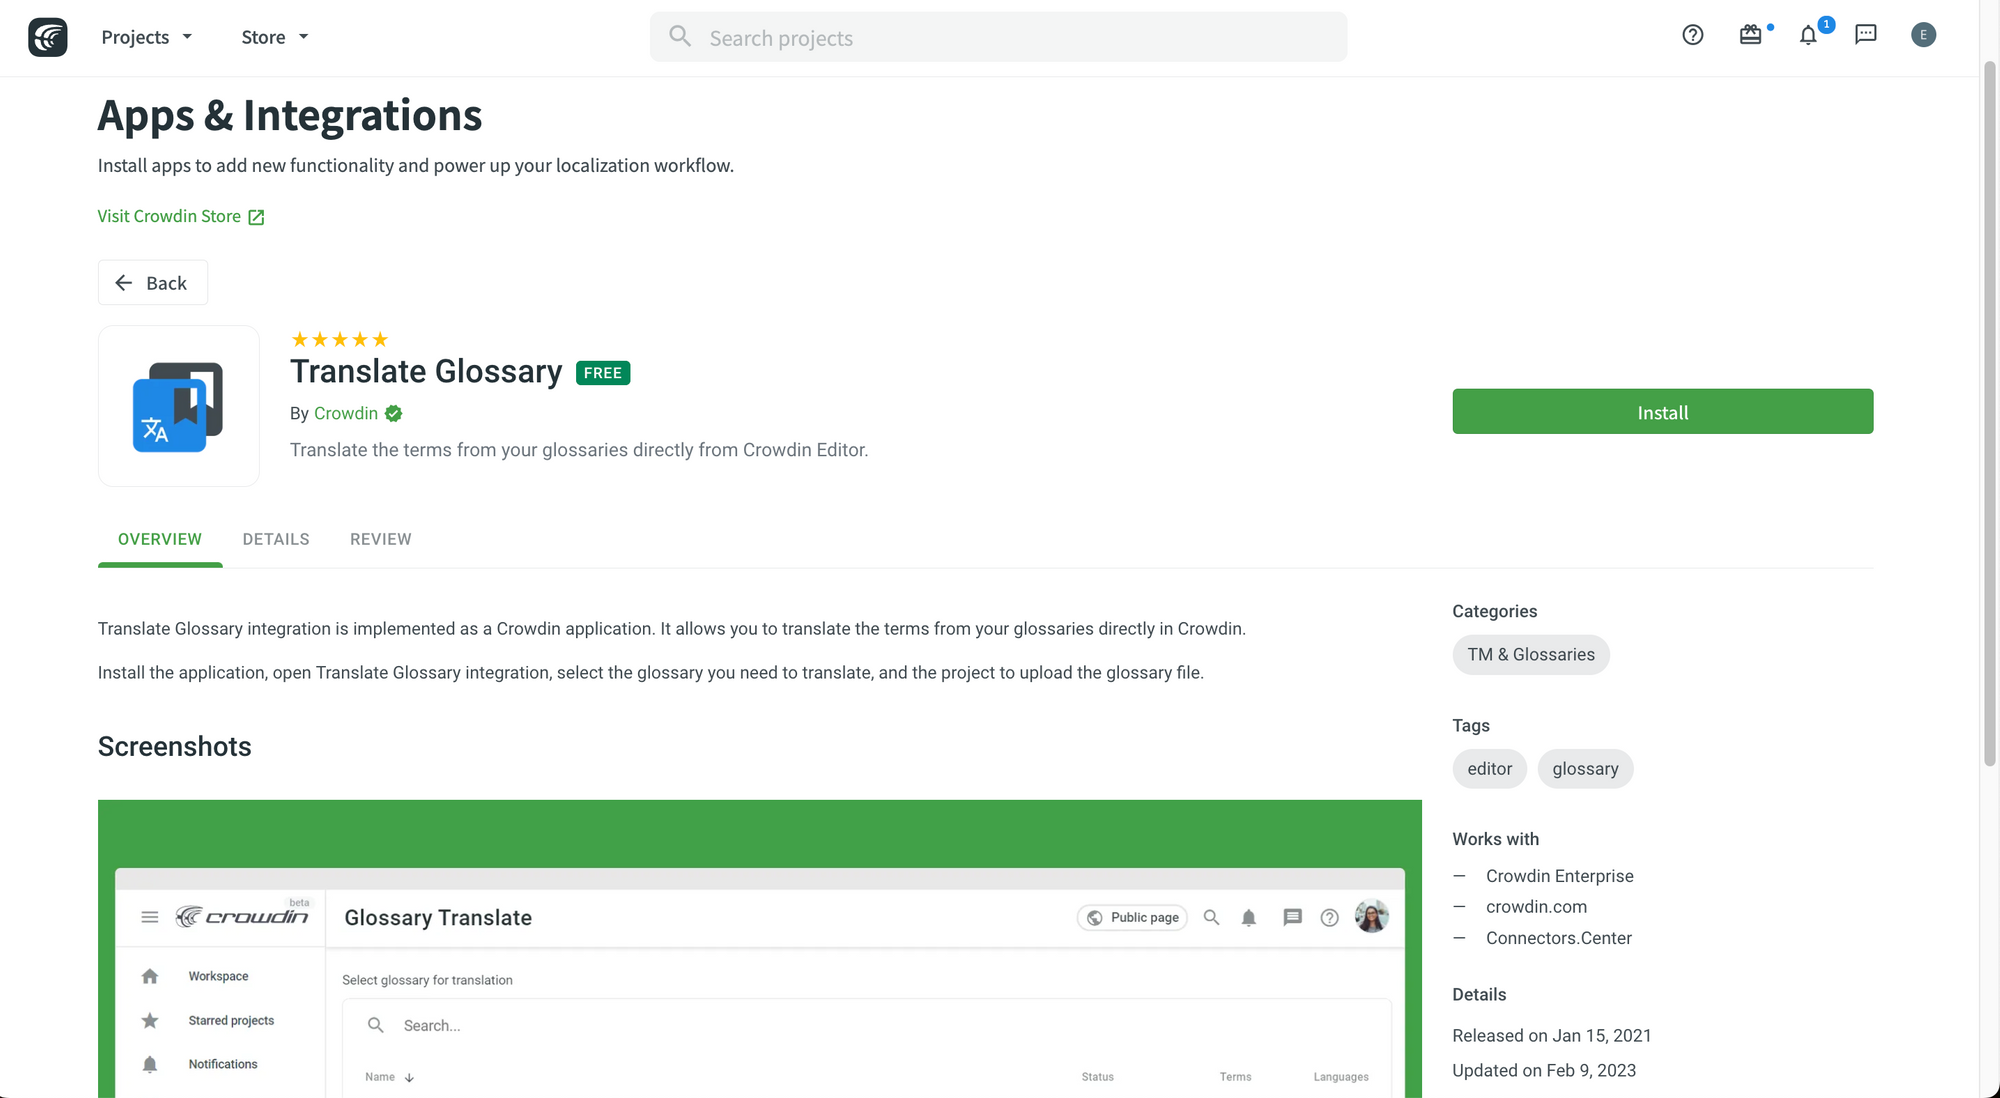 Translate Glossary app.
If you install the app, you will be able to translate your glossary directly on Crowdin and choose which projects should have access to this app.
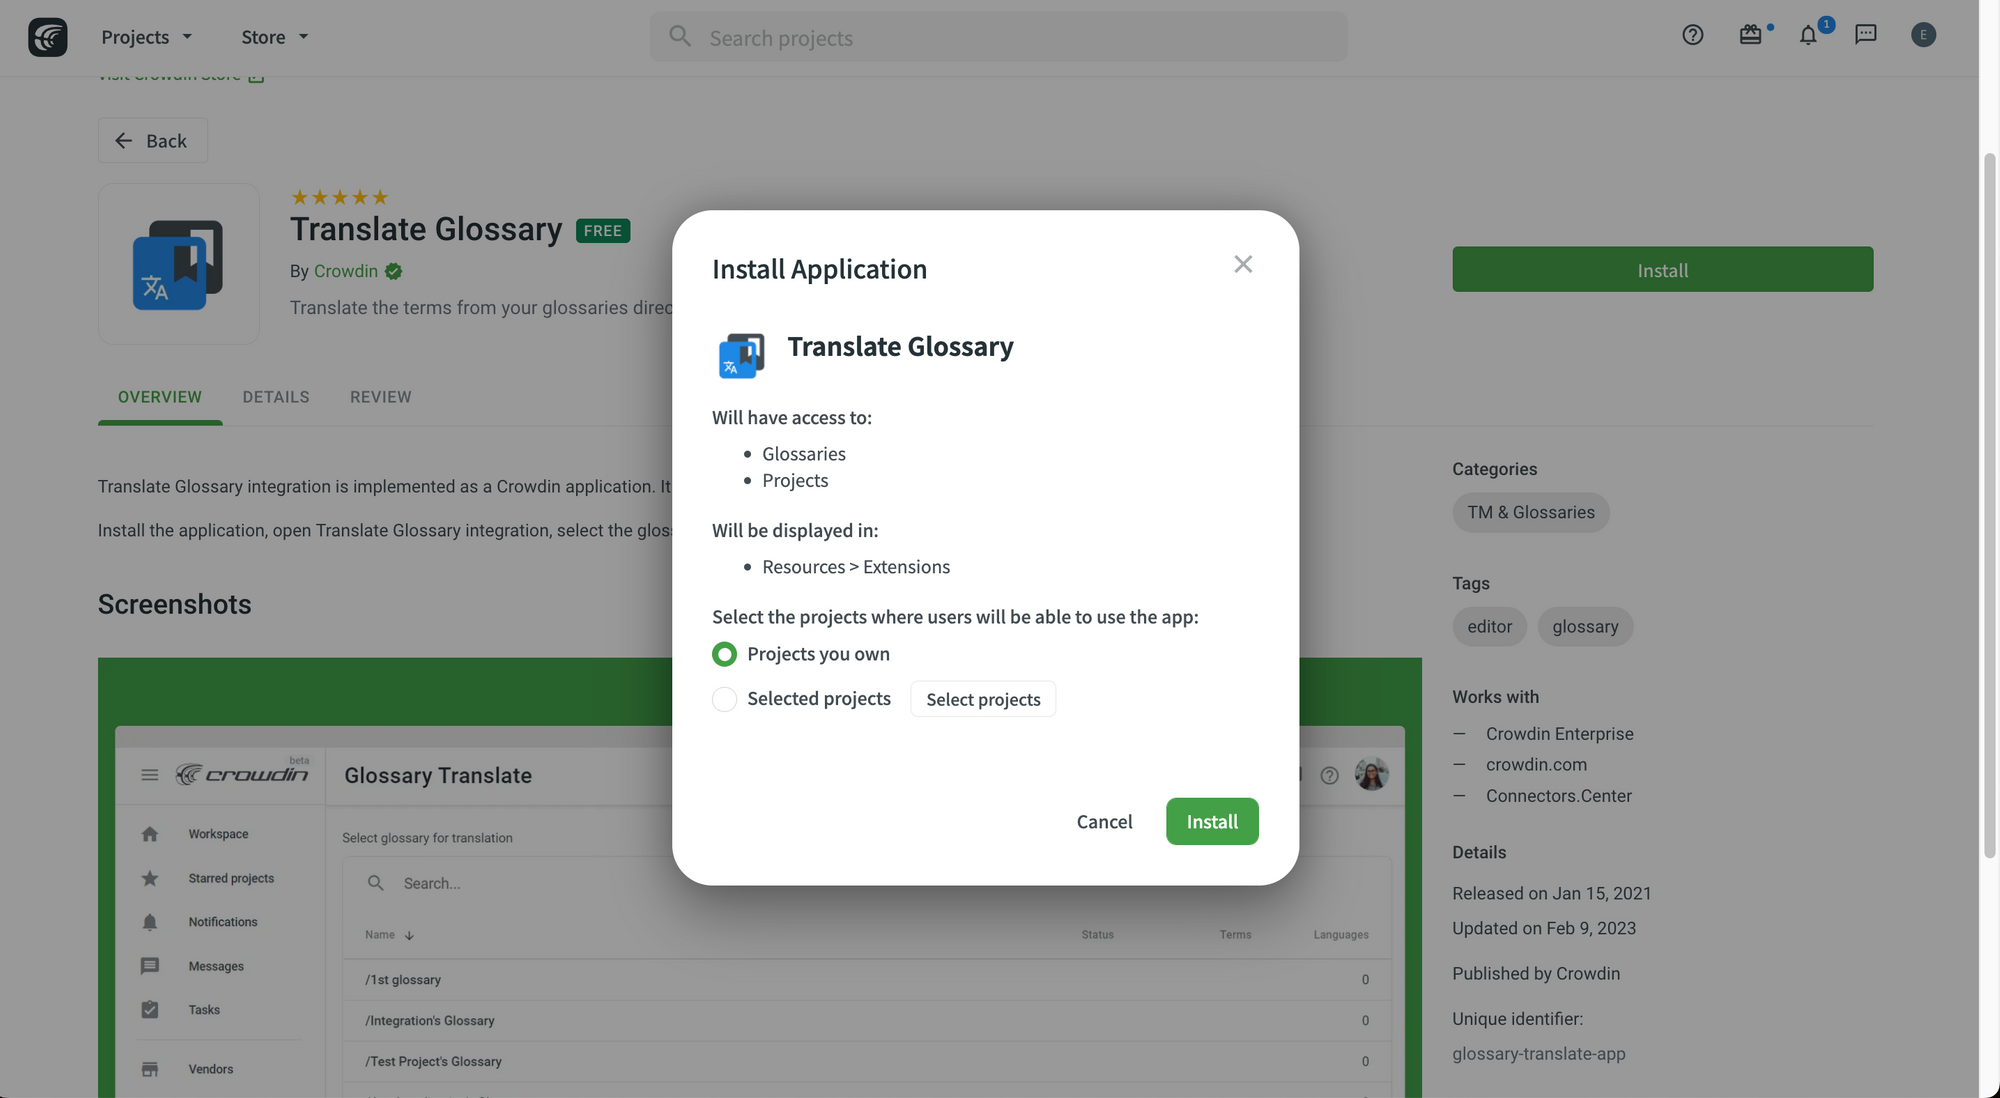 Install the app.
Quality Assurance (QA) Checks in Crowdin
Quality assurance is essential for every type of project and this is especially true for localization projects. One small typo or spelling mistake can make all the difference to your users.
This is why Crowdin implemented efficient quality assurance features to help you deliver the high-quality translations that your users deserve.
According to Crowdin:
QA checks help to detect some common mistakes easily and quickly. It’s recommended to review and resolve all QA check issues before building your project and downloading translations.
The issues detected by the QA Checks include:
- Typos.
- Missing commas.
- Extra spaces.
- Other common mistakes.
How to Configure Quality Assurance (QA) Checks
To configure QA checks and choose what you would like to check for in the translated strings, you just need to:
- Go to your project.
- Go to the "Settings" tab.
- Make sure that "Enable QA Checks" is selected.
- Select what you would like to check for.
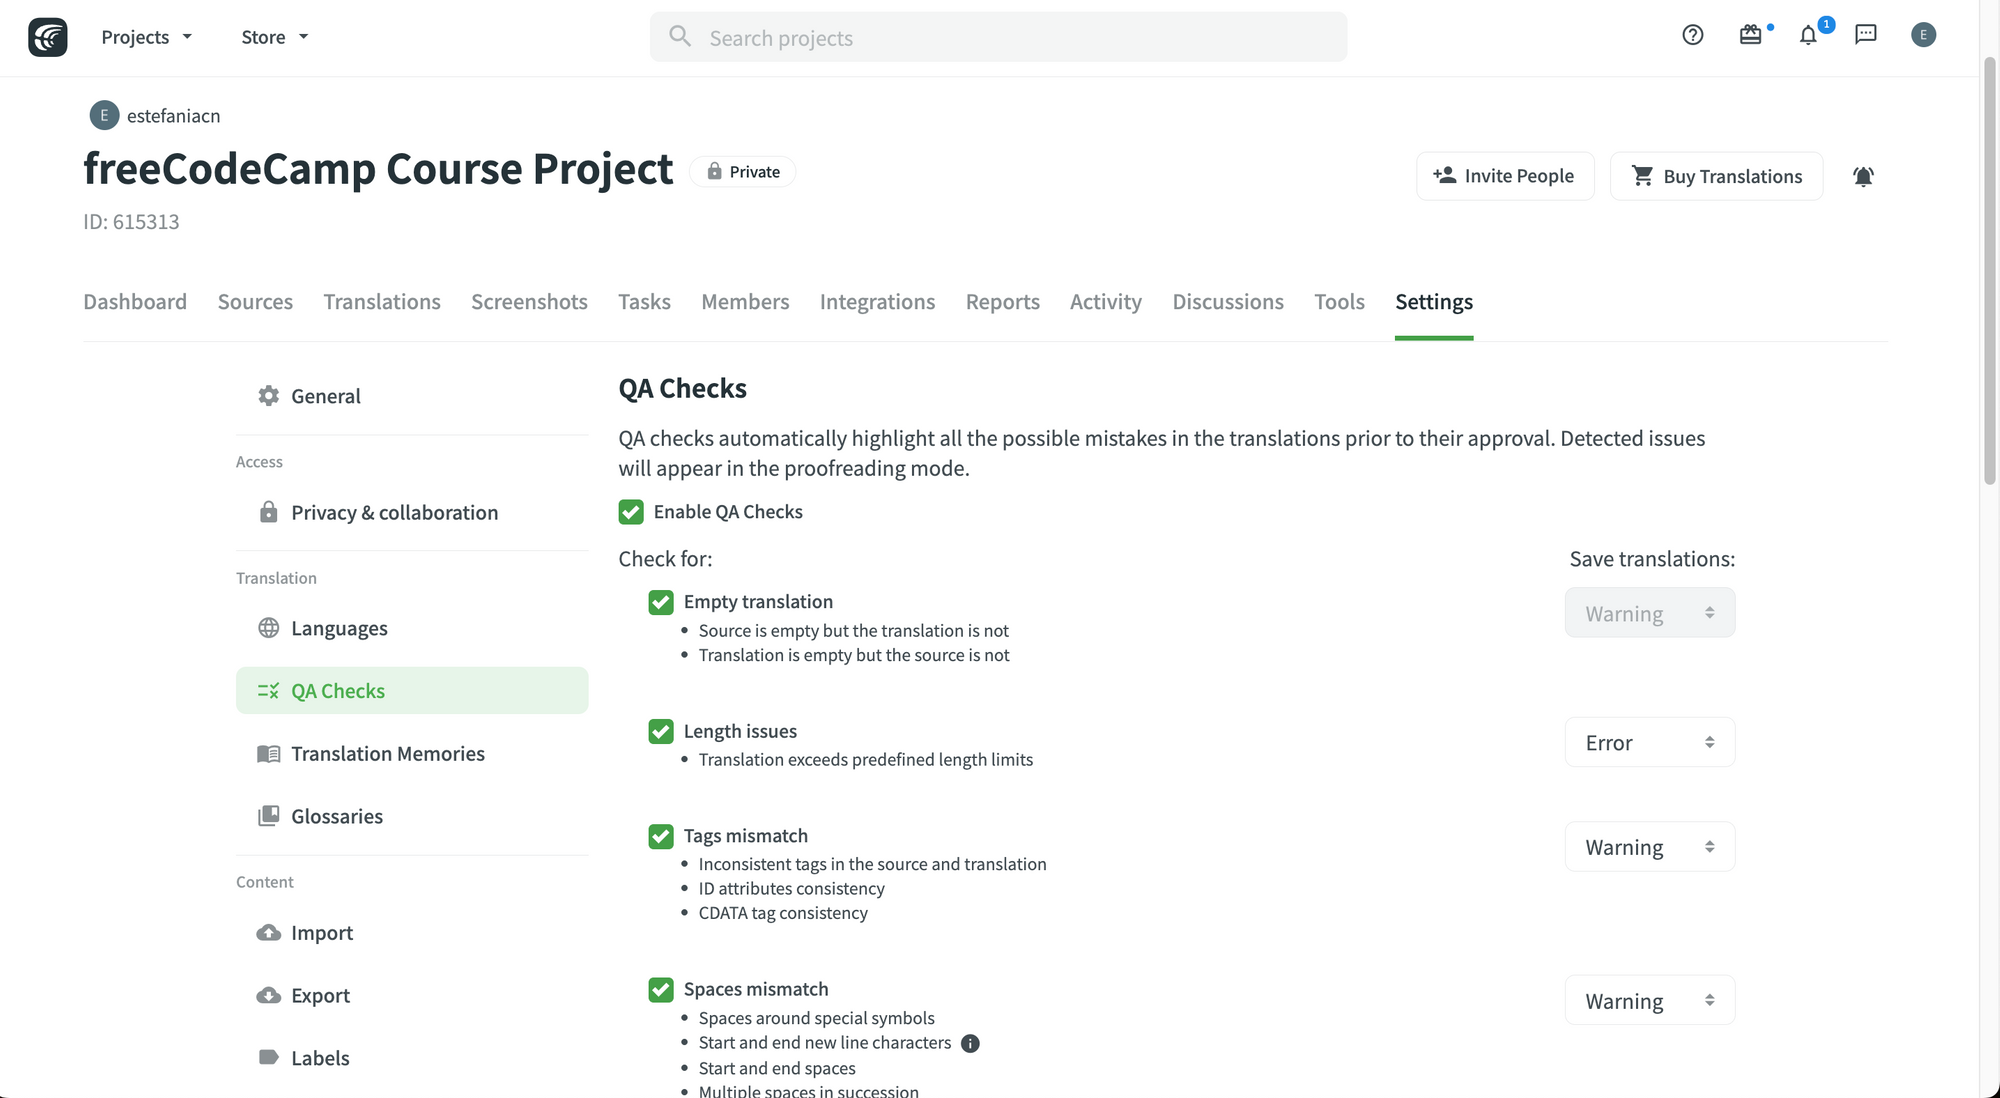 The QA Checks category.
You can check:
- If a translation is empty.
- If the translation is longer than the predefined length limit (if it exists).
- Tags mismatch.
- Spaces mismatch.
- Variables mismatch.
- Punctuation mismatch.
- Character case mismatch.
- Special characters mismatch.
- "Incorrect translation" issues.
- Spelling issues.
- ICU Syntax errors.
- Consistency with the glossary terms.
- Duplicate translation.
- FTL syntax errors.
- Android syntax errors.
💡 Tip: For each of these QA checks, you can choose if you would like to show a warning to the user when the string is being saved or if you would like to go one step further and show an error.
To save your changes, click on the green "Save" button.
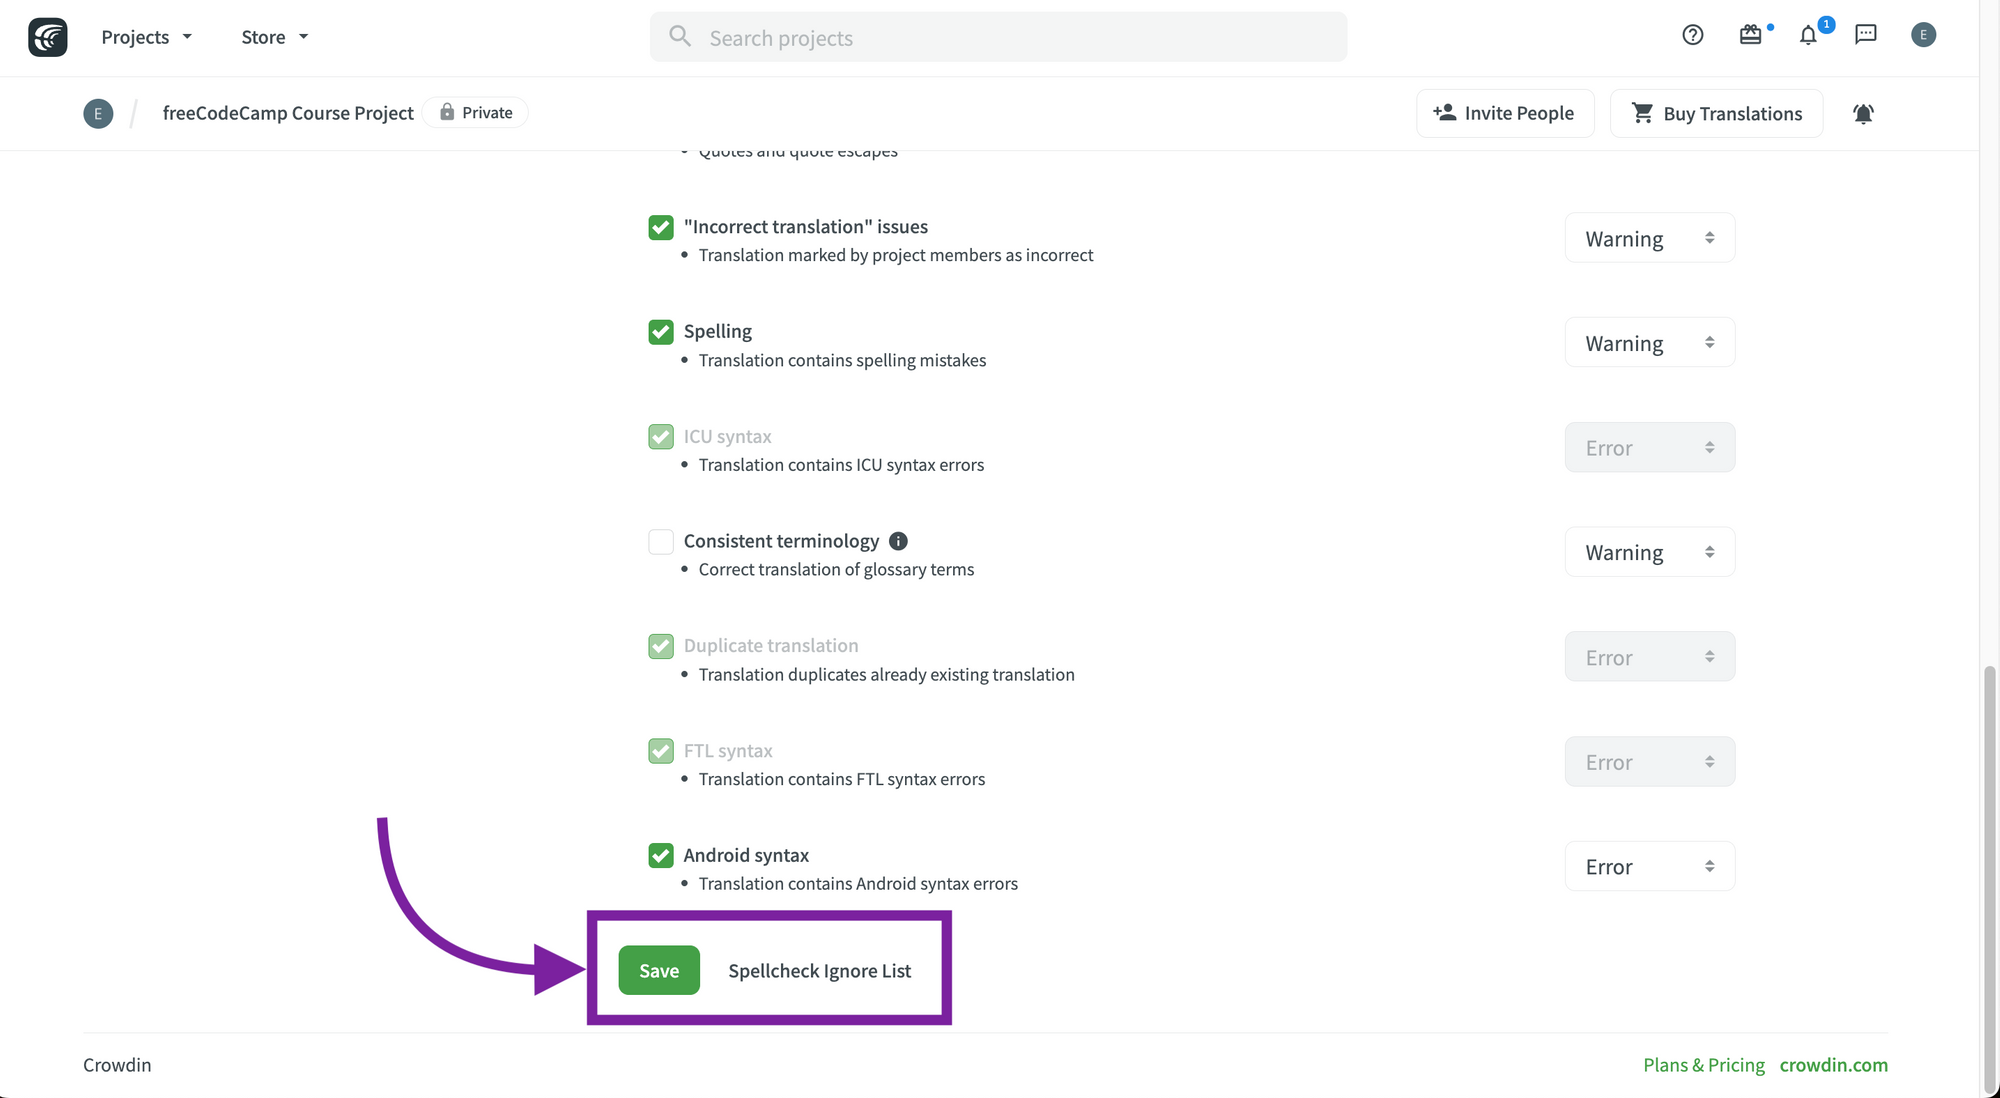 Save QA Checks.
How to Check Quality Assurance Status
Proofreaders and project managers can see the issues found by the quality assurance checks.
To see the current status, you just need to:
- Go to your project.
- Go to the "Dashboard" tab.
- Find the "QA Checks" status.
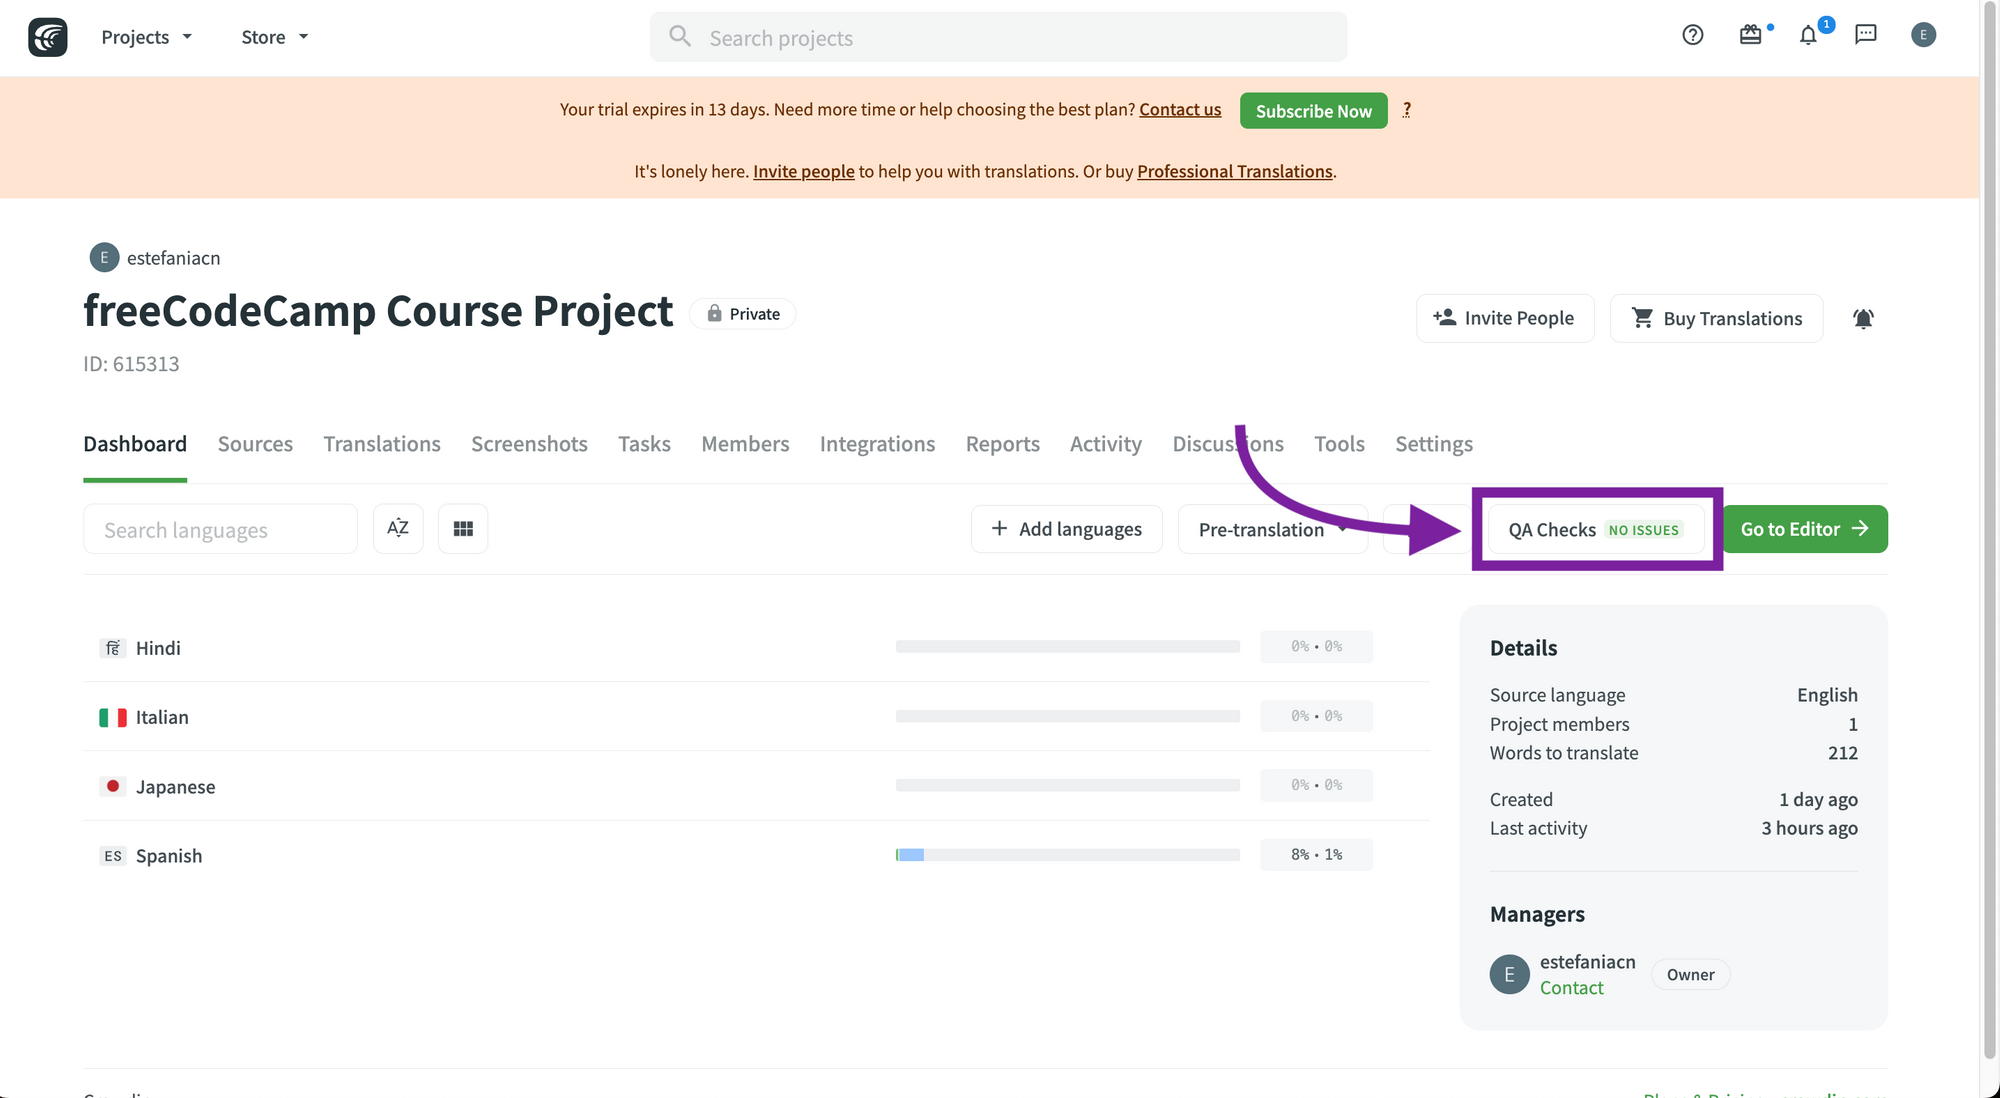 QA Checks with no issues.
You will see one of the following status:
- Off: When the QA checks are not enabled.
- In Progress: When the QA checks are working.
- No Issues: When the QA checks did not find any issues.
- Issues Found: When the QA checks has found issues.
If you try to save a string with QA check issue, you will see a warning or an error. You can save it anyway, but you should always try to fix these issues first.
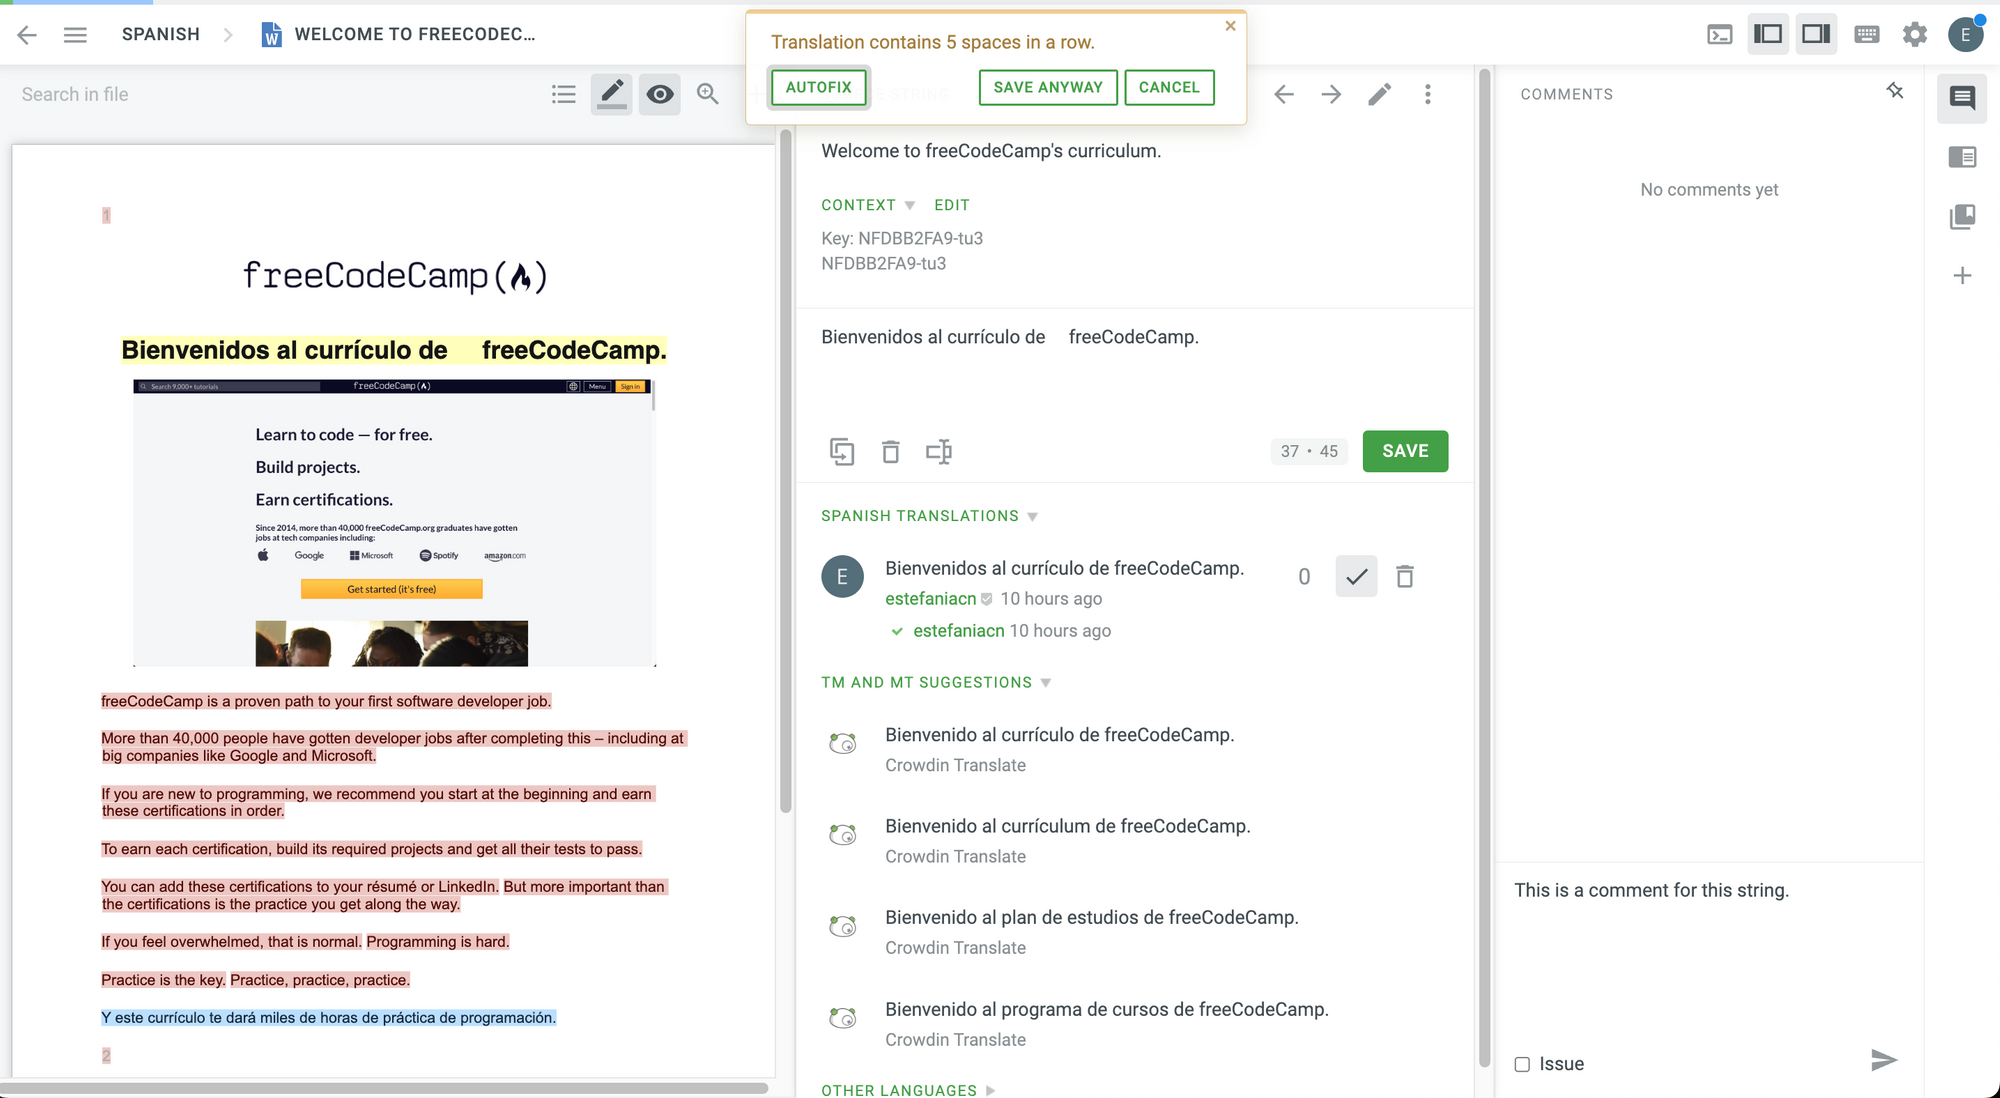 A warning from adding extra spaces.
💡 Tip: Clicking the "Autofix" button on the warning will try to fix the issue automatically. You can also save it anyway or cancel.
This is a sample image from the Crowdin documentation showing what you should see if quality assurance issues are found in your project:
 QA checks issues found. Image taken from the Crowdin documentation.
Quality assurance is a very important step that you should definitely take very seriously during your localization process.
How to Upload Existing Translations
Great. If you have existing translations, you can also upload them to your project.
You have three options:
- Upload them via the Translations Tab.
- Upload them via the Language Page.
- Upload them via the Translation Editor.
How to Upload Via the Translations Tab
To upload them via the Translations Tab:
- Go to your project.
- Go to "Upload existing translations".
- Drag and drop your existing translations or select the files from your file system.
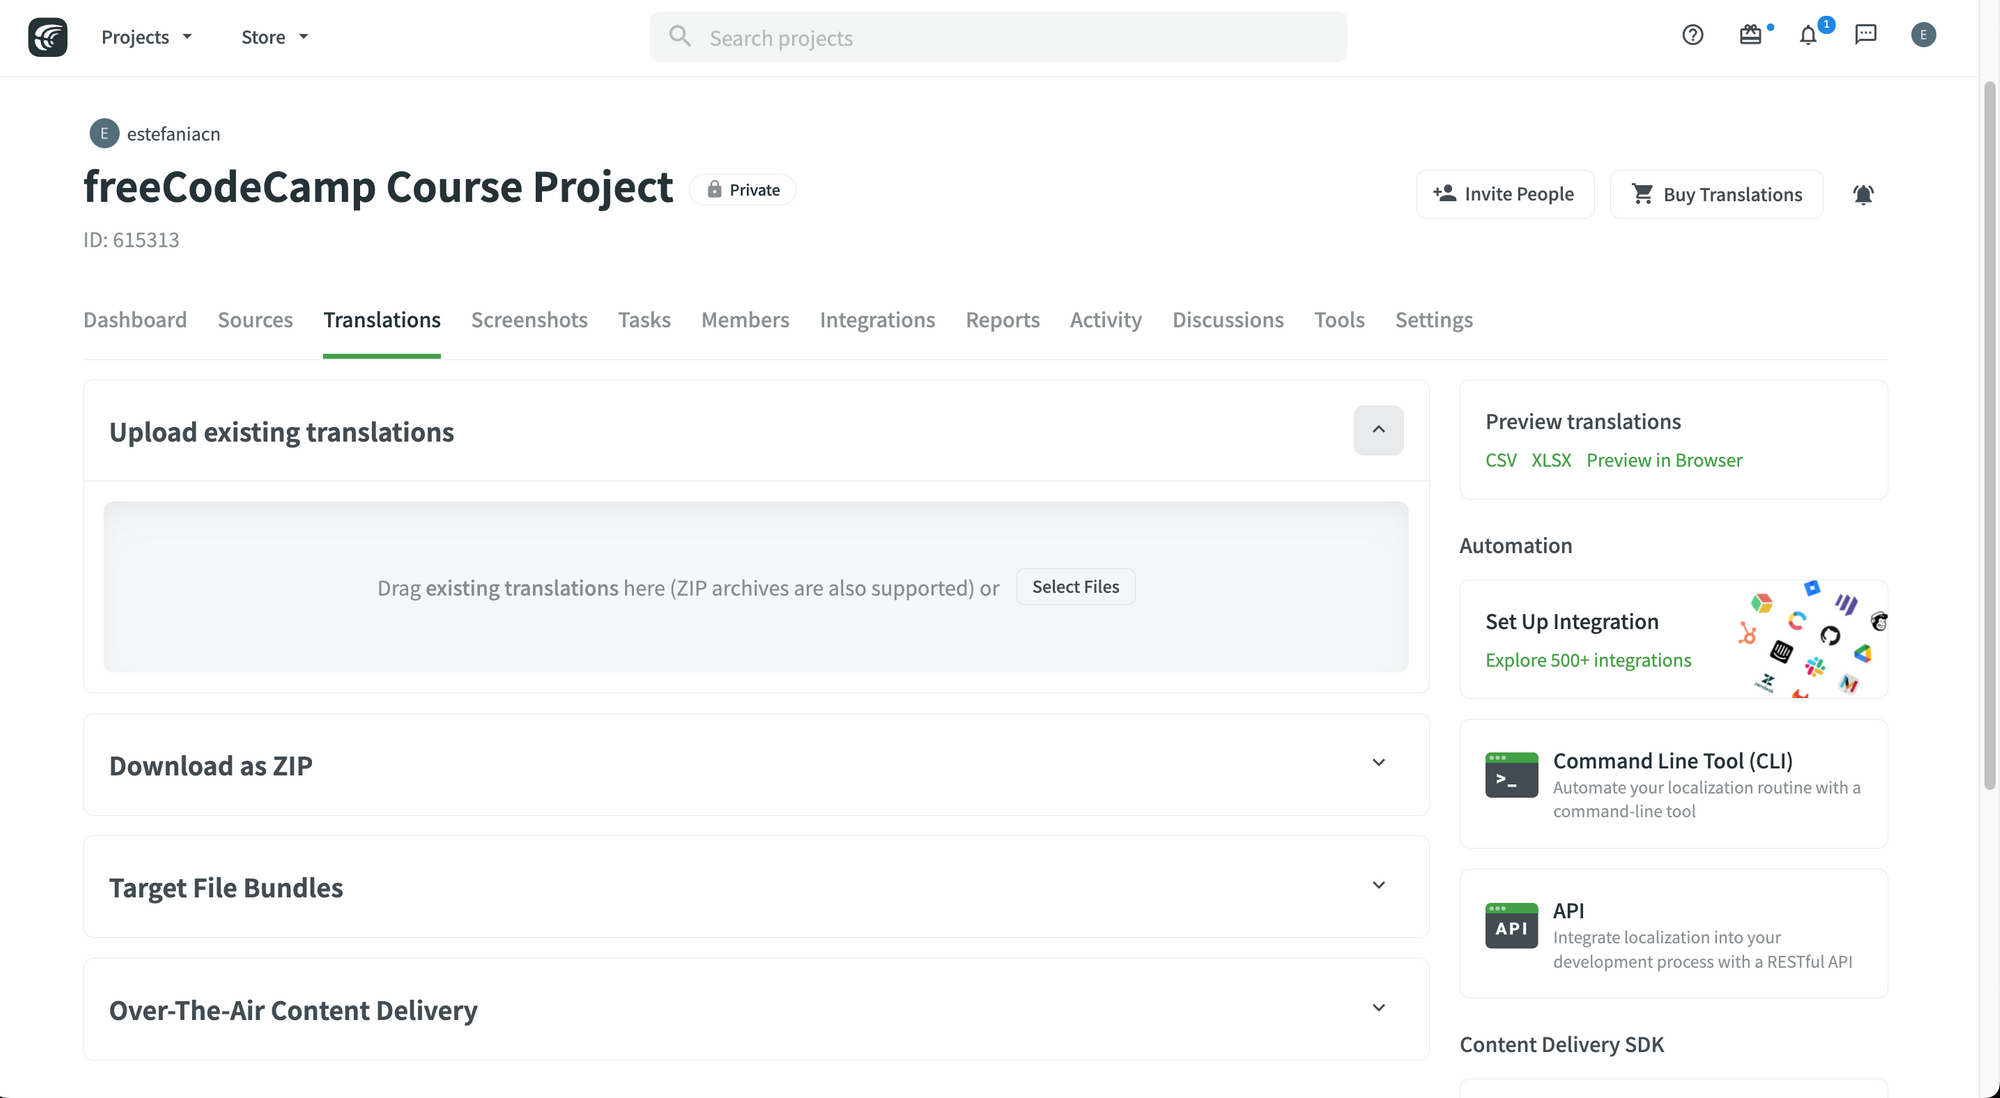 Upload translations via the Translations Tab.
According to Crowdin, the supported formats for uploading translations include those that have a key-value structure, such as:
Android XML, macOS/iOS Strings, Stringsdict, JSON, Chrome JSON, GO JSON, i18next JSON, FBT JSON, XLIFF, XLIFF 2.0, Java Properties, Play Properties, Java Properties XML, RESX, RESW, RES JSON, YAML, INI, Joomla INI, JS, FJS, PO, TS, QT TS, Blackberry, Symbian, Flex, BADA, TOML, Coffee, DKLANG, XAML, SRT, VTT, VTT2, SBV, SVG, DTD, CSV, RC, WXL, Maxthon, Haml, XLSX, PLIST, PHP, ARB, VDF.
Crowdin also mentions that:
For files that do not have a defined structure, translation upload is handled by an experimental machine learning technology.
This includes the following file formats: HTML, Front Matter HTML, Markdown, Front Matter Markdown, TXT, Generic XML, Web XML, DOCX, HAML, IDML, DITA, Wiki, FLSNP, MIF, and ADOC.
How to Upload Via the Language Page
To upload them via the language page:
- Go to your project.
- Go to "Dashboard".
- Choose a target language.
- Choose a file but instead of clicking on it, click on the three dots to its right to show more options.
- Click on "Upload Translations".
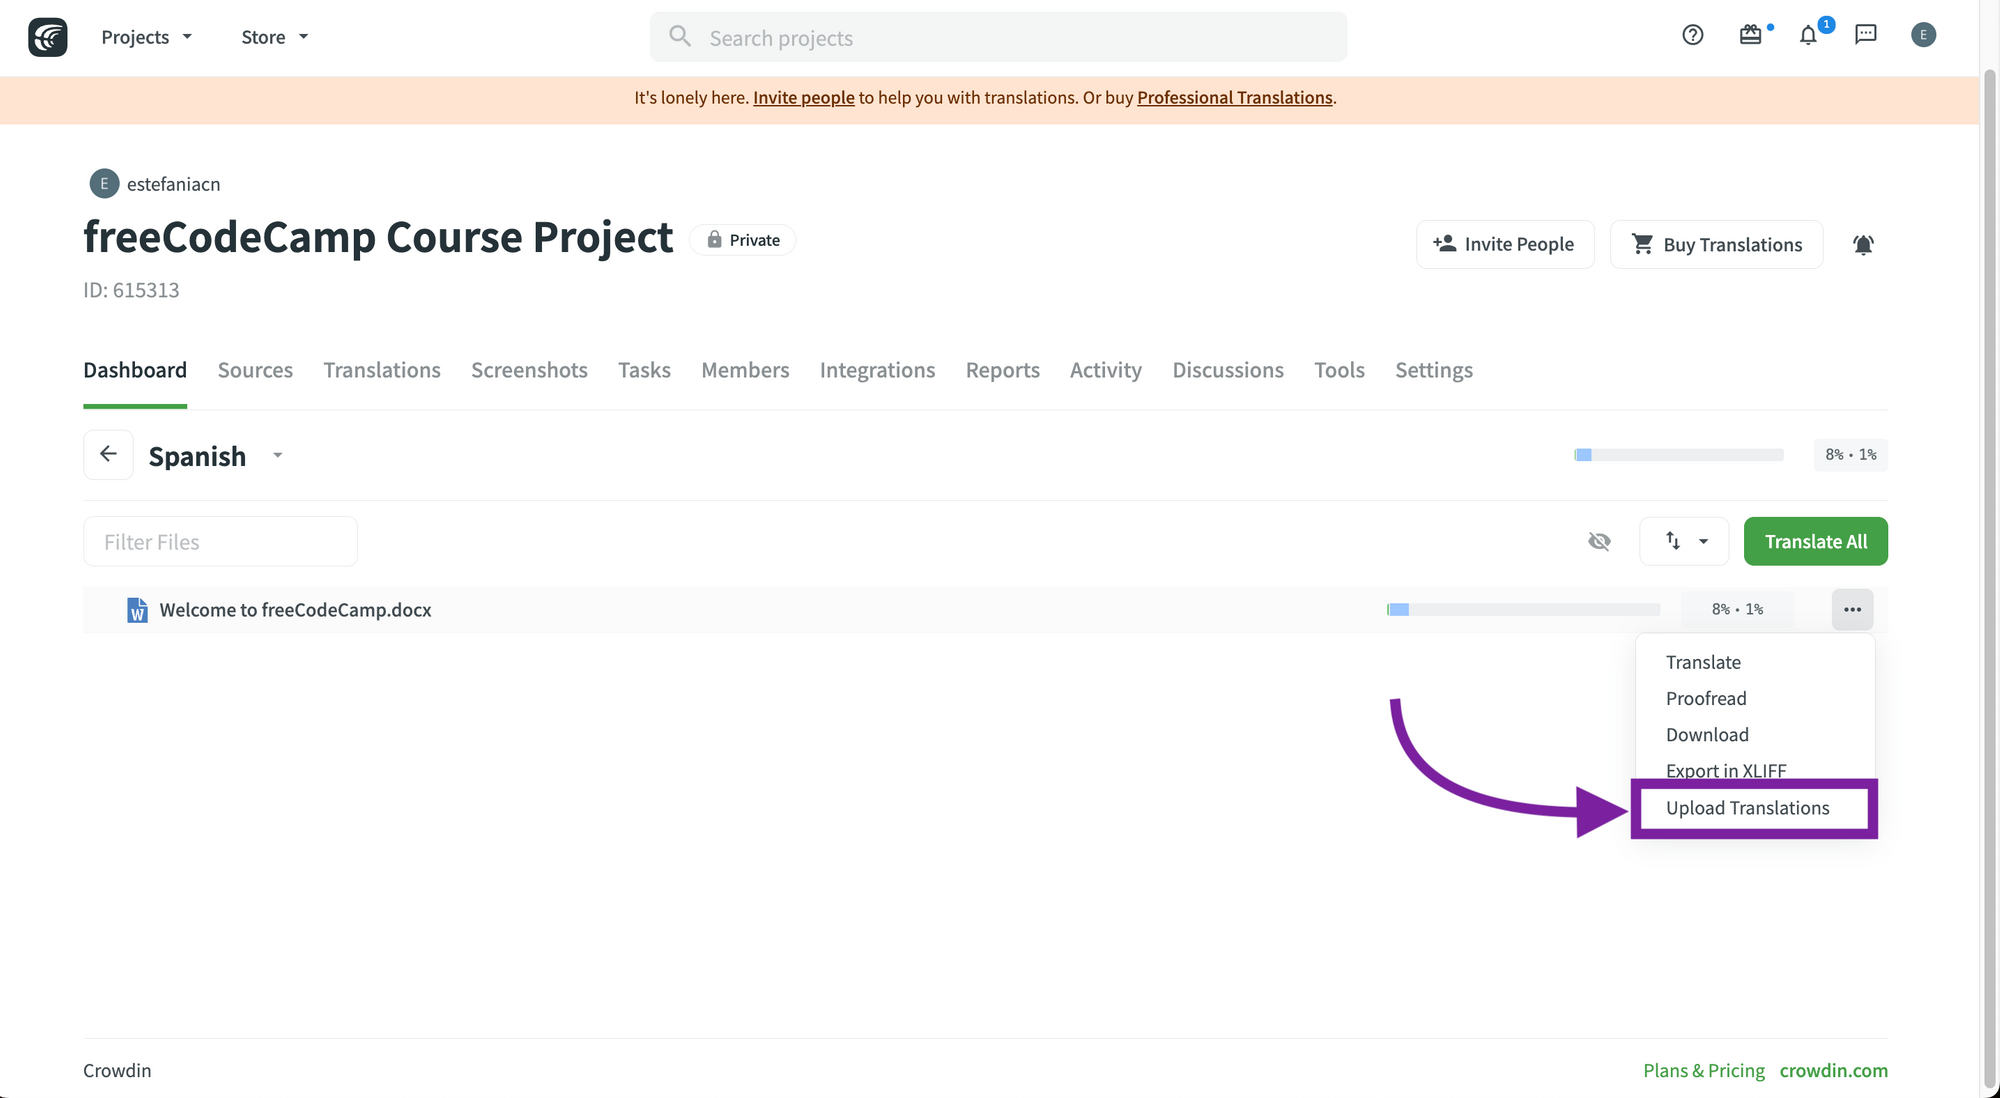 Upload translations from the language page.
When you click on this option, you will see some settings for the upload and for assigning the translations. Check the options that you need for your project.
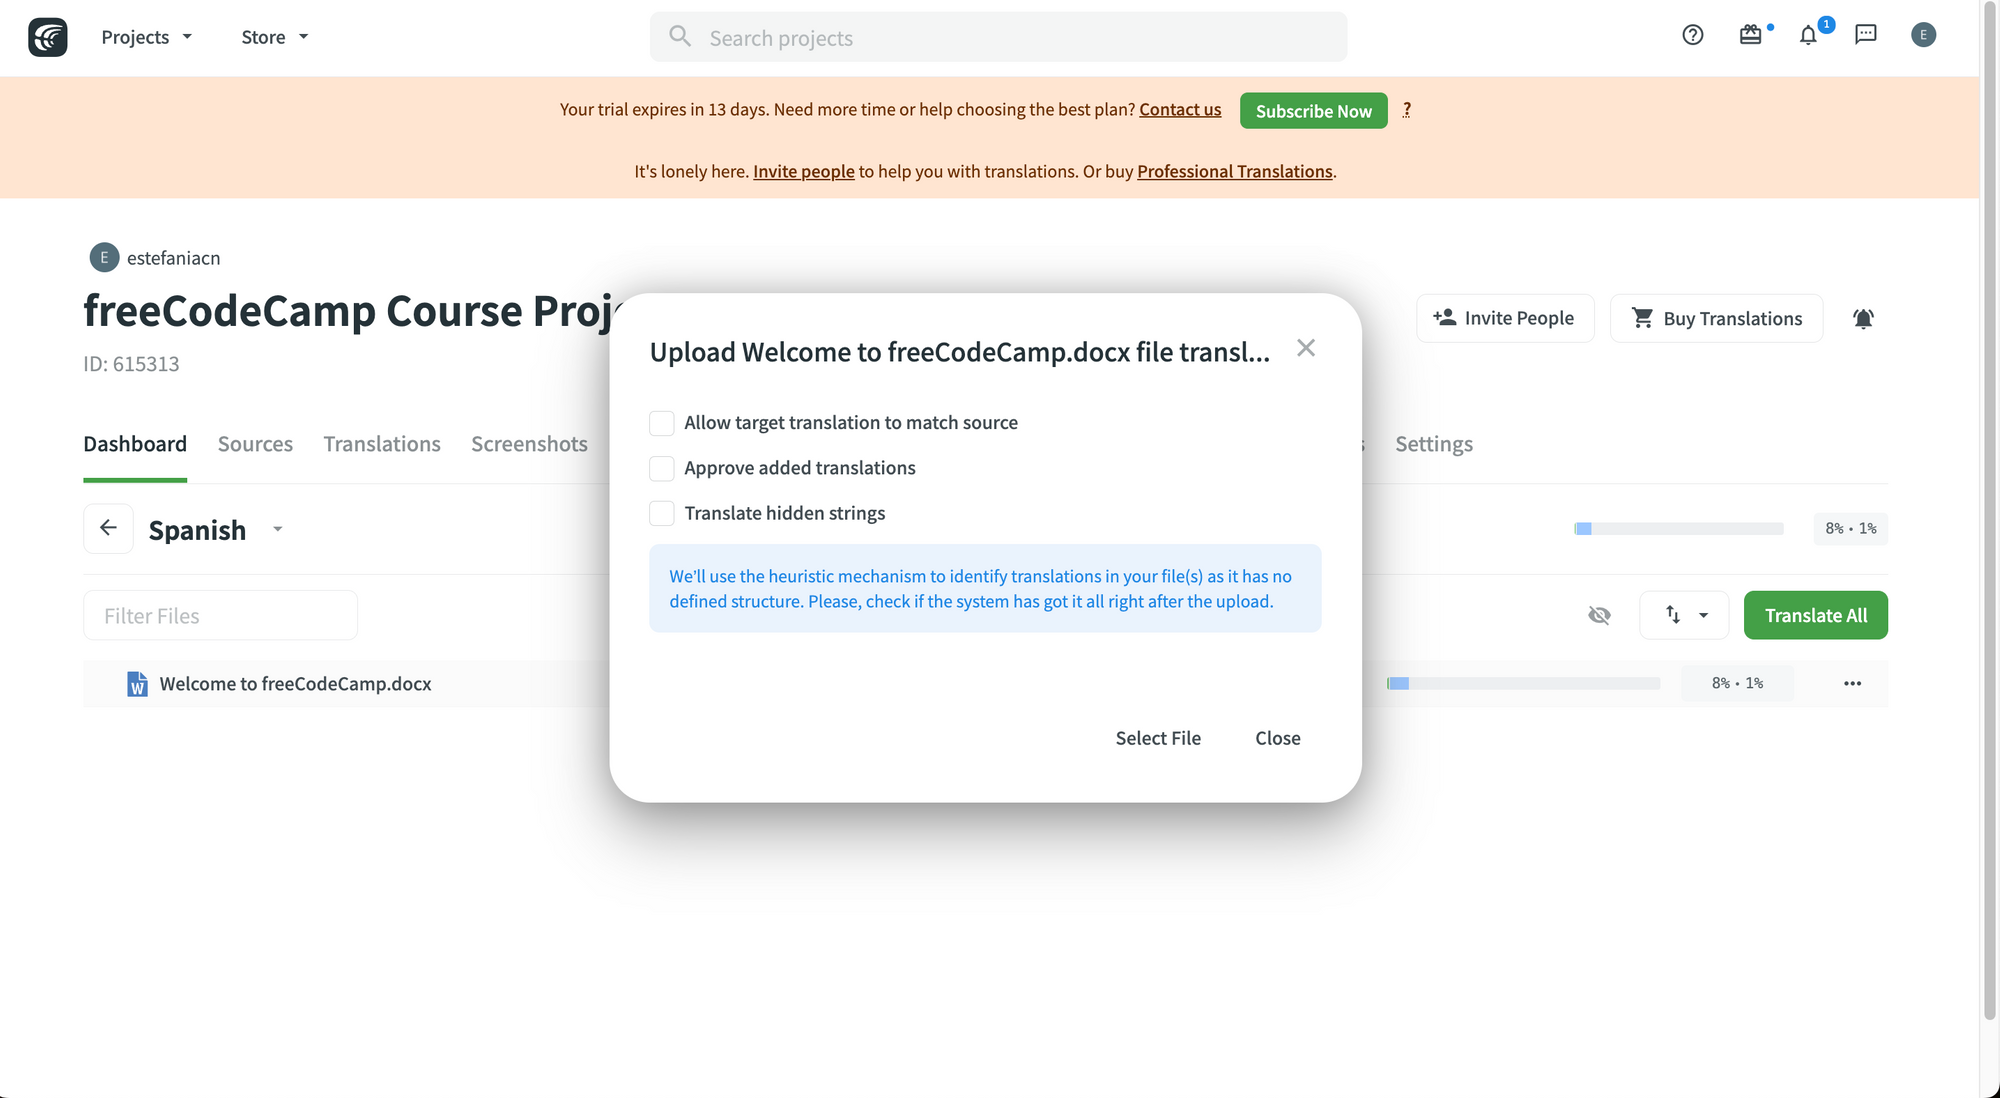
How to Upload Via the Translation Editor
Finally, you can also upload translations directly from the translation editor.
To do this:
- Click on the main menu.
- In File, select "Upload Translations..."
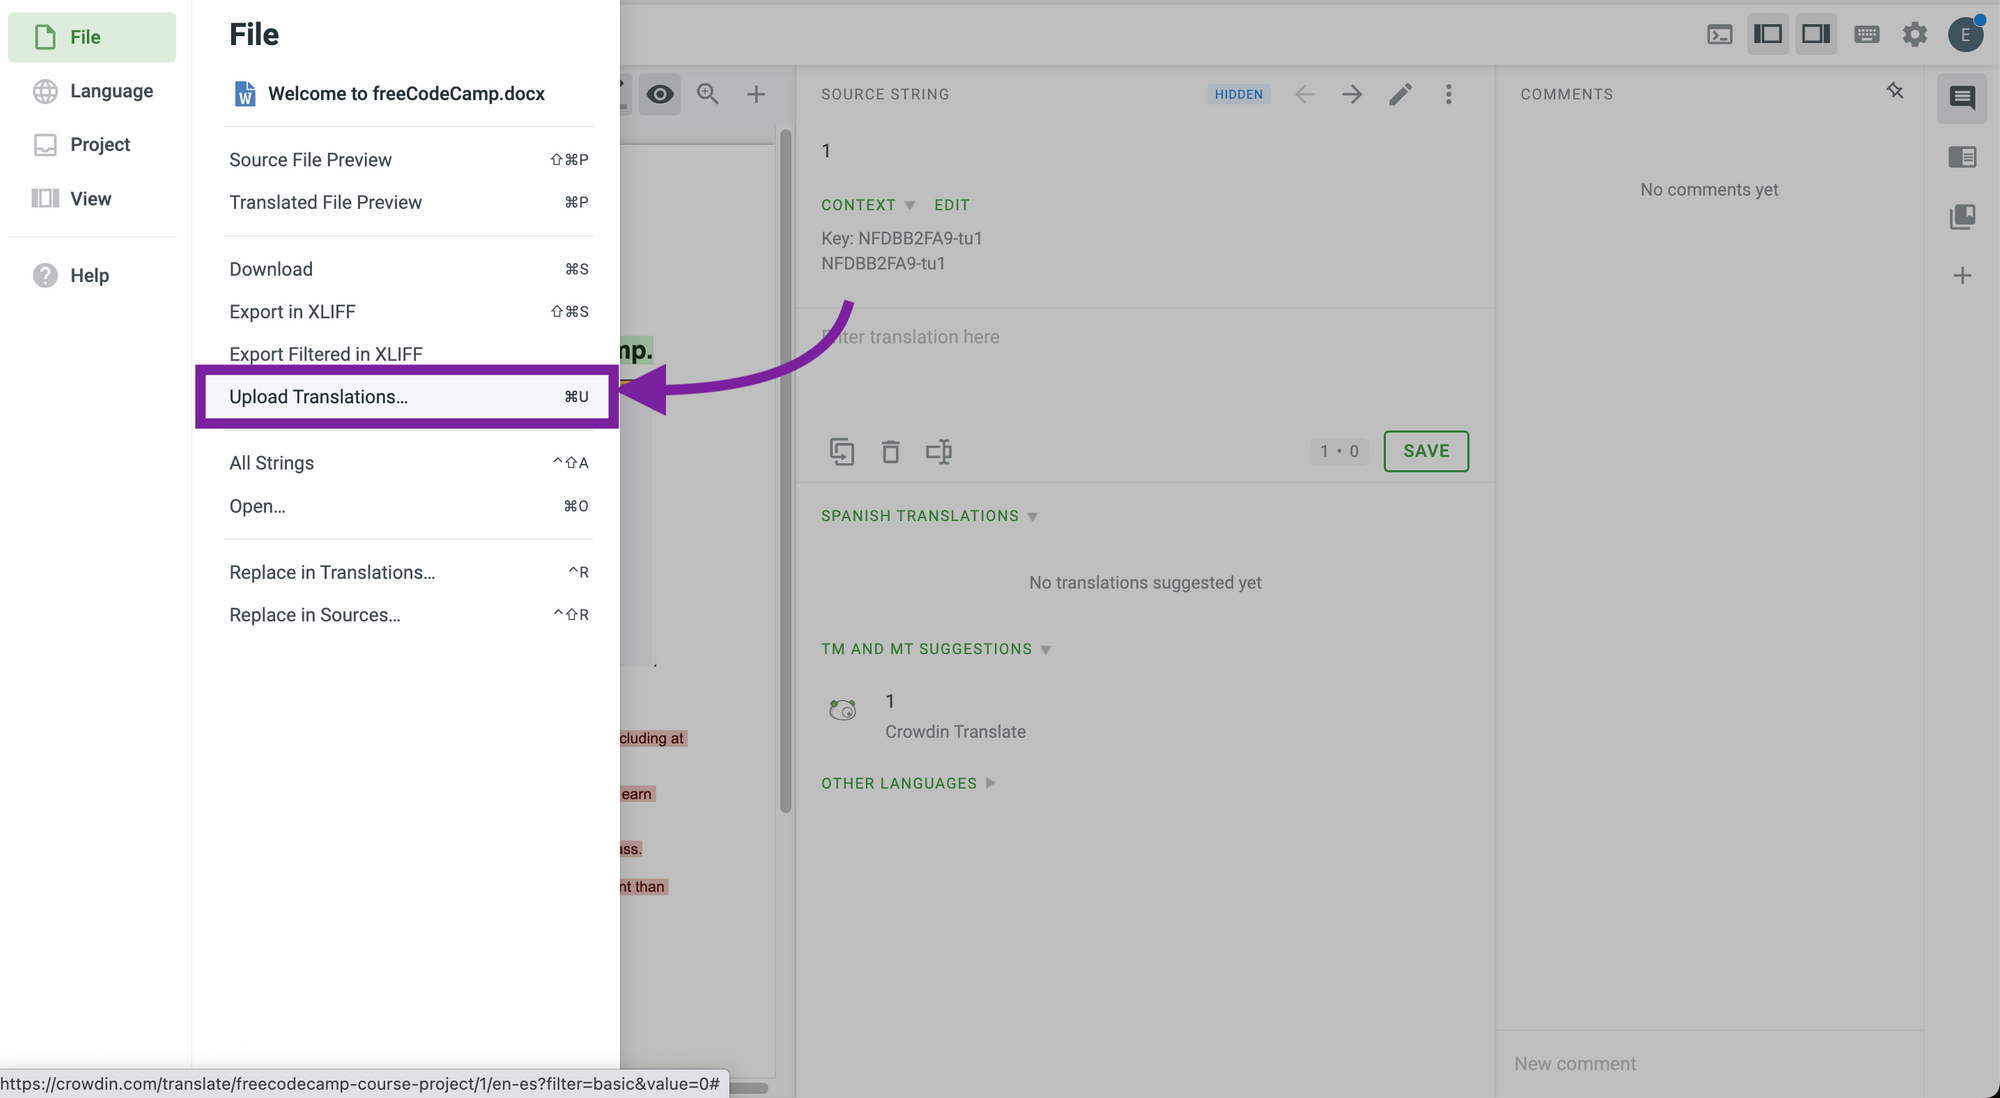 Upload Translations from the Translation Editor.
Supported File Formats on Crowdin
So far, we have mentioned different file formats that you can work with on Crowdin. But Crowdin supports more than 100+ file formats.
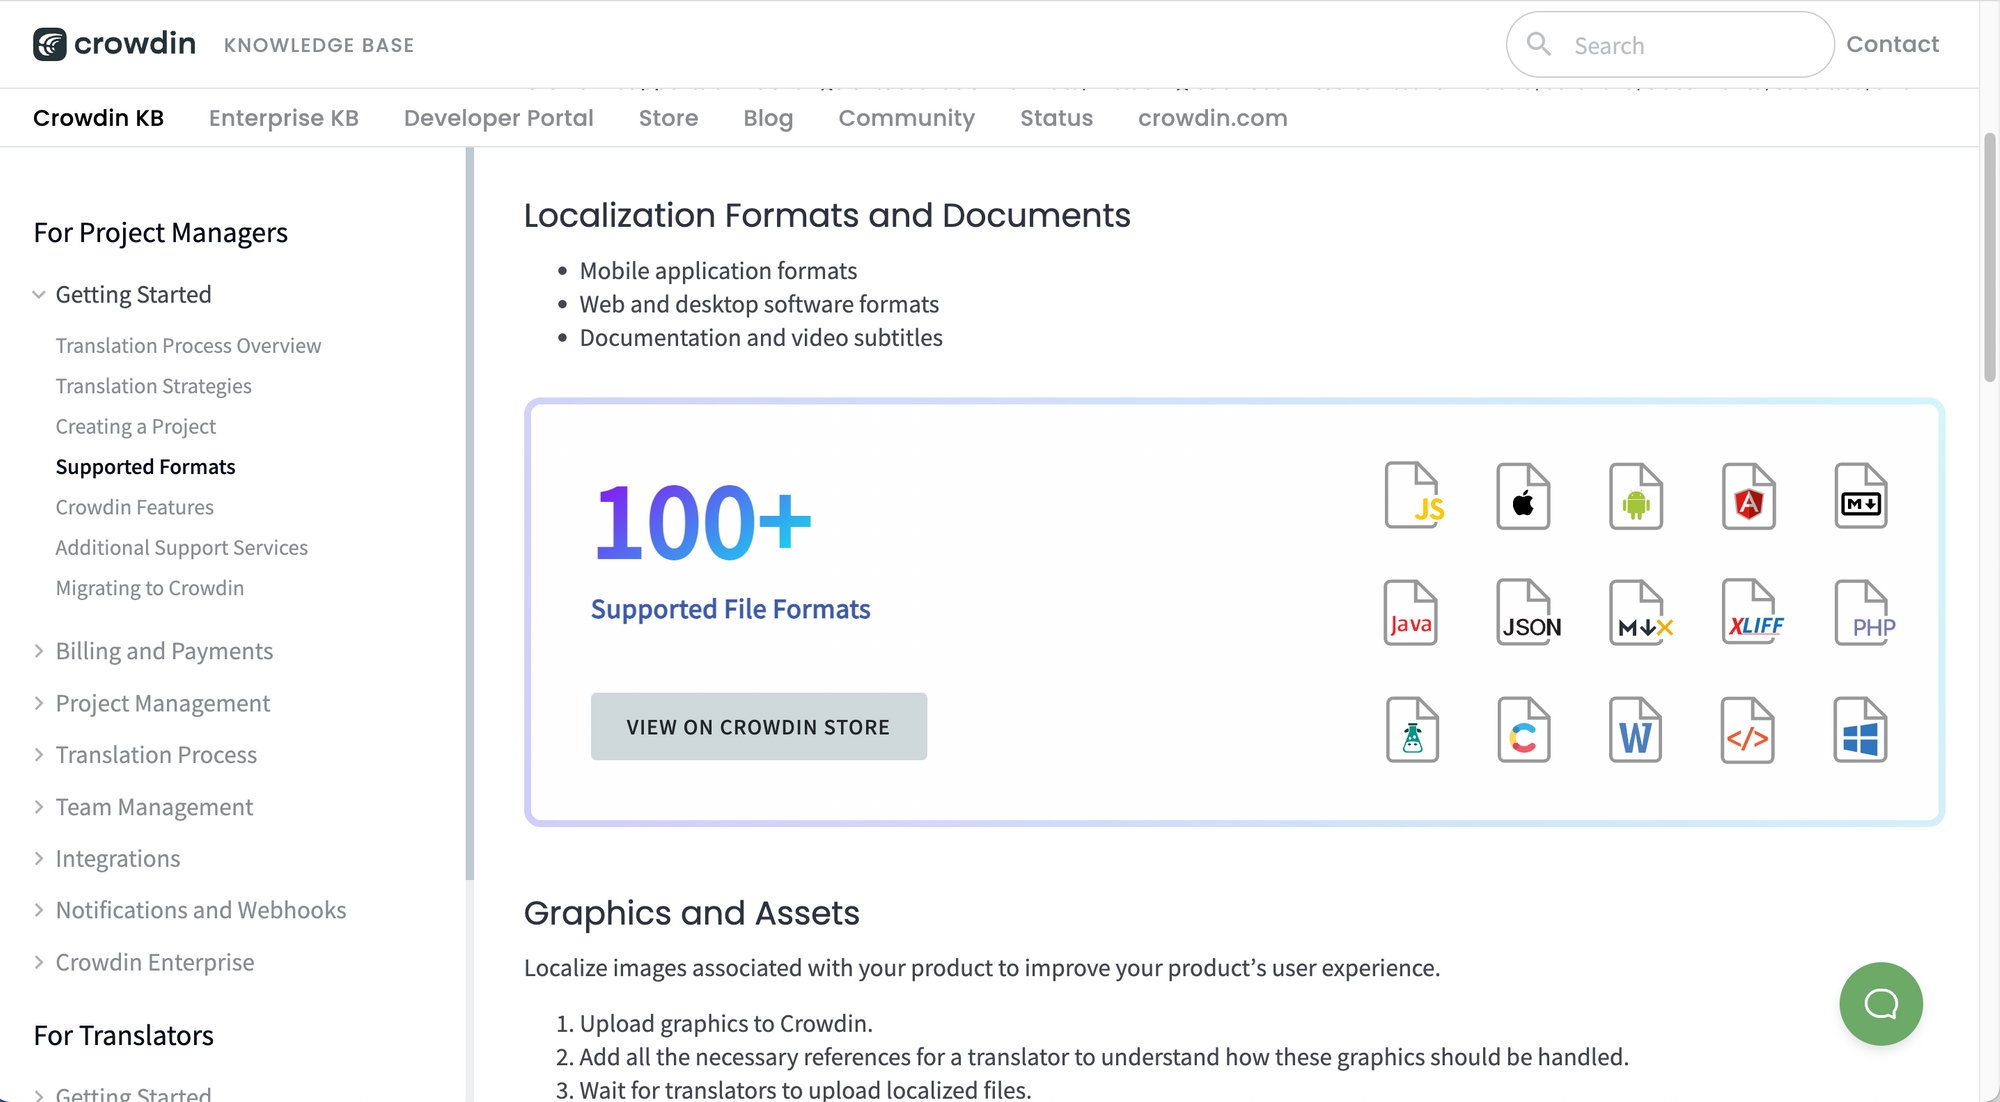 Supports more than 100+ file formats.
 Supported file formats in the Crowdin Store.
You can check the supported file formats in the following resources:
How to Pre-Translate your Project
If your goal is to save time and improve your productivity, pre-translation through Machine Translation (MT) can be exactly what you need.
This is an automated process that applies computer-generated translations to your project when you upload a file. On Crowdin, you can configure machine translation engines to use this feature.
You have two alternatives to implement this process:
- Manual.
- Automated.
Manual Pre-Translation
To pre-translate your content manually via Machine Translation (MT):
- Go to your project.
- Go to the "Dashboard" tab.
- Click "Pre-translation".
- Select via TM (Translation Memory) or via MT (Machine Translation).
 Pre-translation.
If you choose "via MT" (Machine Translation), you will have to choose your translation engine, target languages, and the files that you would like to pre-translate. You can also add labels.
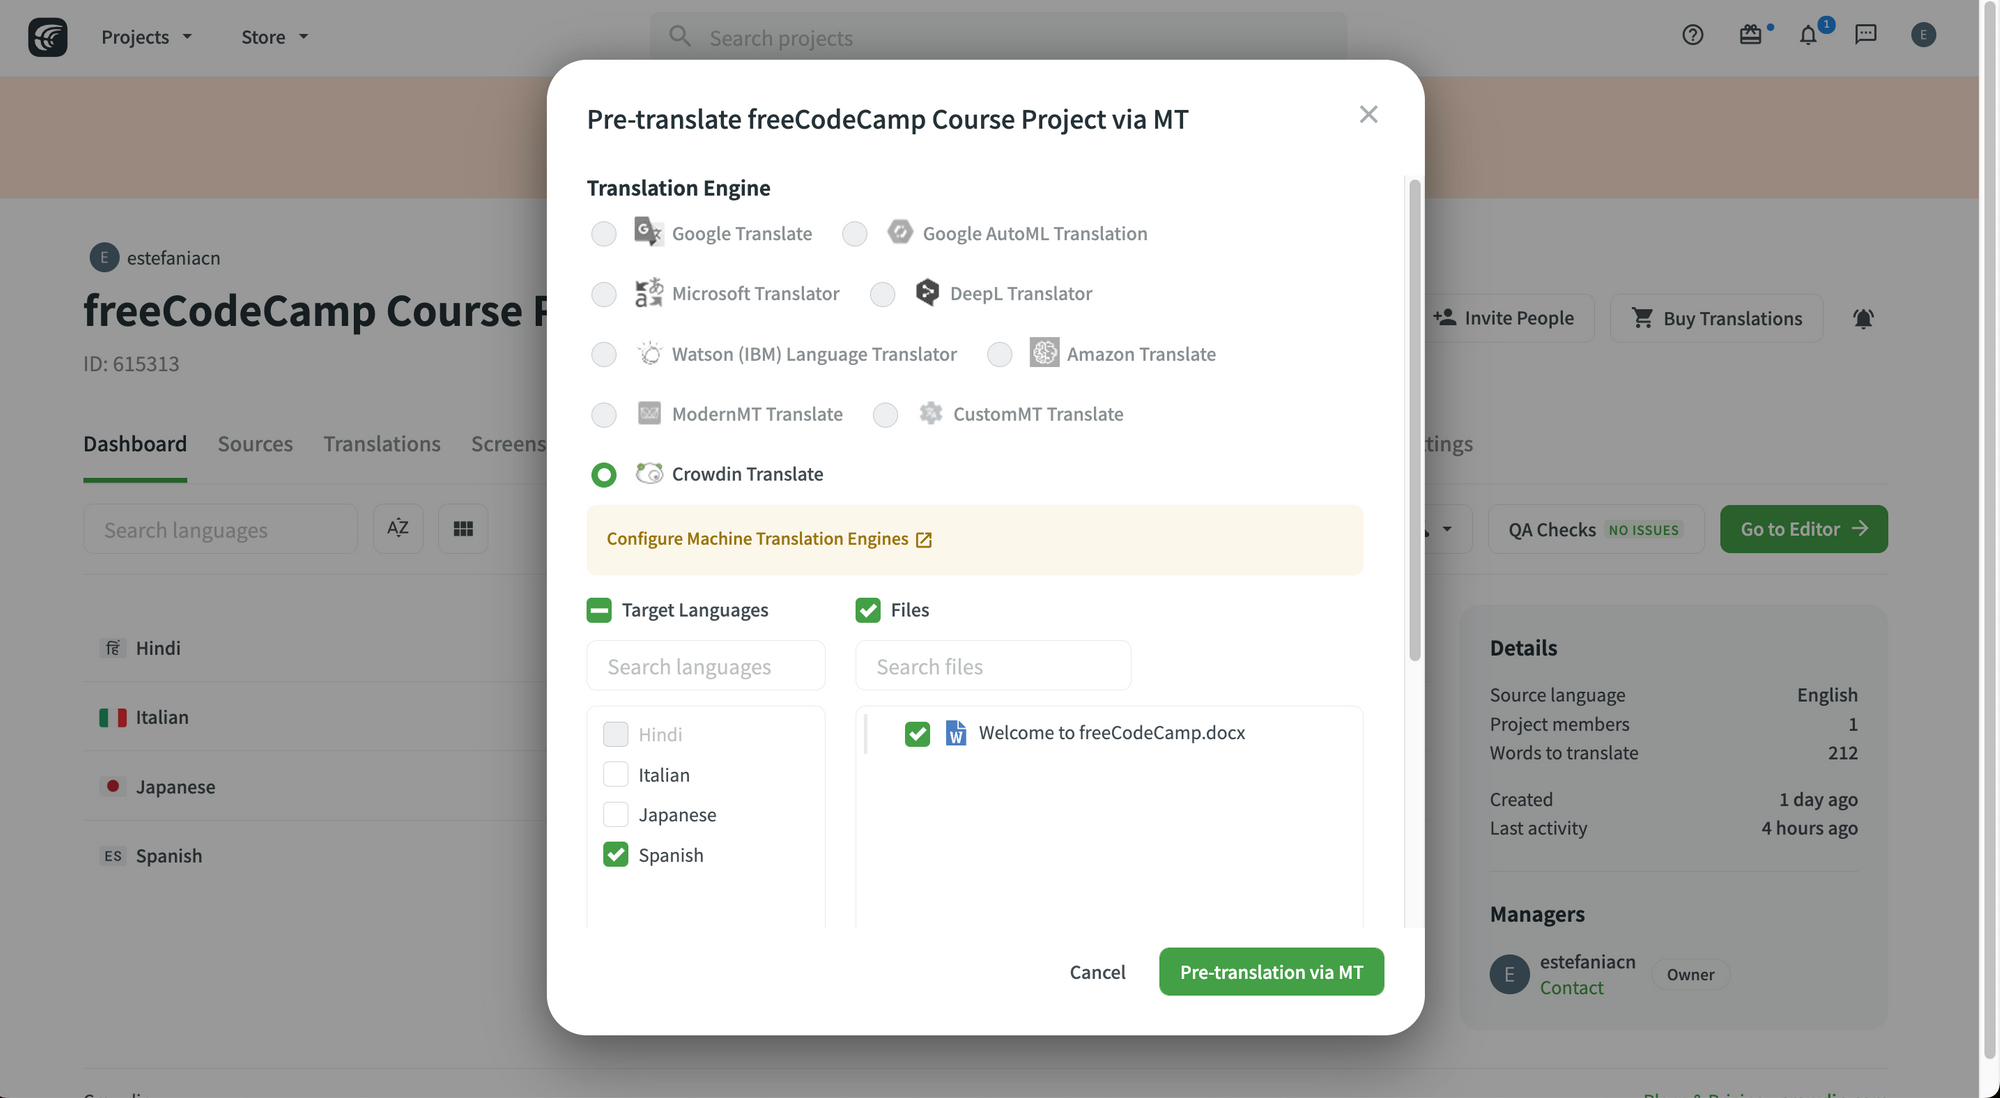 Pre-translate your project via MT.
Automated Pre-Translation
If you choose to automate the process, the system will pre-translate your new content automatically.
Recently, Crowdin added the possibility to enable Machine Translation Pre-Translation for new content in the project settings. If you enable this and you upload new content to your project, the system will translate automatically.
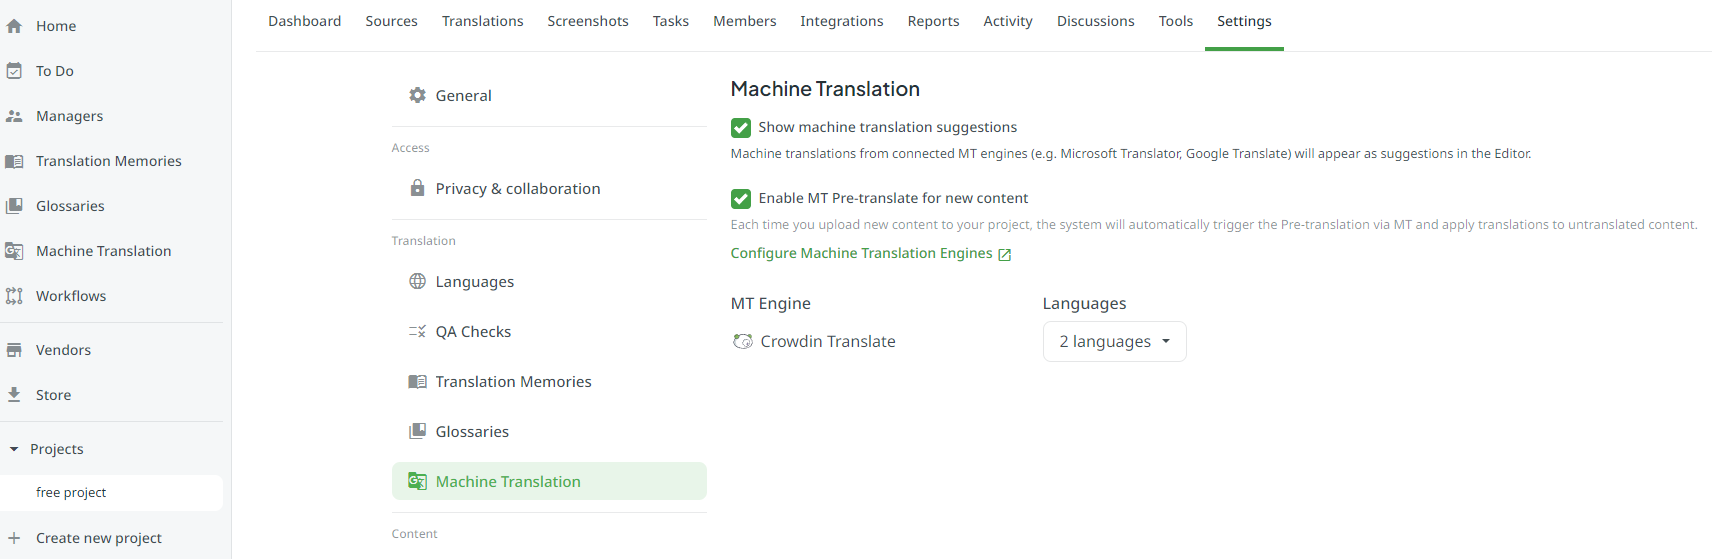 Enable Machine Translation Pre-translate for new content. Screenshot provided by the Crowdin team.
Offline Translation
Sometimes, you may need to work offline. Crowdin also has a great feature for this in situations where you or your team members would like to work on the translations offline.
To enable or disable this feature:
- Go to your project.
- Go to the "Settings" tab.
- Go to "Privacy and Collaboration".
- Check (or uncheck) the "Allow offline translation" option.
💡Tip: This feature can be enabled or disabled by project managers.
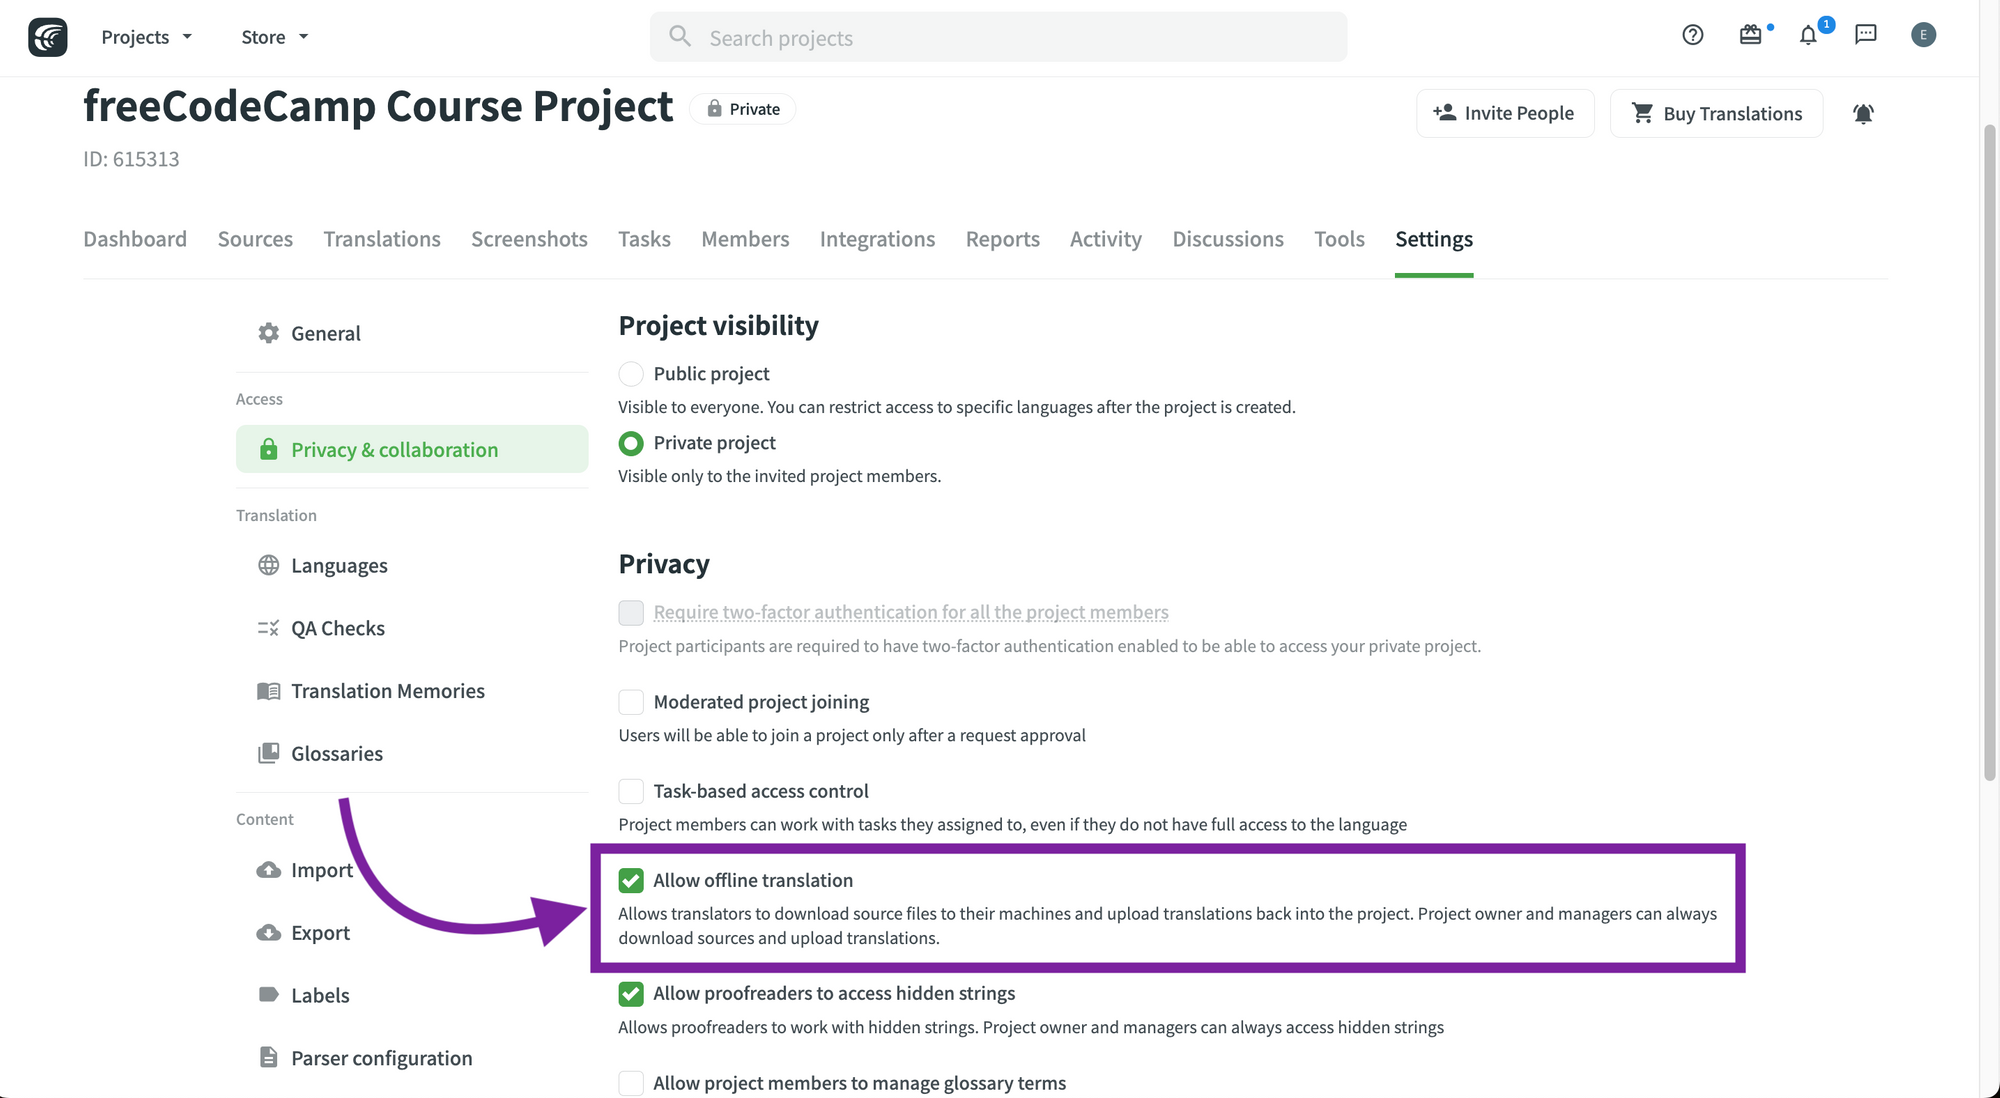 Allow offline translation.
Each file can be downloaded via the Editor or via the Language page.
How to Download a File via the Editor
To download a file via the Translation Editor:
- Click on the main menu at the top left.
- Go to File
- Click on "Download" or "Export in XLIFF".
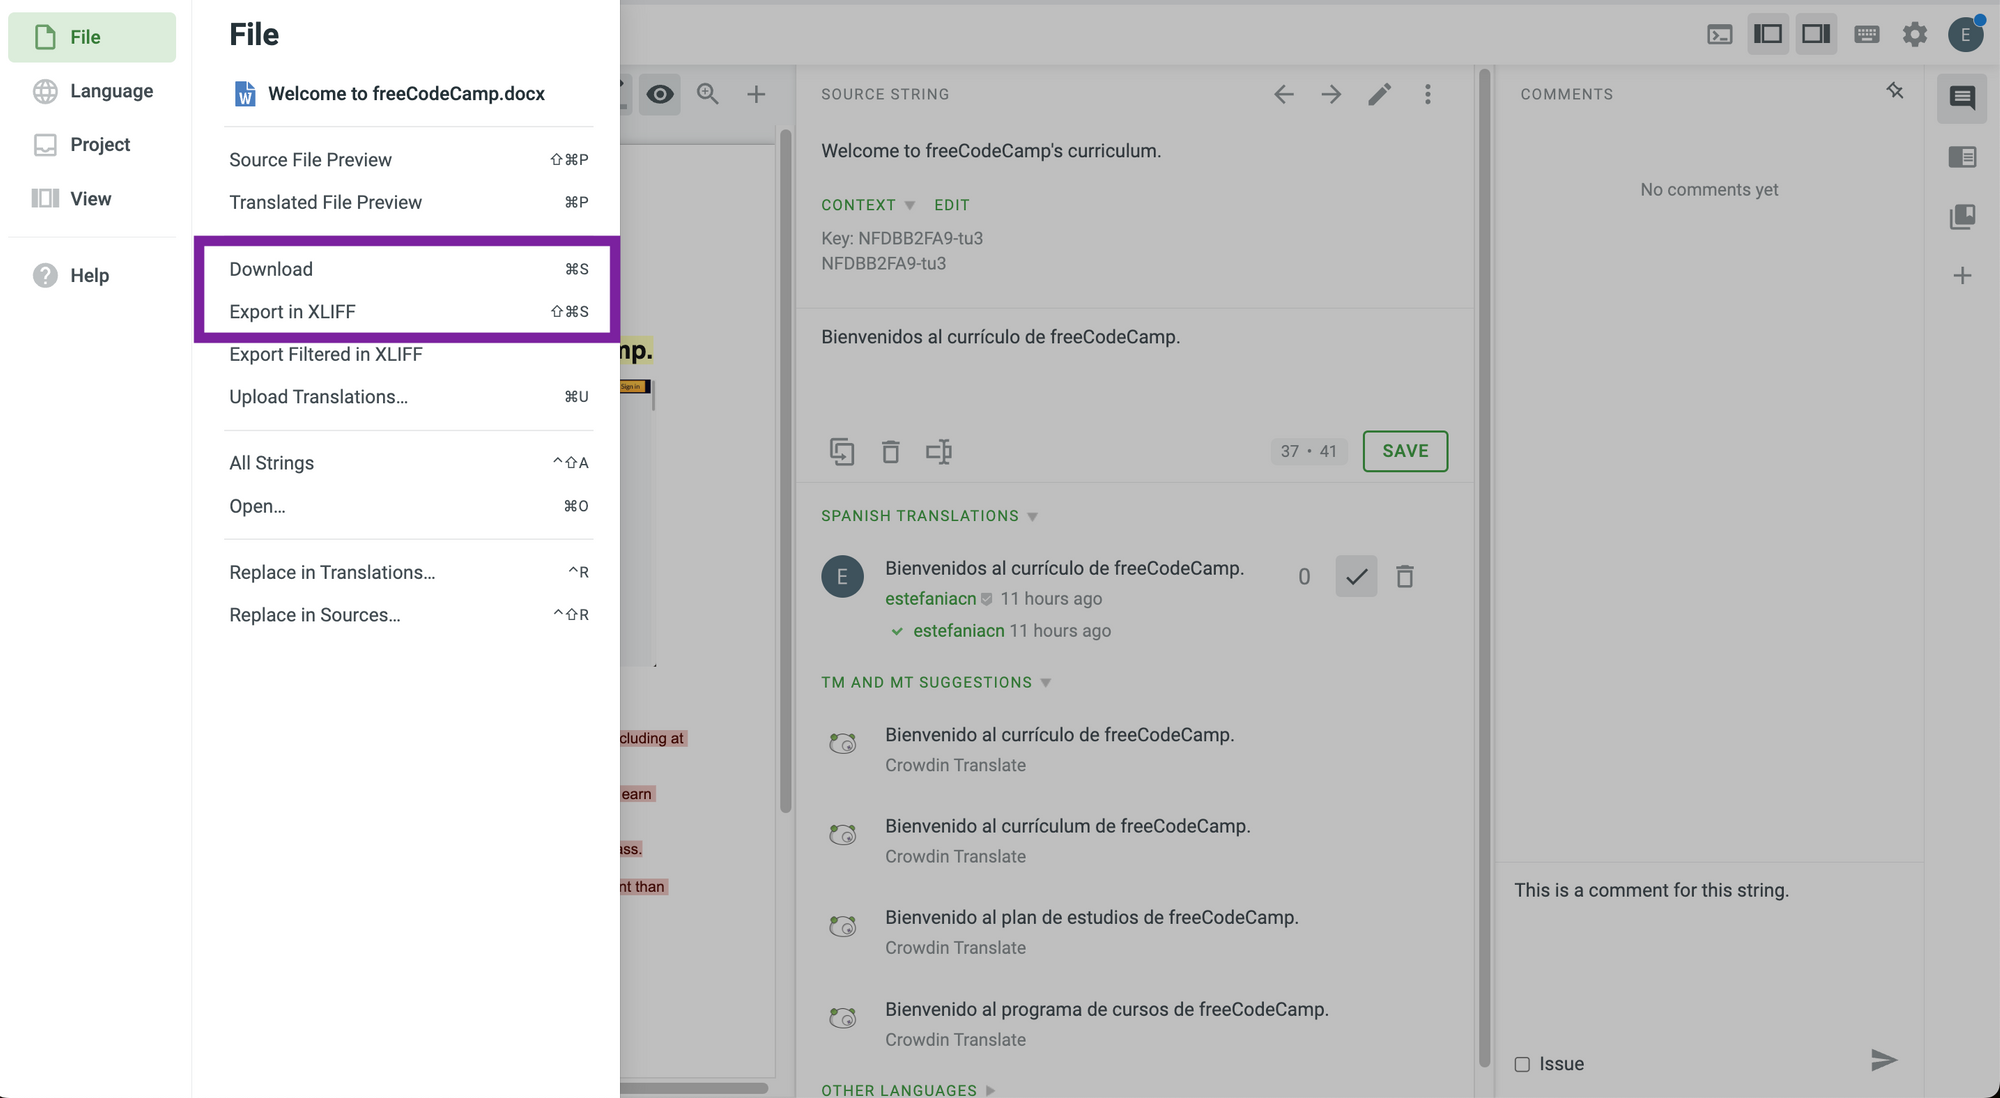 Download file via the editor.
How to Download a File Via the Language Page
To download a file via the language page:
- Go to your project.
- Go to "Dashboard".
- Select a language.
- In the list of files, click on the three dots next to the file that you would like to download to show more options.
- Select "Download" or "Export in XLIFF".
 Download file via the language page.
How to Download All Files for a Target Language
If you need to download all the files for a target language:
- Go to your project.
- Go to "Dashboard".
- Select a language.
- Click on the up and down arrow icon (see the screenshot below).
- Select "Download translations" or "Export in XLIFF".
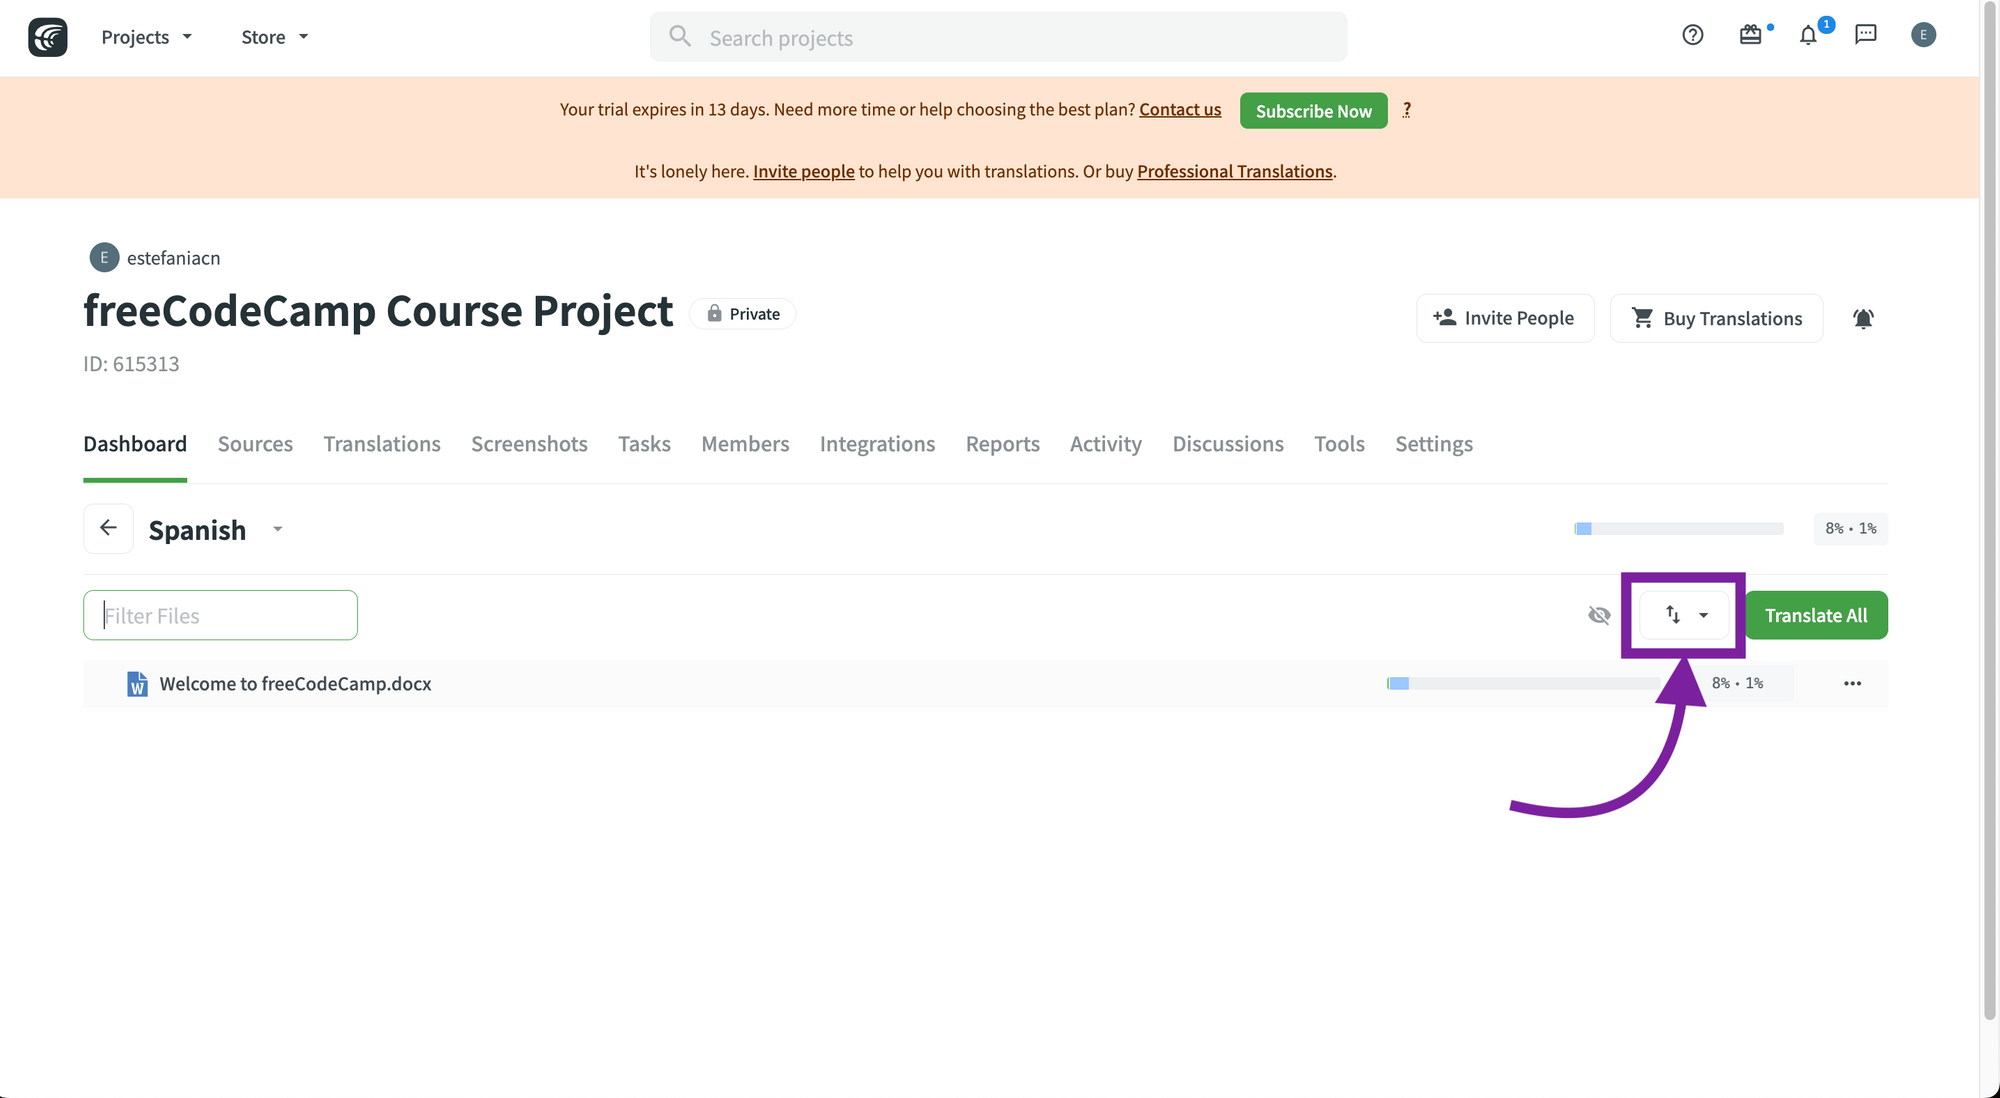 Download all translations.
Exploring Public Projects
Now that you know some of the most important features of Crowdin, you may also be asking yourself how you can explore other projects that are currently being translated on Crowdin.
If you click on "Projects" at the top and then you select "Explore Public Projects", you will see a page where you can explore public projects per topic and find popular projects on Crowdin.
You can also filter projects by searching on the search bar.
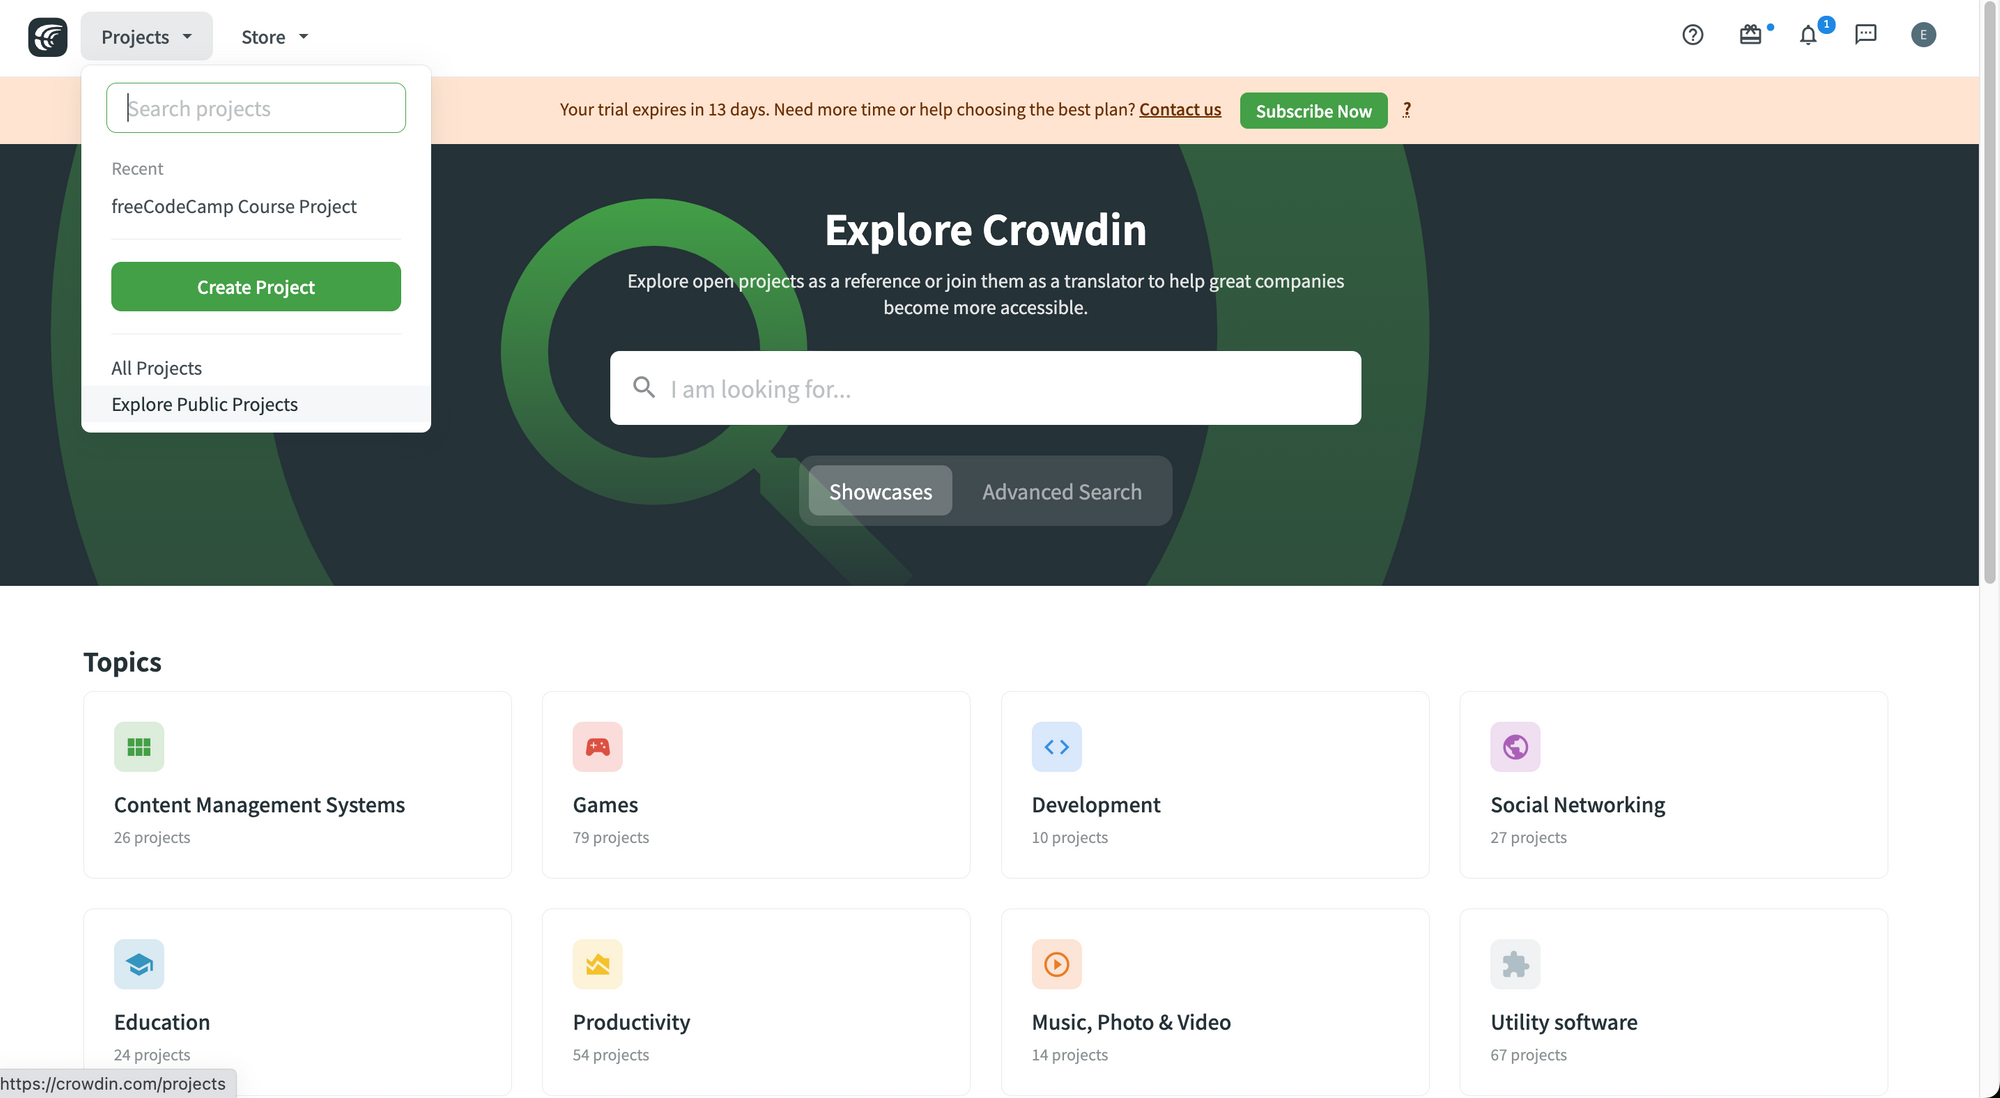 Explore Crowdin.
🎉 Congratulations. We just reached the end of the second part of the book, which was focused on Crowdin fundamentals.
Now we will dive into how teams and organizations can use Crowdin to manage their projects effectively.
🔹 Crowdin for Teams and Organizations
Awesome! Now let's see how Crowdin can help you if you are working with a team on a localization project or if you are the founder or manager of an organization that is interested in localizing a product or platform.
We will talk about how you can invite members, assign roles and tasks, and generate reports.
How to Invite Project Members and Contributors
To invite members to your project:
- Go to your project.
- Go to the "Members" tab.
- Click on the green "Invite" button.
💡 Tip: You can also click on the gray "Invite People" button at the top left to reach the same options.
 The Members tab.
You will need to enter information for these options before sending the invitation(s):
- Role.
- Email or Crowdin username.
- Message.
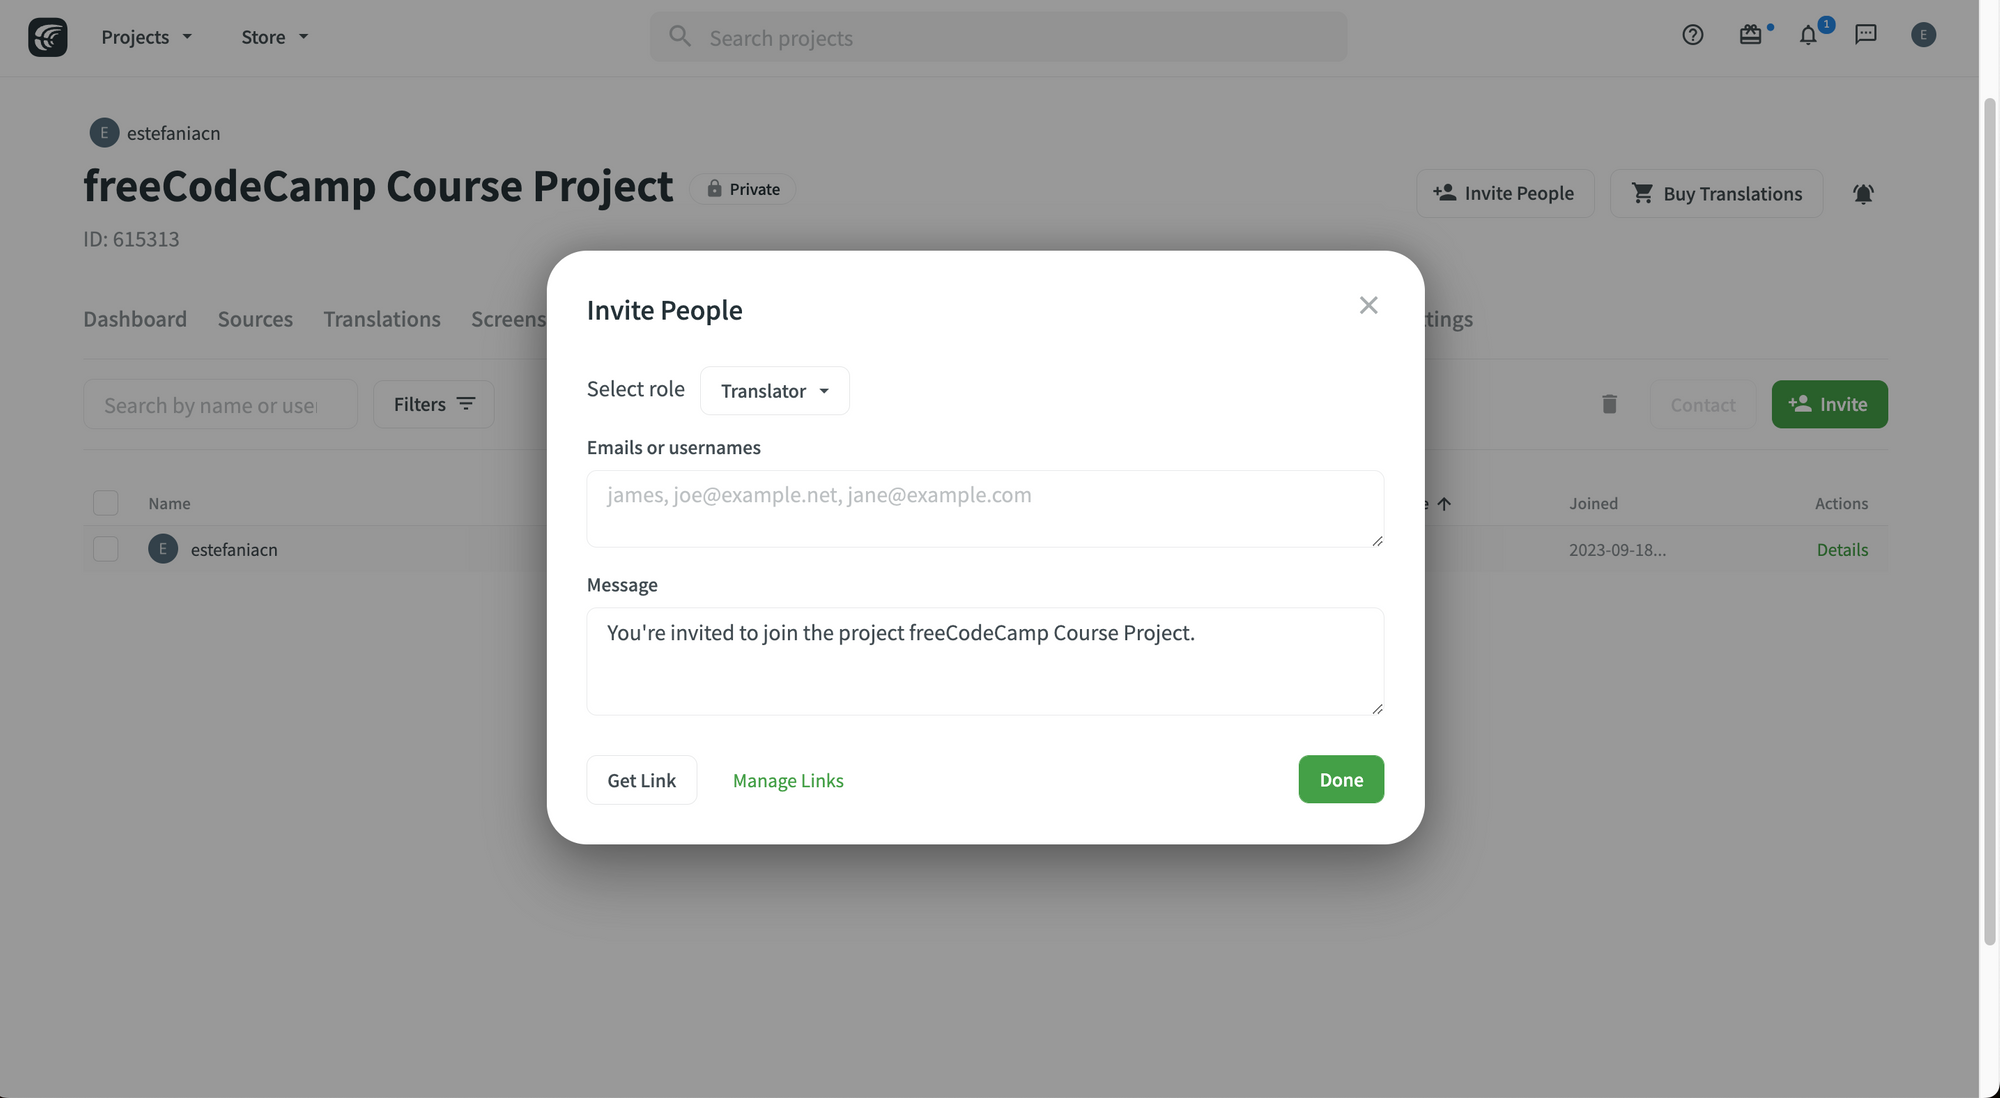 Sending an invitation.
If you click on "Select role", you should see this:
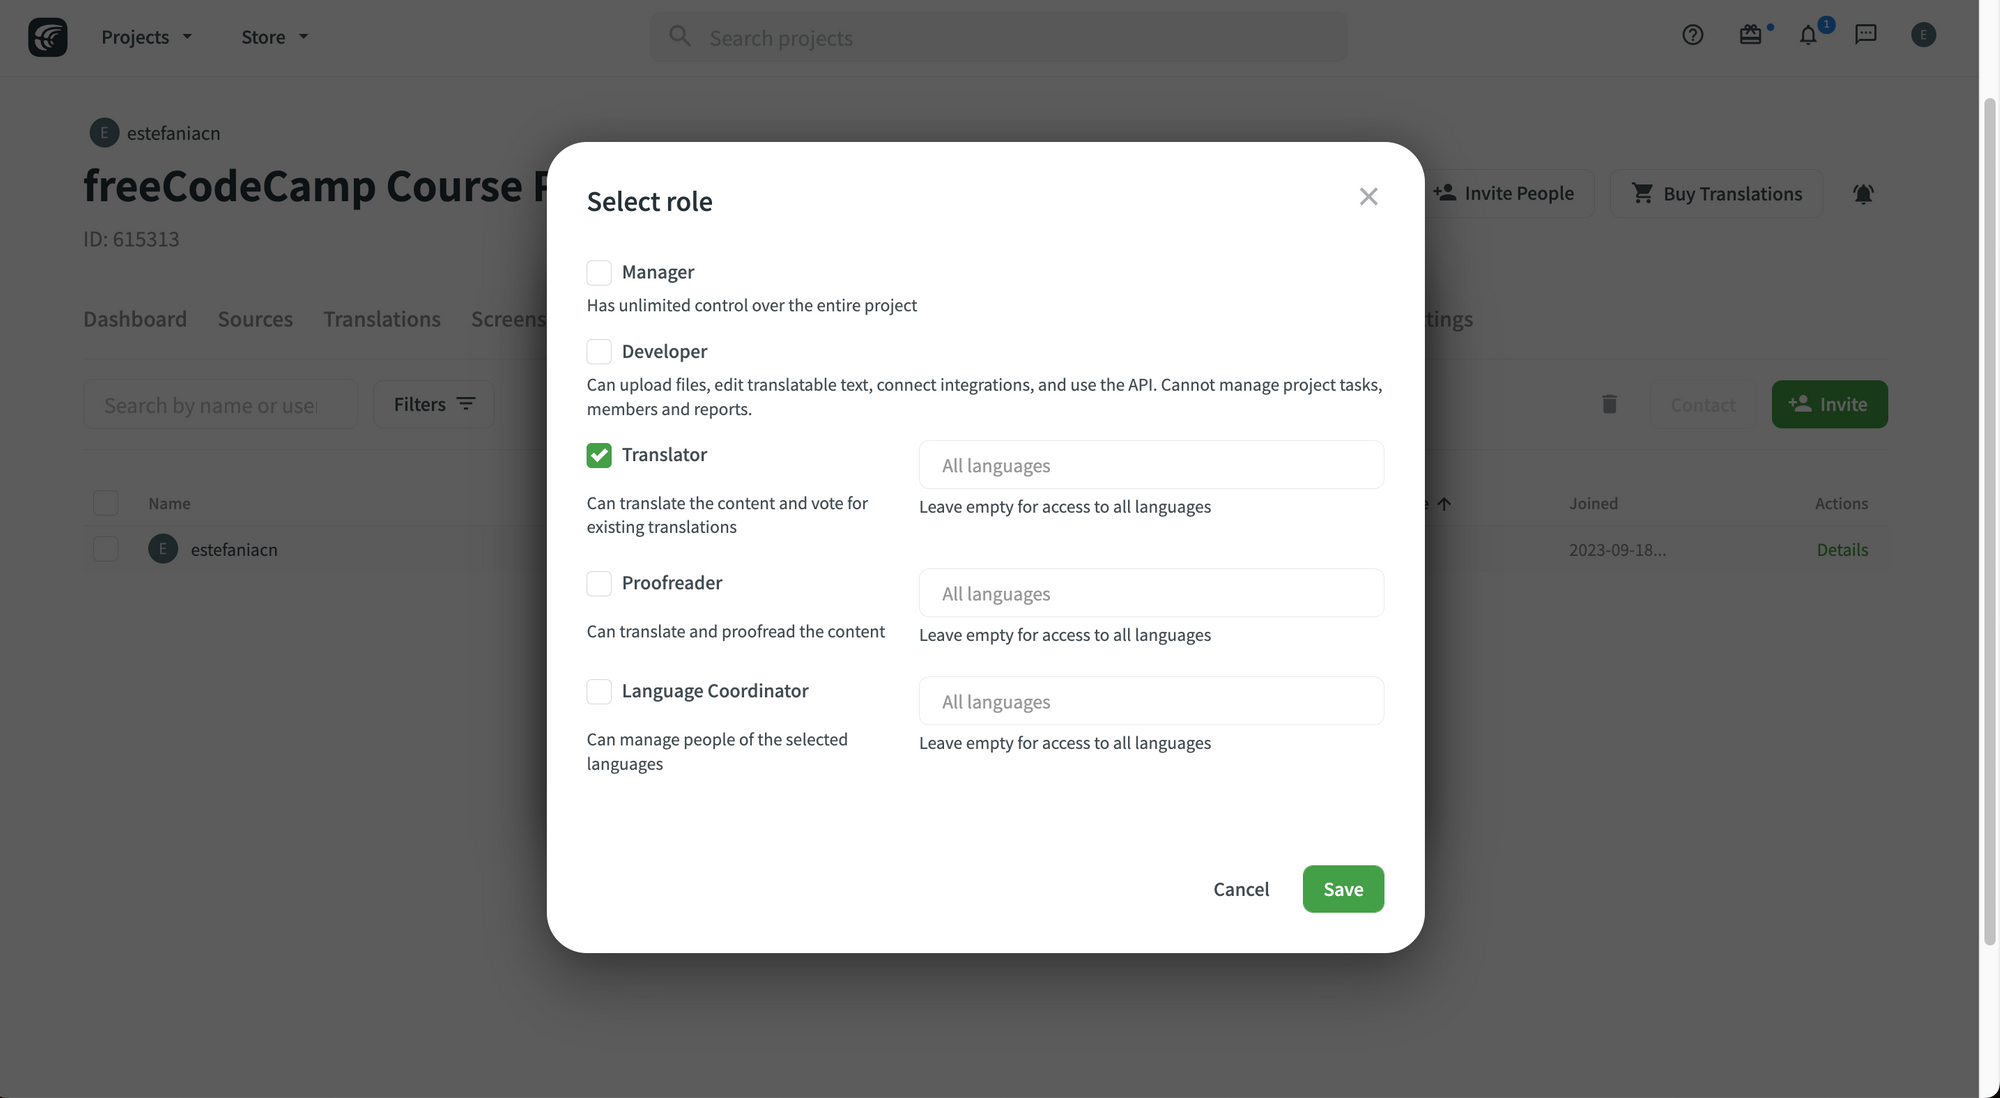 Selecting a role.
By default, the "Translator" role will be selected.
You will also see three fields where you can choose which languages you would like to assign that role. For example, a contributor could be a translator for Japanese and a translator and proofreader for Spanish.
💡 Tip: If you leave it blank, the role will apply to all languages but you can also choose specific languages.
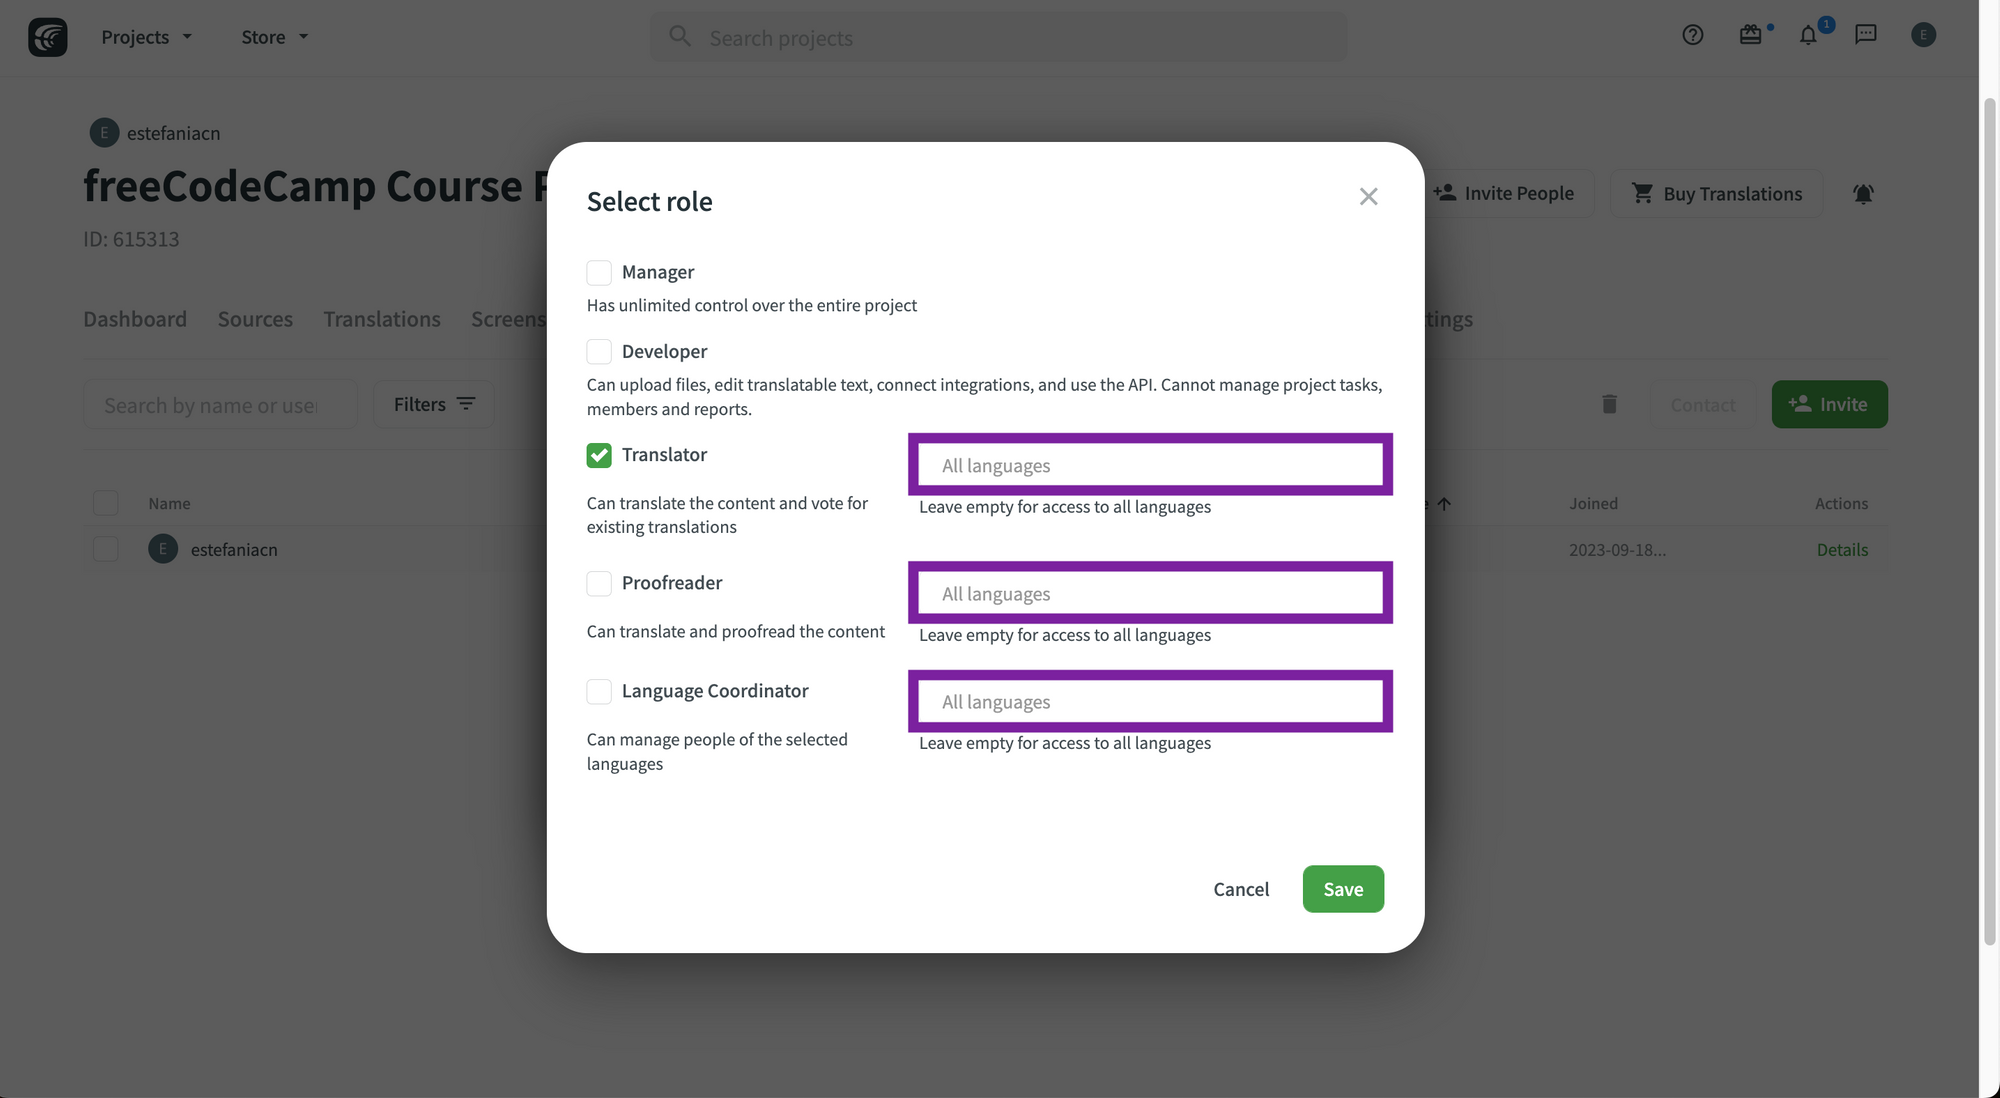 Choosing specific languages.
We will talk more about member roles in just a moment.
💡 Tip: You can also change the role(s) of a member in the Profile section.
Once you are ready, click "Save" and you will go back to the main options. Click "Done" when you are ready to send the invitations.
Sending an invitation.
How to Send Invitation Links
If you would like to invite your team members through a link instead of sending them a direct invitation, you can do so too.
Just click on the "Get Link" button at the bottom to copy the link and send it to the person that you would like to invite to your project.
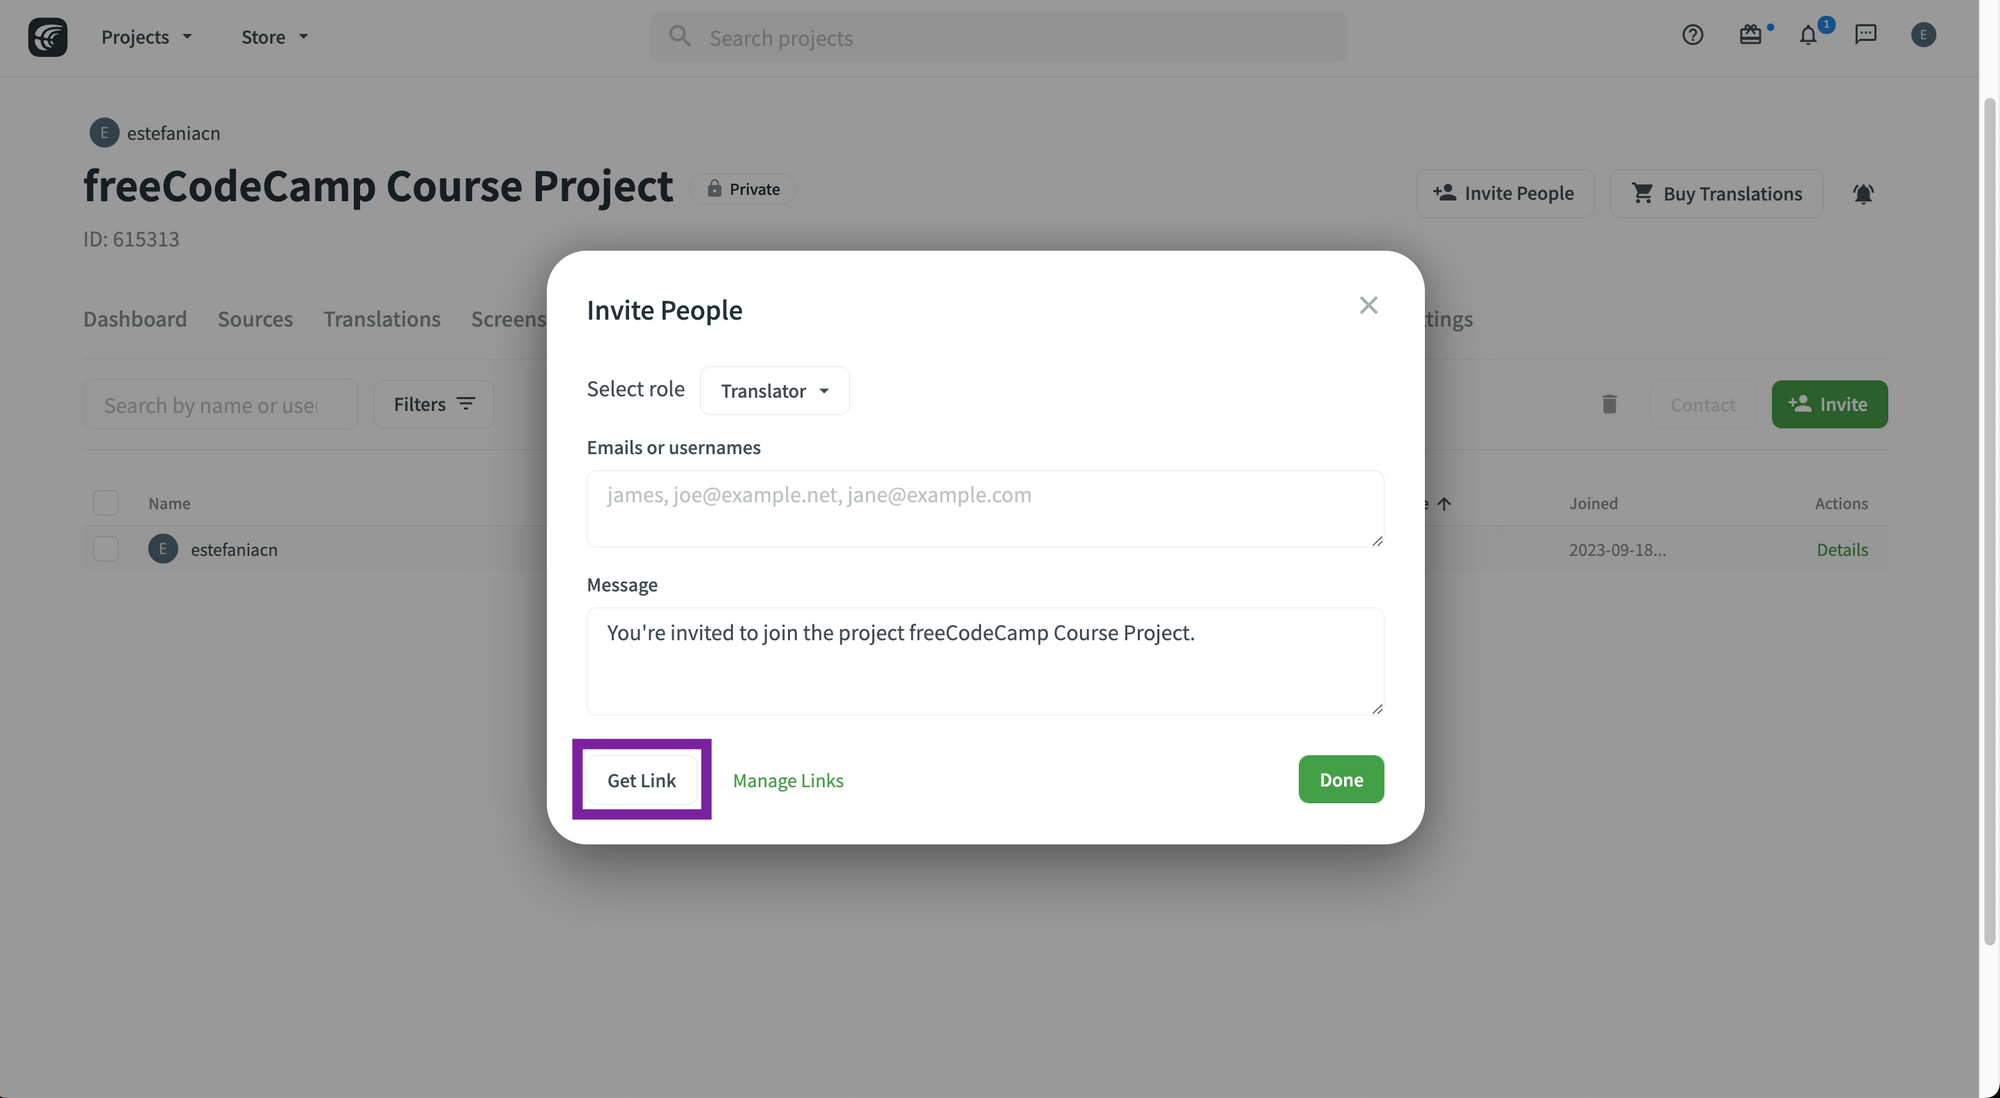 Get an invitation link.
You will see a confirmation message at the top.
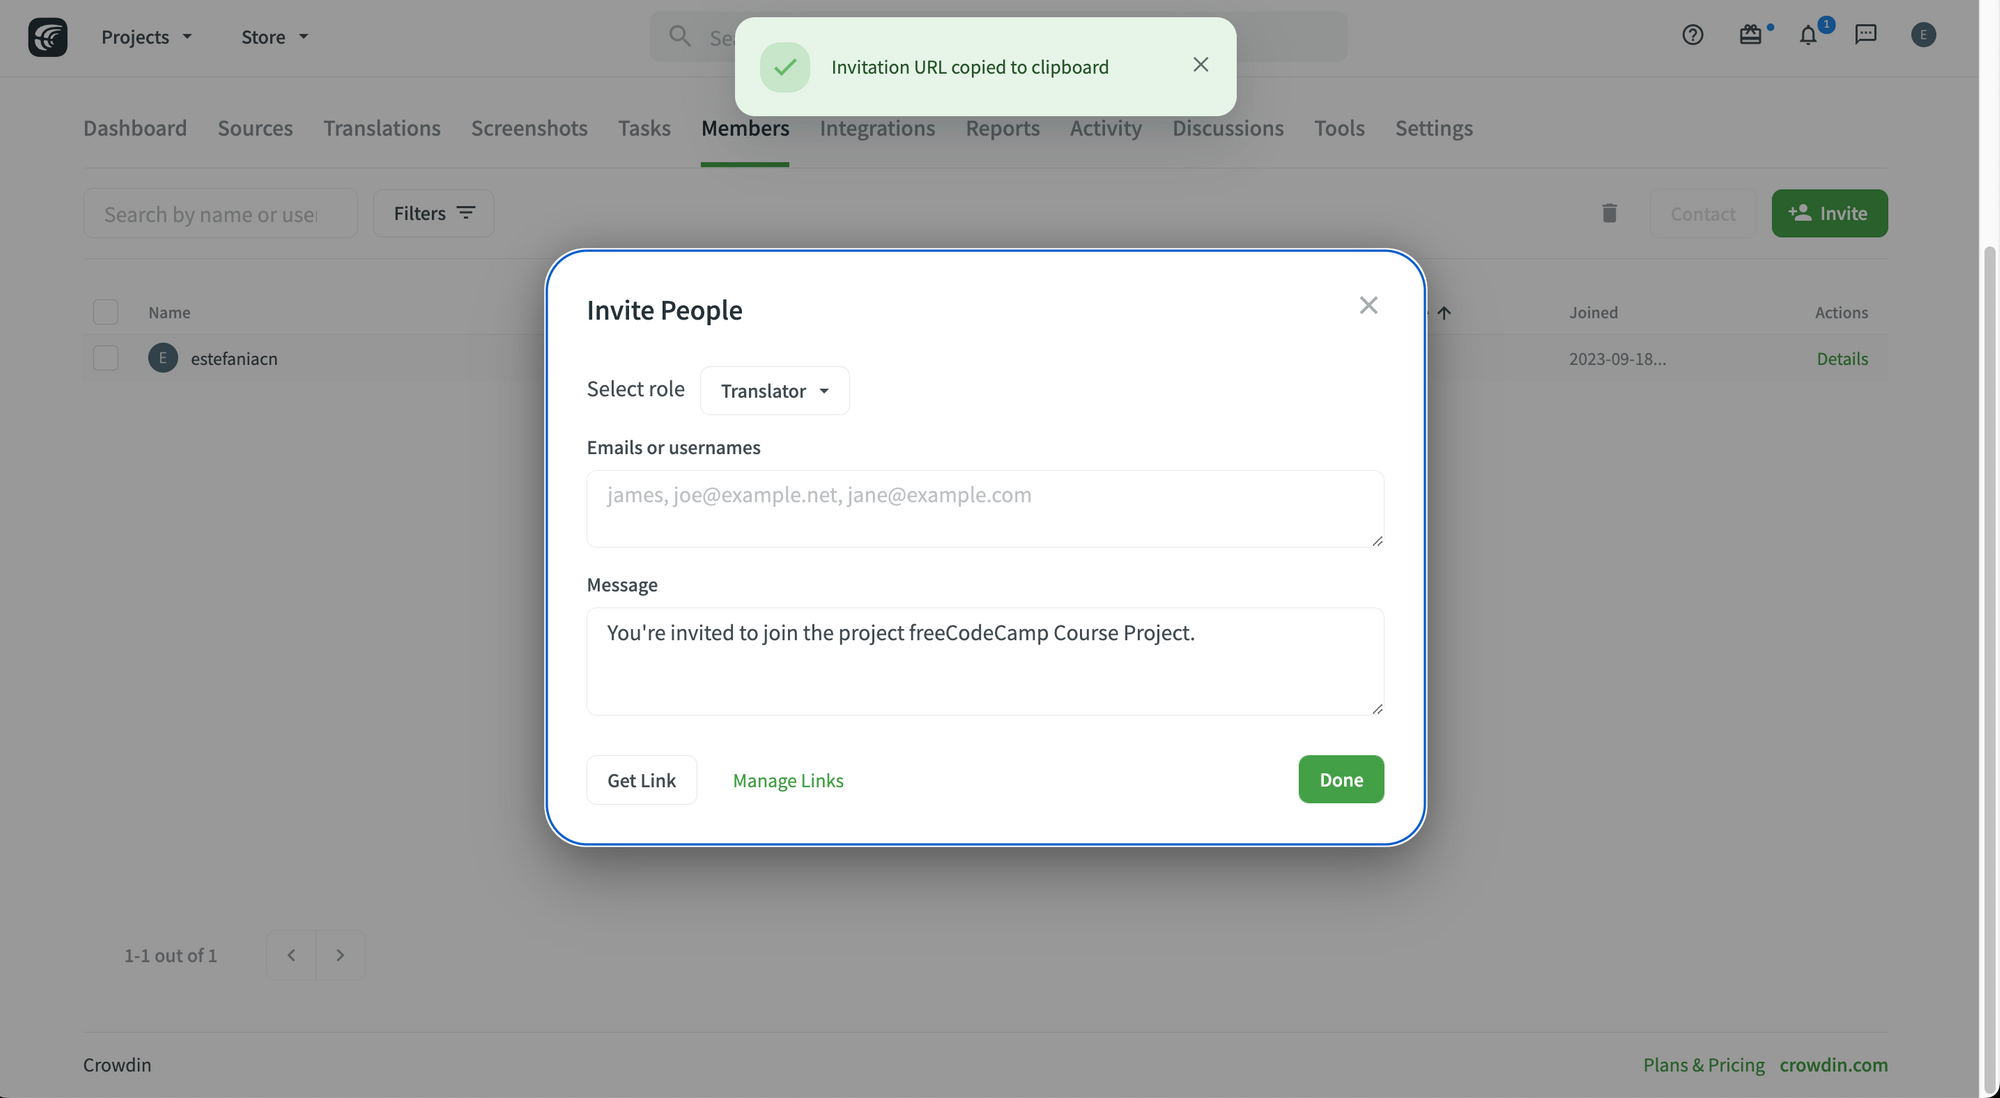 Confirmation Message.
Then, you can paste the link wherever you need to, like an email.
How to Manage Invitation Links
To manage your invitation links, click on the "Manage Links" option:
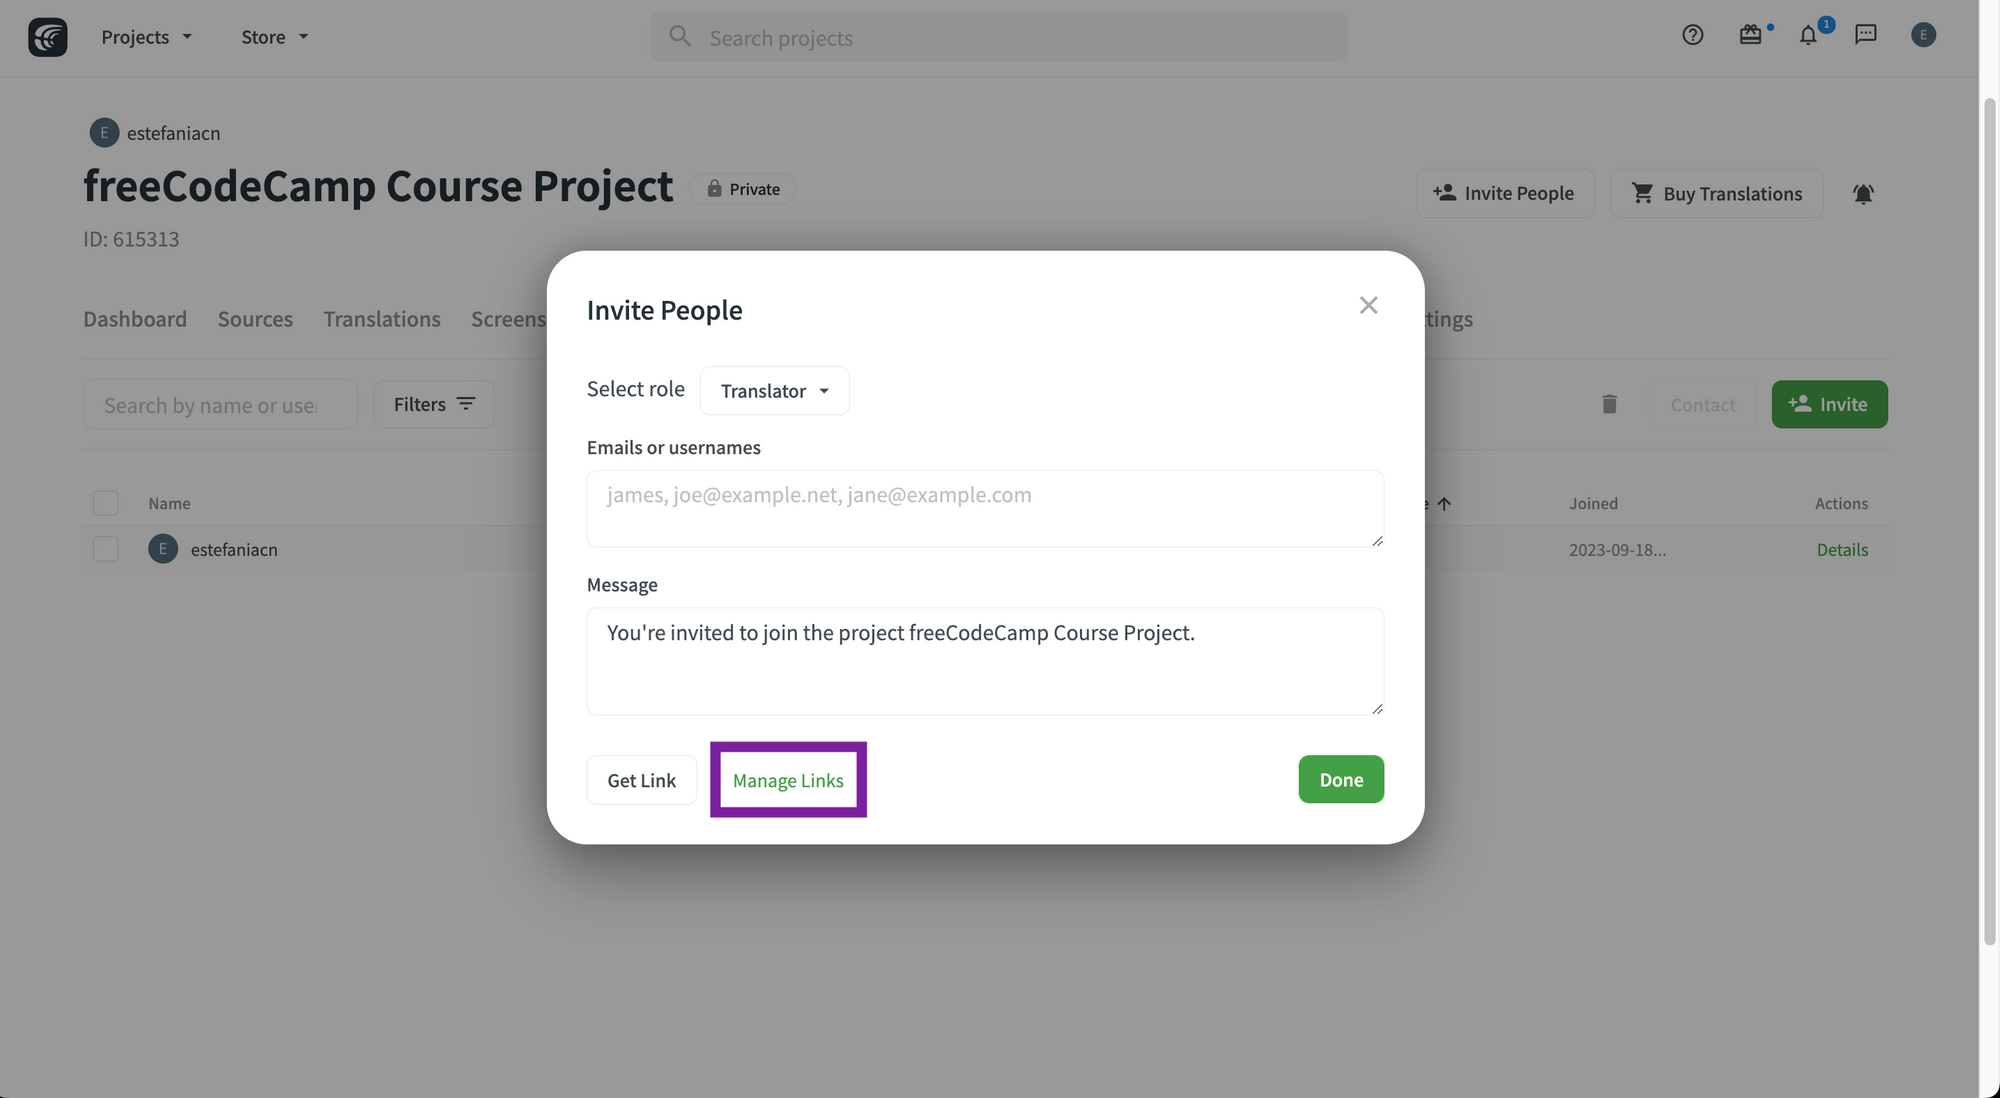 Manage Links.
You will see a list of all the invitation links you have generated, when you generated them, and the role(s) you granted to the invitee.
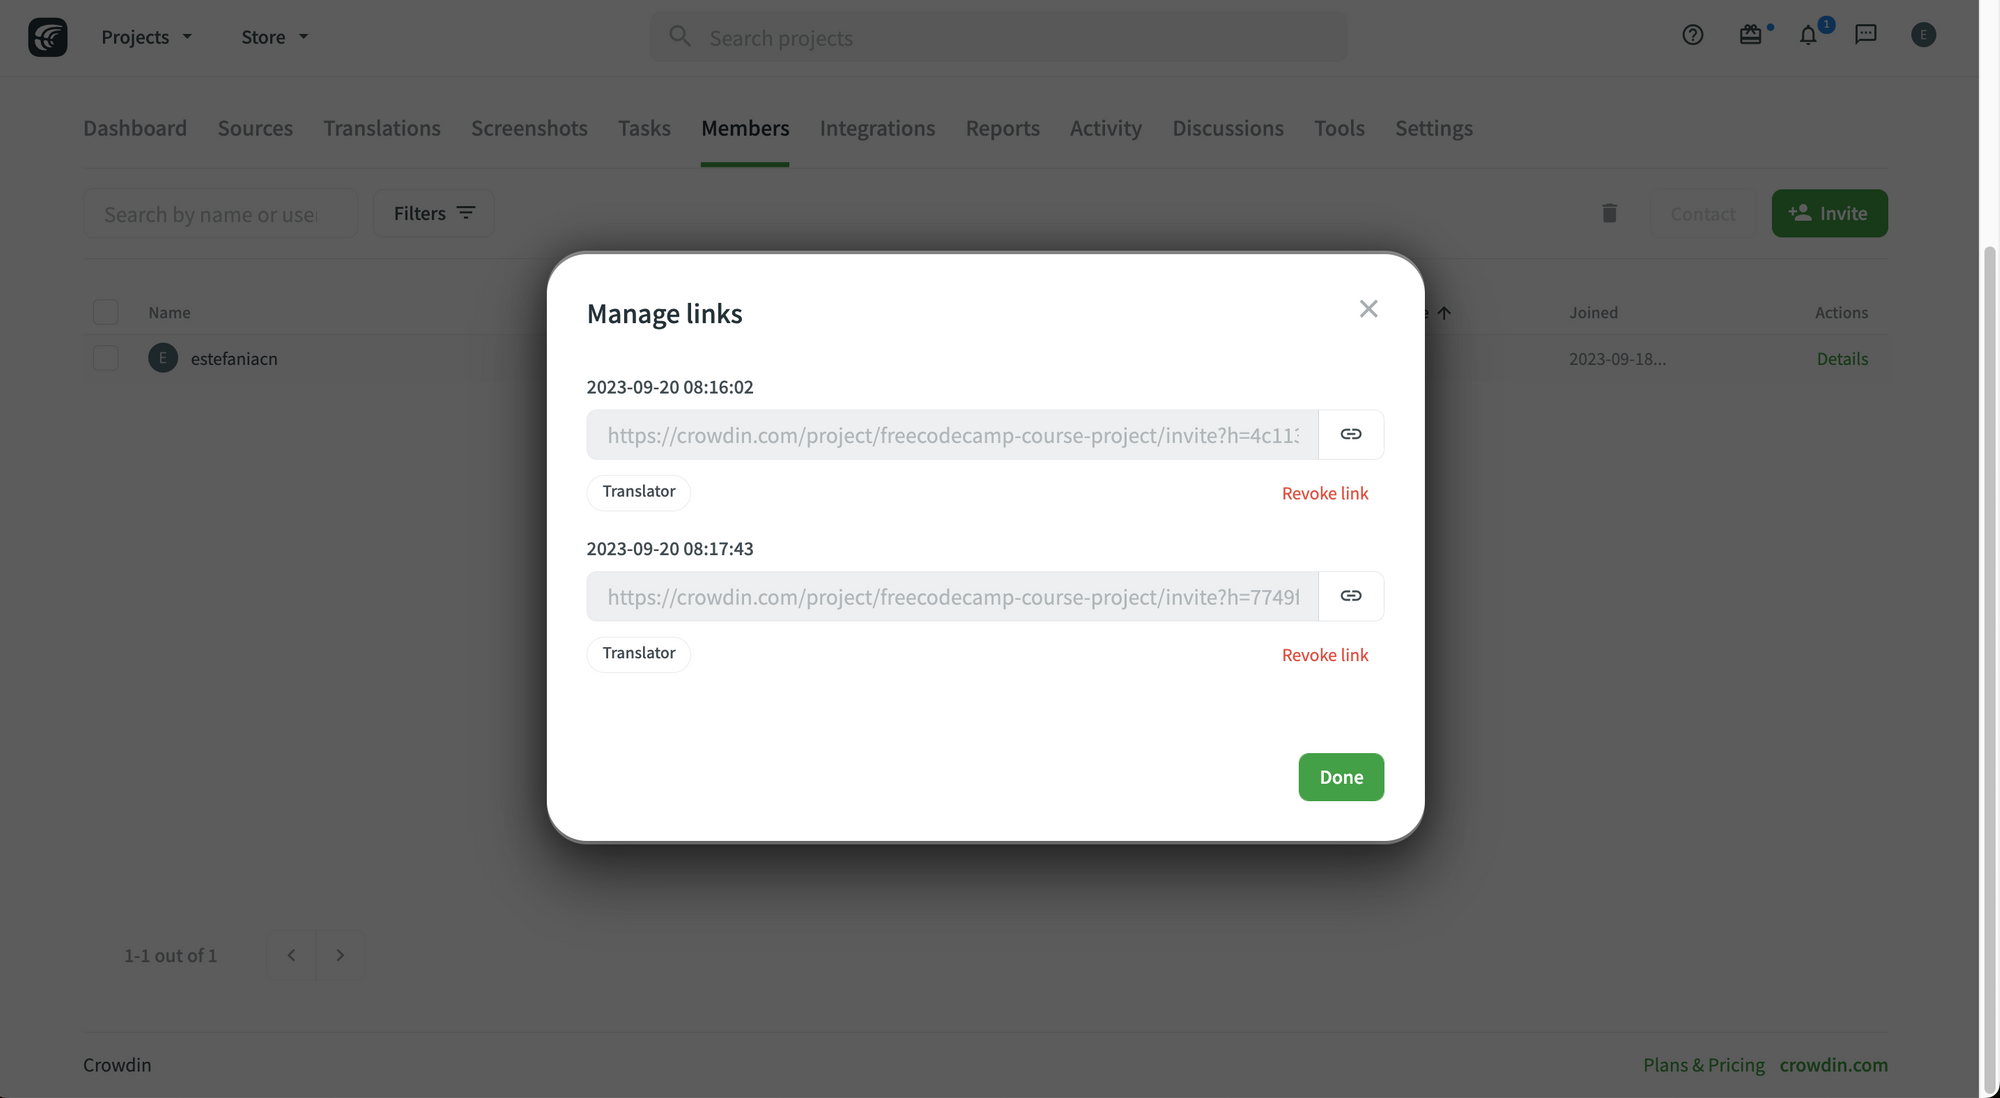 Invitation Links that have been generated.
💡 Tip: You can copy them again by clicking on the link icon to their right or revoke them by clicking on "Revoke link".
If you click on "Done", you will go back to the previous screen and you can click the "X" button at the top to close it.
Project Roles
Now let's talk about the different roles that you can assign to your team members. Let's read the role descriptions provided by Crowdin in the documentation:
Owner
A person who created a project and has complete control over it. The owner can invite and manage project members, create projects, upload source and translation files to the project, set up integrations, etc.
Manager
Has similar rights as a project owner except the ability to manage some of the owner’s Resources (e.g., configuring MT engines, custom workflows, etc.) and delete projects.
Language Coordinator
Can manage certain features of a project only within languages they have access to.
Language coordinators can translate and approve strings, manage project members and join requests, generate project reports, create tasks, and pre-translate the project content.
Unlike managers, they do not have access to other project settings (e.g., project files, integrations, etc.).
Developer
Can upload files, edit translatable text, connect integrations, and use the API. Cannot manage project tasks, members and reports.
Proofreader
Can translate and approve strings. Doesn’t have access to project settings.
Translator
Can translate strings and vote for translations added by other members.
Blocked
Doesn’t have access to the project.
How to Assign or Change Roles
You have two options to assign or change the role of a project member.
You can either:
- Set the role in the invitation.
- Set the role on the member's profile page.
How to Set the Role in the Invitation
You can choose the role when you send an invitation to a new member.
Setting the role in the invitation.
How to Setting the Role in the Profile Page
You can also go to the "Permissions" tab on the member's profile page to choose the roles that you would like to assign to that member and to choose the languages you would like to assign to them.
This is an example from the Crowdin documentation:
 Setting roles in the "Permissions" tab. Image taken from the Crowdin documentation.
Click on the "Save" button to save your changes.
Project Managers
Project managers play a key role for your team and for your project. They can have unlimited control over the entire project and they can help you coordinate and assign tasks to team members.
How to Add a Project Manager
Let's see how you can add a project manager to your project. You can assign the Manager role to a member when you send them an invitation:
- Go to your project.
- Go to the "Members" tab.
- Click on "Invite".
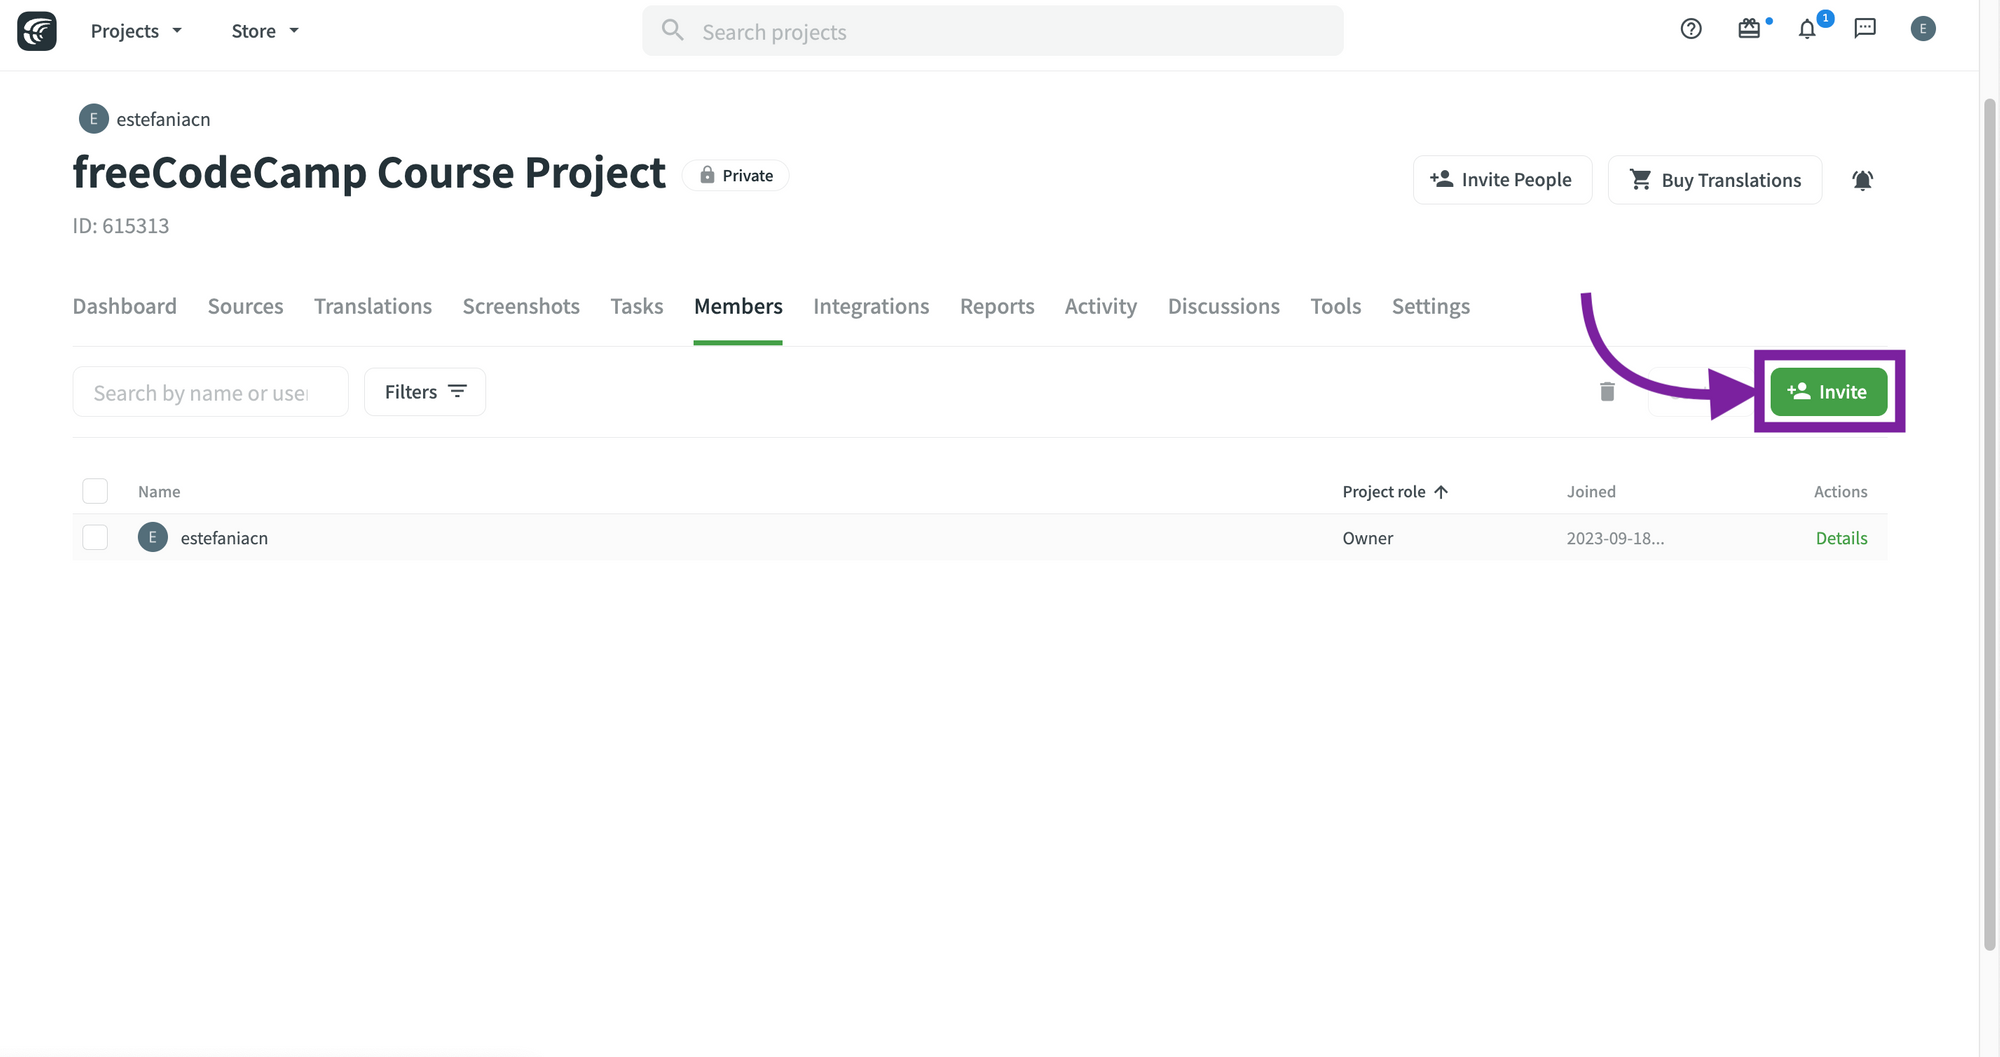 Members tab.
Click on "Translator". You will see all the possible roles.
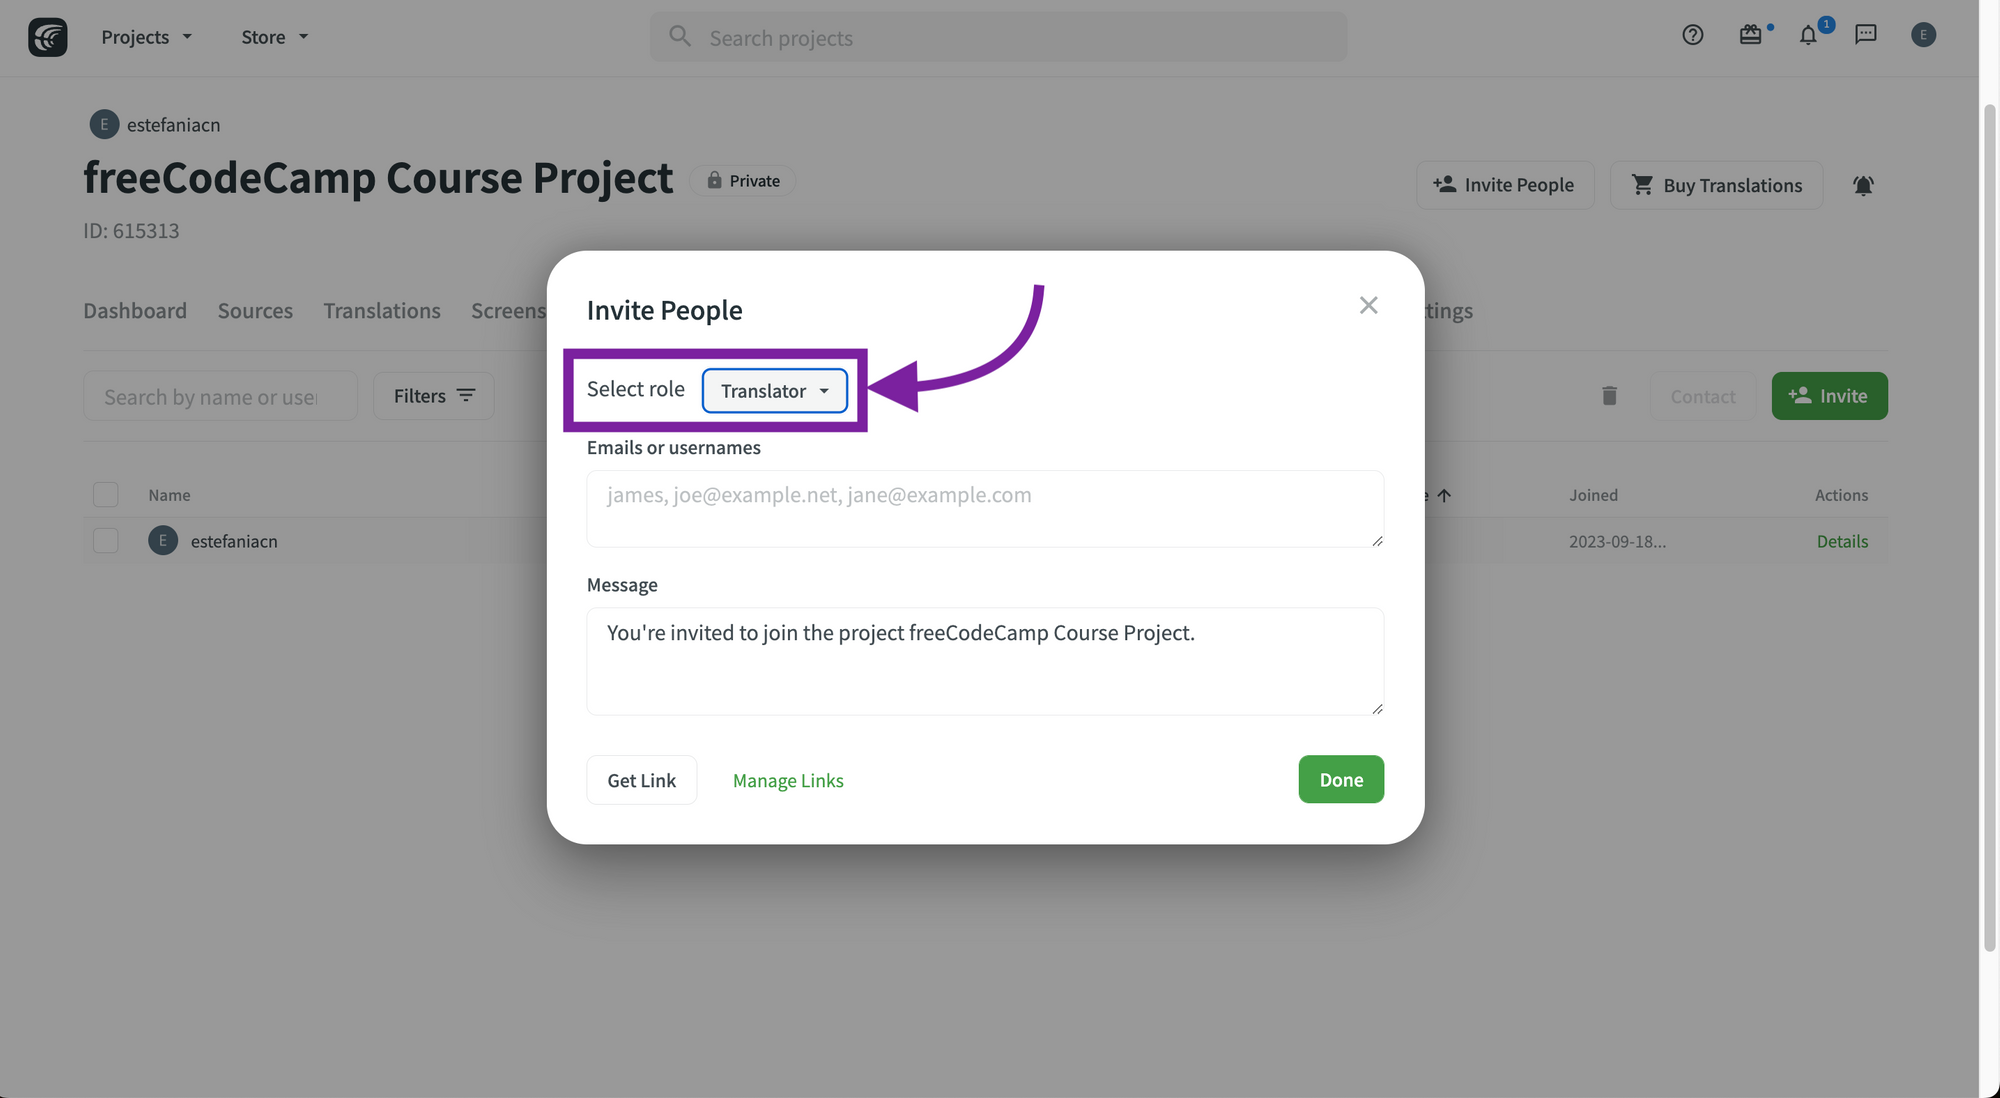 Select a role.
Choose "Manager". This will grant the member unlimited control over the entire project.
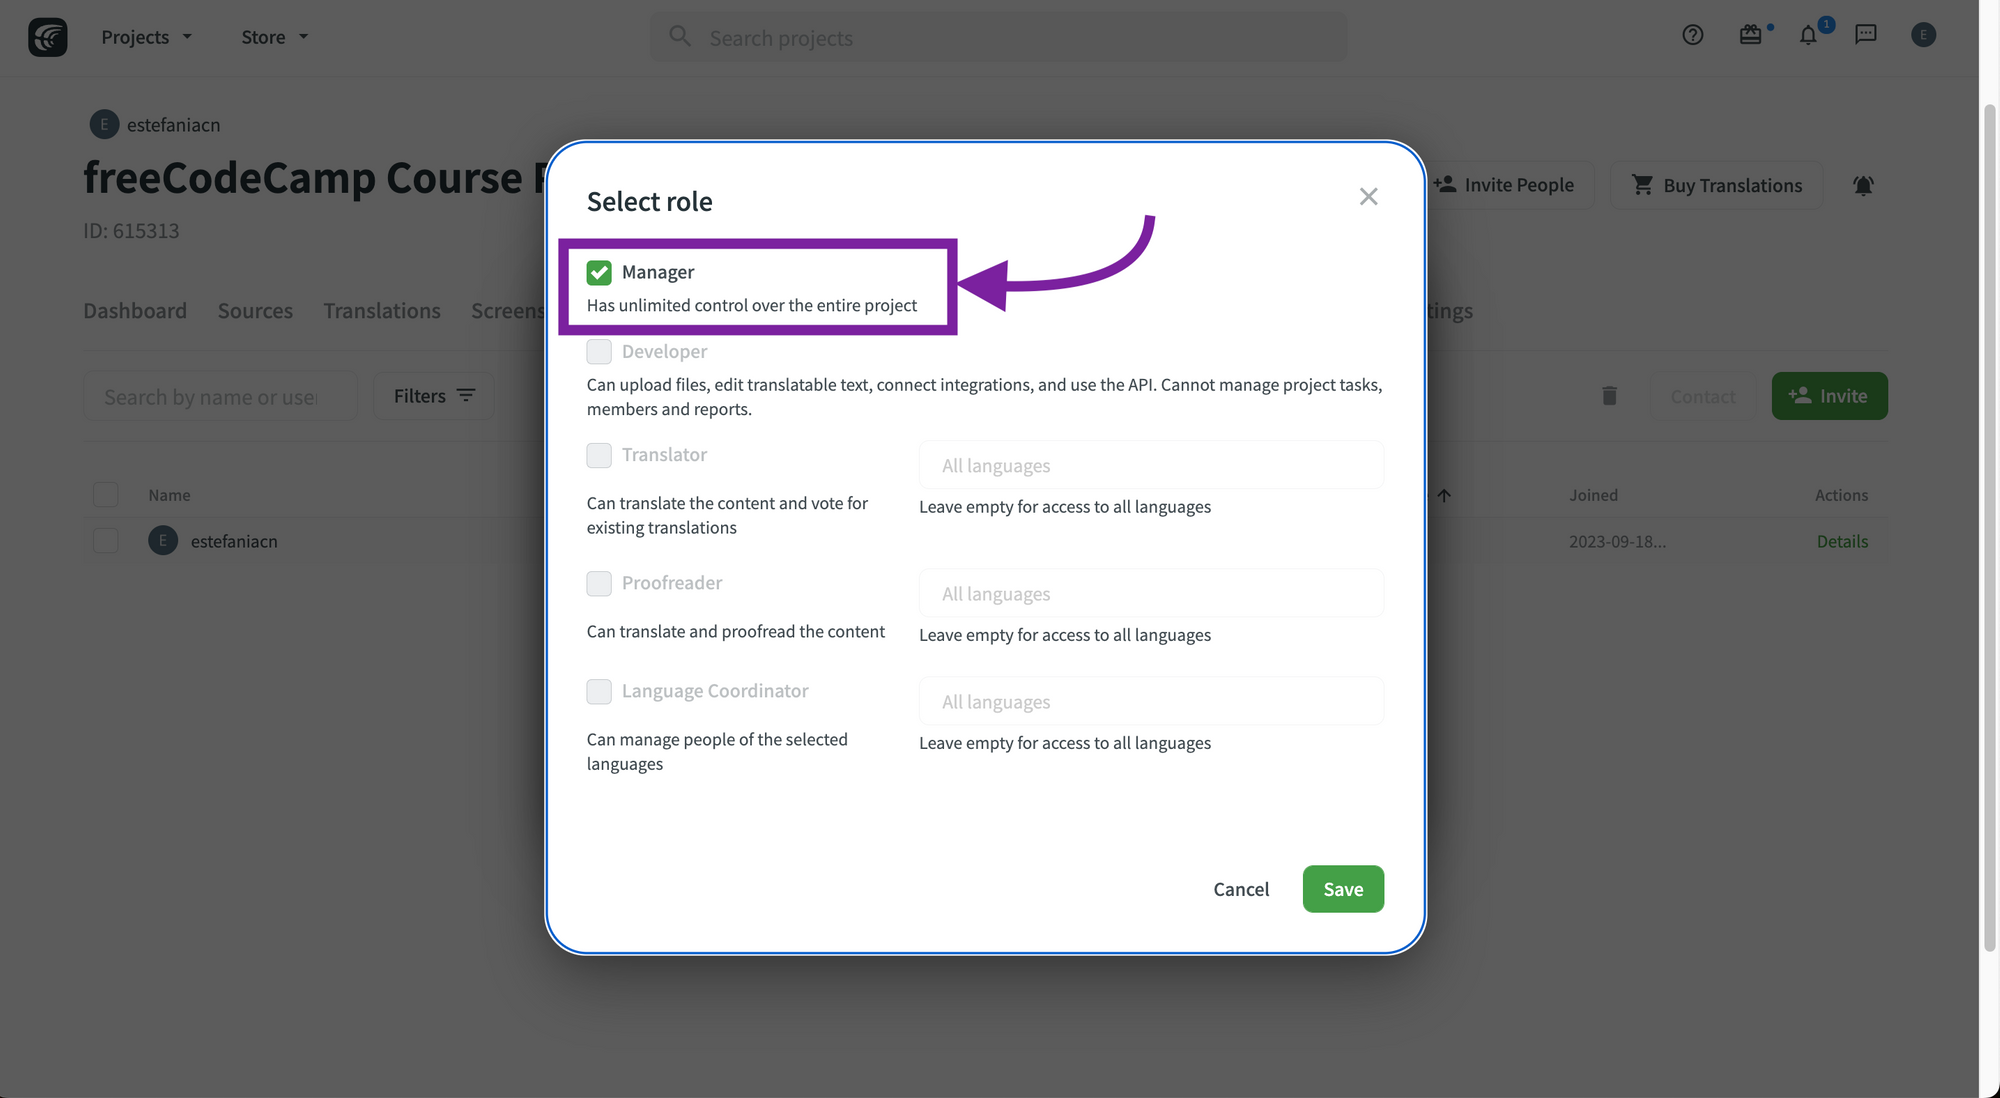 Manager role.
Alternatively, you can invite a Manager from your profile page:
- Go to your profile.
- Go to the "Managers" tab.
- Click on "Add Manager".
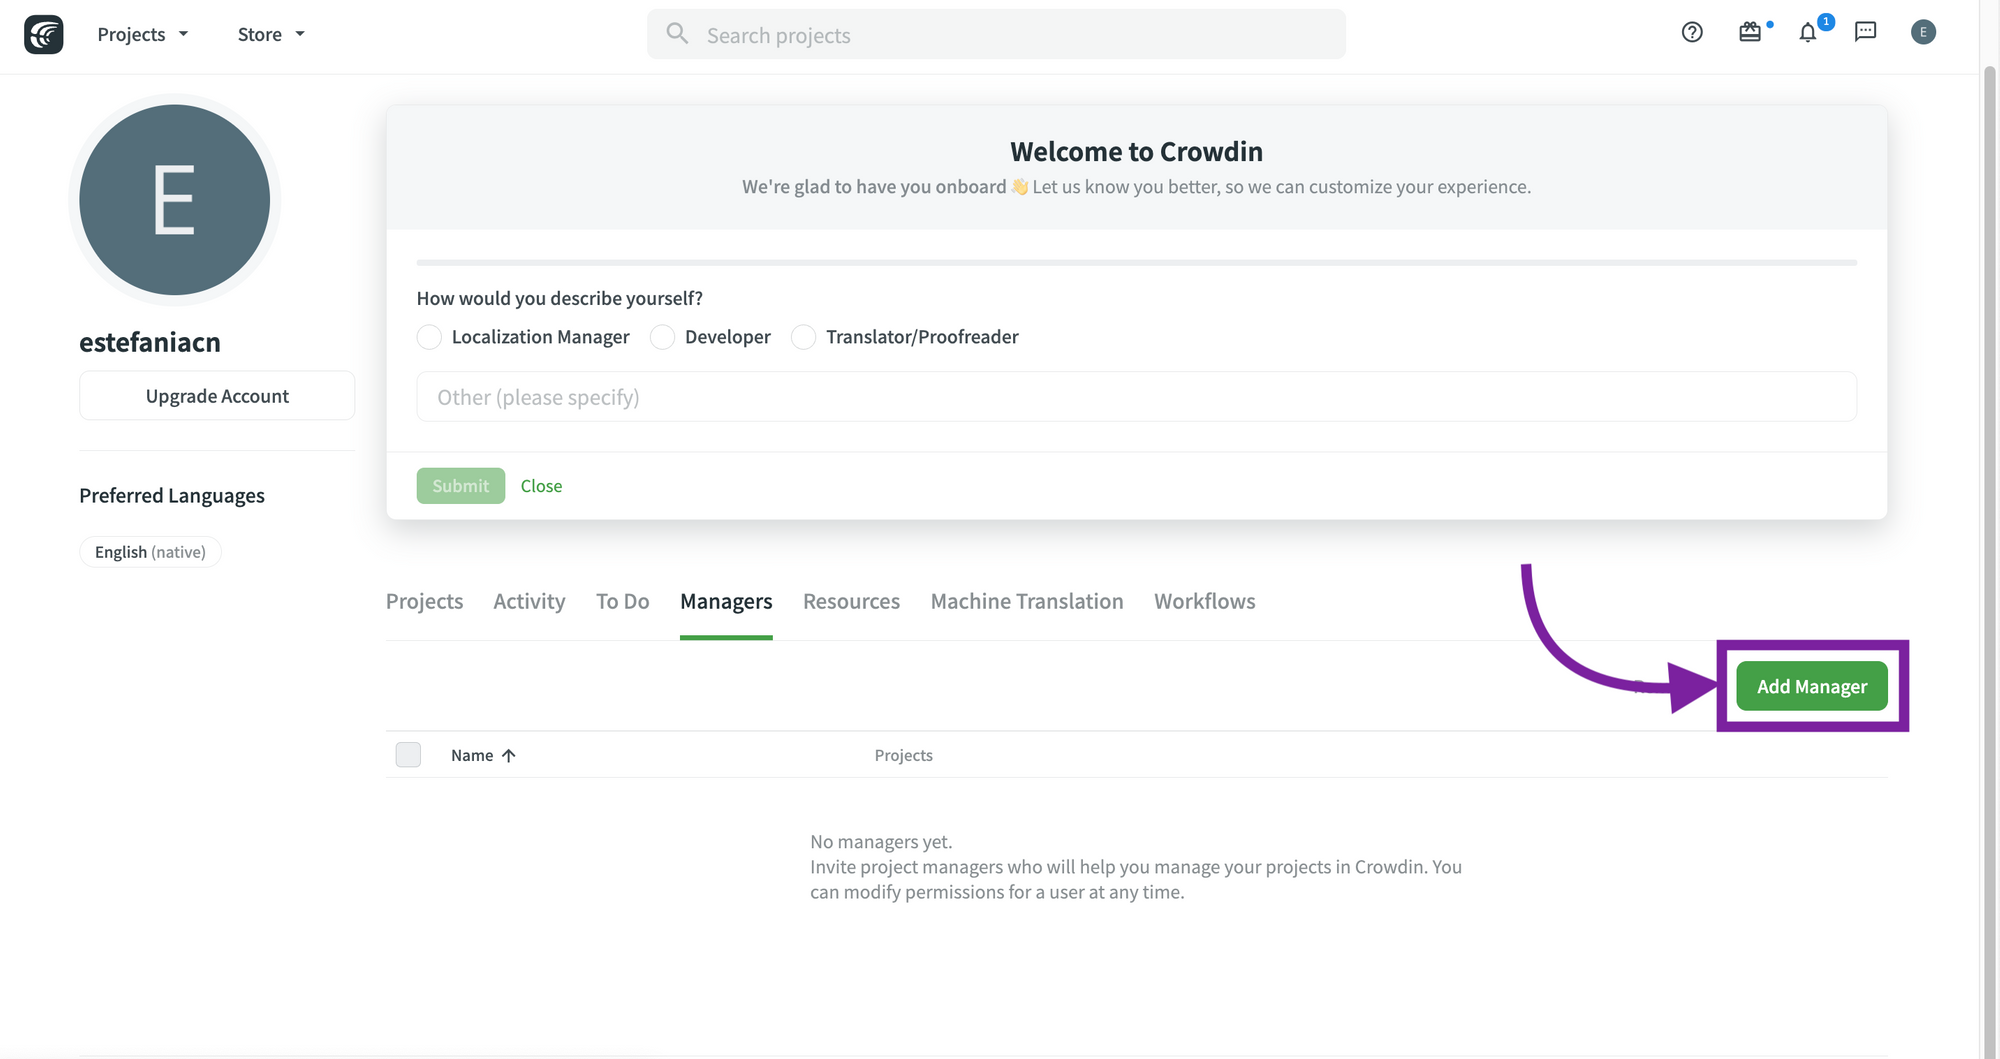 Add Manager.
Now you will need to enter the name or username of the manager, the message, the permissions that you would like to grant, and the projects that will be managed by this manager.
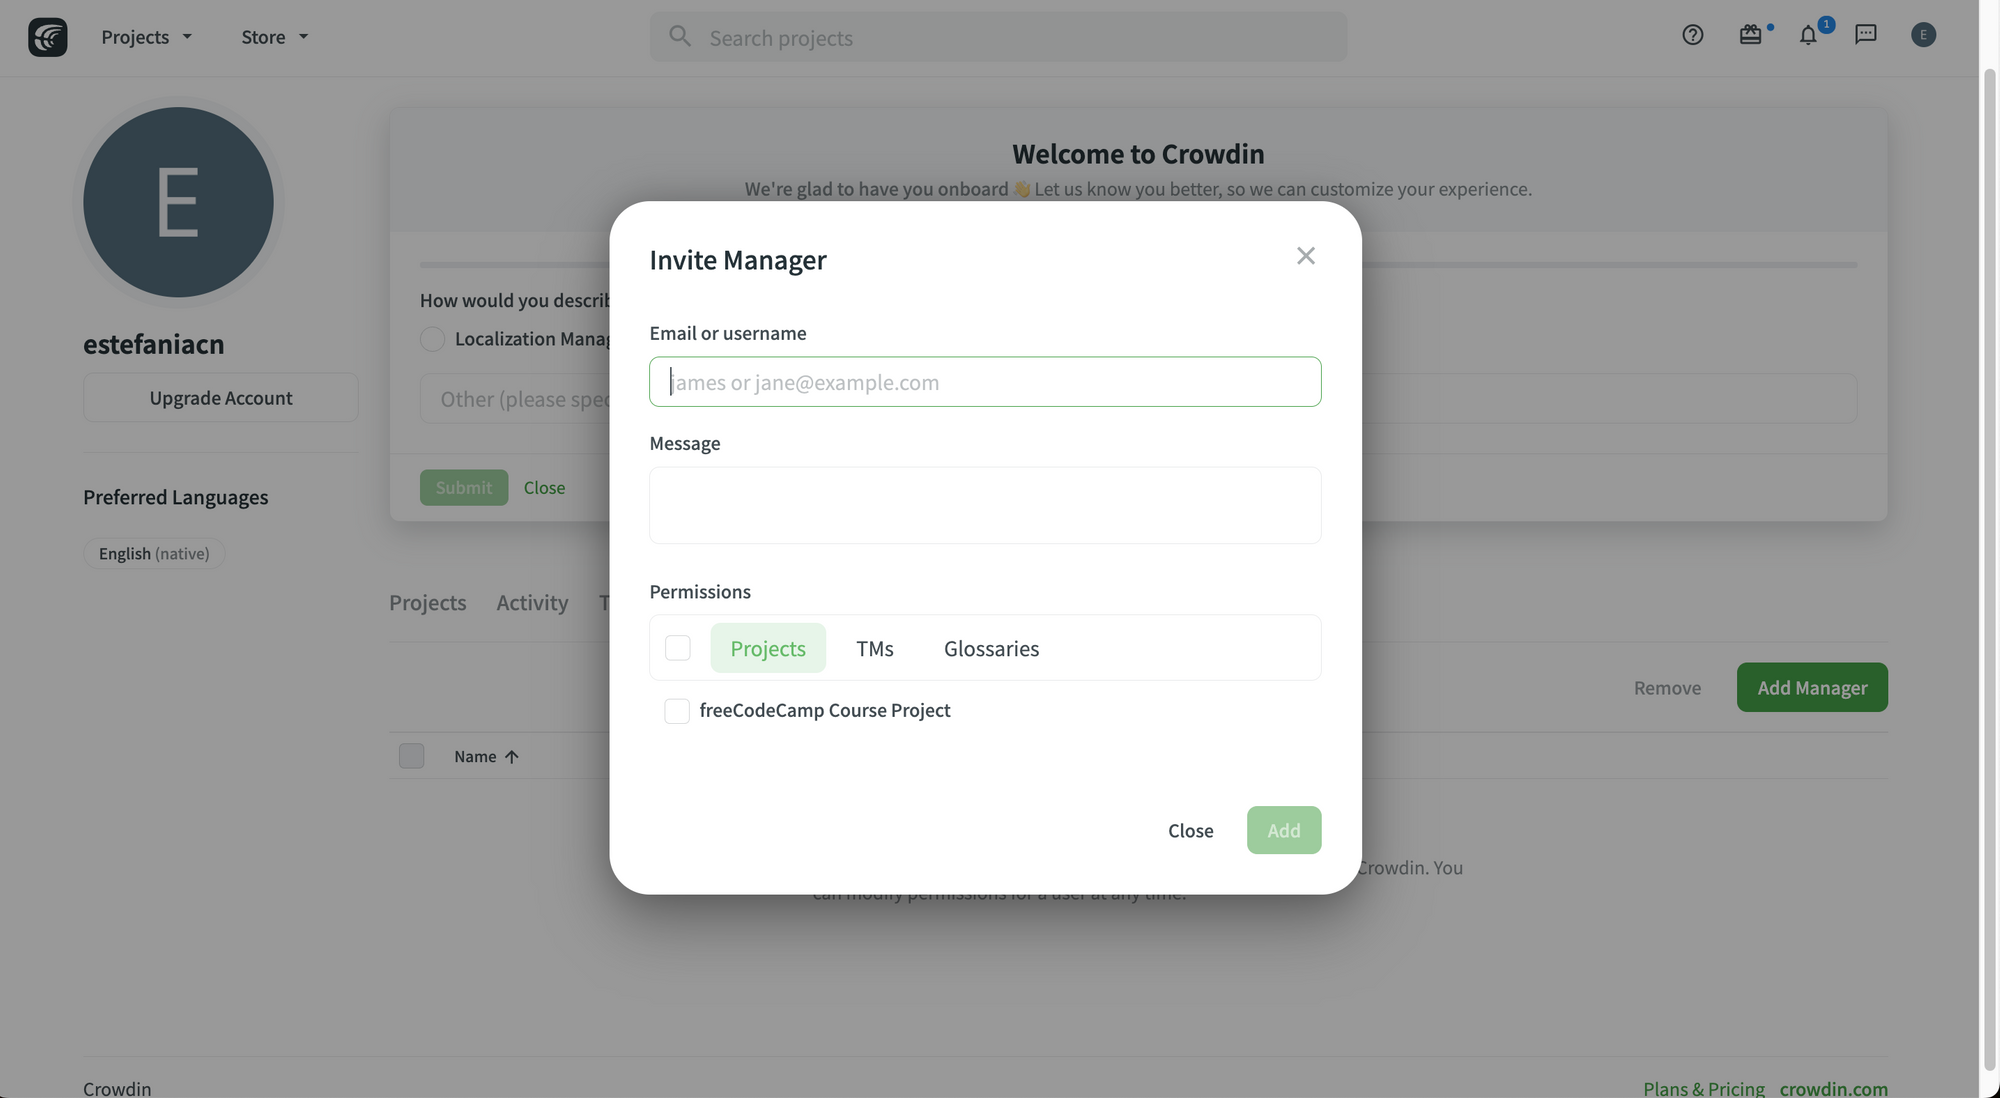 Invite Manager.
Editing Manager Permissions
You can also edit manager permissions on Crowdin.
To do this:
- Go to your profile.
- Go to the "Managers" tab. You will see a list of the managers that you've added to your projects.
- Double-click on the manager you would like to edit.
This is an example from the Crowdin documentation:
 Managers tab example. Image taken from the Crowdin documentation.
Update the permissions for that manager.
Click on the "Save" button.
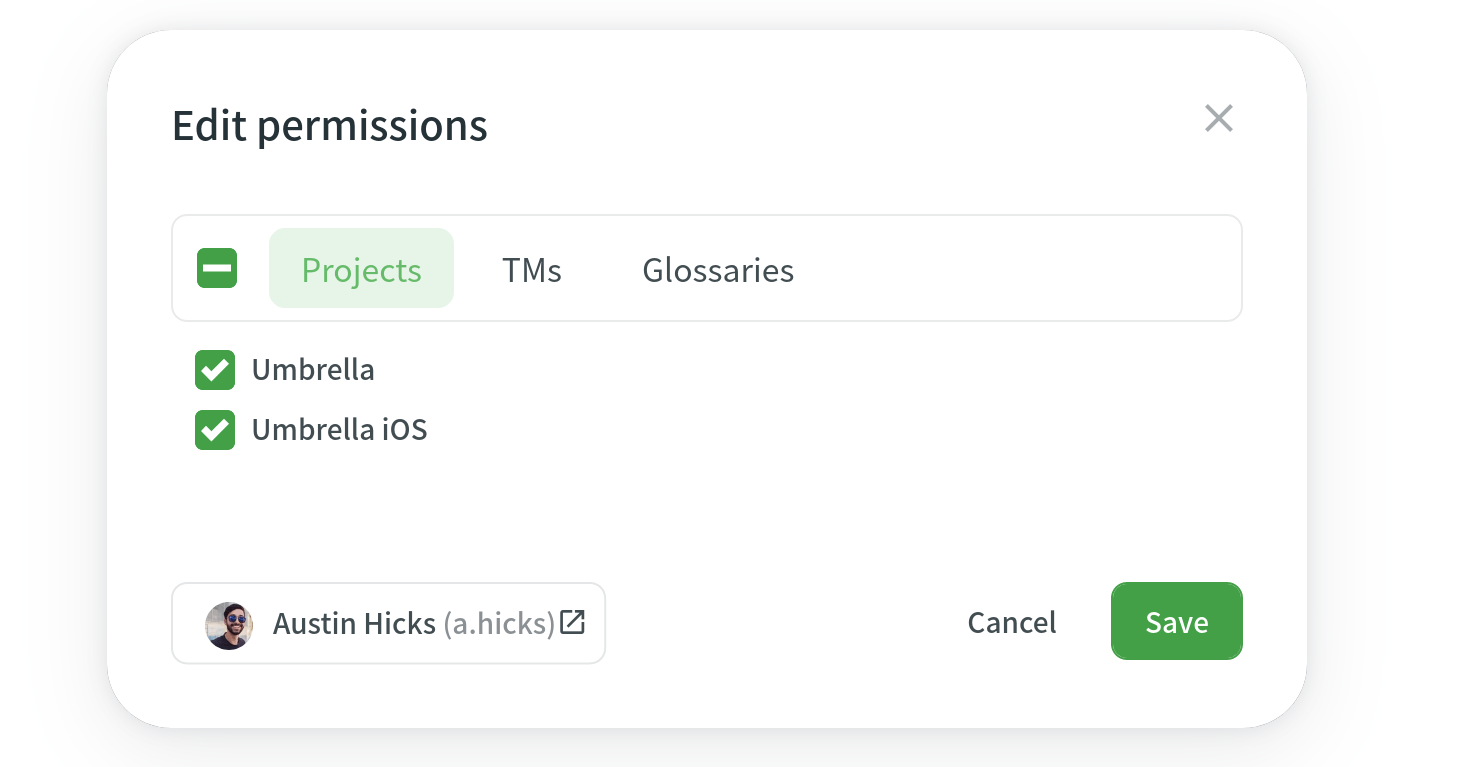 Imagen taken from the Crowdin documentation.
How to Remove a Manager
To remove a manager:
- Go to your profile.
- Go to the "Managers" tab.
- Select the manager that you would like to remove.
- Click "Remove".
Manager vs Proofreader
On Crowdin, Managers and proofreaders have certain differences in their roles and permissions.
To explain this in more detail, the Crowdin team highlights this important question in the documentation:
Q: I’m a project owner. Do I need to invite a manager or a proofreader?
A: The main difference between a manager and a proofreader is the following: in addition to approving translations added by translators, managers can also invite and remove project members, upload source and translation files to the project, set up integrations, etc
If you want to have a project member who should have access to the features mentioned above, you need to invite a project manager. Alternatively, if you plan to manage the project yourself, it will be enough to invite a proofreader.
Tasks
Organization is the key to the success of any project and Crowdin definitely knows this. This is why they incorporated very helpful tools called tasks on their platform to help you organize your project and coordinate tasks among your team members.
With tasks, you can assign specific files to your translators and proofreaders, set due dates, receive notifications, discuss tasks with other team members, and even split the words from the same file between different team members.
You can also track the status of each task in a visual board where you can drag and drop your tasks from one status to the next.
This sounds great, right? Let's see tasks in more detail.
How to Create a New Task
To create a new task:
- Go to your project.
- Click on the "Create Task" button.
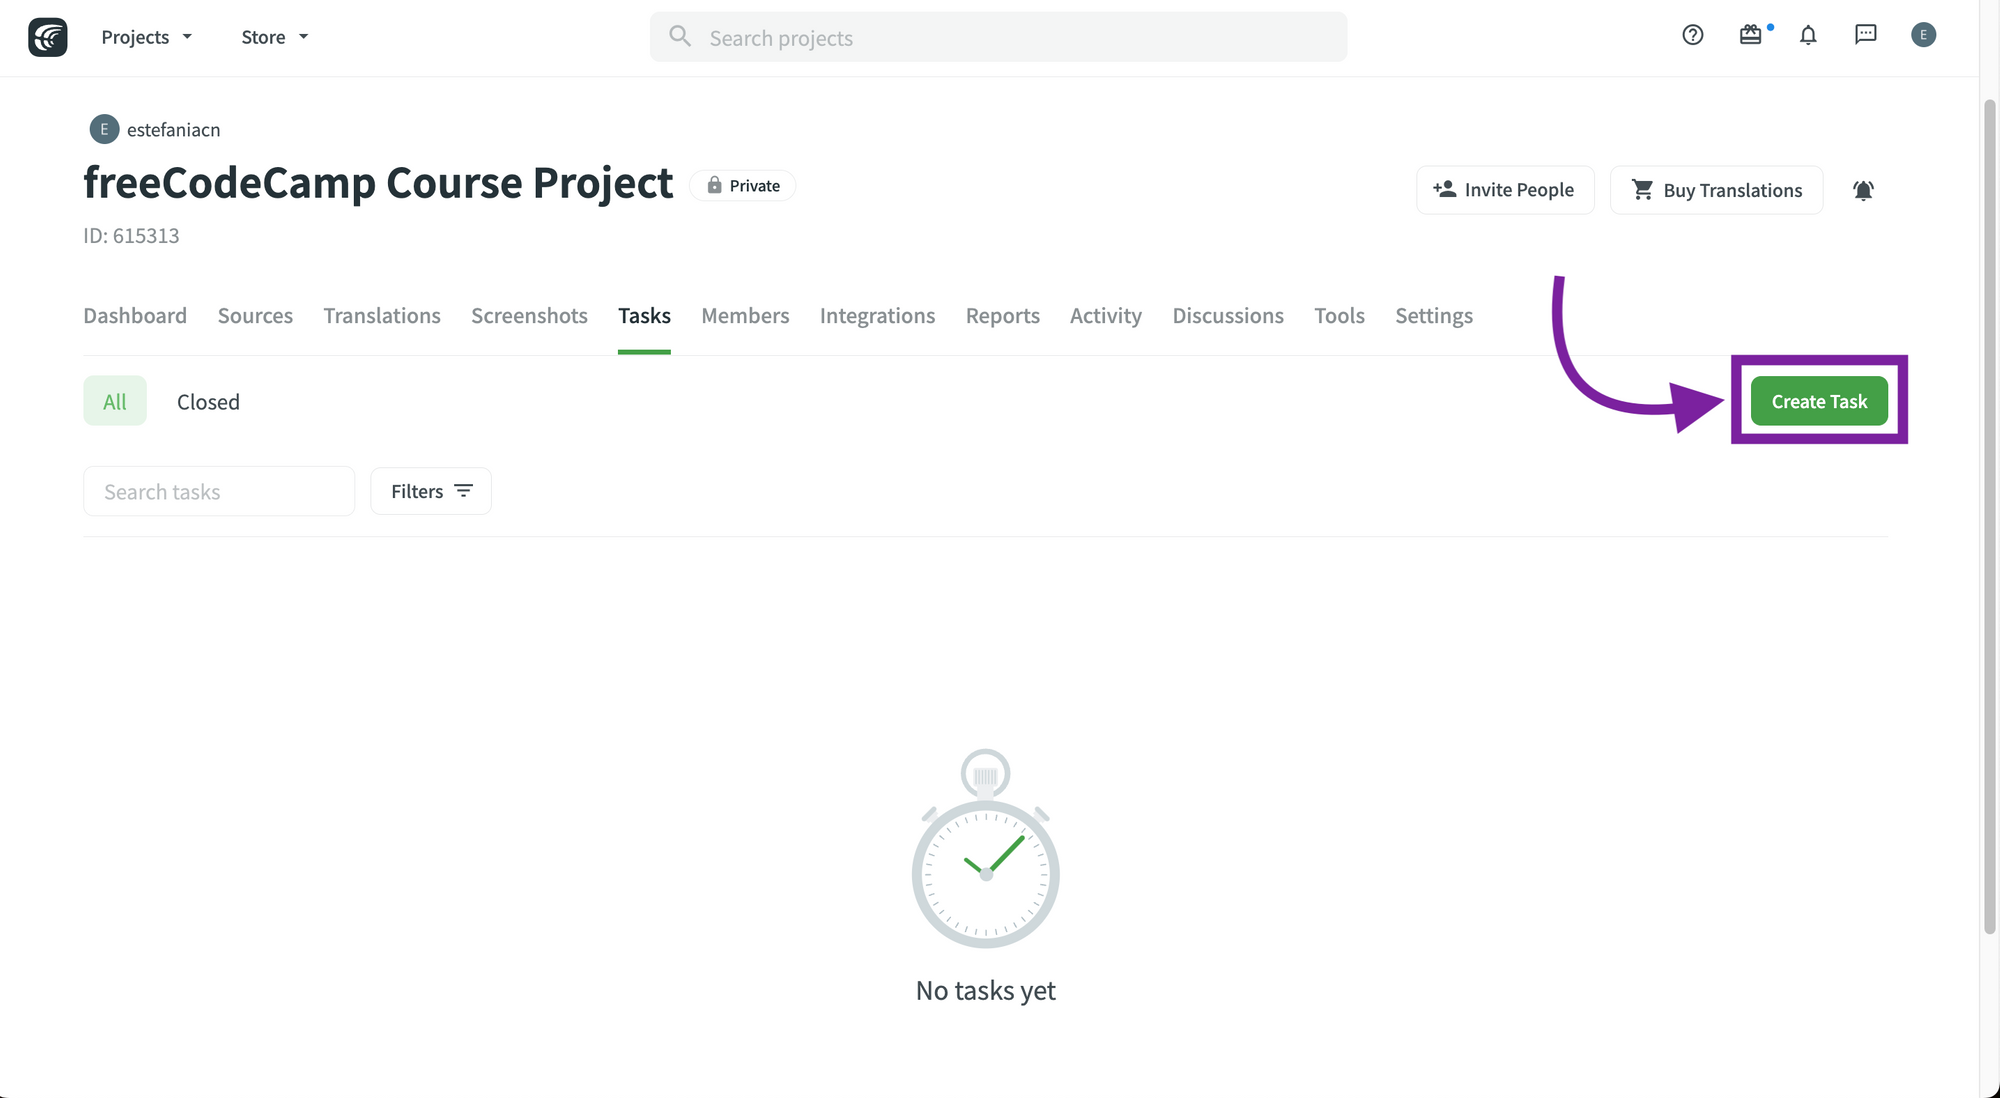 Tasks on Crowdin.
💡 Tip: A task can only be assigned to one project.
After clicking on the button, you will see a form where you can enter all the details of your new task.
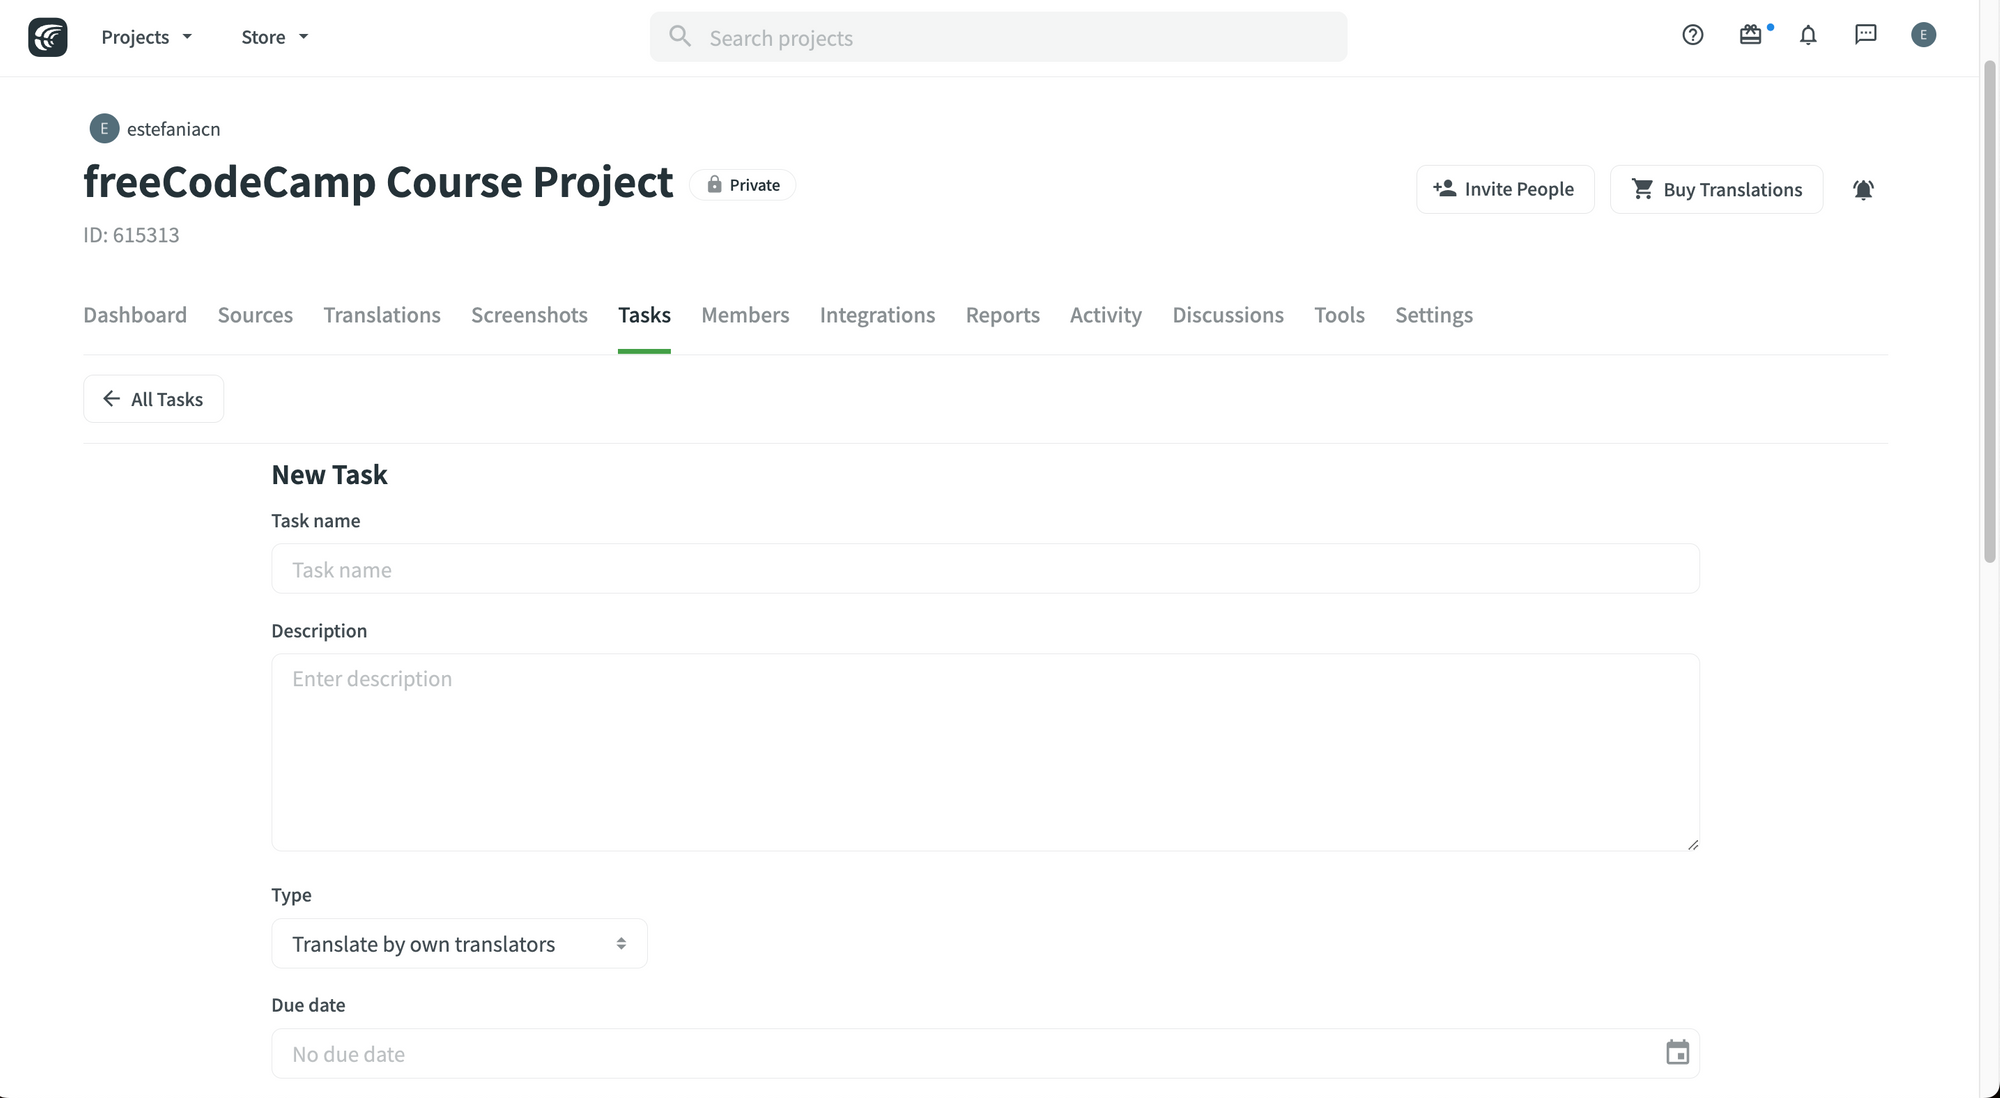 Creating a new task.
The details that you can enter for a task include:
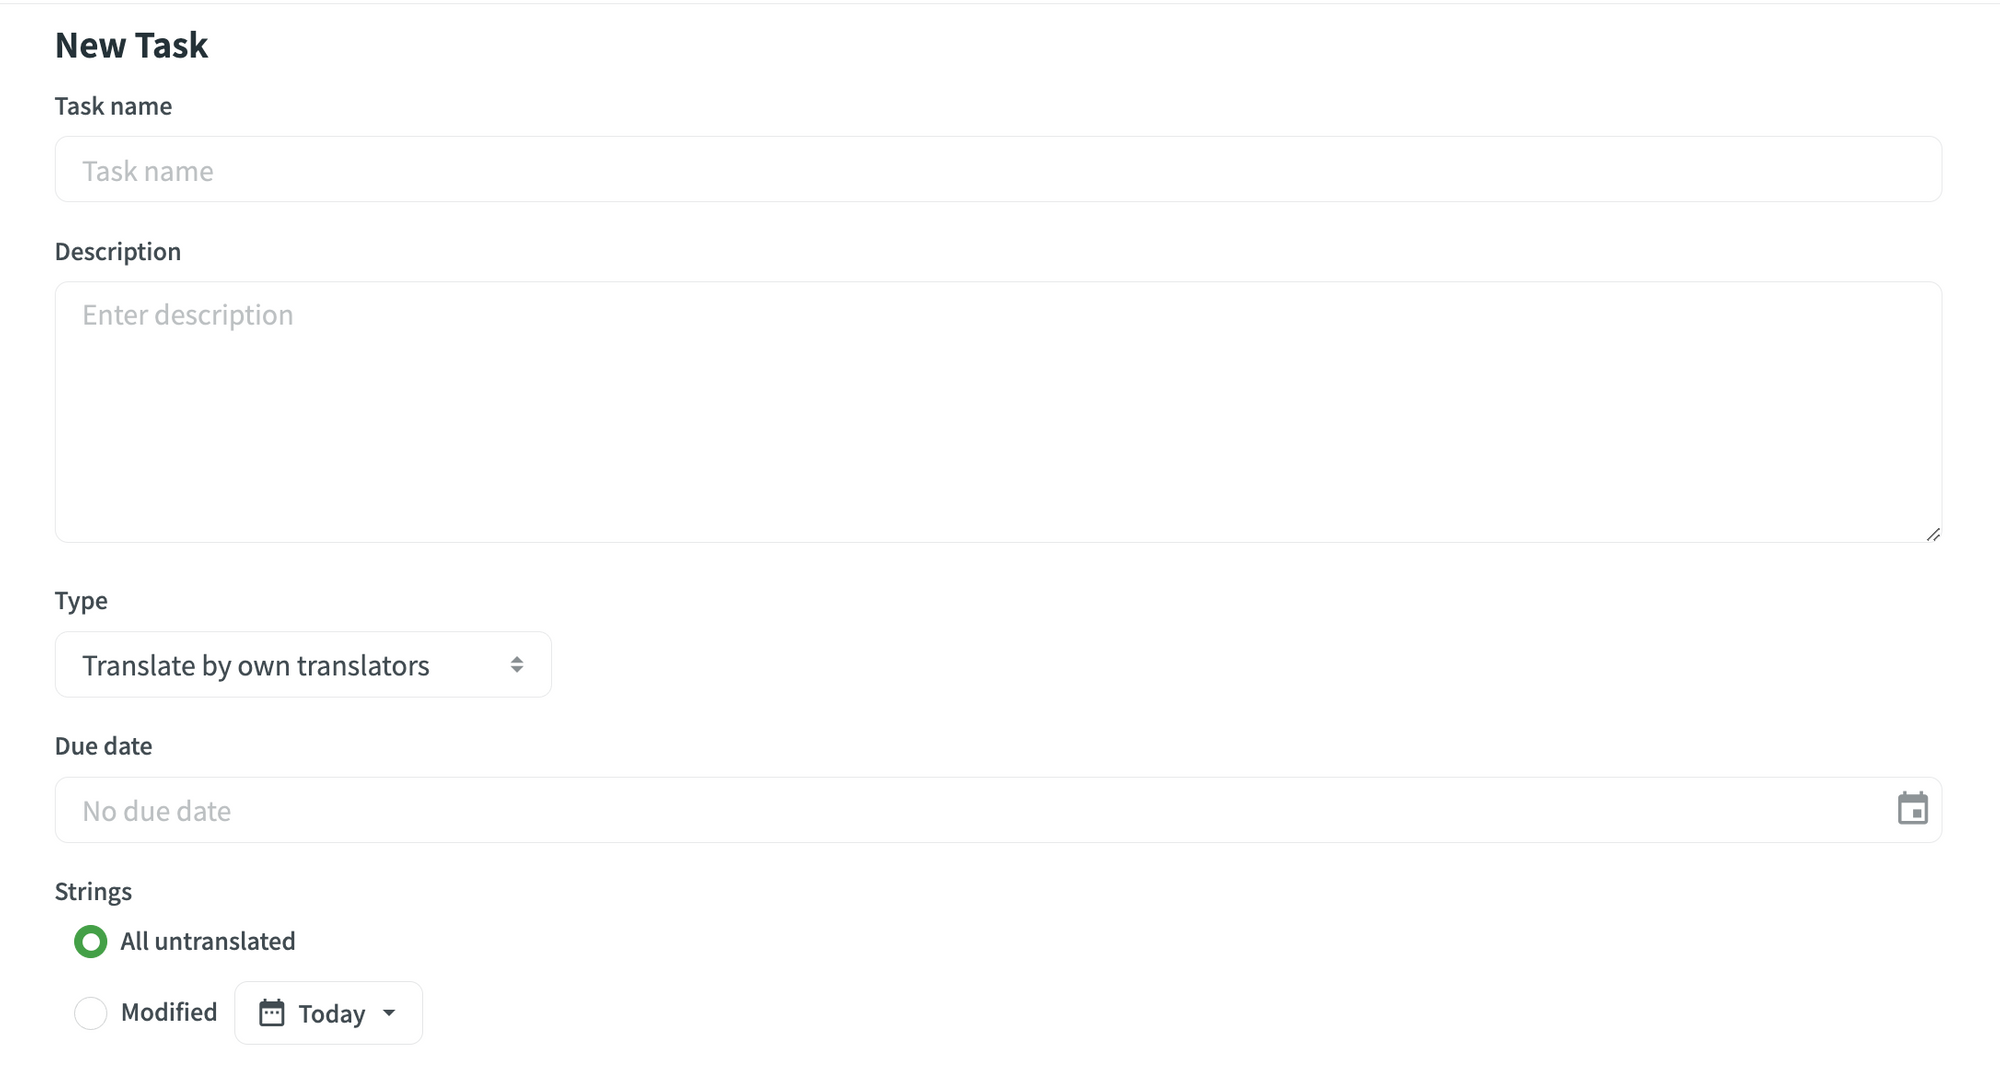 Task information (Part 1).
- Name.
- Description.
- Type (translate or proofread by own translators or by vendors).
- Due date (optional).
- Strings assigned to the task (all the strings of the selected file(s) or only strings modified during a specific time period).
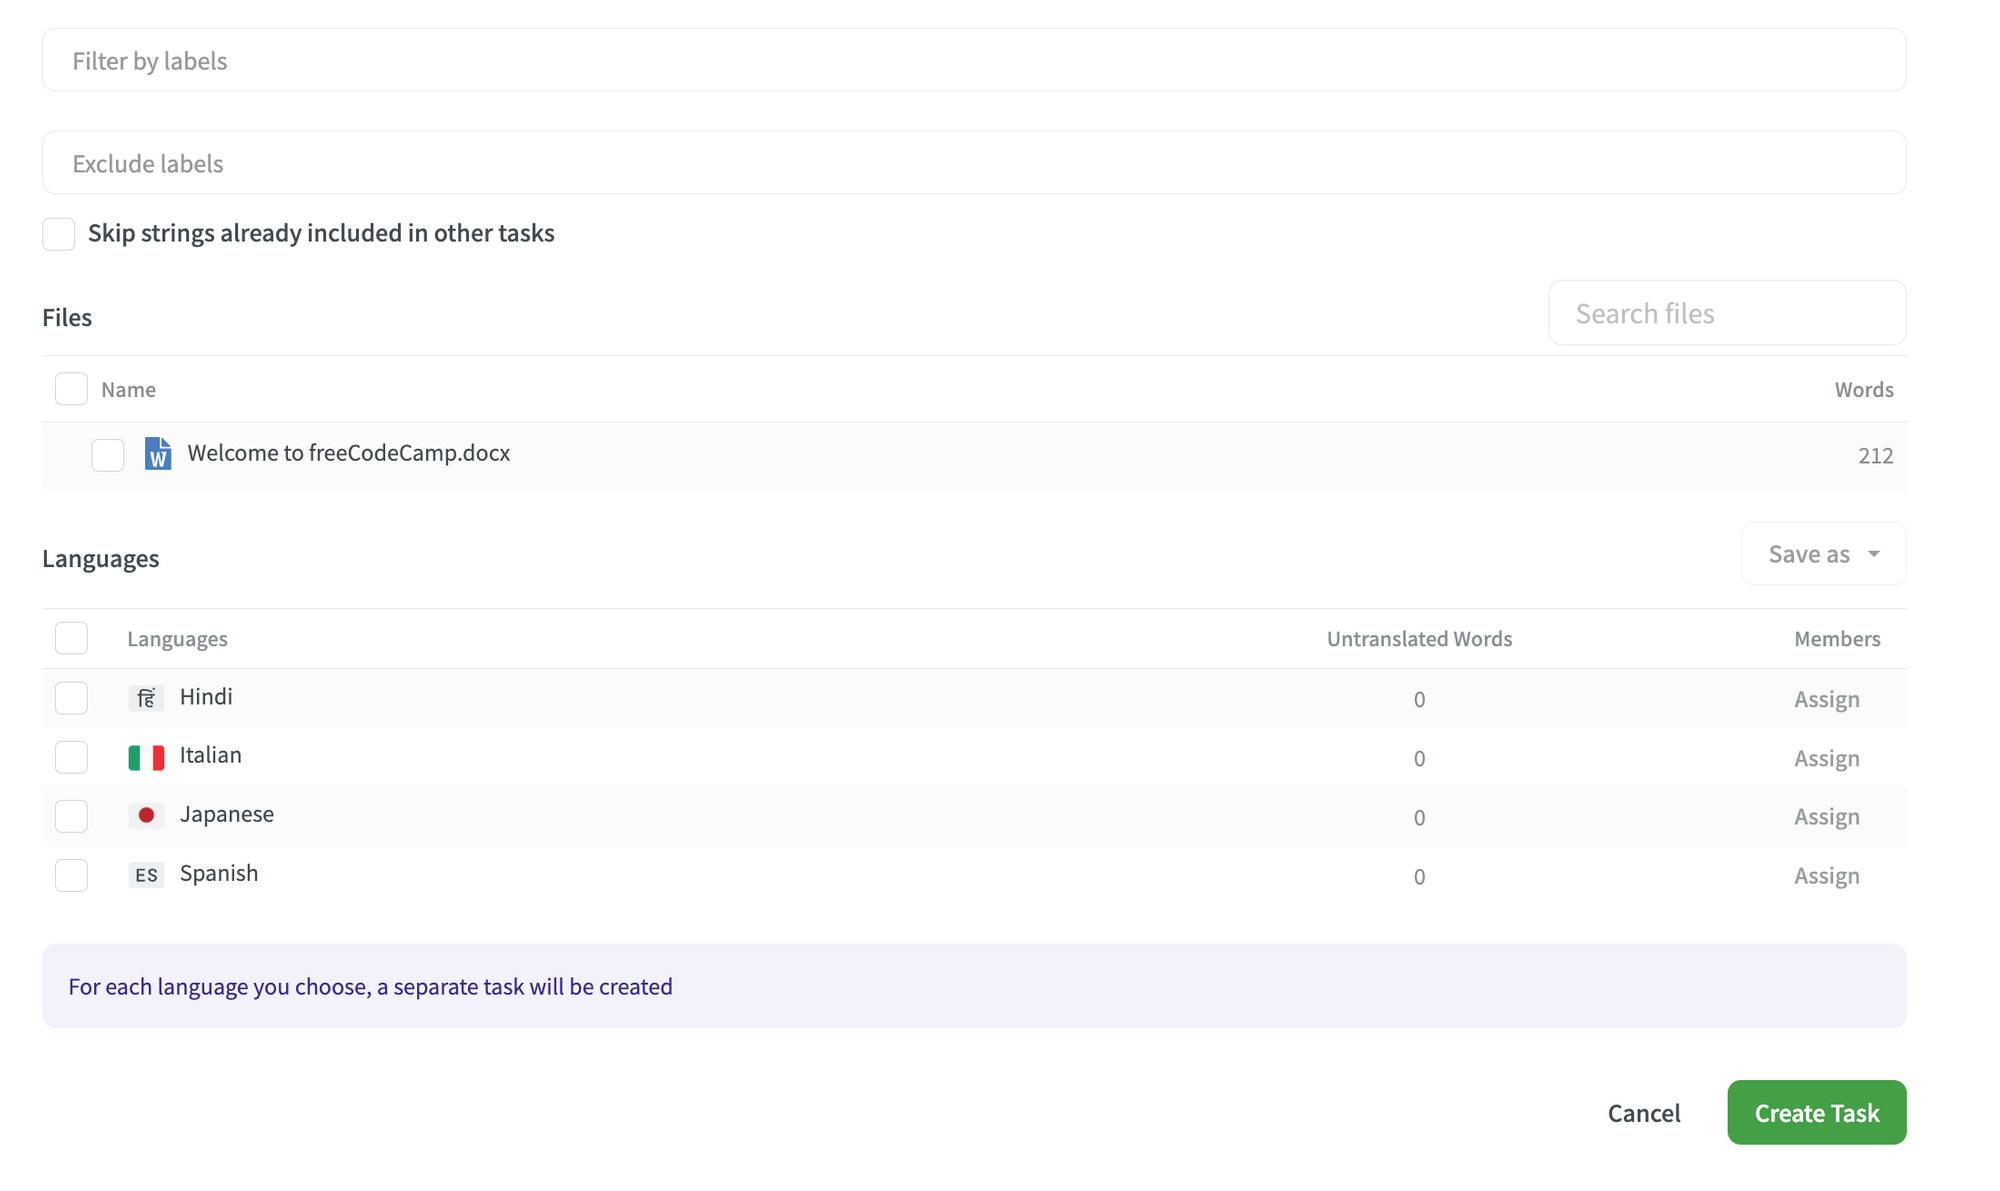 Task information (Part 2)
- Filter by labels (the labels that the strings of the task should have).
- Exclude labels (the labels that the strings of the task should not have).
- You can choose if you would like to skip strings that are already included in other tasks to avoid duplicate work by your team members.
- Files that should be translated or proofread.
- The target language(s). If the task has more than one target language, the system will create a task for each target language.
- To assign team members to the task for each target language, click on the "Assign" option next to each language.
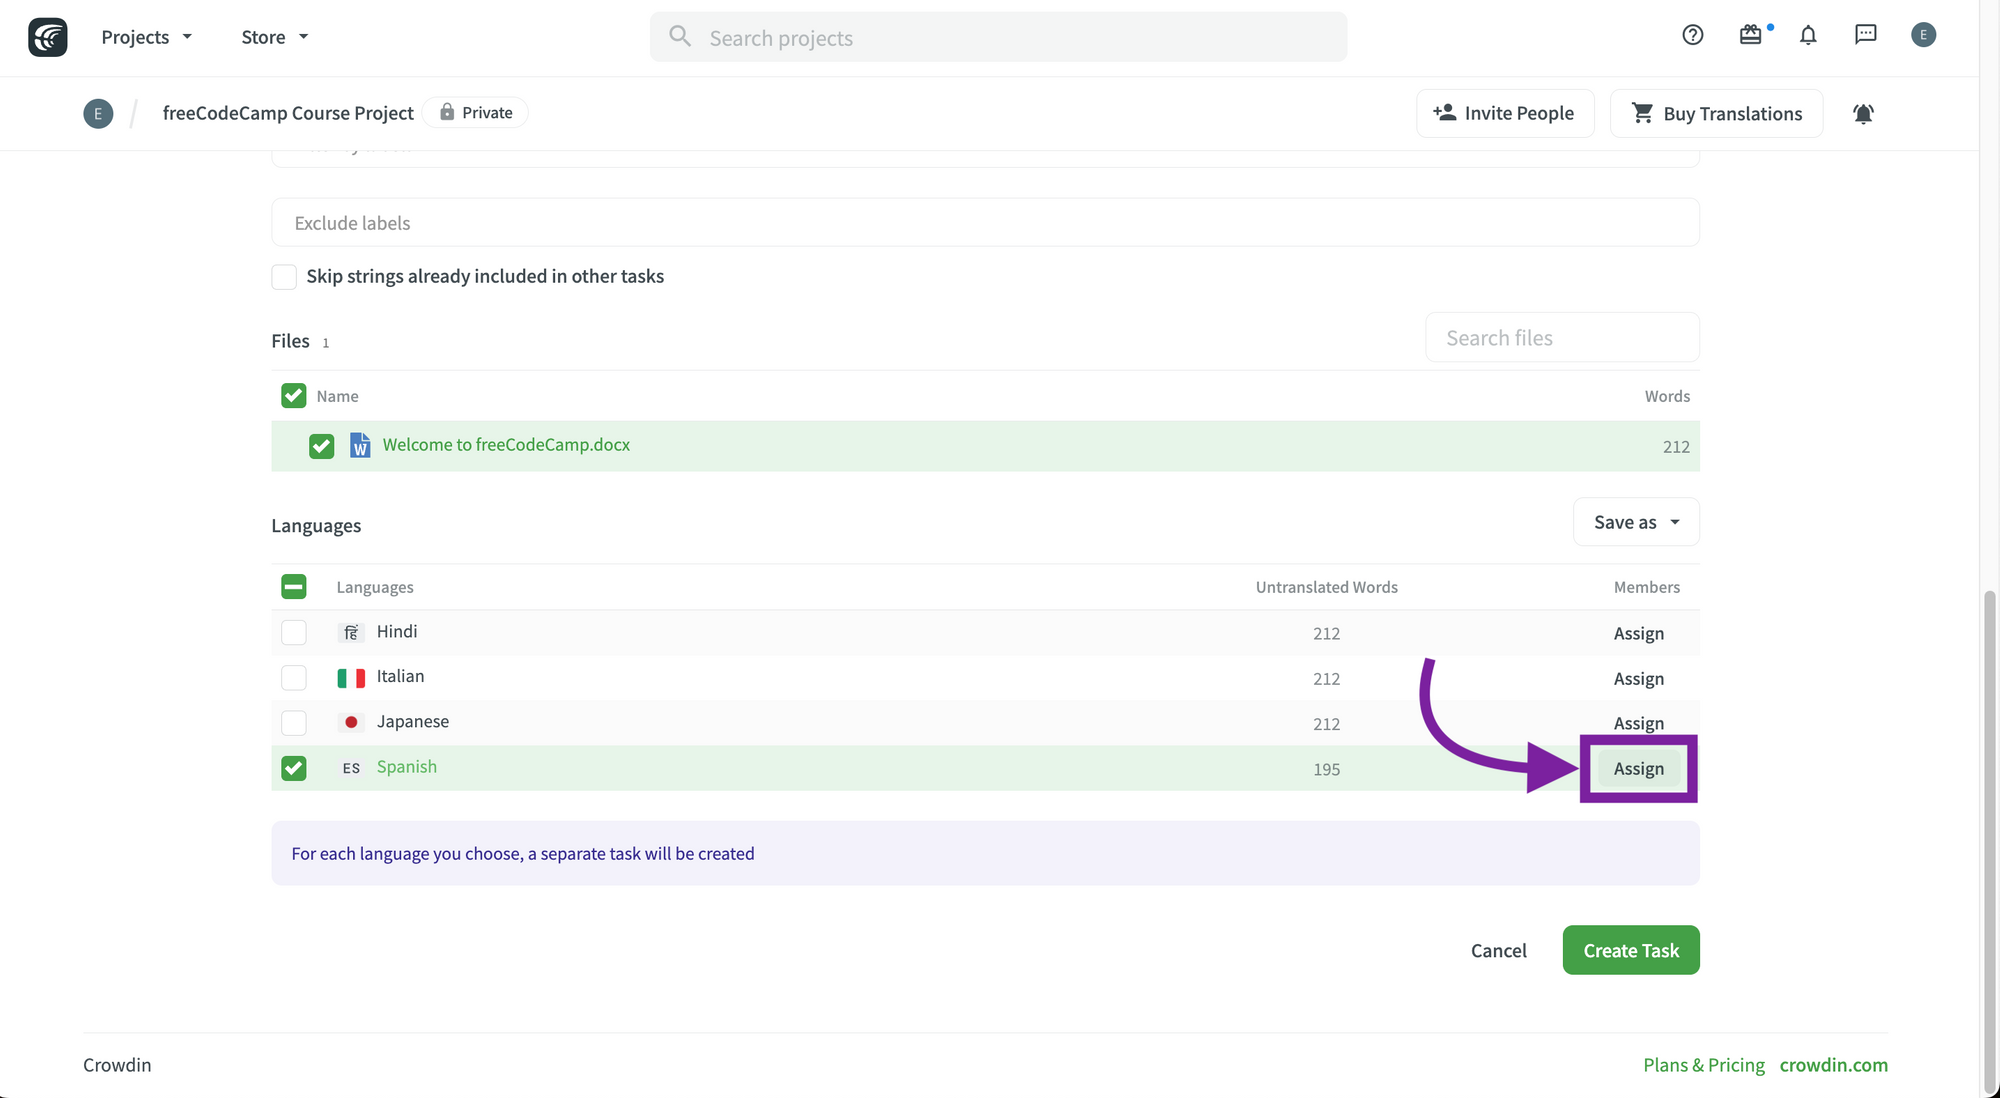 Assign button.
When you click on "Assign", you will see the following options:
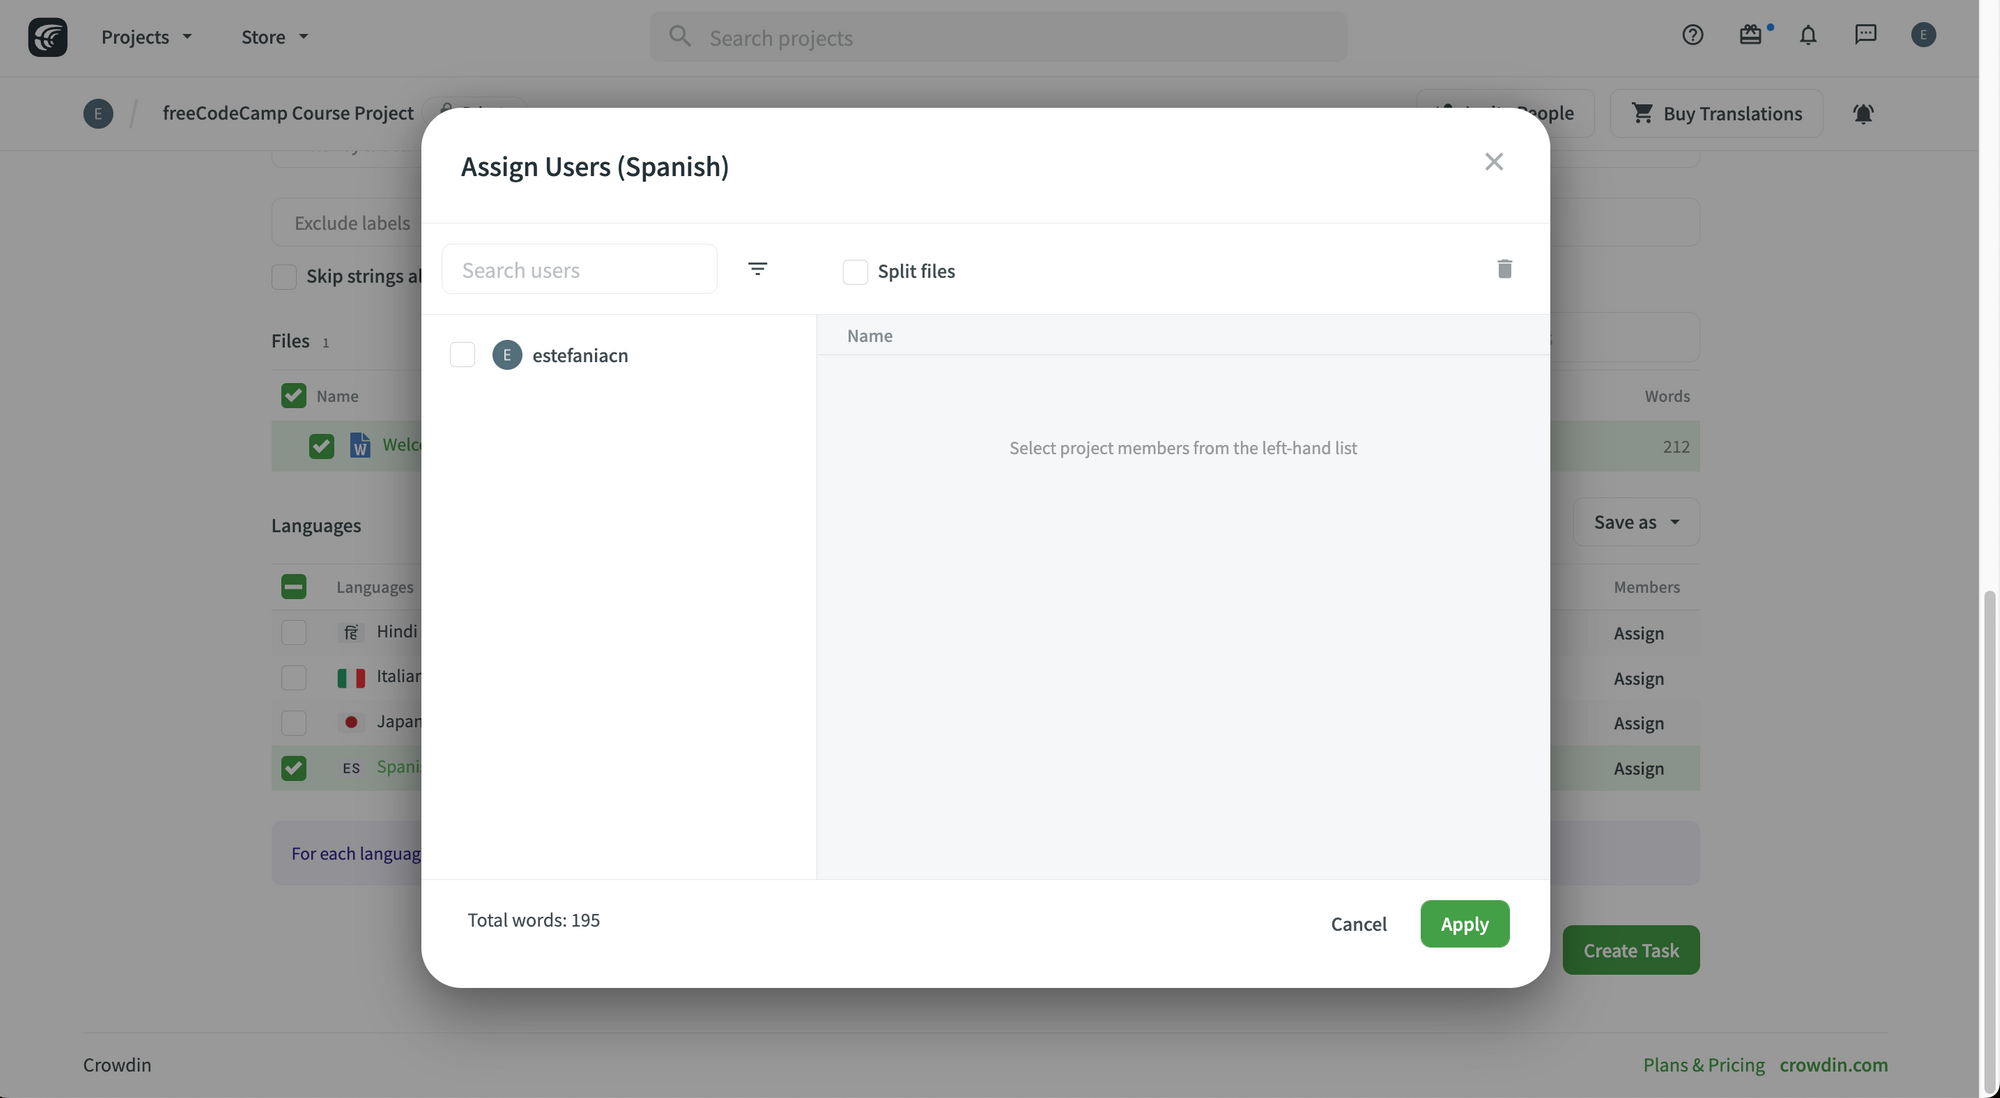 Assign team members.
- Select the user(s) that you would like to assign to the task. You can search for users using the filter tool.
- If you need to remove a user, just click on it on the list to the right. You can empty the list by clicking on the trash icon.
💡 Tip: You can also choose if you would like to split the files to assign multiple users to the same file.
- Once you have all the users selected, click on the "Apply" button.
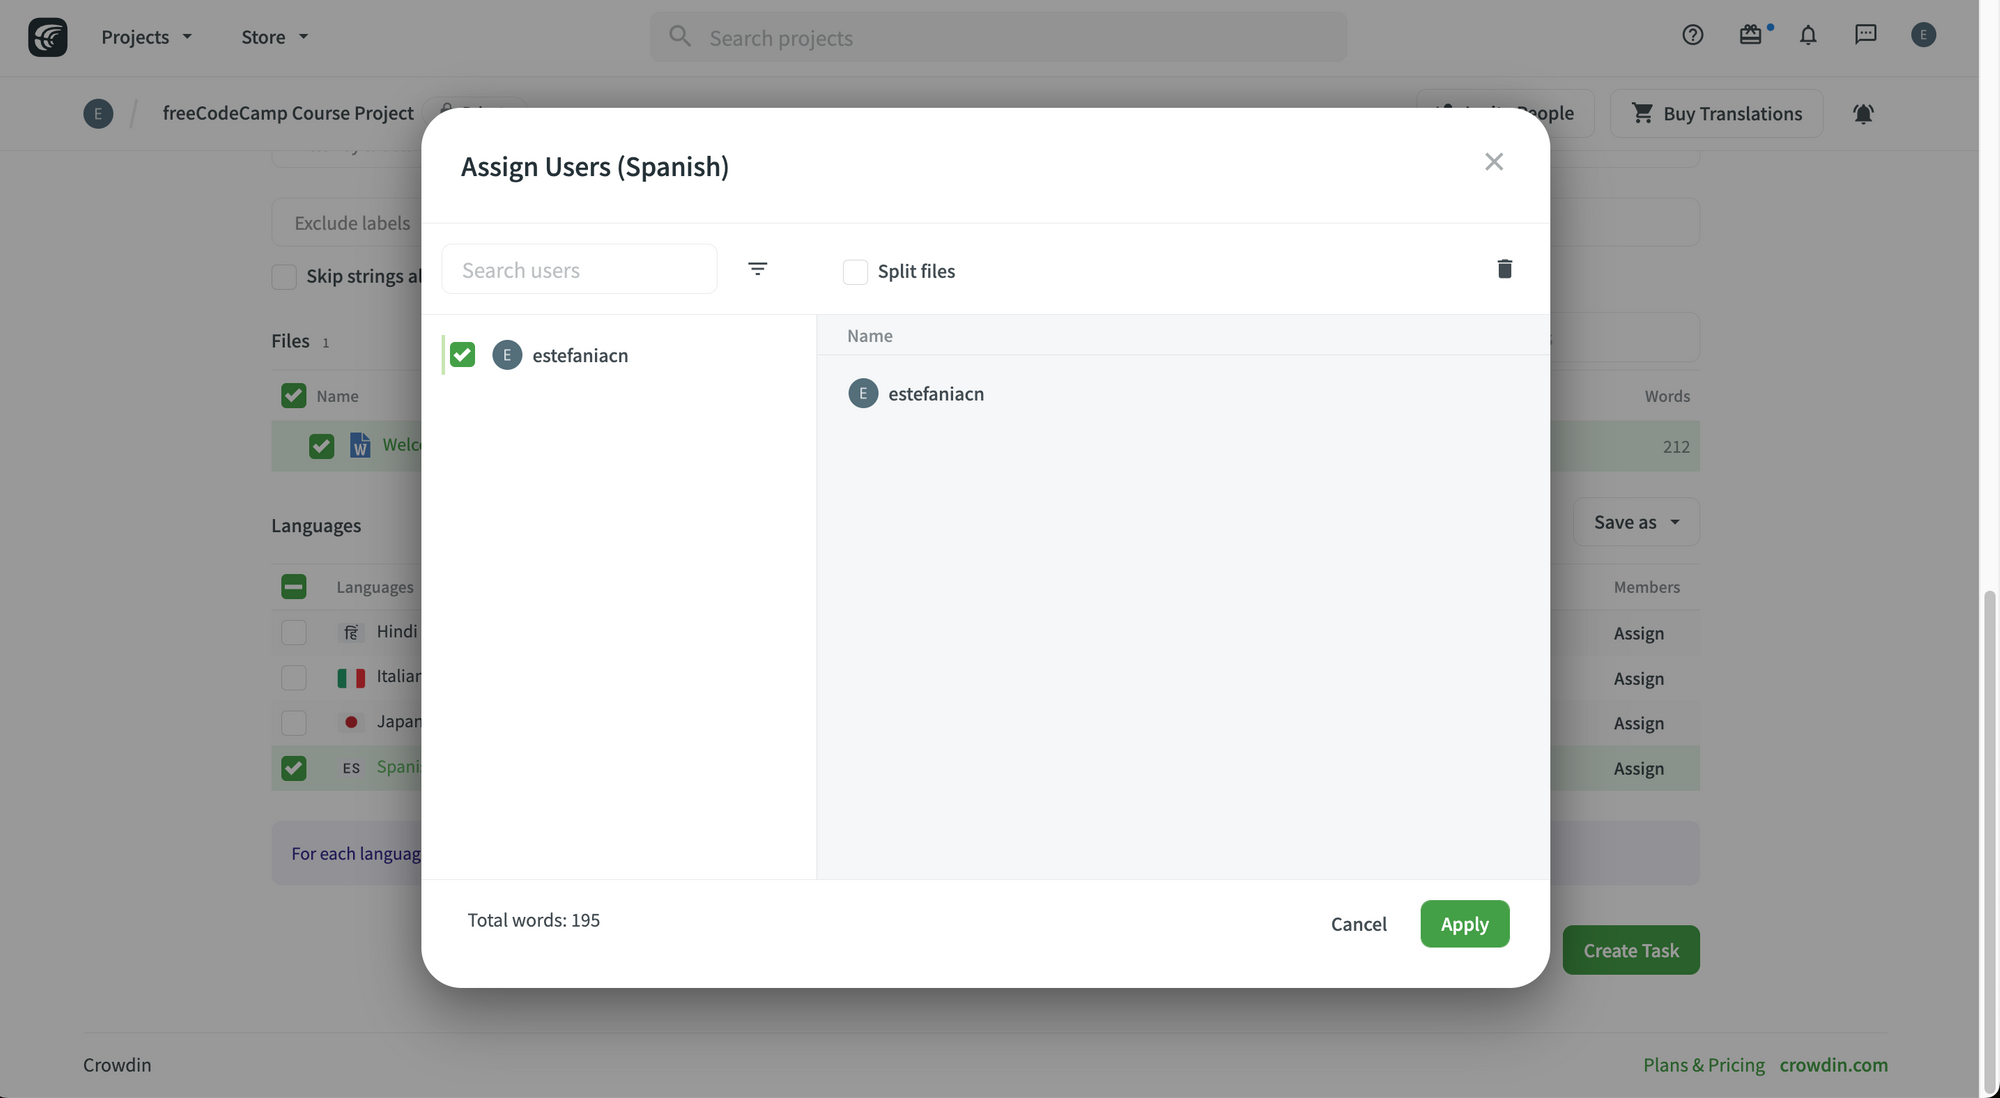 Users selected for the task.
You will see the profile image of the assigned team members in their corresponding language(s).
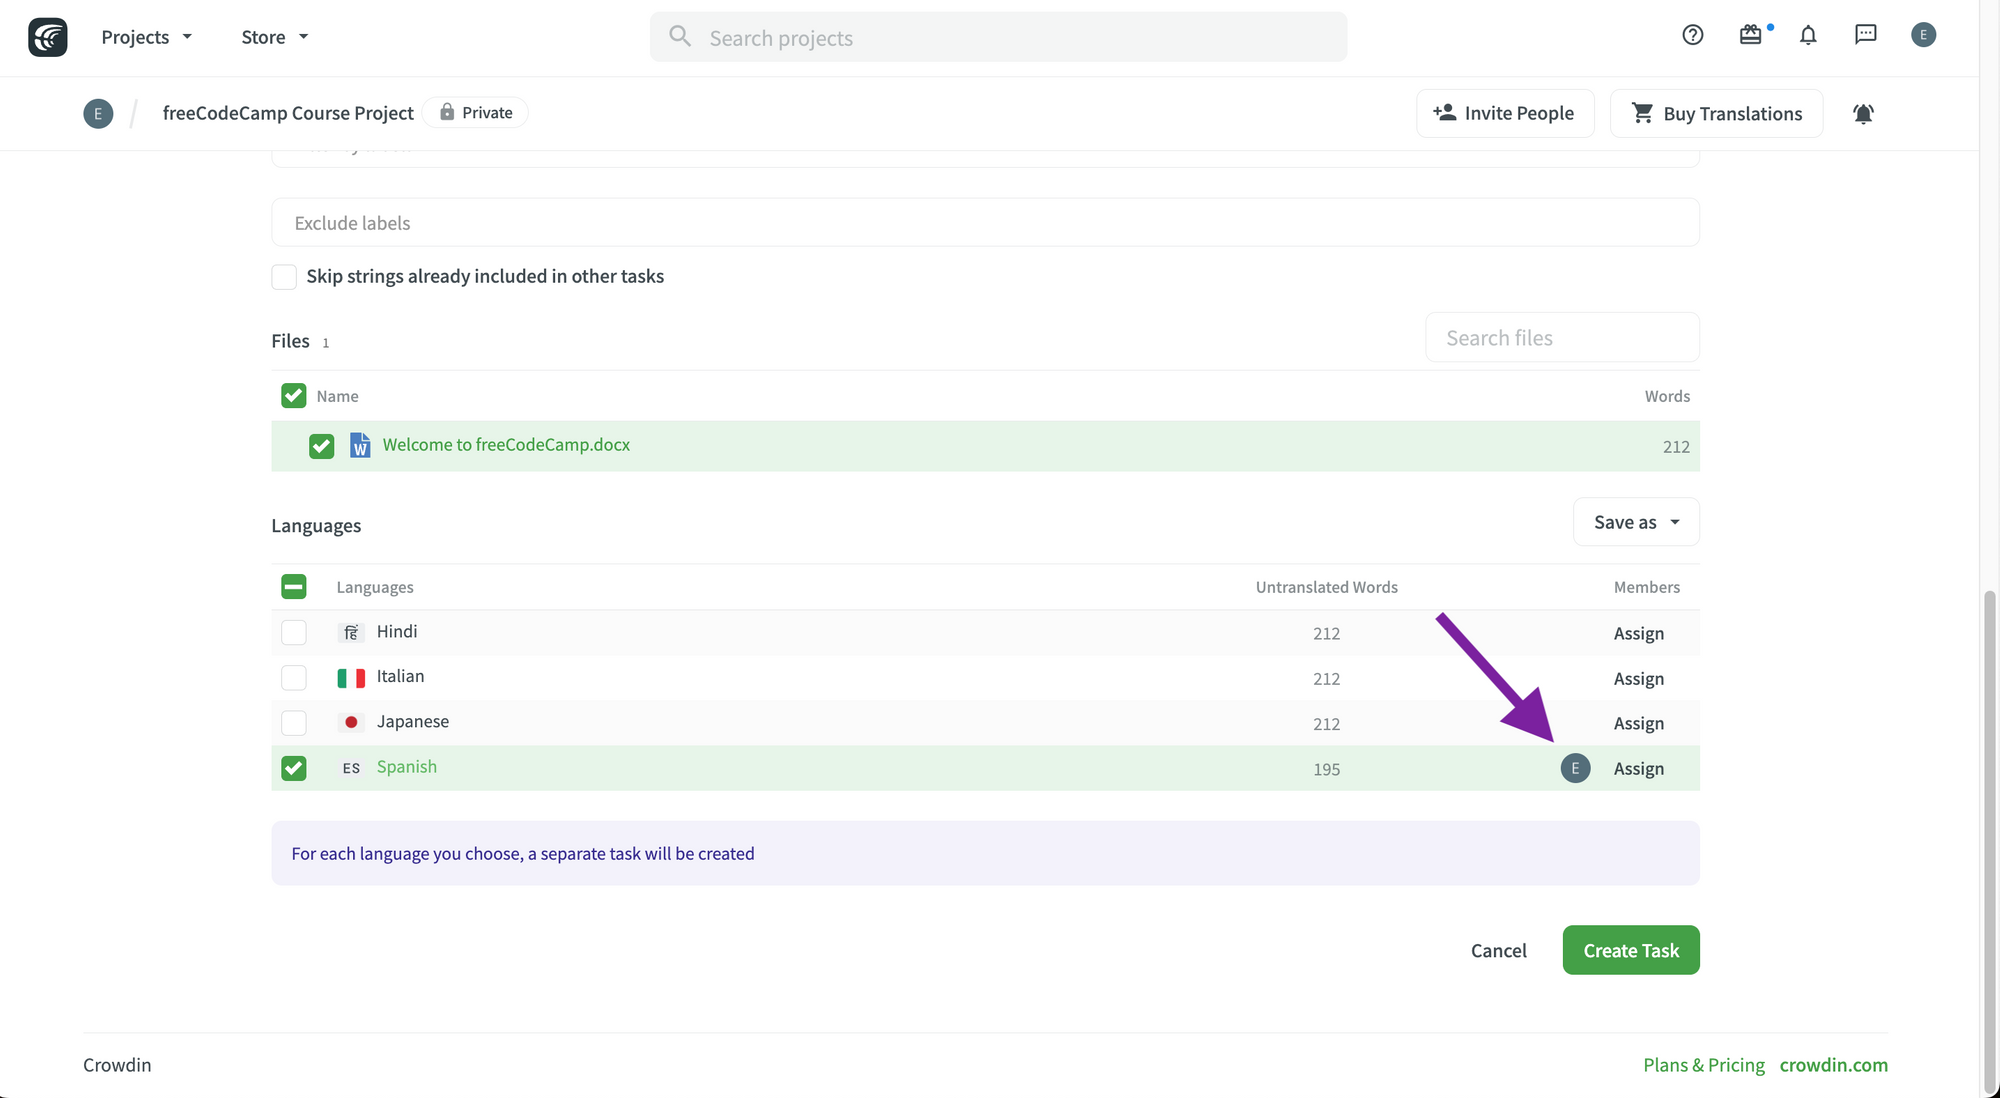 Assigned team member.
Click on "Create Task" to add the new task. Now you will see the task dashboard with a new task in each target language you selected.
In this case, I selected Spanish and assigned myself to the task:
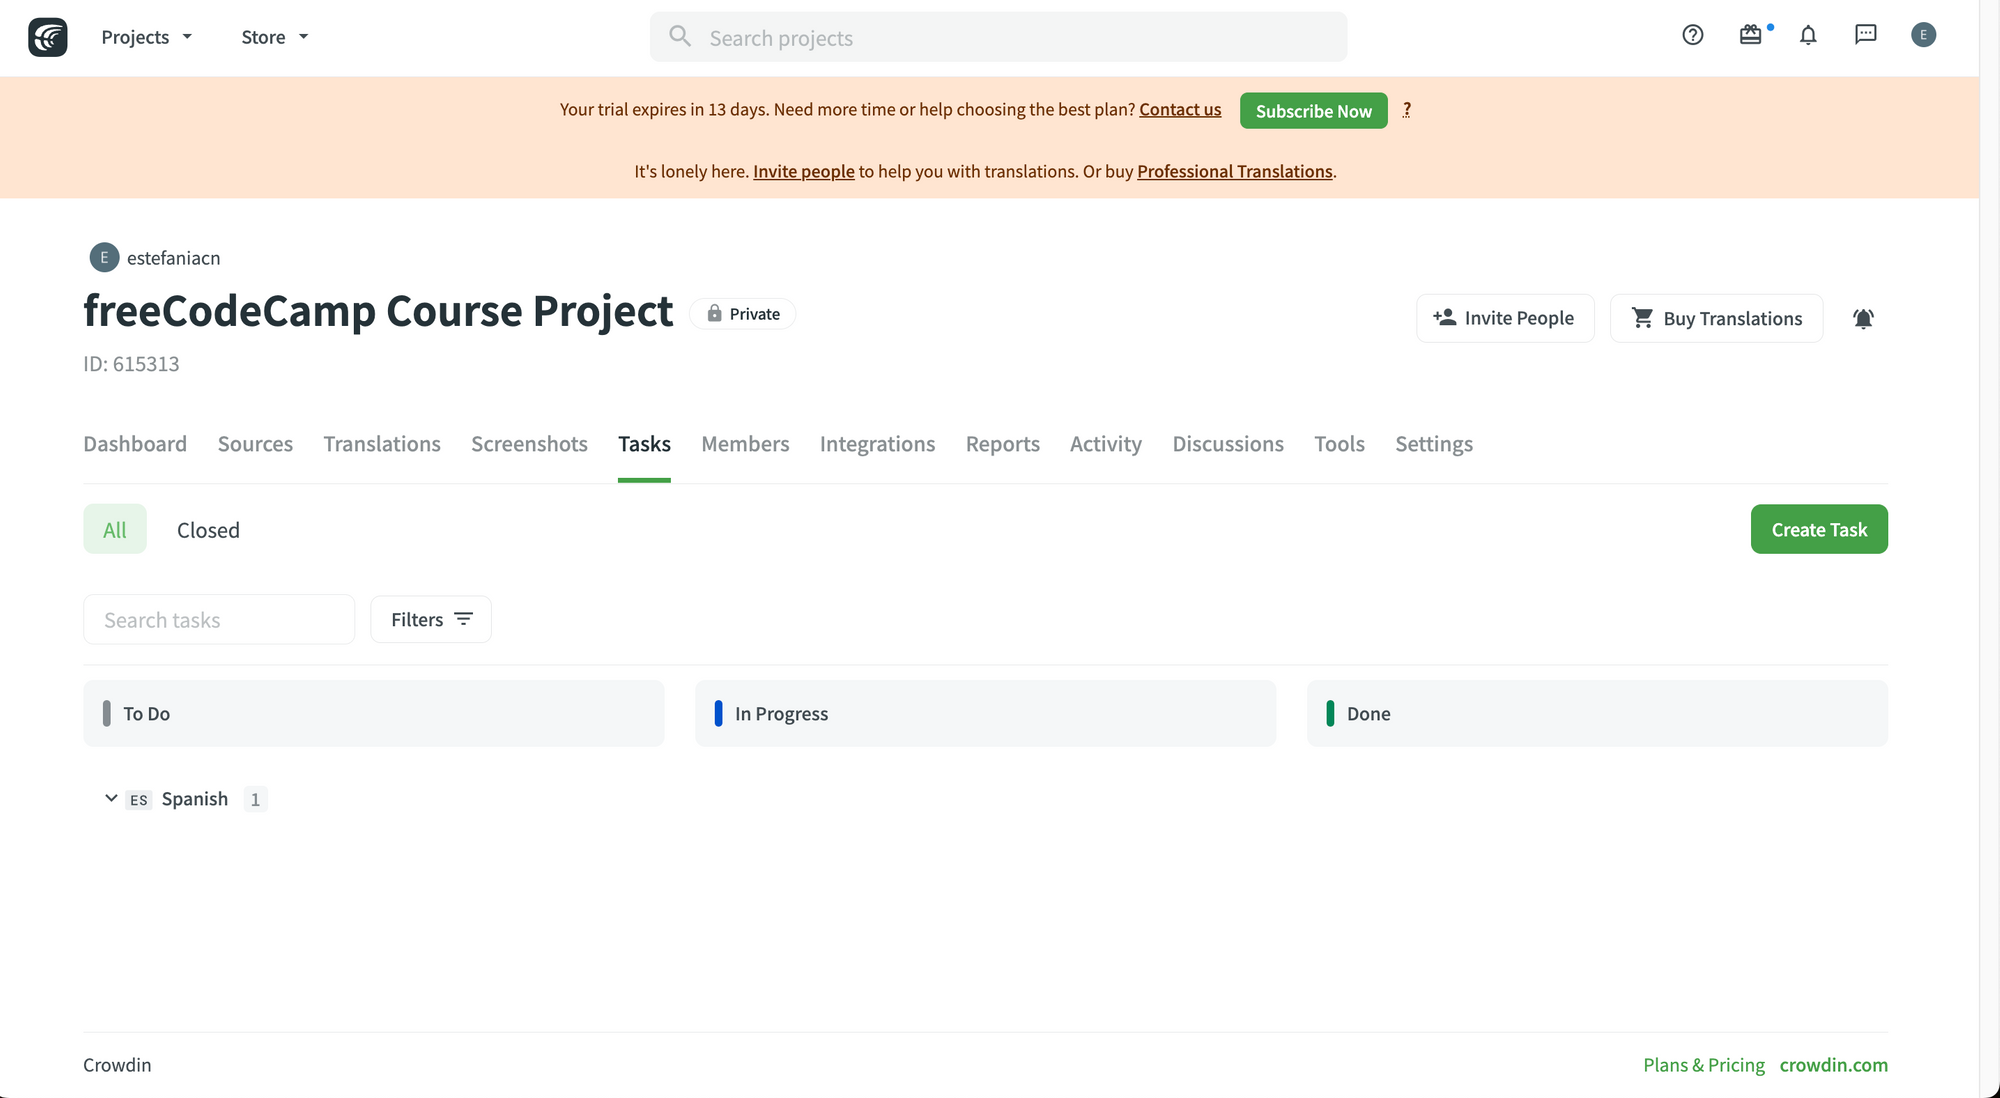 Tasks dashboard.
The Tasks Board
Now it's time to use the tasks board. This board is very helpful to see all the tasks of your project and track their status.
You will immediately notice that there are three possible statuses for a task:
- To Do
- In Progress
- Done
💡 Tip: Project managers can move a task from one status to another by dragging and dropping it.
Tasks dashboard.
To see all the tasks in a specific target language, just click on that language and you will see them as "cards" with their corresponding information.
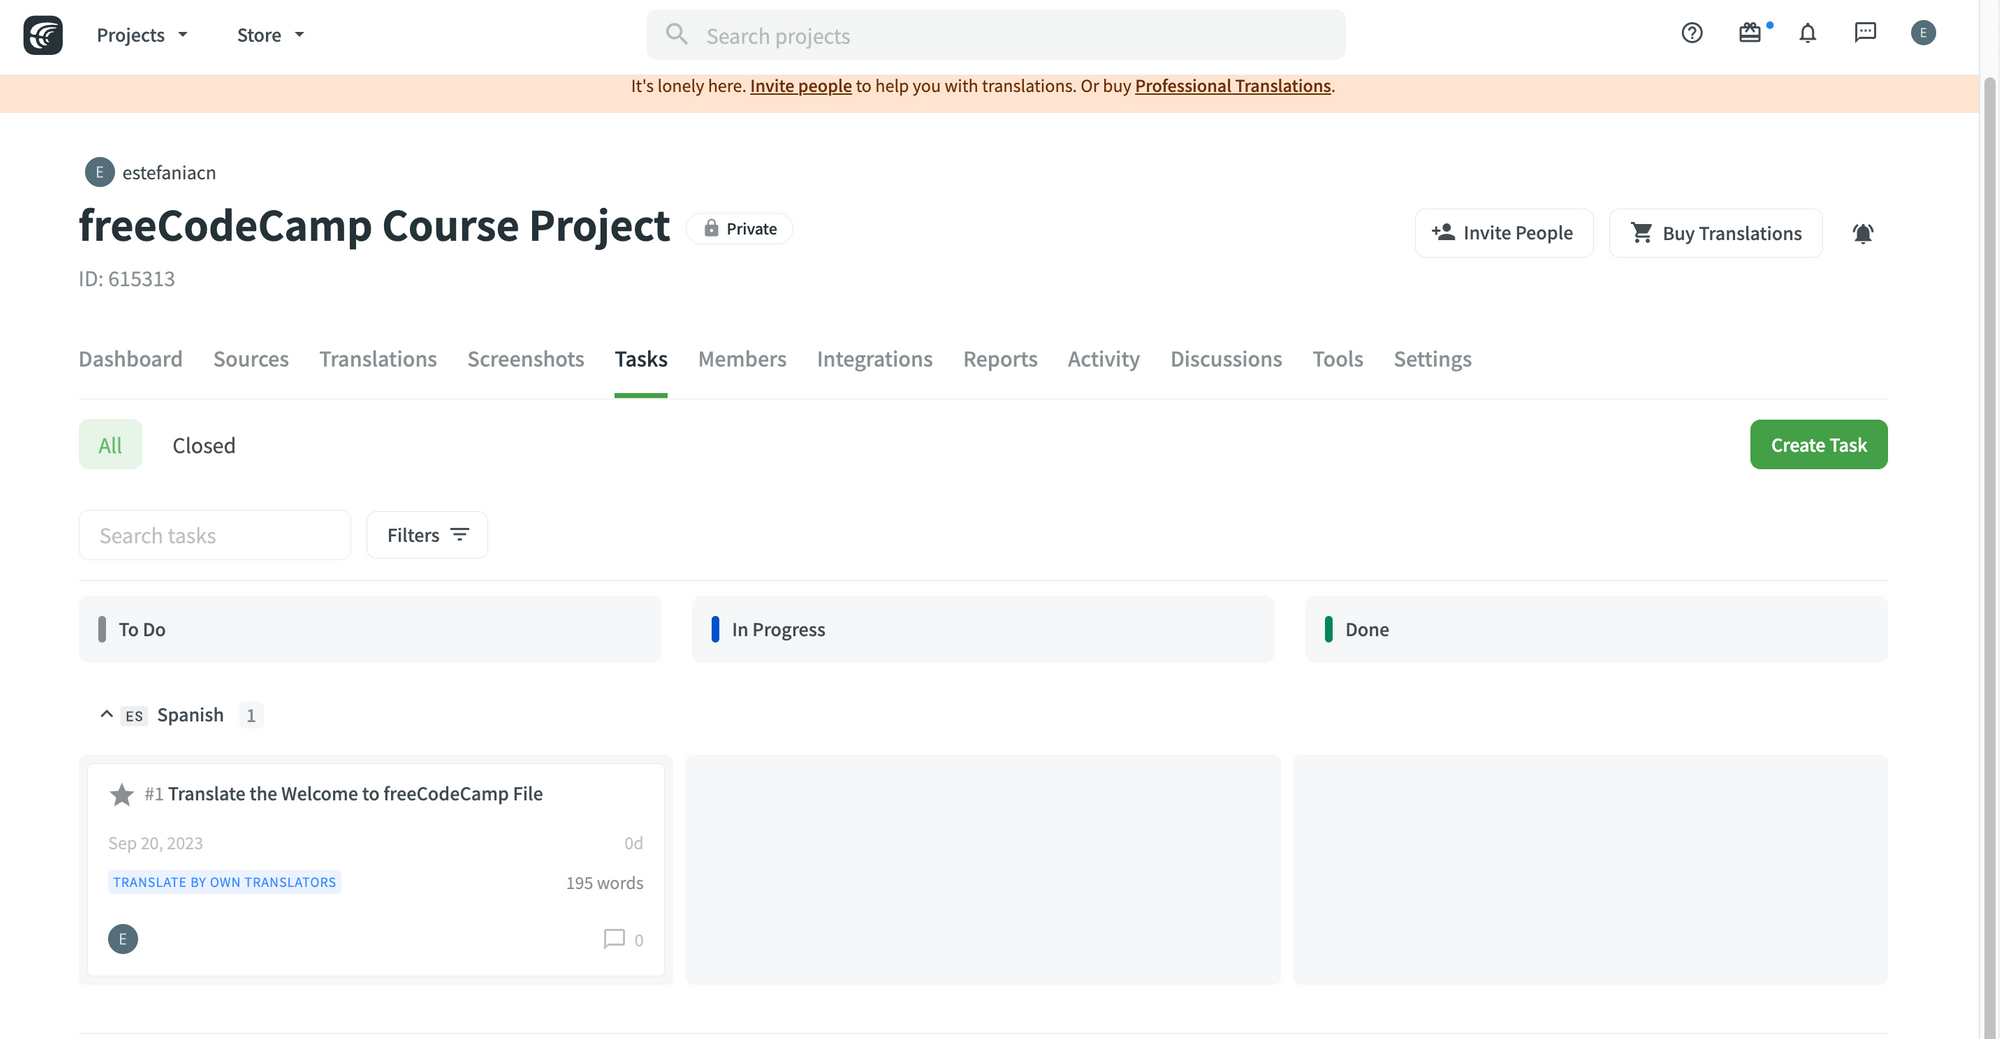 Tasks board.
💡 Tip: If a task is assigned to you, you will see a gray star next to the name of the task. You can also search for tasks and filter them.
How to Filter Tasks by Members
You can see all the tasks assigned to a specific team member by using filters.
- Click on "Filters".
- Click on "All users" (next to "Filter by").
- Search for the username of the team member.
- Click on the username.
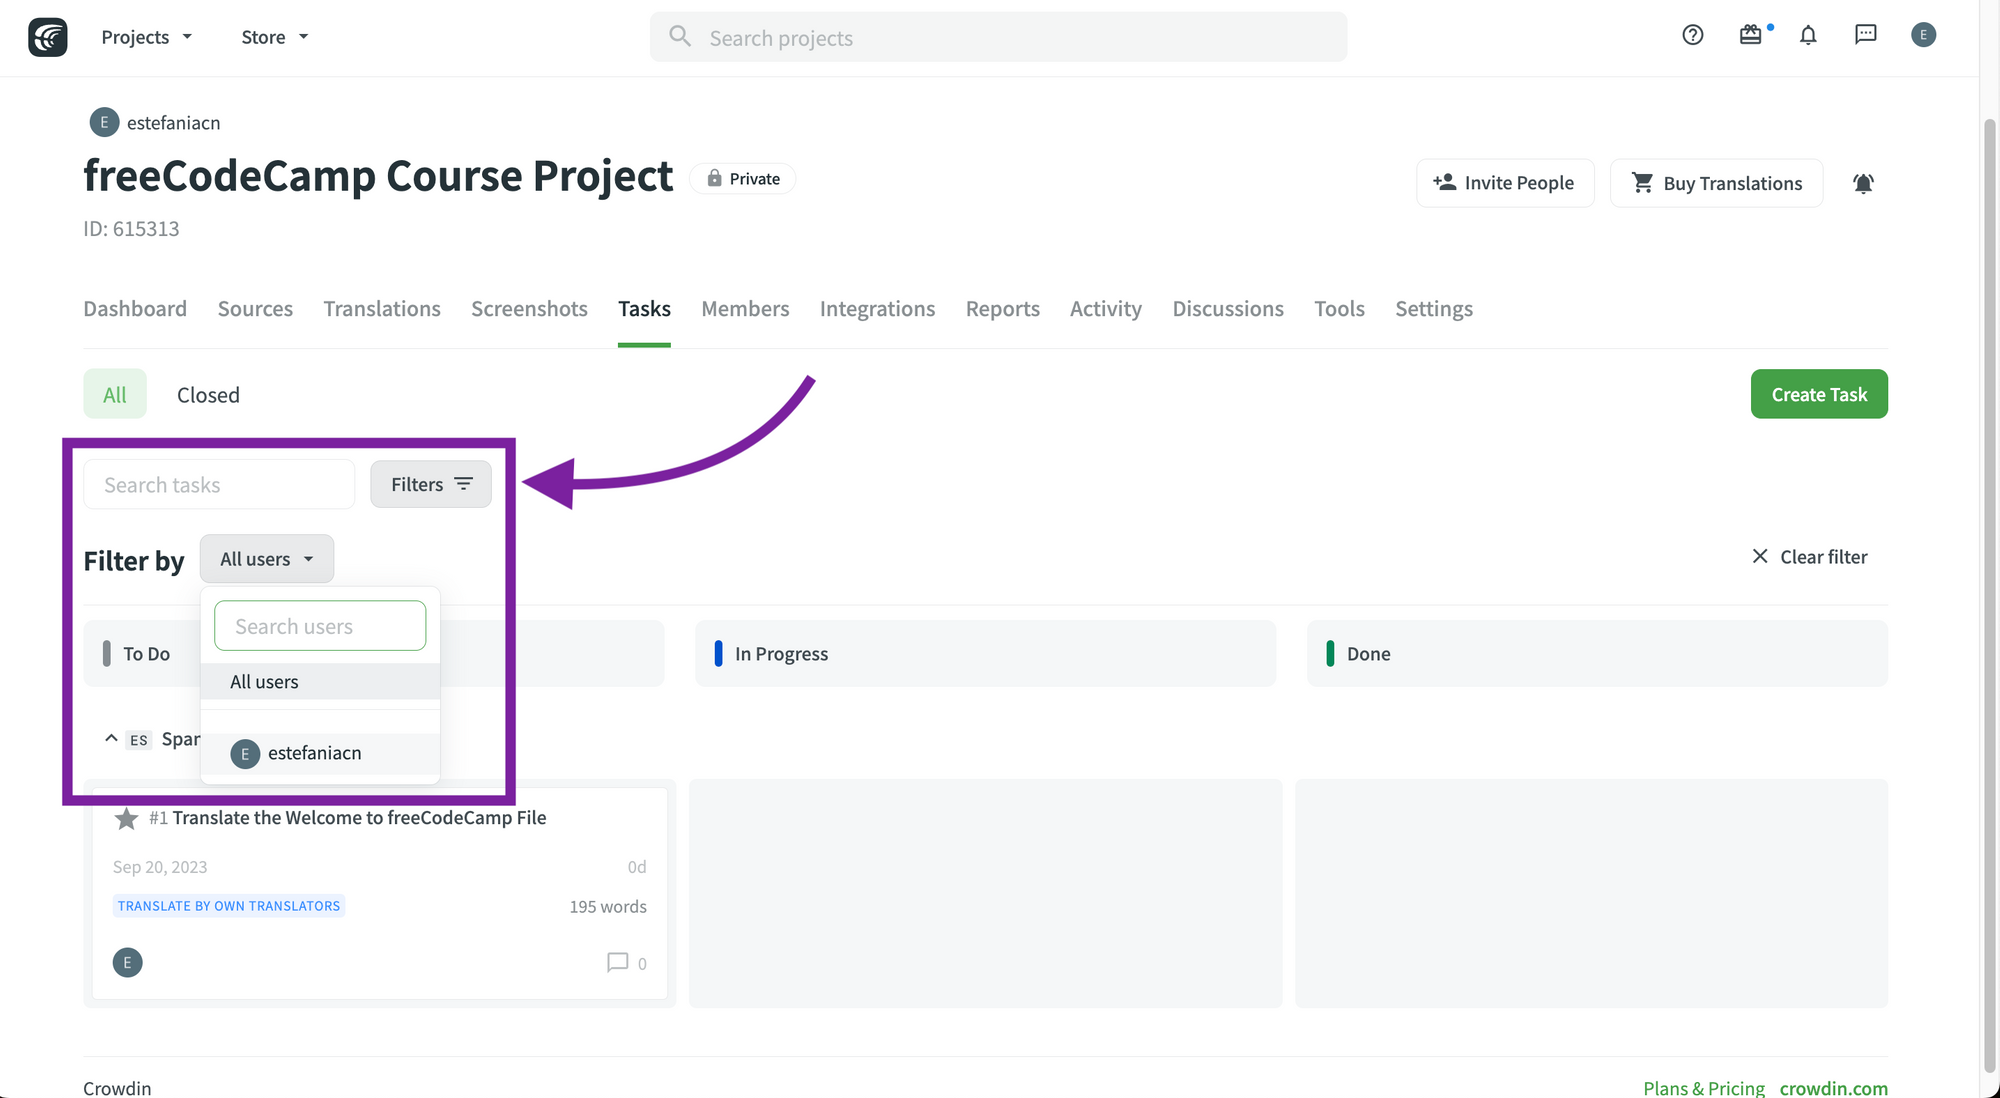 Filter tasks by members.
💡 Tip: To clear the filter, click on the "Clear filter" option to the right.
Task Details
The task details is the basic information and structure of a task. With the details, you can see:
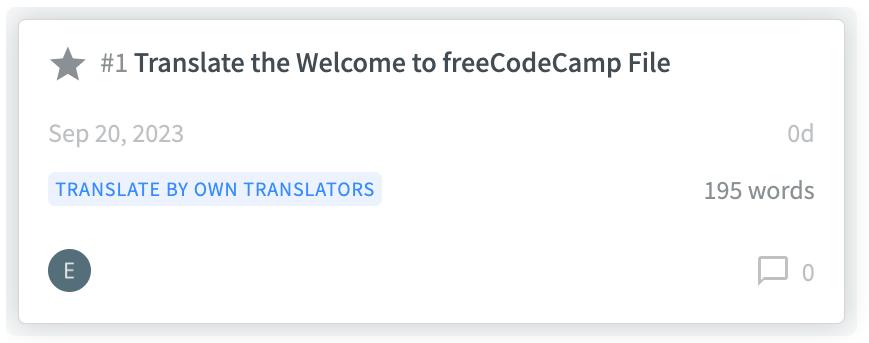 A Task.
- If the task is assigned to you (a gray star).
- Task number.
- Task name.
- When the task was created.
- If it will be translated and proofread by your own team or by vendors.
- The profile pictures of the team members assigned to the task.
- Word count.
- Number of comments on the task.
If you click on the task, you will see a more detailed overview:
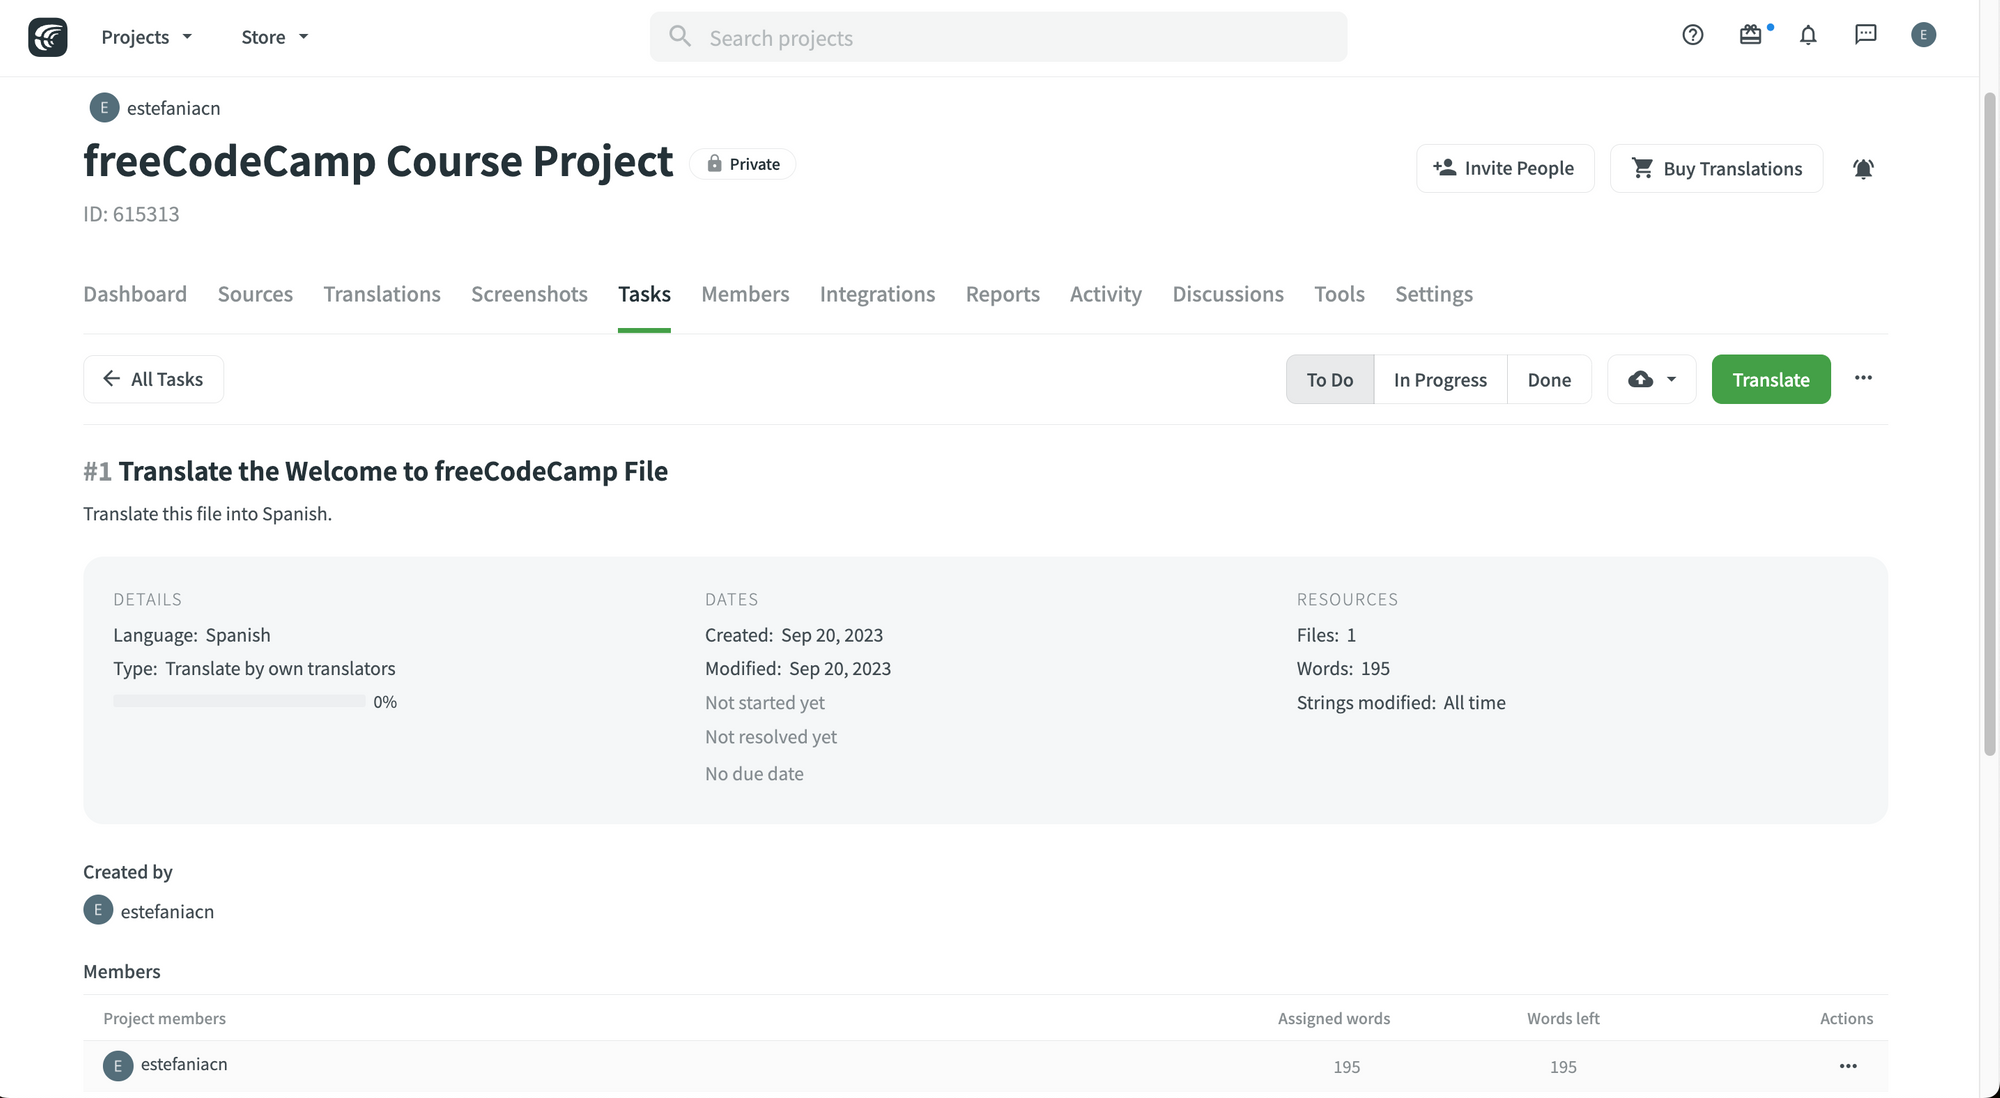 Task details.
How to Add Comments to a Task
If you scroll down, you will also have the option to add comments to the task.
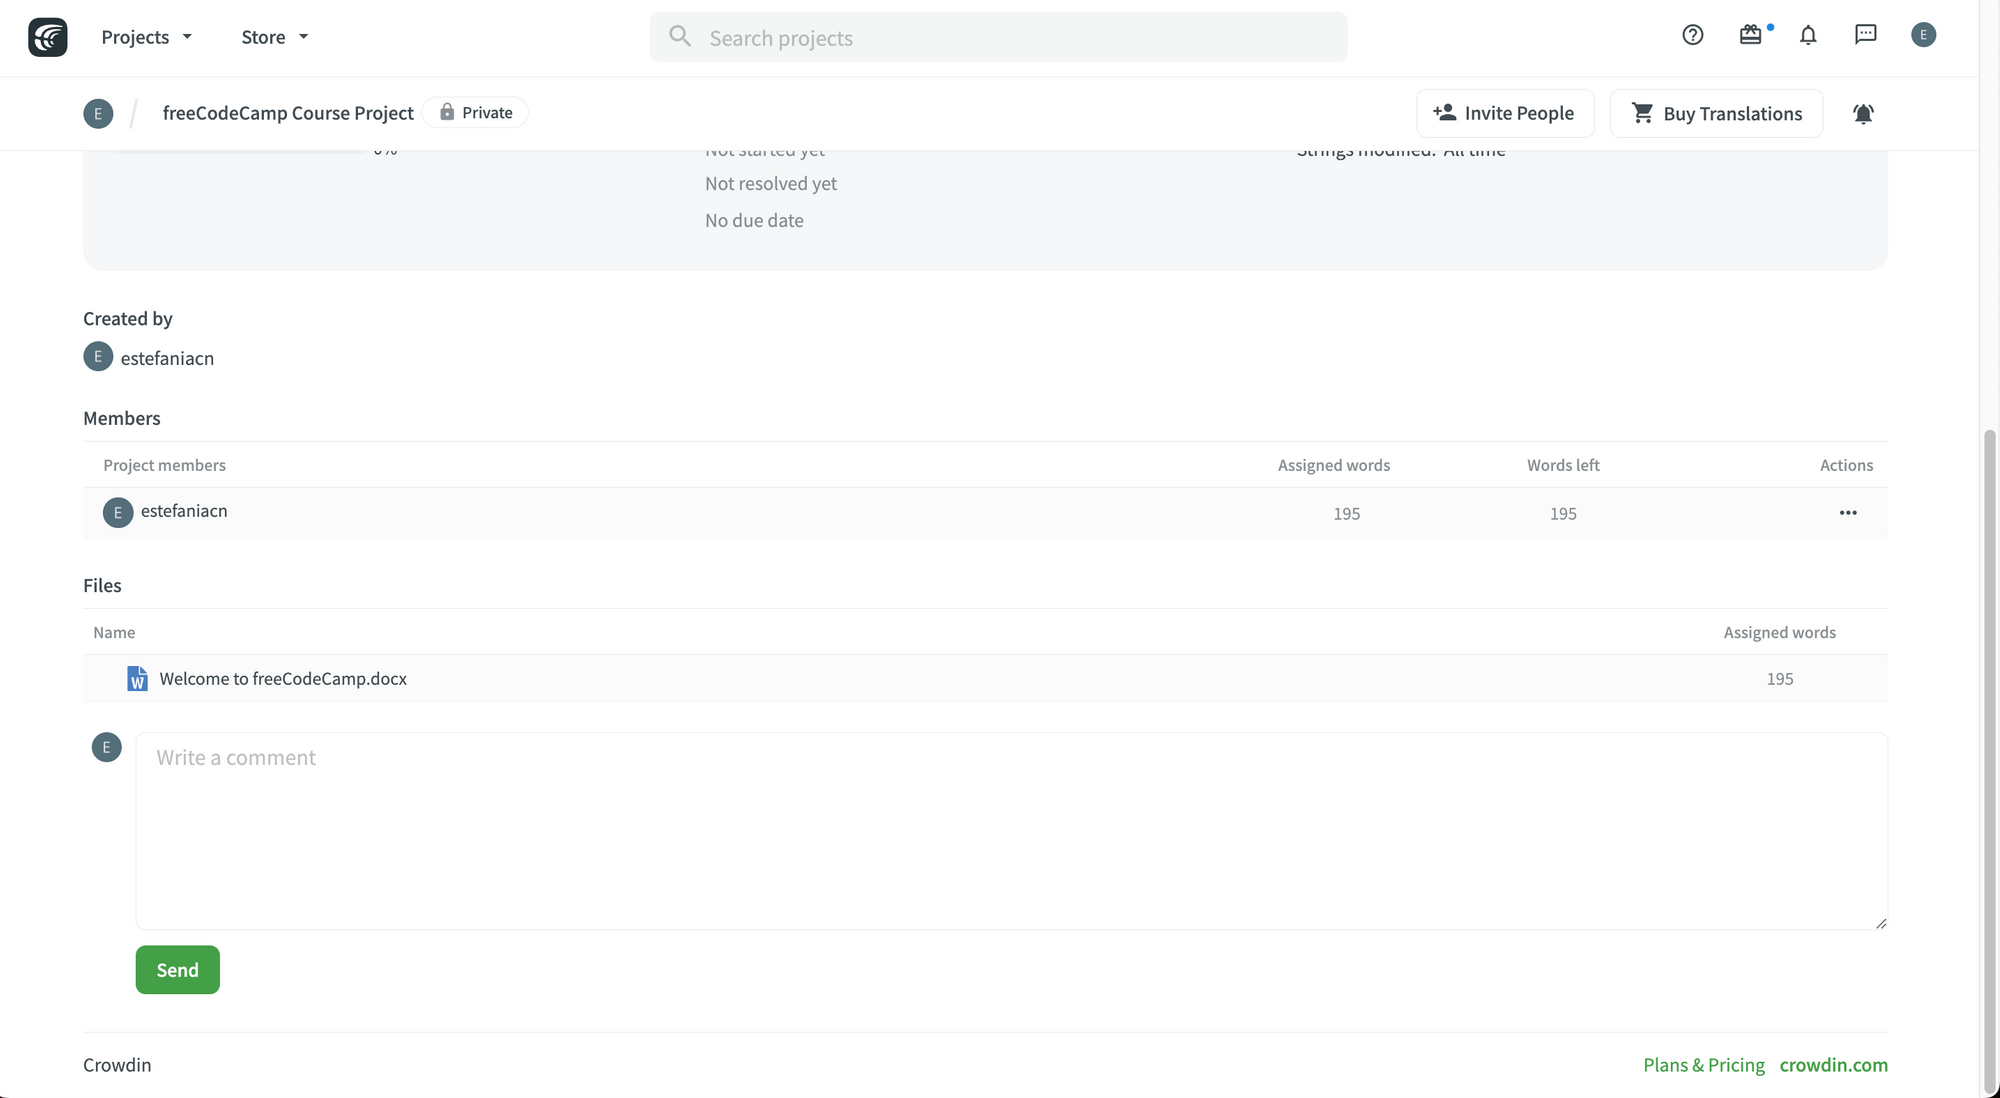 Add comments to a task.
How to Change the Status of a Task
From this detailed view, you will also be able to change the status of the task by just clicking on a button:
 Task options.
If you change the status of a task using these buttons, you will also see the change reflected on the main task board, which would be equivalent to dragging and dropping it into a new status.
How to Manage Tasks
If you click on a task to check its details, and then you click on the three dots at the top right to display more options, you will be able to edit, close, and delete the task.
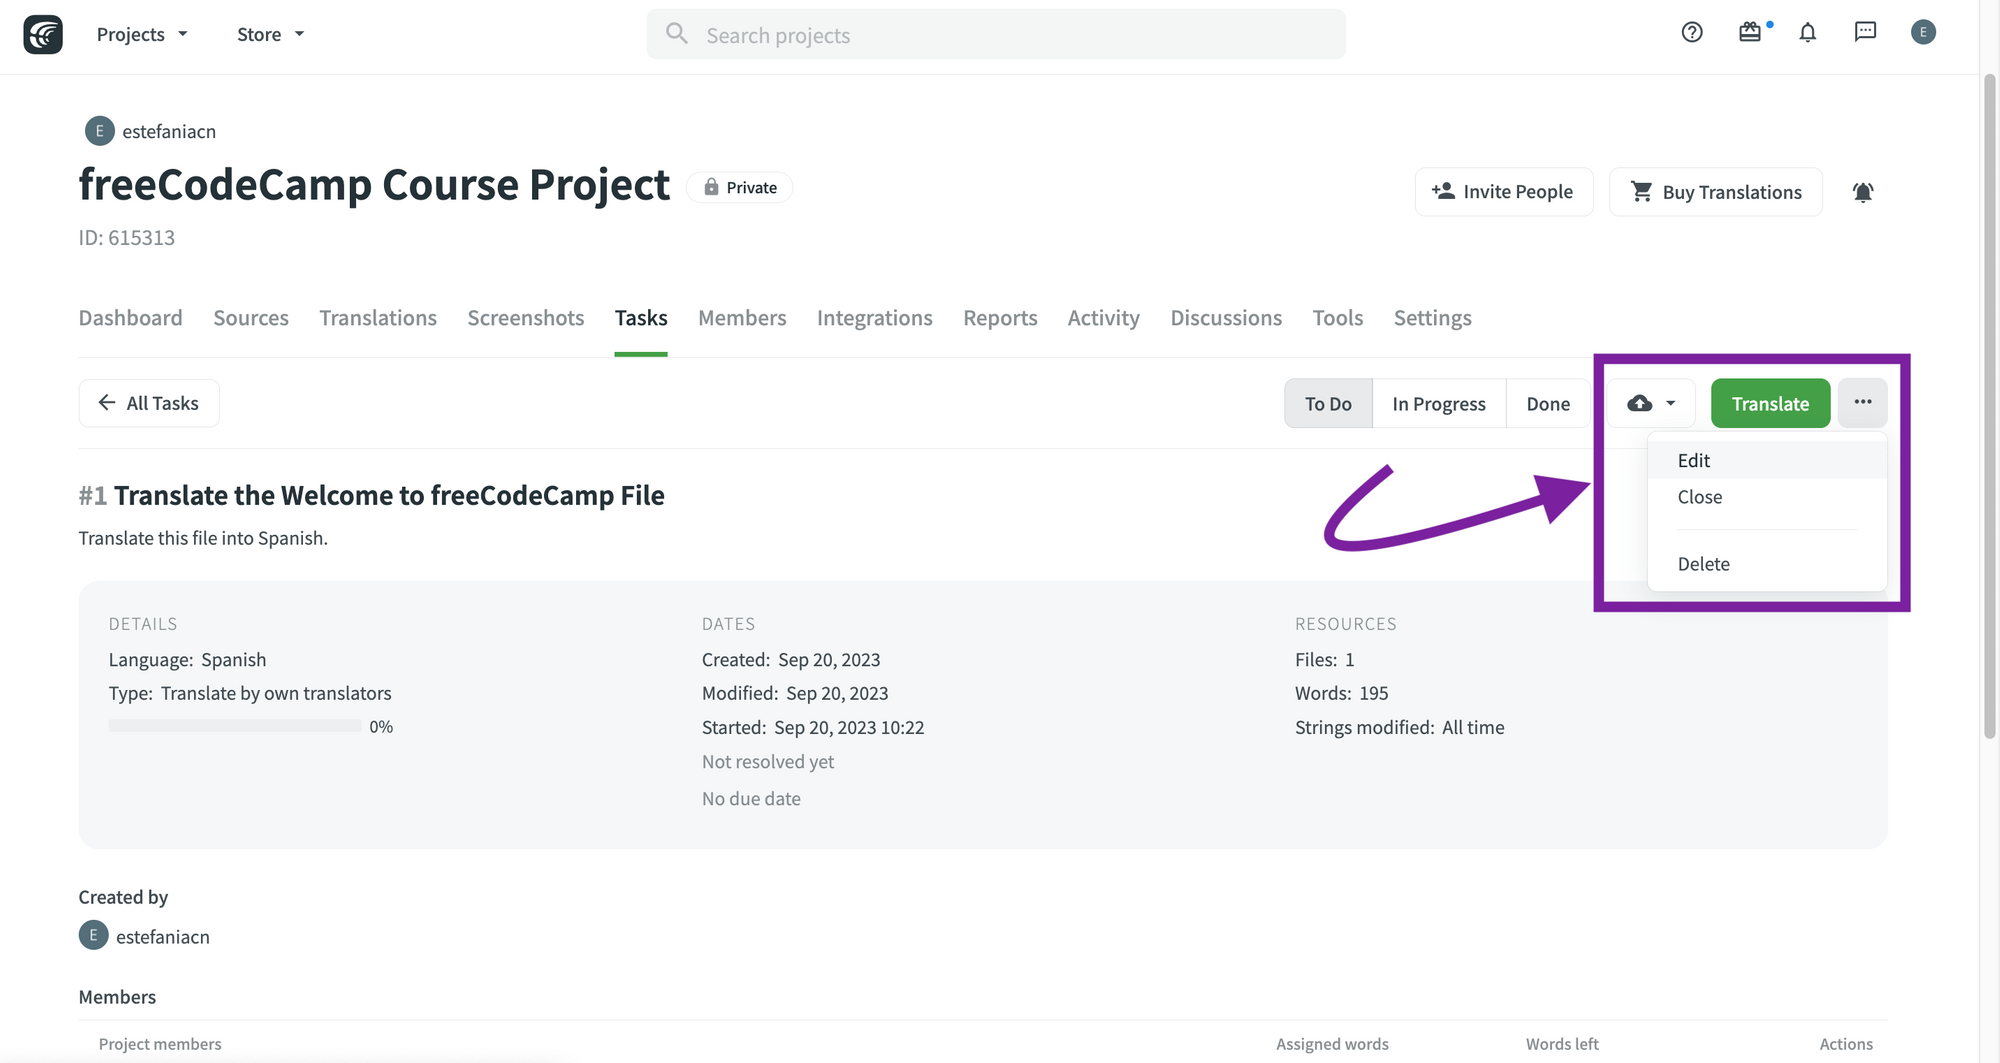 More options for managing tasks.
How to Edit a Task
This is what you will see if you try to edit a task:
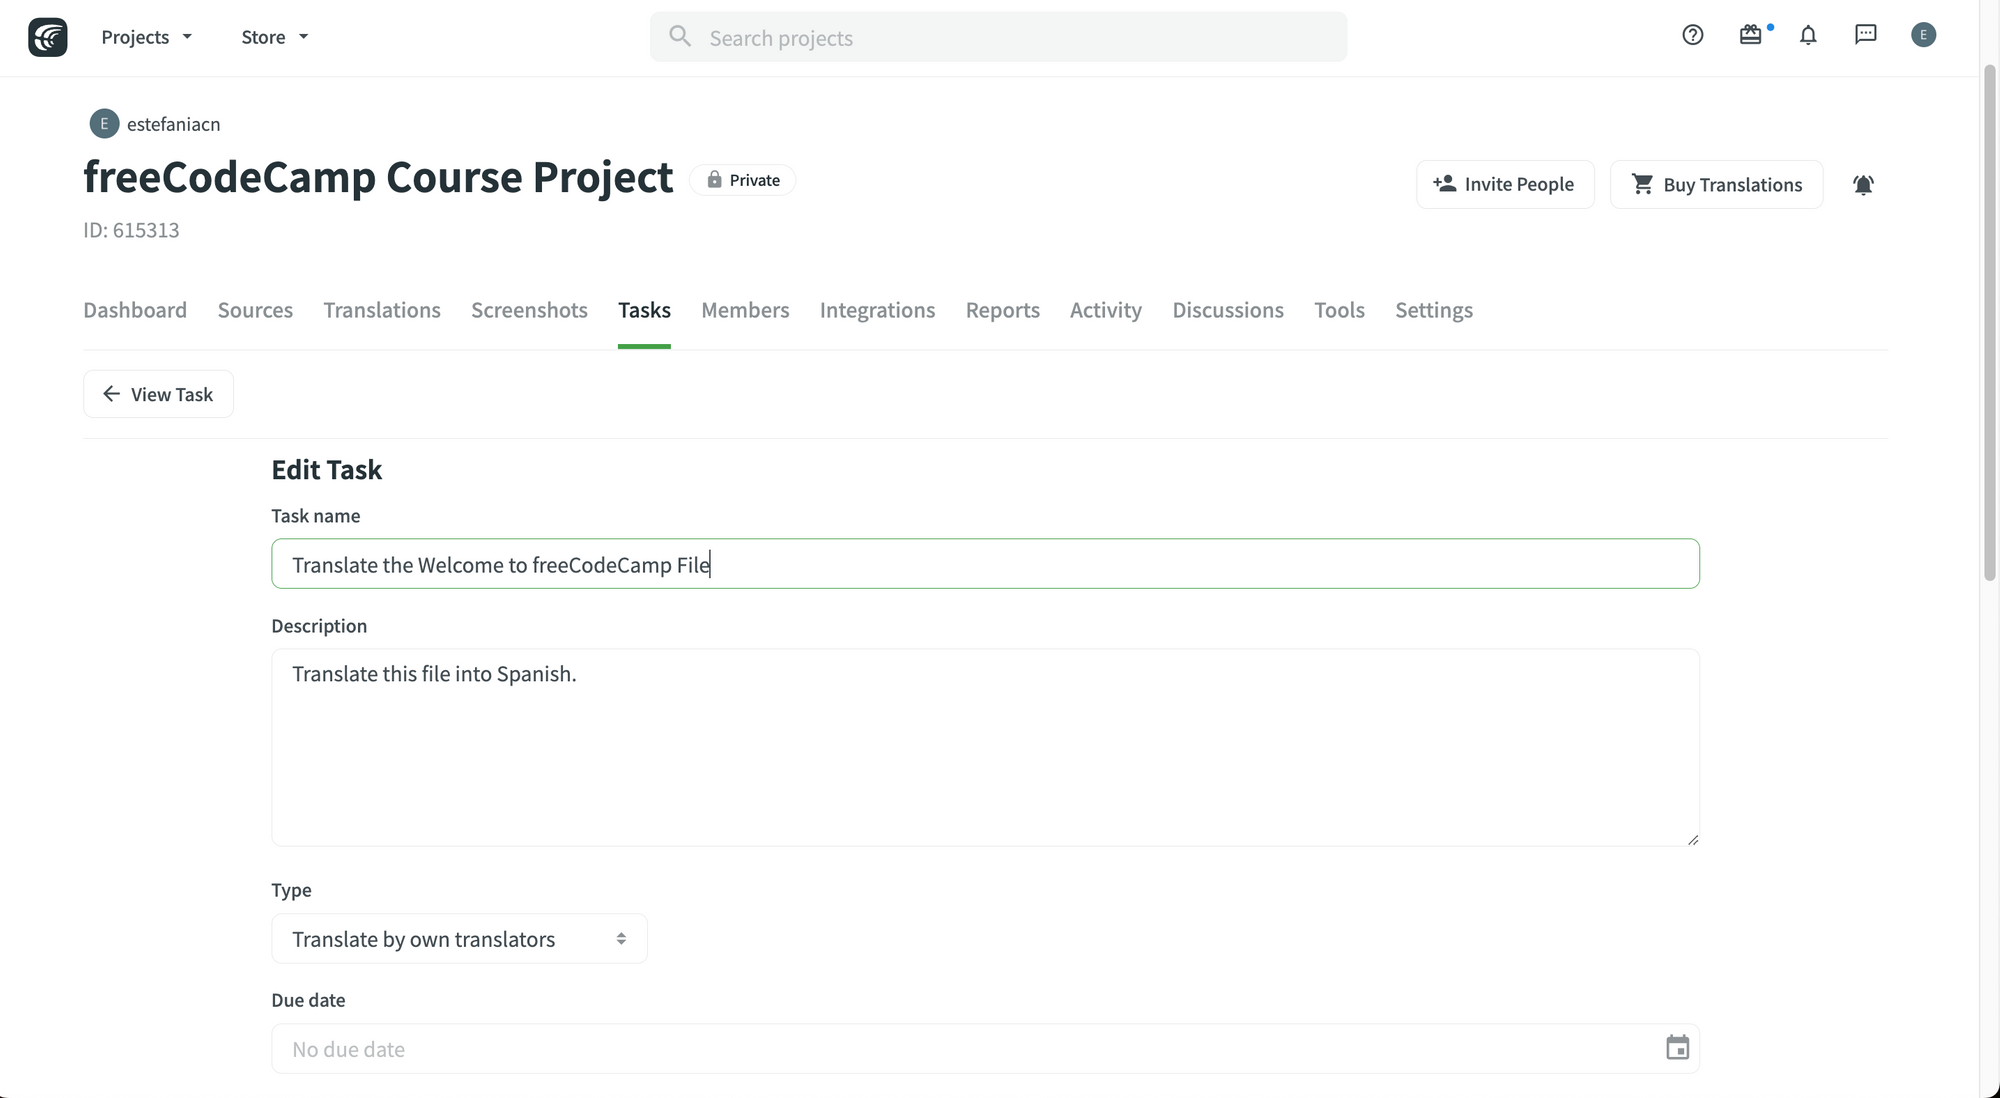 Edit task view.
It's very similar to what we saw when we created the task. You can change the strings assigned, the files, dates, and you can even reset the task scope and the progress for the assigned files.
How to Close a Task
To close a task, you can click on "Close":
More options for managing tasks.
How to See All Closed Tasks
To see all your closed tasks, you will need to:
- Go to your project.
- Go to the "Tasks" tab.
- Select "Closed" (next to "All").
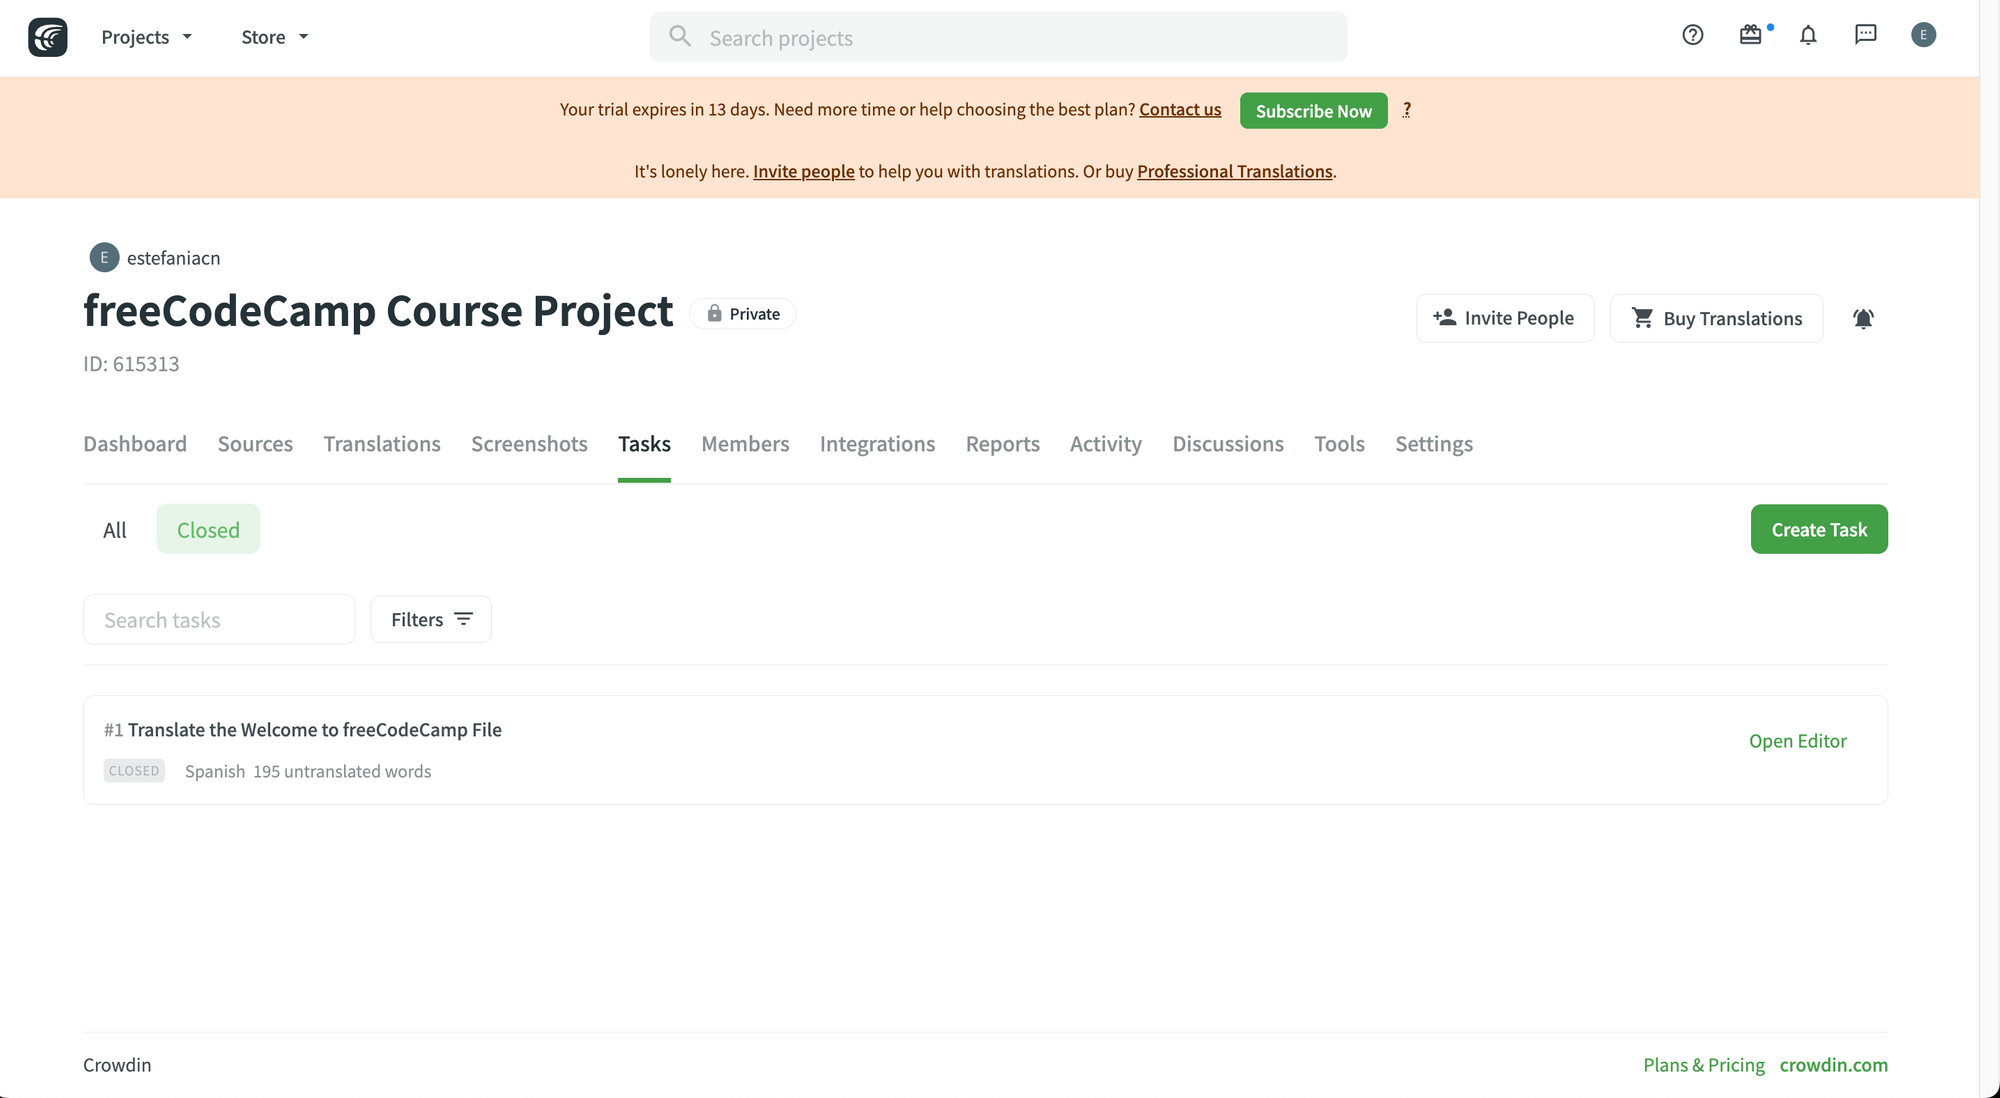
💡 Tip: "Done" and "Closed" are a bit different. A task can have the "Done" status but not closed. When a task is has the "Done" status, you will see a button on the card to close it, just like in the image below:
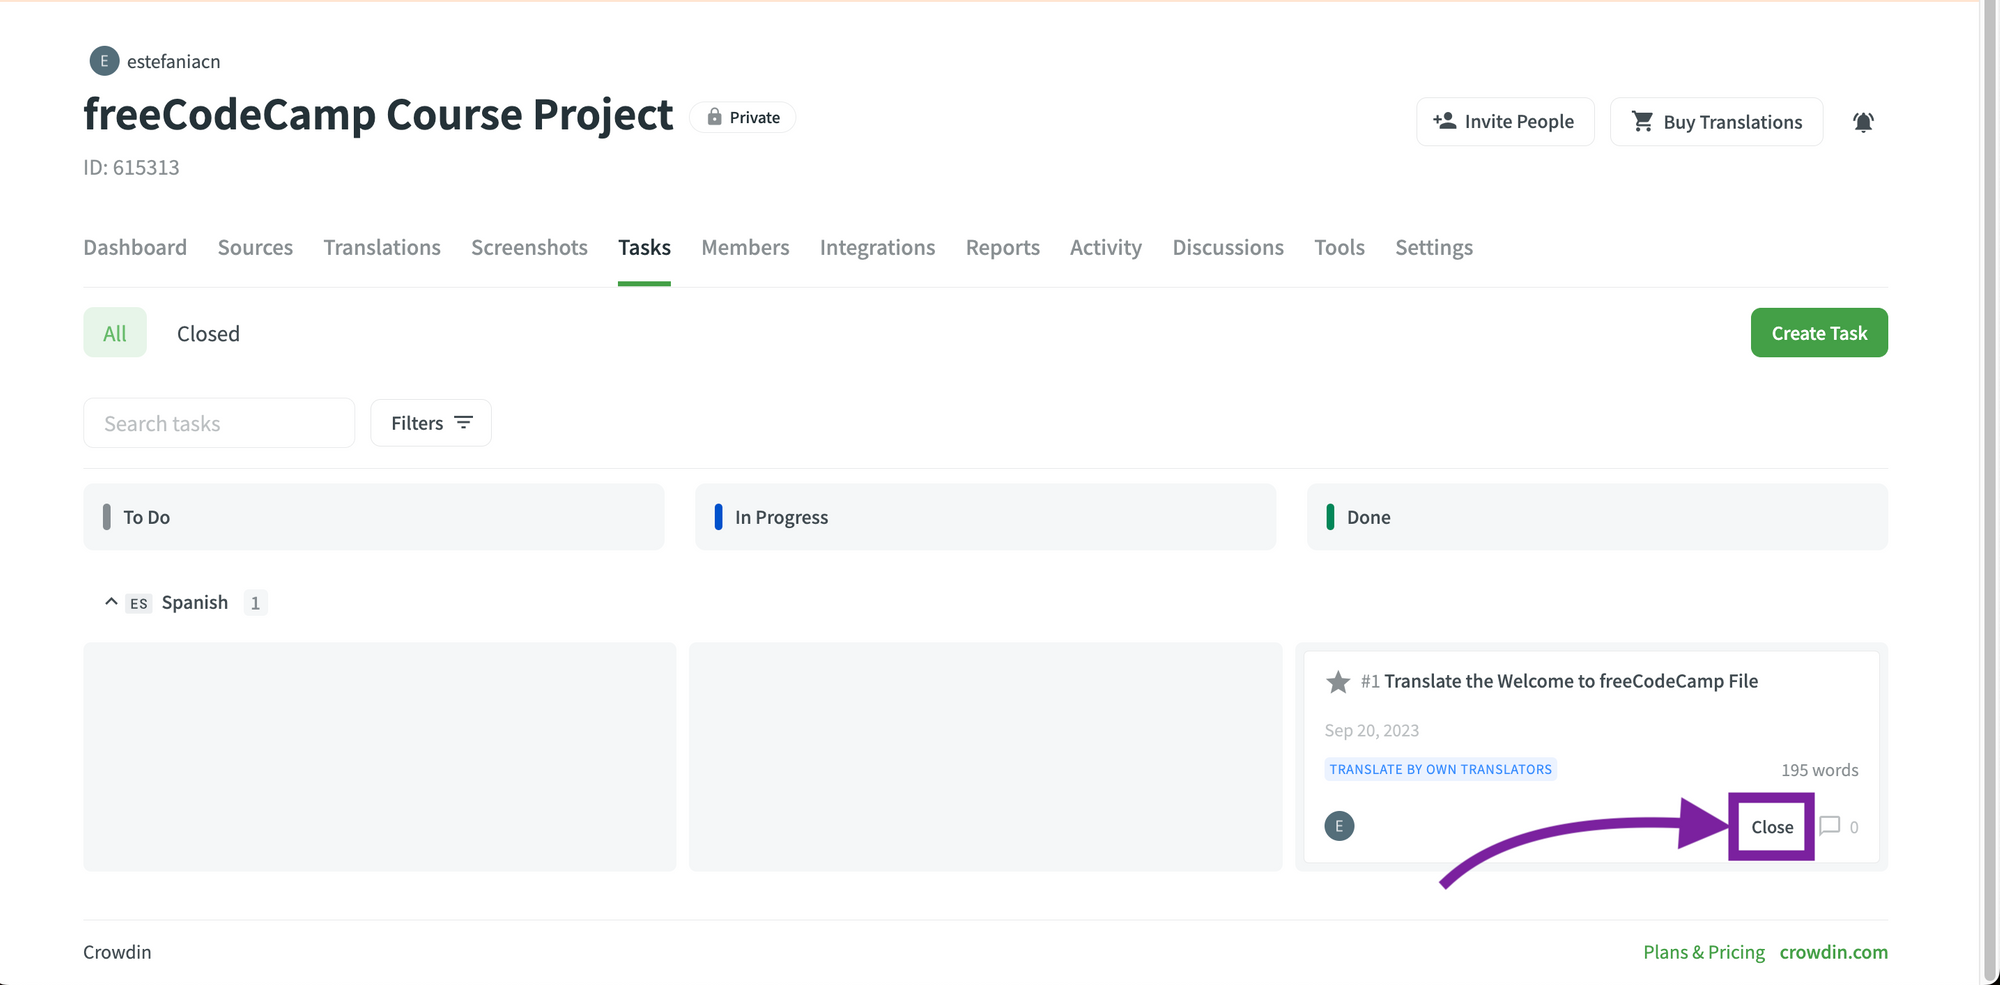 Close button on a task marked as "Done".
How to Reopen a Task
If you close a task and then realize that you need to reopen it, you just need to:
- Open the details of the closed task.
- Click on the three dots to the right to see additional options.
- Choose "Reopen".
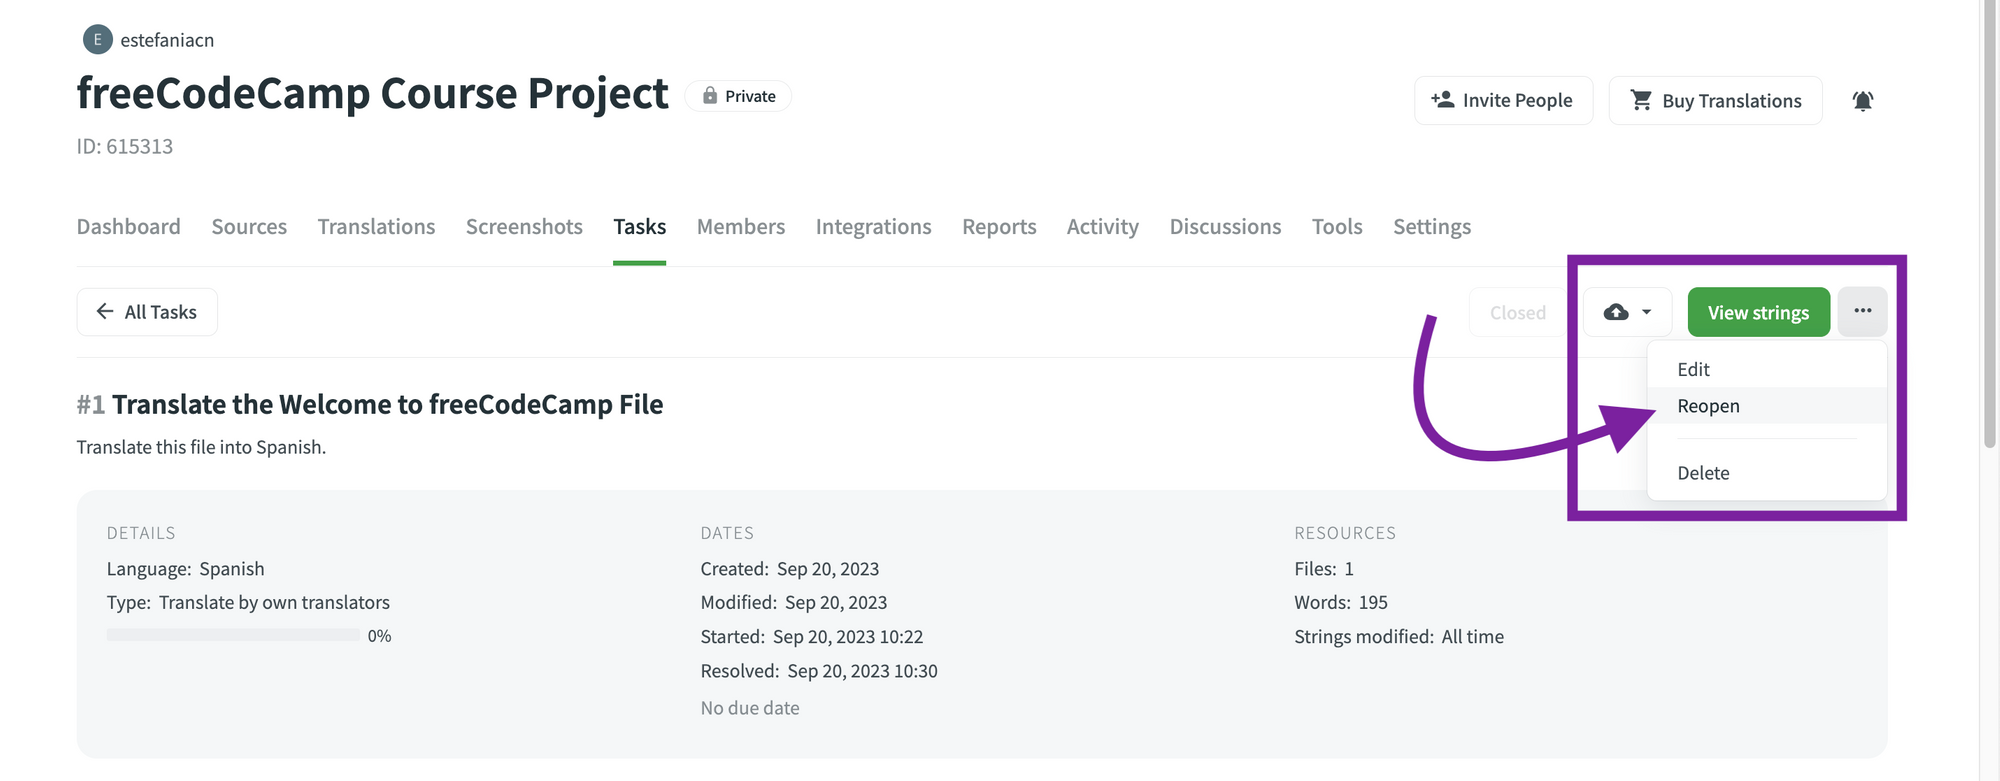 Reopen a task.
Now you will see the reopened task on the "To do" column of the tasks board.
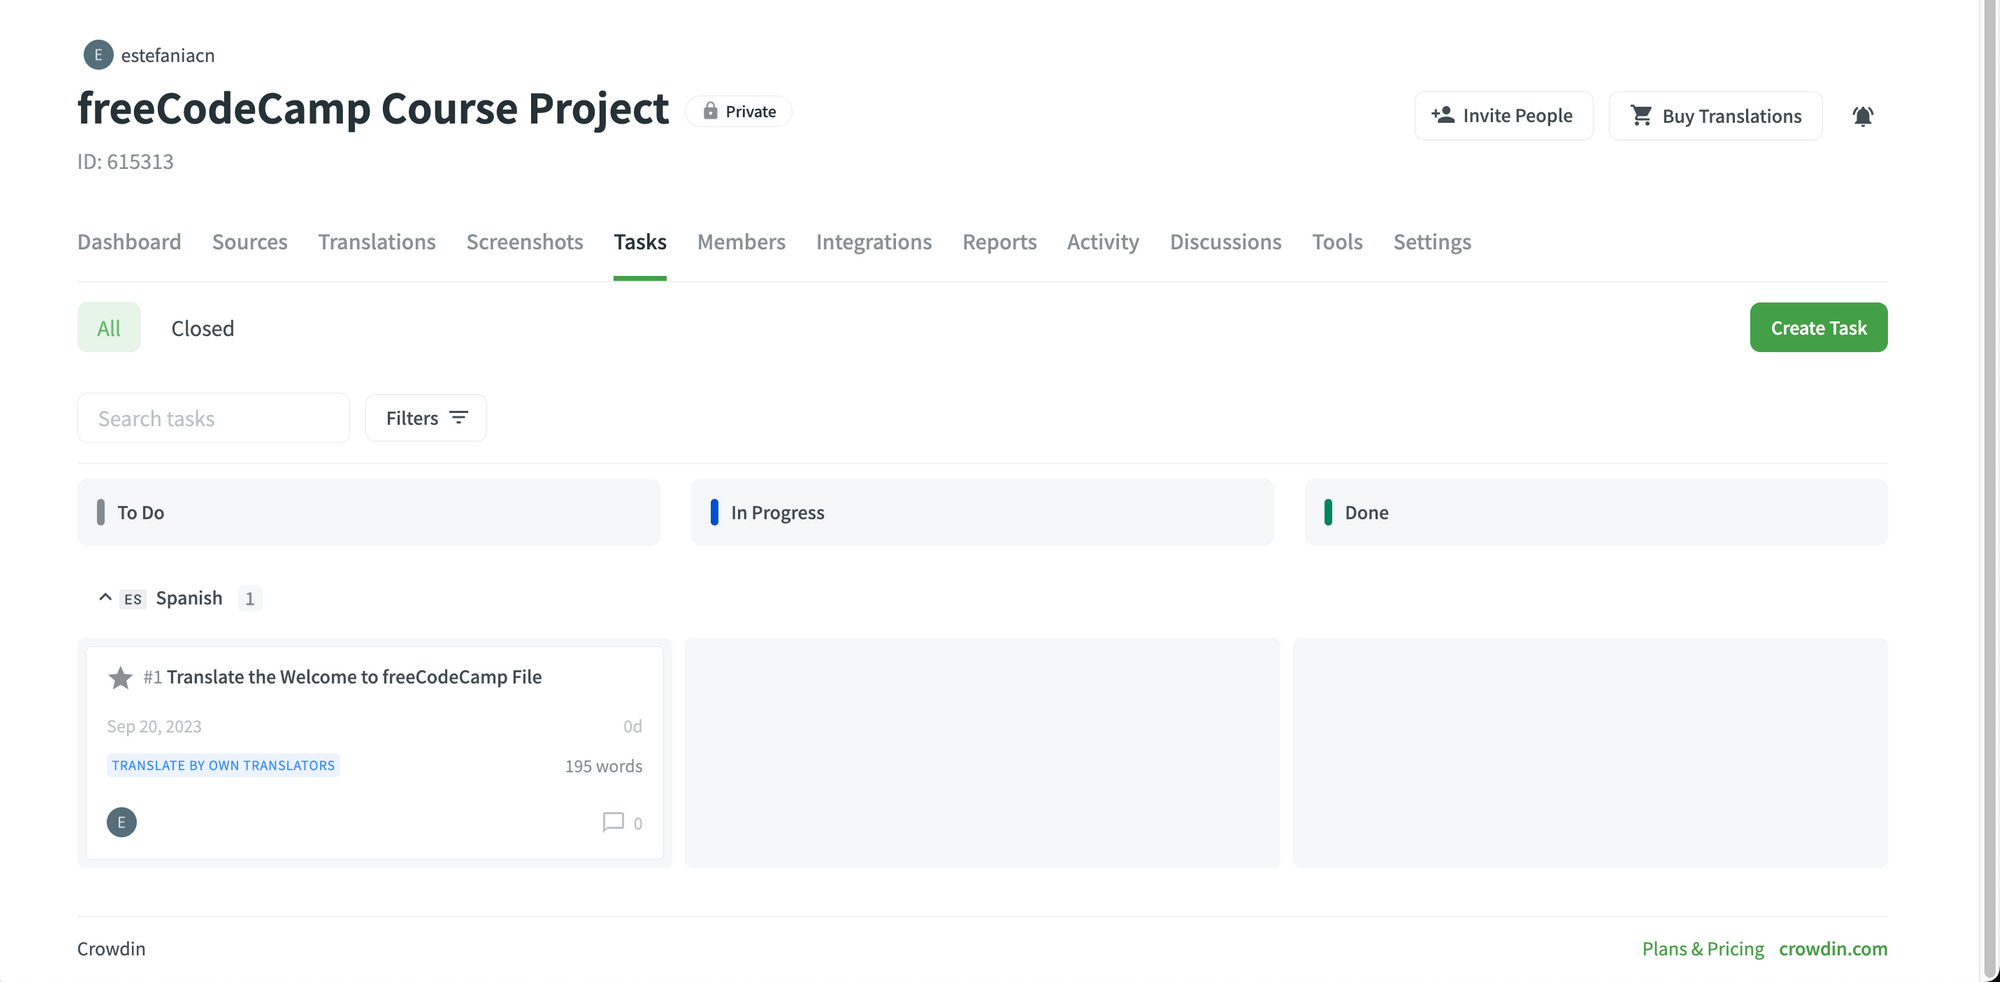 Reopened task.
How to Delete a Task
To delete a task:
- Open the task details.
- Click on the three dots.
- Select "Delete".
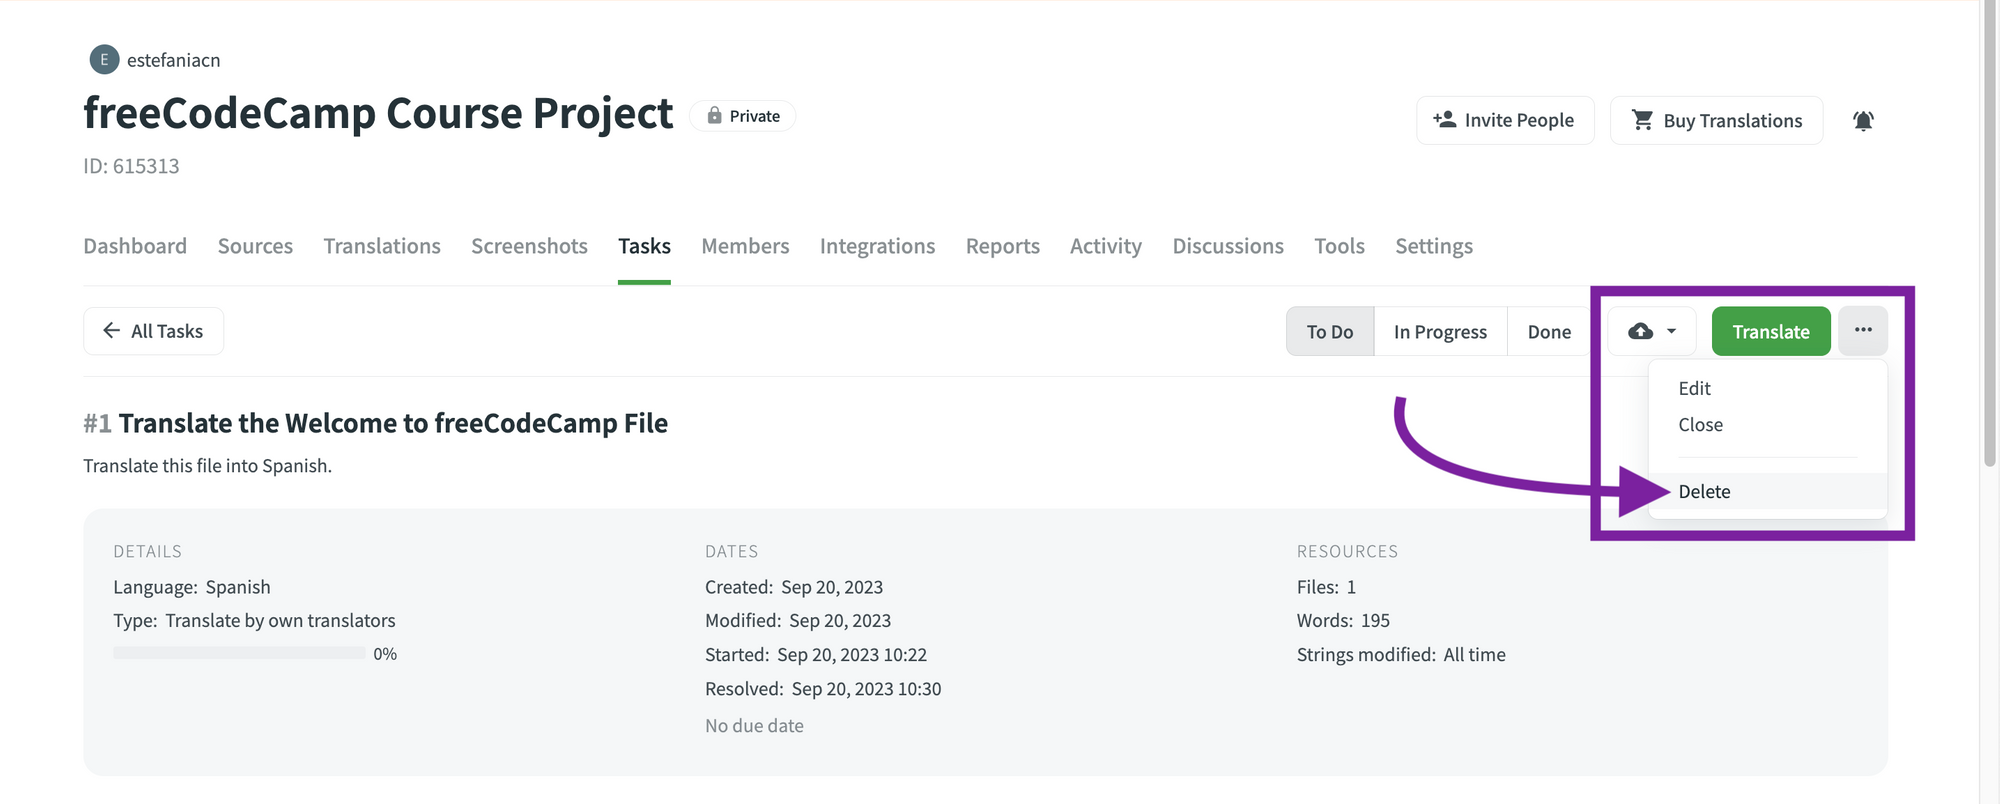 Delete a task.
How to See All Tasks Assigned to You
If you are contributing to a project, you can see all the tasks assigned to you by following these steps:
- Go to your profile.
- Go to the "To do" tab.
- You will see all the tasks assigned to you and your archived tasks.
 The "To Do" tab on Profile.
💡 Tip: At the top, you will also find a search field to filter your tasks and an option to filter tasks by project.
This is the basic information that you will see for each task in this view:
 Task in the "To Do" tab on the profile.
- Task number.
- Task status.
- Project.
- Target language.
- Word count.
You will also see these two options to:
- Open the translation editor and start working on the task.
- Archive the task.
Important Question about Tasks
Crowdin mentions this important question in the documentation:
Q: How the source file updates affect the existing translation and proofreading tasks?
A: After the source file update, the list of source strings included in the task will be updated the following way:
- The strings removed from the source file during the update will be removed from the task.
- The modified strings marked with the Keep Translations option will appear in the task with the new modified text.
- The newly added strings won’t affect the existing task in any way.
If the source file is restored to the revision, containing the removed strings, they will reappear in the task.
Project Reports
As a project owner or project manager, reports can very helpful to understand your team's current progress and activity.
Crowdin has a reports feature where you can check your project status. This is a report of the demo project that we have been working with so far:
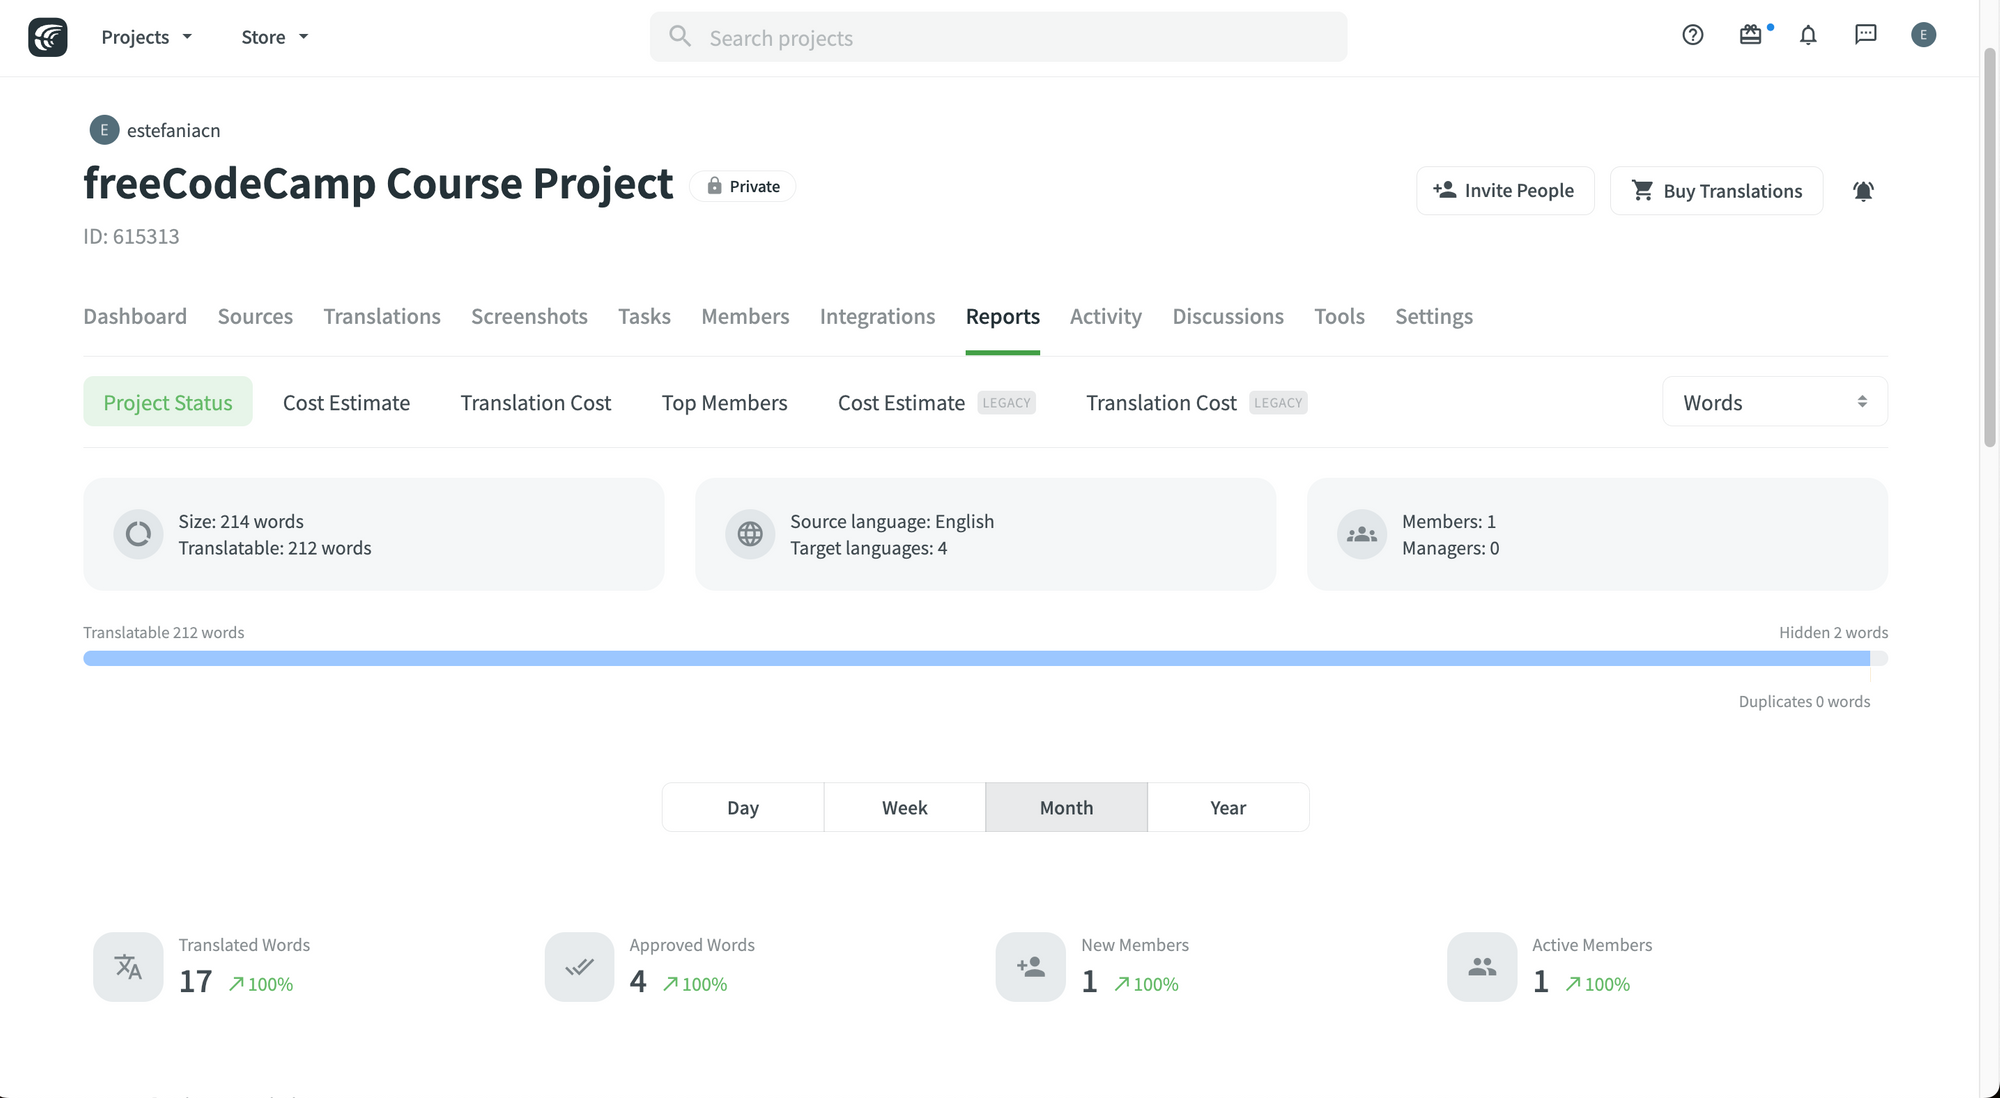 Reports tab.
To access your project report:
- Go to your project.
- Go to the "Reports" tab.
 Report Part 1.
You will see the project status by default and you can switch to cost reports if you need to.
Here you can see some screenshots with the type of data that you can analyze and visualize with these reports:
- Total project size and the number of translatable strings.
- Source language and target language.
- Number of members.
- Number of managers.
- Number of translatable words.
- Number of hidden words.
- Number of duplicate words.
- Number of translated words.
- Number of approved words.
- Number of new members.
- Number of active members.
You can see these reports with their corresponding increase or decrease percentage compared to the time period you selected.
You will also find charts of the translation activity with their corresponding legends.
 Report (Part 2).
You will find charts of the "Proofreading Activity".
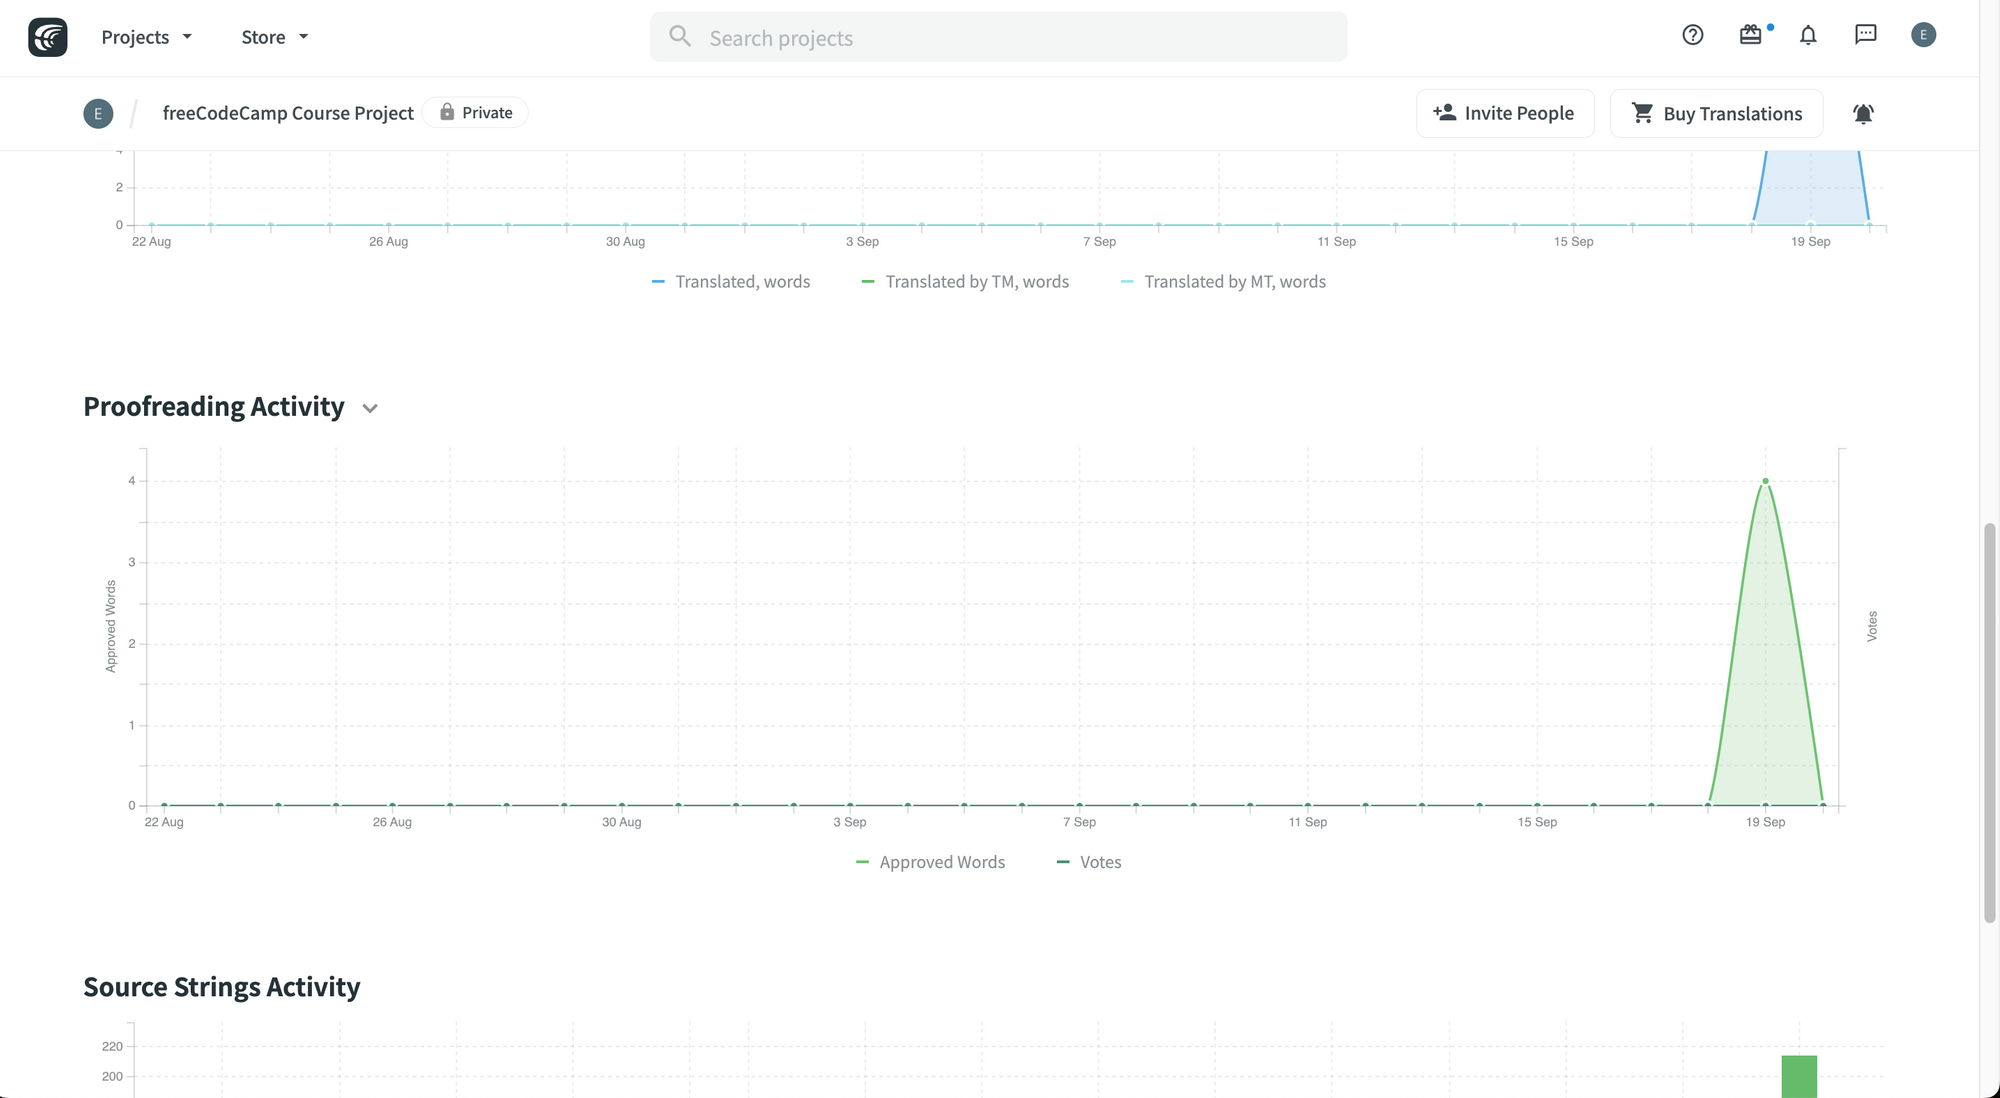
And charts of the "Source Strings Activity", and so on.
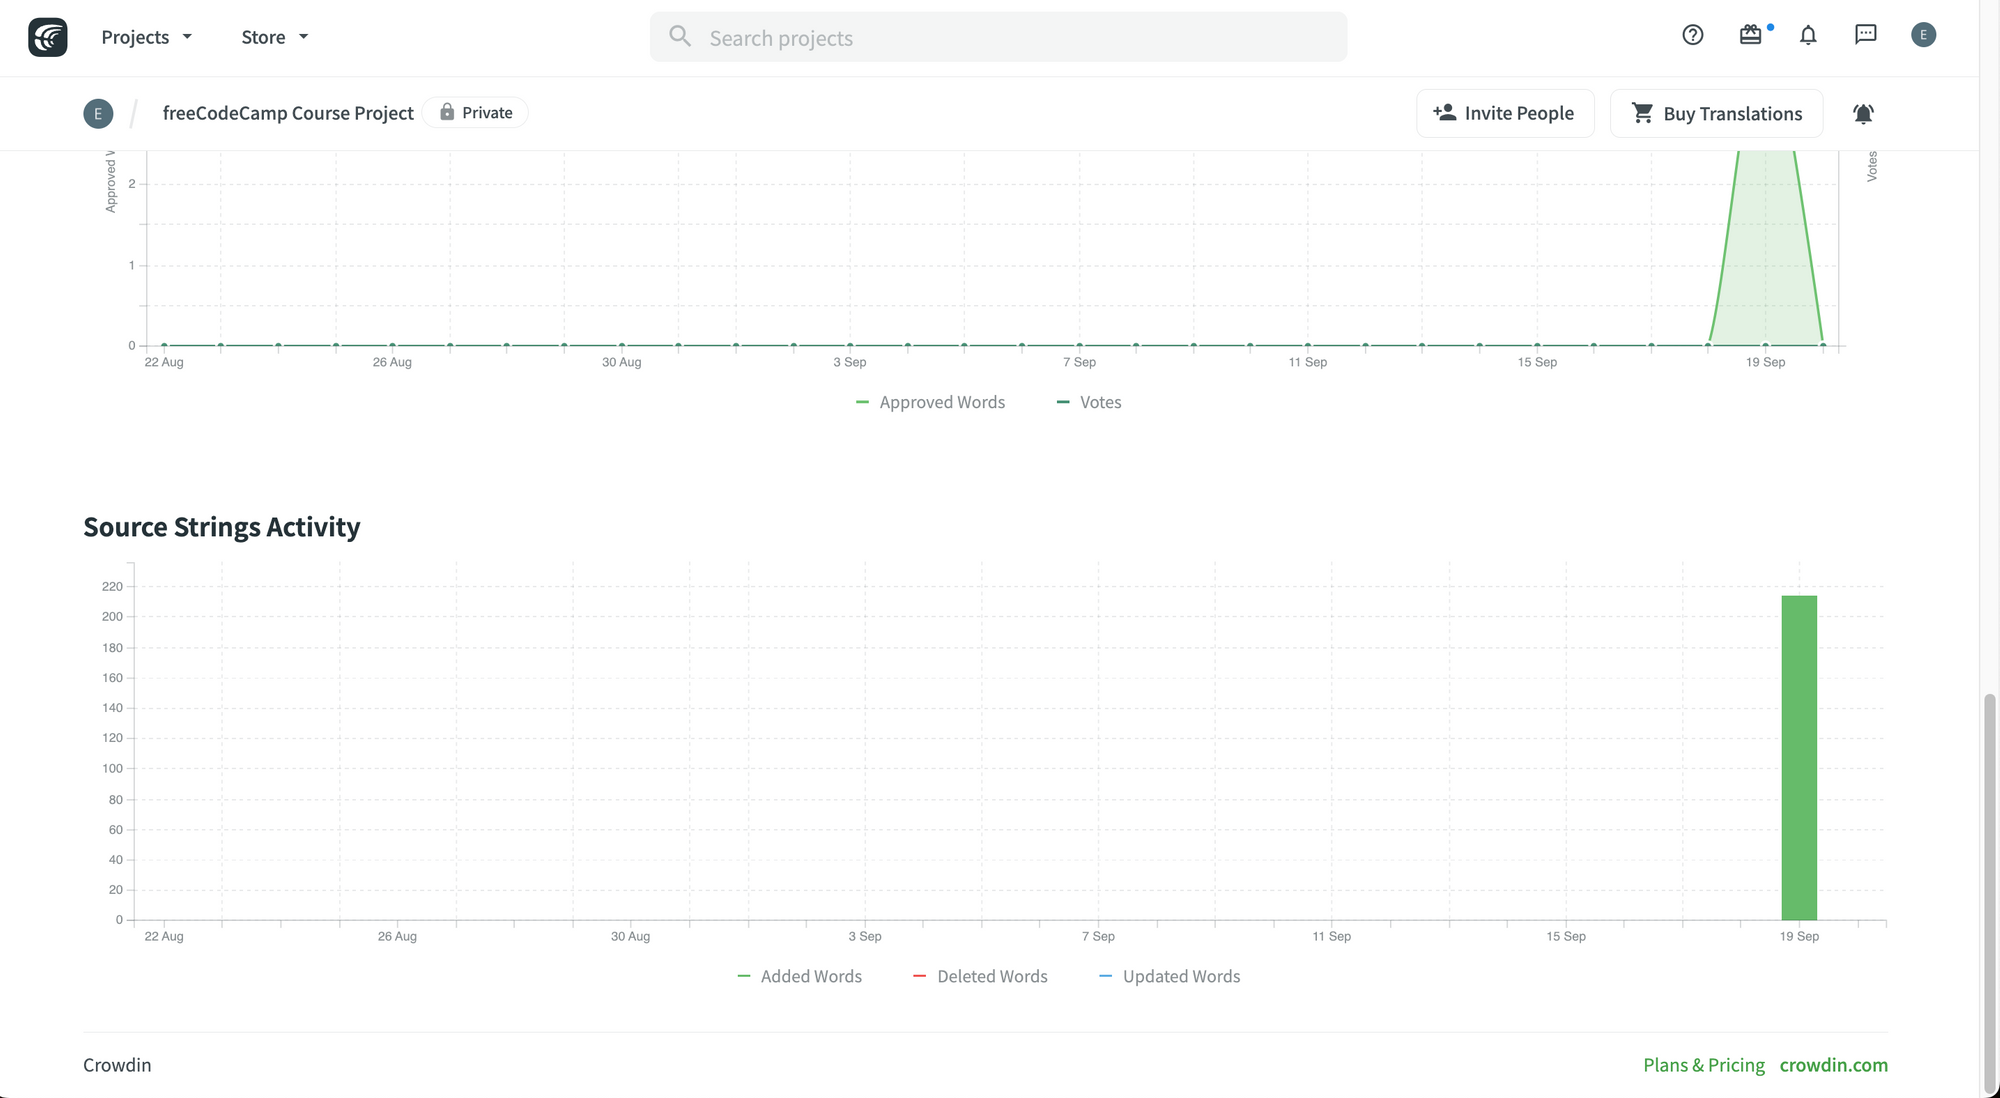
You can also change the report unit by clicking on this option:
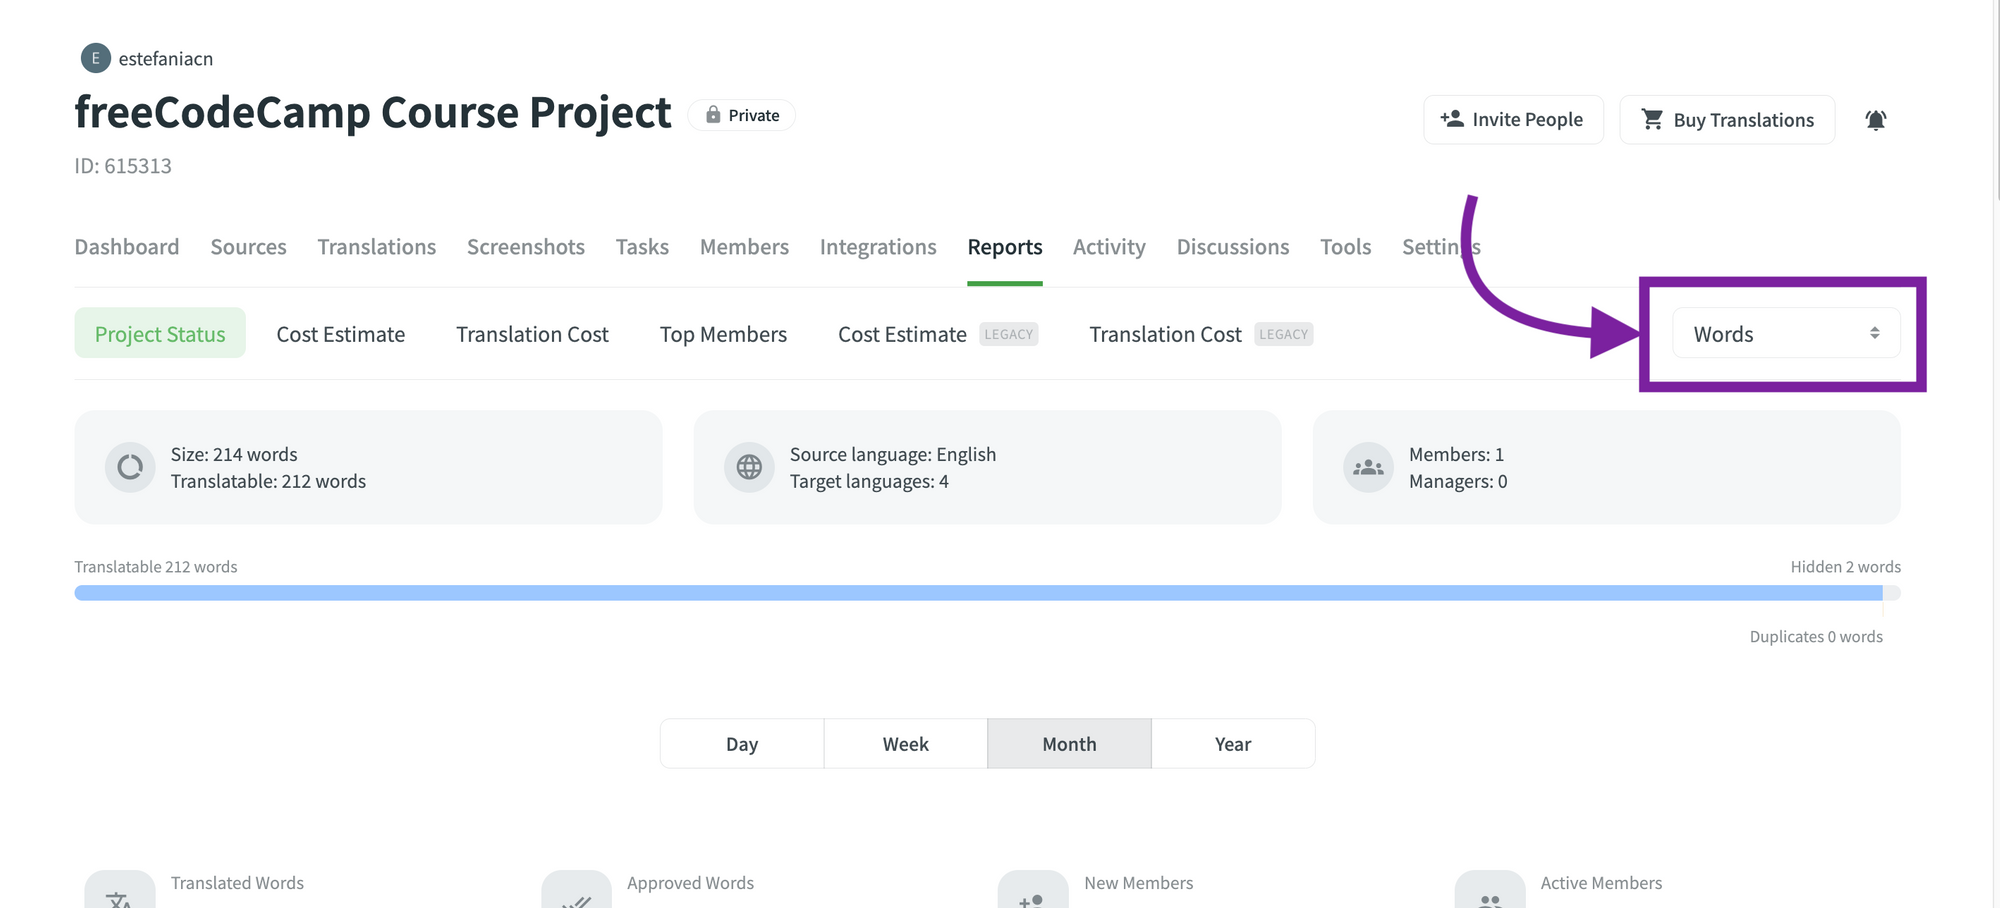
You can choose:
- Strings.
- Words.
- Characters without spaces.
- Characters with spaces.
On the Crowdin documentation, you can find examples of the Translation Activity chart, the Proofreading Activity chart, and the Source Strings Activity chart:
 Translation Activity. Image taken from the Crowdin documentation.
 Proofreading Activity. Image taken from the Crowdin documentation.
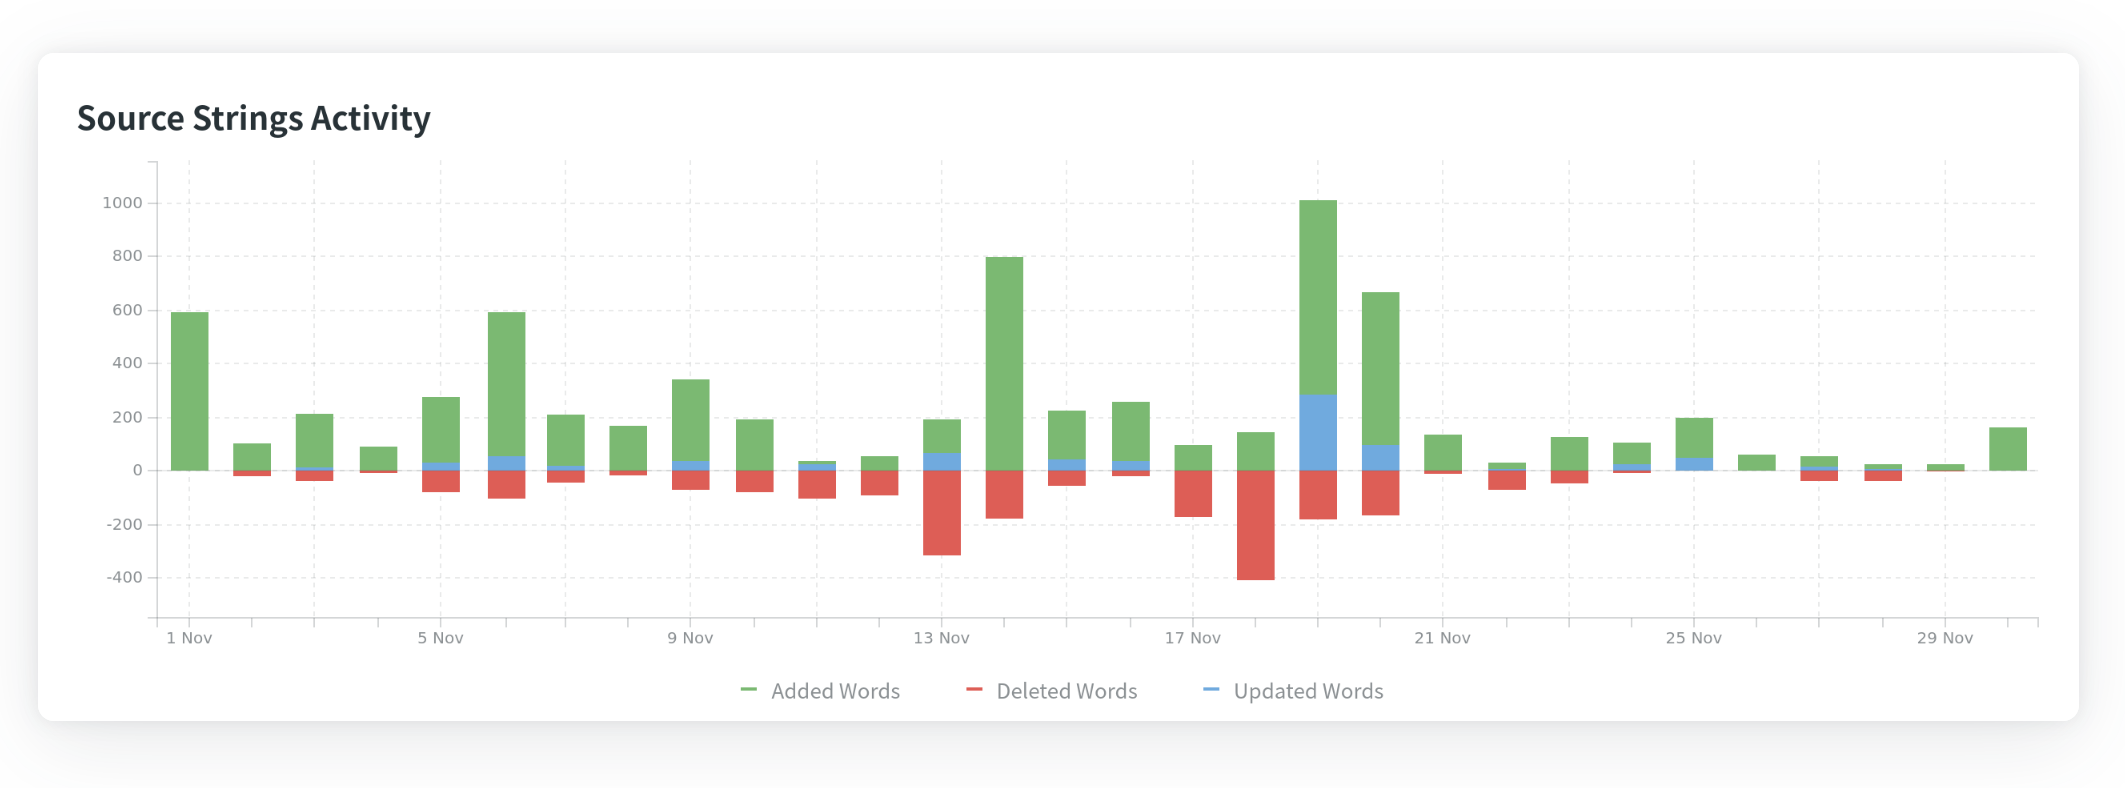 Source Strings Activity. Image taken from the Crowdin documentation.
Top Members Report
Your team members are fundamental for your localization process. Having a detailed report of your most dedicated and productive team members is always helpful.
To generate a report of your top members:
- Go to your project.
- Go to the "Reports" tab.
- Click on "Top Members".
- Select a date range from the calendar.
- Click on "Generate".
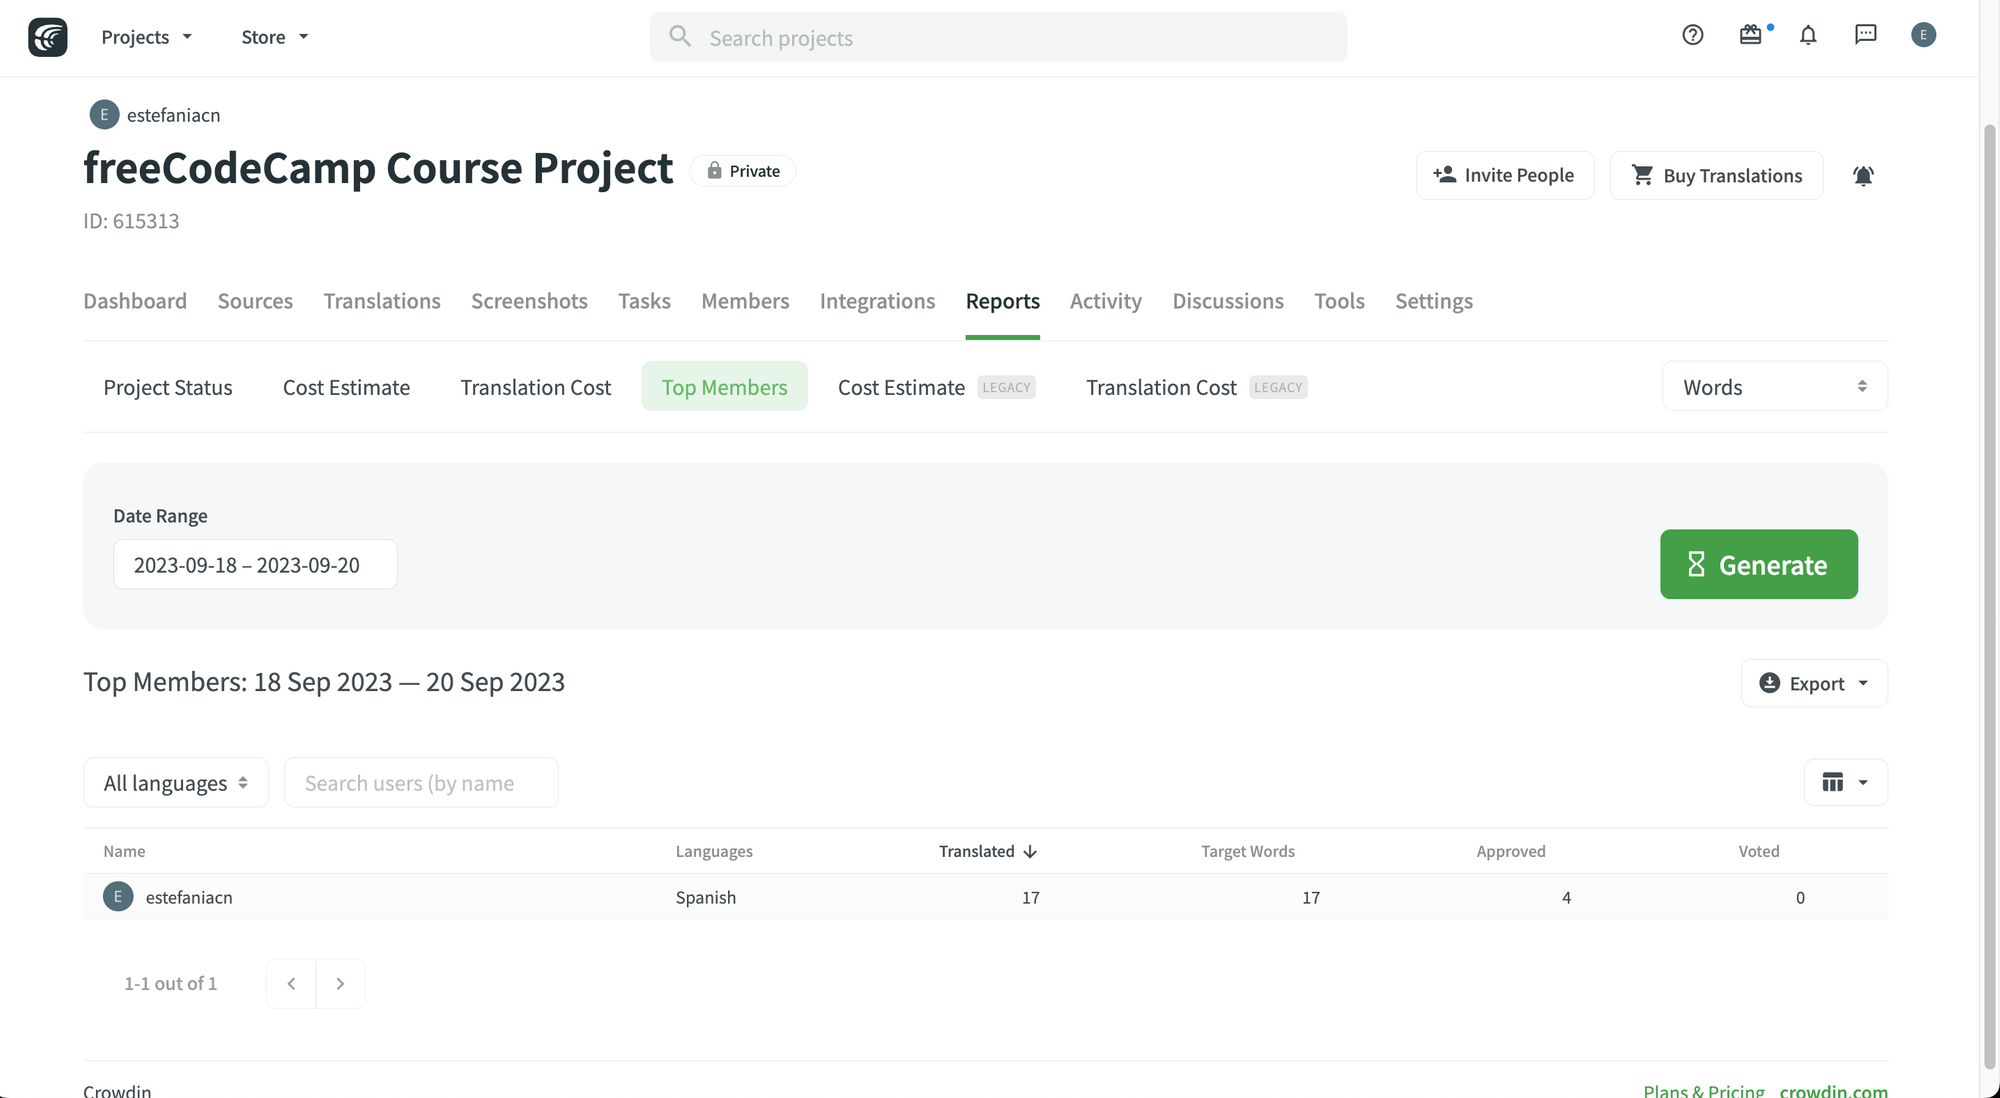
You will see a list of your top members with:
- Their target languages
- How many strings they translated
- Target words
- How many strings they approved
- How many votes they submitted.
You can also export your report in XLSX, CSV or JSON format and display or hide specific columns.
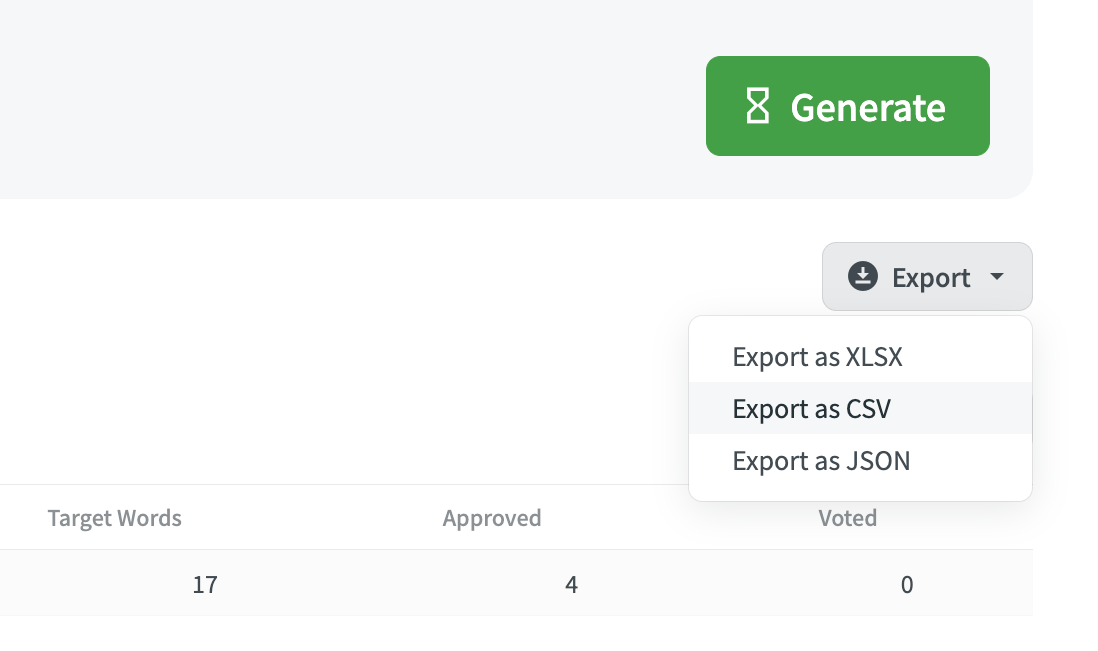 Export options.
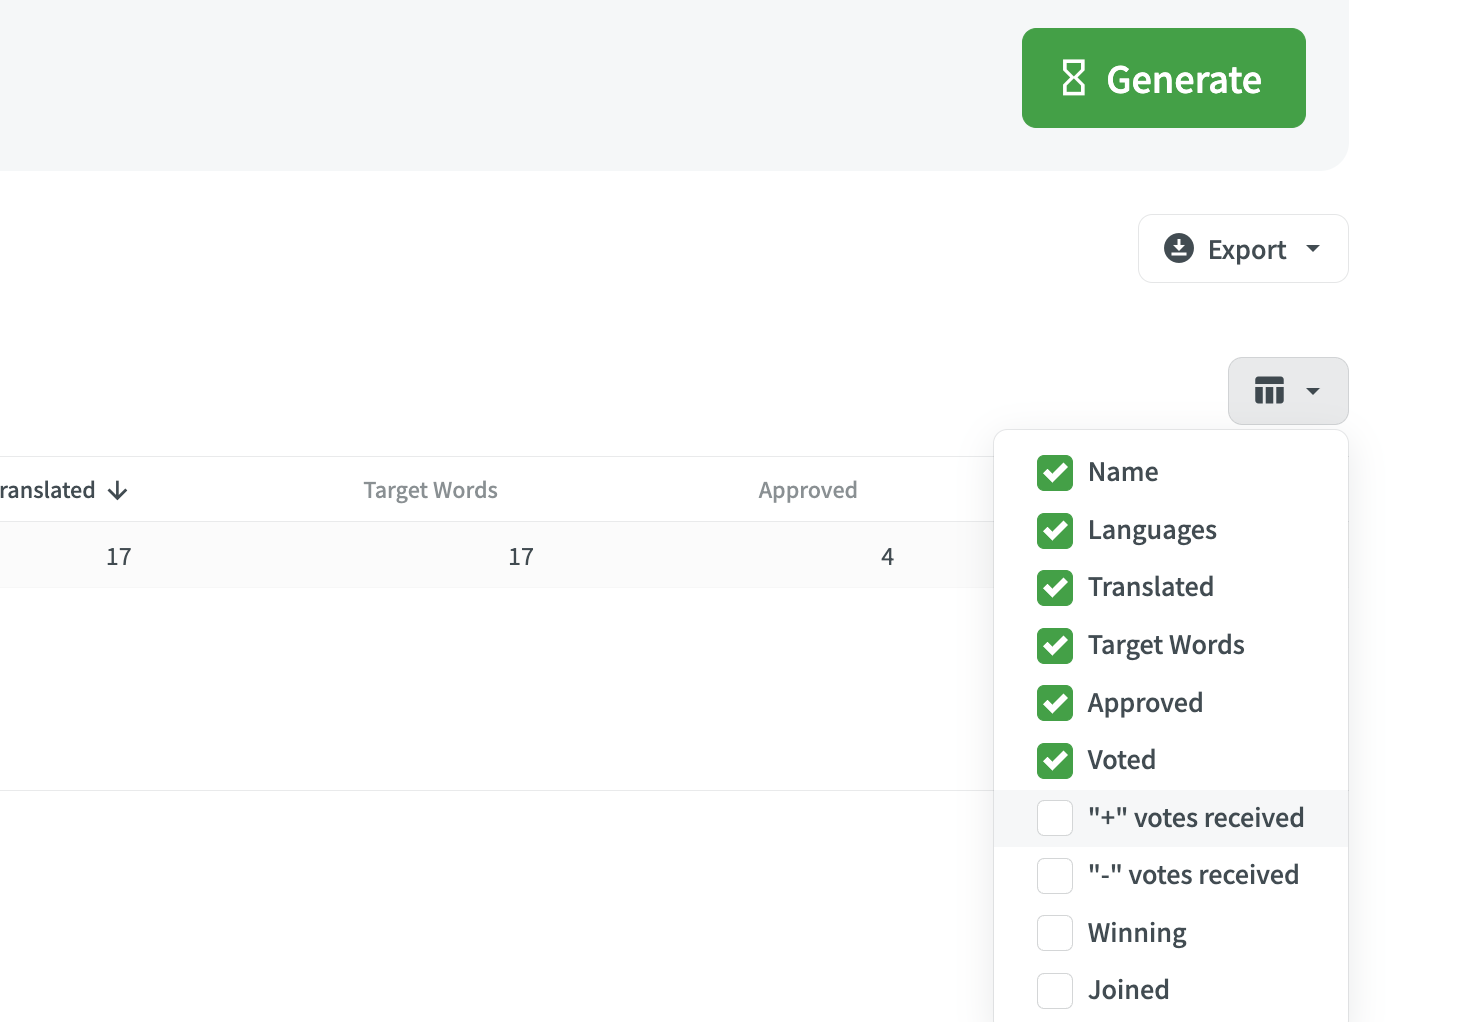 Display or hide columns.
Conversations on Crowdin
Communication is essential for any successful project. You and your team members can communicate directly on Crowdin with the conversations feature.
With this feature, you can communicate with one or more team member in a private chat. Each conversation has a subject, so you can easily find them.
How to Access Conversations
To access your conversations:
Click on the conversations icon at the top right, next to your profile picture.
 Conversations button.
Go to "Create Conversation".
 Create a Conversation.
You can search for users by their name or username and you can also filter users by project.
 Filter users.
This is an example from the Crowdin Documentation:
 Conversation. Image taken from the Crowdin documentation.
How to Manage Conversations and Messages
For conversations, you can:
- Change the subject for all the users in the conversation.
- Mute the conversation to stop receiving notifications.
- Add users.
 Example conversation. Image taken from the Crowdin documentation.
For individual messages within a conversation, you can:
- Share the message in the same conversation or in another conversation.
- Mark the message as unread.
- Edit your messages.
- Delete your messages.
- Report spam.
 Example of managing messages. Image taken from the Crowdin documentation.
🎉 Awesome. Now you know the most important features of Crowdin for teams and organizations.
Let's dive into how you can integrate Crowdin with other services and how you can install apps to improve your productivity.
🔹 Crowdin Integrations and Productivity Tools
One of the key characteristics of Crowdin is its connectivity. You can connect your project to different external services to import and export your files and translations as needed.
What is an Integration?
On Crowdin, an integration is a "connection" that you can make between your project and an external service to synchronize your files between these platforms automatically.
On the Crowdin store, you can find over 600 apps and integrations that you can add to your project.
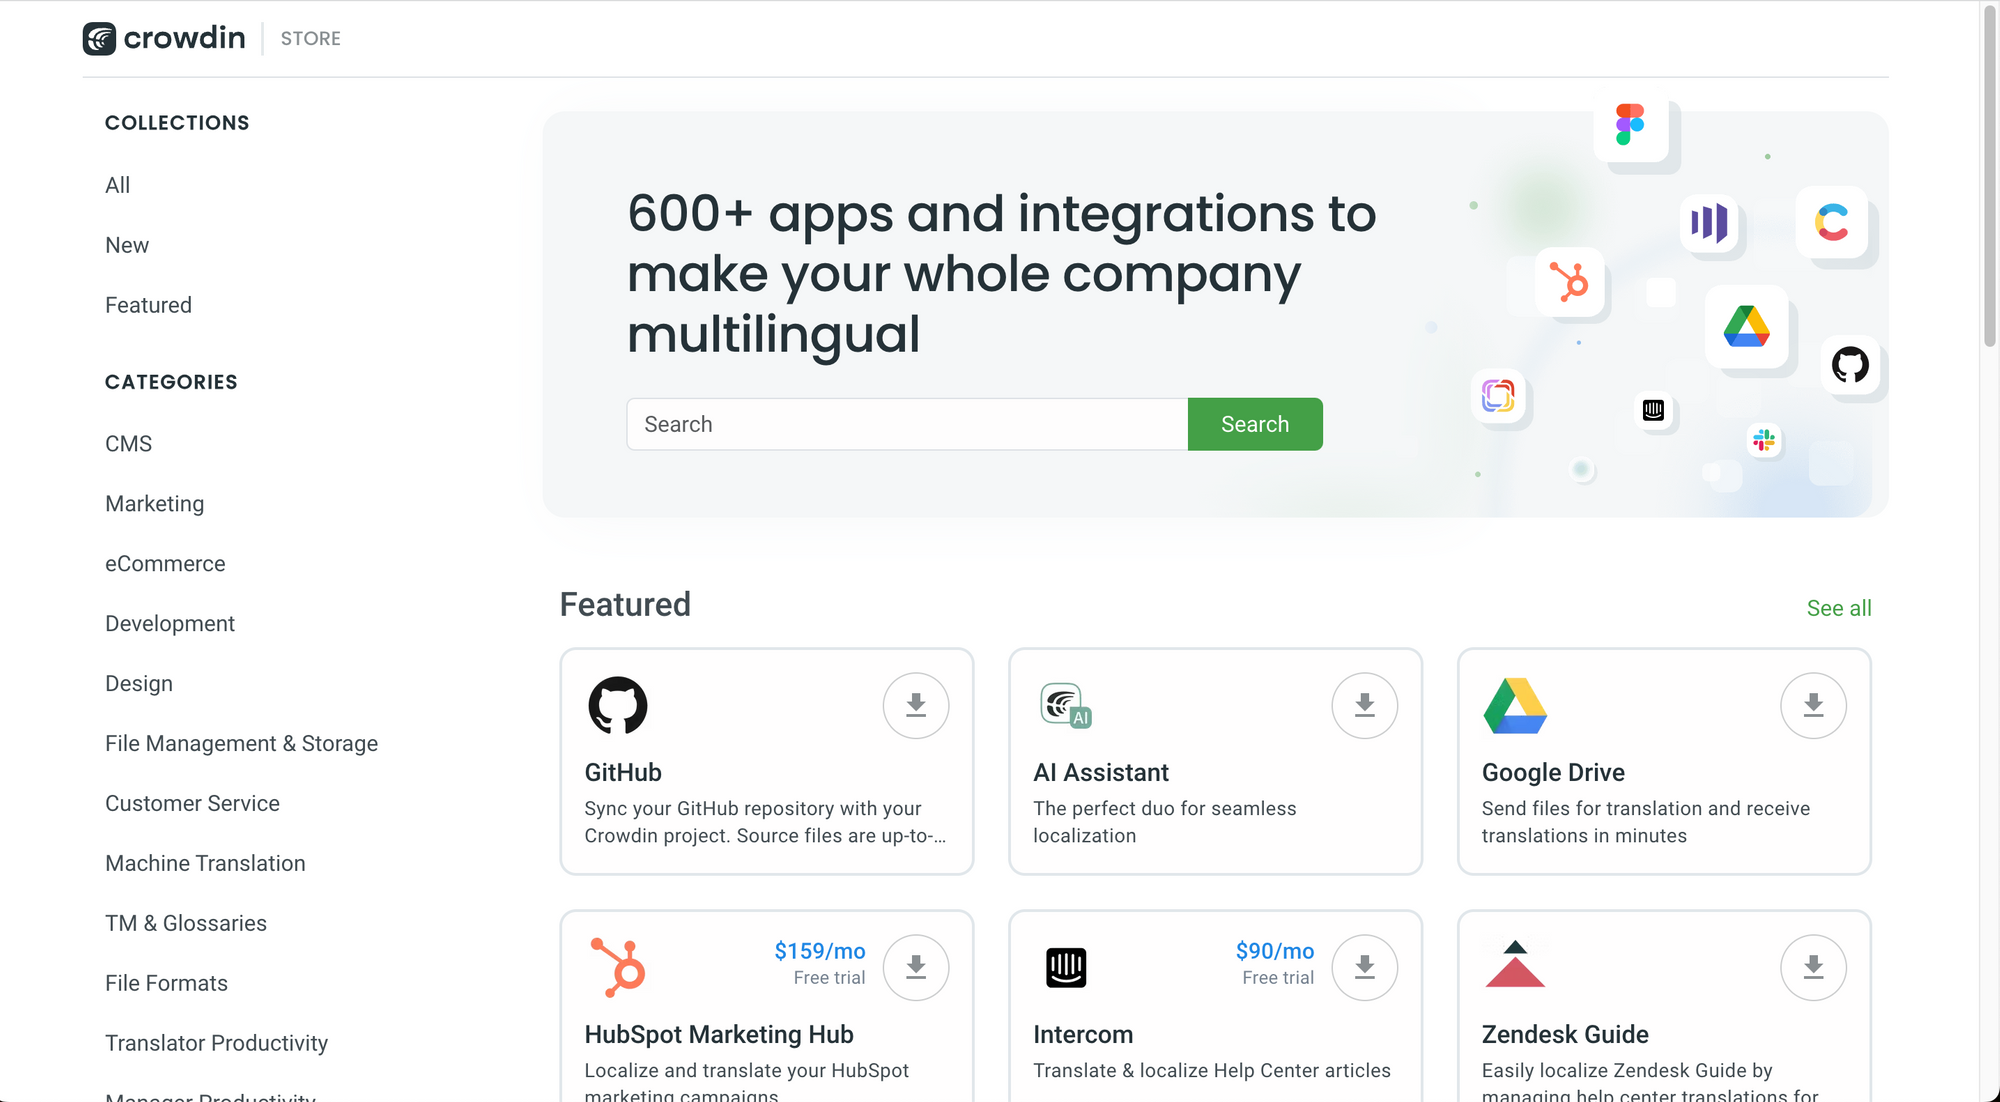 The Crowdin Store.
You can filter them by:
- Collections.
- Categories.
- Partners.
- QA Checks.
To give you an idea of the types of apps and integrations that you can find, these are some of the featured apps and integrations:
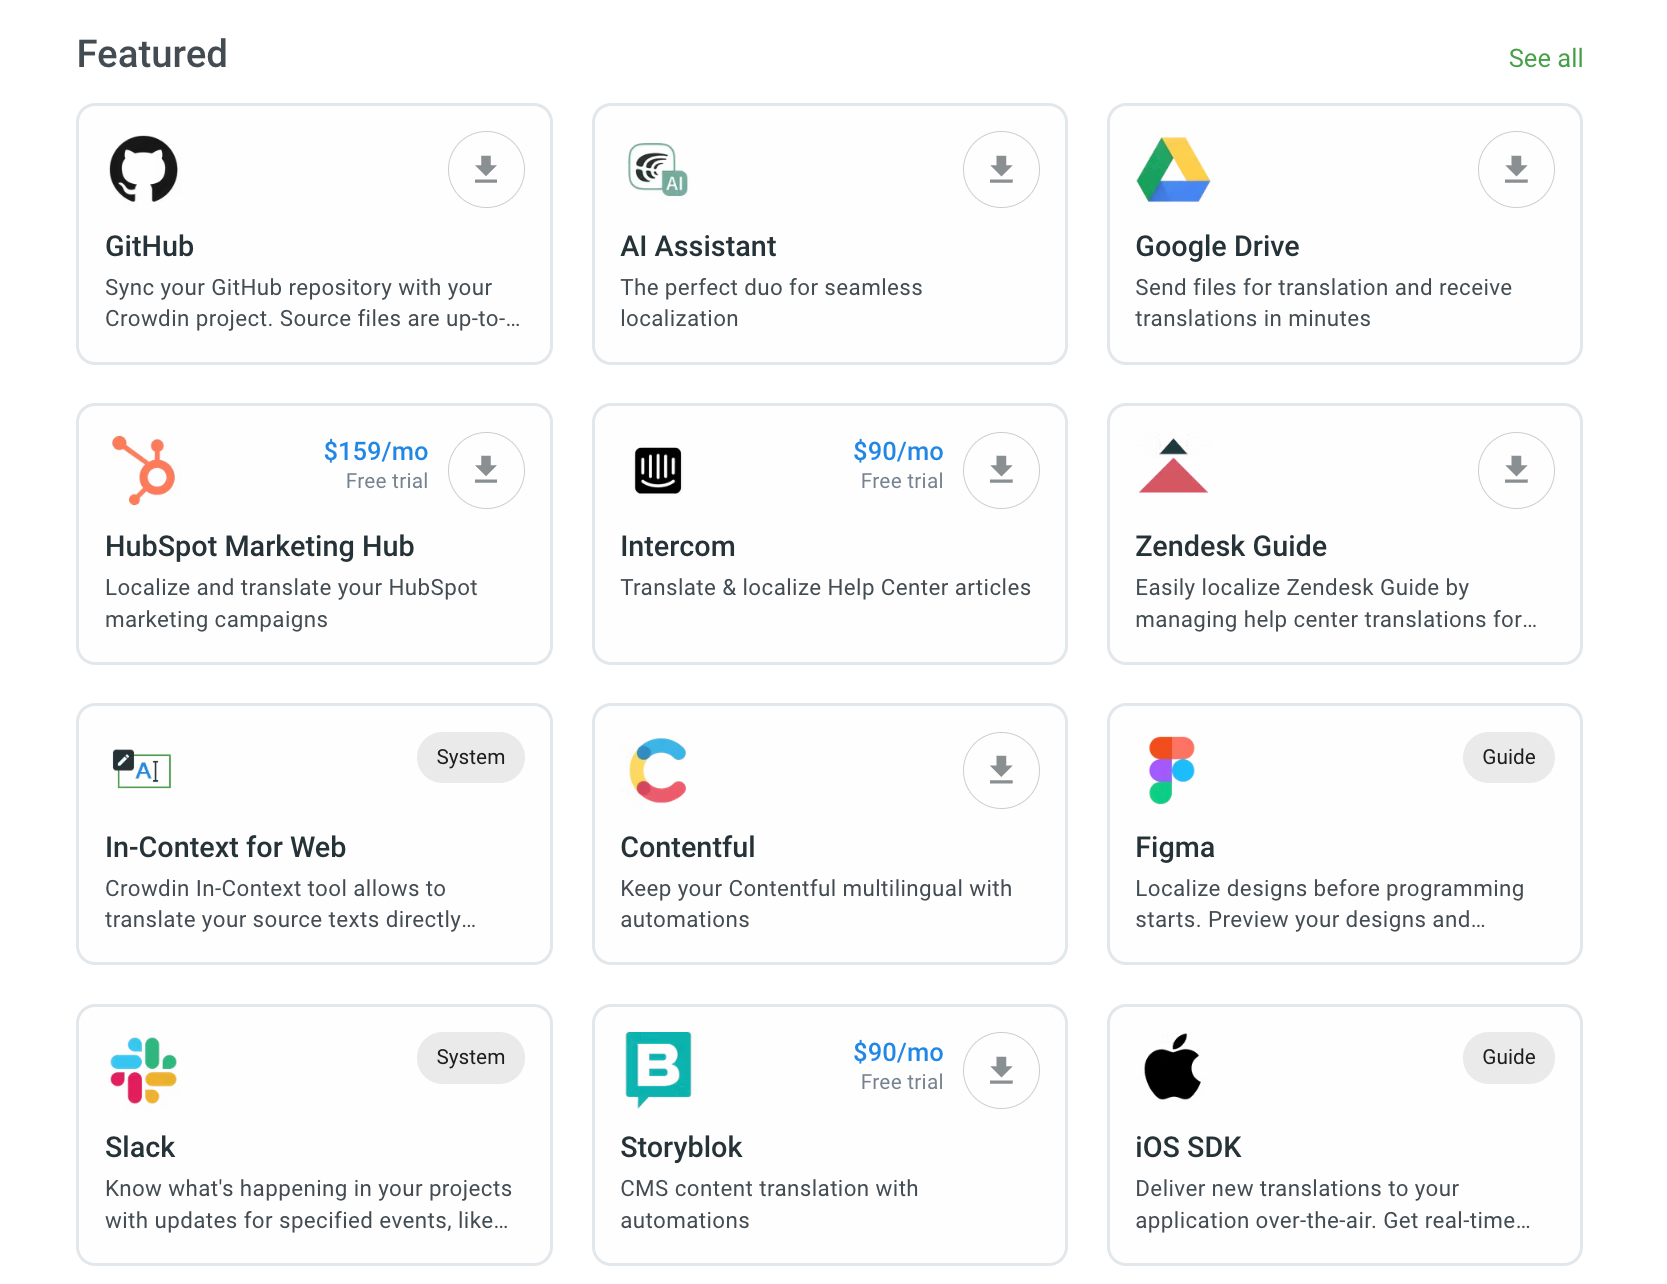 Featured apps and integrations.
Let's talk about a few of them in more detail.
GitHub Integration
If your project is hosted on a GitHub repository, the GitHub integration could be exactly what you need.
Crowdin’s integration with GitHub synchronizes source and translation files between your GitHub repository and translation project in Crowdin. All translated and approved files will be automatically pushed as a pull request to the l10n branch in GitHub repository.
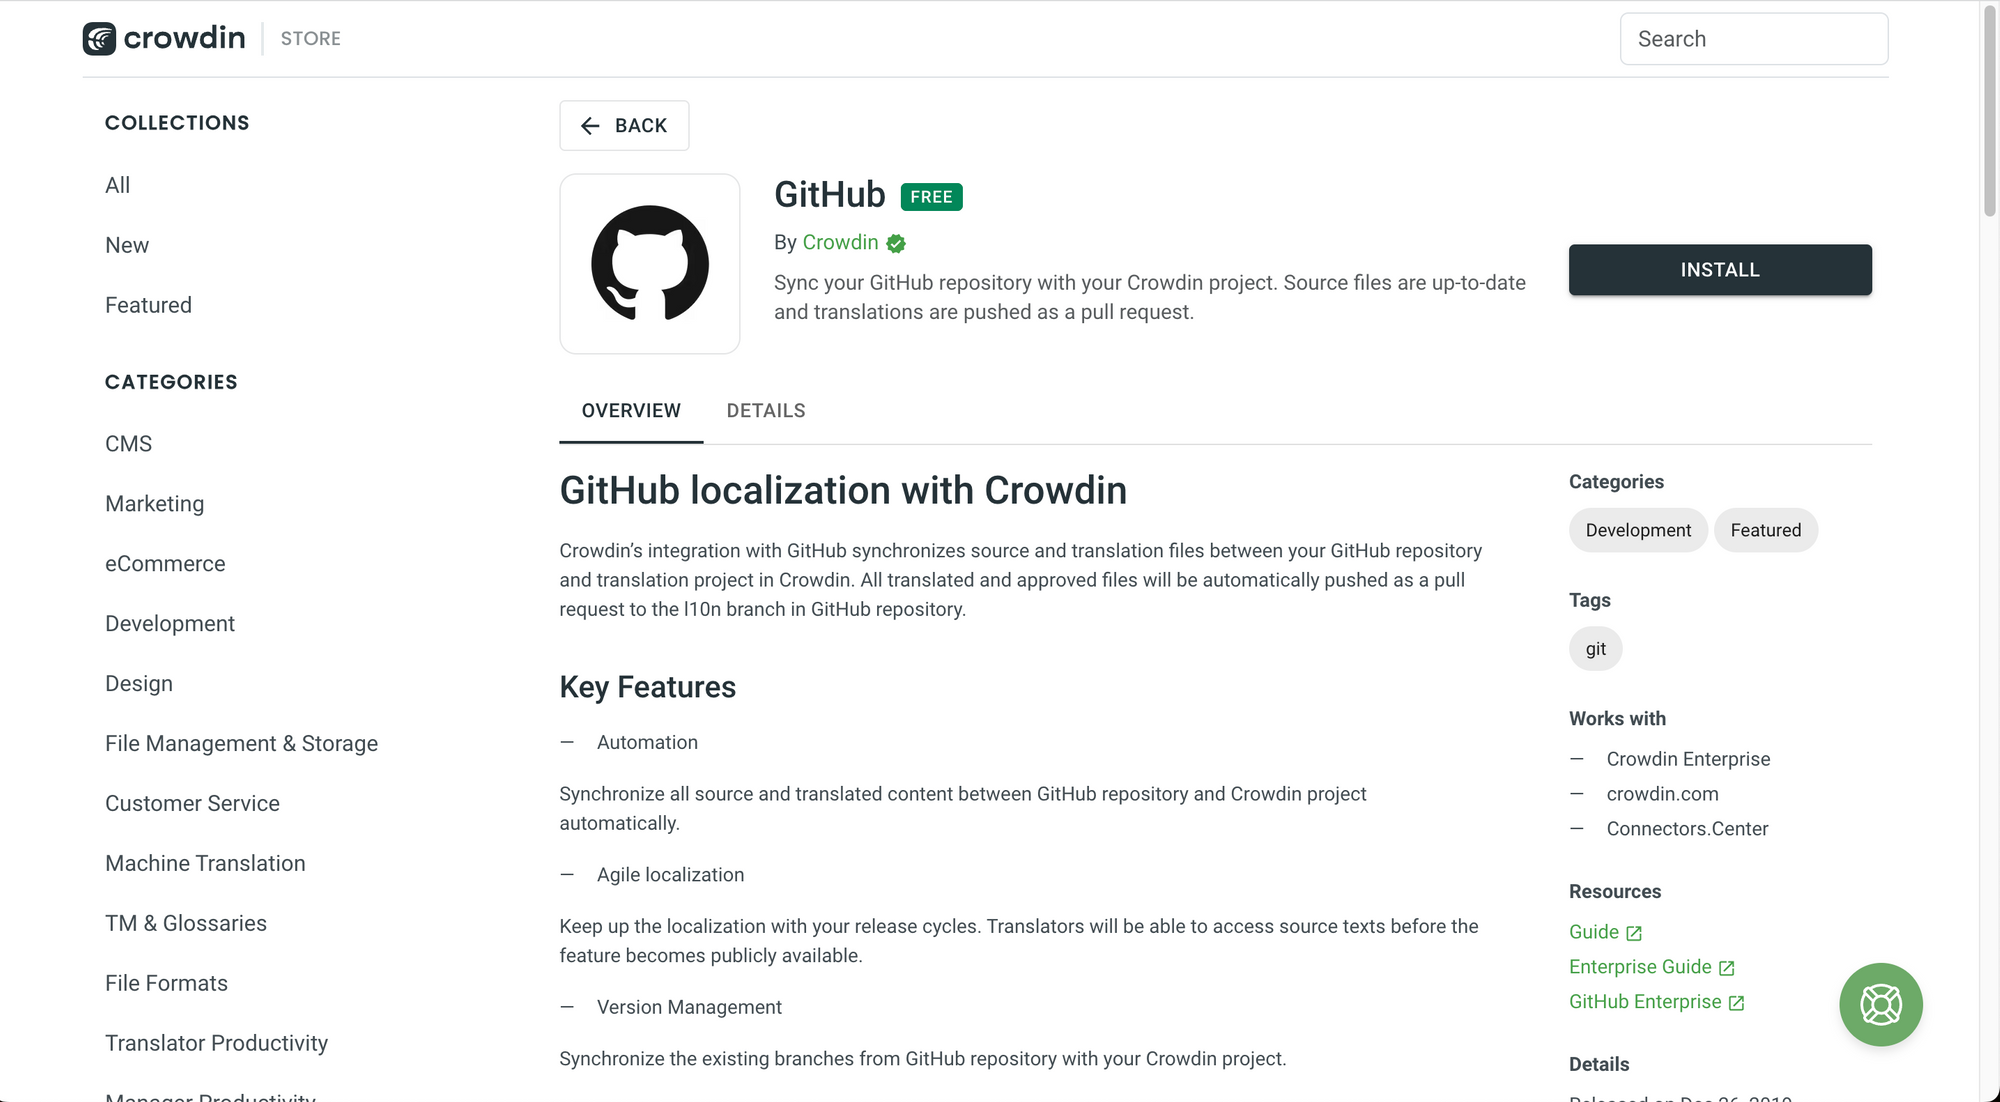 GitHub Integration.
To learn more about this integration, you can check out this tutorial created by Crowdin.
GitHub Crowdin Action
If you need to upload and download files from your GitHub repository to your Crowdin project automatically, this action can be very helpful for you.
The GitHub Crowdin Action can:
- Upload source files to Crowdin.
- Upload translations to Crowdin.
- Downloads translations from Crowdin.
- Create a PR with the translations.
 GitHub Crowdin Action.
To learn more about the GitHub Crowdin Action, check out this tutorial created by the Crowdin team.
Google Drive Integration
Google Drive is very helpful to create, host, and share documents. With the Google Drive integration, you can translate your files very easily on Crowdin.
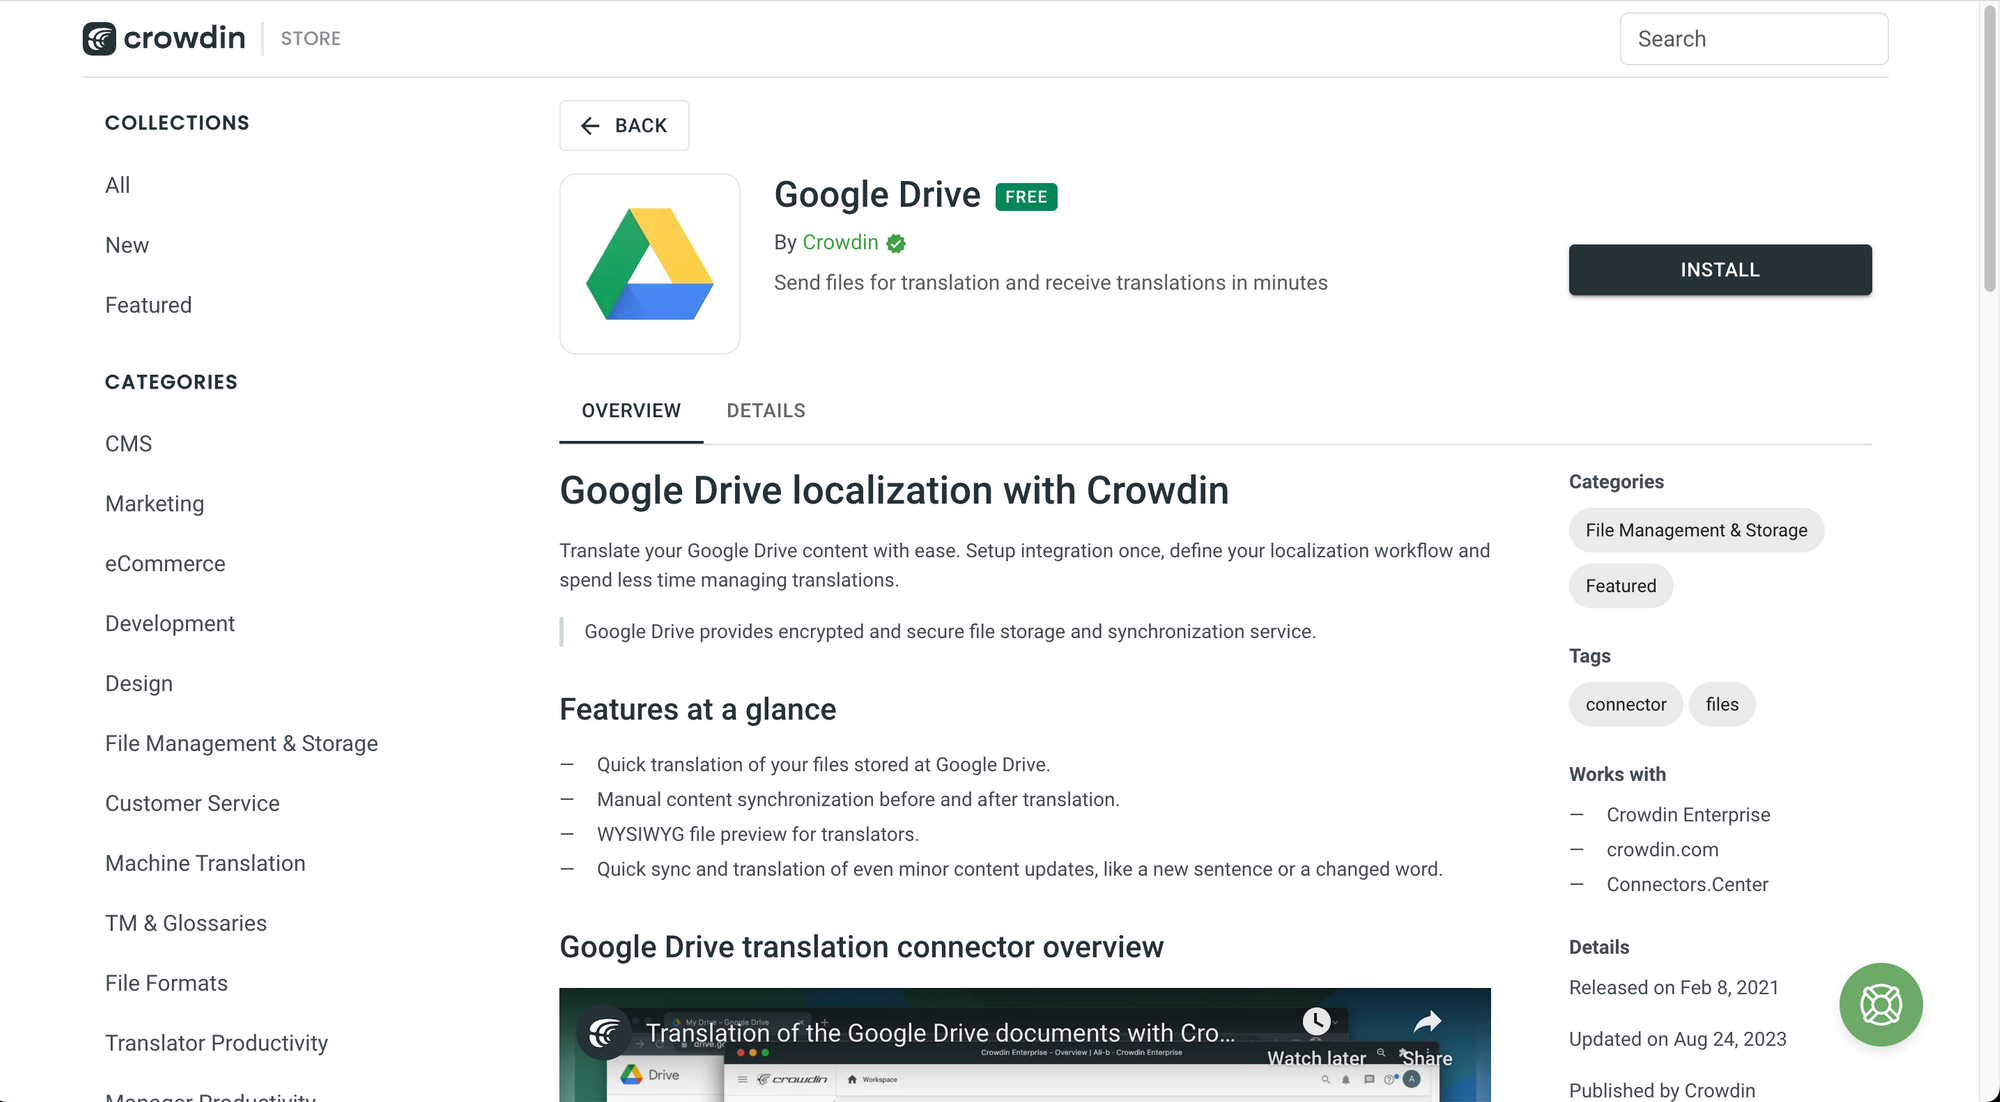 Google Drive Integration.
To learn more about this integration, you can check out this tutorial created by the Crowdin team.
AI Assistant
With the rise in popularity of Large Language Models (LLMs), artificial intelligence has become a very important tool for translation and localization.
Crowdin has a very helpful AI Assistant that you can install to help you and your team. It is described as:
An AI chatbot for translators built on OpenAI’s ChatGPT API. The first version of this app works as a co-pilot for translators. (Source: Crowdin)
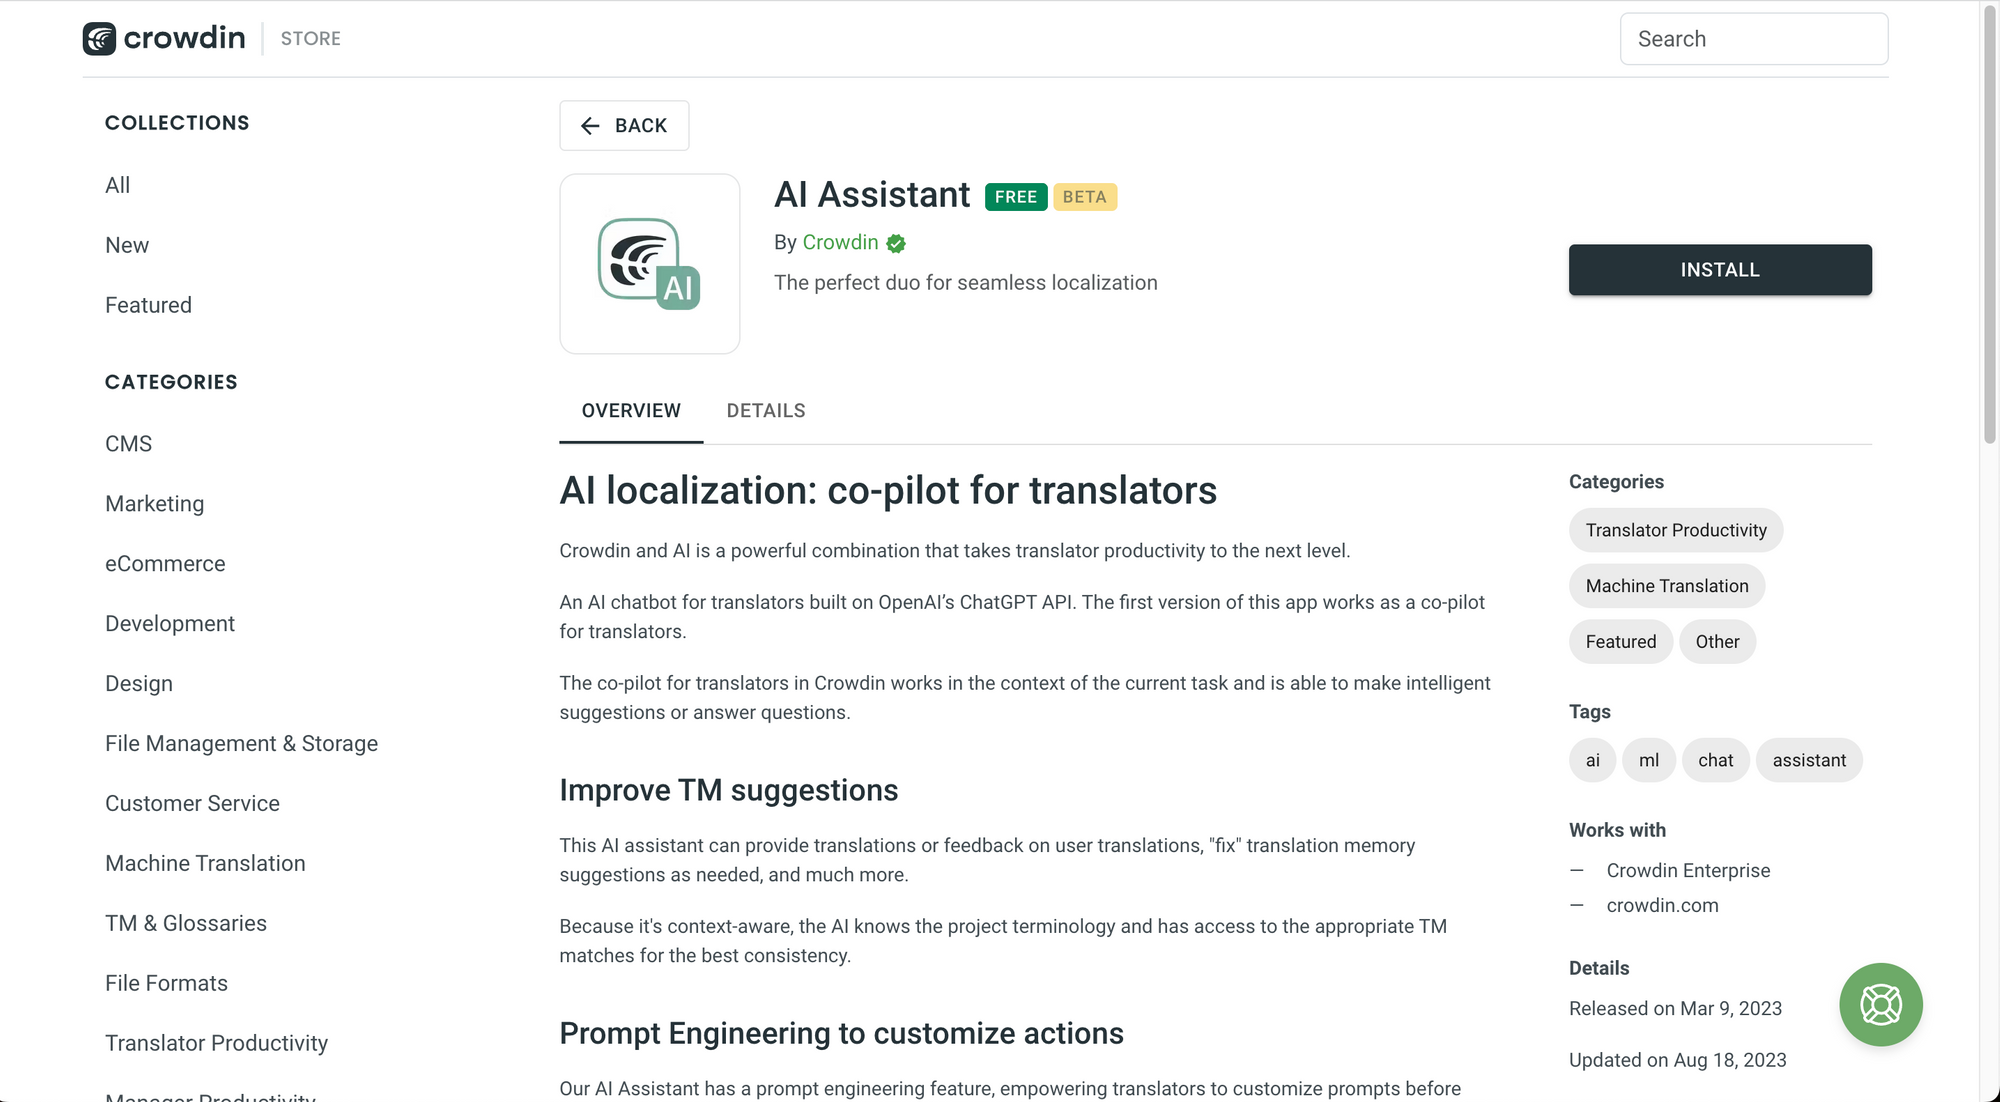 AI Assistant.
Crowdin mentions that the AI Assistant has these interesting features:
Our AI Assistant has a prompt engineering feature, empowering translators to customize prompts before commencing a translation project. As a result, they can conveniently modify the context, enhancing precision and meaningful translations.
To learn more about this integration, check out this tutorial created by the Crowdin team.
Visual Studio Code Integration
If you are a developer who works with Visual Studio Code, then Crowdin also has you covered because the team developed an extension to help you to translate your project.
Integrate your Visual Studio Code projects with Crowdin to optimize the localization process. IDE Plugin allows uploading new source strings instantly to your Crowdin project and downloading translations. (Source: Crowdin)
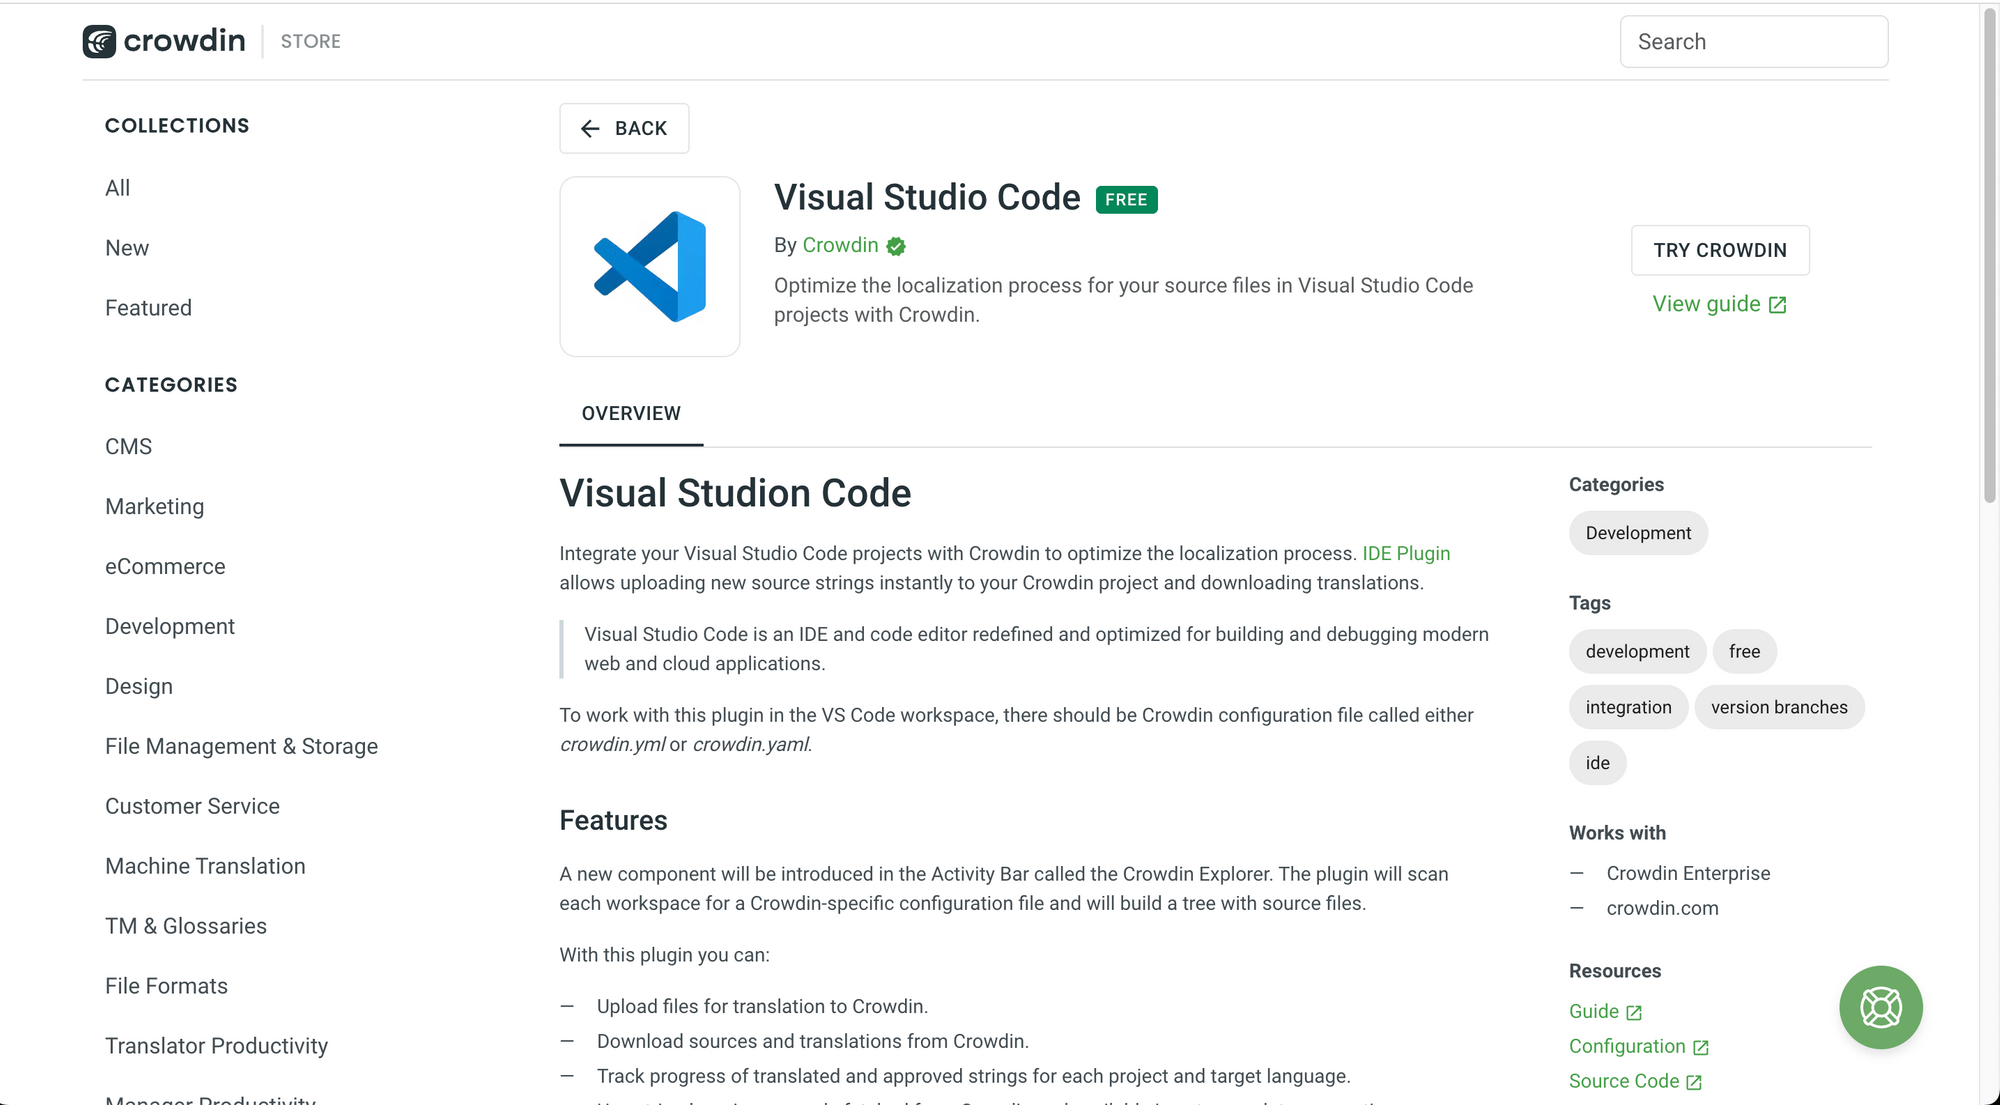 Visual Studio Code Integration.
 The Extensions Marketplace.
You can learn more about this extension on its official documentation in the Visual Studio Code Extensions Marketplace.
Video Captions Translator
If you or your organization need to translate video captions, Crowdin has an integration for that too. It is called Video Captions Translator.
Professional translations for video subtitles. Setup integration once, define your localization workflow and spend less time managing translations.
 Video Captions Translator.
To learn more about YouTube Captions Translation with Crowdin, you can check out this tutorial created by the Crowdin team.
Google Sheets Integration
If you use Google Sheets to manage your localization keys, you can add this integration to your project to map your columns to their corresponding fields on Crowdin, including:
- Key.
- Source Text.
- Target Languages (all project languages).
- Labels.
- Context.
- Translation Maximum Length.
Please note that the Crowdin team mentions that:
It's worth noting that this integration will only sync the first sheet from your Google Sheet document.
 Google Sheets Integration.
To learn more about the Google Sheets Integration, check out this tutorial created by the Crowdin team.
Suggestions Diff Checker
If you have ever asked for a tool that could help your translators and proofreaders compare translations very easily with visual cues, this app is for you.
Crowdin describes Suggestions Diff Checker as:
A great helper for proofreaders and translators that compares two translations and shows the difference between them.
 Suggestions Diff Checker.
Proofreading Diff
Proofreading is a very important task for the localization process. Proofreaders can edit the translations and make sure that they are as accurate as possible.
With the Proofreading Diff report app, you can:
Track and analyze changes made during the proofreading process. This tool can help you provide a thorough feedback to translators about their work.
 Proofreading Diff.
Video Preview
Translating the subtitles of a video without actually watching the video simultaneously can be quite challenging because having the full context of a string is very helpful to translate it accurately.
This is why Crowdin created a translator productivity app called Video Preview. They describe it as:
A handy tool that can be useful when you have video subtitles to translate. It allows you to specify the video URL for each file with subtitles, and enables translators to preview the video while working on the translation.
 Video Preview.
 Video Preview in action. Image taken from the Crowdin Documentation.
Glossary Editor
This is another helpful Crowdin application for managing your project glossaries.
Crowdin mentions that the Glossary Editor:
Allows you to add and change the terms from your glossaries directly in Crowdin Editor.
 Glossary Editor.
Project Duplicator
Have you ever wished that you could use a project as a template for another project and save yourself all the initial set up time?
If you have, then Project Duplicator is exactly what you need:
 Project Duplicator.
With Project Duplicator, you can copy the following settings from a project:
- Source language.
- Quality assurance checks.
- Source strings.
- Translations.
- Translation Memory.
- Notifications.
- Language Mapping.
Unity Integration
If you are a game developer and you work with Unity, this integration is exactly what you need.
With the Unity Integration, you can:
Translate the content within your tables (strings and assets) and download translations into Unity.
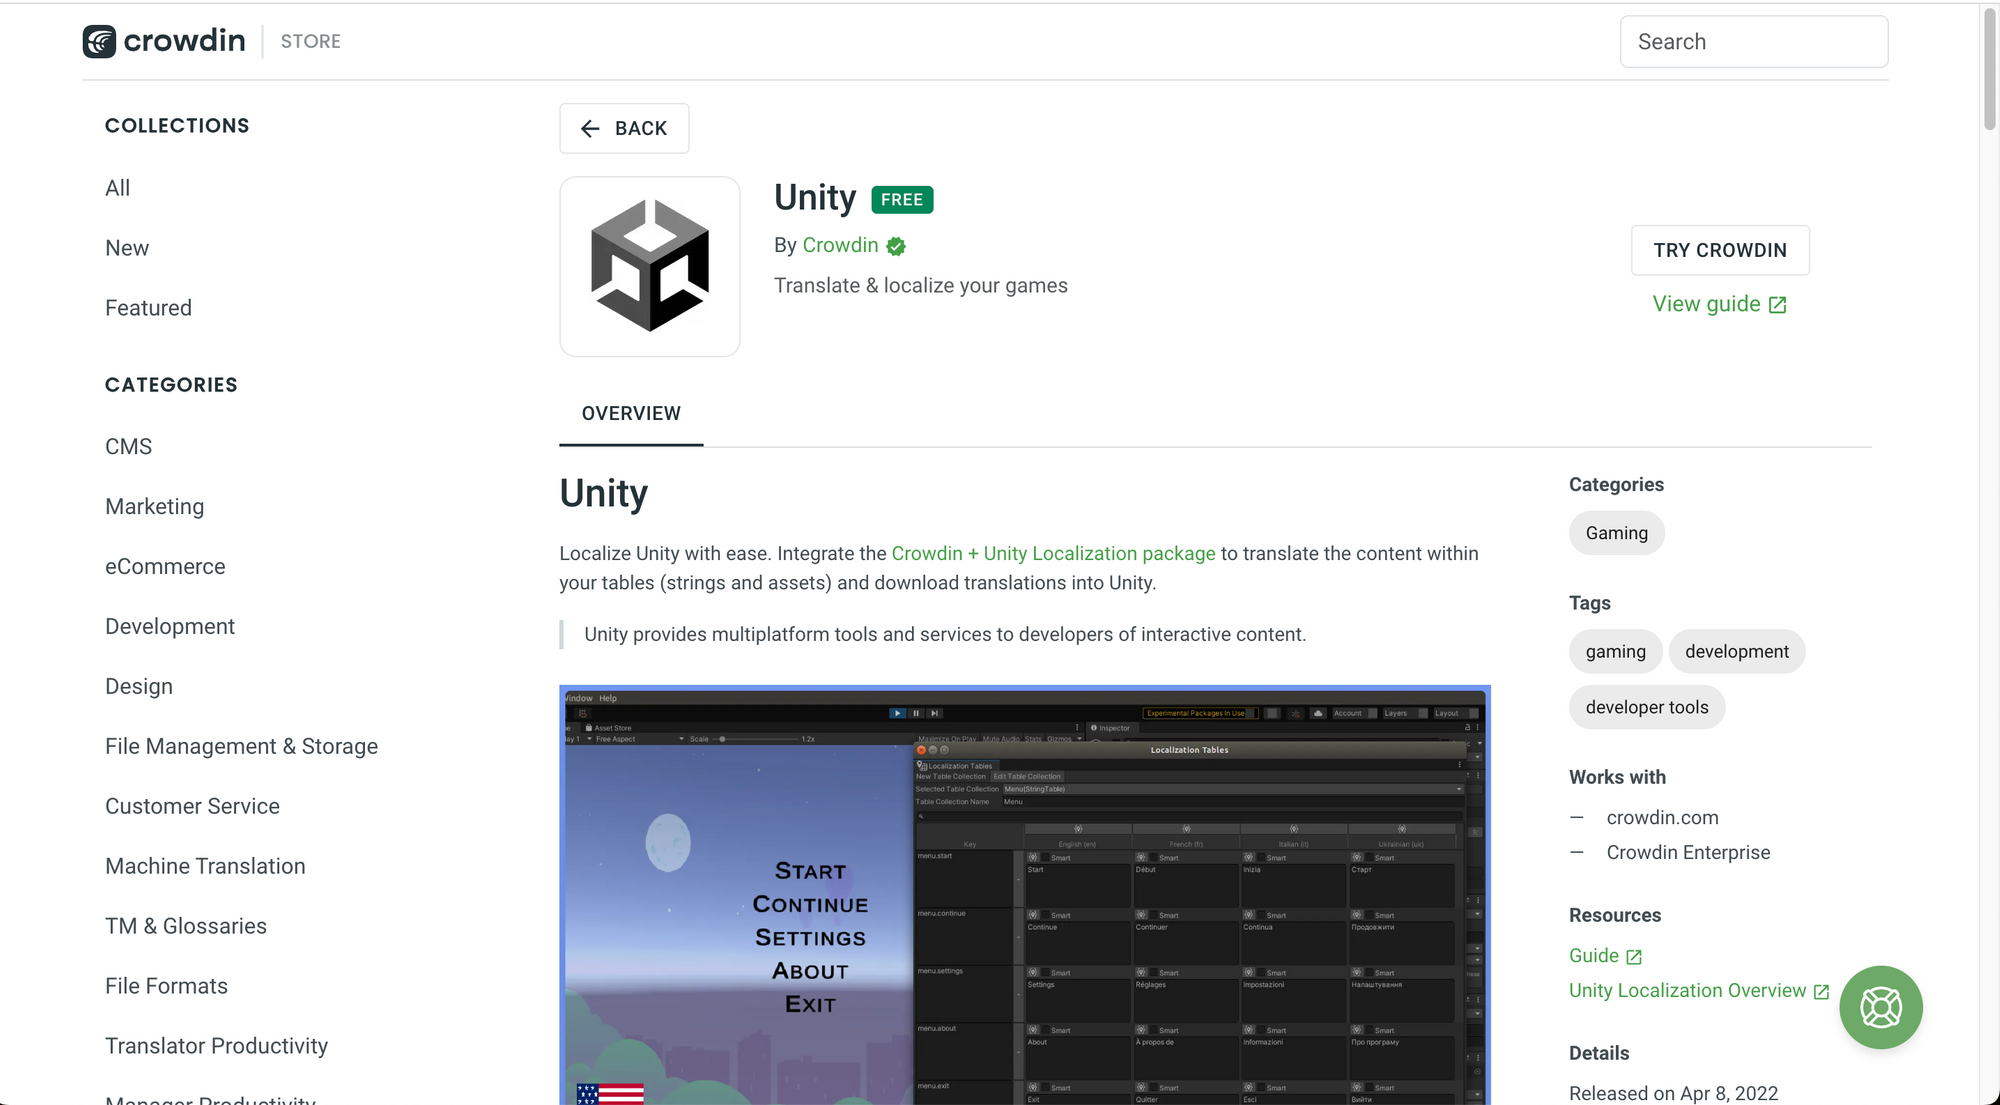 Unity Integration.
This is an official screenshot of the Crowdin Plugin for Unity:
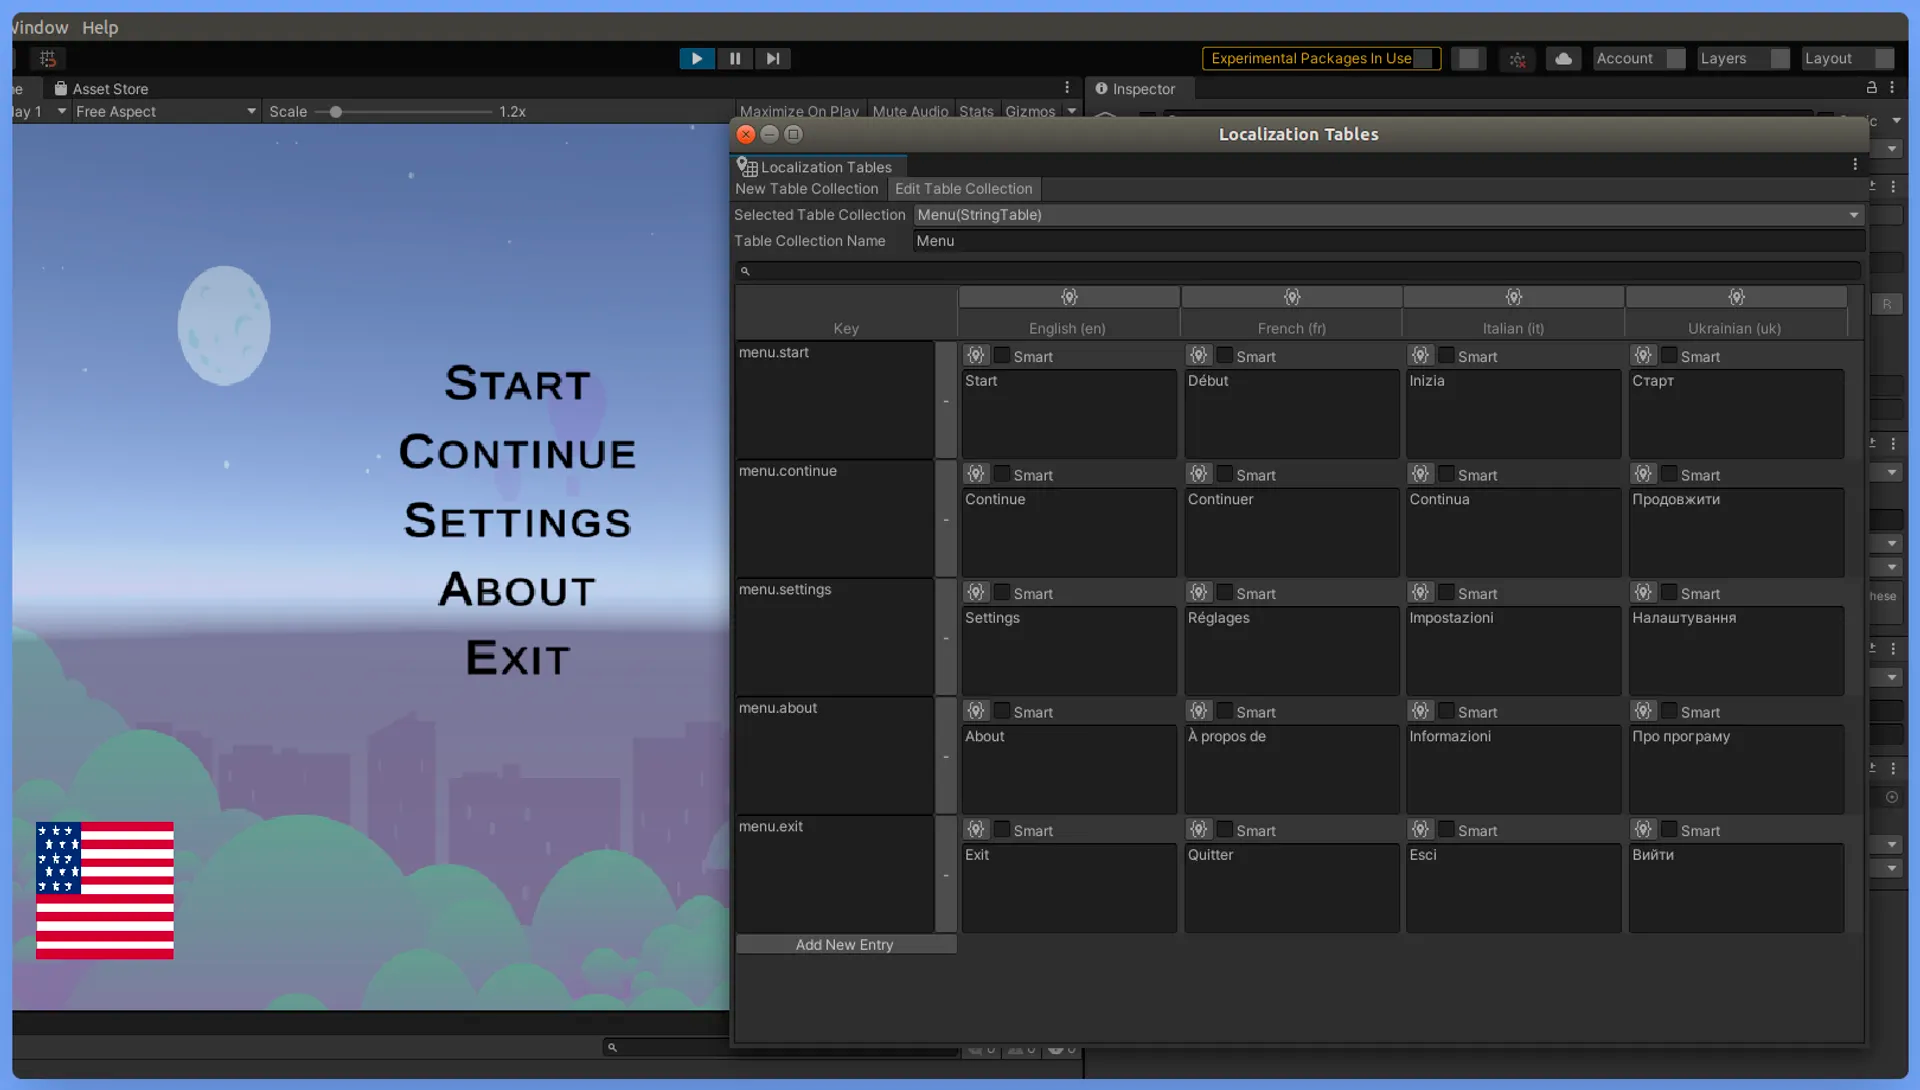 Imagen taken from the Crowdin Documentation.
Is Crowdin slow for everyone or just me?
Yes, this is the official name of a translator productivity tool in Crowdin! 🙂 It is a performance widget for measuring your internet connection.
Crowdin mentions that it can be helpful to:
Know immediately if the slowness you experience is caused by your internet connection or it's a Crowdin performance issue.
 Is Crowdin slow for everyone or just me?
This is an official screenshot of the widget:
 Image taken from the Crowdin Documentation.
Units Converter
You learned that localization is broader than translation. Units are a great example of this.
When you localize a product that includes units of length, area, mass, volume, temperature, speed, and more, you need to have a tool at hand to convert them quickly while you localize your content.
Crowdin mentions that:
The app is especially convenient when localizing for cultures that use different measurement systems.
This is where the Units Converter app can save you a lot of time because you can have it on your Translation Editor and quickly convert units without pausing your localization process to go to another tool.
 Units Converter.
This is an official screenshot of the app:
 _Units Converter app. Image taken from the Crowdin Documentation._
Screenshots Uploader
Visual context is essential for writing high-quality translations.
The Screenshots Uploader app:
Makes it easier for your team to receive visual context.
You can:
- Allow translators to upload screenshots.
- Paste screenshots from your clipboard history without saving them on your device.
- Edit screenshots before uploading them with helpful tools like cropping, zooming in, and so on.
 Screenshots Uploader.
Directory Notifications
The Directory Notifications app is helpful for project owners and managers because Crowdin will:
Send an email notification whenever a directory of files in your Crowdin project gets translated or proofread.
 Directory Notifications.
This is an official screenshot of the app:
 Image taken from the Crowdin Documentation.
Emoji Input for Editor
Emojis are awesome, right? I think we can all agree on that. 😁
Luckily for us, Crowdin has an Emoji Input for the Translation Editor. They describe it as:
A Crowdin Editor emoji list app for easy access with an extensive search functionality.
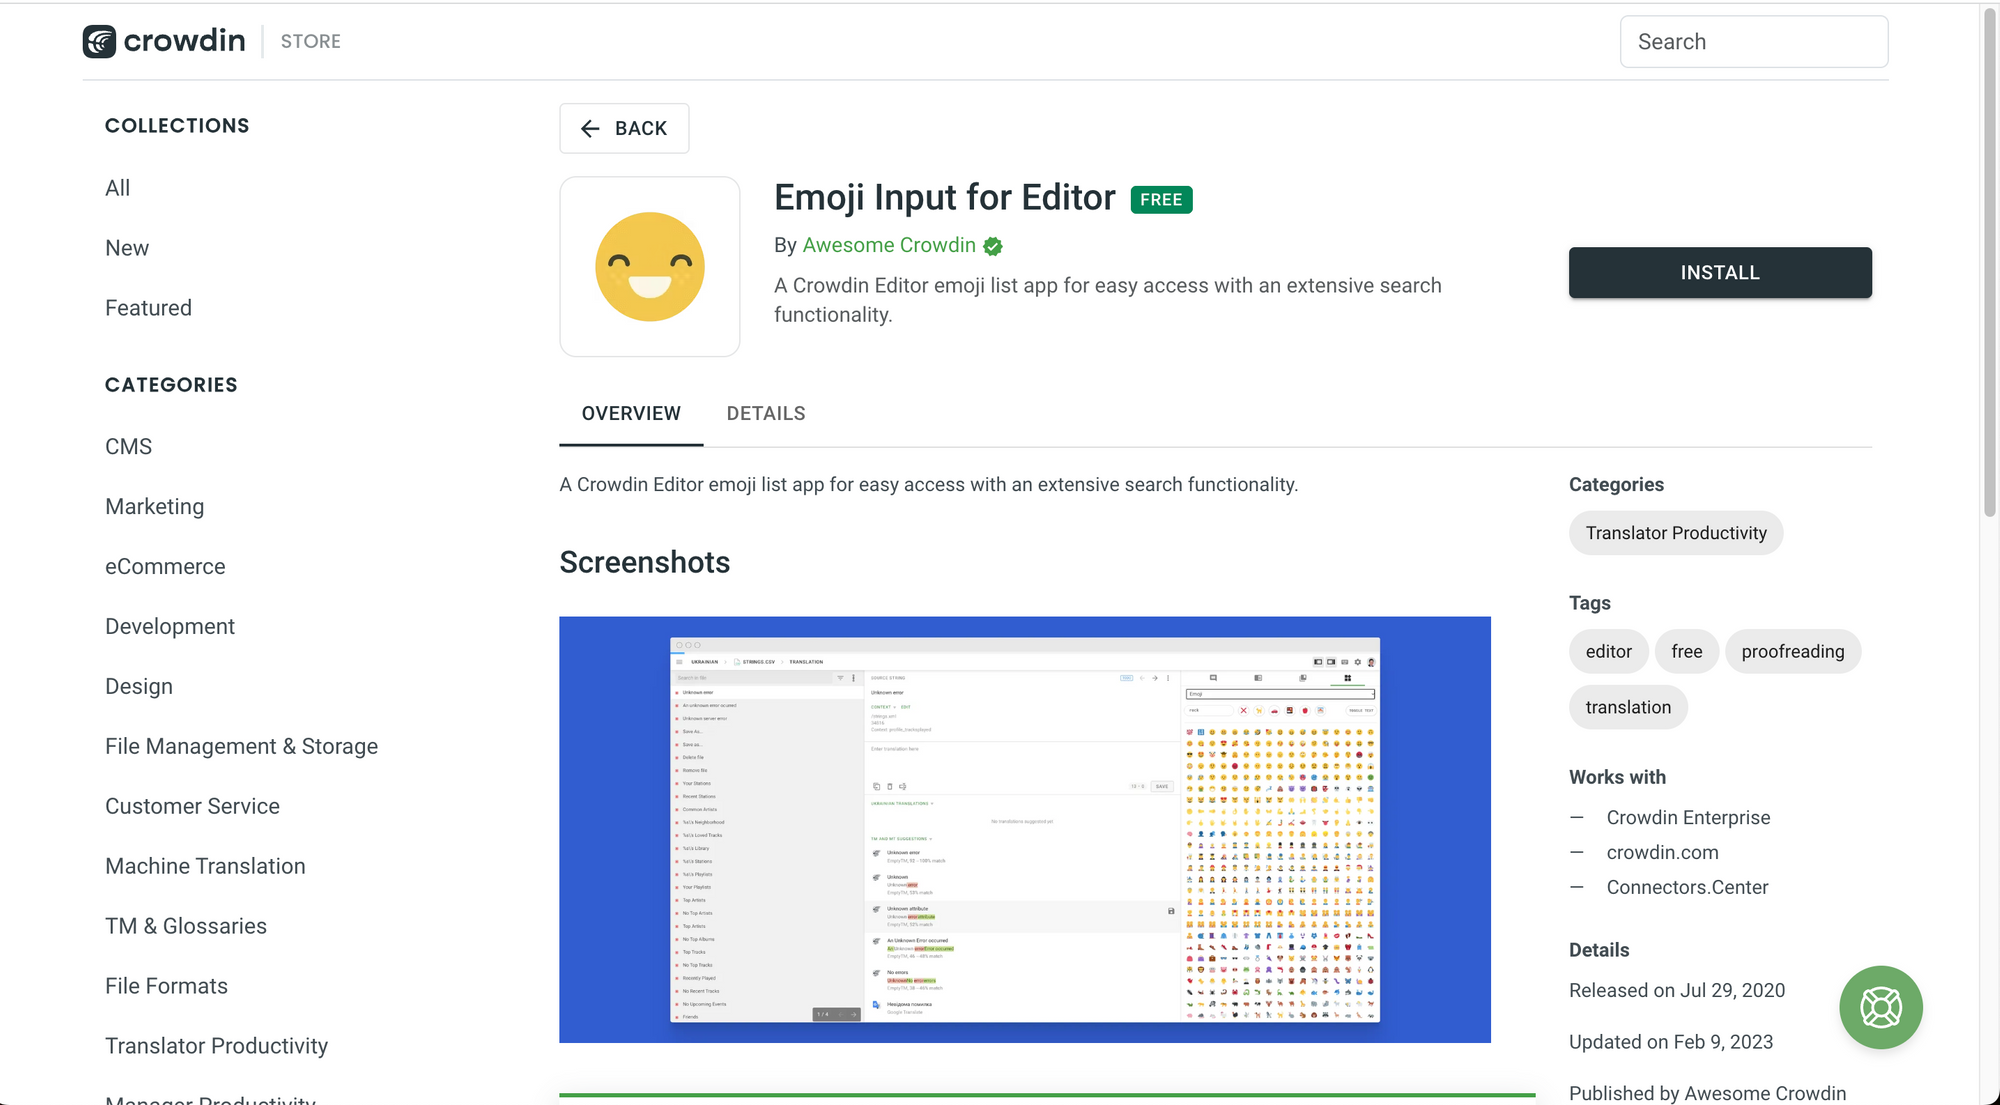 Emoji Input for Editor.
This is an official screenshot of the app:
 Image taken from the Crowdin Documentation.
Emoji Mismatch
And now let's dive into helpful automated Quality Assurance (QA) checks for our project that are available for Enterprise Crowdin accounts.
The first one is Emoji Mismatch, which can help us to find:
Missed, extra or mismatched emoji in the translation.
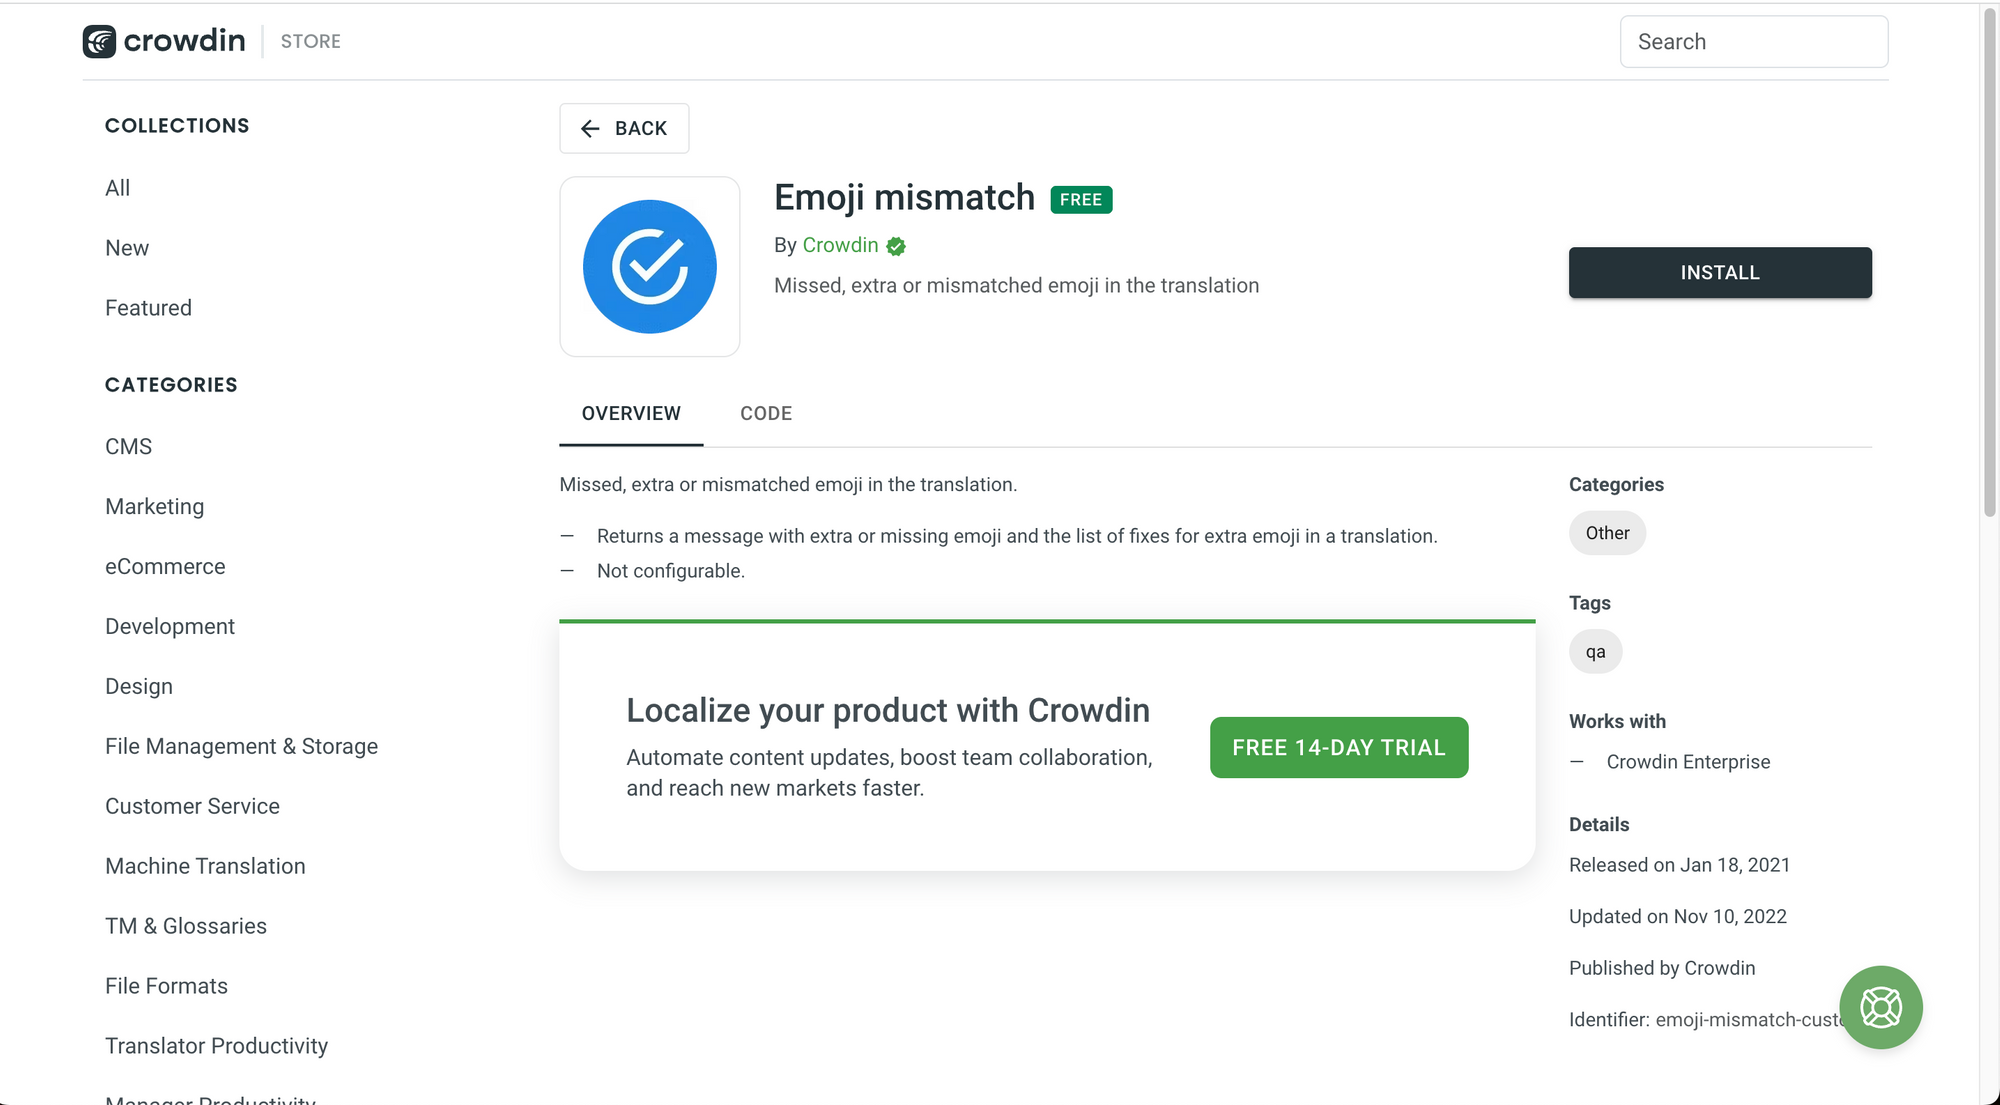 Emoji Mismatch.
Please note that this works with Crowdin Enterprise.
Space After Punctuation
This is a very helpful quality assurance tool that you can add to your project.
Crowdin mentions that Space After Punctuation:
Checks whether the translation contains the spaces after the punctuation symbols.
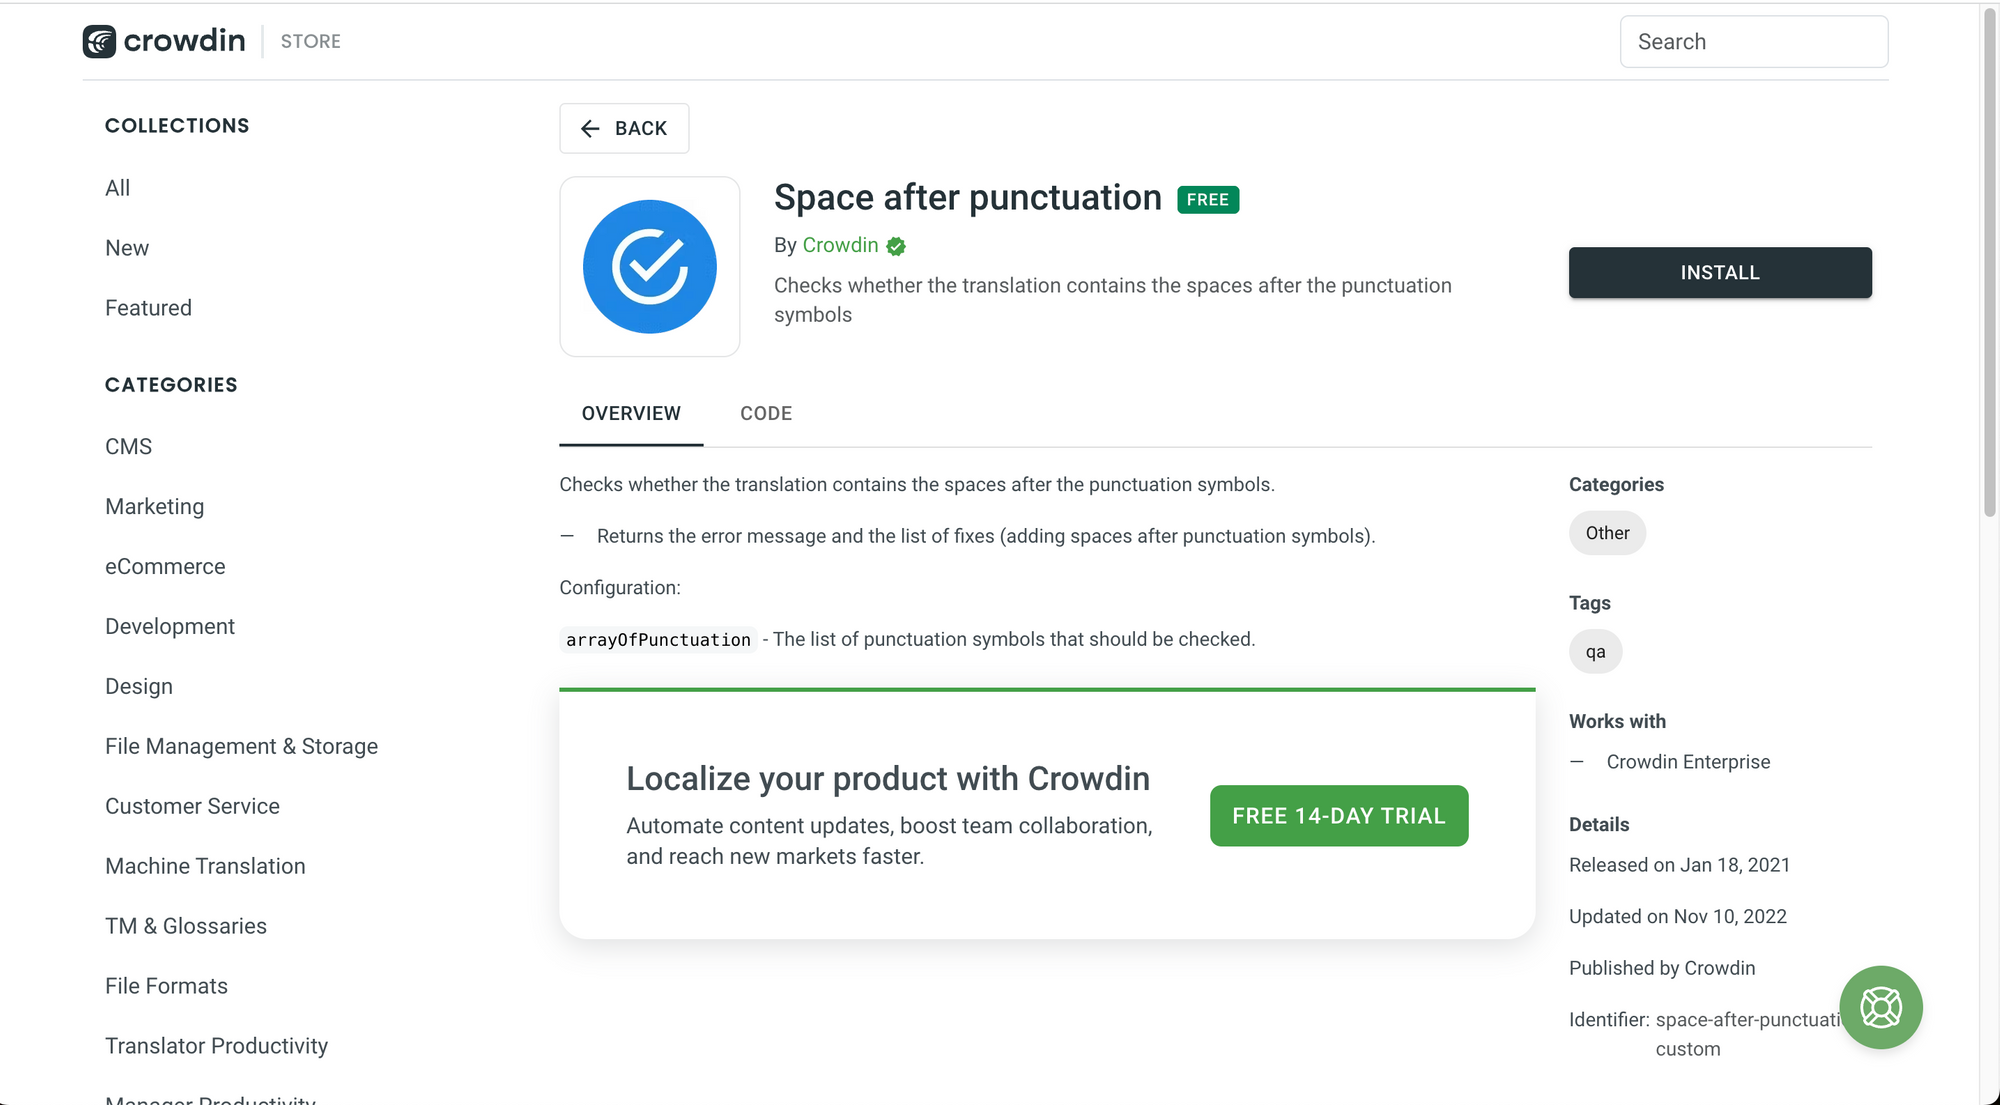 Space After Punctuation.
Please note that this works with Crowdin Enterprise.
URL Localization
This is a quality assurance tool that you can also install for your project. With URL localization, you can check:
Mistakes in URLs in the translation according to QA check configuration.
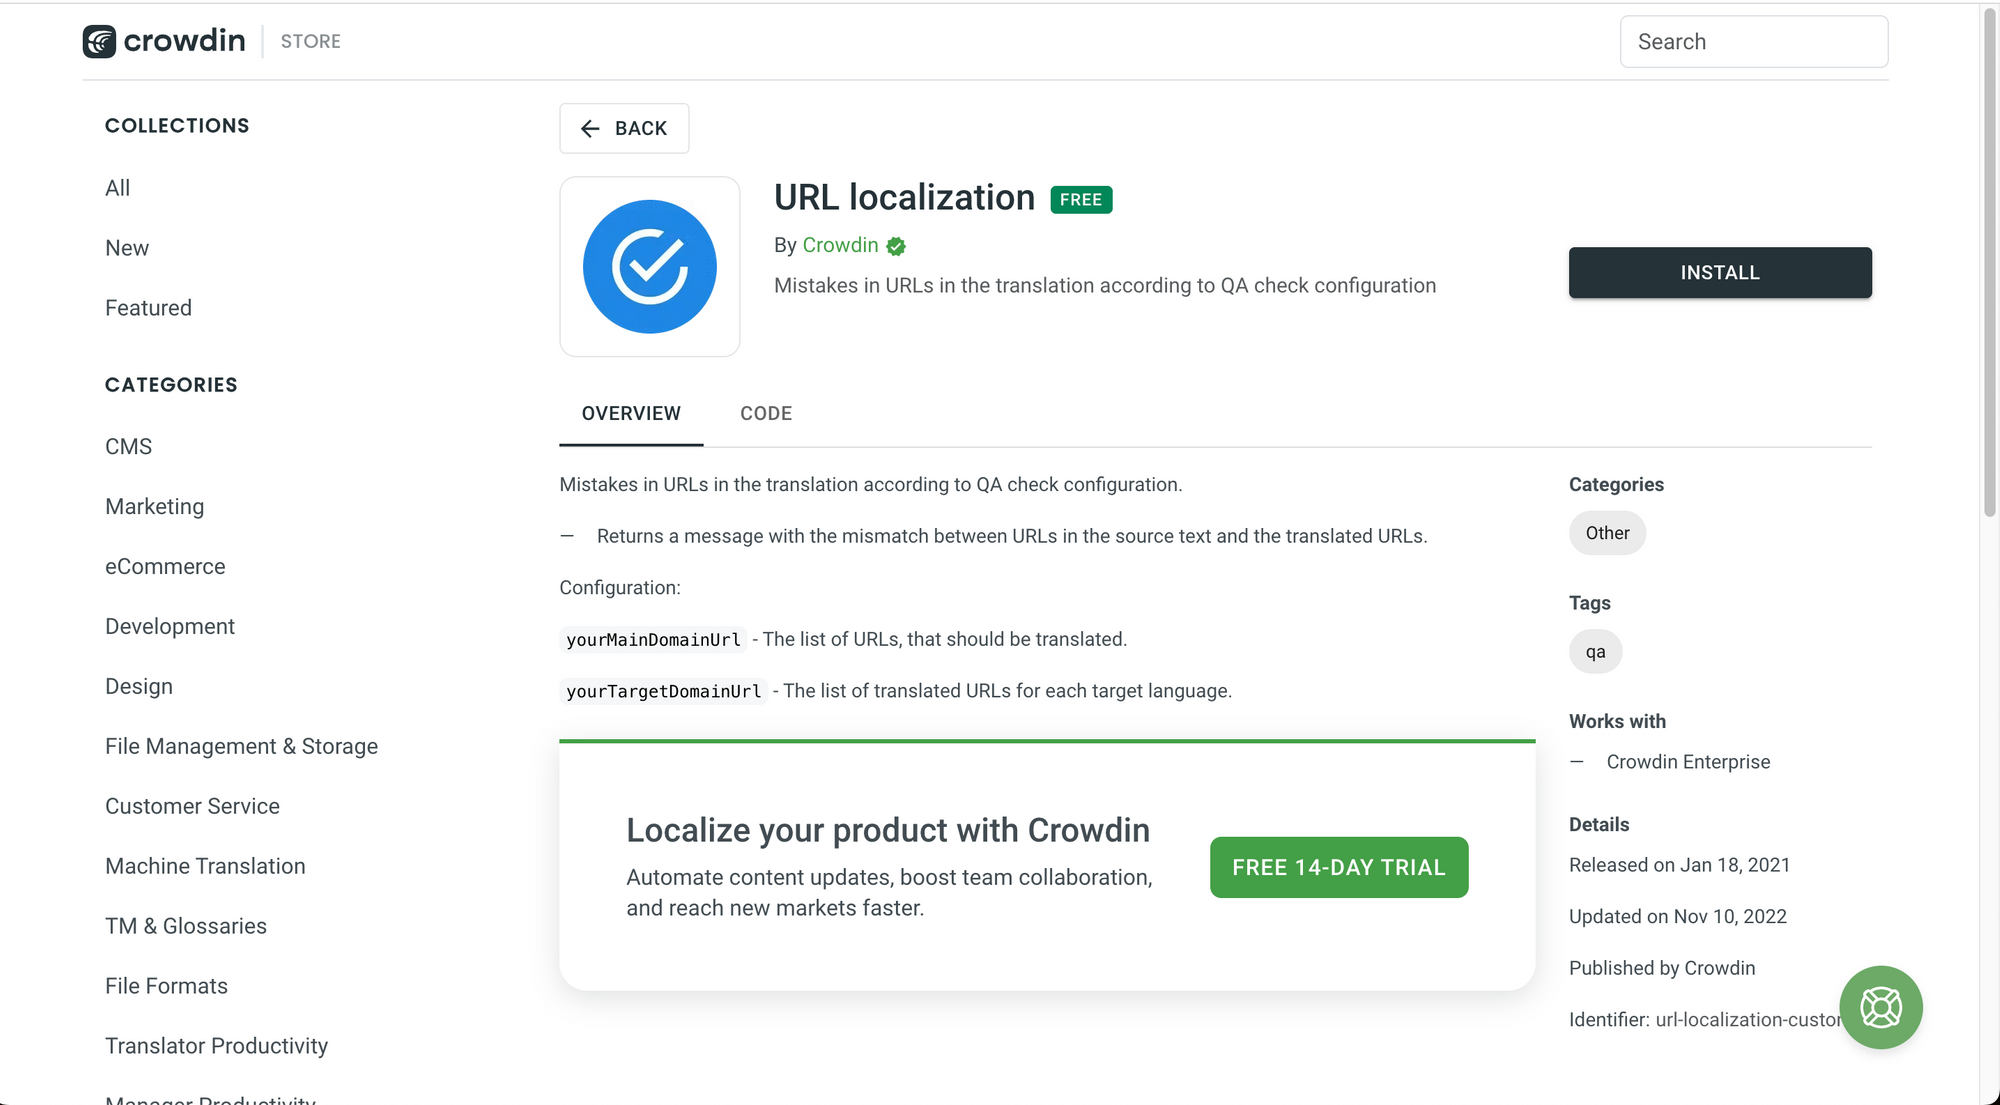 URL Localization.
Please note that this works with Crowdin Enterprise.
Duplicated Words
This is a great tool for the proofreading phase of the localization project. Crowdin mentions that Duplicated Words:
Removes every second repeated word in translation.
 Duplicated words.
Please note that this works with Crowdin Enterprise.
Time Format Consistency
Writing time in a consistent format is also very important when you are localizing a product.
Crowdin mentions that:
This QA check verifies that time formats in the source and translated text match. It checks for time formats in the 24-hour format (HH:MM).
The QA check will give a positive result if the number and format of time instances are consistent between the source and translated text, and a negative result if there is a mismatch.
 Time Format Consistency.
Please note that this works with Crowdin Enterprise.
camelCase Consistency Check
This quality assurance check helps you ensure that product names, brand names, or other names that should be written in camelCase follow the same format in the translation.
Crowdin mentions that it:
Validates that all camelCase words present in the source text are accurately retained in the translated text.
If a camelCase word in the source text is not found in the translated text, the check will fail and notify the translator with a detailed message.
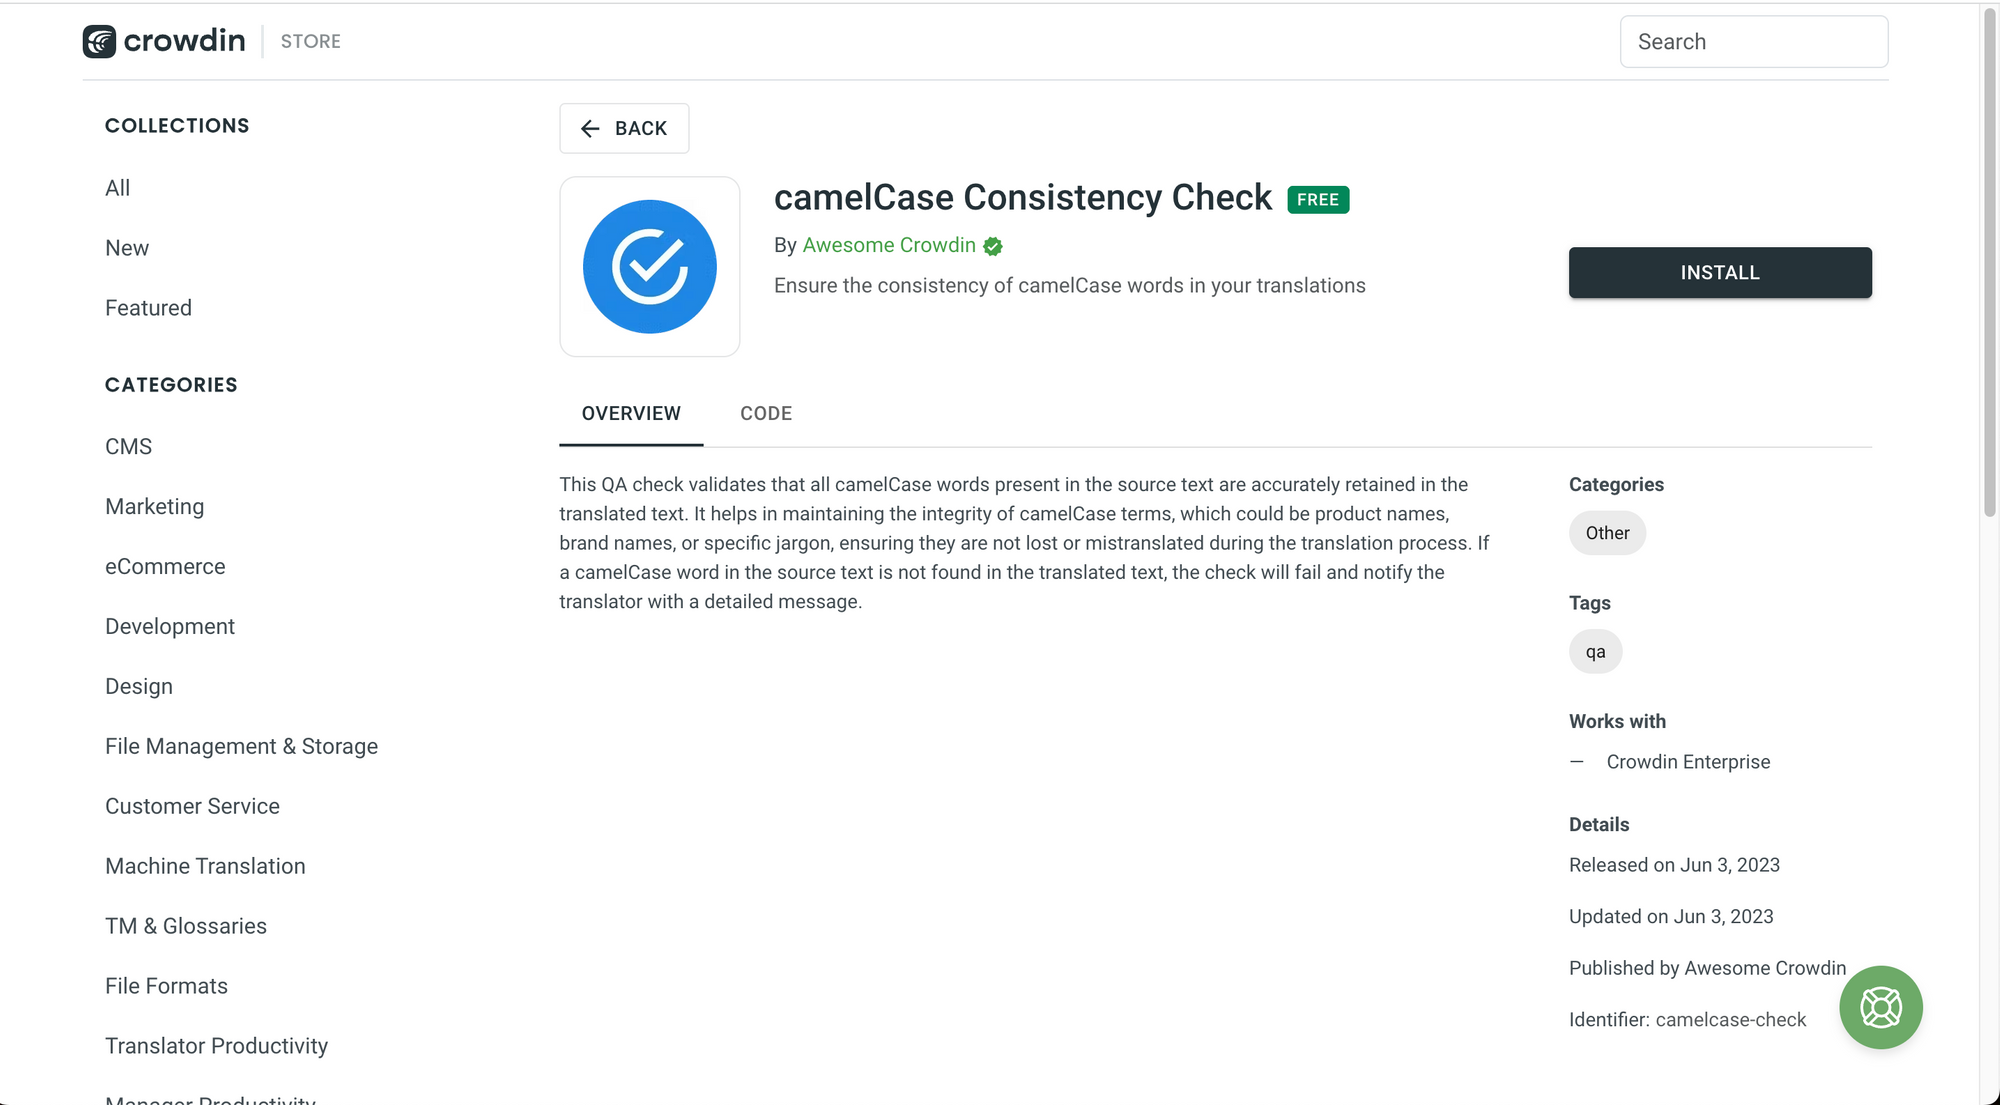 camelCase Consistency Check.
More Apps and Integrations
We have seen many helpful apps and integrations for your localization process. They can optimize your team's productivity and help you to provide high-quality translations.
But this is just the start. Crowdin has more than 600 apps and integrations for your project. You can find a full list on the Crowdin Store.
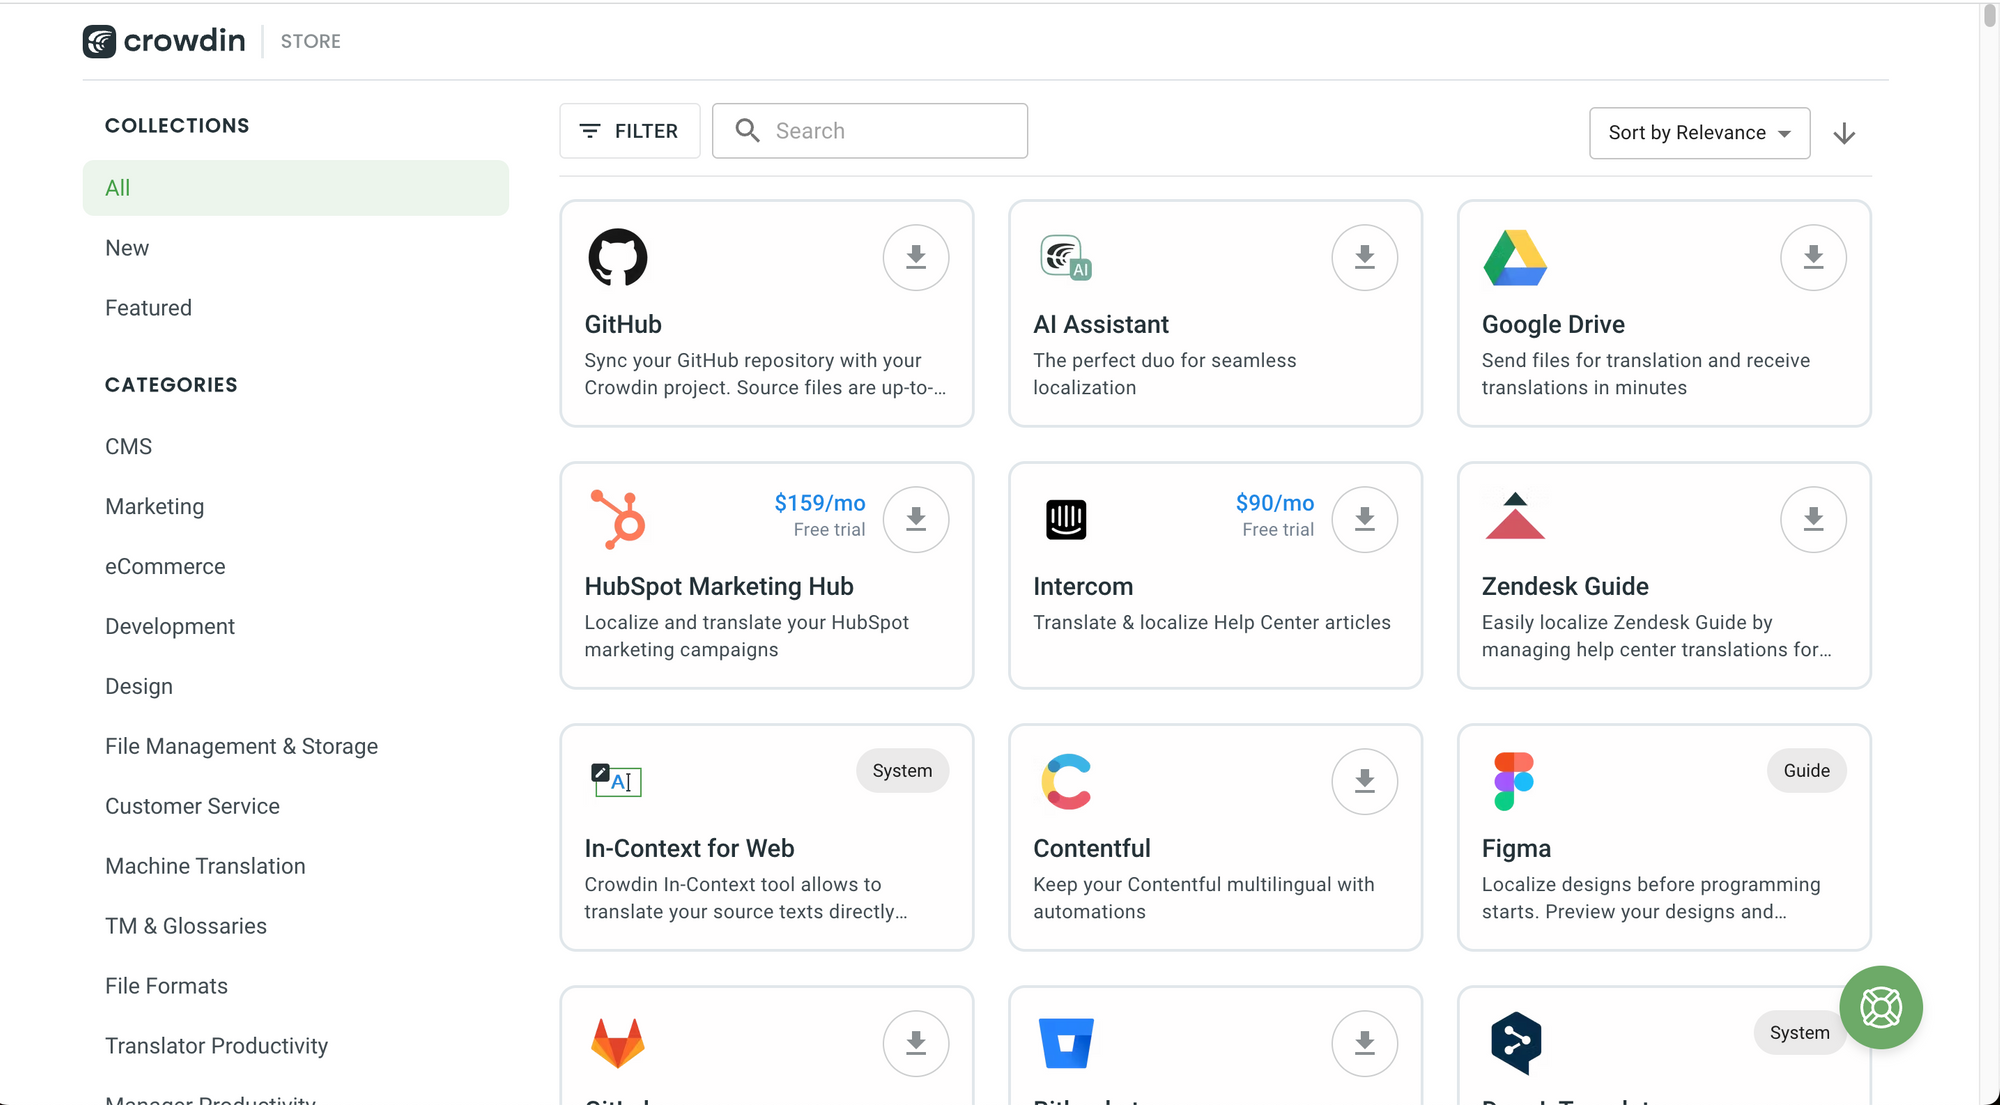 The Crowdin Store.
If you click on them, you will find more details about what they do, how they do it, and you may even find the source code that implements the functionality.
You can also sort them by relevance, name, or date.
The tools that you need to be more productive and deliver high-quality translations to your users are just one click away.
🔹 How to Translate a Website on Crowdin
Great work! We've reached a very important part of the book, how to translate a website on Crowdin.
How to Translate a Website on Crowdin
There are three main approaches for translating a website on Crowdin:
- Integrations.
- JS Proxy Translator.
- Crowdin In-context.
Since there are many technologies, frameworks, and libraries for web development and the internationalization process is very technology-specific, it is recommended to analyze all the options available and find the one that works best for your particular use case.
Integrations
The web development world is incredibly diverse. We can create and host websites on a variety of services and develop them using different tools.
To support this variety of tools and services, Crowdin has developed many integrations with external platforms to import your text and send your translations to the Content Management System (CMS) of your choice.
 Translate a Website on Crowdin.
For example, you can translate a website from WordPress, Webflow, Joomla, and other similar tools.
According to Crowdin:
With Crowdin, you are not confined to any specific website building and hosting services.
We do not only have 15 apps, including Wix, Ghost, Squarespace and Webflow, that provide you with the best way to translate a website, but a separate JS Proxy technology that will help you with the localization of any other website.
Essentially, these technologies:
- Scan your web pages.
- Detect the content that can be translated (strings).
- Extract them in a format that can be localized.
- Synchronize the translations with your original project.
You just need to add a JavaScript snippet to your code and you will be ready to start translating.
These are some of the apps that you can install to start translating your website on various external services:
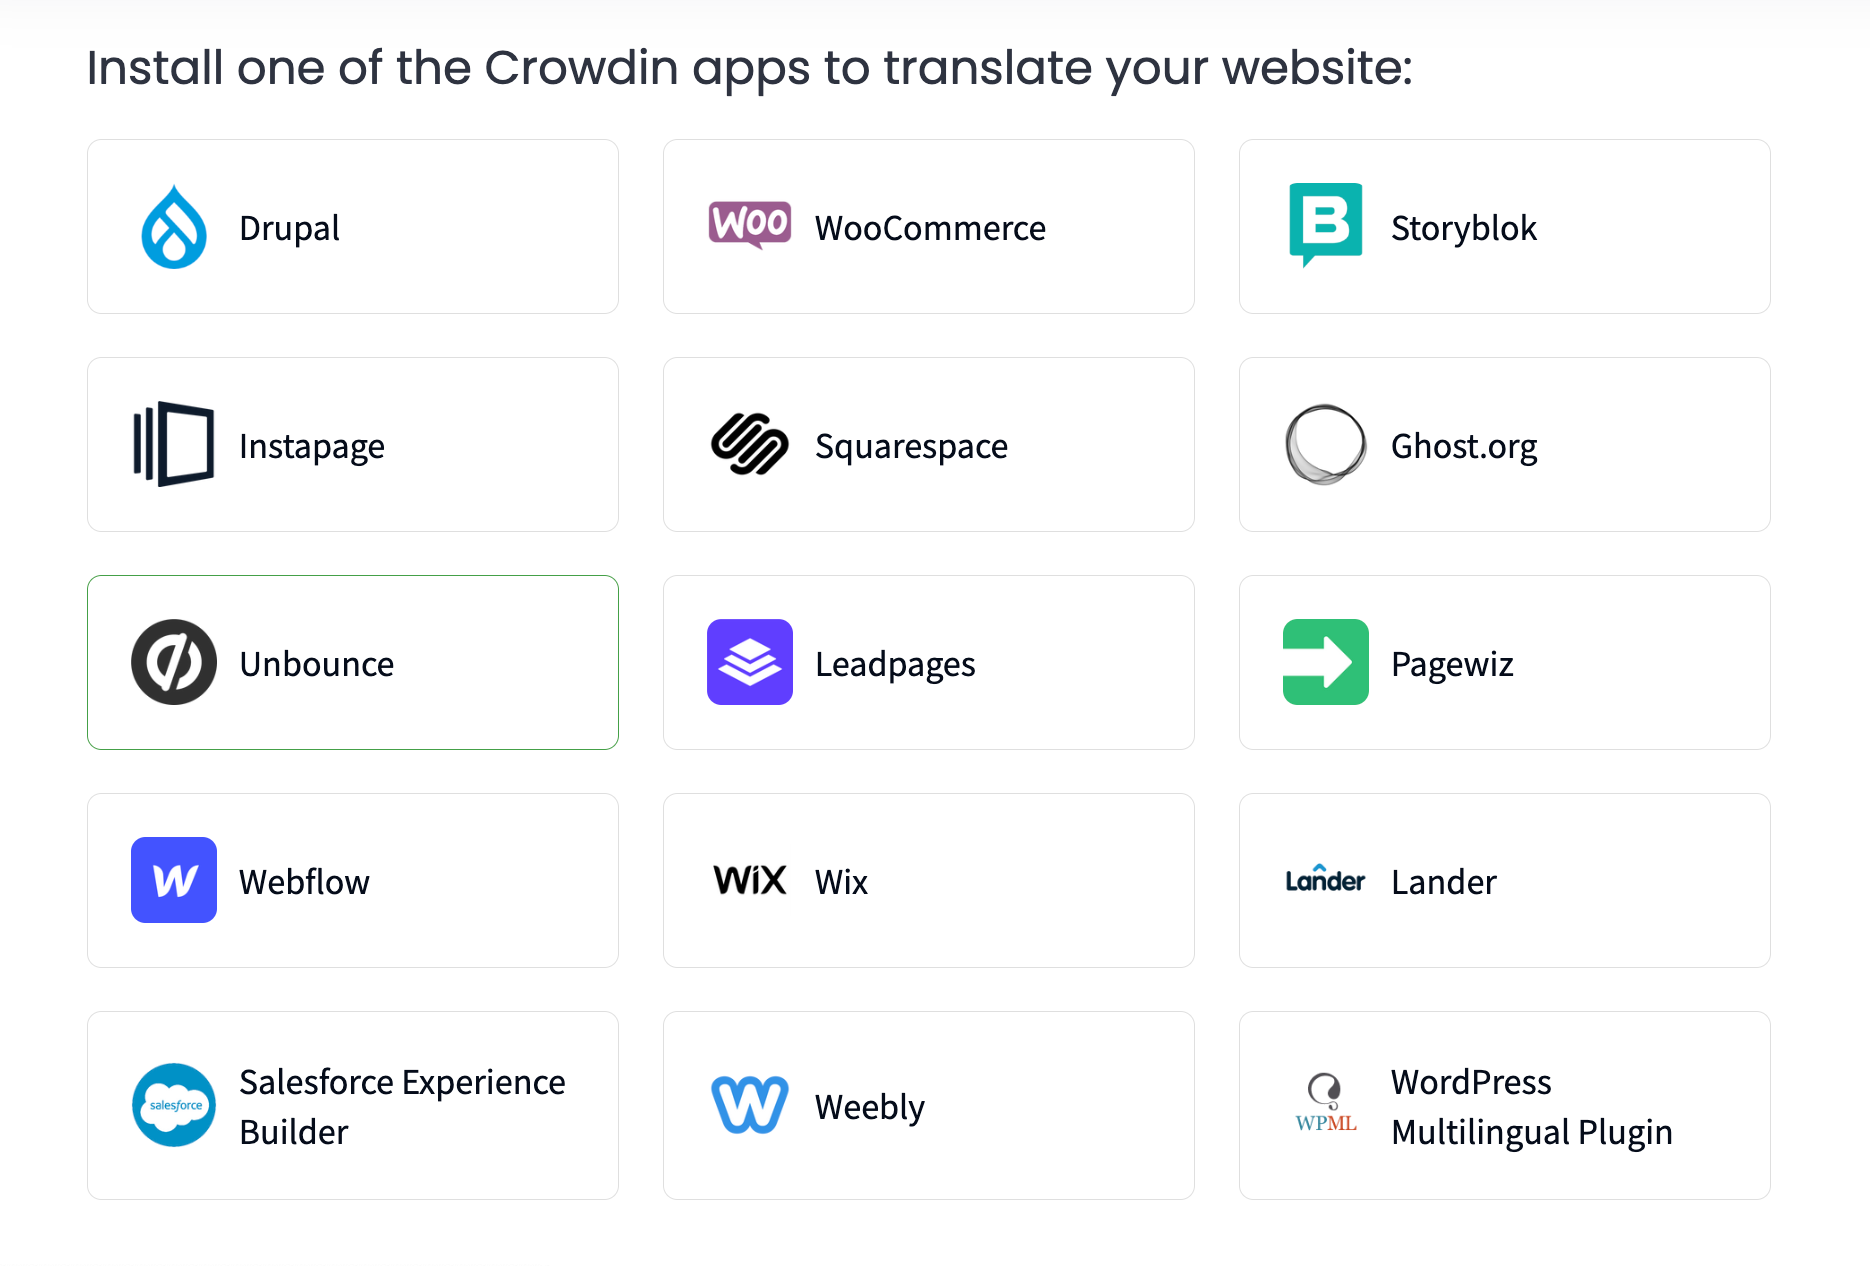 A list of Crowdin apps that you can install to translate your website.
If host your repository on GitHub or you use GitHub pages, you can also use Crowdin's GitHub Integration and the GitHub Crowdin Action to synchronize your website files and translations automatically.
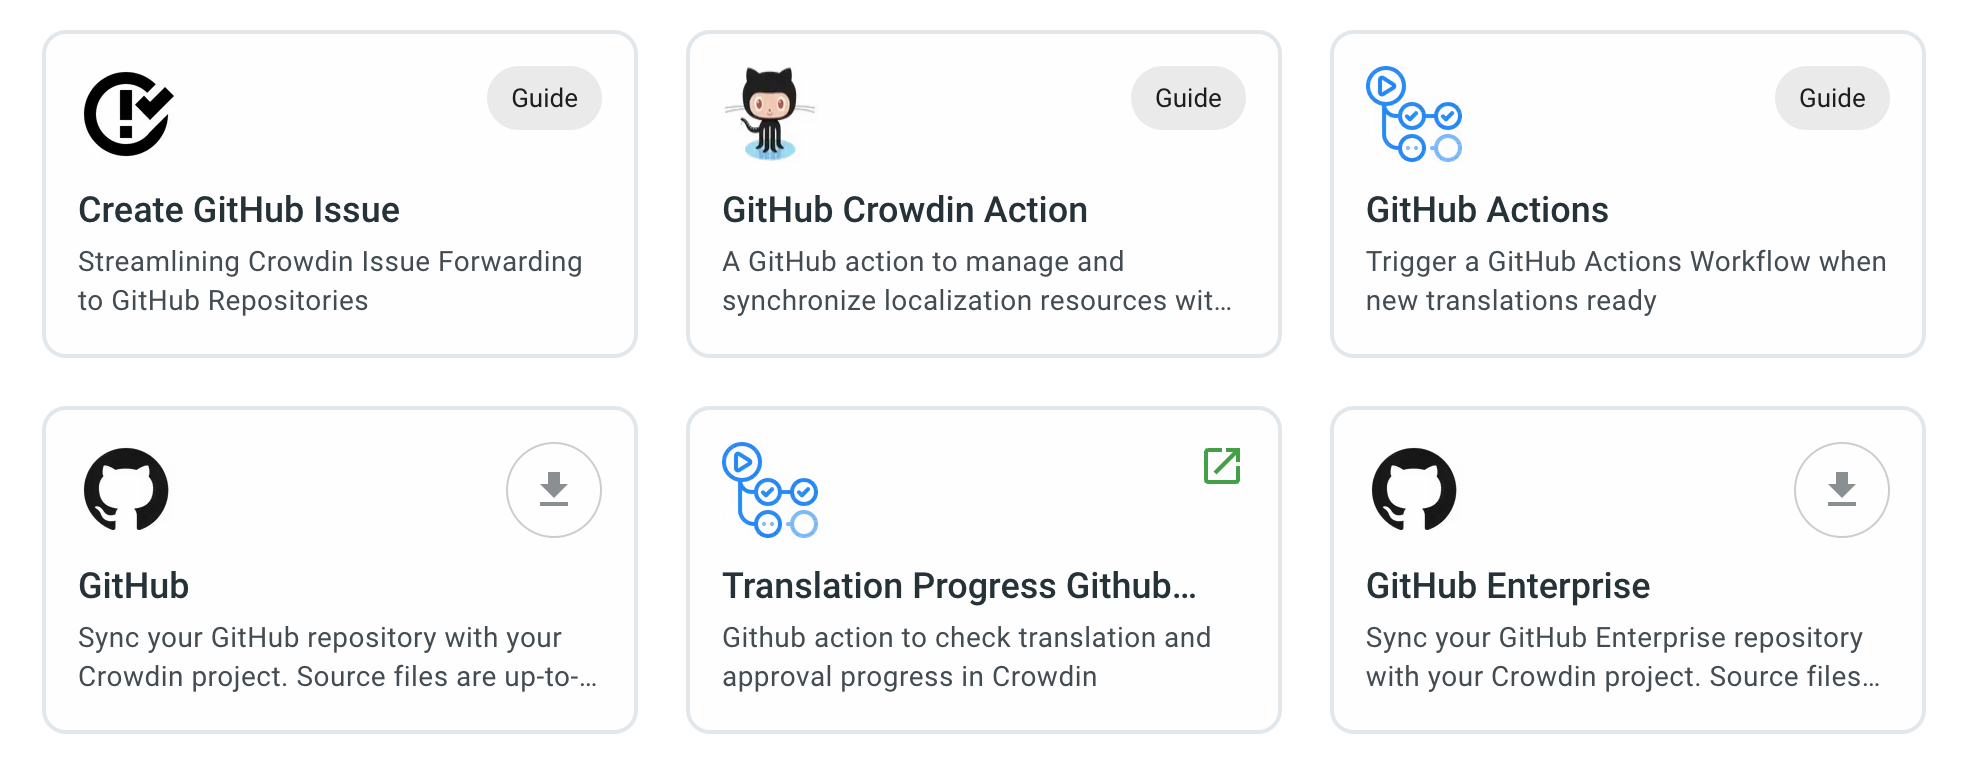 GitHub Integrations.
JS Proxy Translator
Integrations are very helpful, but Crowdin also has an option that can help you with the localization of any website, irrespective of the service where it is hosted.
This approach to website localization on Crowdin is called JS Proxy Translator.
Crowdin mentions that with this proxy, you can:
- Synchronize your sources and translated content.
- Localize your website with minimum effort.
- Extract source text without any coding.
- Translate meta titles and description to be SEO-friendly.
- Schedule when to synchronize your translations.
 JS Proxy Translator.
Here we have two official screenshots provided by the Crowdin team that shows the steps required to configure the JS Proxy Translator.
The first step is to import your website content. You just need to enter your site URL and specify if you would like to sync the source files manually or daily by importing them automatically once a day.
 JS Proxy Translator (Part 1). Image taken from the Crowdin documentation.
Then, after your source text is translated, you can publish the translations to your website.
 JS Proxy Translator (Part 2). Image taken from the Crowdin documentation.
The Crowdin team does mention that:
You need to publish all content on your website before synchronizing it to your project for translation.
To learn more about how to translate a website with a JS Proxy on Crowdin, check out this tutorial created by the Crowdin team.
In-Context for Web
The third approach to website localization on Crowdin is to translate the text directly within the website or web application using Crowdin In-Context.
The Crowdin team mentions that:
Crowdin In-Context tool allows to translate texts directly within the actual web application. In such a way, the best translation quality is maintained.
In-Context localization is tied up with the actual project created in Crowdin, under which translatable files are stored.
This tool makes all the texts in the web app editable. Moreover, the translation process is real-time visible. Even the dynamic part of the application and strings that contain placeholders can be translated this way.
 Crowdin In-Context.
You can see it in action here, in the official Crowdin demo:
 Crowdin In-Context Demo.
If you log in to your Crowdin account, you will see this:
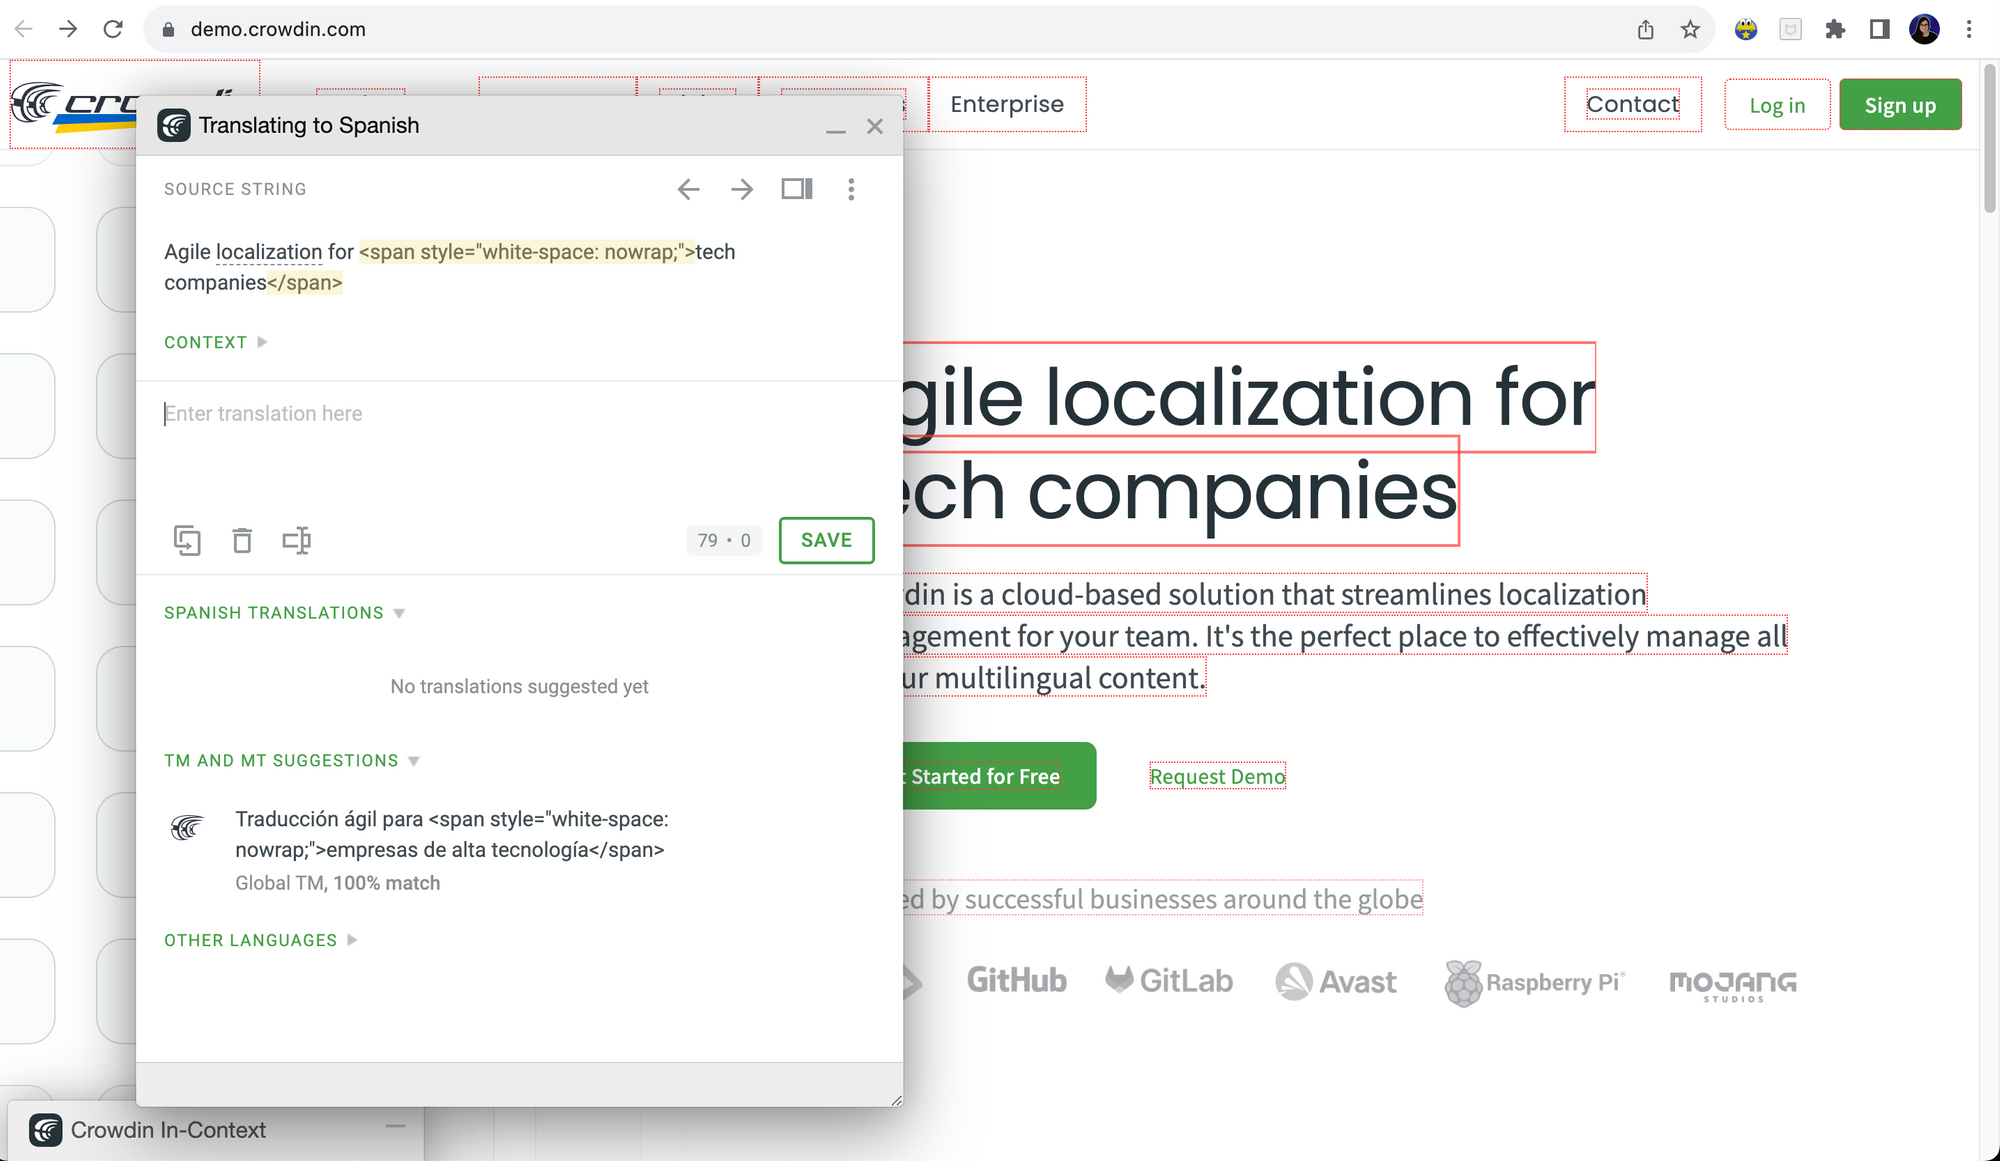 Crowdin In-Context Demo.
You will be able to click on each string on the website to translate it and when you save the translations, they will be synchronized with your Crowdin project.
💡 Tip: To learn more about Crowdin In-Context, check out this tutorial created by the Crowdin team.
These are three different approaches for translating a website on Crowdin. Choosing the right one can make all the difference for your localization team.
Now that you know more about the most important Crowdin features, let's dive into freeCodeCamp's translation effort as a real-world example of a worldwide localization project powered by contributions from an amazing community of volunteers.
🔹 freeCodeCamp's Translation Effort
🎉 Awesome. Congratulations on reaching this part of the book. This proves that you are very interested in learning these skills.
Now that you know how to translate your project on Crowdin, let's see how freeCodeCamp's amazing community is translating our content into many world languages.
We'll see this from a potential contributor's point of view, emphasizing how to translate our content on Crowdin.
freeCodeCamp's Contributing Guidelines
If you are a contributor who is interested in joining the translation effort, where should you start?
You should start by reading our Contributing Guidelines. These are a set of articles that you can always refer to if you have any questions on how to join or how to start translating and proofreading.
There, you will find:
- A written overview of Crowdin.
- How to get started.
- How to select a project and a file.
- How to translate the projects that we have on Crowdin.
- How to proofread translations.
- Translation best practices, and more!
In this article, you will find information on how to prepare yourself for contributions.
We recommend:
- Reading this announcement written by Quincy Larson, the founder of freeCodeCamp.
- Joining the community forum.
- Joining our Discord chat server.
Our documentation also mentions that working with a small team can be super helpful to stay motivated:
Crowdin and other tools make it easy to contribute translations, but it's still a lot of work.
We want you to enjoy contributing and not burn out or lose interest.
A small group of 4-5 individuals is a good size to start your niche for your world language. You can then recruit even more friends to join the team.
Currently, we have over 30 of the most widely spoken languages enabled on our Crowdin project.
Some of them are deployed on the live version of freeCodeCamp. You just need to select them from the dropdown menu to see a new language automatically.
If you do not see your languages listed, the documentation also mentions that:
If you would like us to include a new world language, we recommend getting your friends excited about this.
Once you have a small group of people (at least 4-5) interested and committed, we can hop on a call. We will explain all the details and walk you through some of the tools and processes.
Once you have finished reading this part of the contributing guidelines, you can start to contribute.
First, let's take a look at the different roles that you can have as a freeCodeCamp contributor.
Roles for the freeCodeCamp Localization Process
You can contribute to freeCodeCamp's translation effort as a translator or proofreader.
Translators help us to translate curriculum files, documentation, and elements of freeCodeCamp's user interface like buttons and labels.
Proofreaders make sure that the translations are consistent, uniform in tone, and free from common issues such as typos.
Language Leads
Our language leads will be very happy to welcome you to our translation effort:
- Farhan Hasin Chowdhury (@frhnhsin) is leading the Bengali community.
- Miya Liu (@miyaliu666) is leading the Chinese community.
- Dario Di Cillo (@_DarioDC) is leading the Italian community.
- Yoko Matsuda (@_sidemt) is leading the Japanese community.
- Alison Yoon (@aliyooncreative) is leading the Korean community.
- Daniel Rosa (@Daniel__Rosa) is leading the Portuguese community.
- Nielda Karla Gonçalves de Melo (@NieldaKarla) is leading the Portuguese community.
- Rafael Hernandez (@RafaelDavisH) is leading the Spanish community and the localization process.
- Estefania Cassingena Navone (@EstefaniaCassN) is leading the Spanish YouTube channel.
- Hillary Nyakundi (@larymak1) is leading the Swahili community.
- Anastasiia Buievych (@anisiangel) is leading the Ukrainian community.
- Zaira Hira (@hira_zaira) is leading the Urdu community.
freeCodeCamp on Crowdin
Just like I mentioned before, Crowdin is the translation platform we use. It is a localization management platform where individuals, teams, and organizations can localize their resources efficiently.
To access freeCodeCamp's projects on Crowdin:
Go to translate.freecodecamp.org and you will see the dashboard with the projects that we are currently focused on:
 freeCodeCamp.org on Crowdin.
We have three main projects:
We also have other projects on Crowdin such as News UI, Other Courses, and Subtitles (Chinese).
How to Choose a Project and a Language
Once you're on our translation platform, you will need to choose a project. Let's say that you choose to translate the coding curriculum.
You just need to click on the project:
 Click on the project you would like to contribute work.
Once you click on the project, you will be taken to a list of available languages for translation.
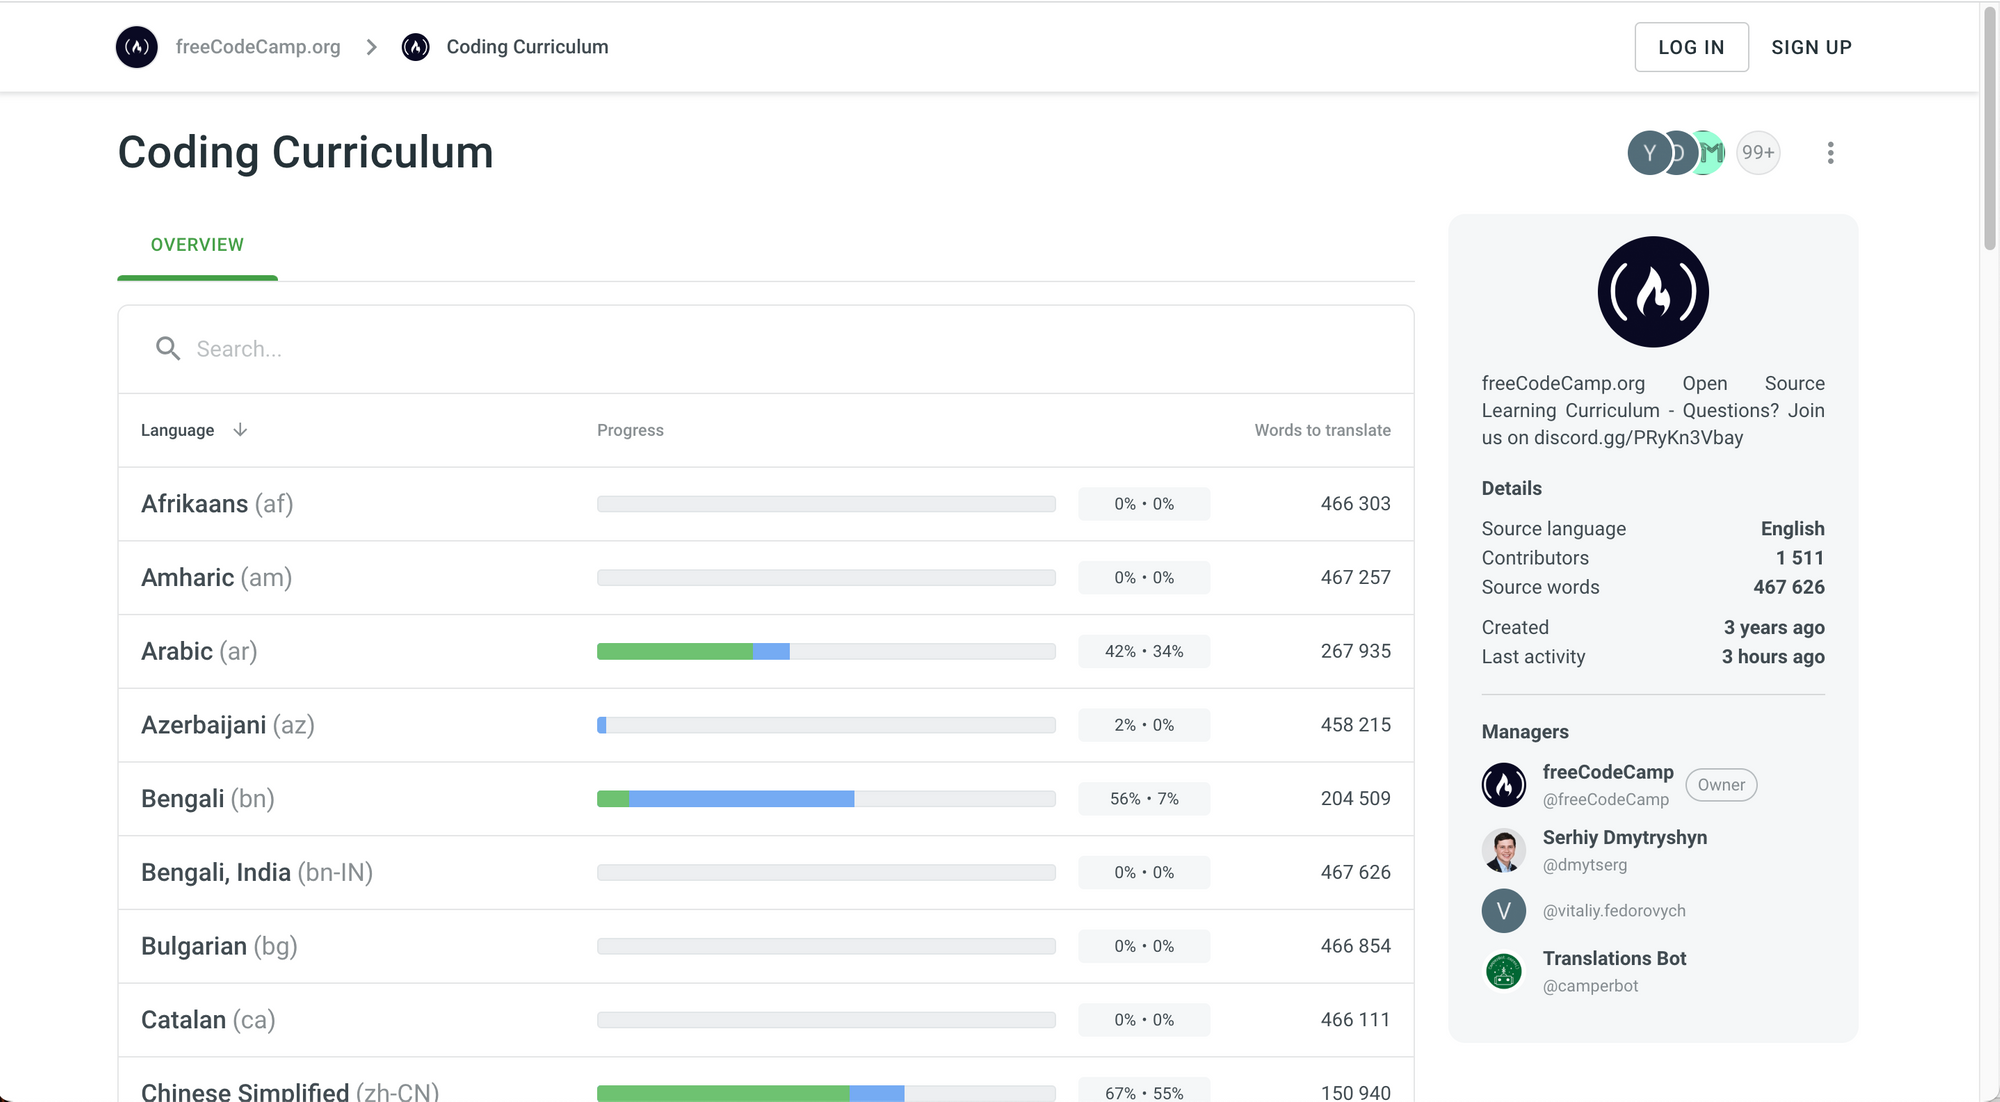 List of available languages for the Coding Curriculum project.
For each language, you will see:

- Its name.
- Its language code.
- A bar with two possible colors. Blue represents the translation progress and green represents the proofreading progress.
- You can also see their corresponding percentages to the right.
- The last number to the right represents the number of words to translate.
You will also find an information panel on the right with:
- A brief description of the project.
- The source language (English).
- The number of contributors for that project.
- How many source words exist in the project.
- When the project was created and when it was last active.
Check out the information on the right (the gray panel).
Now it's time to choose a language.
If you click on the language, you will be taken to the project structure with all the files and folder available for translation.
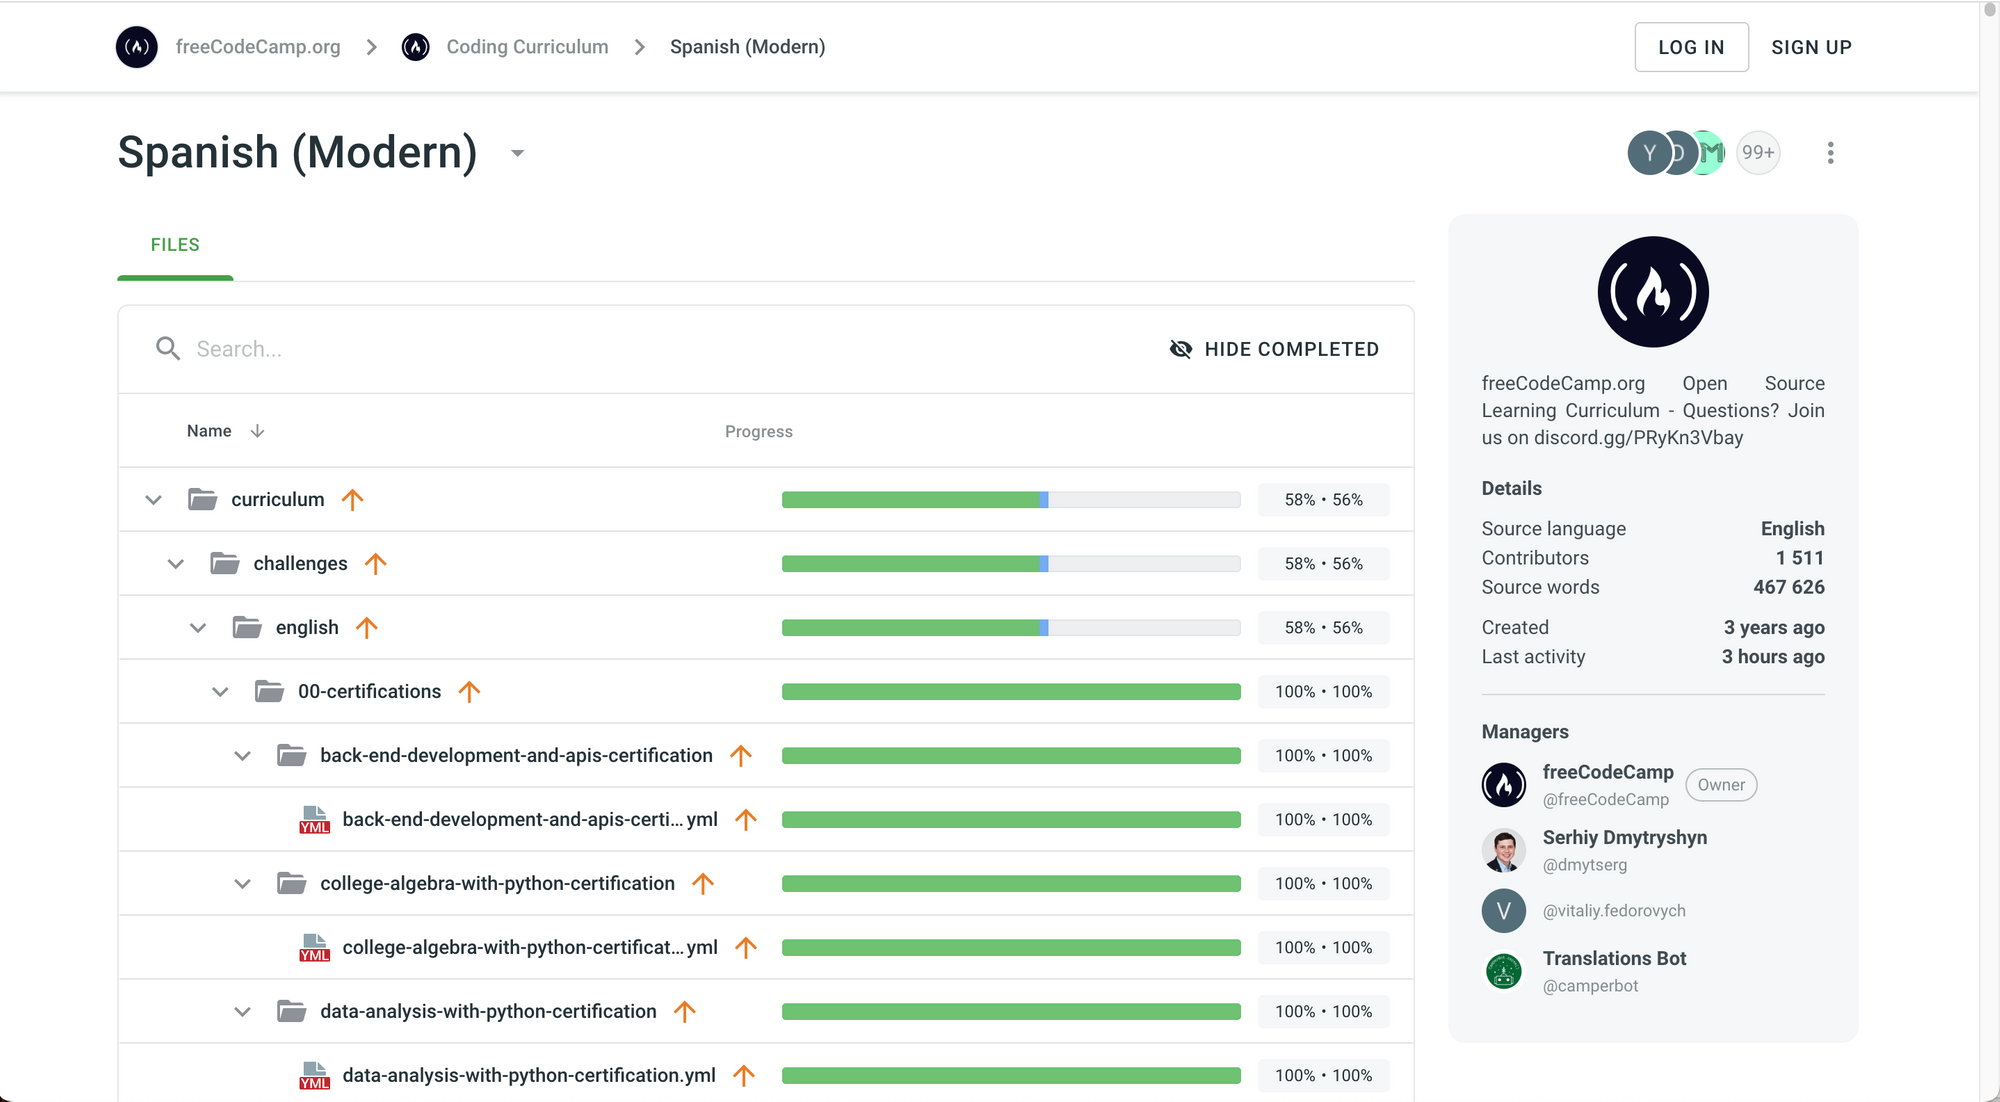 The Coding Curriculum project structure for Spanish (Modern).
How to Select a File
To enter the Translation Editor and start translating, just click on the name of a file that needs translation.
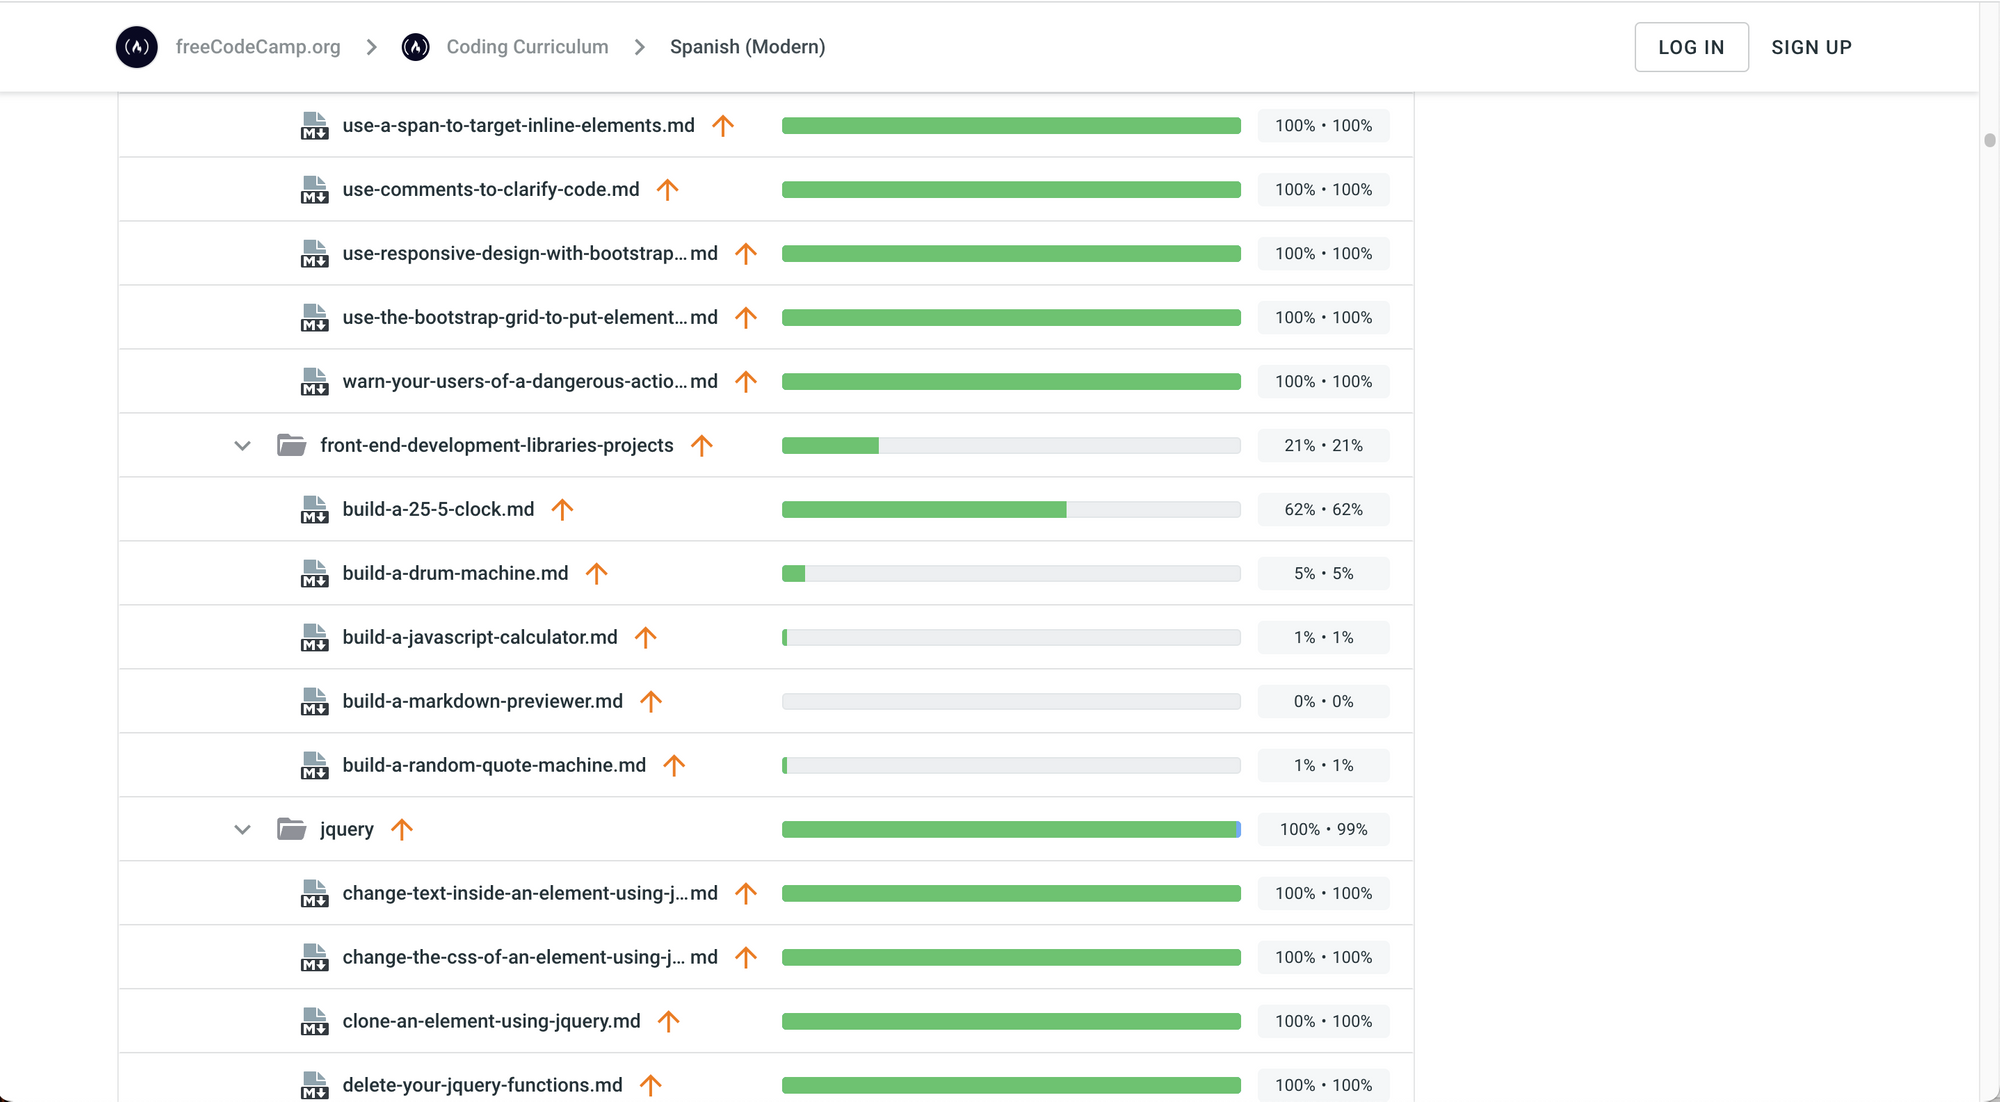 Select a file that needs translation. A file needs translation if the bar is not completely blue (translated) or green (proofread).
Please note that we usually prioritize translating the first three certifications.
💡 Tip: if you are not signed in to your Crowdin account or if you have not created your Crowdin account yet, you will be prompted to do so when you click on a file.
 This is the screen where you can log in to freeCodeCamp's translation platform. You can also sign up to create your Crowdin account.
If you're signing up for a new account, you will need to enter your email, choose your username, and your password. You will also receive an email from Crowdin asking you to click on a link to verify your email address.
The Translation Editor
Congratulations. Now you have your Crowdin account and you are ready to start translating the file you selected.
Let's say that you clicked on the **build-a-drum-machine.md** file and you want to translate it into Spanish (Modern).
You will see a screen similar to this one:
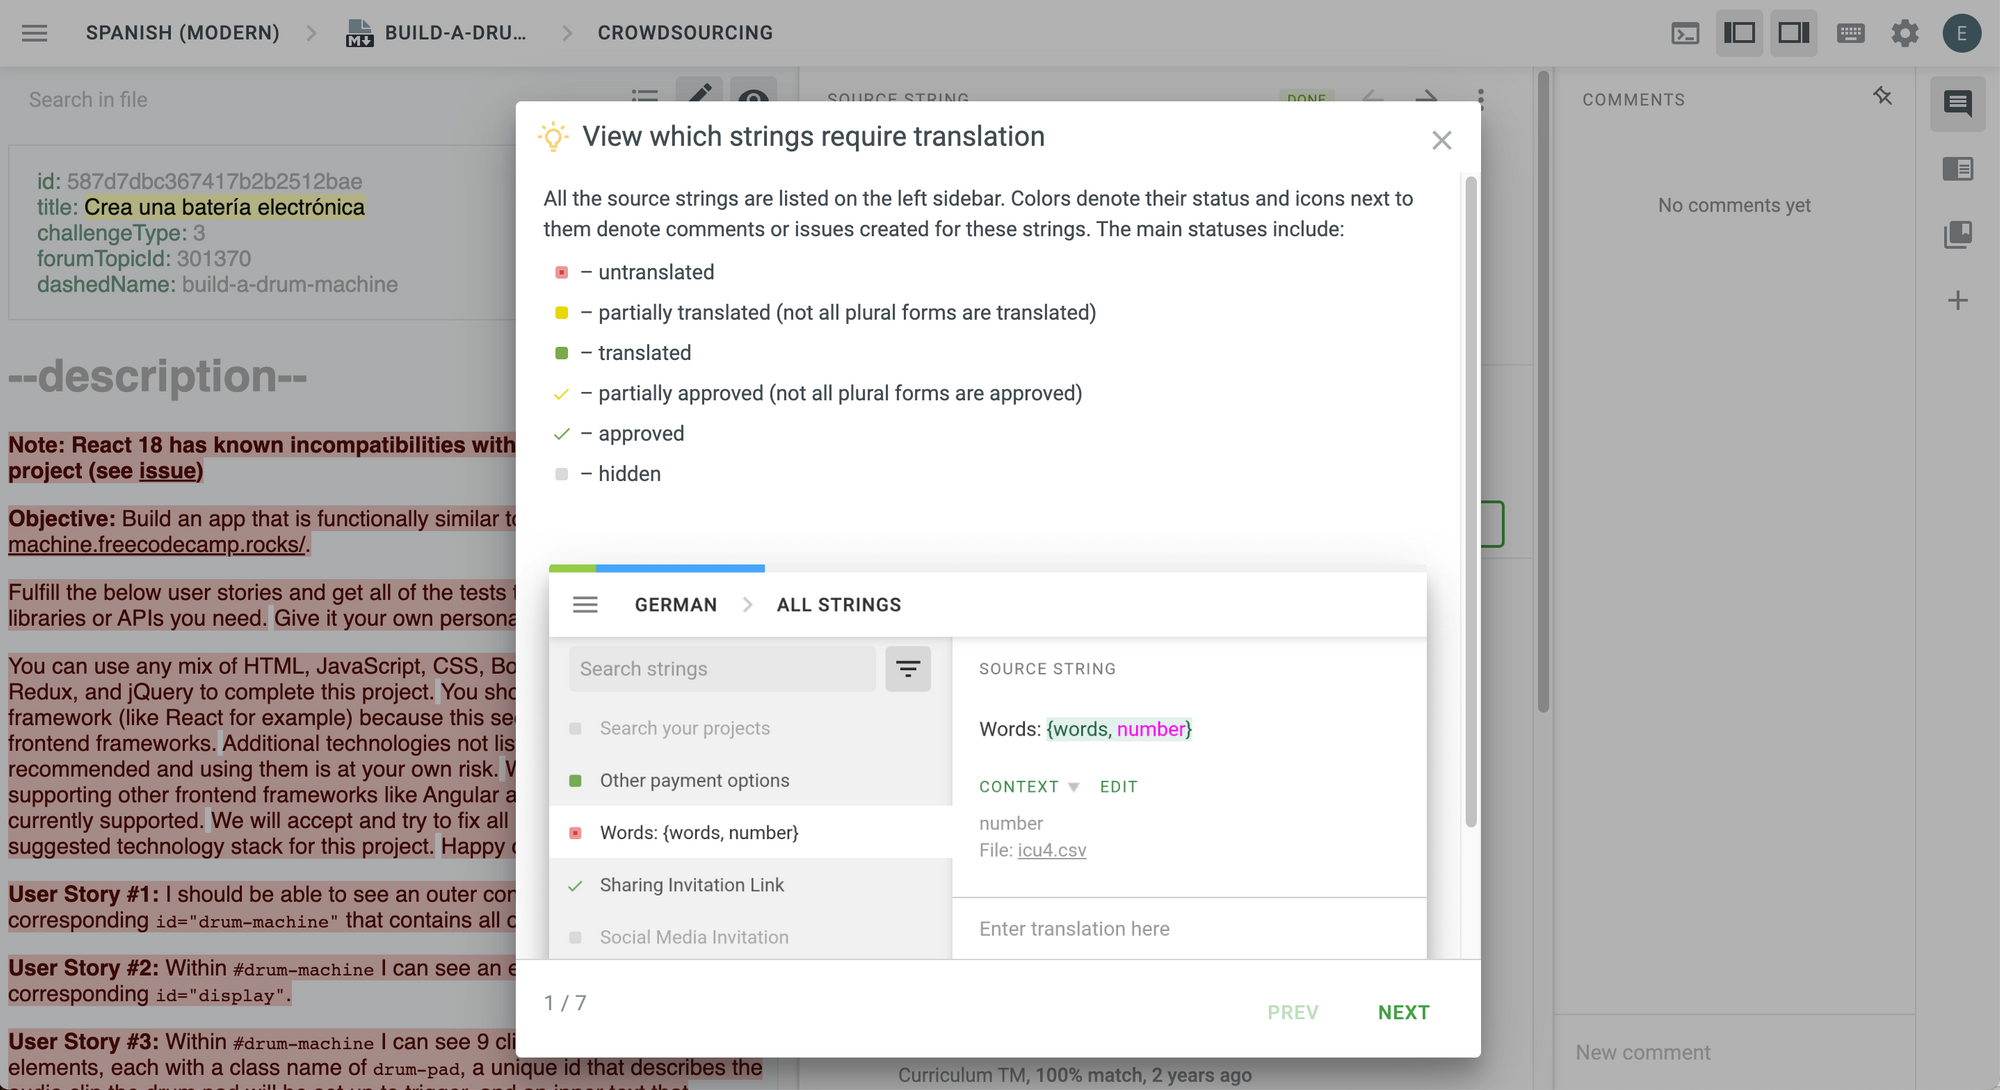 The Translation Editor. This is what you will see when you click on a file and sign in to your Crowdin account.
If you would like to learn more about how the editor works, click on "Next" to see more tips on the UI but if you would like to close this short tutorial, just click on the X at the top.
These are the seven steps of the short tutorial provided by Crowdin in case you would like to keep them as a reference:
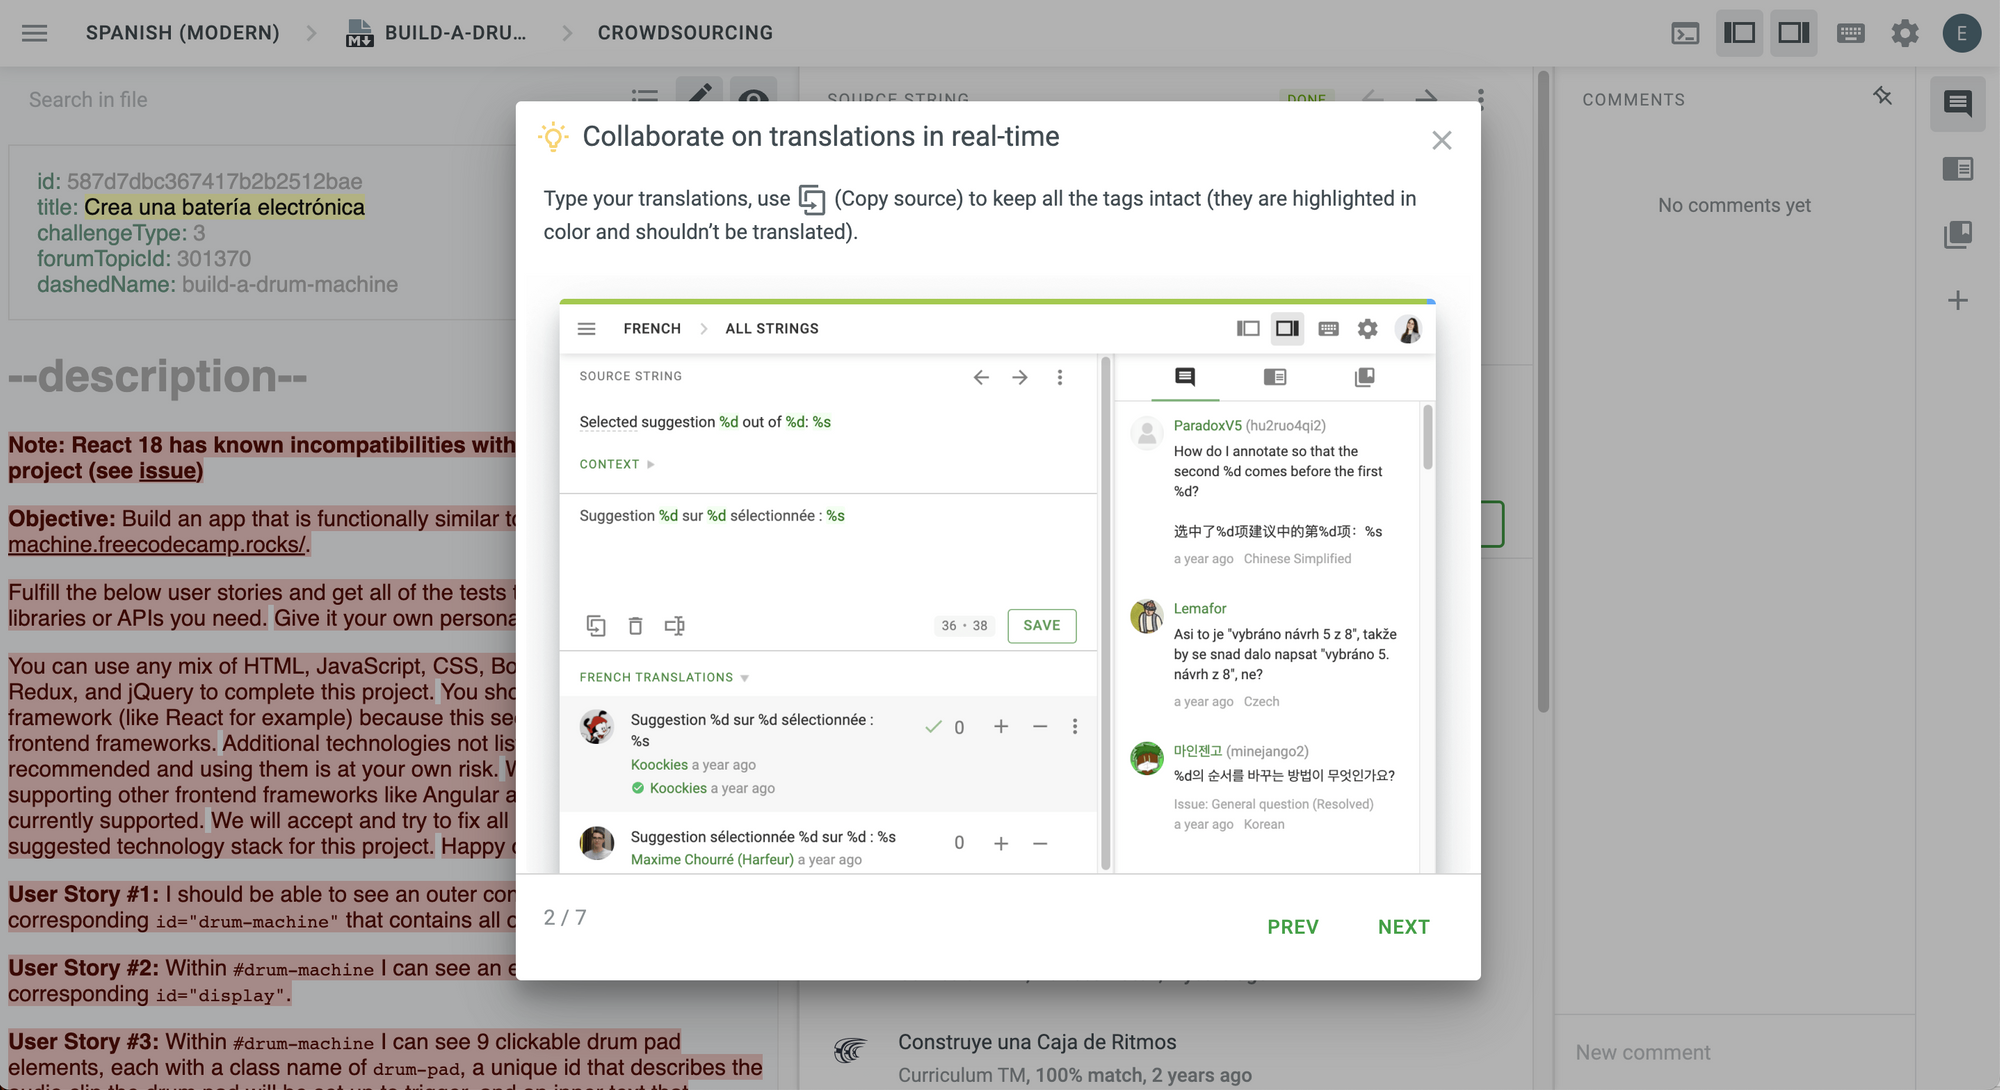 Collaborate on translations in real-time.
 Use context to make relevant translations.
 Preview files.
 Make translations from any device.
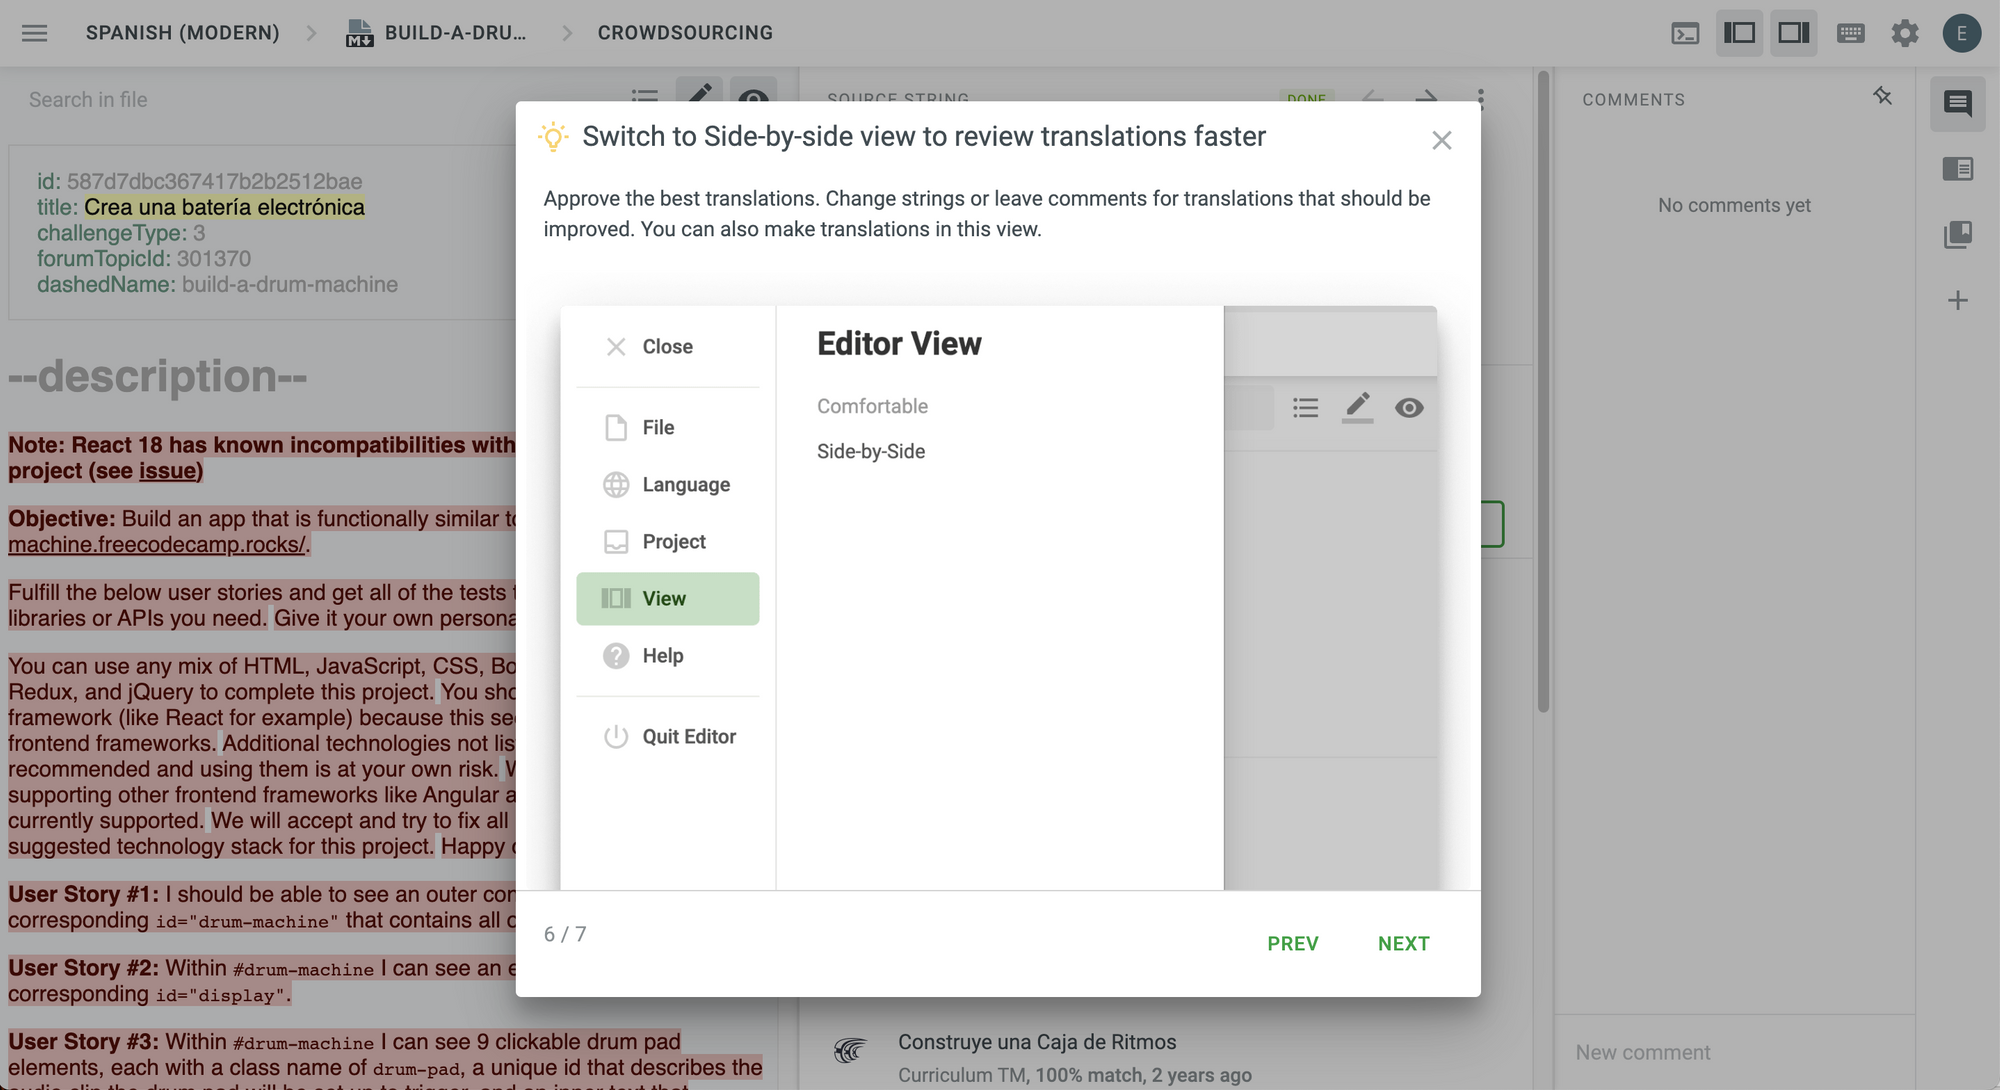 Switch to Side-by-side view to review translations faster.
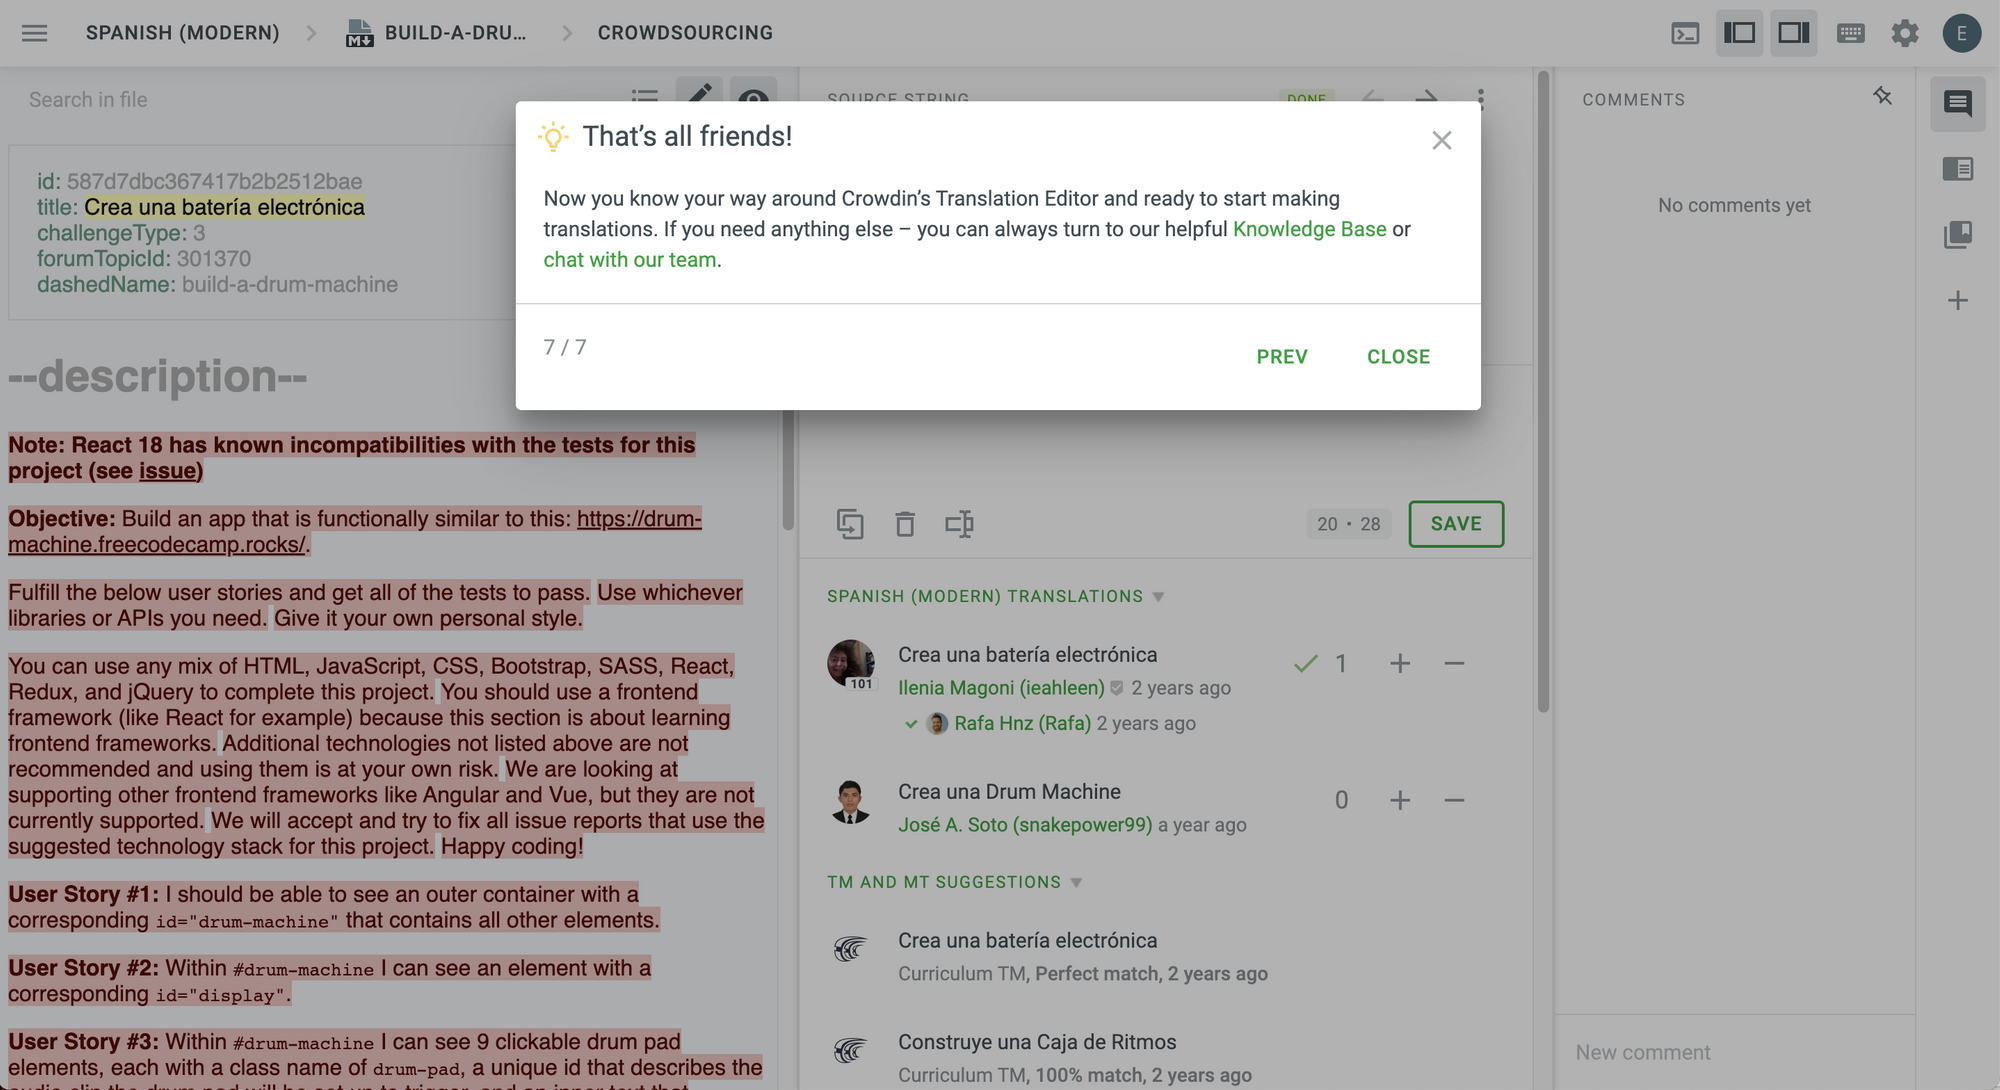 That's all friends! This is the seventh and last step of the tutorial.
After you reach the final step, click "Close" and you will be in the Translation Editor.
This is where the magic happens. You can start translating, save your translations, use suggested translations and adapt them, and even upvote or downvote proposed translations.
To translate a string, just click on it or save your current translation to go to the next string.
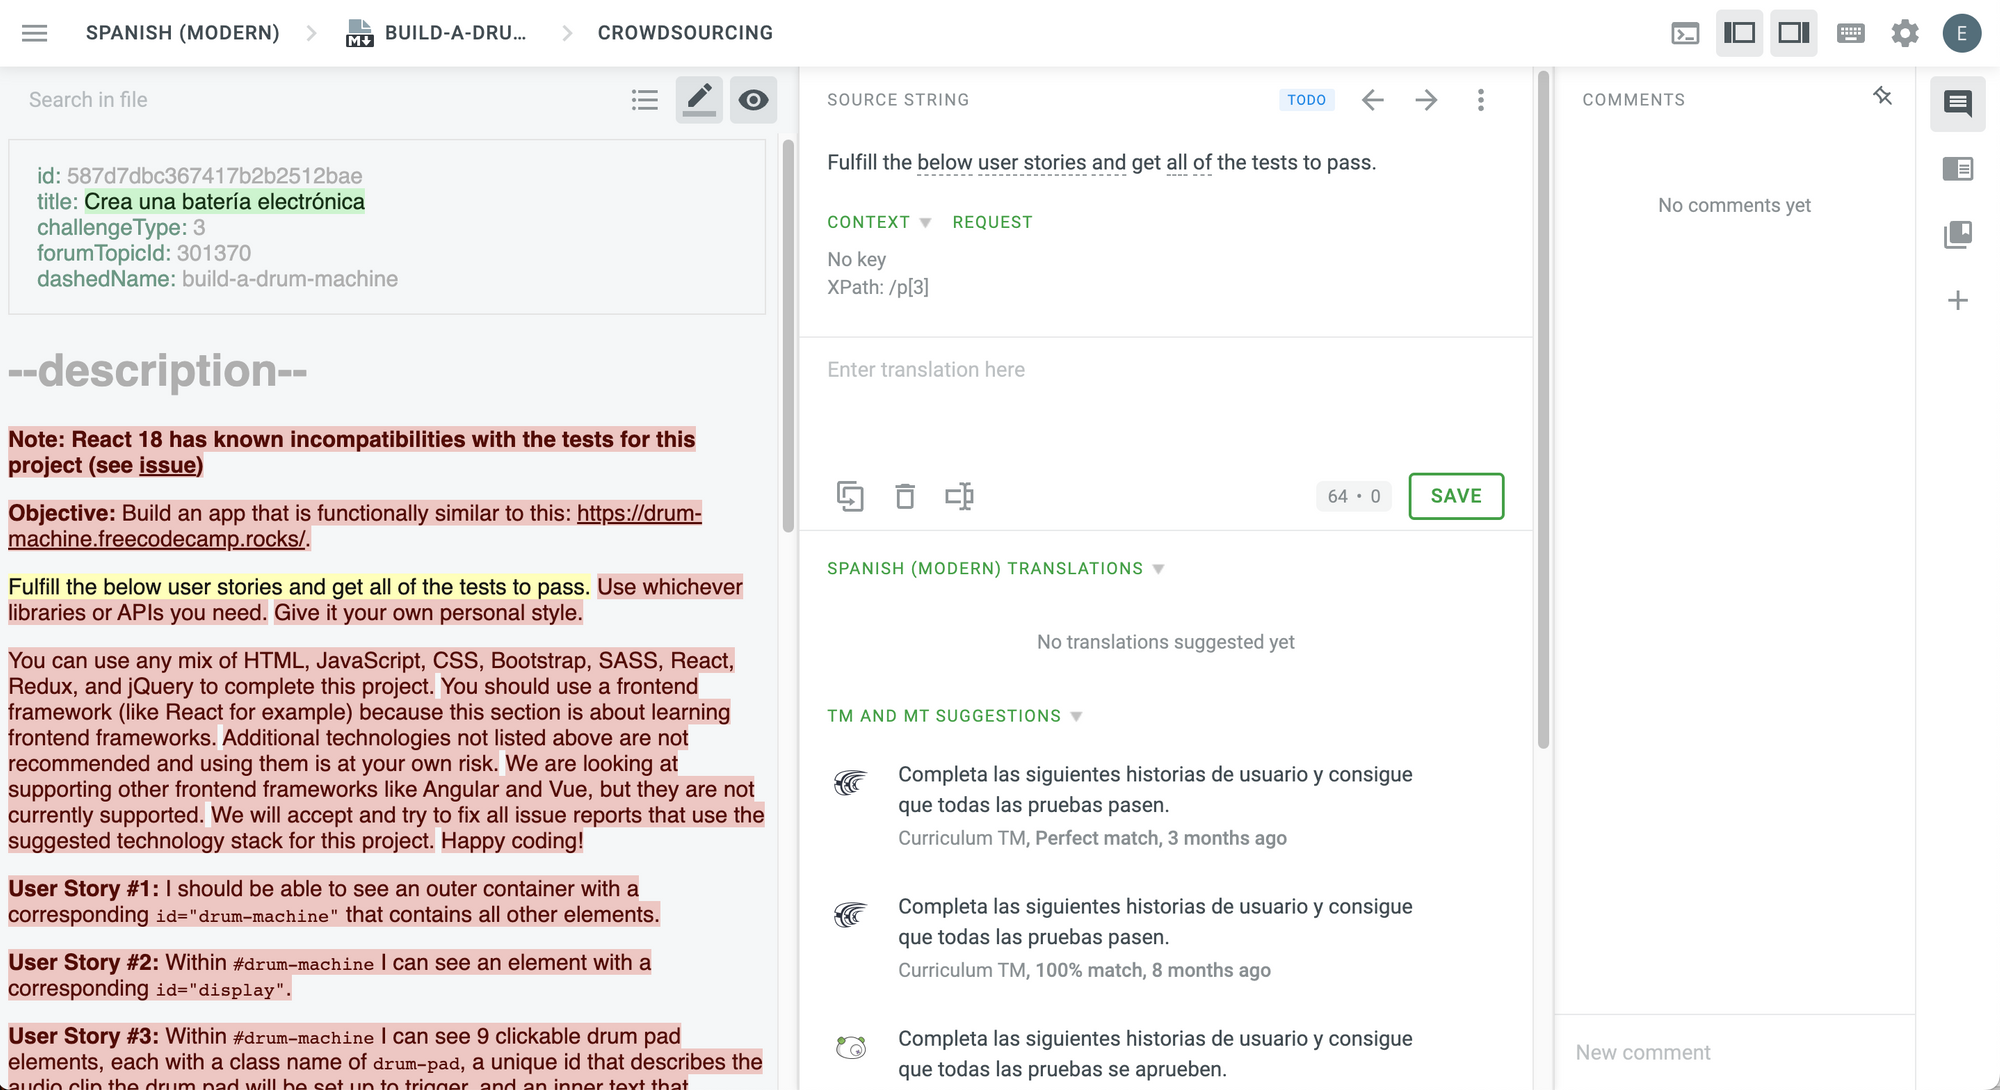 The Translations Editor.
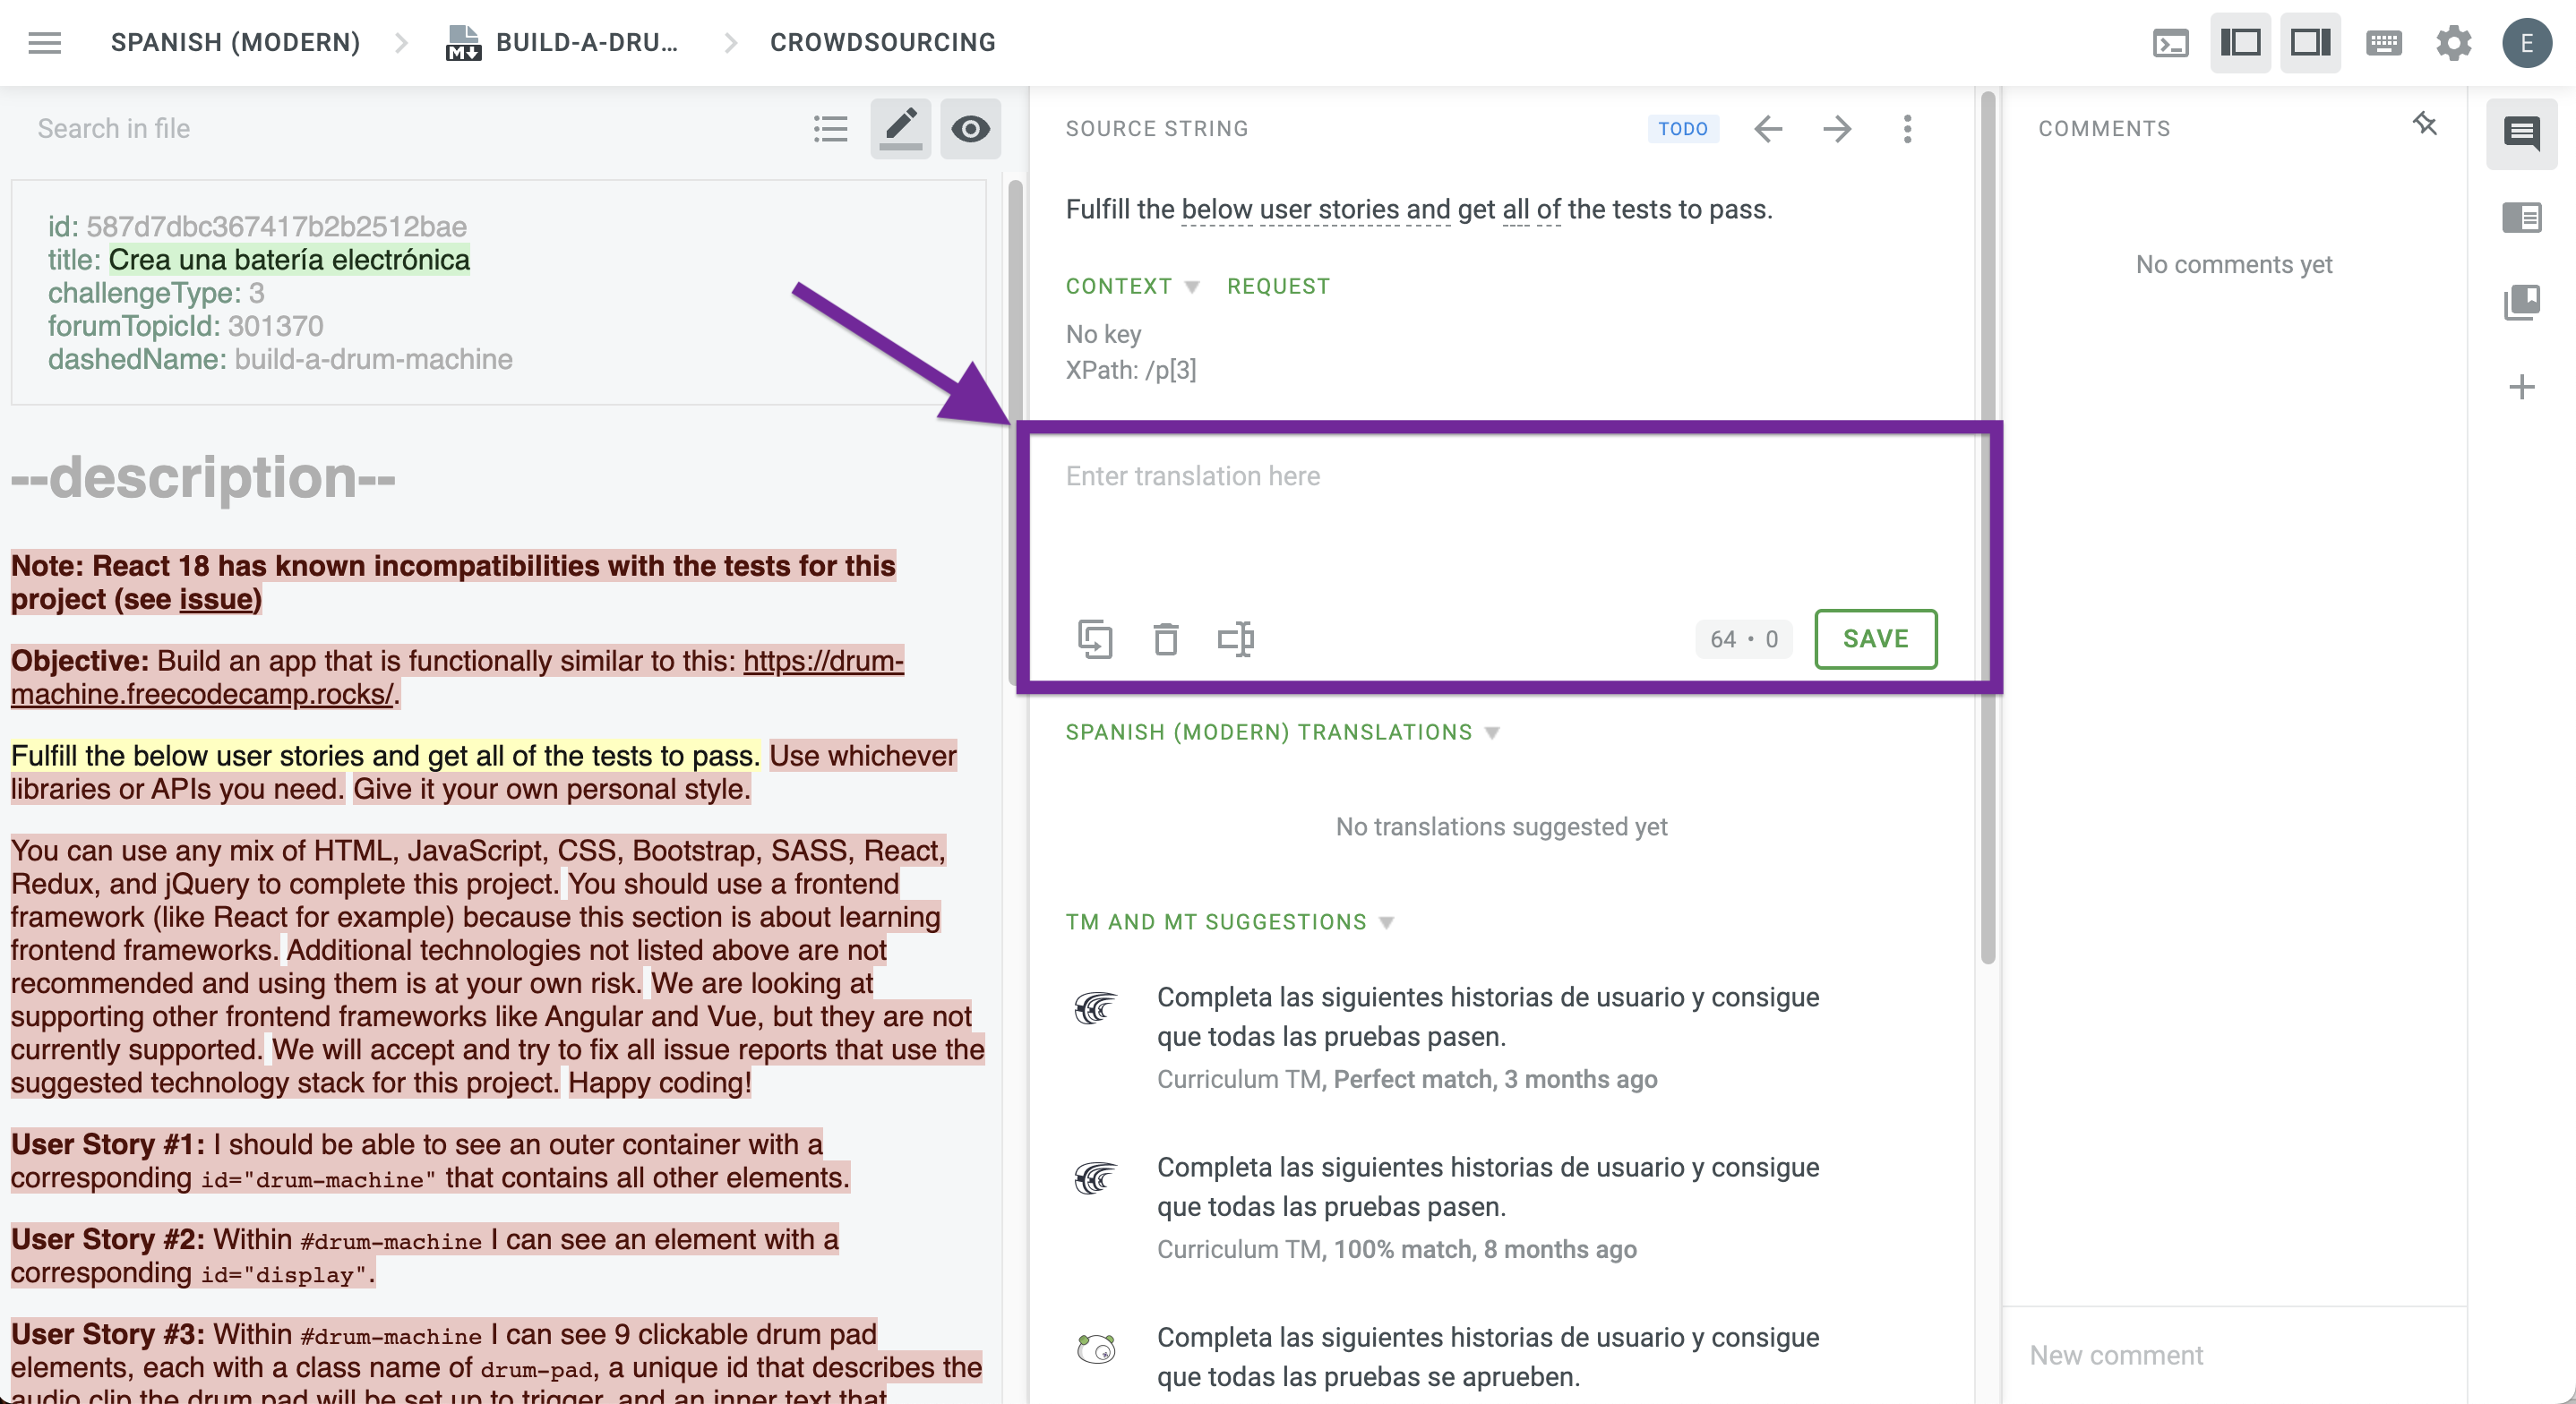 This is where you can write and save your translation.
💡 Tip: You can also write comments and mark them as issues to notify freeCodeCamp's staff and other contributors.
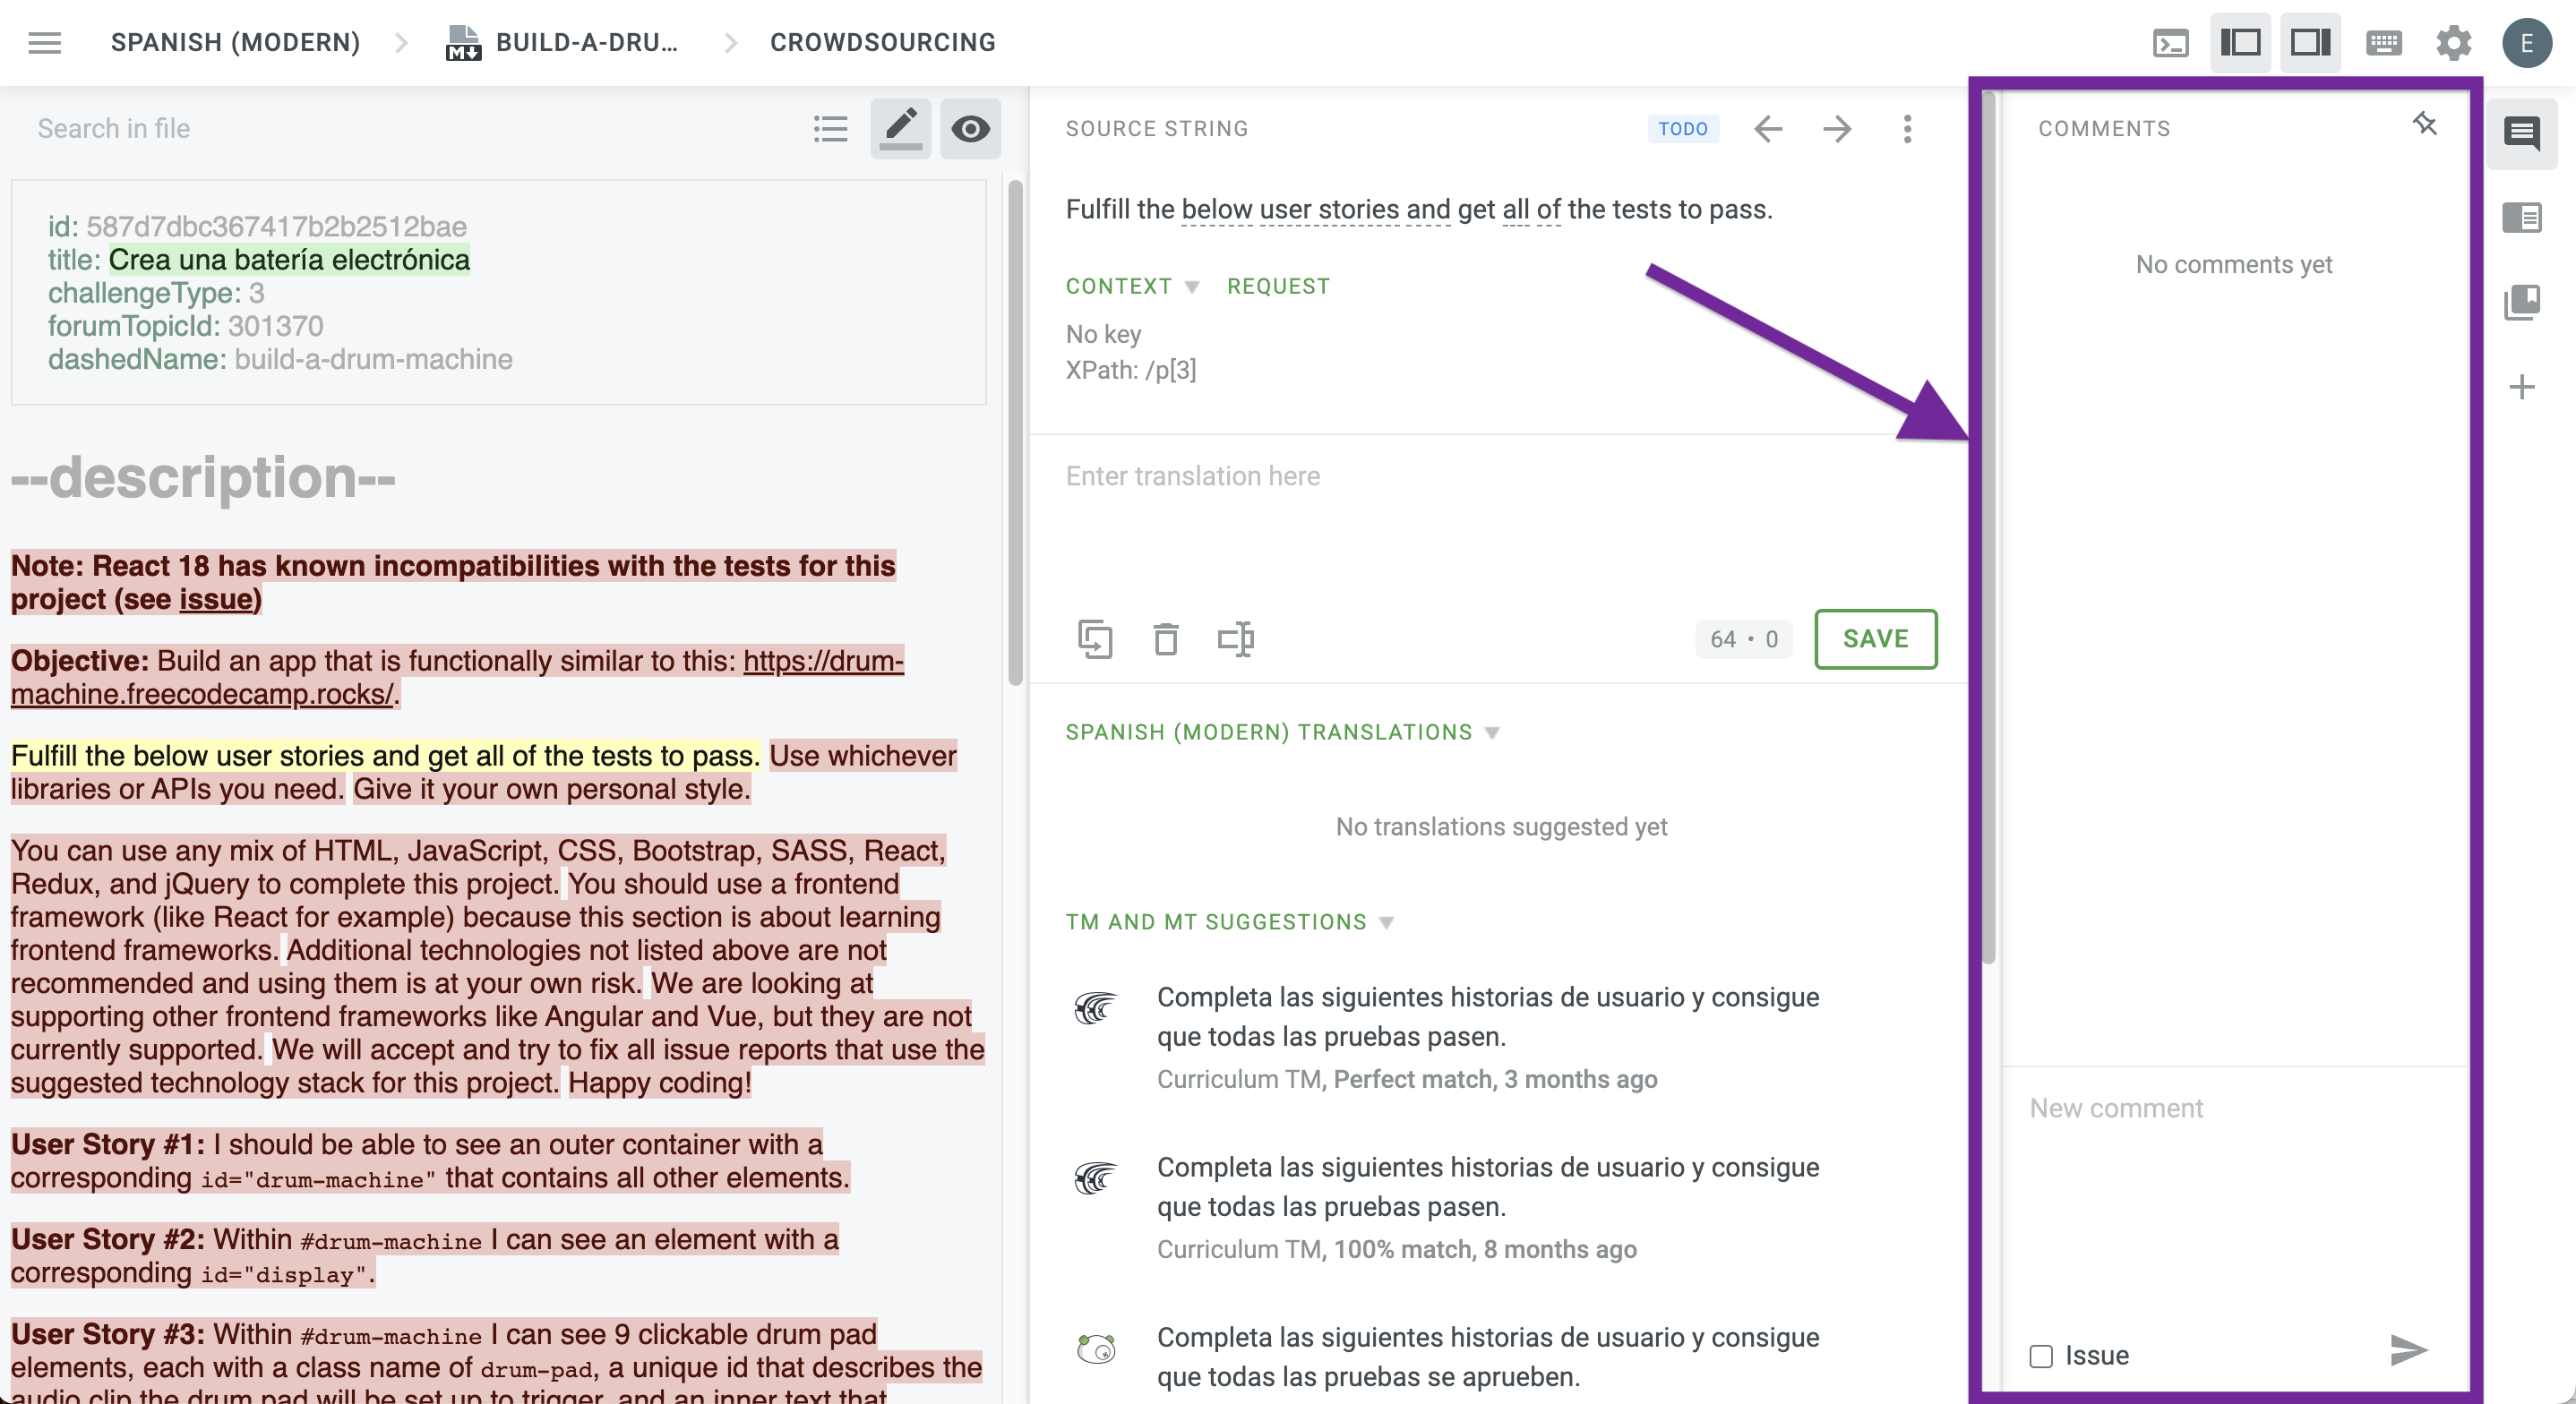 You can write comments for individual strings and mark them as issues.
How to Translate the Learn Interface
We also have specific guidelines for translating the Learn interface.
Our documentation mentions that:
Our
/learninterface relies on JSON files loaded into an i18n plugin to generate translated text. This translation effort is split across both Crowdin and GitHub.
We translate the intro.json and translations.json files on Crowdin. If you are planning to translate strings from these files, please know that the Context information provided in Crowdin can be very helpful.
 Example of the context information provided by Crowdin (source).
There are certain files that we cannot upload to Crowdin, such as links.json, meta-tags.json, motivation.json, and trending.json. These files are usually maintained by language leads but if you would like to help with these, please refer to this article.
How to Translate the Documentation
Documentation is another essential resource for freeCodeCamp's mission because we can share important information, steps, and guidelines with potential contributors.
We do have certain guidelines for translating our documentation. You can find them in this article. It covers how to translate internal links in the translated documentation.
Best Practices
For any project, our goal should always be to follow the best practices, right? These are some of the best practices that you should follow to translate freeCodeCamp's resources:
- Do not translate the content within
<code>tags. These tags indicate text that is found in code and should be left in English. - Do not add additional content. If you feel a challenge requires changes in the text content or additional information, you should propose the changes through a GitHub issue or a pull request that modifies the English file.
- Do not change the order of content.
How to Become a Proofreader
If you join freeCodeCamp's localization effort, you can also become a proofreader.
We will typically grant you proofreading access if you have been contributing to freeCodeCamp for a while.
If you would like to apply to become a proofreader, please reach out to us in our contributors chat room.
💡 Tip: Proofreaders can approve their own translations. However, we advise you to allow another proofreader to review your proposed translations to make sure that there are no errors or typos.
How to Proofread the Translations
When you become a proofreader, you will have special permissions in the Translations Editor. You will be able to see the current translations, edit them, and approve them.
You should consider the community scores determined by the upvotes and the downvotes when deciding which translations to approve.
When you approve a string, the automated process that we configured with the GitHub integration on Crowdin will add it to our live platform:
Approving a string in the proofreading view will mark it as complete and it will be downloaded in our next pull from Crowdin to GitHub.
Discord Chat Server for Translators
If you have any questions or you would like to join our translation effort, you are welcome to join our Discord chat server for translators.
 Our Discord chat server.
Once you create your account and join the server, you will see a welcome message with the **#start-here** localization channel.
Excellent work. Now you are ready to start translating and join freeCodeCamp's localization effort.
Summary
Congratulations! We covered many topics related to localization and now you know more about how to localize your resources and platforms to reach users worldwide.
These are some key takeaways:
- In a globalized world where information is available with just a few clicks, localizing products, services, and platforms is essential if your goal is to reach users worldwide. Adapting them to different cultures will open doors for your team, your organization, and users around the world.
- Crowdin is a powerful localization management platform focused on giving you and your team the tools you need to localize products and platforms that are constantly evolving.
- freeCodeCamp's localization effort is a real-world example of a global community brought together by a common goal: providing free access to education around the world without language barriers. You can join too.
I hope you liked this book on localization fundamentals. You are ready to start localizing your platform. Now is the right time to start. Localization can be exactly what you need to reach a global community of users.