

Tailwind CSS has been quite popular in the web development world due to its utility-first approach and seamless integration.
However, when developing mobile apps with React Native, integrating Tailwind CSS may be challenging. But guess what? Not anymore. With the development of tools such as NativeWind, React Native developers can leverage Tailwind CSS power to design stunning and responsive mobile UIs easily.
In this tutorial, you'll learn the process of integrating Tailwind CSS to your React Native Expo app using NativeWind. We'll also build a simple login screen with NativeWind.
Table of Contents:
- What's NativeWind?
- Prerequisites
- Getting Started
- How to Create A New Expo App
- How to Install NativeWind
- How to Set Up Tailwind CSS
- How to Configure NativeWind With Babel
- How to Style with NativeWind
- How to Build A Simple Login Screen
- Conclusion
What's NativeWind?
NativeWind acts as a bridge between Tailwind CSS and React Native Expo, allowing developers to take advantage of Tailwind's utility-first approach in their mobile app development workflow.
NativeWind provides various benefits to developers, some of these benefits include:
- Familiar Syntax: Developers that are familiar with Tailwind CSS can easily migrate to using NativeWind in their React Native projects, easing the learning curve.
- Consistent Styling: NativeWind ensures consistent styling across platforms by offering a single collection of components and services.
- Flexibility: NativeWind allows developers to easily adapt and extend styles to meet the app's design specifications.
Overall, It provides a collection of components and tools that are very similar to Tailwind CSS, allowing developers to create shorter, more concise code while preserving flexibility and consistency across platforms.
Tailwind makes writing code feel like I’m using a design tool - Didier Catz
Prerequisites
- Basic Understanding of React Native Expo and Tailwind CSS.
- Node.js and npm (or yarn) installed.
- Willingness to learn :)
Getting Started
Before you dive into integrating Tailwind CSS into your React Native Expo app, you'll need to ensure that you have the necessary tools set up.
If you haven't already installed Expo and expo-cli globally, you can do so using npm or yarn:
npm install -g expo-cli
or
yarn global add expo-cli
How to Create A New Expo App
With expo-cli installed, you can now create a new React Native Expo project.
Navigate to the directory where you wish to create your project and open the terminal. You can do this by pressing CTRL + ` on Visual Studio Code. Then execute this command in the terminal:
npx create-expo-app simpleproject
This command creates an expo project in your directory.
How to Install NativeWind
After creating your expo project, you can install NativeWind and its dependencies by running the following commands in your project's directory:
cd simpleproject
npm i nativewind
npm i --dev tailwindcss@3.3.2
or
cd simpleproject
yarn add nativewind
yarn add --dev tailwindcss@3.3.2
Next, you'll need to create a tailwind.config.js file. To do this, run this command in your terminal:
npx tailwindcss init
This would result in a tailwind.config.js file in your project's root directory.
How to Set Up Tailwind CSS
To set up Tailwind CSS in your project, navigate to your tailwind.config.js file, and under content, enter the paths to your components. Your tailwind.config.js file would then look like this:
/** @type {import('tailwindcss').Config} */
module.exports = {
  content: [
    "./App.{js,jsx,ts,tsx}",
    "./<custom directory>/**/*.{js,jsx,ts,tsx}",
  ],
  theme: {
    extend: {},
  },
  plugins: [],
};
 tailwind.conf.js file after adding paths to components
In the above example, you can replace <custom directory> with your directory's real name.
How to Configure NativeWind with Babel
You'll also need to configure NativeWind with Babel. To do this, include the NativeWind plugin in your project's babel.conf.js file:
plugins: ["nativewind/babel"],
The babel.conf.js file would look like this after adding the NativeWind plugin:
module.exports = function (api) {
  api.cache(true);
  return {
    presets: ["babel-preset-expo"],
    plugins: ["nativewind/babel"],
  };
};
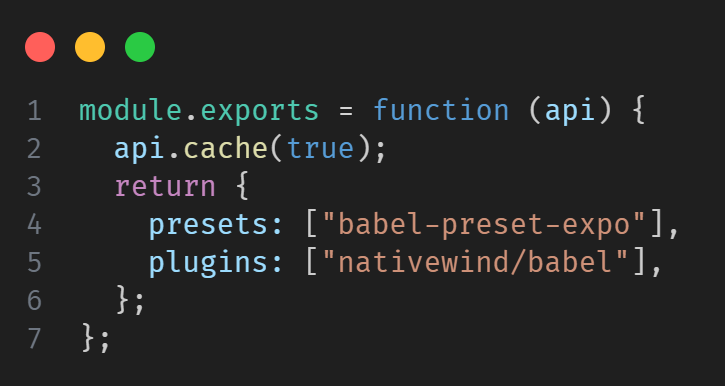 babel.conf.js file after adding nativewind plugin
By including the NativeWind plugin in the Babel configuration file you ensure that NativeWind's functionality is properly incorporated into your project's JavaScript codebase.
🎉With this, NativeWind has been successfully integrated into your Expo app. The next step is to begin styling the app with NativeWind.
How to Style with NativeWind
To begin styling with NativeWind, go to your project's App.js file or the component you would like to style, which would look like this by default:
import { StatusBar } from "expo-status-bar";
import { StyleSheet, Text, View } from "react-native";

export default function App() {
  return (
    <View style={styles.container}>
      <Text>Open up App.js to start working on your app!</Text>
      <StatusBar style='auto' />
    </View>
  );
}

const styles = StyleSheet.create({
  container: {
    flex: 1,
    backgroundColor: "#fff",
    alignItems: "center",
    justifyContent: "center",
  },
});
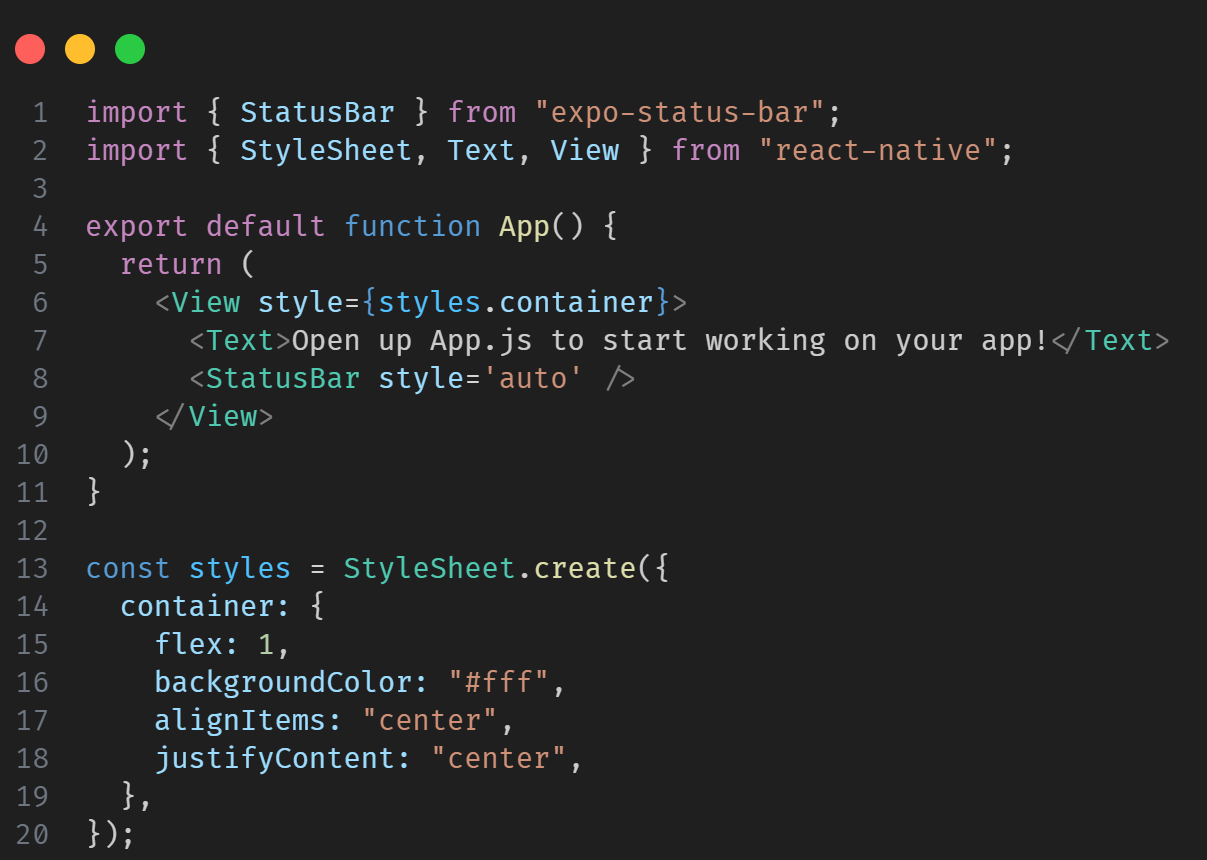 App.js boilerplate code
Next, modify your component to get rid of any instances of StyleSheet abstraction. In this example, we'll modify the App.js code. After adjustments, we should have something like this:
import { StatusBar } from "expo-status-bar";
// import { StyleSheet, Text, View } from "react-native";
import { Text, View } from "react-native";

export default function App() {
  return (
    // <View style={styles.container}>
    <View className='flex-1 justify-center items-center bg-white'>
      <Text>Open up App.js to start working on your app!</Text>
      <StatusBar style='auto' />
    </View>
  );
}

// const styles = StyleSheet.create({
//   container: {
//     flex: 1,
//     backgroundColor: "#fff",
//     alignItems: "center",
//     justifyContent: "center",
//   },
// });
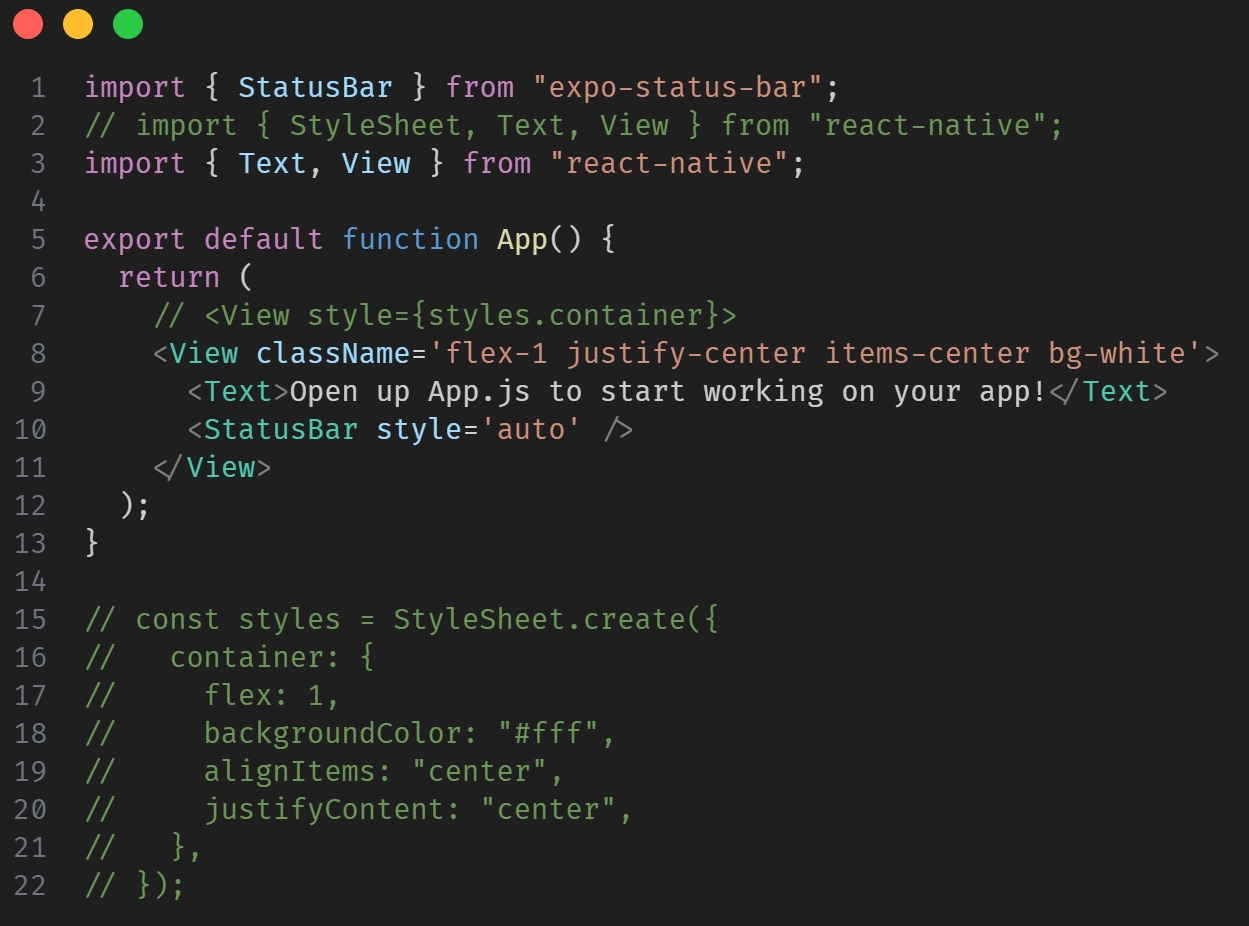 App.js component after modification
In the modified codeblock, we remove all occurrences of StyleSheet abstractions, including the import statement for stylesheet and the StyleSheet.create function, and we replace style with className in the App.js return function.
Having cleared that up, all you need to do is write Tailwind CSS classes into your app className to begin implementing Tailwind CSS in your application. You'll see this in a bit as we build a simple login screen with NativeWind.
How to Build A Simple Login Screen
Now, let's dive into building a simple login screen using NativeWind. We'll continue with the initial setup in the App.js file and gradually add components to create the login UI.
First, let's replace the existing code in the App.js file with the following:
import { StatusBar } from "expo-status-bar";
import { Text, View } from "react-native";

export default function App() {
  return (
    <View className='flex-1 justify-center items-center bg-white'>
      <StatusBar style='auto' />
      <Text className='text-center mt-3 text-2xl font-light text-orange-300'>
        Login
      </Text>
      {/* Additional components goes here */}
    </View>
 );
}
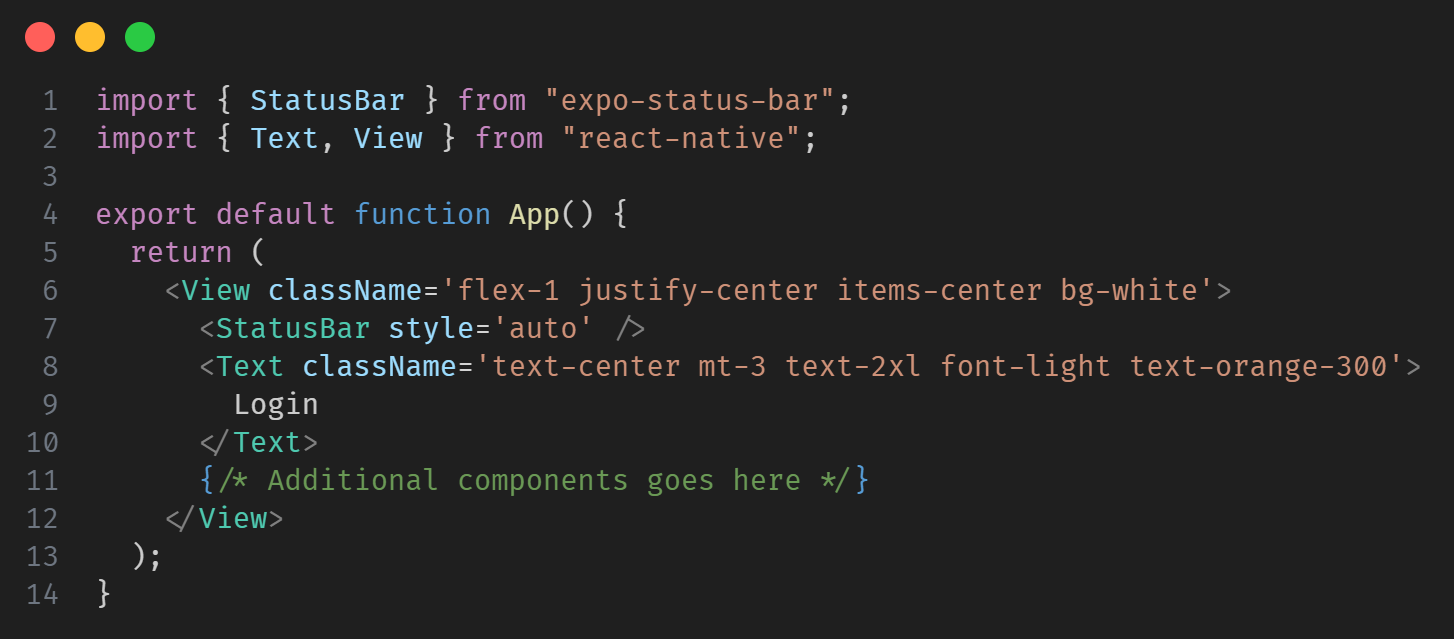 Starter code for login screen UI
The code above imports the essential components from React Native and Expo. We then use a View component to define the structure of our login screen, which is styled with NativeWind's utility classes. Inside the View, we have a Text component that displays "Login" with styling applied using NativeWind classes.
Next, you can add your login form components, such as username and password input fields, a login button, and any other necessary elements. Here is an example of how you can extend the login screen:
import { StatusBar } from "expo-status-bar";
import { Text, View, TouchableOpacity, TextInput } from "react-native";

export default function App() {
  return (
    <View className='flex-1 justify-center items-center bg-white'>
      <StatusBar style='auto' />
      <Text className='text-center mt-3 text-2xl font-light text-orange-300'>
        Login
      </Text>
      {/* Additional components goes here */}
      <View className='mt-5 mx-5'>
        <View>
          <Text className='text-gray-400'>EMAIL:</Text>
          <TextInput
            placeholder='Enter Email...'
            className='border border-dotted p-2 text-gray-500 border-amber-400 mt-1'
          />
        </View>
        <View className='mt-3'>
          <Text className='text-gray-400'>PASSWORD:</Text>
          <TextInput
            secureTextEntry
            placeholder='Enter Password...'
            className='border text-gray-500 border-dotted p-2 border-amber-400 mt-1'
          />
        </View>

        <TouchableOpacity className='bg-orange-300 p-3 mt-4'>
          <Text className='text-center text-base text-white'>Login</Text>
        </TouchableOpacity>

        <Text className='text-center font-normal text-gray-500 text-base mt-3'>
          OR
        </Text>
        <View className='mt-4'>
          <TouchableOpacity className='flex flex-row items-center justify-center p-2 bg-orange-300'>
            <Text className='text-white mx-2 text-sm'>Sign In With Google</Text>
          </TouchableOpacity>
        </View>
        <View className='mt-6 flex-row justify-center'>
          <Text className=''>New to FreeCodeCamp? </Text>
          <TouchableOpacity>
            <Text className='text-amber-500'>Create an Account</Text>
          </TouchableOpacity>
        </View>
      </View>
    </View>
  );
}
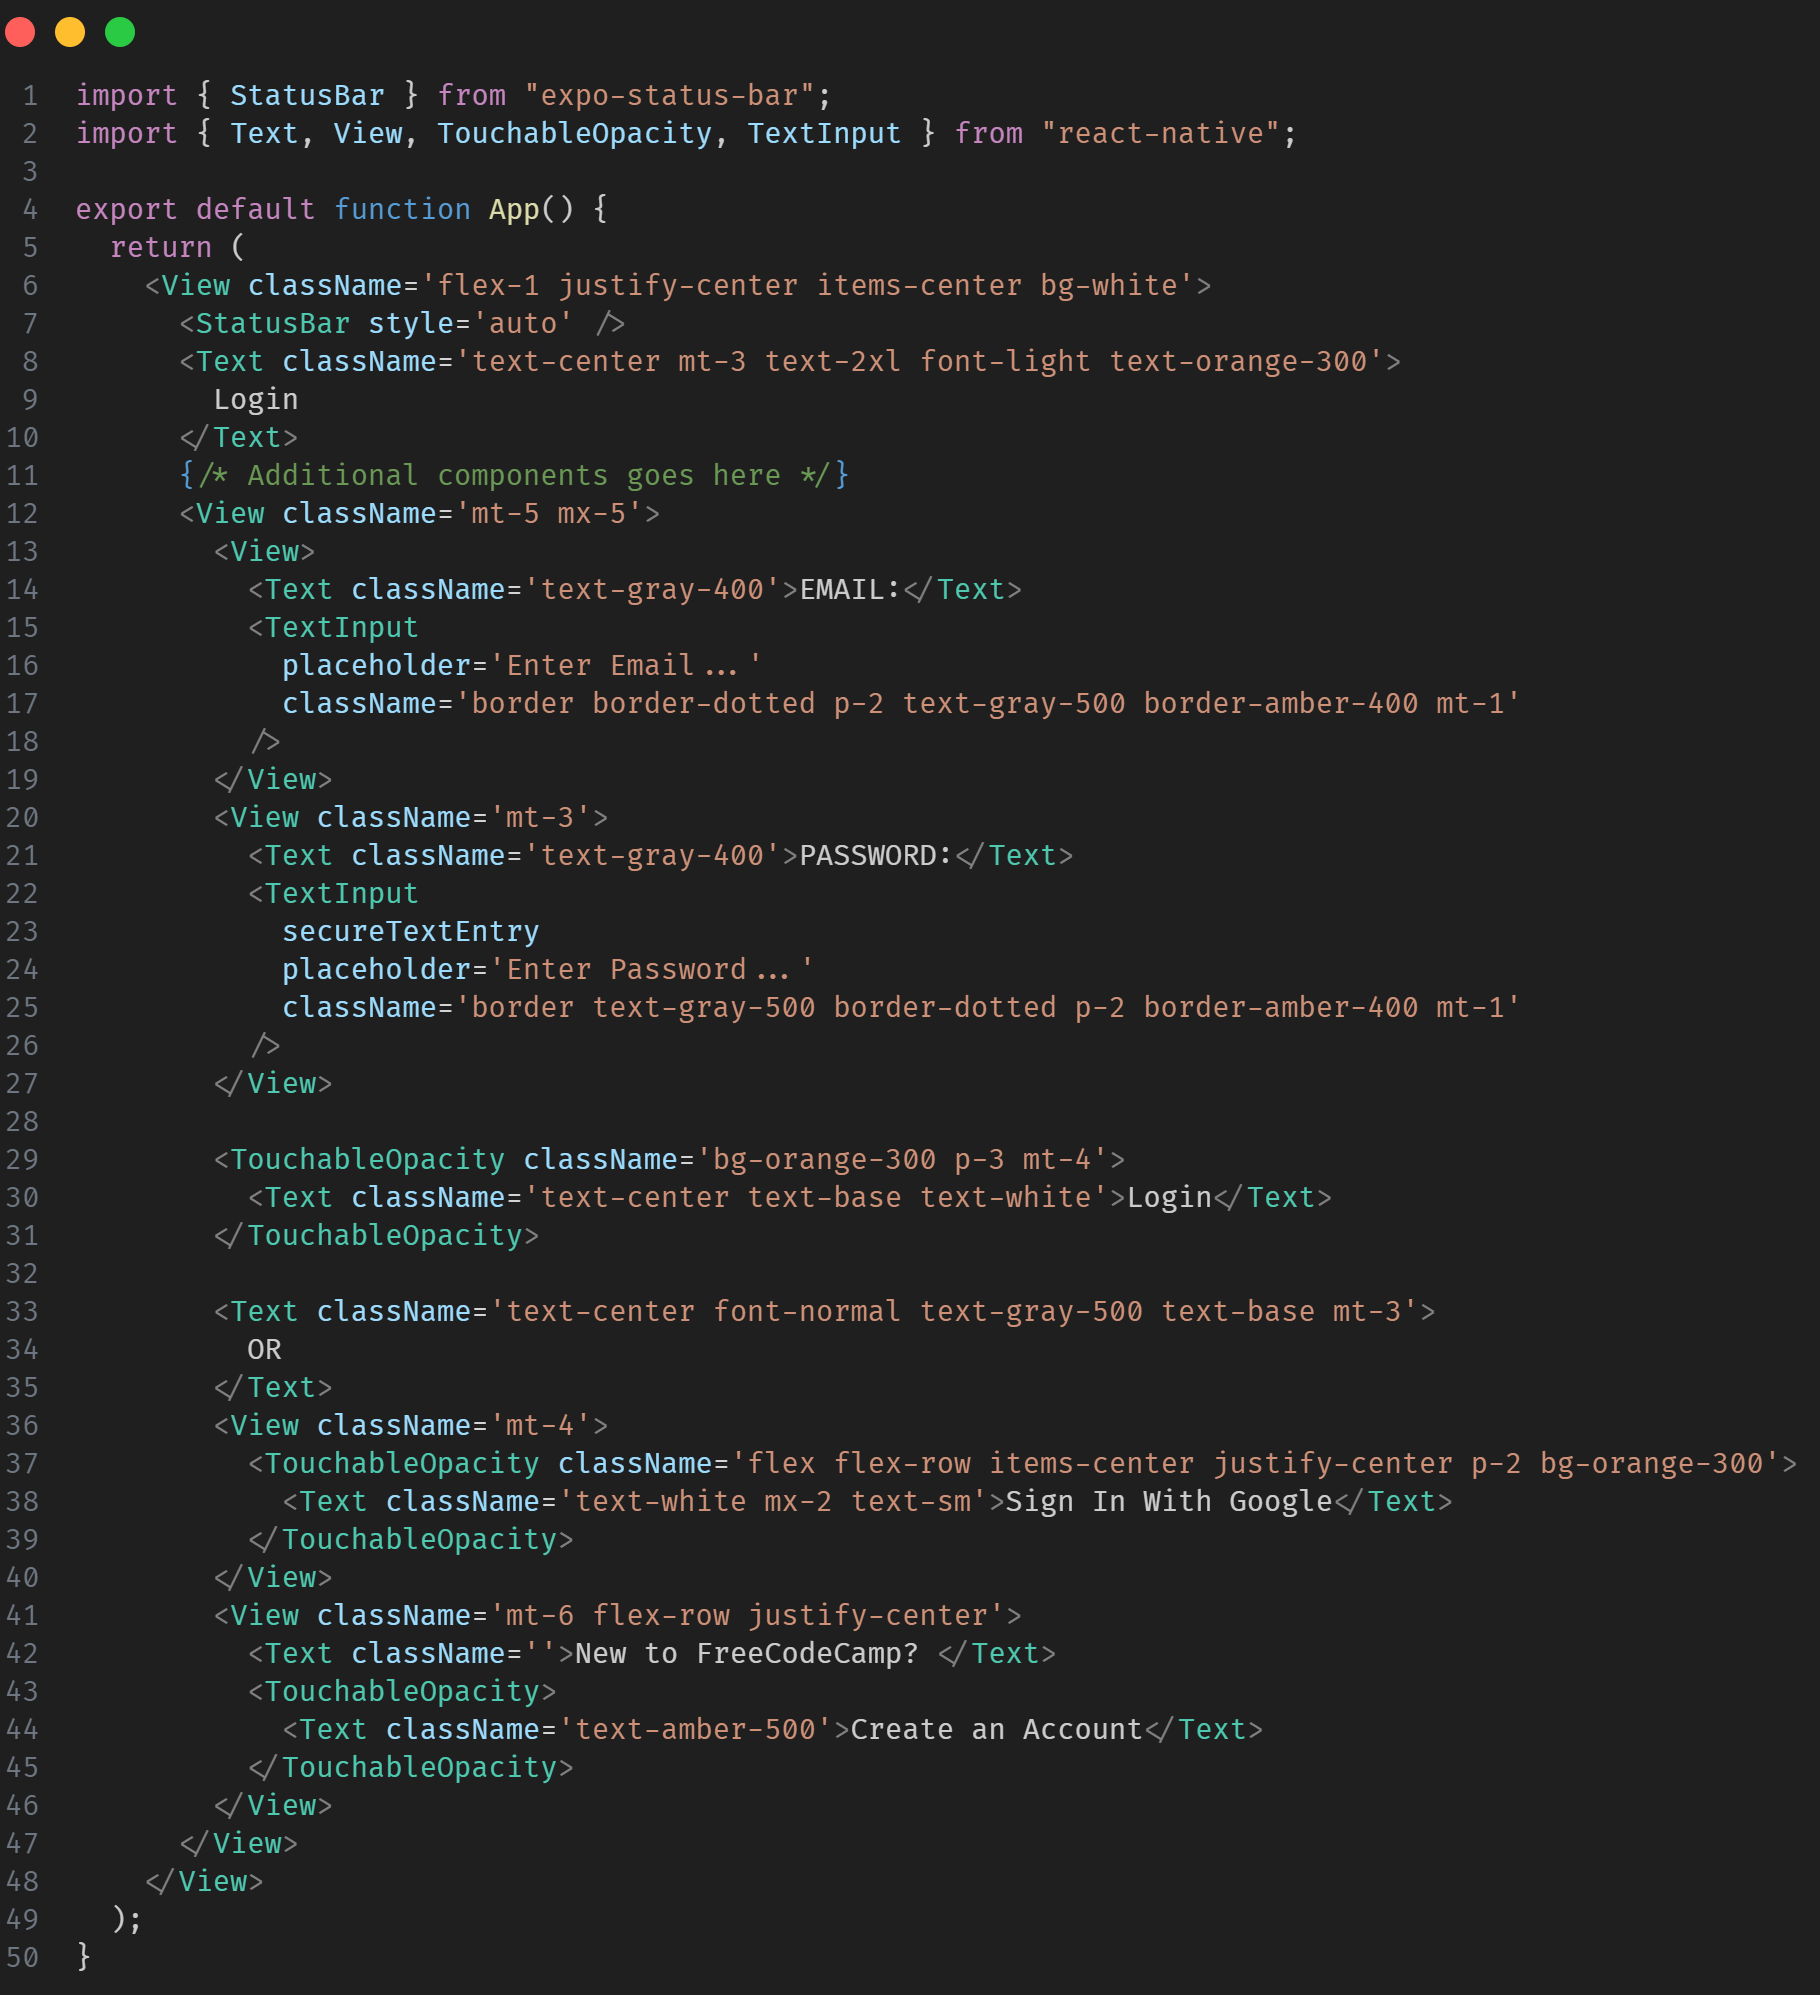 Extended login screen UI with additional components
In this expanded version, we've included TextInput components for the username and password input fields, as well as a TouchableOpacity for the login button. Styling is done with NativeWind's utility classes to provide a clean and consistent appearance.
Furthermore, once you've finished creating your login screen using NativeWind in your React Native Expo project, you'll want to test it to check if everything works properly. You can do this by running this command on your terminal:
expo start
This command will launch the bundler and generate a QR code. To open the app, scan the QR code displayed in the terminal with your emulator's camera, or press "a" for Android or "i" for iOS.
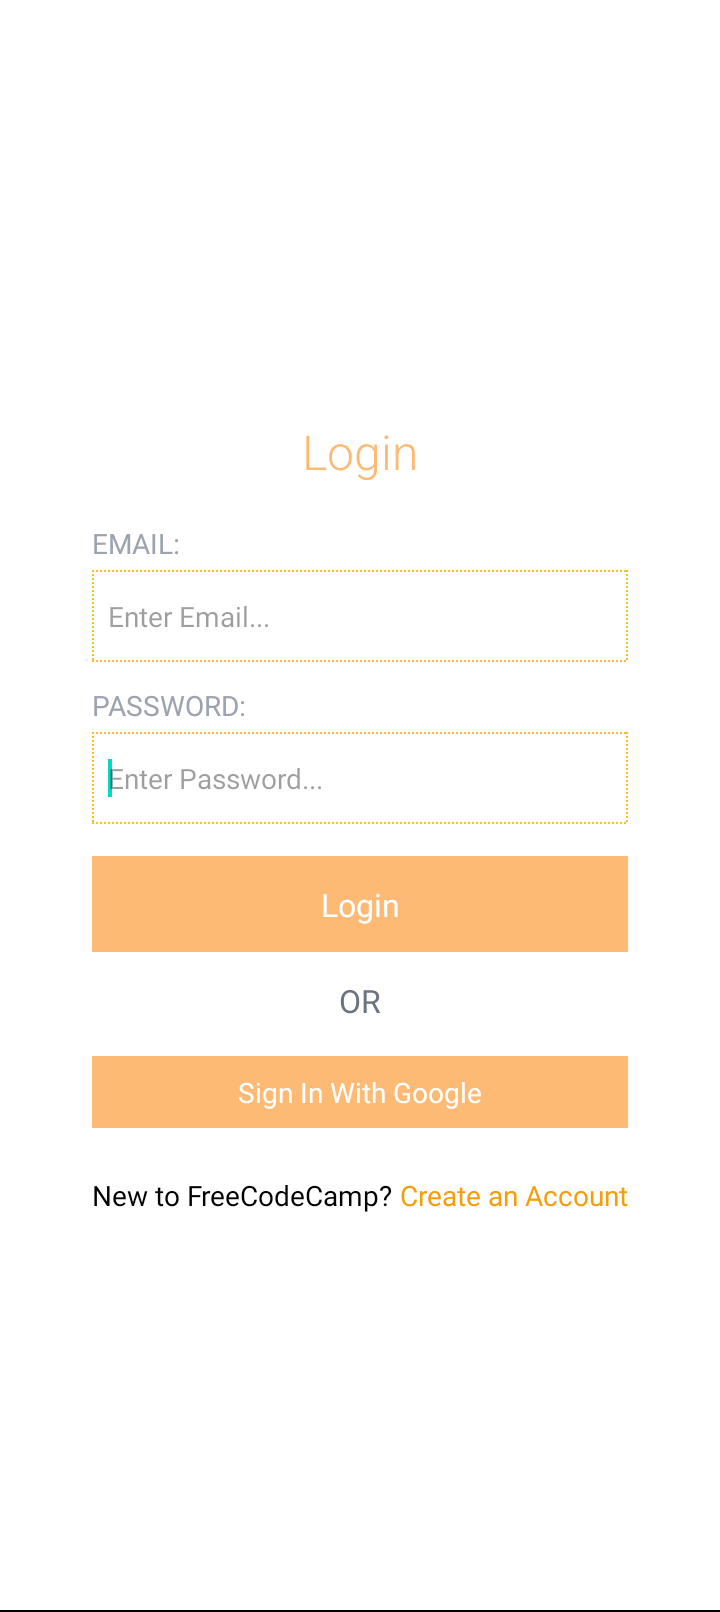 Output of the code in an emulator
If you need to, you can access the complete project code on GitHub.
Conclusion
Integrating Tailwind CSS into a React Native Expo project with NativeWind has various benefits, including increased developer efficiency, code consistency, and performance. Developers can easily create amazing mobile applications by leveraging the power of Tailwind CSS's utility-first approach and React Native's native features.
NativeWind makes it easy to apply Tailwind CSS to your React Native Expo app. Using Tailwind CSS in your mobile app development workflow opens up new possibilities for UI design and customization.
Remember, if you have any questions or just want to say hi, feel free to reach me on X(Twitter) or my website. :)