
The React Handbook follows the 80/20 rule: learn in 20% of the time the 80% of a topic.
I find this approach gives a well-rounded overview. This book does not try to cover everything under the sun related to React, but it should give you the basic building blocks to get out there and become a great React developer. If you think some specific topic should be included, tell me. You can reach me on Twitter @flaviocopes.
I hope the contents of this book will help you achieve what you want: learn the basics of React.
You can get this ebook in PDF, ePub and Mobi format at reacthandbook.com
Book Index
Table of Contents
An introduction to React
How to use create-react-app
SECTION 1: MODERN JAVASCRIPT CORE CONCEPTS YOU NEED TO KNOW TO USE REACT
- Variables
- Arrow functions
- Rest and spread
- Object and array destructuring
- Template literals
- Classes
- Callbacks
- Promises
- Async/Await
- ES Modules
SECTION 2: REACT CONCEPTS
- Single Page Applications
- Declarative
- Immutability
- Purity
- Composition
- The Virtual DOM
- Unidirectional Data Flow
SECTION 3: IN-DEPTH REACT
- JSX
- Components
- State
- Props
- Presentational vs container components
- State vs props
- PropTypes
- React Fragment
- Events
- Lifecycle Events
- Forms in React
- Reference a DOM element
- Server side rendering
- The Context API
- Higher order components
- Render Props
- Hooks
- Code splitting
SECTION 4: PRACTICAL EXAMPLES
SECTION 5: STYLING
SECTION 6: TOOLING
SECTION 7: TESTING
SECTION 8: THE REACT ECOSYSTEM
An introduction to the React view library
What is React?
React is a JavaScript library that aims to simplify development of visual interfaces.
Developed at Facebook and released to the world in 2013, it drives some of the most widely used apps, powering Facebook and Instagram among countless other applications.
Its primary goal is to make it easy to reason about an interface and its state at any point in time, by dividing the UI into a collection of components.
Why is React so popular?
React has taken the frontend web development world by storm. Why?
Less complex than the other alternatives
At the time when React was announced, Ember.js and Angular 1.x were the predominant choices as a framework. Both these imposed so many conventions on the code that porting an existing app was not convenient at all.
React made a choice to be very easy to integrate into an existing project, because that’s how they had to do it at Facebook in order to introduce it to the existing codebase. Also, those 2 frameworks brought too much to the table, while React only chose to implement the View layer instead of the full MVC stack.
Perfect timing
At the time, Angular 2.x was announced by Google, along with the backwards incompatibility and major changes it was going to bring. Moving from Angular 1 to 2 was like moving to a different framework, so this, along with execution speed improvements that React promised, made it something developers were eager to try.
Backed by Facebook
Being backed by Facebook is, of course, going to benefit a project if it turns out to be successful.
Facebook currently has a strong interest in React, sees the value of it being Open Source, and this is a huge plus for all the developers using it in their own projects.
Is React simple to learn?
Even though I said that React is simpler than alternative frameworks, diving into React is still complicated, but mostly because of the corollary technologies that can be integrated with React, like Redux and GraphQL.
React in itself has a very small API, and you basically need to understand 4 concepts to get started:
- Components
- JSX
- State
- Props
All these (and more) are explained in this handbook.
How to install React on your development computer
How do you install React?
React is a library, so saying install might sound a bit weird. Maybe setup is a better word, but you get the concept.
There are various ways to setup React so that it can be used on your app or site.
Load React directly in the web page
The simplest one is to add the React JavaScript file into the page directly. This is best when your React app will interact with the elements present on a single page, and not actually controls the whole navigation aspect.
In this case, you add 2 script tags to the end of the body tag:
<html>
  ...
  <body>
    ...
    <script
      src="https://cdnjs.cloudflare.com/ajax/libs/react/16.8.3/umd/react.development.js"
      crossorigin
    ></script>
    <script
      src="https://cdnjs.cloudflare.com/ajax/libs/react-dom/16.8.3/umd/react-dom.production.min.js"
      crossorigin
    ></script>
  </body>
</html>
Please change the version number to the latest version of React available.
Here we loaded both React and React DOM. Why 2 libraries? Because React is 100% independent from the browser and can be used outside it (for example on Mobile devices with React Native). Hence the need for React DOM, to add the wrappers for the browser.
After those tags you can load your JavaScript files that use React, or even inline JavaScript in a script tag:
<script src="app.js"></script>

<!-- or -->

<script>
  //my app
</script>
To use JSX you need an extra step: load Babel
<script src="https://unpkg.com/babel-standalone@6/babel.min.js"></script>and load your scripts with the special text/babel MIME type:
<script src="app.js" type="text/babel"><;/script>Now you can add JSX in your app.js file:
const Button = () => {
  return <button>Click me!</button>
}

ReactDOM.render(<Button />, document.getElementById('root'))
Check out this simple Glitch example: https://glitch.com/edit/#!/react-example-inline-jsx?path=script.js
Starting in this way with script tags is good for building prototypes and enables a quick start without having to set up a complex workflow.
How to use create-react-app
create-react-app is a project aimed at getting you up to speed with React in no time, and any React app that needs to outgrow a single page will find that create-react-app meets that need.
You start by using npx, which is an easy way to download and execute Node.js commands without installing them. npx comes with npm (since version 5.2) and if you don't have npm installed already, do it now from https://nodejs.org (npm is installed with Node).
If you are unsure which version of npm you have, run npm -v to check if you need to update.
Tip: check out my OSX terminal tutorial if you’re unfamiliar with using the terminal, applies to Linux as well — I’m sorry but I don’t have a tutorial for Windows at the moment, but Google is your friend.
When you run npx create-react-app <app-name>, npx is going to download the most recent create-react-app release, run it, and then remove it from your system. This is great because you will never have an outdated version on your system, and every time you run it, you're getting the latest and greatest code available.
Let’s start then:
npx create-react-app todolist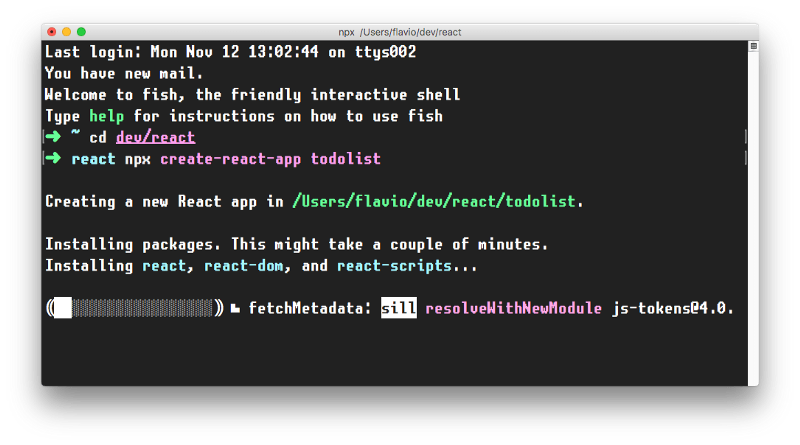
This is when it finished running:
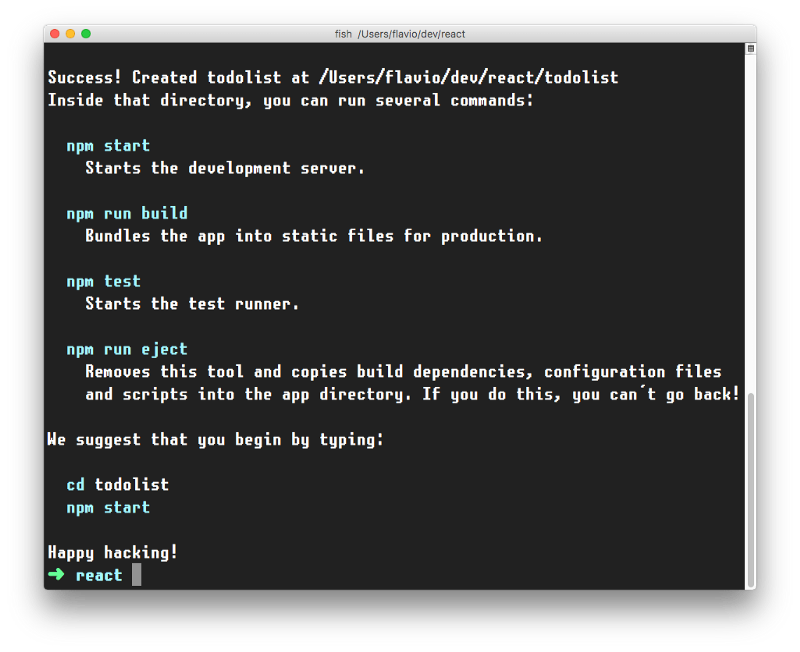
create-react-app created a files structure in the folder you told (todolist in this case), and initialized a Git repository.
It also added a few commands in the package.json file, so you can immediately start the app by going into the folder and run npm start.

In addition to npm start, create-react-app added a few other commands:
npm run build: to build the React application files in thebuildfolder, ready to be deployed to a servernpm test: to run the testing suite using Jestnpm eject: to eject fromcreate-react-app
Ejecting is the act of deciding that create-react-app has done enough for you, but you want to do more than what it allows.
Since create-react-app is a set of common denominator conventions and a limited amount of options, it's probable that at some point your needs will demand something unique that outgrows the capabilities of create-react-app.
When you eject, you lose the ability of automatic updates but you gain more flexibility in the Babel and Webpack configuration.
When you eject the action is irreversible. You will get 2 new folders in your application directory, config and scripts. Those contain the configurations - and now you can start editing them.
If you already have a React app installed using an older version of React, first check the version by addingconsole.log(React.version)in your app, then you can update by runningyarn add react@16.7, and yarn will prompt you to update (choose the latest version available). Repeat foryarn add react-dom@16.7(change "16.7" with whatever is the newest version of React at the moment)
CodeSandbox
An easy way to have the create-react-app structure, without installing it, is to go to https://codesandbox.io/s and choose "React".

CodeSandbox is a great way to start a React project without having to install it locally.
Codepen
Another great solution is Codepen.
You can use this Codepen starter project which already comes pre-configured with React, with support for Hooks: https://codepen.io/flaviocopes/pen/VqeaxB
Codepen “pens” are great for quick projects with one JavaScript file, while “projects” are great for projects with multiple files, like the ones we’ll use the most when building React apps.
One thing to note is that in Codepen, due to how it works internally, you don’t use the regular ES Modules import syntax, but rather to import for example useState, you use
const { useState } = Reactand not
import { useState } from 'react'SECTION 1: MODERN JAVASCRIPT CORE CONCEPTS YOU NEED TO KNOW TO USE REACT
Find out if you have to learn something before diving into learning React
If you are willing to learn React, you first need to have a few things under your belt. There are some prerequisite technologies you have to be familiar with, in particular related to some of the more recent JavaScript features you’ll use over and over in React.
Sometimes people think one particular feature is provided by React, but instead it’s just modern JavaScript syntax.
There is no point in being an expert in those topics right away, but the more you dive into React, the more you’ll need to master those.
I will mention a list of things to get you up to speed quickly.
Variables
A variable is a literal assigned to an identifier, so you can reference and use it later in the program.
Variables in JavaScript do not have any type attached. Once you assign a specific literal type to a variable, you can later reassign the variable to host any other type, without type errors or any issue.
This is why JavaScript is sometimes referred to as “untyped”.
A variable must be declared before you can use it. There are 3 ways to do this, using var, let or const, and those 3 ways differ in how you can interact with the variable later on.
Using var
Until ES2015, var was the only construct available for defining variables.
var a = 0If you forget to add var you will be assigning a value to an undeclared variable, and the results might vary.
In modern environments, with strict mode enabled, you will get an error. In older environments (or with strict mode disabled) this will simply initialize the variable and assign it to the global object.
If you don’t initialize the variable when you declare it, it will have the undefined value until you assign a value to it.
var a //typeof a === 'undefined'You can redeclare the variable many times, overriding it:
var a = 1
var a = 2
You can also declare multiple variables at once in the same statement:
var a = 1, b = 2jsxThe scope is the portion of code where the variable is visible.
A variable initialized with var outside of any function is assigned to the global object, has a global scope and is visible everywhere. A variable initialized with var inside a function is assigned to that function, it's local and is visible only inside it, just like a function parameter.
Any variable defined in a function with the same name as a global variable takes precedence over the global variable, shadowing it.
It’s important to understand that a block (identified by a pair of curly braces) does not define a new scope. A new scope is only created when a function is created, because var does not have block scope, but function scope.
Inside a function, any variable defined in it is visible throughout all the function code, even if the variable is declared at the end of the function it can still be referenced in the beginning, because JavaScript before executing the code actually moves all variables on top (something that is called hoisting). To avoid confusion, always declare variables at the beginning of a function.
Using let
let is a new feature introduced in ES2015 and it's essentially a block scoped version of var. Its scope is limited to the block, statement or expression where it's defined, and all the contained inner blocks.
Modern JavaScript developers might choose to only use let and completely discard the use of var.
Ifletseems an obscure term, just readlet color = 'red'as let the color be red and it all makes much more sense
Defining let outside of any function - contrary to var - does not create a global variable.
Using const
Variables declared with var or let can be changed later on in the program, and reassigned. Once a const is initialized, its value can never be changed again, and it can't be reassigned to a different value.
const a = 'test'We can’t assign a different literal to the a const. We can however mutate a if it's an object that provides methods that mutate its contents.
const does not provide immutability, just makes sure that the reference can't be changed.
const has block scope, same as let.
Modern JavaScript developers might choose to always use const for variables that don't need to be reassigned later in the program.
Why? Because we should always use the simplest construct available to avoid making errors down the road.
Arrow functions
Arrow functions were introduced in ES6 / ECMAScript 2015, and since their introduction they changed forever how JavaScript code looks (and works).
In my opinion this change was so welcoming that you now rarely see the usage of the function keyword in modern codebases.
Visually, it’s a simple and welcome change, which allows you to write functions with a shorter syntax, from:
const myFunction = function() {
  //...
}
to
const myFunction = () => {
  //...
}
If the function body contains just a single statement, you can omit the brackets and write all on a single line:
const myFunction = () => doSomething()Parameters are passed in the parentheses:
const myFunction = (param1, param2) => doSomething(param1, param2)If you have one (and just one) parameter, you could omit the parentheses completely:
const myFunction = param => doSomething(param)Thanks to this short syntax, arrow functions encourage the use of small functions.
Implicit return
Arrow functions allow you to have an implicit return: values are returned without having to use the return keyword.
It works when there is a one-line statement in the function body:
const myFunction = () => 'test'

myFunction() //'test'
Another example, when returning an object, remember to wrap the curly brackets in parentheses to avoid it being considered the wrapping function body brackets:
const myFunction = () => ({ value: 'test' })

myFunction() //{value: 'test'}
How this works in arrow functions
this is a concept that can be complicated to grasp, as it varies a lot depending on the context and also varies depending on the mode of JavaScript (strict mode or not).
It’s important to clarify this concept because arrow functions behave very differently compared to regular functions.
When defined as a method of an object, in a regular function this refers to the object, so you can do:
const car = {
  model: 'Fiesta',
  manufacturer: 'Ford',
  fullName: function() {
    return `${this.manufacturer} ${this.model}`
  }
}
calling car.fullName() will return "Ford Fiesta".
The this scope with arrow functions is inherited from the execution context. An arrow function does not bind this at all, so its value will be looked up in the call stack, so in this code car.fullName() will not work, and will return the string "undefined undefined":
const car = {
  model: 'Fiesta',
  manufacturer: 'Ford',
  fullName: () => {
    return `${this.manufacturer} ${this.model}`
  }
}
Due to this, arrow functions are not suited as object methods.
Arrow functions cannot be used as constructors either, when instantiating an object will raise a TypeError.
This is where regular functions should be used instead, when dynamic context is not needed.
This is also a problem when handling events. DOM Event listeners set this to be the target element, and if you rely on this in an event handler, a regular function is necessary:
const link = document.querySelector('#link')
link.addEventListener('click', () => {
  // this === window
})

const link = document.querySelector('#link')
link.addEventListener('click', function() {
  // this === link
})
Rest and spread
You can expand an array, an object or a string using the spread operator ....
Let’s start with an array example. Given
const a = [1, 2, 3]you can create a new array using
const b = [...a, 4, 5, 6]You can also create a copy of an array using
const c = [...a]This works for objects as well. Clone an object with:
const newObj = { ...oldObj }Using strings, the spread operator creates an array with each char in the string:
const hey = 'hey'
const arrayized = [...hey] // ['h', 'e', 'y']
This operator has some pretty useful applications. The most important one is the ability to use an array as function argument in a very simple way:
const f = (foo, bar) => {}
const a = [1, 2]
f(...a)
(in the past you could do this using f.apply(null, a) but that's not as nice and readable)
The rest element is useful when working with array destructuring:
const numbers = [1, 2, 3, 4, 5]
[first, second, ...others] = numbers
and spread elements:
const numbers = [1, 2, 3, 4, 5]
const sum = (a, b, c, d, e) => a + b + c + d + e
const sumOfNumbers = sum(...numbers)
ES2018 introduces rest properties, which are the same but for objects.
Rest properties:
const { first, second, ...others } = {
  first: 1,
  second: 2,
  third: 3,
  fourth: 4,
  fifth: 5
}

first // 1
second // 2
others // { third: 3, fourth: 4, fifth: 5 }
Spread properties allow to create a new object by combining the properties of the object passed after the spread operator:
const items = { first, second, ...others }
items //{ first: 1, second: 2, third: 3, fourth: 4, fifth: 5 }
Object and array destructuring
Given an object, using the destructuring syntax you can extract just some values and put them into named variables:
const person = {
  firstName: 'Tom',
  lastName: 'Cruise',
  actor: true,
  age: 54 //made up
}

const { firstName: name, age } = person //name: Tom, age: 54
name and age contain the desired values.
The syntax also works on arrays:
const a = [1, 2, 3, 4, 5]
const [first, second] = a
This statement creates 3 new variables by getting the items with index 0, 1, 4 from the array a:
const [first, second, , , fifth] = aTemplate literals
Template Literals are a new ES2015 / ES6 feature that allows you to work with strings in a novel way compared to ES5 and below.
The syntax at a first glance is very simple, just use backticks instead of single or double quotes:
const a_string = `something`They are unique because they provide a lot of features that normal strings built with quotes do not, in particular:
- they offer a great syntax to define multiline strings
- they provide an easy way to interpolate variables and expressions in strings
- they allow you to create DSLs with template tags (DSL means domain specific language, and it’s for example used in React by Styled Components, to define CSS for a component)
Let’s dive into each of these in detail.
Multiline strings
Pre-ES6, to create a string spanning over two lines you had to use the \ character at the end of a line:
const string =
  'first part \
second part'
This allows to create a string on 2 lines, but it’s rendered on just one line:
first part second part
To render the string on multiple lines as well, you explicitly need to add \n at the end of each line, like this:
const string =
  'first line\n \
second line'
or
const string = 'first line\n' + 'second line'Template literals make multiline strings much simpler.
Once a template literal is opened with the backtick, you just press enter to create a new line, with no special characters, and it’s rendered as-is:
const string = `Hey
this
string
is awesome!`
Keep in mind that space is meaningful, so doing this:
const string = `First
                Second`
is going to create a string like this:
First
                Second
an easy way to fix this problem is by having an empty first line, and appending the trim() method right after the closing backtick, which will eliminate any space before the first character:
const string = `
First
Second`.trim()
Interpolation
Template literals provide an easy way to interpolate variables and expressions into strings.
You do so by using the ${...} syntax:
const myVariable = 'test'
const string = `something ${myVariable}` //something test
inside the ${} you can add anything, even expressions:
const string = `something ${1 + 2 + 3}`
const string2 = `something ${foo() ? 'x' : 'y'}`
Classes
In 2015 the ECMAScript 6 (ES6) standard introduced classes.
JavaScript has a quite uncommon way to implement inheritance: prototypical inheritance. Prototypal inheritance, while in my opinion great, is unlike most other popular programming language’s implementation of inheritance, which is class-based.
People coming from Java or Python or other languages had a hard time understanding the intricacies of prototypal inheritance, so the ECMAScript committee decided to sprinkle syntactic sugar on top of prototypical inheritance so that it resembles how class-based inheritance works in other popular implementations.
This is important: JavaScript under the hood is still the same, and you can access an object prototype in the usual way.
A class definition
This is how a class looks.
class Person {
  constructor(name) {
    this.name = name
  }

  hello() {
    return 'Hello, I am ' + this.name + '.'
  }
}
A class has an identifier, which we can use to create new objects using new ClassIdentifier().
When the object is initialized, the constructor method is called, with any parameters passed.
A class also has as many methods as it needs. In this case hello is a method and can be called on all objects derived from this class:
const flavio = new Person('Flavio')
flavio.hello()
Class inheritance
A class can extend another class, and objects initialized using that class inherit all the methods of both classes.
If the inherited class has a method with the same name as one of the classes higher in the hierarchy, the closest method takes precedence:
class Programmer extends Person {
  hello() {
    return super.hello() + ' I am a programmer.'
  }
}

const flavio = new Programmer('Flavio')
flavio.hello()
(the above program prints “Hello, I am Flavio. I am a programmer.”)
Classes do not have explicit class variable declarations, but you must initialize any variable in the constructor.
Inside a class, you can reference the parent class calling super().
Static methods
Normally methods are defined on the instance, not on the class.
Static methods are executed on the class instead:
class Person {
  static genericHello() {
    return 'Hello'
  }
}

Person.genericHello() //Hello
Private methods
JavaScript does not have a built-in way to define private or protected methods.
There are workarounds, but I won’t describe them here.
Getters and setters
You can add methods prefixed with get or set to create a getter and setter, which are two different pieces of code that are executed based on what you are doing: accessing the variable, or modifying its value.
class Person {
  constructor(name) {
    this.name = name
  }

  set name(value) {
    this.name = value
  }

  get name() {
    return this.name
  }
}
If you only have a getter, the property cannot be set, and any attempt at doing so will be ignored:
class Person {
  constructor(name) {
    this.name = name
  }

  get name() {
    return this.name
  }
}
If you only have a setter, you can change the value but not access it from the outside:
class Person {
  constructor(name) {
    this.name = name
  }

  set name(value) {
    this.name = value
  }
}
Callbacks
Computers are asynchronous by design.
Asynchronous means that things can happen independently of the main program flow.
In the current consumer computers, every program runs for a specific time slot, and then it stops its execution to let another program continue its execution. This thing runs in a cycle so fast that’s impossible to notice, and we think our computers run many programs simultaneously, but this is an illusion (except on multiprocessor machines).
Programs internally use interrupts, a signal that’s emitted to the processor to gain the attention of the system.
I won’t go into the internals of this, but just keep in mind that it’s normal for programs to be asynchronous, and halt their execution until they need attention, and the computer can execute other things in the meantime. When a program is waiting for a response from the network, it cannot halt the processor until the request finishes.
Normally, programming languages are synchronous, and some provide a way to manage asynchronicity, in the language or through libraries. C, Java, C#, PHP, Go, Ruby, Swift, Python, they are all synchronous by default. Some of them handle async by using threads, spawning a new process.
JavaScript is synchronous by default and is single threaded. This means that code cannot create new threads and run in parallel.
Lines of code are executed in series, one after another, for example:
const a = 1
const b = 2
const c = a * b
console.log(c)
doSomething()
But JavaScript was born inside the browser, its main job, in the beginning, was to respond to user actions, like onClick, onMouseOver, onChange, onSubmit and so on. How could it do this with a synchronous programming model?
The answer was in its environment. The browser provides a way to do it by providing a set of APIs that can handle this kind of functionality.
More recently, Node.js introduced a non-blocking I/O environment to extend this concept to file access, network calls and so on.
You can’t know when a user is going to click a button, so what you do is, you define an event handler for the click event. This event handler accepts a function, which will be called when the event is triggered:
document.getElementById('button').addEventListener('click', () => {
  //item clicked
})
This is the so-called callback.
A callback is a simple function that’s passed as a value to another function, and will only be executed when the event happens. We can do this because JavaScript has first-class functions, which can be assigned to variables and passed around to other functions (called higher-order functions)
It’s common to wrap all your client code in a load event listener on the windowobject, which runs the callback function only when the page is ready:
window.addEventListener('load', () => {
  //window loaded
  //do what you want
})
Callbacks are used everywhere, not just in DOM events.
One common example is by using timers:
setTimeout(() => {
  // runs after 2 seconds
}, 2000)
XHR requests also accept a callback, in this example by assigning a function to a property that will be called when a particular event occurs (in this case, the state of the request changes):
const xhr = new XMLHttpRequest()
xhr.onreadystatechange = () => {
  if (xhr.readyState === 4) {
    xhr.status === 200 ? console.log(xhr.responseText) : console.error('error')
  }
}
xhr.open('GET', 'https://yoursite.com')
xhr.send()
Handling errors in callbacks
How do you handle errors with callbacks? One very common strategy is to use what Node.js adopted: the first parameter in any callback function is the error object: error-first callbacks
If there is no error, the object is null. If there is an error, it contains some description of the error and other information.
fs.readFile('/file.json', (err, data) => {
  if (err !== null) {
    //handle error
    console.log(err)
    return
  }

  //no errors, process data
  console.log(data)
})
The problem with callbacks
Callbacks are great for simple cases!
However every callback adds a level of nesting, and when you have lots of callbacks, the code starts to be complicated very quickly:
window.addEventListener('load', () => {
  document.getElementById('button').addEventListener('click', () => {
    setTimeout(() => {
      items.forEach(item => {
        //your code here
      })
    }, 2000)
  })
})
This is just a simple 4-levels code, but I’ve seen much more levels of nesting and it’s not fun.
How do we solve this?
ALTERNATIVES TO CALLBACKS
Starting with ES6, JavaScript introduced several features that help us with asynchronous code that do not involve using callbacks:
- Promises (ES6)
- Async/Await (ES8)
Promises
Promises are one way to deal with asynchronous code, without writing too many callbacks in your code.
Although they’ve been around for years, they were standardized and introduced in ES2015, and now they have been superseded in ES2017 by async functions.
Async functions use the promises API as their building block, so understanding them is fundamental even if in newer code you’ll likely use async functions instead of promises.
How promises work, in brief
Once a promise has been called, it will start in pending state. This means that the caller function continues the execution, while it waits for the promise to do its own processing, and give the caller function some feedback.
At this point, the caller function waits for it to either return the promise in a resolved state, or in a rejected state, but as you know JavaScript is asynchronous, so the function continues its execution while the promise does it work.
Which JS API use promises?
In addition to your own code and library code, promises are used by standard modern Web APIs like Fetch or Service Workers.
It’s unlikely that in modern JavaScript you’ll find yourself not using promises, so let’s start diving right into them.
Creating a promise
The Promise API exposes a Promise constructor, which you initialize using new Promise():
let done = true

const isItDoneYet = new Promise((resolve, reject) => {
  if (done) {
    const workDone = 'Here is the thing I built'
    resolve(workDone)
  } else {
    const why = 'Still working on something else'
    reject(why)
  }
})
As you can see the promise checks the done global constant, and if that's true, we return a resolved promise, otherwise a rejected promise.
Using resolve and reject we can communicate back a value, in the above case we just return a string, but it could be an object as well.
Consuming a promise
In the last section, we introduced how a promise is created.
Now let’s see how the promise can be consumed or used.
const isItDoneYet = new Promise()
//...

const checkIfItsDone = () => {
  isItDoneYet
    .then(ok => {
      console.log(ok)
    })
    .catch(err => {
      console.error(err)
    })
}
Running checkIfItsDone() will execute the isItDoneYet() promise and will wait for it to resolve, using the then callback, and if there is an error, it will handle it in the catch callback.
Chaining promises
A promise can be returned to another promise, creating a chain of promises.
A great example of chaining promises is given by the Fetch API, a layer on top of the XMLHttpRequest API, which we can use to get a resource and queue a chain of promises to execute when the resource is fetched.
The Fetch API is a promise-based mechanism, and calling fetch() is equivalent to defining our own promise using new Promise().
Example:
const status = response => {
  if (response.status >= 200 && response.status < 300) {
    return Promise.resolve(response)
  }
  return Promise.reject(new Error(response.statusText))
}

const json = response => response.json()

fetch('/todos.json')
  .then(status)
  .then(json)
  .then(data => {
    console.log('Request succeeded with JSON response', data)
  })
  .catch(error => {
    console.log('Request failed', error)
  })
In this example, we call fetch() to get a list of TODO items from the todos.json file found in the domain root, and we create a chain of promises.
Running fetch() returns a response, which has many properties, and within those we reference:
status, a numeric value representing the HTTP status codestatusText, a status message, which isOKif the request succeeded
response also has a json() method, which returns a promise that will resolve with the content of the body processed and transformed into JSON.
So given those premises, this is what happens: the first promise in the chain is a function that we defined, called status(), that checks the response status and if it's not a success response (between 200 and 299), it rejects the promise.
This operation will cause the promise chain to skip all the chained promises listed and will skip directly to the catch() statement at the bottom, logging the Request failed text along with the error message.
If that succeeds instead, it calls the json() function we defined. Since the previous promise, when successful, returned the response object, we get it as an input to the second promise.
In this case, we return the data JSON processed, so the third promise receives the JSON directly:
.then((data) => {
  console.log('Request succeeded with JSON response', data)
})
and we simply log it to the console.
Handling errors
In the above example, in the previous section, we had a catch that was appended to the chain of promises.
When anything in the chain of promises fails and raises an error or rejects the promise, the control goes to the nearest catch() statement down the chain.
new Promise((resolve, reject) => {
  throw new Error('Error')
}).catch(err => {
  console.error(err)
})

// or

new Promise((resolve, reject) => {
  reject('Error')
}).catch(err => {
  console.error(err)
})
Cascading errors
If inside the catch() you raise an error, you can append a second catch() to handle it, and so on.
new Promise((resolve, reject) => {
  throw new Error('Error')
})
  .catch(err => {
    throw new Error('Error')
  })
  .catch(err => {
    console.error(err)
  })
Orchestrating promises with Promise.all()
If you need to synchronize different promises, Promise.all() helps you define a list of promises, and execute something when they are all resolved.
Example:
const f1 = fetch('/something.json')
const f2 = fetch('/something2.json')

Promise.all([f1, f2])
  .then(res => {
    console.log('Array of results', res)
  })
  .catch(err => {
    console.error(err)
  })
The ES2015 destructuring assignment syntax allows you to also do
Promise.all([f1, f2]).then(([res1, res2]) => {
  console.log('Results', res1, res2)
})
You are not limited to using fetch of course, any promise is good to go.
Orchestrating promises with Promise.race()
Promise.race() runs as soon as one of the promises you pass to it resolves, and it runs the attached callback just once with the result of the first promise resolved.
Example:
const promiseOne = new Promise((resolve, reject) => {
  setTimeout(resolve, 500, 'one')
})
const promiseTwo = new Promise((resolve, reject) => {
  setTimeout(resolve, 100, 'two')
})

Promise.race([promiseOne, promiseTwo]).then(result => {
  console.log(result) // 'two'
})
Async/Await
JavaScript evolved in a very short time from callbacks to promises (ES2015), and since ES2017 asynchronous JavaScript is even simpler with the async/await syntax.
Async functions are a combination of promises and generators, and basically, they are a higher level abstraction over promises. Let me repeat: async/await is built on promises.
Why were async/await introduced?
They reduce the boilerplate around promises, and the “don’t break the chain” limitation of chaining promises.
When Promises were introduced in ES2015, they were meant to solve a problem with asynchronous code, and they did, but over the 2 years that separated ES2015 and ES2017, it was clear that promises could not be the final solution.
Promises were introduced to solve the famous callback hell problem, but they introduced complexity on their own, and syntax complexity.
They were good primitives around which a better syntax could be exposed to developers, so when the time was right we got async functions.
They make the code look like it’s synchronous, but it’s asynchronous and non-blocking behind the scenes.
How it works
An async function returns a promise, like in this example:
const doSomethingAsync = () => {
  return new Promise(resolve => {
    setTimeout(() => resolve('I did something'), 3000)
  })
}
When you want to call this function you prepend await, and the calling code will stop until the promise is resolved or rejected. One caveat: the client function must be defined as async. Here's an example:
const doSomething = async () => {
  console.log(await doSomethingAsync())
}
A quick example
This is a simple example of async/await used to run a function asynchronously:
const doSomethingAsync = () => {
  return new Promise(resolve => {
    setTimeout(() => resolve('I did something'), 3000)
  })
}

const doSomething = async () => {
  console.log(await doSomethingAsync())
}

console.log('Before')
doSomething()
console.log('After')
The above code will print the following to the browser console:
Before
After
I did something //after 3s
Promise all the things
Prepending the async keyword to any function means that the function will return a promise.
Even if it’s not doing so explicitly, it will internally make it return a promise.
This is why this code is valid:
const aFunction = async () => {
  return 'test'
}

aFunction().then(alert) // This will alert 'test'
and it’s the same as:
const aFunction = async () => {
  return Promise.resolve('test')
}

aFunction().then(alert) // This will alert 'test'
The code is much simpler to read
As you can see in the example above, our code looks very simple. Compare it to code using plain promises, with chaining and callback functions.
And this is a very simple example, the major benefits will arise when the code is much more complex.
For example here’s how you would get a JSON resource, and parse it, using promises:
const getFirstUserData = () => {
  return fetch('/users.json') // get users list
    .then(response => response.json()) // parse JSON
    .then(users => users[0]) // pick first user
    .then(user => fetch(`/users/${user.name}`)) // get user data
    .then(userResponse => userResponse.json()) // parse JSON
}

getFirstUserData()
And here is the same functionality provided using await/async:
const getFirstUserData = async () => {
  const response = await fetch('/users.json') // get users list
  const users = await response.json() // parse JSON
  const user = users[0] // pick first user
  const userResponse = await fetch(`/users/${user.name}`) // get user data
  const userData = await userResponse.json() // parse JSON
  return userData
}

getFirstUserData()
Multiple async functions in series
Async functions can be chained very easily, and the syntax is much more readable than with plain promises:
const promiseToDoSomething = () => {
  return new Promise(resolve => {
    setTimeout(() => resolve('I did something'), 10000)
  })
}

const watchOverSomeoneDoingSomething = async () => {
  const something = await promiseToDoSomething()
  return something + ' and I watched'
}

const watchOverSomeoneWatchingSomeoneDoingSomething = async () => {
  const something = await watchOverSomeoneDoingSomething()
  return something + ' and I watched as well'
}

watchOverSomeoneWatchingSomeoneDoingSomething().then(res => {
  console.log(res)
})
Will print:
I did something and I watched and I watched as wellEasier debugging
Debugging promises is hard because the debugger will not step over asynchronous code.
Async/await makes this very easy because to the compiler it’s just like synchronous code.
ES Modules
ES Modules is the ECMAScript standard for working with modules.
While Node.js has been using the CommonJS standard for years, the browser never had a module system, as every major decision such as a module system must be first standardized by ECMAScript and then implemented by the browser.
This standardization process completed with ES6 and browsers started implementing this standard trying to keep everything well aligned, working all in the same way, and now ES Modules are supported in Chrome, Safari, Edge and Firefox (since version 60).
Modules are very cool, because they let you encapsulate all sorts of functionality, and expose this functionality to other JavaScript files, as libraries.
The ES Modules Syntax
The syntax to import a module is:
import package from 'module-name'while CommonJS uses
const package = require('module-name')A module is a JavaScript file that exports one or more values (objects, functions or variables), using the export keyword. For example, this module exports a function that returns a string uppercase:
uppercase.js
export default str => str.toUpperCase()In this example, the module defines a single, default export, so it can be an anonymous function. Otherwise it would need a name to distinguish it from other exports.
Now, any other JavaScript module can import the functionality offered by uppercase.js by importing it.
An HTML page can add a module by using a <script> tag with the special type="module" attribute:
<script type="module" src="index.js"><;/script>Note: this module import behaves like a defer script load. See efficiently load JavaScript with defer and asyncIt’s important to note that any script loaded with type="module" is loaded in strict mode.
In this example, the uppercase.js module defines a default export, so when we import it, we can assign it a name we prefer:
import toUpperCase from './uppercase.js'and we can use it:
toUpperCase('test') //'TEST'You can also use an absolute path for the module import, to reference modules defined on another domain:
import toUpperCase from 'https://flavio-es-modules-example.glitch.me/uppercase.js'This is also valid import syntax:
import { foo } from '/uppercase.js'import { foo } from '../uppercase.js'This is not:
import { foo } from 'uppercase.js'
import { foo } from 'utils/uppercase.js'
It’s either absolute, or has a ./ or / before the name.
Other import/export options
We saw this example above:
export default str => str.toUpperCase()This creates one default export. In a file however you can export more than one thing, by using this syntax:
const a = 1
const b = 2
const c = 3

export { a, b, c }
Another module can import all those exports using
import * from 'module'You can import just a few of those exports, using the destructuring assignment:
import { a } from 'module'
import { a, b } from 'module'
You can rename any import, for convenience, using as:
import { a, b as two } from 'module'You can import the default export, and any non-default export by name, like in this common React import:
import React, { Component } from 'react'You can see an ES Modules example here: https://glitch.com/edit/#!/flavio-es-modules-example?path=index.html
CORS
Modules are fetched using CORS. This means that if you reference scripts from other domains, they must have a valid CORS header that allows cross-site loading (like Access-Control-Allow-Origin: *)
What about browsers that do not support modules?
Use a combination of type="module" and nomodule:
<script type="module" src="module.js"></script>
<script nomodule src="fallback.js"></script>
ES Modules are one of the biggest features introduced in modern browsers. They are part of ES6 but the road to implement them has been long.
We can now use them! But we must also remember that having more than a few modules is going to have a performance hit on our pages, as it’s one more step that the browser must perform at runtime.
Webpack is probably going to still be a huge player even if ES Modules land in the browser, but having such a feature directly built in the language is huge for a unification of how modules work client-side and on Node.js as well.
SECTION 2: REACT CONCEPTS
Single Page Applications
React Applications are also called Single Page Applications. What does this mean?
In the past, when browsers were much less capable than today, and JavaScript performance was poor, every page was coming from a server. Every time you clicked something, a new request was made to the server and the browser subsequently loaded the new page.
Only very innovative products worked differently, and experimented with new approaches.
Today, popularized by modern frontend JavaScript frameworks like React, an app is usually built as a single page application: you only load the application code (HTML, CSS, JavaScript) once, and when you interact with the application, what generally happens is that JavaScript intercepts the browser events and instead of making a new request to the server that then returns a new document, the client requests some JSON or performs an action on the server but the page that the user sees is never completely wiped away, and behaves more like a desktop application.
Single page applications are built in JavaScript (or at least compiled to JavaScript) and work in the browser.
The technology is always the same, but the philosophy and some key components of how the application works are different.
Examples of Single Page Applications
Some notable examples:
- Gmail
- Google Maps
- Google Drive
Pros and cons of SPAs
An SPA feels much faster to the user, because instead of waiting for the client-server communication to happen, and wait for the browser to re-render the page, you can now have instant feedback. This is the responsibility of the application maker, but you can have transitions and spinners and any kind of UX improvement that is certainly better than the traditional workflow.
In addition to making the experience faster to the user, the server will consume less resources because you can focus on providing an efficient API instead of building the layouts server-side.
This makes it ideal if you also build a mobile app on top of the API, as you can completely reuse your existing server-side code.
Single Page Applications are easy to transform into Progressive Web Apps, which in turn enables you to provide local caching and to support offline experiences for your services (or simply a better error message if your users need to be online).
SPAs are best used when there is no need for SEO (search engine optimization). For example for apps that work behind a login.
Search engines, while improving every day, still have trouble indexing sites built with an SPA approach rather than the traditional server-rendered pages. This is the case for blogs. If you are going to rely on search engines, don’t even bother with creating a single page application without having a server rendered part as well.
When coding an SPA, you are going to write a great deal of JavaScript. Since the app can be long-running, you are going to need to pay a lot more attention to possible memory leaks — if in the past your page had a lifespan that was counted in minutes, now an SPA might stay open for hours at a time and if there is any memory issue that’s going to increase the browser memory usage by a lot more and it’s going to cause an unpleasantly slow experience if you don’t take care of it.
SPAs are great when working in teams. Backend developers can just focus on the API, and frontend developers can focus on creating the best user experience, making use of the API built in the backend.
As a con, Single Page Apps rely heavily on JavaScript. This might make using an application running on low power devices a poor experience in terms of speed. Also, some of your visitors might just have JavaScript disabled, and you also need to consider accessibility for anything you build.
Overriding the navigation
Since you get rid of the default browser navigation, URLs must be managed manually.
This part of an application is called the router. Some frameworks already take care of them for you (like Ember), others require libraries that will do this job (like React Router).
What’s the problem? In the beginning, this was an afterthought for developers building Single Page Applications. This caused the common “broken back button” issue: when navigating inside the application the URL didn’t change (since the browser default navigation was hijacked) and hitting the back button, a common operation that users do to go to the previous screen, might move to a website you visited a long time ago.
This problem can now be solved using the History API offered by browsers, but most of the time you’ll use a library that internally uses that API, like React Router.
Declarative
What does it mean when you read that React is declarative? You’ll run across articles describing React as a declarative approach to building UIs.
React made its “declarative approach” quite popular and upfront so it permeated the frontend world along with React.
It’s really not a new concept, but React took building UIs a lot more declaratively than with HTML templates:
- you can build Web interfaces without even touching the DOM directly
- you can have an event system without having to interact with the actual DOM Events.
The opposite of declarative is imperative. A common example of an imperative approach is looking up elements in the DOM using jQuery or DOM events. You tell the browser exactly what to do, instead of telling it what you need.
The React declarative approach abstracts that for us. We just tell React we want a component to be rendered in a specific way, and we never have to interact with the DOM to reference it later.
Immutability
One concept you will likely meet when programming in React is immutability (and its opposite, mutability).
It’s a controversial topic, but whatever you might think about the concept of immutability, React and most of its ecosystem kind of forces this, so you need to at least have a grasp of why it’s so important and the implications of it.
In programming, a variable is immutable when its value cannot change after it’s created.
You are already using immutable variables without knowing it when you manipulate a string. Strings are immutable by default, when you change them in reality you create a new string and assign it to the same variable name.
An immutable variable can never be changed. To update its value, you create a new variable.
The same applies to objects and arrays.
Instead of changing an array, to add a new item you create a new array by concatenating the old array, plus the new item.
An object is never updated, but copied before changing it.
This applies to React in many places.
For example, you should never mutate the state property of a component directly, but only through the setState() method.
In Redux, you never mutate the state directly, but only through reducers, which are functions.
The question is, why?
There are various reasons, the most important of which are:
- Mutations can be centralized, like in the case of Redux, which improves your debugging capabilities and reduces sources of errors.
- Code looks cleaner and simpler to understand. You never expect a function to change some value without you knowing, which gives you predictability. When a function does not mutate objects but just returns a new object, it’s called a pure function.
- The library can optimize the code because for example JavaScript is faster when swapping an old object reference for an entirely new object, rather than mutating an existing object. This gives you performance.
Purity
In JavaScript, when a function does not mutate objects but just returns a new object, it’s called a pure function.
A function, or a method, in order to be called pure should not cause side effects and should return the same output when called multiple times with the same input.
A pure function takes an input and returns an output without changing the input nor anything else.
Its output is only determined by the arguments. You could call this function 1M times, and given the same set of arguments, the output will always be the same.
React applies this concept to components. A React component is a pure component when its output is only dependant on its props.
All functional components are pure components:
const Button = props => {
  return <button>{props.message}</button>
}
Class components can be pure if their output only depends on the props:
class Button extends React.Component {
  render() {
    return <button>{this.props.message}</button>
  }
}
Composition
In programming, composition allows you to build more complex functionality by combining small and focused functions.
For example, think about using map() to create a new array from an initial set, and then filtering the result using filter():
const list = ['Apple', 'Orange', 'Egg']
list.map(item => item[0]).filter(item => item === 'A') //'A'
In React, composition allows you to have some pretty cool advantages.
You create small and lean components and use them to compose more functionality on top of them. How?
Create specialized version of a component
Use an outer component to expand and specialize a more generic component:
const Button = props => {
  return <button>{props.text}</button>
}

const SubmitButton = () => {
  return <Button text="Submit" />
}

const LoginButton = () => {
  return <Button text="Login" />
}
Pass methods as props
A component can focus on tracking a click event, for example, and what actually happens when the click event happens is up to the container component:
const Button = props => {
  return <button onClick={props.onClickHandler}>{props.text}</button>
}

const LoginButton = props => {
  return <Button text="Login" onClickHandler={props.onClickHandler} />
}

const Container = () => {
  const onClickHandler = () => {
    alert('clicked')
  }

  return <LoginButton onClickHandler={onClickHandler} />
}
Using children
The props.children property allows you to inject components inside other components.
The component needs to output props.children in its JSX:
const Sidebar = props => {
  return <aside>{props.children}</aside>
}
and you embed more components into it in a transparent way:
<Sidebar>
  <Link title="First link" />
  <Link title="Second link" />
</Sidebar>
Higher order components
When a component receives a component as a prop and returns a component, it’s called higher order component.
We’ll see them in a little while.
The Virtual DOM
Many existing frameworks, before React came on the scene, were directly manipulating the DOM on every change.
First, what is the DOM?
The DOM (Document Object Model) is a Tree representation of the page, starting from the <html> tag, going down into every child, which are called nodes.
It’s kept in the browser memory, and directly linked to what you see in a page. The DOM has an API that you can use to traverse it, access every single node, filter them, modify them.
The API is the familiar syntax you have likely seen many times, if you were not using the abstract API provided by jQuery and friends:
document.getElementById(id)
document.getElementsByTagName(name)
document.createElement(name)
parentNode.appendChild(node)
element.innerHTML
element.style.left
element.setAttribute()
element.getAttribute()
element.addEventListener()
window.content
window.onload
window.dump()
window.scrollTo()
React keeps a copy of the DOM representation, for what concerns the React rendering: the Virtual DOM
The Virtual DOM Explained
Every time the DOM changes, the browser has to do two intensive operations: repaint (visual or content changes to an element that do not affect the layout and positioning relative to other elements) and reflow (recalculate the layout of a portion of the page — or the whole page layout).
React uses a Virtual DOM to help the browser use less resources when changes need to be done on a page.
When you call setState() on a Component, specifying a state different than the previous one, React marks that Component as dirty. This is key: React only updates when a Component changes the state explicitly.
What happens next is:
- React updates the Virtual DOM relative to the components marked as dirty (with some additional checks, like triggering
shouldComponentUpdate()) - Runs the diffing algorithm to reconcile the changes
- Updates the real DOM
Why is the Virtual DOM helpful: batching
The key thing is that React batches much of the changes and performs a unique update to the real DOM, by changing all the elements that need to be changed at the same time, so the repaint and reflow the browser must perform to render the changes are executed just once.
Unidirectional Data Flow
Working with React you might encounter the term Unidirectional Data Flow. What does it mean? Unidirectional Data Flow is not a concept unique to React, but as a JavaScript developer this might be the first time you hear it.
In general this concept means that data has one, and only one, way to be transferred to other parts of the application.
In React this means that:
- state is passed to the view and to child components
- actions are triggered by the view
- actions can update the state
- the state change is passed to the view and to child components
The view is a result of the application state. State can only change when actions happen. When actions happen, the state is updated.
Thanks to one-way bindings, data cannot flow in the opposite way (as would happen with two-way bindings, for example), and this has some key advantages:
- it’s less error prone, as you have more control over your data
- it’s easier to debug, as you know what is coming from where
- it’s more efficient, as the library already knows what the boundaries are of each part of the system
A state is always owned by one Component. Any data that’s affected by this state can only affect Components below it: its children.
Changing state on a Component will never affect its parent, or its siblings, or any other Component in the application: just its children.
This is the reason that the state is often moved up in the Component tree, so that it can be shared between components that need to access it.
SECTION 3: IN-DEPTH REACT
JSX
JSX is a technology that was introduced by React.
Although React can work completely fine without using JSX, it’s an ideal technology to work with components, so React benefits a lot from JSX.
At first, you might think that using JSX is like mixing HTML and JavaScript (and as you’ll see CSS).
But this is not true, because what you are really doing when using JSX syntax is writing a declarative syntax of what a component UI should be.
And you’re describing that UI not using strings, but instead using JavaScript, which allows you to do many nice things.
A JSX primer
Here is how you define a h1 tag containing a string:
const element = <h1>Hello, world!</h1>It looks like a strange mix of JavaScript and HTML, but in reality it’s all JavaScript.
What looks like HTML, is actually syntactic sugar for defining components and their positioning inside the markup.
Inside a JSX expression, attributes can be inserted very easily:
const myId = 'test'
const element = <h1 id={myId}>Hello, world!</h1>
You just need to pay attention when an attribute has a dash (-) which is converted to camelCase syntax instead, and these 2 special cases:
classbecomesclassNameforbecomeshtmlFor
because they are reserved words in JavaScript.
Here’s a JSX snippet that wraps two components into a div tag:
<div>
  <BlogPostsList />
  <Sidebar />
</div>
A tag always needs to be closed, because this is more XML than HTML (if you remember the XHTML days, this will be familiar, but since then the HTML5 loose syntax won). In this case a self-closing tag is used.
Notice how I wrapped the 2 components into a div. Why? Because the render() function can only return a single node, so in case you want to return 2 siblings, just add a parent. It can be any tag, not just div.
Transpiling JSX
A browser cannot execute JavaScript files containing JSX code. They must be first transformed to regular JS.
How? By doing a process called transpiling.
We already said that JSX is optional, because to every JSX line, a corresponding plain JavaScript alternative is available, and that’s what JSX is transpiled to.
For example the following two constructs are equivalent:
Plain JS
ReactDOM.render(
  React.DOM.div(
    { id: 'test' },
    React.DOM.h1(null, 'A title'),
    React.DOM.p(null, 'A paragraph')
  ),
  document.getElementById('myapp')
)
JSX
ReactDOM.render(
  <div id="test">
    <h1>A title</h1>
    <p>A paragraph</p>
  </div>,
  document.getElementById('myapp')
)
This very basic example is just the starting point, but you can already see how more complicated the plain JS syntax is compared to using JSX.
At the time of writing the most popular way to perform the transpilation is to use Babel, which is the default option when running create-react-app, so if you use it you don't have to worry, everything happens under the hood for you.
If you don’t use create-react-app you need to setup Babel yourself.
JS in JSX
JSX accepts any kind of JavaScript mixed into it.
Whenever you need to add some JS, just put it inside curly braces {}. For example here's how to use a constant value defined elsewhere:
const paragraph = 'A paragraph'
ReactDOM.render(
  <div id="test">
    <h1>A title</h1>
    <p>{paragraph}</p>
  </div>,
  document.getElementById('myapp')
)
This is a basic example. Curly braces accept any JS code:
const paragraph = 'A paragraph'
ReactDOM.render(
  <table>
    {rows.map((row, i) => {
      return <tr>{row.text}</tr>
    })}
  </table>,
  document.getElementById('myapp')
)
As you can see we nested JavaScript inside JSX defined inside JavaScript nested in JSX. You can go as deep as you need.
HTML in JSX
JSX resembles HTML a lot, but it’s actually XML syntax.
In the end you render HTML, so you need to know a few differences between how you would define some things in HTML, and how you define them in JSX.
You need to close all tags
Just like in XHTML, if you have ever used it, you need to close all tags: no more <br> but instead use the self-closing tag: <br /> (the same goes for other tags)
camelCase is the new standard
In HTML you’ll find attributes without any case (e.g. onchange). In JSX, they are renamed to their camelCase equivalent:
onchange=>onChangeonclick=>onClickonsubmit=>onSubmit
class becomes className
Due to the fact that JSX is JavaScript, and class is a reserved word, you can't write
<p class="description">but you need to use
<p className="description">The same applies to for which is translated to htmlFor.
CSS in React
JSX provides a cool way to define CSS.
If you have a little experience with HTML inline styles, at first glance you’ll find yourself pushed back 10 or 15 years, to a world where inline CSS was completely normal (nowadays it’s demonized and usually just a “quick fix” go-to solution).
JSX style is not the same thing: first of all, instead of accepting a string containing CSS properties, the JSX style attribute only accepts an object. This means you define properties in an object:
var divStyle = {
  color: 'white'
}

ReactDOM.render(<div style={divStyle}>Hello World!</div>, mountNode)
or
ReactDOM.render(<div style={{ color: 'white' }}>Hello World!</div>, mountNode)The CSS values you write in JSX are slightly different from plain CSS:
- the keys property names are camelCased
- values are just strings
- you separate each tuple with a comma
Why is this preferred over plain CSS / SASS / LESS?
CSS is an unsolved problem. Since its inception, dozens of tools around it rose and then fell. The main problem with JS is that there is no scoping and it’s easy to write CSS that is not enforced in any way, thus a “quick fix” can impact elements that should not be touched.
JSX allows components (defined in React for example) to completely encapsulate their style.
Is this the go-to solution?
Inline styles in JSX are good until you need to
- write media queries
- style animations
- reference pseudo classes (e.g.
:hover) - reference pseudo elements (e.g.
::first-letter)
In short, they cover the basics, but it’s not the final solution.
Forms in JSX
JSX adds some changes to how HTML forms work, with the goal of making things easier for the developer.
value and defaultValue
The value attribute always holds the current value of the field.
The defaultValue attribute holds the default value that was set when the field was created.
This helps solve some weird behavior of regular DOM interaction when inspecting input.value and input.getAttribute('value') returning one the current value and one the original default value.
This also applies to the textarea field, e.g.
<textarea>Some text</textarea>but instead
<textarea defaultValue={'Some text'} />For select fields, instead of using
<select>
  <option value="x" selected>
    ...
  </option>
</select>
use
<select defaultValue="x">
  <option value="x">...</option>
</select>
A more consistent onChange
Passing a function to the onChange attribute you can subscribe to events on form fields.
It works consistently across fields, even radio, select and checkbox input fields fire a onChange event.
onChange also fires when typing a character into an input or textarea field.
JSX auto escapes
To mitigate the ever present risk of XSS exploits, JSX forces automatic escaping in expressions.
This means that you might run into issues when using an HTML entity in a string expression.
You expect the following to print © 2017:
<p>{'© 2017'}</p>But it’s not, it’s printing © 2017 because the string is escaped.
To fix this you can either move the entities outside the expression:
<p>© 2017</p>or by using a constant that prints the Unicode representation corresponding to the HTML entity you need to print:
<p>{'\u00A9 2017'}</p>White space in JSX
To add white space in JSX there are 2 rules:
Rule 1: Horizontal white space is trimmed to 1
If you have white space between elements in the same line, it’s all trimmed to 1 white space.
<p>Something becomes this</p>becomes
<p>Something becomes this</p>Rule 2: Vertical white space is eliminated
<p>
  Something
  becomes
  this
</p>
becomes
<p>Somethingbecomesthis</p>To fix this problem you need to explicitly add white space, by adding a space expression like this:
<p>
  Something
  {' '}becomes
  {' '}this
</p>
or by embedding the string in a space expression:
<p>
  Something
  {' becomes '}
  this
</p>
Adding comments in JSX
You can add comments to JSX by using the normal JavaScript comments inside an expression:
<p>
  {/* a comment */}
  {
    //another comment
  }
</p>
Spread attributes
In JSX a common operation is assigning values to attributes.
Instead of doing it manually, e.g.
<div>
  <BlogPost title={data.title} date={data.date} />
</div>
you can pass
<div>
  <BlogPost {...data} />
</div>
and the properties of the data object will be used as attributes automatically, thanks to the ES6 spread operator.
How to loop in JSX
If you have a set of elements you need to loop upon to generate a JSX partial, you can create a loop, and then add JSX to an array:
const elements = [] //..some array

const items = []

for (const [index, value] of elements.entries()) {
  items.push(<Element key={index} />)
}
Now when rendering the JSX you can embed the items array simply by wrapping it in curly braces:
const elements = ['one', 'two', 'three'];

const items = []

for (const [index, value] of elements.entries()) {
  items.push(<li key={index}>{value}</li>)
}

return (
  <div>
    {items}
  </div>
)
You can do the same directly in the JSX, using map instead of a for-of loop:
const elements = ['one', 'two', 'three'];
return (
  <ul>
    {elements.map((value, index) => {
      return <li key={index}>{value}</li>
    })}
  </ul>
)
Components
A component is one isolated piece of interface. For example in a typical blog homepage you might find the Sidebar component, and the Blog Posts List component. They are in turn composed of components themselves, so you could have a list of Blog post components, each for every blog post, and each with its own peculiar properties.
React makes it very simple: everything is a component.
Even plain HTML tags are component on their own, and they are added by default.
The next 2 lines are equivalent, they do the same thing. One with JSX, one without, by injecting <h1>Hello World!</h1> into an element with id app.
import React from 'react'
import ReactDOM from 'react-dom'

ReactDOM.render(<h1>Hello World!</h1>, document.getElementById('app'))

ReactDOM.render(
  React.DOM.h1(null, 'Hello World!'),
  document.getElementById('app')
)
See, React.DOM exposed us an h1 component. Which other HTML tags are available? All of them! You can inspect what React.DOM offers by typing it in the Browser Console:
(the list is longer)
The built-in components are nice, but you’ll quickly outgrow them. What React excels in is letting us compose a UI by composing custom components.
Custom components
There are 2 ways to define a component in React.
A function component:
const BlogPostExcerpt = () => {
  return (
    <div>
      <h1>Title</h1>
      <p>Description</p>
    </div>
  )
}
A class component:
import React, { Component } from 'react'

class BlogPostExcerpt extends Component {
  render() {
    return (
      <div>
        <h1>Title</h1>
        <p>Description</p>
      </div>
    )
  }
}
Up until recently, class components were the only way to define a component that had its own state, and could access the lifecycle methods so you could do things when the component was first rendered, updated or removed.
React Hooks changed this, so our function components are now much more powerful than ever and I believe we’ll see fewer and fewer class components in the future, although it will still be perfectly valid way to create components.
There is also a third syntax which uses the ES5 syntax, without the classes:
import React from 'react'

React.createClass({
  render() {
    return (
      <div>
        <h1>Title</h1>
        <p>Description</p>
      </div>
    )
  }
})
You’ll rarely see this in modern, > ES6 codebases.
State
Setting the default state of a component
In the Component constructor, initialize this.state. For example the BlogPostExcerpt component might have a clicked state:
class BlogPostExcerpt extends Component {
  constructor(props) {
    super(props)
    this.state = { clicked: false }
  }

  render() {
    return (
      <div>
        <h1>Title</h1>
        <p>Description</p>
      </div>
    )
  }
}
Accessing the state
The clicked state can be accessed by referencing this.state.clicked:
class BlogPostExcerpt extends Component {
  constructor(props) {
    super(props)
    this.state = { clicked: false }
  }

  render() {
    return (
      <div>
        <h1>Title</h1>
        <p>Description</p>
        <p>Clicked: {this.state.clicked}</p>
      </div>
    )
  }
}
Mutating the state
A state should never be mutated by using
this.state.clicked = trueInstead, you should always use setState() instead, passing it an object:
this.setState({ clicked: true })The object can contain a subset, or a superset, of the state. Only the properties you pass will be mutated, the ones omitted will be left in their current state.
Why you should always use setState()
The reason is that using this method, React knows that the state has changed. It will then start the series of events that will lead to the Component being re-rendered, along with any DOM update.
Unidirectional Data Flow
A state is always owned by one Component. Any data that’s affected by this state can only affect Components below it: its children.
Changing the state on a Component will never affect its parent, or its siblings, or any other Component in the application: just its children.
This is the reason the state is often moved up in the Component tree.
Moving the State Up in the Tree
Because of the Unidirectional Data Flow rule, if two components need to share state, the state needs to be moved up to a common ancestor.
Many times the closest ancestor is the best place to manage the state, but it’s not a mandatory rule.
The state is passed down to the components that need that value via props:
class Converter extends React.Component {
  constructor(props) {
    super(props)
    this.state = { currency: '€' }
  }

  render() {
    return (
      <div>
        <Display currency={this.state.currency} />
        <CurrencySwitcher currency={this.state.currency} />
      </div>
    )
  }
}
The state can be mutated by a child component by passing a mutating function down as a prop:
class Converter extends React.Component {
  constructor(props) {
    super(props)
    this.state = { currency: '€' }
  }

  handleChangeCurrency = event => {
    this.setState({ currency: this.state.currency === '€' ? '$' : '€' })
  }

  render() {
    return (
      <div>
        <Display currency={this.state.currency} />
        <CurrencySwitcher
          currency={this.state.currency}
          handleChangeCurrency={this.handleChangeCurrency}
        />
      </div>
    )
  }
}

const CurrencySwitcher = props => {
  return (
    <button onClick={props.handleChangeCurrency}>
      Current currency is {props.currency}. Change it!
    </button>
  )
}

const Display = props => {
  return <p>Current currency is {props.currency}.</p>
}
Props
Props is how Components get their properties. Starting from the top component, every child component gets its props from the parent. In a function component, props is all it gets passed, and they are available by adding props as the function argument:
const BlogPostExcerpt = props => {
  return (
    <div>
      <h1>{props.title}</h1>
      <p>{props.description}</p>
    </div>
  )
}
In a class component, props are passed by default. There is no need to add anything special, and they are accessible as this.props in a Component instance.
import React, { Component } from 'react'

class BlogPostExcerpt extends Component {
  render() {
    return (
      <div>
        <h1>{this.props.title}</h1>
        <p>{this.props.description}</p>
      </div>
    )
  }
}
Passing props down to child components is a great way to pass values around in your application. A component either holds data (has state) or receives data through its props.
It gets complicated when:
- you need to access the state of a component from a child that’s several levels down (all the previous children need to act as a pass-through, even if they do not need to know the state, complicating things)
- you need to access the state of a component from a completely unrelated component.
Default values for props
If any value is not required we need to specify a default value for it if it’s missing when the Component is initialized.
BlogPostExcerpt.propTypes = {
  title: PropTypes.string,
  description: PropTypes.string
}

BlogPostExcerpt.defaultProps = {
  title: '',
  description: ''
}
Some tooling like ESLint have the ability to enforce defining the defaultProps for a Component with some propTypes not explicitly required.
How props are passed
When initializing a component, pass the props in a way similar to HTML attributes:
const desc = 'A description'
//...
<BlogPostExcerpt title="A blog post" description={desc} />
We passed the title as a plain string (something we can only do with strings!), and description as a variable.
Children
A special prop is children. That contains the value of anything that is passed in the body of the component, for example:
<BlogPostExcerpt title="A blog post" description="{desc}">
  Something
</BlogPostExcerpt>
In this case, inside BlogPostExcerpt we could access "Something" by looking up this.props.children.
While Props allow a Component to receive properties from its parent, to be “instructed” to print some data for example, state allows a component to take on life itself, and be independent of the surrounding environment.
Presentational vs container components
In React, components are often divided into 2 big buckets: presentational components and container components.
Each of those have their unique characteristics.
Presentational components are mostly concerned with generating some markup to be outputted.
They don’t manage any kind of state, except for state related the the presentation
Container components are mostly concerned with the “backend” operations.
They might handle the state of various sub-components. They might wrap several presentational components. They might interface with Redux.
As a way to simplify the distinction, we can say presentational components are concerned with the look, container components are concerned with making things work.
For example, this is a presentational component. It gets data from its props, and just focuses on showing an element:
const Users = props => (
  <ul>
    {props.users.map(user => (
      <li>{user}</li>
    ))}
  </ul>
)
On the other hand this is a container component. It manages and stores its own data, and uses the presentational component to display it.
class UsersContainer extends React.Component {
  constructor() {
    this.state = {
      users: []
    }
  }

  componentDidMount() {
    axios.get('/users').then(users =>
      this.setState({ users: users }))
    )
  }

  render() {
    return <Users users={this.state.users} />
  }
}
State vs props
In a React component, props are variables passed to it by its parent component. State on the other hand is still variables, but directly initialized and managed by the component.
The state can be initialized by props.
For example, a parent component might include a child component by calling
<ChildComponent />The parent can pass a prop by using this syntax:
<ChildComponent color=green />Inside the ChildComponent constructor we could access the prop:
class ChildComponent extends React.Component {
  constructor(props) {
    super(props)
    console.log(props.color)
  }
}
and any other method in this class can reference the props using this.props.
Props can be used to set the internal state based on a prop value in the constructor, like this:
class ChildComponent extends React.Component {
  constructor(props) {
    super(props)
    this.state.colorName = props.color
  }
}
Of course a component can also initialize the state without looking at props.
In this case there’s nothing useful going on, but imagine doing something different based on the prop value, probably setting a state value is best.
Props should never be changed in a child component, so if there’s something going on that alters some variable, that variable should belong to the component state.
Props are also used to allow child components to access methods defined in the parent component. This is a good way to centralize managing the state in the parent component, and avoid children having the need to have their own state.
Most of your components will just display some kind of information based on the props they received, and stay stateless.
PropTypes
Since JavaScript is a dynamically typed language, we don’t really have a way to enforce the type of a variable at compile time, and if we pass invalid types, they will fail at runtime or give weird results if the types are compatible but not what we expect.
Flow and TypeScript help a lot, but React has a way to directly help with props types, and even before running the code, our tools (editors, linters) can detect when we are passing the wrong values:
import PropTypes from 'prop-types'
import React from 'react'

class BlogPostExcerpt extends Component {
  render() {
    return (
      <div>
        <h1>{this.props.title}</h1>
        <p>{this.props.description}</p>
      </div>
    )
  }
}

BlogPostExcerpt.propTypes = {
  title: PropTypes.string,
  description: PropTypes.string
}

export default BlogPostExcerpt
Which types can we use
These are the fundamental types we can accept:
- PropTypes.array
- PropTypes.bool
- PropTypes.func
- PropTypes.number
- PropTypes.object
- PropTypes.string
- PropTypes.symbol
We can accept one of two types:
PropTypes.oneOfType([
  PropTypes.string,
  PropTypes.number
]),
We can accept one of many values:
PropTypes.oneOf(['Test1', 'Test2']),We can accept an instance of a class:
PropTypes.instanceOf(Something)We can accept any React node:
PropTypes.nodeor even any type at all:
PropTypes.anyArrays have a special syntax that we can use to accept an array of a particular type:
PropTypes.arrayOf(PropTypes.string)We can compose object properties by using
PropTypes.shape({
  color: PropTypes.string,
  fontSize: PropTypes.number
})
Requiring properties
Appending isRequired to any PropTypes option will cause React to return an error if that property is missing:
PropTypes.arrayOf(PropTypes.string).isRequired,
PropTypes.string.isRequired,
React Fragment
Notice how I wrap return values in a div. This is because a component can only return one single element, and if you want more than one, you need to wrap it with another container tag.
This, however, causes an unnecessary div in the output. You can avoid this by using React.Fragment:
import React, { Component } from 'react'

class BlogPostExcerpt extends Component {
  render() {
    return (
      <React.Fragment>
        <h1>{this.props.title}</h1>
        <p>{this.props.description}</p>
      </React.Fragment>
    )
  }
}
which also has a very nice shorthand syntax <></> that is supported only in recent releases (and Babel 7+):
import React, { Component } from 'react'

class BlogPostExcerpt extends Component {
  render() {
    return (
      <>
        <h1>{this.props.title}</h1>
        <p>{this.props.description}</p>
      </>
    )
  }
}
Events
React provides an easy way to manage events. Prepare to say goodbye to addEventListener.
In the previous article about the State you saw this example:
const CurrencySwitcher = props => {
  return (
    <button onClick={props.handleChangeCurrency}>
      Current currency is {props.currency}. Change it!
    </button>
  )
}
If you’ve been using JavaScript for a while, this is just like plain old JavaScript event handlers, except that this time you’re defining everything in JavaScript, not in your HTML, and you’re passing a function, not a string.
The actual event names are a little bit different because in React you use camelCase for everything, so onclick becomes onClick, onsubmit becomes onSubmit.
For reference, this is old school HTML with JavaScript events mixed in:
<button onclick="handleChangeCurrency()">...<;/button>Event handlers
It’s a convention to have event handlers defined as methods on the Component class:
class Converter extends React.Component {
  handleChangeCurrency = event => {
    this.setState({ currency: this.state.currency === '€' ? '$' : '€' })
  }
}
All handlers receive an event object that adheres, cross-browser, to the W3C UI Events spec.
Bind this in methods
If you use class components, don’t forget to bind methods. The methods of ES6 classes by default are not bound. What this means is that this is not defined unless you define methods as arrow functions:
class Converter extends React.Component {
  handleClick = e => {
    /* ... */
  }
  //...
}
when using the the property initializer syntax with Babel (enabled by default in create-react-app), otherwise you need to bind it manually in the constructor:
class Converter extends React.Component {
  constructor(props) {
    super(props)
    this.handleClick = this.handleClick.bind(this)
  }
  handleClick(e) {}
}
The events reference
There are lots of events supported, here’s a summary list.
Clipboard
- onCopy
- onCut
- onPaste
Composition
- onCompositionEnd
- onCompositionStart
- onCompositionUpdate
Keyboard
- onKeyDown
- onKeyPress
- onKeyUp
Focus
- onFocus
- onBlur
Form
- onChange
- onInput
- onSubmit
Mouse
- onClick
- onContextMenu
- onDoubleClick
- onDrag
- onDragEnd
- onDragEnter
- onDragExit
- onDragLeave
- onDragOver
- onDragStart
- onDrop
- onMouseDown
- onMouseEnter
- onMouseLeave
- onMouseMove
- onMouseOut
- onMouseOver
- onMouseUp
Selection
- onSelect
Touch
- onTouchCancel
- onTouchEnd
- onTouchMove
- onTouchStart
UI
- onScroll
Mouse Wheel
- onWheel
Media
- onAbort
- onCanPlay
- onCanPlayThrough
- onDurationChange
- onEmptied
- onEncrypted
- onEnded
- onError
- onLoadedData
- onLoadedMetadata
- onLoadStart
- onPause
- onPlay
- onPlaying
- onProgress
- onRateChange
- onSeeked
- onSeeking
- onStalled
- onSuspend
- onTimeUpdate
- onVolumeChange
- onWaiting
Image
- onLoad
- onError
Animation
- onAnimationStart
- onAnimationEnd
- onAnimationIteration
Transition
- onTransitionEnd
Lifecycle Events
React class components can have hooks for several lifecycle events.
Hooks allow function components to access them too, in a different way.
During the lifetime of a component, there’s a series of events that gets called, and to each event you can hook and provide custom functionality.
What hook is best for what functionality is something we’re going to see here.
First, there are 3 phases in a React component lifecycle:
- Mounting
- Updating
- Unmounting
Let’s see those 3 phases in detail and the methods that get called for each.
Mounting
When mounting you have 4 lifecycle methods before the component is mounted in the DOM: the constructor, getDerivedStateFromProps, render and componentDidMount.
Constructor
The constructor is the first method that is called when mounting a component.
You usually use the constructor to set up the initial state using this.state = ....
getDerivedStateFromProps()
When the state depends on props, getDerivedStateFromProps can be used to update the state based on the props value.
It was added in React 16.3, aiming to replace the componentWillReceiveProps deprecated method.
In this method you haven’t access to this as it's a static method.
It’s a pure method, so it should not cause side effects and should return the same output when called multiple times with the same input.
Returns an object with the updated elements of the state (or null if the state does not change)
render()
From the render() method you return the JSX that builds the component interface.
It’s a pure method, so it should not cause side effects and should return the same output when called multiple times with the same input.
componentDidMount()
This method is the one that you will use to perform API calls, or process operations on the DOM.
Updating
When updating you have 5 lifecycle methods before the component is mounted in the DOM: the getDerivedStateFromProps, shouldComponentUpdate, render, getSnapshotBeforeUpdate and componentDidUpdate.
getDerivedStateFromProps()
See the above description for this method.
shouldComponentUpdate()
This method returns a boolean, true or false. You use this method to tell React if it should go on with the rerendering, and defaults to true. You will return false when rerendering is expensive and you want to have more control on when this happens.
render()
See the above description for this method.
getSnapshotBeforeUpdate()
In this method you have access to the props and state of the previous render, and of the current render.
Its use cases are very niche, and it’s probably the one that you will use less.
componentDidUpdate()
This method is called when the component has been updated in the DOM. Use this to run any 3rd party DOM API or call APIs that must be updated when the DOM changes.
It corresponds to the componentDidMount() method from the mounting phase.
Unmounting
In this phase we only have one method, componentWillUnmount.
componentWillUnmount()
The method is called when the component is removed from the DOM. Use this to do any sort of cleanup you need to perform.
Legacy
If you are working on an app that uses componentWillMount, componentWillReceiveProps or componentWillUpdate, those were deprecated in React 16.3 and you should migrate to other lifecycle methods.
Forms in React
Forms are one of the few HTML elements that are interactive by default.
They were designed to allow the user to interact with a page.
Common uses of forms?
- Search
- Contact forms
- Shopping carts checkout
- Login and registration
- and more!
Using React we can make our forms much more interactive and less static.
There are two main ways of handling forms in React, which differ on a fundamental level: how data is managed.
- if the data is handled by the DOM, we call them uncontrolled components
- if the data is handled by the components we call them controlled components
As you can imagine, controlled components is what you will use most of the time. The component state is the single source of truth, rather than the DOM. Some form fields are inherently uncontrolled because of their behavior, like the <input type="file"> field.
When an element state changes in a form field managed by a component, we track it using the onChange attribute.
class Form extends React.Component {
  constructor(props) {
    super(props)
    this.state = { username: '' }
  }

  handleChange(event) {}

  render() {
    return (
      <form>
        Username:
        <input
          type="text"
          value={this.state.username}
          onChange={this.handleChange}
        />
      </form>
    )
  }
}
In order to set the new state, we must bind this to the handleChange method, otherwise this is not accessible from within that method:
class Form extends React.Component {
  constructor(props) {
    super(props)
    this.state = { username: '' }
    this.handleChange = this.handleChange.bind(this)
  }

  handleChange(event) {
    this.setState({ value: event.target.value })
  }

  render() {
    return (
      <form>
        <input
          type="text"
          value={this.state.username}
          onChange={this.handleChange}
        />
      </form>
    )
  }
}
Similarly, we use the onSubmit attribute on the form to call the handleSubmit method when the form is submitted:
class Form extends React.Component {
  constructor(props) {
    super(props)
    this.state = { username: '' }
    this.handleChange = this.handleChange.bind(this)
    this.handleSubmit = this.handleSubmit.bind(this)
  }

  handleChange(event) {
    this.setState({ value: event.target.value })
  }

  handleSubmit(event) {
    alert(this.state.username)
    event.preventDefault()
  }

  render() {
    return (
      <form onSubmit={this.handleSubmit}>
        <input
          type="text"
          value={this.state.username}
          onChange={this.handleChange}
        />
        <input type="submit" value="Submit" />
      </form>
    )
  }
}
Validation in a form can be handled in the handleChange method: you have access to the old value of the state, and the new one. You can check the new value and if not valid reject the updated value (and communicate it in some way to the user).
HTML Forms are inconsistent. They have a long history, and it shows. React however makes things more consistent for us, and you can get (and update) fields using its value attribute.
Here’s a textarea, for example:
<textarea value={this.state.address} onChange={this.handleChange} />The same goes for the select tag:
<select value="{this.state.age}" onChange="{this.handleChange}">
  <option value="teen">Less than 18</option>
  <option value="adult">18+</option>
</select>
Previously we mentioned the <input type="file"> field. That works a bit differently.
In this case you need to get a reference to the field by assigning the ref attribute to a property defined in the constructor with React.createRef(), and use that to get the value of it in the submit handler:
class FileInput extends React.Component {
  constructor(props) {
    super(props)
    this.curriculum = React.createRef()
    this.handleSubmit = this.handleSubmit.bind(this)
  }

  handleSubmit(event) {
    alert(this.curriculum.current.files[0].name)
    event.preventDefault()
  }

  render() {
    return (
      <form onSubmit={this.handleSubmit}>
        <input type="file" ref={this.curriculum} />
        <input type="submit" value="Submit" />
      </form>
    )
  }
}
This is the uncontrolled components way. The state is stored in the DOM rather than in the component state (notice we used this.curriculum to access the uploaded file, and have not touched the state.
I know what you’re thinking — beyond those basics, there must be a library that simplifies all this form handling stuff and automates validation, error handling and more, right? There is a great one, Formik.
Reference a DOM element
React is great at abstracting away the DOM from you when building apps.
But what if you want to access the DOM element that a React component represents?
Maybe you have to add a library that interacts directly with the DOM like a chart library, maybe you need to call some DOM API, or add focus on an element.
Whatever the reason is, a good practice is making sure there’s no other way of doing so without accessing the DOM directly.
In the JSX of your component, you can assign the reference of the DOM element to a component property using this attribute:
ref={el => this.someProperty = el}Put this into context, for example with a button element:
<button ref={el => (this.button = el)} />button refers to a property of the component, which can then be used by the component's lifecycle methods (or other methods) to interact with the DOM:
class SomeComponent extends Component {
  render() {
    return <button ref={el => (this.button = el)} />
  }
}
In a function component the mechanism is the same, you just avoid using this (since it does not point to the component instance) and use a property instead:
function SomeComponent() {
  let button
  return <button ref={el => (button = el)} />
}
Server side rendering
Server Side Rendering, also called SSR, is the ability of a JavaScript application to render on the server rather than in the browser.
Why would we ever want to do so?
- it allows your site to have a faster first page load time, which is the key to a good user experience
- it is essential for SEO: search engines cannot (yet?) efficiently and correctly index applications that exclusively render client-side. Despite the latest improvements to indexing in Google, there are other search engines too, and Google is not perfect at it in any case. Also, Google favors sites with fast load times, and having to load client-side is not good for speed
- it’s great when people share a page of your site on social media, as they can easily gather the metadata needed to nicely share the link (images, title, description..)
Without Server Side Rendering, all your server ships is an HTML page with no body, just some script tags that are then used by the browser to render the application.
Client-rendered apps are great at any subsequent user interaction after the first page load. Server Side Rendering allows us to get the sweet spot in the middle of client-rendered apps and backend-rendered apps: the page is generated server-side, but all interactions with the page once it’s been loaded are handled client-side.
However Server Side Rendering has its drawback too:
- it’s fair to say that a simple SSR proof of concept is simple, but the complexity of SSR can grow with the complexity of your application
- rendering a big application server-side can be quite resource-intensive, and under heavy load it could even provide a slower experience than client-side rendering, since you have a single bottleneck
A very simplistic example of what it takes to Server-Side render a React app
SSR setups can grow very, very complex and most tutorials will bake in Redux, React Router and many other concepts from the start.
To understand how SSR works, let’s start from the basics to implement a proof of concept.
Feel free to skip this paragraph if you just want to look into the libraries that provide SSR and not bother with the ground work
To implement basic SSR we’re going to use Express.
If you are new to Express, or need some catch-up, check out my free Express Handbook here: https://flaviocopes.com/page/ebooks/.
Warning: the complexity of SSR can grow with the complexity of your application. This is the bare minimum setup to render a basic React app. For more complex needs you might need to do a bit more work or also check out SSR libraries for React.
I assume you started a React app with create-react-app. If you are just trying, install one now using npx create-react-app ssr.
Go to the main app folder with the terminal, then run:
npm install expressYou have a set of folders in your app directory. Create a new folder called server, then go into it and create a file named server.js.
Following the create-react-app conventions, the app lives in the src/App.js file. We're going to load that component, and render it to a string using ReactDOMServer.renderToString(), which is provided by react-dom.
You get the contents of the ./build/index.html file, and replace the <div id="root"></div>placeholder, which is the tag where the application hooks by default, with `<div id="root">\${ReactDOMServer.renderToString(<App />)}</div>.
All the content inside the build folder is going to be served as-is, statically by Express.
import path from 'path'
import fs from 'fs'

import express from 'express'
import React from 'react'
import ReactDOMServer from 'react-dom/server'

import App from '../src/App'

const PORT = 8080
const app = express()

const router = express.Router()

const serverRenderer = (req, res, next) => {
  fs.readFile(path.resolve('./build/index.html'), 'utf8', (err, data) => {
    if (err) {
      console.error(err)
      return res.status(500).send('An error occurred')
    }
    return res.send(
      data.replace(
        '<div id="root"></div>',
        `<div id="root">${ReactDOMServer.renderToString(<App />)}</div>`
      )
    )
  })
}
router.use('^/$', serverRenderer)

router.use(
  express.static(path.resolve(__dirname, '..', 'build'), { maxAge: '30d' })
)

// tell the app to use the above rules
app.use(router)

// app.use(express.static('./build'))
app.listen(PORT, () => {
  console.log(`SSR running on port ${PORT}`)
})
Now, in the client application, in your src/index.js, instead of calling ReactDOM.render():
ReactDOM.render(<App />, document.getElementById('root'))call ReactDOM.hydrate(), which is the same but has the additional ability to attach event listeners to existing markup once React loads:
ReactDOM.hydrate(<App />, document.getElementById('root'))All the Node.js code needs to be transpiled by Babel, as server-side Node.js code does not know anything about JSX, nor ES Modules (which we use for the include statements).
Install these 3 packages:
npm install @babel/register @babel/preset-env @babel/preset-react ignore-styles expressignore-styles is a Babel utility that will tell it to ignore CSS files imported using the import syntax.
Let’s create an entry point in server/index.js:
require('ignore-styles')

require('@babel/register')({
  ignore: [/(node_modules)/],
  presets: ['@babel/preset-env', '@babel/preset-react']
})

require('./server')
Build the React application, so that the build/ folder is populated:
npm run buildand let’s run this:
node server/index.jsI said this is a simplistic approach, and it is:
- it does not handle rendering images correctly when using imports, which need Webpack in order to work (and which complicates the process a lot)
- it does not handle page header metadata, which is essential for SEO and social sharing purposes (among other things)
So while this is a good example of using ReactDOMServer.renderToString() and ReactDOM.hydrate to get this basic server-side rendering, it's not enough for real world usage.
Server Side Rendering using libraries
SSR is hard to do right, and React has no de-facto way to implement it.
It’s still very much debatable if it’s worth the trouble, complication and overhead to get the benefits, rather than using a different technology to serve those pages. This discussion on Reddit has lots of opinions in that regard.
When Server Side Rendering is an important matter, my suggestion is to rely on pre-made libraries and tools that have had this goal in mind since the beginning.
In particular, I suggest Next.js and Gatsby, two projects we’ll see later on.
The Context API
The Context API is a neat way to pass state across the app without having to use props. It was introduced to allow you to pass state (and enable the state to update) across the app, without having to use props for it.
The React team suggests to stick to props if you have just a few levels of children to pass, because it’s still a much less complicated API than the Context API.
In many cases, it enables us to avoid using Redux, simplifying our apps a lot, and also learning how to use React.
How does it work?
You create a context using React.createContext(), which returns a Context object:
const { Provider, Consumer } = React.createContext()Then you create a wrapper component that returns a Provider component, and you add as children all the components from which you want to access the context:
class Container extends React.Component {
  constructor(props) {
    super(props)
    this.state = {
      something: 'hey'
    }
  }

  render() {
    return (
      <Provider value={{ state: this.state }}>{this.props.children}</Provider>
    )
  }
}

class HelloWorld extends React.Component {
  render() {
    return (
      <Container>
        <Button />
      </Container>
    )
  }
}
I used Container as the name of this component because this will be a global provider. You can also create smaller contexts.
Inside a component that’s wrapped in a Provider, you use a Consumer component to make use of the context:
class Button extends React.Component {
  render() {
    return (
      <Consumer>
        {context => <button>{context.state.something}</button>}
      </Consumer>
    )
  }
}
You can also pass functions into a Provider value, and those functions will be used by the Consumer to update the context state:
<Provider value={{
  state: this.state,
  updateSomething: () => this.setState({something: 'ho!'})
  {this.props.children}
</Provider>

/* ... */
<Consumer>
  {(context) => (
    <button onClick={context.updateSomething}>{context.state.something}</button>
  )}
</Consumer>
You can see this in action in this Glitch.
You can create multiple contexts, to make your state distributed across components, yet expose it and make it reachable by any component you want.
When using multiple files, you create the content in one file, and import it in all the places you use it:
//context.js
import React from 'react'
export default React.createContext()

//component1.js
import Context from './context'
//... use Context.Provider

//component2.js
import Context from './context'
//... use Context.Consumer
Higher order components
You might be familiar with Higher Order Functions in JavaScript. Those are functions that accept functions as arguments, and/or return functions.
Two examples of those functions are Array.map() or Array.filter().
In React, we extend this concept to components, and so we have a Higher Order Component (HOC)when the component accepts a component as input and returns a component as its output.
In general, higher order components allow you to create code that’s composable and reusable, and also more encapsulated.
We can use a HOC to add methods or properties to the state of a component, or a Redux store for example.
You might want to use Higher Order Components when you want to enhance an existing component, operate on the state or props, or its rendered markup.
There is a convention of prepending a Higher Order Component with the with string (it's a convention, so it's not mandatory), so if you have a Button component, its HOC counterpart should be called withButton.
Let’s create one.
The simplest example ever of a HOC is one that simply returns the component unaltered:
const withElement = Element => () => <Element />Let’s make this a little bit more useful and add a property to that button, in addition to all the props it already came with, the color:
const withColor = Element => props => <Element {...props} color="red" />We use this HOC in a component JSX:
const Button = () => {
  return <button>test</button>
}

const ColoredButton = withColor(Button)
and we can finally render the ColoredButton component in our app JSX:
function App() {
  return (
    <div className="App">
      <h1>Hello</h1>
      <ColoredButton />
    </div>
  )
}
This is a very simple example but hopefully you can get the gist of HOCs before applying those concepts to more complex scenarios.
Render Props
A common pattern used to share state between components is to use the children prop.
Inside a component JSX you can render {this.props.children} which automatically injects any JSX passed in the parent component as a children:
class Parent extends React.Component {
  constructor(props) {
    super(props)
    this.state = {
      /*...*/
    }
  }

  render() {
    return <div>{this.props.children}</div>
  }
}

const Children1 = () => {}

const Children2 = () => {}

const App = () => (
  <Parent>
    <Children1 />
    <Children2 />
  </Parent>
)
However, there is a problem here: the state of the parent component cannot be accessed from the children.
To be able to share the state, you need to use a render prop component, and instead of passing components as children of the parent component, you pass a function which you then execute in {this.props.children()}. The function can accept arguments:
class Parent extends React.Component {
  constructor(props) {
    super(props)
    this.state = { name: 'Flavio' }
  }

  render() {
    return <div>{this.props.children(this.state.name)}</div>
  }
}

const Children1 = props => {
  return <p>{props.name}</p>
}

const App = () => <Parent>{name => <Children1 name={name} />}</Parent>
Instead of using the children prop, which has a very specific meaning, you can use any prop, and so you can use this pattern multiple times on the same component:
class Parent extends React.Component {
  constructor(props) {
    super(props)
    this.state = { name: 'Flavio', age: 35 }
  }

  render() {
    return (
      <div>
        <p>Test</p>
        {this.props.someprop1(this.state.name)}
        {this.props.someprop2(this.state.age)}
      </div>
    )
  }
}

const Children1 = props => {
  return <p>{props.name}</p>
}

const Children2 = props => {
  return <p>{props.age}</p>
}

const App = () => (
  <Parent
    someprop1={name => <Children1 name={name} />}
    someprop2={age => <Children2 age={age} />}
  />
)

ReactDOM.render(<App />, document.getElementById('app'))
Hooks
Hooks is a feature that will be introduced in React 16.7, and is going to change how we write React apps in the future.
Before Hooks appeared, some key things in components were only possible using class components: having their own state, and using lifecycle events. Function components, lighter and more flexible, were limited in functionality.
Hooks allow function components to have state and to respond to lifecycle events too, and kind of make class components obsolete. They also allow function components to have a good way to handle events.
Access state
Using the useState() API, you can create a new state variable, and have a way to alter it. useState() accepts the initial value of the state item and returns an array containing the state variable, and the function you call to alter the state. Since it returns an array we use array destructuring to access each individual item, like this: const [count, setCount] = useState(0)
Here’s a practical example:
import { useState } from 'react'

const Counter = () => {
  const [count, setCount] = useState(0)

  return (
    <div>
      <p>You clicked {count} times</p>
      <button onClick={() => setCount(count + 1)}>Click me</button>
    </div>
  )
}

ReactDOM.render(<Counter />, document.getElementById('app'))
You can add as many useState() calls you want, to create as many state variables as you want. Just make sure you call it in the top level of a component (not in an if or in any other block).
Access lifecycle hooks
Another very important feature of Hooks is allowing function components to have access to the lifecycle hooks.
Using class components you can register a function on the componentDidMount, componentWillUnmount and componentDidUpdate events, and those will serve many use cases, from variables initialization to API calls to cleanup.
Hooks provide the useEffect() API. The call accepts a function as argument.
The function runs when the component is first rendered, and on every subsequent re-render/update. React first updates the DOM, then calls any function passed to useEffect(). All without blocking the UI rendering even on blocking code, unlike the old componentDidMount and componentDidUpdate, which makes our apps feel faster.
Example:
const { useEffect, useState } = React

const CounterWithNameAndSideEffect = () => {
  const [count, setCount] = useState(0)
  const [name, setName] = useState('Flavio')

  useEffect(() => {
    console.log(`Hi ${name} you clicked ${count} times`)
  })

  return (
    <div>
      <p>
        Hi {name} you clicked {count} times
      </p>
      <button onClick={() => setCount(count + 1)}>Click me</button>
      <button onClick={() => setName(name === 'Flavio' ? 'Roger' : 'Flavio')}>
        Change name
      </button>
    </div>
  )
}

ReactDOM.render(
  <CounterWithNameAndSideEffect />,
  document.getElementById('app')
)
The same componentWillUnmount job can be achieved by optionally returning a function from our useEffect() parameter:
useEffect(() => {
  console.log(`Hi ${name} you clicked ${count} times`)
  return () => {
    console.log(`Unmounted`)
  }
})
useEffect() can be called multiple times, which is nice to separate unrelated logic (something that plagues the class component lifecycle events).
Since the useEffect() functions are run on every subsequent re-render/update, we can tell React to skip a run, for performance purposes, by adding a second parameter which is an array that contains a list of state variables to watch for. React will only re-run the side effect if one of the items in this array changes.
useEffect(
  () => {
    console.log(`Hi ${name} you clicked ${count} times`)
  },
  [name, count]
)
Similarly you can tell React to only execute the side effect once (at mount time), by passing an empty array:
useEffect(() => {
  console.log(`Component mounted`)
}, [])
useEffect() is great for adding logs, accessing 3rd party APIs and much more.
Handle events in function components
Before hooks, you either used class components, or you passed an event handler using props.
Now we can use the useCallback() built-in API:
const Button = () => {
  const handleClick = useCallback(() => {
    //...do something
  })
  return <button onClick={handleClick} />
}
Any parameter used inside the function must be passed through a second parameter to useCallback(), in an array:
const Button = () => {
  let name = '' //... add logic
  const handleClick = useCallback(
    () => {
      //...do something
    },
    [name]
  )
  return <button onClick={handleClick} />
}
Enable cross-component communication using custom hooks
The ability to write your own hooks is the feature that is going to significantly alter how you write React apps in the future.
Using custom hooks you have one more way to share state and logic between components, adding a significant improvement to the patterns of render props and higher order components. Which are still great, but now with custom hooks have less relevance in many use cases.
How do you create a custom hook?
A hook is just a function that conventionally starts with use. It can accept an arbitrary number of arguments, and return anything it wants.
Examples:
const useGetData() {
  //...
  return data
}
or
const useGetUser(username) {
  //...const user = fetch(...)
  //...const userData = ...
  return [user, userData]
}
In your own components, you can use the hook like this:
const MyComponent = () => {
  const data = useGetData()
  const [user, userData] = useGetUser('flavio')
  //...
}
When exactly to add hooks instead of regular functions should be determined on a use case basis, and only experience will tell.
Code splitting
Modern JavaScript applications can be quite huge in terms of bundle size. You don’t want your users to have to download a 1MB package of JavaScript (your code and the libraries you use) just to load the first page, right? But this is what happens by default when you ship a modern Web App built with Webpack bundling.
That bundle will contain code that might never run because the user only stops on the login page and never sees the rest of your app.
Code splitting is the practice of only loading the JavaScript you need the moment when you need it.
This improves:
- the performance of your app
- the impact on memory, and so battery usage on mobile devices
- the downloaded KiloBytes (or MegaBytes) size
React 16.6.0, released in October 2018, introduced a way of performing code splitting that should take the place of every previously used tool or library: React.lazy and Suspense.
React.lazy and Suspense form the perfect way to lazily load a dependency and only load it when needed.
Let’s start with React.lazy. You use it to import any component:
import React from 'react'

const TodoList = React.lazy(() => import('./TodoList'))

export default () => {
  return (
    <div>
      <TodoList />
    </div>
  )
}
the TodoList component will be dynamically added to the output as soon as it’s available. Webpack will create a separate bundle for it, and will take care of loading it when necessary.
Suspense is a component that you can use to wrap any lazily loaded component:
import React from 'react'

const TodoList = React.lazy(() => import('./TodoList'))

export default () => {
  return (
    <div>
      <React.Suspense>
        <TodoList />
      </React.Suspense>
    </div>
  )
}
It takes care of handling the output while the lazy loaded component is fetched and rendered.
Use its fallback prop to output some JSX or a component output:
...
      <React.Suspense fallback={<p>Please wait</p>}>
        <TodoList />
      </React.Suspense>
...
All this plays well with React Router:
import React from 'react'
import { BrowserRouter as Router, Route, Switch } from 'react-router-dom'

const TodoList = React.lazy(() => import('./routes/TodoList'))
const NewTodo = React.lazy(() => import('./routes/NewTodo'))

const App = () => (
  <Router>
    <React.Suspense fallback={<p>Please wait</p>}>
      <Switch>
        <Route exact path="/" component={TodoList} />
        <Route path="/new" component={NewTodo} />
      </Switch>
    </React.Suspense>
  </Router>
)
SECTION 4: PRACTICAL EXAMPLES
2 very simple applications to explain some of the concepts introduced so far.
A very simple example of building a counter in React
In this short example we’ll build a very simple example of a counter in React, applying many of the concepts and theory outlined before.
Let’s use Codepen for this. We start by forking the React template pen.
In Codepen we don’t need to import React and ReactDOM as they are already added in the scope.
We show the count in a div, and we add a few buttons to increment this count:
const Button = ({ increment }) => {
  return <button>+{increment}</button>
}

const App = () => {
  let count = 0

  return (
    <div>
      <Button increment={1} />
      <Button increment={10} />
      <Button increment={100} />
      <Button increment={1000} />
      <span>{count}</span>
    </div>
  )
}

ReactDOM.render(<App />, document.getElementById('app'))
Let’s add the functionality that lets us change the count by clicking the buttons, by adding a onClickFunction prop:
const Button = ({ increment, onClickFunction }) => {
  const handleClick = () => {
    onClickFunction(increment)
  }
  return <button onClick={handleClick}>+{increment}</button>
}

const App = () => {
  let count = 0

  const incrementCount = increment => {
    //TODO
  }

  return (
    <div>
      <Button increment={1} onClickFunction={incrementCount} />
      <Button increment={10} onClickFunction={incrementCount} />
      <Button increment={100} onClickFunction={incrementCount} />
      <Button increment={1000} onClickFunction={incrementCount} />
      <span>{count}</span>
    </div>
  )
}

ReactDOM.render(<App />, document.getElementById('app'))
Here, every Button element has 2 props: increment and onClickFunction. We create 4 different buttons, with 4 increment values: 1, 10, 100, 1000.
When the button in the Button component is clicked, the incrementCount function is called.
This function must increment the local count. How can we do so? We can use hooks:
const { useState } = React

const Button = ({ increment, onClickFunction }) => {
  const handleClick = () => {
    onClickFunction(increment)
  }
  return <button onClick={handleClick}>+{increment}</button>
}

const App = () => {
  const [count, setCount] = useState(0)

  const incrementCount = increment => {
    setCount(count + increment)
  }

  return (
    <div>
      <Button increment={1} onClickFunction={incrementCount} />
      <Button increment={10} onClickFunction={incrementCount} />
      <Button increment={100} onClickFunction={incrementCount} />
      <Button increment={1000} onClickFunction={incrementCount} />
      <span>{count}</span>
    </div>
  )
}

ReactDOM.render(<App />, document.getElementById('app'))
useState() initializes the count variable at 0 and provides us the setCount() method to update its value.
We use both in the incrementCount() method implementation, which calls setCount() updating the value to the existing value of count, plus the increment passed by each Button component.
The complete example code can be seen at https://codepen.io/flaviocopes/pen/QzEQPR
Fetch and display GitHub users information via API
Very simple example of a form that accepts a GitHub username and once it receives a submit event, it asks the GitHub API for the user information, and prints them.
This code creates a reusable Card component. When you enter a name in the input field managed by the Form component, this name is bound to its state.
When Add card is pressed, the input form is cleared by clearing the userName state of the Form component.
The example uses, in addition to React, the Axios library. It’s a nice useful and lightweight library to handle network requests. Add it to the Pen settings in Codepen, or install it locally using npm install axios.
We start by creating the Card component, the one that will display our image and details as gathered from GitHub. It gets its data via props, using
props.avatar_urlthe user avatarprops.namethe user nameprops.blogthe user website URL
const Card = props => {
  return (
    <div style={{ margin: '1em' }}>
      <img alt="avatar" style={{ width: '70px' }} src={props.avatar_url} />
      <div>
        <div style={{ fontWeight: 'bold' }}>{props.name}</div>
        <div>{props.blog}</div>
      </div>
    </div>
  )
}
We create a list of those components, which will be passed by a parent component in the cards prop to CardList, which simply iterates on it using map() and outputs a list of cards:
const CardList = props => (
  <div>
    {props.cards.map(card => (
      <Card {...card} />
    ))}
  </div>
)
The parent component is App, which stores the cards array in its own state, managed using the useState() Hook:
const App = () => {
  const [cards, setCards] = useState([])

  return (
    <div>
      <CardList cards={cards} />
    </div>
  )
}
Cool! We must have a way now to ask GitHub for the details of a single username. We’ll do so using a Form component, where we manage our own state (username), and we ask GitHub for information about a user using their public APIs, via Axios:
const Form = props => {
  const [username, setUsername] = useState('')

  handleSubmit = event => {
    event.preventDefault()

    axios.get(`https://api.github.com/users/${username}`).then(resp => {
      props.onSubmit(resp.data)
      setUsername('')
    })
  }

  return (
    <form onSubmit={handleSubmit}>
      <input
        type="text"
        value={username}
        onChange={event => setUsername(event.target.value)}
        placeholder="GitHub username"
        required
      />
      <button type="submit">Add card</button>
    </form>
  )
}
When the form is submitted we call the handleSubmit event, and after the network call we call props.onSubmit passing the parent (App) the data we got from GitHub.
We add it to App, passing a method to add a new card to the list of cards, addNewCard, as its onSubmit prop:
const App = () => {
  const [cards, setCards] = useState([])

  addNewCard = cardInfo => {
    setCards(cards.concat(cardInfo))
  }

  return (
    <div>
      <Form onSubmit={addNewCard} />
      <CardList cards={cards} />
    </div>
  )
}
Finally we render the app:
ReactDOM.render(<App />, document.getElementById('app'))Here is the full source code of our little React app:
const { useState } = React

const Card = props => {
  return (
    <div style={{ margin: '1em' }}>
      <img alt="avatar" style={{ width: '70px' }} src={props.avatar_url} />
      <div>
        <div style={{ fontWeight: 'bold' }}>{props.name}</div>
        <div>{props.blog}</div>
      </div>
    </div>
  )
}

const CardList = props => <div>{props.cards.map(card => <Card {...card} />)}</div>

const Form = props => {
  const [username, setUsername] = useState('')

  handleSubmit = event => {
    event.preventDefault()

    axios
      .get(`https://api.github.com/users/${username}`)
      .then(resp => {
        props.onSubmit(resp.data)
        setUsername('')
      })
  }

  return (
    <form onSubmit={handleSubmit}>
      <input
        type="text"
        value={username}
        onChange={event => setUsername(event.target.value)}
        placeholder="GitHub username"
        required
      />
      <button type="submit">Add card</button>
    </form>
  )
}

const App = () => {
  const [cards, setCards] = useState([])

  addNewCard = cardInfo => {
    setCards(cards.concat(cardInfo))
  }

  return (
    <div>
      <Form onSubmit={addNewCard} />
      <CardList cards={cards} />
    </div>
  )
}

ReactDOM.render(<App />, document.getElementById('app'))
This is the final result:
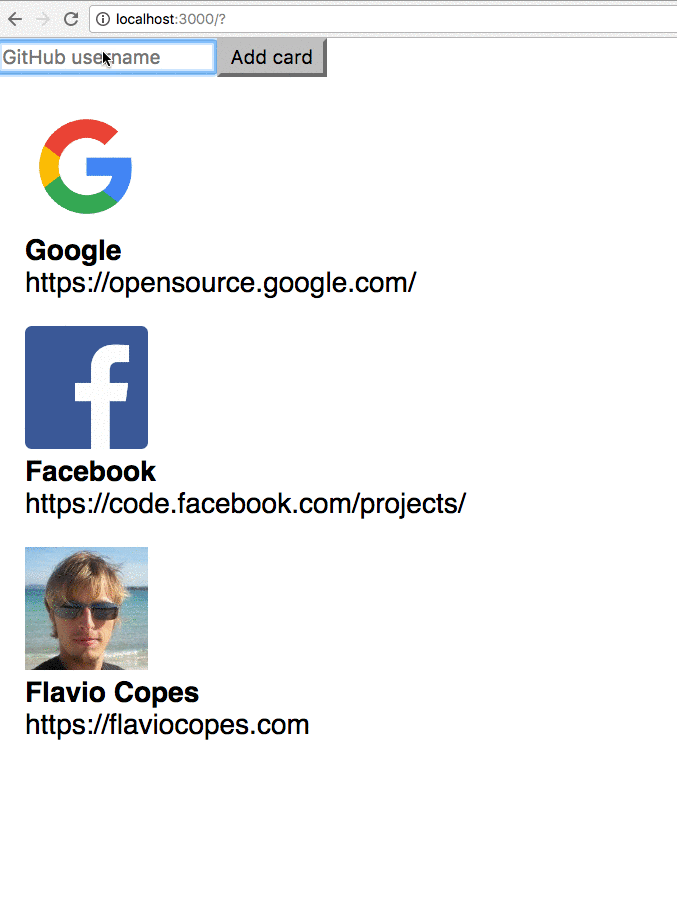
Check it out on Codepen at https://codepen.io/flaviocopes/pen/oJLyeY
SECTION 5: STYLING
CSS in React
Using React you have various ways to add styling to your components.
Using classes and CSS
The first and most simple is to use classes, and use a normal CSS file to target those classes:
const Button = () => {
  return <button className="button">A button</button>
}

.button {
  background-color: yellow;
}
You can import the stylesheet using an import statement, like this:
import './style.css'and Webpack will take care of adding the CSS property to the bundle.
Using the style attribute
A second method is to use the style attribute attached to a JSX element. Using this approach you don't need a separate CSS file.
const Button = () => {
  return <button style={{ backgroundColor: 'yellow' }}>A button</button>
}
CSS is defined in a slightly different way now. First, notice the double curly brackets: it’s because style accepts an object. We pass in a JavaScript object, which is defined in curly braces. We could also do this:
const buttonStyle = { backgroundColor: 'yellow' }
const Button = () => {
  return <button style={buttonStyle}>A button</button>
}
When using create-react-app, those styles are autoprefixed by default thanks to its use of Autoprefixer.
Also, the style now is camelCased instead of using dashes. Every time a CSS property has a dash, remove it and start the next word capitalized.
Styles have the benefit of being local to the component, and they cannot leak to other components in other parts of the app, something that using classes and an external CSS file can’t provide.
Using CSS Modules
CSS Modules seem to be a perfect spot in the middle: you use classes, but CSS is scoped to the component, which means that any styling you add cannot be applied to other components without your permission. And yet your styles are defined in a separate CSS file, which is easier to maintain than CSS in JavaScript (and you can use your good old CSS property names).
Start by creating a CSS file that ends with .module.css, for example Button.module.css. A great choice is to give it the same name as the component you are going to style
Add your CSS here, then import it inside the component file you want to style:
import style from './Button.module.css'now you can use it in your JSX:
const Button = () => {
  return <button className={style.content}>A button</button>
}
That’s it! In the resulting markup, React will generate a specific, unique class for each rendered component, and assign the CSS to that class, so that the CSS is not affecting other markup.
SASS in React
When you build a React application using create-react-app, you have many options at your disposal when it comes to styling.
Of course, if not usingcreate-react-app, you have all the choices in the world, but we limit the discussion to thecreate-react-app-provided options.
You can style using plain classes and CSS files, using the style attribute or CSS Modules, to start with.
SASS/SCSS is a very popular option, a much loved one by many developers.
You can use it without any configuration at all, starting with create-react-app 2.
All you need is a .sass or .scss file, and you just import it in a component:
import './styles.scss'You can see an example of it working at https://codesandbox.io/s/18qq31rp3.
Styled Components
Styled Components are one of the new ways to use CSS in modern JavaScript. It is the meant to be a successor of CSS Modules, a way to write CSS that’s scoped to a single component, and not leak to any other element in the page
A brief history
Once upon a time, the Web was really simple and CSS didn’t even exist. We laid out pages using tables and frames. Good times.
Then CSS came to life, and after some time it became clear that frameworks could greatly help especially in building grids and layouts, Bootstrap and Foundation playing a big part in this.
Preprocessors like SASS and others helped a lot to slow down the adoption of frameworks, and to better organize the code, conventions like BEM and SMACSS grew in use, especially within teams.
Conventions are not a solution to everything, and they are complex to remember, so in the last few years with the increasing adoption of JavaScript and build processes in every frontend project, CSS found its way into JavaScript (CSS-in-JS).
New tools explored new ways of doing CSS-in-JS and a few succeeded with increasing popularity:
- React Style
- jsxstyle
- Radium
and more.
Introducing Styled Components
One of the most popular of these tools is Styled Components.
It is the meant to be a successor to CSS Modules, a way to write CSS that’s scoped to a single component, and not leak to any other element in the page.
(more on CSS modules here and here)
Styled Components allow you to write plain CSS in your components without worrying about class name collisions.
Installation
Simply install styled-components using npm or yarn:
npm install styled-components
yarn add styled-components
That’s it! Now all you have to do is to add this import:
import styled from 'styled-components'Your first styled component
With the styled object imported, you can now start creating Styled Components. Here's the first one:
const Button = styled.button`
  font-size: 1.5em;
  background-color: black;
  color: white;
`
Button is now a React Component in all its greatness.
We created it using a function of the styled object, called button in this case, and passing some CSS properties in a template literal.
Now this component can be rendered in our container using the normal React syntax:
render(<Button />)Styled Components offer other functions you can use to create other components, not just button, like section, h1, input and many others.
The syntax used, with the backtick, might be weird at first, but it’s called Tagged Templates, it’s plain JavaScript and it’s a way to pass an argument to the function.
Using props to customize components
When you pass some props to a Styled Component, it will pass them down to the DOM node mounted.
For example here’s how we pass the placeholder and type props to an input component:
const Input = styled.input`
  //...
`

render(
  <div>
    <Input placeholder="..." type="text" />
  </div>
)
This will do just what you think, inserting those props as HTML attributes.
Props instead of just being blindly passed down to the DOM can also be used to customize a component based on the prop value. Here’s an example:
const Button = styled.button`
  background: ${props => (props.primary ? 'black' : 'white')};
  color: ${props => (props.primary ? 'white' : 'black')};
`

render(
  <div>
    <Button>A normal button</Button>
    <Button>A normal button</Button>
    <Button primary>The primary button</Button>
  </div>
)
Setting the primary prop changes the color of the button.
Extending an existing Styled Component
If you have one component and you want to create a similar one, just styled slightly differently, you can use extend:
const Button = styled.button`
  color: black;
  //...
`

const WhiteButton = Button.extend`
  color: white;
`

render(
  <div>
    <Button>A black button, like all buttons</Button>
    <WhiteButton>A white button</WhiteButton>
  </div>
)
It’s Regular CSS
In Styled Components, you can use the CSS you already know and love. It’s just plain CSS. It is not pseudo CSS nor inline CSS with its limitations.
You can use media queries, nesting and anything else you might need.
Using Vendor Prefixes
Styled Components automatically add all the vendor prefixes needed, so you don’t need to worry about this problem.
SECTION 6: TOOLING
Babel
Babel is an awesome tool, and it’s been around for quite some time, but nowadays almost every JavaScript developer relies on it. This will continue, because Babel is now indispensable and has solved a big problem for everyone.
Which problem?
The problem that every Web Developer has surely had: a feature of JavaScript is available in the latest release of a browser, but not in the older versions. Or maybe Chrome or Firefox implement it, but Safari iOS and Edge do not.
For example, ES6 introduced the arrow function:
[1, 2, 3].map((n) => n + 1)Which is now supported by all modern browsers. IE11 does not support it, nor Opera Mini (How do I know? By checking the ES6 Compatibility Table).
So how should you deal with this problem? Should you move on and leave those customers with older/incompatible browsers behind, or should you write older JavaScript code to make all your users happy?
Enter Babel. Babel is a compiler: it takes code written in one standard, and it transpiles it to code written into another standard.
You can configure Babel to transpile modern ES2017 JavaScript into JavaScript ES5 syntax:
[1, 2, 3].map(function(n) {
  return n + 1
})
This must happen at build time, so you must setup a workflow that handles this for you. Webpack is a common solution.
(P.S. if all this ES thing sounds confusing to you, see more about ES versions in the ECMAScript guide)
Installing Babel
Babel is easily installed using npm, locally in a project:
npm install --save-dev @babel/core @babel/cliSince npm now comes with npx, locally installed CLI packages can run by typing the command in the project folder:
So we can run Babel by just running
npx babel script.jsAn example Babel configuration
Babel out of the box does not do anything useful, you need to configure it and add plugins.
Here is a list of Babel plugins
To solve the problem we talked about in the introduction (using arrow functions in every browser), we can run
npm install --save-dev \
    @babel/plugin-transform-es2015-arrow-functions
to download the package in the node_modules folder of our app, then we need to add
{
  "plugins": ["transform-es2015-arrow-functions"]
}
to the .babelrc file present in the application root folder. If you don't have that file already, you just create a blank file, and put that content into it.
TIP: If you have never seen a dot file (a file starting with a dot) it might be odd at first because that file might not appear in your file manager, as it’s a hidden file.
Now if we have a script.js file with this content:
var a = () => {};
var a = (b) => b;

const double = [1,2,3].map((num) => num * 2);
console.log(double); // [2,4,6]

var bob = {
  _name: "Bob",
  _friends: ["Sally", "Tom"],
  printFriends() {
    this._friends.forEach(f =>
      console.log(this._name + " knows " + f));
  }
};
console.log(bob.printFriends());
running babel script.js will output the following code:
var a = function () {};var a = function (b) {
  return b;
};

const double = [1, 2, 3].map(function (num) {
  return num * 2;
});
console.log(double); // [2,4,6]

var bob = {
  _name: "Bob",
  _friends: ["Sally", "Tom"],
  printFriends() {
    var _this = this;

    this._friends.forEach(function (f) {
      return console.log(_this._name + " knows " + f);
    });
  }
};
console.log(bob.printFriends());
As you can see arrow functions have all been converted to JavaScript ES5 functions.
Babel presets
We just saw in the previous article how Babel can be configured to transpile specific JavaScript features.
You can add much more plugins, but you can’t add to the configuration features one by one, it’s not practical.
This is why Babel offers presets.
The most popular presets are env and react.
Tip: Babel 7 deprecated (and removed) yearly presets likepreset-es2017, and stage presets. Use@babel/preset-envinstead.
env preset
The env preset is very nice: you tell it which environments you want to support, and it does everything for you, supporting all modern JavaScript features.
E.g. “support the last 2 versions of every browser, but for Safari let’s support all versions since Safari 7”
{
  "presets": [
    ["env", {
      "targets": {
        "browsers": ["last 2 versions", "safari >= 7"]
      }
    }]
  ]
}
or “I don’t need browser support, just let me work with Node.js 6.10”
{
  "presets": [
    ["env", {
      "targets": {
        "node": "6.10"
      }
    }]
  ]
}
react preset
The react preset is very convenient when writing React apps: adding preset-flow, syntax-jsx, transform-react-jsx, transform-react-display-name.
By including it, you are all ready to go developing React apps, with JSX transforms and Flow support.
More info on presets
https://babeljs.io/docs/plugins/
Using Babel with webpack
If you want to run modern JavaScript in the browser, Babel on its own is not enough, you also need to bundle the code. Webpack is the perfect tool for this.
Modern JS needs two different stages: a compile stage, and a runtime stage. This is because some ES6+ features need a polyfill or a runtime helper.
To install the Babel polyfill runtime functionality, run
npm install @babel/polyfill \
            @babel/runtime \
            @babel/plugin-transform-runtime
Now in your webpack.config.js file add:
entry: [
  'babel-polyfill',
  // your app scripts should be here
],

module: {
  loaders: [
    // Babel loader compiles ES2015 into ES5 for
    // complete cross-browser support
    {
      loader: 'babel-loader',
      test: /\.js$/,
      // only include files present in the `src` subdirectory
      include: [path.resolve(__dirname, "src")],
      // exclude node_modules, equivalent to the above line
      exclude: /node_modules/,
      query: {
        // Use the default ES2015 preset
        // to include all ES2015 features
        presets: ['es2015'],
        plugins: ['transform-runtime']
      }
    }
  ]
}
By keeping the presets and plugins information inside the webpack.config.js file, we can avoid having a .babelrc file.
Webpack
Webpack is a tool that lets you compile JavaScript modules, also known as module bundler. Given a large number of files, it generates a single file (or a few files) that run your app.
It can perform many operations:
- helps you bundle your resources.
- watches for changes and re-runs the tasks.
- can run Babel transpilation to ES5, allowing you to use the latest JavaScript features without worrying about browser support.
- can transpile CoffeeScript to JavaScript
- can convert inline images to data URIs.
- allows you to use require() for CSS files.
- can run a development webserver.
- can handle hot module replacement.
- can split the output files into multiple files, to avoid having a huge js file to load in the first page hit.
- can perform tree shaking.
Webpack is not limited to be use on the frontend, it’s also useful in backend Node.js development as well.
Predecessors of webpack, and still widely used tools, include:
- Grunt
- Broccoli
- Gulp
There are lots of similarities in what those and Webpack can do, but the main difference is that those are known as task runners, while webpack was born as a module bundler.
It’s a more focused tool: you specify an entry point to your app (it could even be an HTML file with script tags) and webpack analyzes the files and bundles all you need to run the app in a single JavaScript output file (or in more files if you use code splitting).
Installing webpack
Webpack can be installed globally or locally for each project.
Global install
Here’s how to install it globally with Yarn:
yarn global add webpack webpack-cliwith npm:
npm i -g webpack webpack-clionce this is done, you should be able to run
webpack-cliLocal install
Webpack can be installed locally as well. It’s the recommended setup, because webpack can be updated per-project, and you have less resistance to using the latest features just for a small project rather than updating all the projects you have that use webpack.
With Yarn:
yarn add webpack webpack-cli -Dwith npm:
npm i webpack webpack-cli --save-devOnce this is done, add this to your package.json file:
{
  //...
  "scripts": {
    "build": "webpack"
  }
}
once this is done, you can run webpack by typing
yarn buildin the project root.
Webpack configuration
By default, webpack (starting from version 4) does not require any config if you respect these conventions:
- the entry point of your app is
./src/index.js - the output is put in
./dist/main.js. - Webpack works in production mode
You can customize every little bit of webpack of course, when you need. The webpack configuration is stored in the webpack.config.js file, in the project root folder.
The entry point
By default the entry point is ./src/index.js This simple example uses the ./index.js file as a starting point:
module.exports = {
  /*...*/
  entry: './index.js'
  /*...*/
}
The output
By default the output is generated in ./dist/main.js. This example puts the output bundle into app.js:
module.exports = {
  /*...*/
  output: {
    path: path.resolve(__dirname, 'dist'),
    filename: 'app.js'
  }
  /*...*/
}
Loaders
Using webpack allows you to use import or require statements in your JavaScript code to not just include other JavaScript, but any kind of file, for example CSS.
Webpack aims to handle all our dependencies, not just JavaScript, and loaders are one way to do that.
For example, in your code you can use:
import 'style.css'by using this loader configuration:
module.exports = {
  /*...*/
  module: {
    rules: [
      { test: /\.css$/, use: 'css-loader' },
    }]
  }
  /*...*/
}
The regular expression targets any CSS file.
A loader can have options:
module.exports = {
  /*...*/
  module: {
    rules: [
      {
        test: /\.css$/,
        use: [
          {
            loader: 'css-loader',
            options: {
              modules: true
            }
          }
        ]
      }
    ]
  }
  /*...*/
}
You can require multiple loaders for each rule:
module.exports = {
  /*...*/
  module: {
    rules: [
      {
        test: /\.css$/,
        use:
          [
            'style-loader',
            'css-loader',
          ]
      }
    ]
  }
  /*...*/
}
In this example, css-loader interprets the import 'style.css' directive in the CSS. style-loader is then responsible for injecting that CSS in the DOM, using a <style> tag.
The order matters, and it’s reversed (the last is executed first).
What kind of loaders are there? Many! You can find the full list here.
A commonly used loader is Babel, which is used to transpile modern JavaScript to ES5 code:
module.exports = {
  /*...*/
  module: {
    rules: [
      {
        test: /\.js$/,
        exclude: /(node_modules|bower_components)/,
        use: {
          loader: 'babel-loader',
          options: {
            presets: ['@babel/preset-env']
          }
        }
      }
    ]
  }
  /*...*/
}
This example makes Babel preprocess all our React/JSX files:
module.exports = {
  /*...*/
  module: {
    rules: [
      {
        test: /\.(js|jsx)$/,
        exclude: /node_modules/,
        use: 'babel-loader'
      }
    ]
  },
  resolve: {
    extensions: [
      '.js',
      '.jsx'
    ]
  }
  /*...*/
}
See the babel-loader options here.
Plugins
Plugins are like loaders, but on steroids. They can do things that loaders can’t do, and they are the main building block of webpack.
Take this example:
module.exports = {
  /*...*/
  plugins: [
    new HTMLWebpackPlugin()
  ]
  /*...*/
}
The HTMLWebpackPlugin plugin has the job of automatically creating an HTML file, adding the output JS bundle path, so the JavaScript is ready to be served.
There are lots of plugins available.
One useful plugin, CleanWebpackPlugin, can be used to clear the dist/ folder before creating any output, so you don't leave files around when you change the name of the output file:
module.exports = {
  /*...*/
  plugins: [
    new CleanWebpackPlugin(['dist']),
  ]
  /*...*/
}
The webpack mode
This mode (introduced in webpack 4) sets the environment on which webpack works. It can be set to development or production (defaults to production, so you only set it when moving to development)
module.exports = {
  entry: './index.js',
  mode: 'development',
  output: {
    path: path.resolve(__dirname, 'dist'),
    filename: 'app.js'
  }
}
Development mode:
- builds very fast
- is less optimized than production
- does not remove comments
- provides more detailed error messages and suggestions
- provides a better debugging experience
Production mode is slower to build, since it needs to generate a more optimized bundle. The resulting JavaScript file is smaller in size, as it removes many things that are not needed in production.
I made a sample app that just prints a console.log statement.
Here’s the production bundle:
Here’s the development bundle:
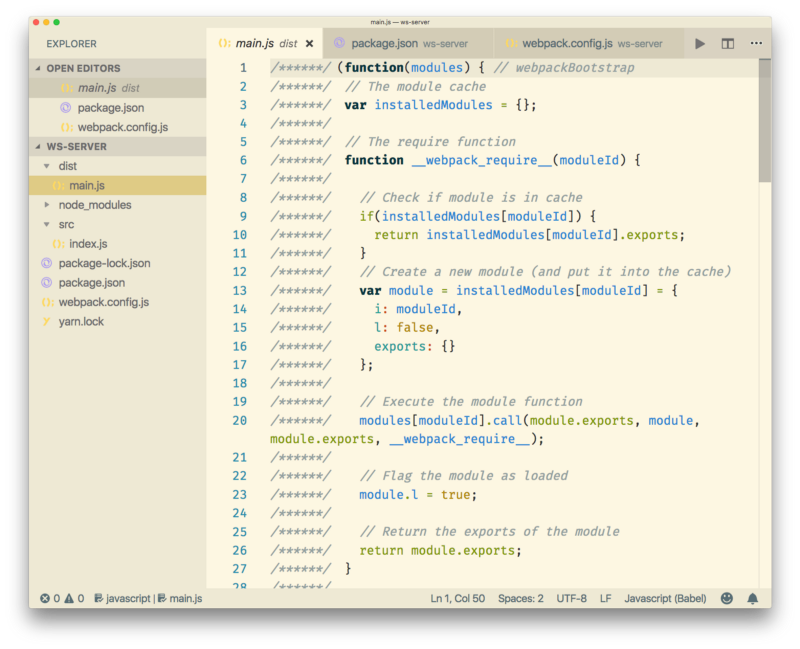
Running webpack
Webpack can be run from the command line manually if installed globally, but generally you write a script inside the package.json file, which is then run using npm or yarn.
For example this package.json scripts definition we used before:
"scripts": {
  "build": "webpack"
}
allows us to run webpack by running
npm run buildor
yarn run buildor simply
yarn buildWatching changes
Webpack can automatically rebuild the bundle when a change in your app happens, and keep listening for the next change.
Just add this script:
"scripts": {
  "watch": "webpack --watch"
}
and run
npm run watchor
yarn run watchor simply
yarn watchOne nice feature of the watch mode is that the bundle is only changed if the build has no errors. If there are errors, watch will keep listening for changes, and try to rebuild the bundle, but the current, working bundle is not affected by those problematic builds.
Handling images
Webpack allows us to use images in a very convenient way, using the file-loader loader.
This simple configuration:
module.exports = {
  /*...*/
  module: {
    rules: [
      {
        test: /\.(png|svg|jpg|gif)$/,
        use: [
          'file-loader'
        ]
      }
    ]
  }
  /*...*/
}
Allows you to import images in your JavaScript:
import Icon from './icon.png'

const img = new Image()
img.src = Icon
element.appendChild(img)(img is an HTMLImageElement. Check the Image docs)
file-loader can handle other asset types as well, like fonts, CSV files, xml, and more.
Another nice tool to work with images is the url-loader loader.
This example loads any PNG file smaller than 8KB as a data URL.
module.exports = {
  /*...*/
  module: {
    rules: [
      {
        test: /\.png$/,
        use: [
          {
            loader: 'url-loader',
            options: {
              limit: 8192
            }
          }
        ]
      }
    ]
  }
  /*...*/
}
Process your SASS code and transform it to CSS
Using sass-loader, css-loader and style-loader:
module.exports = {
  /*...*/
  module: {
    rules: [
      {
        test: /\.scss$/,
        use: [
          'style-loader',
          'css-loader',
          'sass-loader'
        ]
      }
    ]
  }
  /*...*/
}
Generate Source Maps
Since webpack bundles the code, Source Maps are mandatory to get a reference to the original file that raised an error, for example.
You tell webpack to generate source maps using the devtool property of the configuration:
module.exports = {
  /*...*/
  devtool: 'inline-source-map',
  /*...*/
}
devtool has many possible values, the most used probably are:
none: adds no source mapssource-map: ideal for production, provides a separate source map that can be minimized, and adds a reference into the bundle, so development tools know that the source map is available. Of course you should configure the server to avoid shipping this, and just use it for debugging purposesinline-source-map: ideal for development, inlines the source map as a Data URL
SECTION 7: TESTING
Jest
Jest is a library for testing JavaScript code.
It’s an open source project maintained by Facebook, and it’s especially well suited for React code testing, although not limited to that: it can test any JavaScript code. Its strengths are:
- it’s fast
- it can perform snapshot testing
- it’s opinionated, and provides everything out of the box without requiring you to make choices
Jest is a tool very similar to Mocha, although they have differences:
- Mocha is less opinionated, while Jest has a certain set of conventions
- Mocha requires more configuration, while Jest works usually out of the box, thanks to being opinionated
- Mocha is older and more established, with more tooling integrations
In my opinion the biggest feature of Jest is it’s an out of the box solution that works without having to interact with other testing libraries to perform its job.
Installation
Jest is automatically installed in create-react-app, so if you use that, you don’t need to install Jest.
Jest can be installed in any other project using Yarn:
yarn add --dev jestor npm:
npm install --save-dev jestnotice how we instruct both to put Jest in the devDependencies part of the package.json file, so that it will only be installed in the development environment and not in production.
Add this line to the scripts part of your package.json file:
{
  "scripts": {
    "test": "jest"
  }
}
so that tests can be run using yarn test or npm run test.
Alternatively, you can install Jest globally:
yarn global add jestand run all your tests using the jest command line tool.
Create the first Jest test
Projects created with create-react-app have Jest installed and preconfigured out of the box, but adding Jest to any project is as easy as typing
yarn add --dev jestAdd to your package.json this line:
{
  "scripts": {
    "test": "jest"
  }
}
and run your tests by executing yarn test in your shell.
Now, you don’t have any tests here, so nothing is going to be executed:
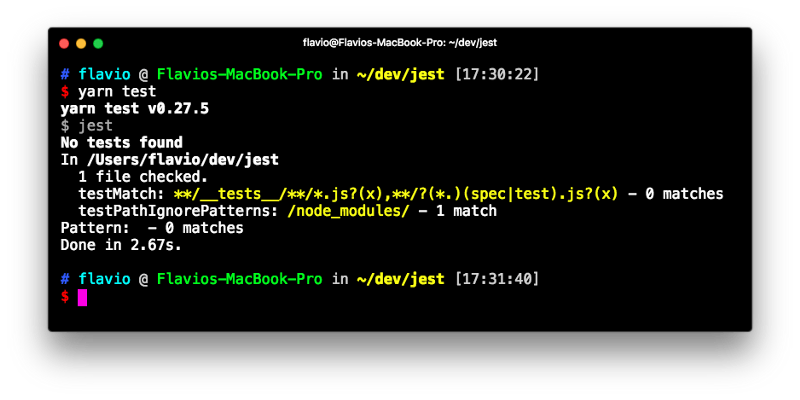
Let’s create the first test. Open a math.js file and type a couple functions that we’ll later test:
const sum = (a, b) => a + b
const mul = (a, b) => a * b
const sub = (a, b) => a - b
const div = (a, b) => a / b

export default { sum, mul, sub, div }
Now create a math.test.js file, in the same folder, and there we’ll use Jest to test the functions defined in math.js:
const { sum, mul, sub, div } = require('./math')

test('Adding 1 + 1 equals 2', () => {
  expect(sum(1, 1)).toBe(2)
})
test('Multiplying 1 * 1 equals 1', () => {
  expect(mul(1, 1)).toBe(1)
})
test('Subtracting 1 - 1 equals 0', () => {
  expect(sub(1, 1)).toBe(0)
})
test('Dividing 1 / 1 equals 1', () => {
  expect(div(1, 1)).toBe(1)
})
Running yarn test results in Jest being run on all the test files it finds, and returning us the end result:
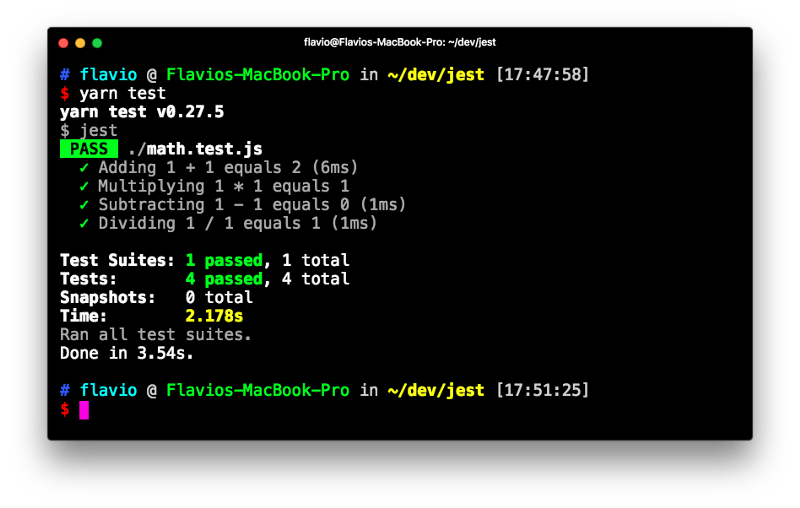
Run Jest with VS Code
Visual Studio Code is a great editor for JavaScript development. The Jest extension offers a top notch integration for our tests.
Once you install it, it will automatically detect if you have installed Jest in your devDependencies and run the tests. You can also invoke the tests manually by selecting the Jest: Start Runner command. It will run the tests and stay in watch mode to re-run them whenever you change one of the files that have a test (or a test file):
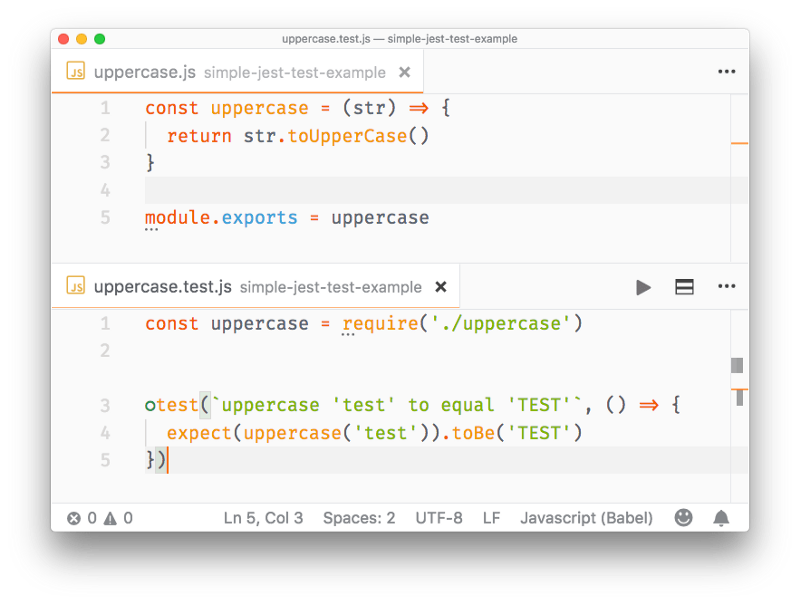
Matchers
In the previous article I used toBe() as the only matcher:
test('Adding 1 + 1 equals 2', () => {
  expect(sum(1, 1)).toBe(2)
})
A matcher is a method that lets you test values.
Most commonly used matchers, comparing the value of the result of expect() with the value passed in as argument, are:
toBecompares strict equality, using===toEqualcompares the values of two variables. If it’s an object or array, it checks the equality of all the properties or elementstoBeNullis true when passing a null valuetoBeDefinedis true when passing a defined value (opposite to the above)toBeUndefinedis true when passing an undefined valuetoBeCloseTois used to compare floating values, avoiding rounding errorstoBeTruthytrue if the value is considered true (like anifdoes)toBeFalsytrue if the value is considered false (like anifdoes)toBeGreaterThantrue if the result of expect() is higher than the argumenttoBeGreaterThanOrEqualtrue if the result of expect() is equal to the argument, or higher than the argumenttoBeLessThantrue if the result of expect() is lower than the argumenttoBeLessThanOrEqualtrue if the result of expect() is equal to the argument, or lower than the argumenttoMatchis used to compare strings with regular expression pattern matchingtoContainis used in arrays, true if the expected array contains the argument in its elements settoHaveLength(number): checks the length of an arraytoHaveProperty(key, value): checks if an object has a property, and optionally checks its valuetoThrowchecks if a function you pass throws an exception (in general) or a specific exceptiontoBeInstanceOf(): checks if an object is an instance of a class
All those matchers can be negated using .not. inside the statement, for example:
test('Adding 1 + 1 does not equal 3', () => {
  expect(sum(1, 1)).not.toBe(3)
})
For use with promises, you can use .resolves and .rejects:
expect(Promise.resolve('lemon')).resolves.toBe('lemon')

expect(Promise.reject(new Error('octopus'))).rejects.toThrow('octopus')
Setup
Before running your tests you will want to perform some initialization.
To do something once before all the tests run, use the beforeAll() function:
beforeAll(() => {
//do something
})To perform something before each test runs, use beforeEach():
beforeEach(() => {
//do something
})Teardown
Just as you can do with setup, you can also perform something after each test runs:
afterEach(() => {
//do something
})and after all tests end:
afterAll(() => {
//do something
})Group tests using describe()
You can create groups of tests, in a single file, that isolate the setup and teardown functions:
describe('first set', () => {
beforeEach(() => {
//do something
})
afterAll(() => {
//do something
})
test(/*...*/)
test(/*...*/)
})
describe('second set', () => {
beforeEach(() => {
//do something
})
beforeAll(() => {
//do something
})
test(/*...*/)
test(/*...*/)
}) Testing asynchronous code
Asynchronous code in modern JavaScript can have basically 2 forms: callbacks and promises. On top of promises we can use async/await.
Callbacks
You can’t have a test in a callback, because Jest won’t execute it — the execution of the test file ends before the callback is called. To fix this, pass a parameter to the test function, which you can conveniently call done. Jest will wait until you call done() before ending that test:
//uppercase.js
function uppercase(str, callback) {
callback(str.toUpperCase())
}
module.exports = uppercase
//uppercase.test.js
const uppercase = require('./src/uppercase')
test(`uppercase 'test' to equal 'TEST'`, (done) => {
uppercase('test', (str) => {
expect(str).toBe('TEST')
done()
}
})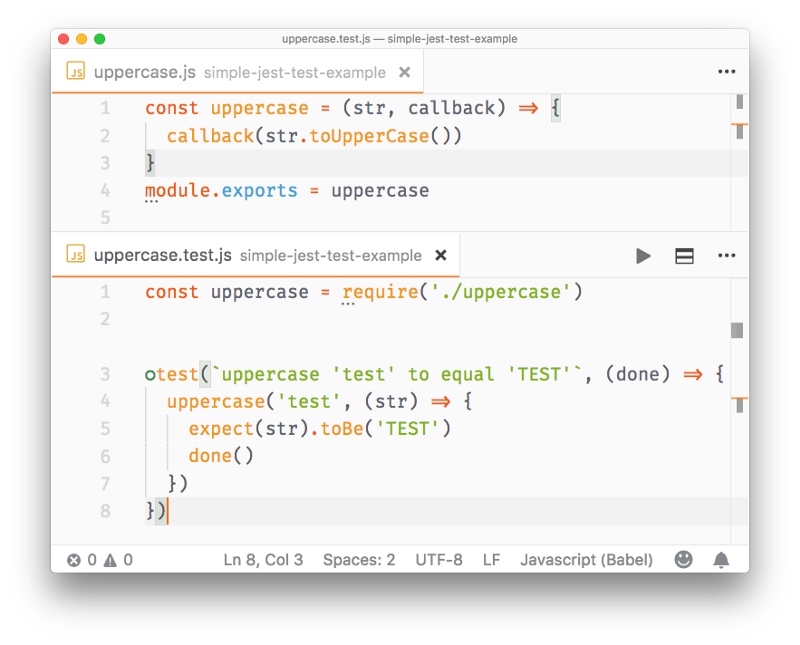
Promises
With functions that return promises, we simply return a promise from the test:
//uppercase.js
const uppercase = str => {
return new Promise((resolve, reject) => {
if (!str) {
reject('Empty string')
return
}
resolve(str.toUpperCase())
})
}
module.exports = uppercase
//uppercase.test.js
const uppercase = require('./uppercase')
test(`uppercase 'test' to equal 'TEST'`, () => {
return uppercase('test').then(str => {
expect(str).toBe('TEST')
})
})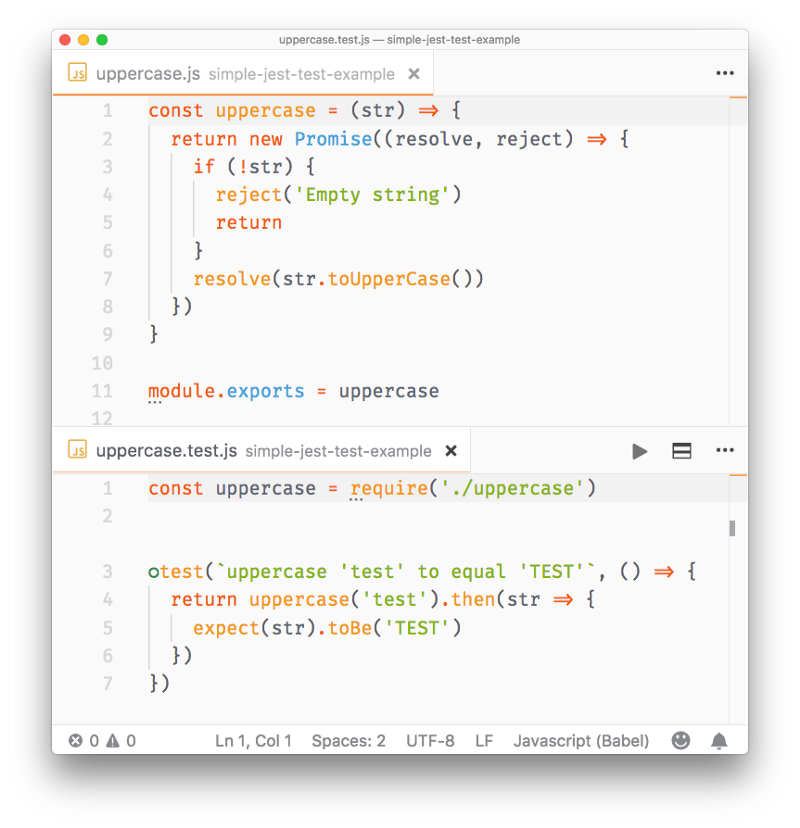
Promises that are rejected can be tested using .catch():
//uppercase.js
const uppercase = str => {
return new Promise((resolve, reject) => {
if (!str) {
reject('Empty string')
return
}
resolve(str.toUpperCase())
})
}
module.exports = uppercase
//uppercase.test.js
const uppercase = require('./uppercase')
test(`uppercase 'test' to equal 'TEST'`, () => {
return uppercase('').catch(e => {
expect(e).toMatch('Empty string')
})
})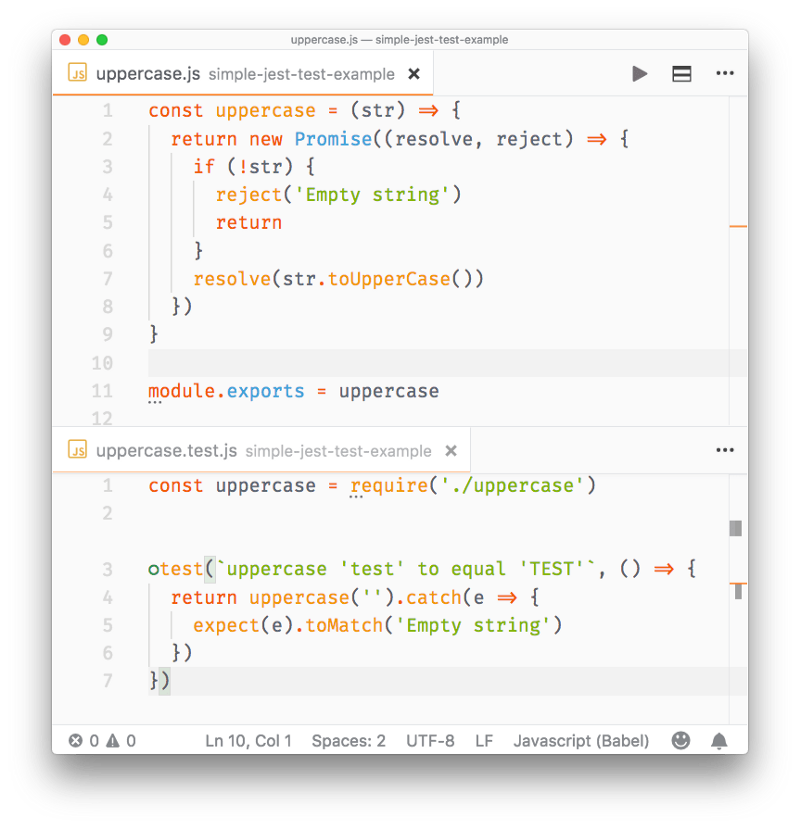
Async/await
To test functions that return promises we can also use async/await, which makes the syntax very straightforward and simple:
//uppercase.test.js
const uppercase = require('./uppercase')
test(`uppercase 'test' to equal 'TEST'`, async () => {
const str = await uppercase('test')
expect(str).toBe('TEST')
})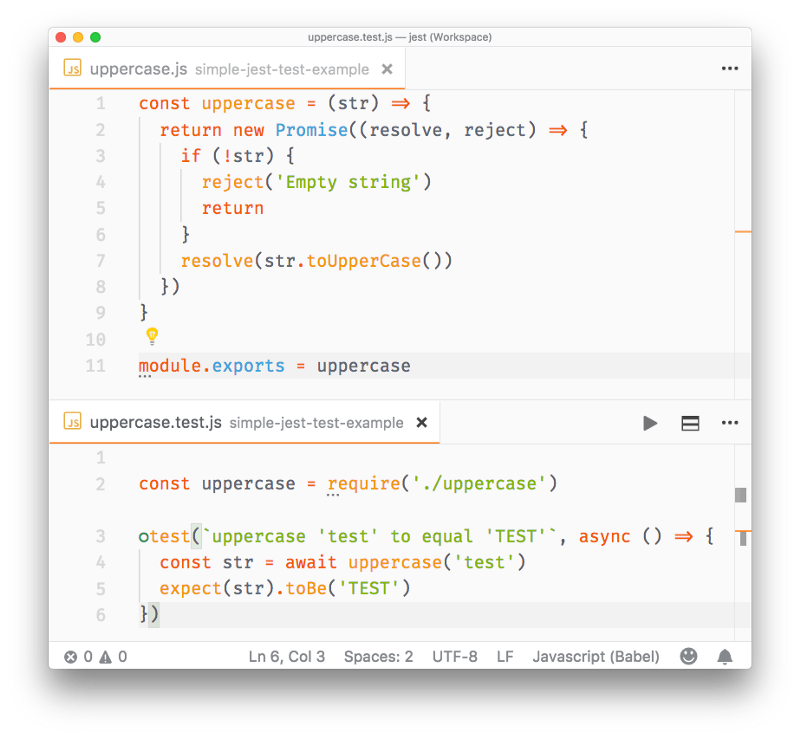
Mocking
In testing, mocking allows you to test functionality that depends on:
- Database
- Network requests
- access to Files
- any External system
so that:
- your tests run faster, giving a quick turnaround time during development
- your tests are independent of network conditions, or the state of the database
- your tests do not pollute any data storage because they do not touch the database
- any change done in a test does not change the state for subsequent tests, and re-running the test suite should start from a known and reproducible starting point
- you don’t have to worry about rate limiting on API calls and network requests
Mocking is useful when you want to avoid side effects (e.g. writing to a database) or you want to skip slow portions of code (like network access), and also avoids implications with running your tests multiple times (e.g. imagine a function that sends an email or calls a rate-limited API).
Even more important, if you are writing a Unit Test, you should test the functionality of a function in isolation, not with all its baggage of things it touches.
Using mocks, you can inspect if a module function has been called and which parameters were used, with:
expect().toHaveBeenCalled(): check if a spied function has been calledexpect().toHaveBeenCalledTimes(): count how many times a spied function has been calledexpect().toHaveBeenCalledWith(): check if the function has been called with a specific set of parametersexpect().toHaveBeenLastCalledWith(): check the parameters of the last time the function has been invoked
Spy packages without affecting the functions code
When you import a package, you can tell Jest to “spy” on the execution of a particular function, using spyOn(), without affecting how that method works.
Example:
const mathjs = require('mathjs')
test(`The mathjs log function`, () => {
const spy = jest.spyOn(mathjs, 'log')
const result = mathjs.log(10000, 10)
expect(mathjs.log).toHaveBeenCalled()
expect(mathjs.log).toHaveBeenCalledWith(10000, 10)
})Mock an entire package
Jest provides a convenient way to mock an entire package. Create a __mocks__folder in the project root, and in this folder create one JavaScript file for each of your packages.
Say you import mathjs. Create a __mocks__/mathjs.js file in your project root, and add this content:
module.exports = {
log: jest.fn(() => 'test')
}This will mock the log() function of the package. Add as many functions as you want to mock:
const mathjs = require('mathjs')
test(`The mathjs log function`, () => {
const result = mathjs.log(10000, 10)
expect(result).toBe('test')
expect(mathjs.log).toHaveBeenCalled()
expect(mathjs.log).toHaveBeenCalledWith(10000, 10)
})Mock a single function
More simply, you can mock a single function using jest.fn():
const mathjs = require('mathjs')
mathjs.log = jest.fn(() => 'test')
test(`The mathjs log function`, () => {
const result = mathjs.log(10000, 10)
expect(result).toBe('test')
expect(mathjs.log).toHaveBeenCalled()
expect(mathjs.log).toHaveBeenCalledWith(10000, 10)
})You can also use jest.fn().mockReturnValue('test') to create a simple mock that does nothing except returning a value.
Pre-built mocks
You can find pre-made mocks for popular libraries. For example this package https://github.com/jefflau/jest-fetch-mock allows you to mock fetch() calls, and provide sample return values without interacting with the actual server in your tests.
Snapshot testing
Snapshot testing is a pretty cool feature offered by Jest. It can memorize how your UI components are rendered, and compare it to the current test, raising an error if there’s a mismatch.
This is a simple test on the App component of a simple create-react-app application (make sure you install react-test-renderer):
import React from 'react'
import App from './App'
import renderer from 'react-test-renderer'
it('renders correctly', () => {
const tree = renderer.create(<App />).toJSON()
expect(tree).toMatchSnapshot()
})the first time you run this test, Jest saves the snapshot to the __snapshots__folder. Here’s what App.test.js.snap contains:
// Jest Snapshot v1, https://goo.gl/fbAQLP
exports[`renders correctly 1`] = `
<div
className="App"
>
<header
className="App-header"
>
<img
alt="logo"
className="App-logo"
src="logo.svg"
/>
<h1
className="App-title"
>
Welcome to React
</h1>
</header>
<p
className="App-intro"
>
To get started, edit
<code>
src/App.js
</code>
and save to reload.
</p>
</div>
`As you see it’s the code that the App component renders, nothing more.
The next time the test compares the output of <App /> to this. If App changes, you get an error:
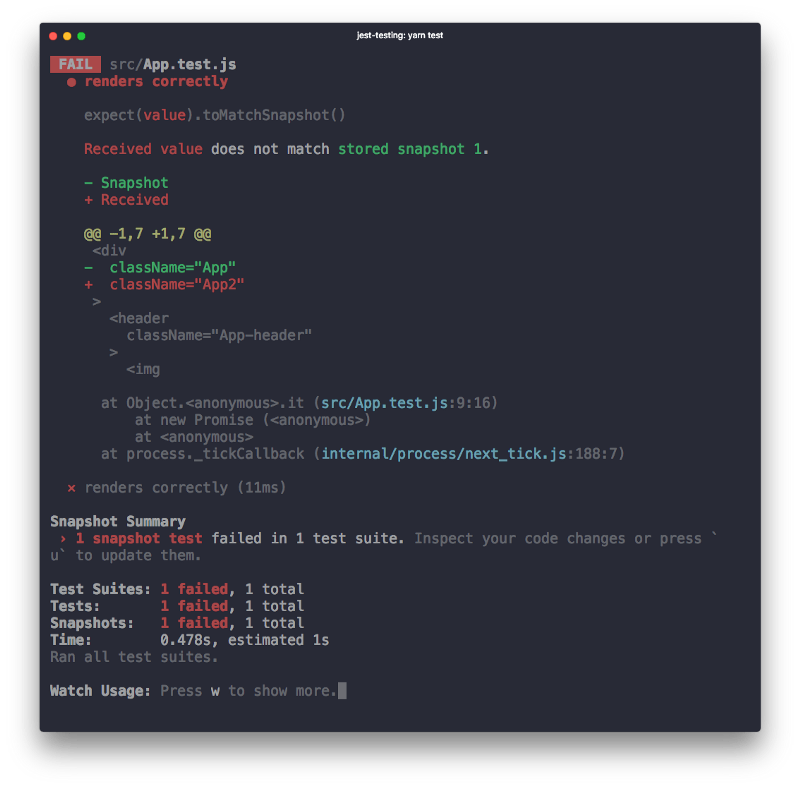
When using yarn test in create-react-app you are in watch mode, and from there you can press w and show more options:
Watch Usage
› Press u to update failing snapshots.
› Press p to filter by a filename regex pattern.
› Press t to filter by a test name regex pattern.
› Press q to quit watch mode.
› Press Enter to trigger a test run.If your change is intended, pressing u will update the failing snapshots, and make the test pass.
You can also update the snapshot by running jest -u (or jest --updateSnapshot) outside of watch mode.
Testing React components
The easiest way to start with testing React components is doing snapshot testing, a testing technique that lets you test components in isolation.
If you are familiar with testing software, it’s just like unit testing you do for classes: you test each component functionality.
I assume you created a React app with create-react-app, which already comes with Jest installed, the testing package we'll need.
Let’s start with a simple test. CodeSandbox is a great environment to try this out. Start with a React sandbox, and create an App.js component in a components folder, and add an App.test.js file.
import React from 'react'
export default function App() {
return (
<div className="App">
<h1>Hello CodeSandbox</h1>
<h2>Start editing to see some magic happen!</h2>
</div>
)
}Our first test is dumb:
test('First test', () => {
expect(true).toBeTruthy()
})When CodeSandbox detects test files, it automatically runs them for you, and you can click the Tests button in the bottom of the view to show your test results:
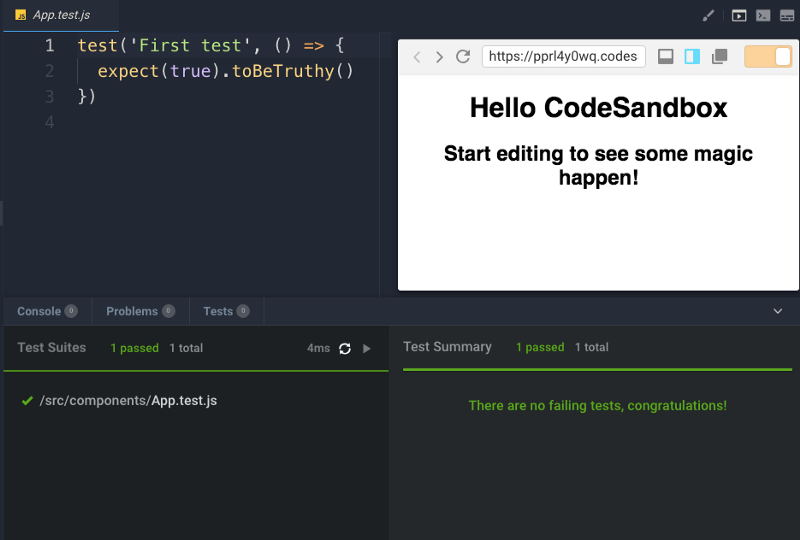
A test file can contain multiple tests:
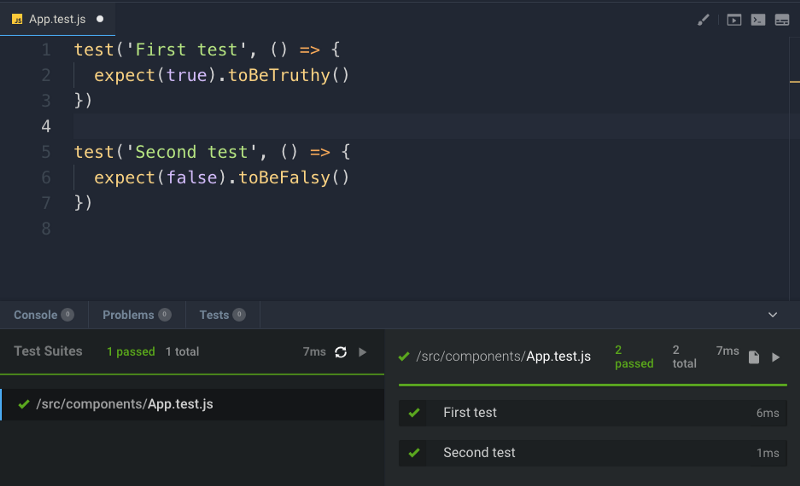
Let’s do something a bit more useful now, to actually test a React component. We only have App now, which is not doing anything really useful, so let’s first set up the environment with a little application with more functionality: the counter app we built previously. If you skipped it, you can go back and read how we built it, but for easier reference I add it here again.
It’s just 2 components: App and Button. Create the App.js file:
import React, { useState } from 'react'
import Button from './Button'
const App = () => {
const [count, setCount] = useState(0)
const incrementCount = increment => {
setCount(count + increment)
}
return (
<div>
<Button increment={1} onClickFunction={incrementCount} />
<Button increment={10} onClickFunction={incrementCount} />
<Button increment={100} onClickFunction={incrementCount} />
<Button increment={1000} onClickFunction={incrementCount} />
<span>{count}</span>
</div>
)
}
export default Appand the Button.js file:
import React from 'react'
const Button = ({ increment, onClickFunction }) => {
const handleClick = () => {
onClickFunction(increment)
}
return <button onClick={handleClick}>+{increment}</button>
}
export default ButtonWe are going to use the react-testing-library, which is a great help as it allows us to inspect the output of every component and to apply events on them. You can read more about it on https://github.com/kentcdodds/react-testing-library or watch this video.
Let’s test the Button component first.
We start by importing render and fireEvent from react-testing-library, two helpers. The first lets us render JSX. The second lets us emit events on a component.
Create a Button.test.js and put it in the same folder as Button.js.
import React from 'react'
import { render, fireEvent } from 'react-testing-library'
import Button from './Button'Buttons are used in the app to accept a click event and then they call a function passed to the onClickFunction prop. We add a count variable and we create a function that increments it:
let count
const incrementCount = increment => {
count += increment
}Now off to the actual tests. We first initialize count to 0, and we render a +1 Button component passing a 1 to increment and our incrementCount function to onClickFunction.
Then we get the content of the first child of the component, and we check it outputs +1.
We then proceed to clicking the button, and we check that the count got from 0 to 1:
test('+1 Button works', () => {
count = 0
const { container } = render(
<Button increment={1} onClickFunction={incrementCount} />
)
const button = container.firstChild
expect(button.textContent).toBe('+1')
expect(count).toBe(0)
fireEvent.click(button)
expect(count).toBe(1)
})Similarly we test a +100 button, this time checking the output is +100 and the button click increments the count of 100.
test('+100 Button works', () => {
count = 0
const { container } = render(
<Button increment={100} onClickFunction={incrementCount} />
)
const button = container.firstChild
expect(button.textContent).toBe('+100')
expect(count).toBe(0)
fireEvent.click(button)
expect(count).toBe(100)
})Let’s test the App component now. It shows 4 buttons and the result in the page. We can inspect each button and see if the result increases when we click them, clicking multiple times as well:
import React from 'react'
import { render, fireEvent } from 'react-testing-library'
import App from './App'
test('App works', () => {
const { container } = render(<App />)
console.log(container)
const buttons = container.querySelectorAll('button')
expect(buttons[0].textContent).toBe('+1')
expect(buttons[1].textContent).toBe('+10')
expect(buttons[2].textContent).toBe('+100')
expect(buttons[3].textContent).toBe('+1000')
const result = container.querySelector('span')
expect(result.textContent).toBe('0')
fireEvent.click(buttons[0])
expect(result.textContent).toBe('1')
fireEvent.click(buttons[1])
expect(result.textContent).toBe('11')
fireEvent.click(buttons[2])
expect(result.textContent).toBe('111')
fireEvent.click(buttons[3])
expect(result.textContent).toBe('1111')
fireEvent.click(buttons[2])
expect(result.textContent).toBe('1211')
fireEvent.click(buttons[1])
expect(result.textContent).toBe('1221')
fireEvent.click(buttons[0])
expect(result.textContent).toBe('1222')
})Check the code working on this CodeSandbox: https://codesandbox.io/s/pprl4y0wq
SECTION 8: THE REACT ECOSYSTEM
The ecosystem around React is huge. Here I introduce you to 4 of the most popular projects based upon React: React Router, Redux, Next.js, Gatsby.
React Router
React Router is the de-facto React routing library, and it’s one of the most popular projects built on top of React.
React at its core is a very simple library, and it does not dictate anything about routing.
Routing in a Single Page Application is the way to introduce some features to navigating the app through links, which are expected in normal web applications:
- The browser should change the URL when you navigate to a different screen
- Deep linking should work: if you point the browser to a URL, the application should reconstruct the same view that was presented when the URL was generated.
- The browser back (and forward) button should work like expected.
Routing links together your application navigation with the navigation features offered by the browser: the address bar and the navigation buttons.
React Router offers a way to write your code so that it will show certain components of your app only if the route matches what you define.
Installation
With npm:
npm install react-router-domWith Yarn:
yarn add react-router-domTypes of routes
React Router provides two different kind of routes:
BrowserRouterHashRouter
One builds classic URLs, the other builds URLs with the hash:
https://application.com/dashboard /* BrowserRouter */
https://application.com/#/dashboard /* HashRouter */Which one to use is mainly dictated by the browsers you need to support. BrowserRouter uses the History API, which is relatively recent, and not supported in IE9 and below. If you don't have to worry about older browsers, it's the recommended choice.
Components
The 3 components you will interact the most when working with React Router are:
BrowserRouter, usually aliased asRouterLinkRoute
BrowserRouter wraps all your Route components.
Link components are - as you can imagine - used to generate links to your routes
Route components are responsible for showing - or hiding - the components they contain.
BrowserRouter
Here’s a simple example of the BrowserRouter component. You import it from react-router-dom, and you use it to wrap all your app:
import React from 'react'
import ReactDOM from 'react-dom'
import { BrowserRouter as Router } from 'react-router-dom'
ReactDOM.render(
<Router>
<div>
<!-- -->
</div>
</Router>,
document.getElementById('app')
)A BrowserRouter component can only have one child element, so we wrap all we’re going to add in a div element.
Link
The Link component is used to trigger new routes. You import it from react-router-dom, and you can add the Link components to point at different routes, with the to attribute:
import React from 'react'
import ReactDOM from 'react-dom'
import { BrowserRouter as Router, Link } from 'react-router-dom'
ReactDOM.render(
<Router>
<div>
<aside>
<Link to={`/dashboard`}>Dashboard</Link>
<Link to={`/about`}>About</Link>
</aside>
<!-- -->
</div>
</Router>,
document.getElementById('app')
)Route
Now let’s add the Route component in the above snippet to make things actually work as we want:
import React from 'react'
import ReactDOM from 'react-dom'
import { BrowserRouter as Router, Link, Route } from 'react-router-dom'
const Dashboard = () => (
<div>
<h2>Dashboard</h2>
...
</div>
)
const About = () => (
<div>
<h2>About</h2>
...
</div>
)
ReactDOM.render(
<Router>
<div>
<aside>
<Link to={`/`}>Dashboard</Link>
<Link to={`/about`}>About</Link>
</aside>
<main>
<Route exact path="/" component={Dashboard} />
<Route path="/about" component={About} />
</main>
</div>
</Router>,
document.getElementById('app')
)Check this example on Glitch: https://flaviocopes-react-router-v4.glitch.me/
When the route matches /, the application shows the Dashboard component.
When the route is changed by clicking the “About” link to /about, the Dashboard component is removed and the About component is inserted in the DOM.
Notice the exact attribute. Without this, path="/" would also match /about, since / is contained in the route.
Match multiple paths
You can have a route respond to multiple paths simply using a regex, because path can be a regular expressions string:
<Route path="/(about|who)/" component={Dashboard} />Inline rendering
Instead of specifying a component property on Route, you can set a render prop:
<Route
path="/(about|who)/"
render={() => (
<div>
<h2>About</h2>
...
</div>
)}
/>Match dynamic route parameter
You already saw how to use static routes like
const Posts = () => (
<div>
<h2>Posts</h2>
...
</div>
)
//...
<Route exact path="/posts" component={Posts} />Here’s how to handle dynamic routes:
const Post = ({match}) => (
<div>
<h2>Post #{match.params.id}</h2>
...
</div>
)
//...
<Route exact path="/post/:id" component={Post} />In your Route component you can lookup the dynamic parameters in match.params.
match is also available in inline rendered routes, and this is especially useful in this case, because we can use the id parameter to lookup the post data in our data source before rendering Post:
const posts = [
{ id: 1, title: 'First', content: 'Hello world!' },
{ id: 2, title: 'Second', content: 'Hello again!' }
]
const Post = ({post}) => (
<div>
<h2>{post.title}</h2>
{post.content}
</div>
)
//...
<Route exact path="/post/:id" render={({match}) => (
<Post post={posts.find(p => p.id === match.params.id)} />
)} />Redux
Redux is a state manager that’s usually used along with React, but it’s not tied to that library — it can be used with other technologies as well, but we’ll stick to React for the sake of the explanation..
Redux is a way to manage an application state, and move it to an external global store.
There are a few concepts to grasp, but once you do, Redux is a very simple approach to the problem.
Redux is very popular with React applications, but it’s in no way unique to React: there are bindings for nearly any popular framework. That said, I’ll make some examples using React as it is its primary use case.
When should you use Redux?
Redux is ideal for medium to big apps, and you should only use it when you have trouble managing the state with the default state management of React, or the other library you use.
Simple apps should not need it at all (and there’s nothing wrong with simple apps).
Immutable State Tree
In Redux, the whole state of the application is represented by one JavaScript object, called State or State Tree.
We call it Immutable State Tree because it is read only: it can’t be changed directly.
It can only be changed by dispatching an Action.
Actions
An Action is a JavaScript object that describes a change in a minimal way (with just the information needed):
{
type: 'CLICKED_SIDEBAR'
}
// e.g. with more data
{
type: 'SELECTED_USER',
userId: 232
}The only requirement of an action object is having a type property, whose value is usually a string.
Actions types should be constants
In a simple app an action type can be defined as a string, as I did in the example in the previous lesson.
When the app grows is best to use constants:
const ADD_ITEM = 'ADD_ITEM'
const action = { type: ADD_ITEM, title: 'Third item' }and to separate actions in their own files, and import them
import { ADD_ITEM, REMOVE_ITEM } from './actions'Action creators
Actions Creators are functions that create actions.
function addItem(t) {
return {
type: ADD_ITEM,
title: t
}
}You usually run action creators in combination with triggering the dispatcher:
dispatch(addItem('Milk'))or by defining an action dispatcher function:
const dispatchAddItem = i => dispatch(addItem(i))
dispatchAddItem('Milk')Reducers
When an action is fired, something must happen, the state of the application must change.
This is the job of reducers.
A reducer is a pure function that calculates the next State Tree based on the previous State Tree, and the action dispatched.
;(currentState, action) => newStateA pure function takes an input and returns an output without changing the input or anything else. Thus, a reducer returns a completely new state tree object that substitutes the previous one.
What a reducer should not do
A reducer should be a pure function, so it should:
- never mutate its arguments
- never mutate the state, but instead create a new one with
Object.assign({}, ...) - never generate side-effects (no API calls changing anything)
- never call non-pure functions, functions that change their output based on factors other than their input (e.g.
Date.now()orMath.random())
There is no reinforcement, but you should stick to the rules.
Multiple reducers
Since the state of a complex app could be really wide, there is not a single reducer, but many reducers for any kind of action.
A simulation of a reducer
At its core, Redux can be simplified with this simple model:
The state
{
list: [
{ title: "First item" },
{ title: "Second item" },
],
title: 'Groceries list'
}A list of actions
{ type: 'ADD_ITEM', title: 'Third item' }
{ type: 'REMOVE_ITEM', index: 1 }
{ type: 'CHANGE_LIST_TITLE', title: 'Road trip list' }A reducer for every part of the state
const title = (state = '', action) => {
if (action.type === 'CHANGE_LIST_TITLE') {
return action.title
} else {
return state
}
}
const list = (state = [], action) => {
switch (action.type) {
case 'ADD_ITEM':
return state.concat([{ title: action.title }])
case 'REMOVE_ITEM':
return state.map((item, index) =>
action.index === index
? { title: item.title }
: item
default:
return state
}
}A reducer for the whole state
const listManager = (state = {}, action) => {
return {
title: title(state.title, action),
list: list(state.list, action)
}
}The Store
The Store is an object that:
- holds the state of the app
- exposes the state via
getState() - allows us to update the state via
dispatch() - allows us to (un)register a state change listener using
subscribe()
A store is unique in the app.
Here is how a store for the listManager app is created:
import { createStore } from 'redux'
import listManager from './reducers'
let store = createStore(listManager)Can I initialize the store with server-side data?
Sure, just pass a starting state:
let store = createStore(listManager, preexistingState)Getting the state
store.getState()Update the state
store.dispatch(addItem('Something'))Listen to state changes
const unsubscribe = store.subscribe(() =>
const newState = store.getState()
)
unsubscribe()Data Flow
Data flow in Redux is always unidirectional.
You call dispatch() on the Store, passing an Action.
The Store takes care of passing the Action to the Reducer, generating the next State.
The Store updates the State and alerts all the Listeners.
Next.js
Working on a modern JavaScript application powered by React is awesome until you realize that there are a couple problems related to rendering all the content on the client-side.
First, the page takes longer to the become visible to the user, because before the content loads, all the JavaScript must load, and your application needs to run to determine what to show on the page.
Second, if you are building a publicly available website, you have a content SEO issue. Search engines are getting better at running and indexing JavaScript apps, but it’s much better if we can send them content instead of letting them figure it out.
The solution to both of those problems is server rendering, also called static pre-rendering.
Next.js is one React framework to do all of this in a very simple way, but it’s not limited to this. It’s advertised by its creators as a zero-configuration, single-command toolchain for React apps.
It provides a common structure that allows you to easily build a frontend React application, and transparently handle server-side rendering for you.
Here is a non-exhaustive list of the main Next.js features:
- Hot Code Reloading: Next.js reloads the page when it detects any change saved to disk.
- Automatic Routing: any URL is mapped to the filesystem, to files put in the
pagesfolder, and you don’t need any configuration (you have customization options of course). - Single File Components: using styled-jsx, completely integrated as built by the same team, it’s trivial to add styles scoped to the component.
- Server Rendering: you can (optionally) render React components on the server side, before sending the HTML to the client.
- Ecosystem Compatibility: Next.js plays well with the rest of the JavaScript, Node and React ecosystem.
- Automatic Code Splitting: pages are rendered with just the libraries and JavaScript that they need, no more.
- Prefetching: the
Linkcomponent, used to link together different pages, supports aprefetchprop which automatically prefetches page resources (including code missing due to code splitting) in the background. - Dynamic Components: you can import JavaScript modules and React Components dynamically (https://github.com/zeit/next.js#dynamic-import).
- Static Exports: using the
next exportcommand, Next.js allows you to export a fully static site from your app.
Installation
Next.js supports all the major platforms: Linux, macOS, Windows.
A Next.js project is started easily with npm:
npm install next react react-domor with Yarn:
yarn add next react react-domGetting started
Create a package.json file with this content:
{
"scripts": {
"dev": "next"
}
}If you run this command now:
npm run devthe script will raise an error complaining about not finding the pages folder. This is the only thing that Next.js requires to run.
Create an empty pages folder, and run the command again, and Next.js will start up a server on localhost:3000.
If you go to that URL now, you’ll be greeted by a friendly 404 page, with a nice clean design.
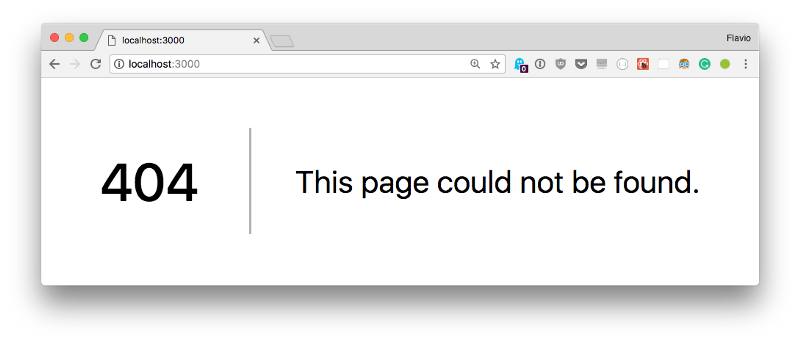
Next.js handles other error types as well, like 500 errors for example.
Create a page
In the pages folder create an index.js file with a simple React functional component:
export default () => (
<div>
<p>Hello World!</p>
</div>
)If you visit localhost:3000, this component will automatically be rendered.
Why is this so simple?
Next.js uses a declarative pages structure, which is based on the filesystem structure.
Simply put, pages are inside a pages folder, and the page URL is determined by the page file name. The filesystem is the pages API.
Server-side rendering
Open the page source, View -> Developer -> View Source with Chrome.
As you can see, the HTML generated by the component is sent directly in the page source. It’s not rendered client-side, but instead it’s rendered on the server.
The Next.js team wanted to create a developer experience for server rendered pages similar to the one you get when creating a basic PHP project, where you simply drop PHP files and you call them, and they show up as pages. Internally of course it’s all very different, but the apparent ease of use is clear.
Add a second page
Let’s create another page, in pages/contact.js
export default () => (
<div>
<p>
<a href="mailto:my@email.com">Contact us!</a>
</p>
</div>
)If you point your browser to localhost:3000/contact this page will be rendered. As you can see, also this page is server rendered.
Hot reloading
Note how you did not have to restart the npm process to load the second page. Next.js does this for you under the hood.
Client rendering
Server rendering is very convenient in your first page load, for all the reasons we saw above, but when it comes to navigating inside the website, client-side rendering is key to speeding up the page load and improving the user experience.
Next.js provides a Link component you can use to build links. Try linking the two pages above.
Change index.js to this code:
import Link from 'next/link'
export default () => (
<div>
<p>Hello World!</p>
<Link href="/contact">
<a>Contact me!</a>
</Link>
</div>
)Now go back to the browser and try this link. As you can see, the Contact page loads immediately, without a page refresh.
This is client-side navigation working correctly, with complete support for the History API, which means your users back button won’t break.
If you now cmd-click the link, the same Contact page will open in a new tab, now server rendered.
Dynamic pages
A good use case for Next.js is a blog, as it’s something that all developers know how it works, and it’s a good fit for a simple example of how to handle dynamic pages.
A dynamic page is a page that has no fixed content, but instead display some data based on some parameters.
Change index.js to
import Link from 'next/link'
const Post = props => (
<li>
<Link href={`/post?title=${props.title}`}>
<a>{props.title}</a>
</Link>
</li>
)
export default () => (
<div>
<h2>My blog</h2>
<ul>
<li>
<Post title="Yet another post" />
<Post title="Second post" />
<Post title="Hello, world!" />
</li>
</ul>
</div>
)This will create a series of posts and will fill the title query parameter with the post title:
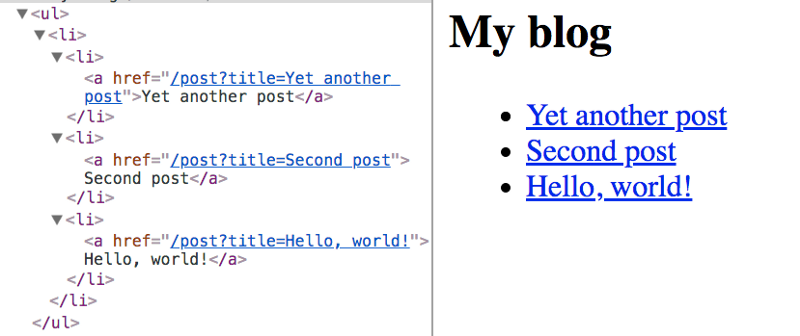
Now create a post.js file in the pages folder, and add:
export default props => <h1>{props.url.query.title}</h1>Now clicking a single post will render the post title in a h1 tag:

You can use clean URLs without query parameters. The Next.js Link component helps us by accepting an as attribute, which you can use to pass a slug:
import Link from 'next/link'
const Post = props => (
<li>
<Link as={`/${props.slug}`} href={`/post?title=${props.title}`}>
<a>{props.title}</a>
</Link>
</li>
)
export default () => (
<div>
<h2>My blog</h2>
<ul>
<li>
<Post slug="yet-another-post" title="Yet another post" />
<Post slug="second-post" title="Second post" />
<Post slug="hello-world" title="Hello, world!" />
</li>
</ul>
</div>
)CSS-in-JS
Next.js by default provides support for styled-jsx, which is a CSS-in-JS solution provided by the same development team, but you can use whatever library you prefer, like Styled Components.
Example:
export default () => (
<div>
<p>
<a href="mailto:my@email.com">Contact us!</a>
</p>
<style jsx>{`
p {
font-family: 'Courier New';
}
a {
text-decoration: none;
color: black;
}
a:hover {
opacity: 0.8;
}
`}</style>
</div>
)Styles are scoped to the component, but you can also edit global styles adding global to the style element:
export default () => (
<div>
<p>
<a href="mailto:my@email.com">Contact us!</a>
</p>
<style jsx global>{`
body {
font-family: 'Benton Sans', 'Helvetica Neue';
margin: 2em;
}
h2 {
font-style: italic;
color: #373fff;
}
`}</style>
</div>
)Exporting a static site
A Next.js application can be easily exported as a static site, which can be deployed on one of the super fast static site hosts, like Netlify or Firebase Hosting, without the need to set up a Node environment.
The process requires you to declare the URLs that compose the site, but it’s a straightforward process.
Deploying
Creating a production-ready copy of the application, without source maps or other development tooling that aren’t needed in the final build, is easy.
At the beginning of this tutorial you created a package.json file with this content:
{
"scripts": {
"dev": "next"
}
}which was the way to start up a development server using npm run dev.
Now just add the following content to package.json instead:
{
"scripts": {
"dev": "next",
"build": "next build",
"start": "next start"
}
}and prepare your app by running npm run build and npm run start.
Now
The company behind Next.js provides an awesome hosting service for Node.js applications, called Now.
Of course they integrate both their products so you can deploy Next.js apps seamlessly, once you have Now installed, by running the now command in the application folder.
Behind the scenes Now sets up a server for you, and you don’t need to worry about anything, just wait for your application URL to be ready.
Zones
You can set up multiple Next.js instances to listen to different URLs, yet the application to an outside user will simply look like it’s being powered by a single server: https://github.com/zeit/next.js/#multi-zones
Plugins
Next.js has a list of plugins at https://github.com/zeit/next-plugins
Starter kit on Glitch
If you’re looking to experiment, I recommend Glitch. Check out my Next.js Glitch Starter Kit.
Gatsby
Gatsby is a platform for building apps and websites using React.
It is one of the tools that allow you to build on a set of technologies and practices collectively known as JAMstack.
Gatsby is one of the cool kids in the Frontend Development space right now. Why? I think the reasons are:
- the explosion of the JAMstack approach to building Web Apps and Web Sites
- the rapid adoption of the Progressive Web Apps technology in the industry, which is one of the key features of Gatsby
- it’s built in React and GraphQL, which are two very popular and rising technologies
- it’s really powerful
- it’s fast
- the documentation is great
- the network effect (people use it, create sites, make tutorials, people know more about it, creating a cycle)
- everything is JavaScript (no need to learn a new templating language)
- it hides the complexity, in the beginning, but allows us access into every step to customize
All those are great points, and Gatsby is definitely worth a look.
How does it work?
With Gatsby, your applications are built using React components.
The content you’ll render in a site is generally written using Markdown, but you can use any kind of data source, like a headless CMS or a web service like Contentful.
Gatsby builds the site, and it’s compiled to static HTML which can be deployed on any Web Server you want, like Netlify, AWS S3, GitHub Pages, regular hosting providers, PAAS and more. All you need is a place that serves plain HTTP pages and your assets to the client.
I mentioned Progressive Web Apps in the list. Gatsby automatically generates your site as a PWA, with a service worker that speeds up page loading and resource caching.
You can enhance the functionality of Gatsby via plugins.
Installation
You can install Gatsby by simply running this in your terminal:
npm install -g gatsby-cliThis installs the gatsby CLI utility.
(when a new version is out, update it by calling this command again)
You create a new “Hello World” site by running
gatsby new mysite https://github.com/gatsbyjs/gatsby-starter-hello-worldThis command creates a brand new Gatsby site in the mysite folder, using the starter available at https://github.com/gatsbyjs/gatsby-starter-hello-world.
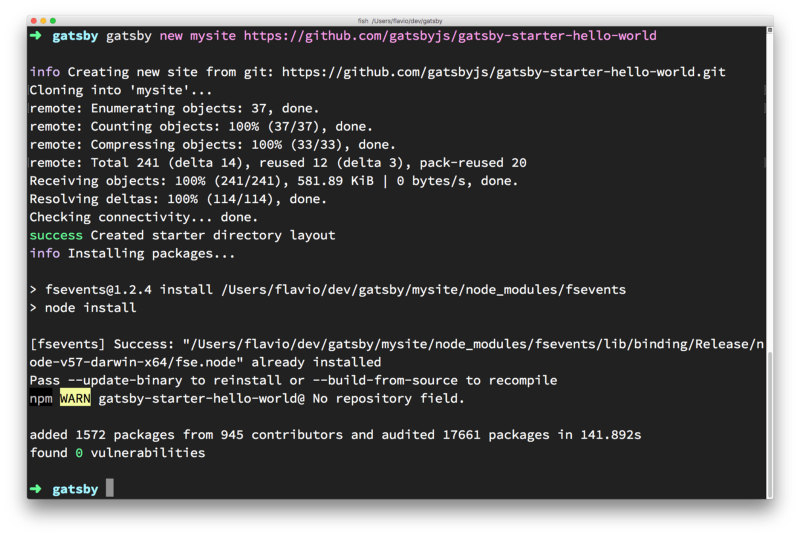
A starter is a sample site that you can build upon. Another common starter is default, available at https://github.com/gatsbyjs/gatsby-starter-default.
Here you can find a list of all the starters you can use.
Running the Gatsby site
After the terminal has finished installing the starter, you can run the website by calling
cd mysite
gatsby developwhich will start up a new Web Server and serve the site on port 8000 on localhost.
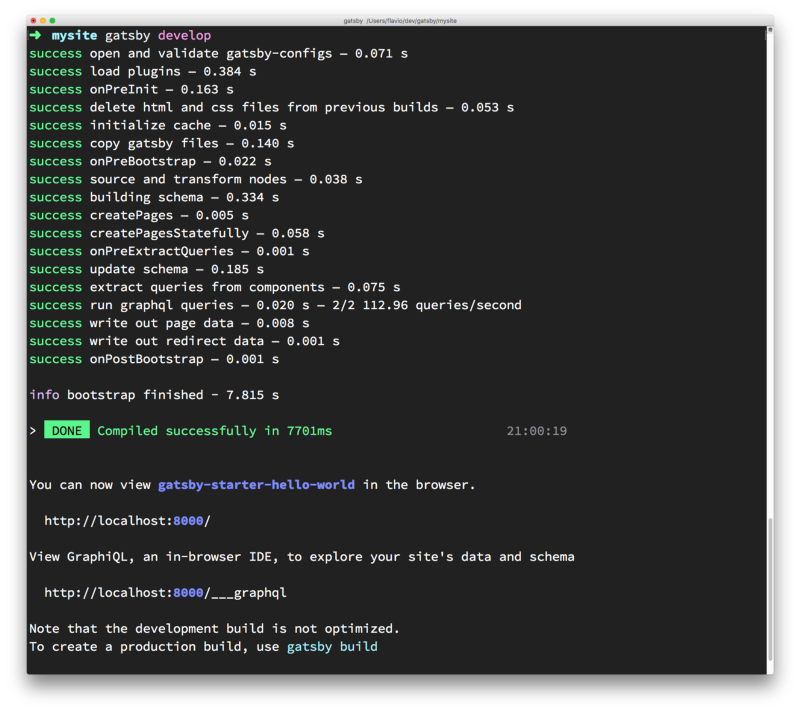
And here is our Hello World starter in action:
Inspecting the site
If you open the site you created with your favorite code editor (I use VS Code), you’ll find there are 3 folders:
.cache, a hidden folder that contains the Gatsby internals, nothing you should change right nowpublic, which contains the resulting website once you build itsrccontains the React components, in this case just theindexcomponentstaticwhich will contain the static resources like CSS and images

Now, making a simple change to the default page is easy, just open src/pages/index.js and change “Hello world!” to something else, and save. The browser should instantly hot reload the component (which means the page does not actually refresh, but the content changes - a trick made possible by the underlying technology).
To add a second page, just create another .js file in this folder, with the same content of index.js (tweak the content) and save it.
For example I created a second.js file with this content:
import React from 'react'
export default () => <div>Second page!</div>and I opened the browser to http://localhost:8000/second:

Linking pages
You can link those pages by importing a Gatsby-provided React component called Link:
import { Link } from "gatsby"and using it in your component JSX:
<Link to="/second/">Second</Link>Adding CSS
You can import any CSS file using a JavaScript import:
import './index.css'You can use React styling:
<p style={{
margin: '0 auto',
padding: '20px'
}}>Hello world</p>Using plugins
Gatsby provides lots of things out of the box, but many other functionalities are provided by plugins.
There are 3 kind of plugins:
- source plugins fetch data from a source. Create nodes that can be then filtered by transformer plugins
- transformer plugins transform the data provided by source plugins into something Gatsby can use
- functional plugins implement some kind of functionality, like adding sitemap support or more
Some commonly used plugins are:
- gatsby-plugin-react-helmet which allows to edit the
headtag content - gatsby-plugin-catch-links which uses the History API to prevent the browser reloading the page when a link is clicked, loading the new content using AJAX instead
A Gatsby plugin is installed in 2 steps. First you install it using npm, then you add it to the Gatsby configuration in gatsby-config.js.
For example you can install the Catch Links plugin:
npm install gatsby-plugin-catch-linksIn gatsby-config.js (create it if you don’t have it, in the website root folder), add the plugin to the plugins exported array:
module.exports = {
plugins: ['gatsby-plugin-catch-links']
}That’s it, the plugin will now do its job.
Building the static website
Once you are done tweaking the site and you want to generate the production static site, you will call
gatsby buildAt this point you can check that it all works as you expect by starting a local Web Server using
gatsby servewhich will render the site as close as possible to how you will see it in production.
Deployment
Once you build the site using gatsby build, all you need to do is to deploy the result contained in the public folder.
Depending on the solution you choose, you’ll need different steps here, but generally you’ll push to a Git repository and let the Git post-commit hooks do the job of deploying. Here are some great guides for some popular hosting platforms where you can deploy Gatsby.
Wrapping up
I hope this book has helped you get started with React, and maybe it gave you a head start in exploring some of the most advanced aspects of React programming. That’s my hope, at least.
You can get this ebook in PDF, ePub and Mobi format at reacthandbook.com