
Hi everyone! In this article we're going to take a look at two very useful tools we can use to make our lives easier when writing code: linting tools and code formatters.
We're going to talk about what these tools are, how they work, why are they useful, and finally see how we can implement them in a basic React project.
Let's go!
Table of Contents
About Linting Tools
In the world of web development, linting tools have become an essential part of the developer's toolkit.
Linting tools are used to analyze source code for potential errors or stylistic issues, making it easier to maintain code quality and consistency across a project.
What are Linting Tools?
Linting tools are automated tools that analyze source code to detect potential errors, security vulnerabilities, or coding style issues.
They are designed to help developers catch mistakes before they become a problem, and to promote best practices in coding.
The term "lint" comes from the name of the first lint tool, which was developed in the early 1970s by a team of Bell Labs researchers led by Stephen C. Johnson.
The original lint tool was designed to analyze C source code for potential errors and stylistic issues.
Since then, linting tools have evolved to work with a variety of programming languages, including JavaScript, Python, and Ruby.
Why are Linting Tools Useful?
Linting tools are useful for a number of reasons. Firstly, they help you catch errors early in the development process, when they are easier and cheaper to fix.
Secondly, they can help promote coding standards and best practices within a development team, ensuring that code is consistent and maintainable.
Finally, they can help you identify potential security vulnerabilities in your code, reducing the risk of a breach.
Main Linting Tools in the Market
There are several linting tools available in the market today. Here are some of the most popular ones:
ESLint: ESLint is a widely used and highly configurable linter for JavaScript and TypeScript. It can be extended using plugins and supports various rule sets, making it a flexible tool for enforcing coding standards and preventing errors.
JSHint: JSHint is a popular linter that has been around since 2010. It offers a simple configuration and a wide range of built-in rules to help developers avoid common pitfalls and improve code quality.
JSLint: JSLint was one of the first linters to be developed for JavaScript, and it still sees some use today. It is known for its strictness and for enforcing a particular style of code, which can be helpful for maintaining consistency across a team.
StandardJS: StandardJS is a popular linter that aims to provide a "batteries included" approach to JavaScript linting. It has a minimal configuration and includes a set of opinionated rules designed to promote clean, readable code.
And we should also talk about Typescript. When using TypeScript, the TypeScript compiler itself acts as a linter. It checks the syntax of TypeScript code and provides warnings and errors when there are issues. This built-in linter can catch common mistakes and issues such as misspelled variable names, invalid method calls, and syntax errors.
The TypeScript compiler can be run using the tsc command in a terminal. When the --noEmit flag is used, the TypeScript compiler will only perform a syntax check without compiling the code to JavaScript. This allows the compiler to act as a linter and provide feedback on code quality without actually generating any output.
You can also configure the TypeScript compiler using a tsconfig.json file to specify various options, including the strictness of the checking. This can help catch even more potential issues and ensure that the code follows best practice
If you're not familiar with TypeScript, I recommend you this article I wrote a while ago.
About Code Formatters
In modern web development, code formatters have become an essential tool for developers. These tools automate the process of code formatting, making it easier to write and read code.
What are Code Formatters?
Code formatters are automated tools that help you format source code automatically. The main purpose of code formatters is to standardize the formatting of code across a project or team, making it easier to read and understand code.
With code formatters, developers no longer need to spend time formatting code manually, which can save a lot of time and effort.
Code formatting tools have been around for decades. One of the earliest tools was the "indent" program, which was used to format C code in the early 1970s. But these early tools were limited and didn't have the same level of functionality as modern code formatters.
In the early 2000s, tools like "astyle" and "uncrustify" were developed, which introduced more advanced formatting capabilities.
Why are Code Formatters Useful?
Code formatters are useful for a variety of reasons. First and foremost, they help to standardize code formatting, which makes it easier to read and understand code. This is particularly important when working on large projects with multiple developers, where everyone needs to be able to read and understand each other's code.
Code formatters also help to ensure that code is consistent across a project or team, which can help to prevent errors and improve code quality. They also make it easier to maintain code over time, as the code is formatted consistently and is easier to read and understand.
Main Code Formatters Available
There are several code formatting tools available in the market today. Here are some of the most popular ones:
Prettier: Prettier is a popular code formatter for JavaScript, TypeScript, and CSS. It's highly configurable and can be used in a variety of different environments, including editors, build tools, and code quality checkers.
ESLint: While primarily known as a linting tool, ESLint can also be used as a code formatter. It has a
--fixflag that can automatically format your code based on rules you define.Beautify: Beautify is a code formatter for JavaScript, HTML, and CSS that can be used in a variety of editors and IDEs. It allows you to customize your formatting options and has support for a wide range of languages.
How to Implement ESLint and Prettier
Cool, so now let's see a linter and code formatter in action! We're going to implement the two most popular tools (ESLint and Prettier) in a simple React project to get an idea of how these things work.
First let's create our project by running this in our command line: npm create vite@latest linternsAndFormatters --template react
Then cd into your project and run npm install so our dependencies get installed.
Now that we have our project up and running, we'll start by installing ESLint.
How to Install ESLint
To install ESLint, we can just run npm init @eslint/config in our console. This will fire a series of prompts asking how we want to use ESLint in our project and building the corresponding config. Your console might end up looking something like this:
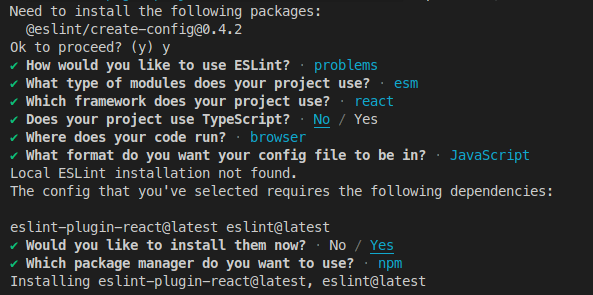
Installing ESLint
After all this, we'll see a new file called .eslintrc.cjs in the root of our project. Here's where ESLint's config lives and where we can customize the linter to our preferences. The initial config given the options I selected is the following:
module.exports = {
    "env": {
        "browser": true,
        "es2021": true
    },
    "extends": [
        "eslint:recommended",
        "plugin:react/recommended"
    ],
    "overrides": [
    ],
    "parserOptions": {
        "ecmaVersion": "latest",
        "sourceType": "module"
    },
    "plugins": [
        "react"
    ],
    "rules": {
    }
}
To see our linter in action, let's add the following script in our package.json file:
"lint": "eslint --fix . --ext .js,.jsx"
This script executes the eslint command with the --fix option to automatically fix linting errors and warnings. The command is executed on all files with the .js or .jsx extension located in the root directory of the project, as specified by the . argument.
Now let's modify our app.jsx file to have the following code:
import React from 'react'
import './App.css'

function App() {

  const emptyVariable = ''

  return (
    <div className="App">
      <h1>Vite + React</h1>
    </div>
  )
}

export default App
Then run npm run lint and voilà! Your linter is screaming with red highlighted text that you have an unused variable in your code! =D

How to Install Prettier
Cool, now let's hop on to our code formatter.
We're going to install it by running npm install --save-dev --save-exact prettier.
Then we're going to create and empty config file by running echo {}> .prettierrc.json.
Since we're here, add the following options to your newly created config file:
{
  "singleQuote": true,
  "jsxSingleQuote": true,
  "semi": false
}
What this does is assure single quotes are used whenever possible and semicolons are nowhere to be found (because, god, who likes semicolons...).
As we did with our linter, let's add the following script in our package.json file:
"format": "prettier --write ."
The script runs the Prettier code formatter on all the files in the project directory and its sub-directories. When run with the --write option, it modifies the files in place, changing them to conform to Prettier's rules for indentation, line length, and other formatting options. The . argument specifies that all files in the project directory and its sub directories should be formatted.
Lastly, let's "uglify" the first line of our app.jsx file like this:
import React from "react";
Run npm run format and you should see it corrected right in front of you:
import React from 'react'
You can breath easy now, those ugly semicolons won't come back to haunt you. ;)
As we've seen, the set up of these two tools isn't that complex, and they truly help to make our everyday jobs easier. ESLint will help us catch bugs and unnecessary/redundant code, and Prettier will help us standardize code format all across our codebase.
Another tip is that if you have a CI/CD pipeline in place, it's a good idea to implement the linting and formatting scripts as part of your workflow. This will help you ensure that every deployment is both automatically linted and formatted.
If you're not familiar with CI/CD or setting up a pipeline, I recently wrote an article about that. ;)
Wrapping up
Linters and code formatters are powerful tools that can greatly benefit web developers.
Linters help you catch potential bugs and issues before they become serious problems, and encourage you to write more maintainable and readable code.
Code formatters help you enforce a consistent code style and format, saving time and reducing the chances of human error.
By using these tools in your web development workflow, you can improve your productivity and the quality of your code.
As always, I hope you enjoyed the article and learned something new.
If you want, you can also follow me on LinkedIn or Twitter. See you in the next one!