
At Figma Config 2023, the Figma team unveiled a lot of new features – including variables. The launch of variables in Figma offers designers a new approach that helps them make their designs more flexible and adaptable.
In this tutorial, you'll learn what variables in Figma are, and how to create and implement different types of variables while designing in Figma.
Prerequisites:
To get the most out of this handbook, it'll be helpful to have basic knowledge of how to use Figma and its features. But note that this is not necessary, as I wrote this handbook for everyone – irrespective of their individual level of knowledge.
This handbook is for everyone who is interested in learning more about variables, Figma, and design in general.
Table of Contents:
- What are variables?
- Differences between Variables and Styles in Figma
- Why are Variables Important to the Design Process?
- How to Create Variables in Figma
- How to Use Variables for Advanced Prototyping
- How to Use Variables for Developers- Using APIs
- Conclusion
What Are Variables?
The word "variable" has a lot of definitions. The Oxford Dictionary defines the word variable as "not consistent or having a fixed pattern; liable to change." Another definition says "an element, feature, or factor that is liable to vary or change."
The definitions above simply tell us that variables are elements which are dynamic and prone to change. With these definitions, we can now define what a variable is in Figma.
In Figma, a variable stores reusable values like colour and text values that you can apply to different kinds of design properties and prototypes.
Differences between Variables and Styles in Figma
Given the definition of variables above, you might have begun to see some similarities between variables and style guides. Although both features exist to make your work better, there are a few key differences to keep in mind:
- Variables are a more advanced feature, and they allow you to define and reuse values like colours, text, and spacing across your designs. On the other hand, styles are predefined sets of design properties such as text styles, colour styles, and effect styles.
- Variables allow designs to change when used in various contexts, because of their dynamic nature, unlike styles. For example, you can change your designs from light mode to dark mode or have padding values change when designing for different devices. This makes variables useful for creating design systems with adaptable components.
- Variables offer a more flexible design process in creating flexible design components, especially where you want to change values like button text or color on different instances of the same component. Styles are typically used for maintaining consistent design elements like button styles, text headings, or colour palettes.
- Variables can store raw, single values, while styles store sets of values.
Why are Variables Important to the Design Process?
Using variables is quite important for a number of reasons.
First, variables help maintain consistency across a design system. By defining variables for colors, typography, spacing, and other design elements, you ensure that these elements have a uniform appearance throughout your project. This consistency is crucial for branding and user experience.
Variables also make designs adaptable. Designers can quickly experiment with different values such as colour schemes or font sizes by adjusting the variables. This adaptability is valuable when creating designs for different platforms or devices.
Variables are also quite efficient. When a variable is updated, all instances of that variable in the design updates automatically. This saves time and effort, and eliminates the need to manually update every instance of a specific element.
Variables are particularly useful in large projects or design systems because of their scalability and ease of maintenance. They allow designers to scale their designs without losing control.
Since projects grow and design systems evolve over time, variables can be adjusted globally to accommodate new requirements. Variables also provide a central place to update these changes, ensuring that all design elements are consistently modified.
And finally, variables can be beneficial to developers during the hand-off process. Designers can provide developers with precise values for design elements, reducing the chances of misinterpretation and streamlining the implementation process.
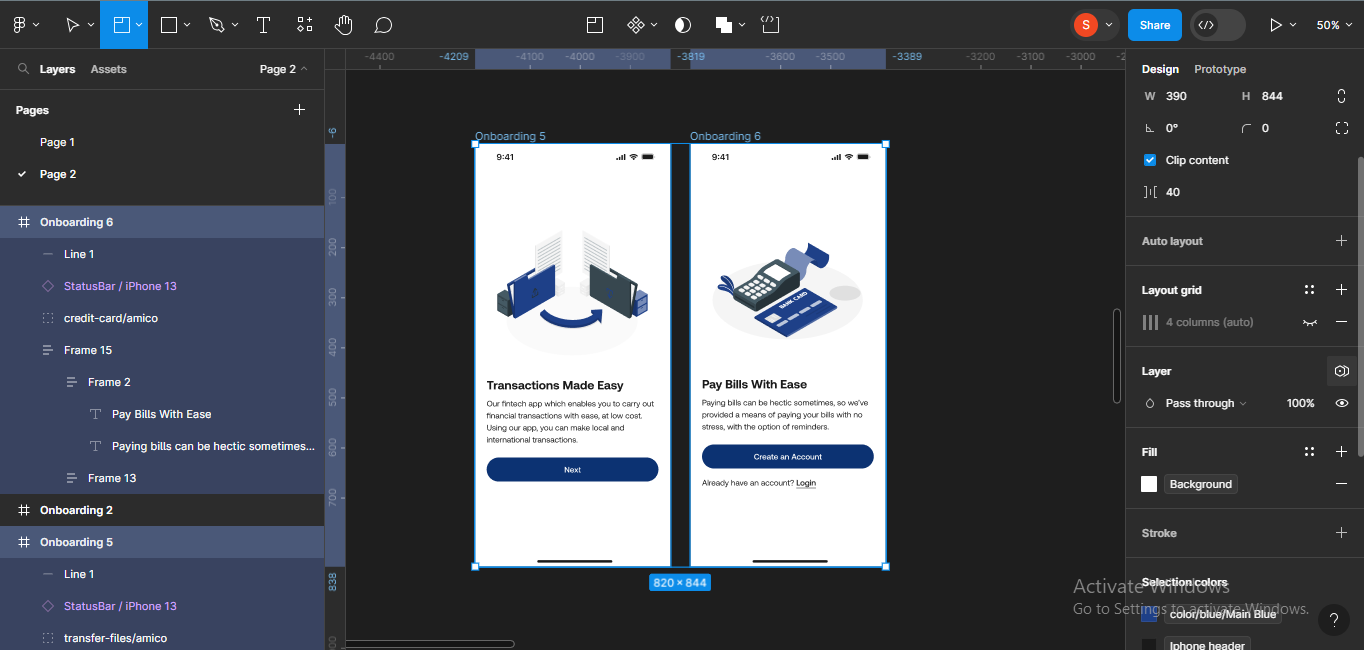
How to Create Variables in Figma
Variables are quite easy to create in Figma. Below, I'll walk you through the steps for creating different kinds of variables in Figma.
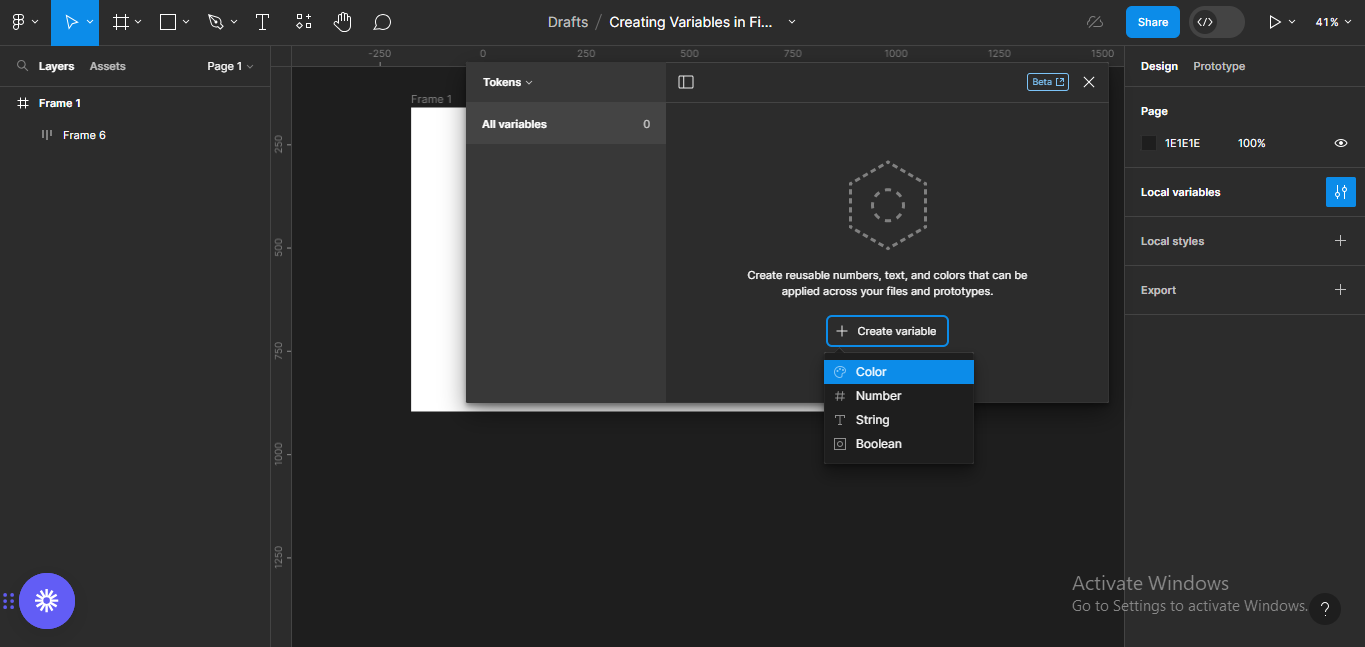
At the moment, we have four types of variables in Figma:
- Color: used for colour fills.
- Number: used for dimensions, corner radius, and auto layout properties.
- String: used for text layers and variant properties.
- Boolean: used to toggle layer visibility.
We'll create and implement each of these variables in Figma, and also use them for advanced prototyping.
How to Create Colour Variables in Figma
The first type of variable we'll be creating is a colour variable. As a designer or developer, you have likely used colours in your projects. So, the concept of colour shouldn't be unfamiliar to you from a design standpoint.
Step 1: Open a new Figma file
Let's assume that you want to create colour variables for a new design project you're going to start working on, like a magazine website for example. The first thing you need to do is open a new Figma file.
 Blank Figma file
Step 2: Choose a colour palette
The next step is to choose a colour palette for the project. Every design project has a set of colours used repeatedly to establish consistency – for example, for headers and backgrounds, to call attention to a primary button, and so on.
You'll want to choose colours which complement each other for your design. If you need some help here, you can read my article on the 60-30-10 rule in design.
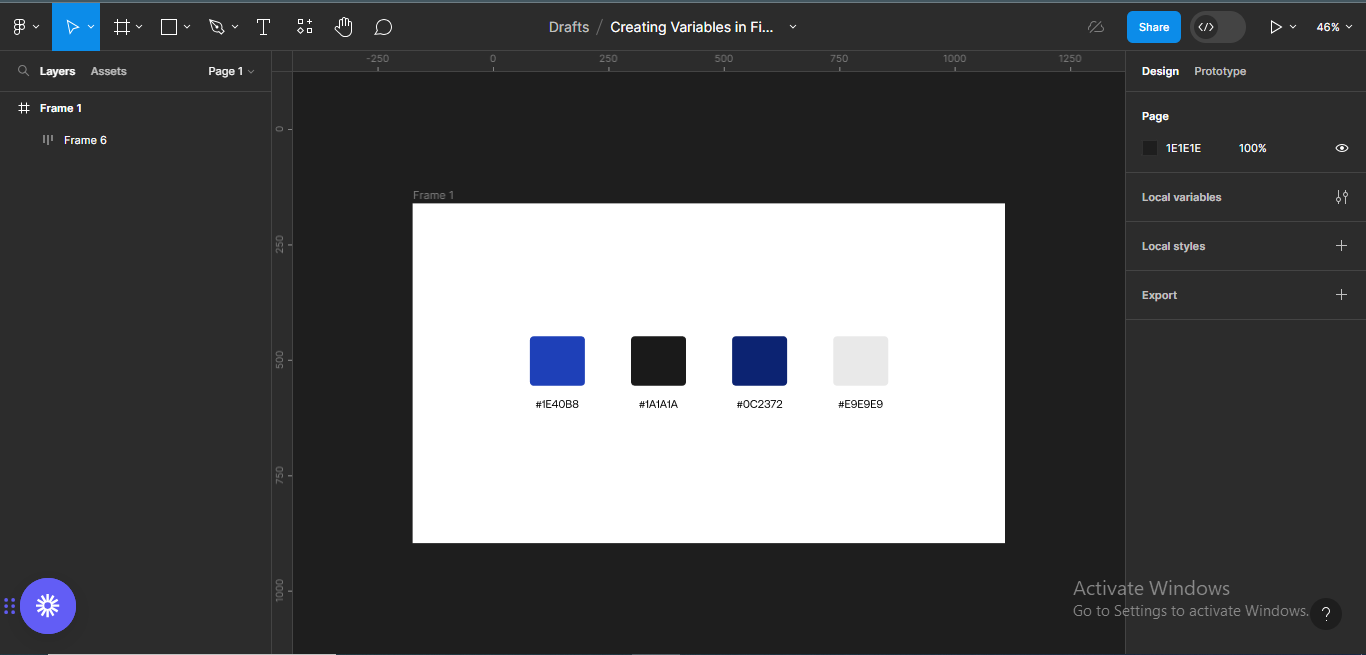 Creating a colour palette
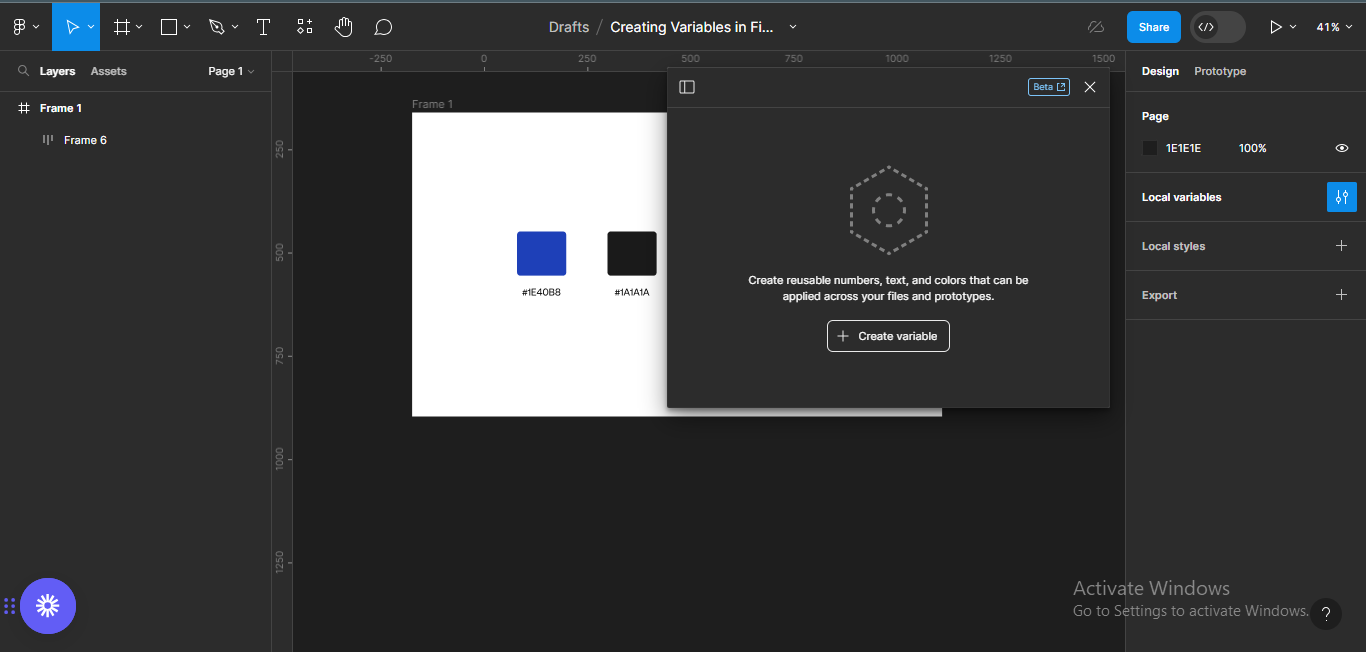
Step 3: Create variables for each colour
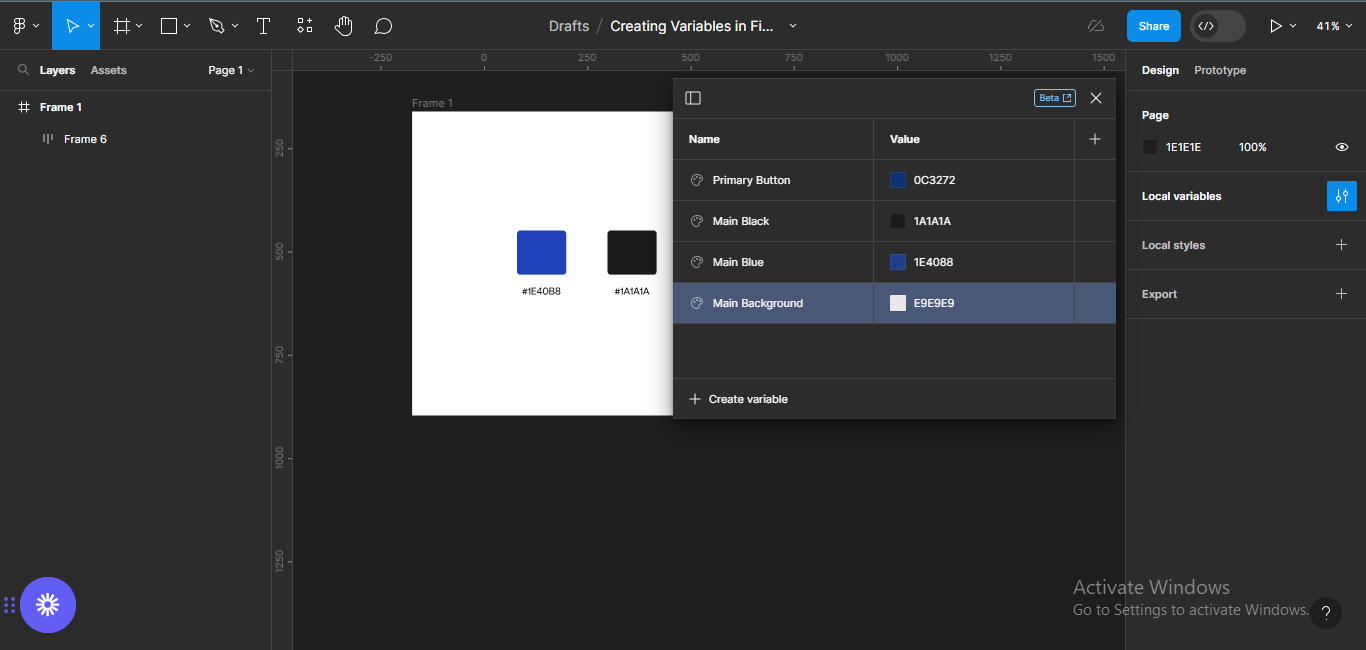
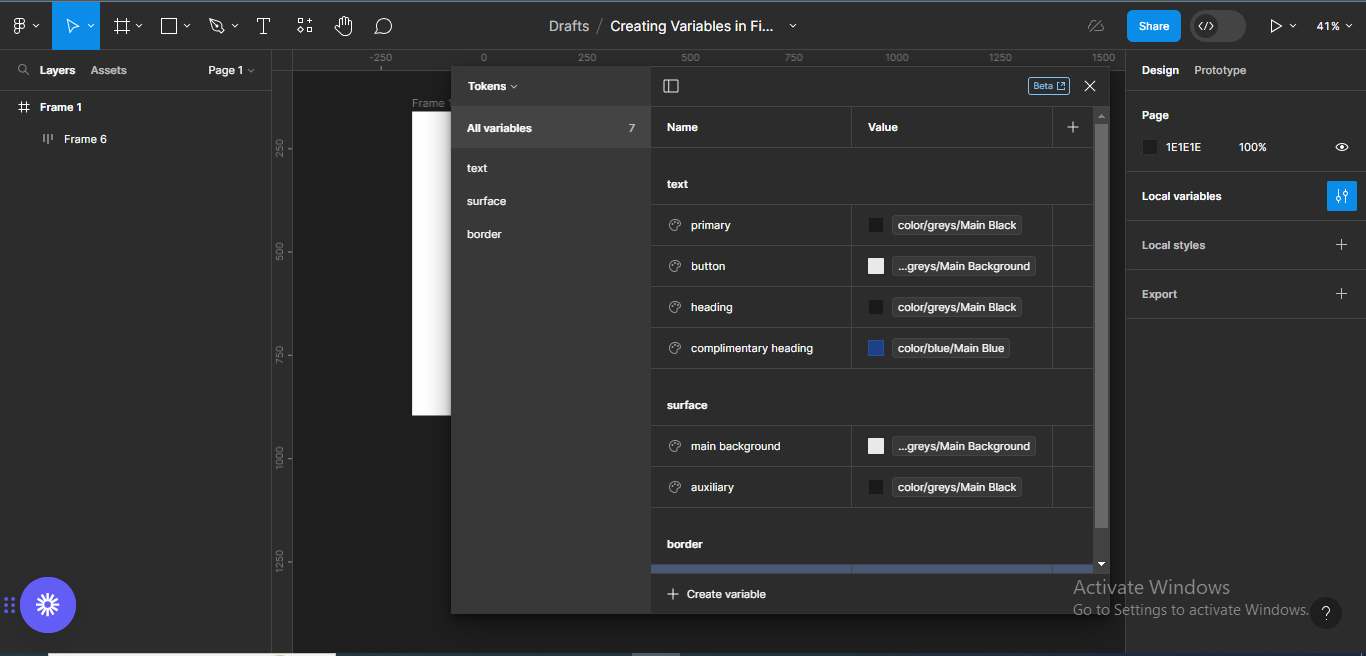
Next, we'll create variables for each colour code in the palette. Go to the panel on the right-hand side and click on local variables.
Local variables means all the variables located in the design file.
 Click on local variables
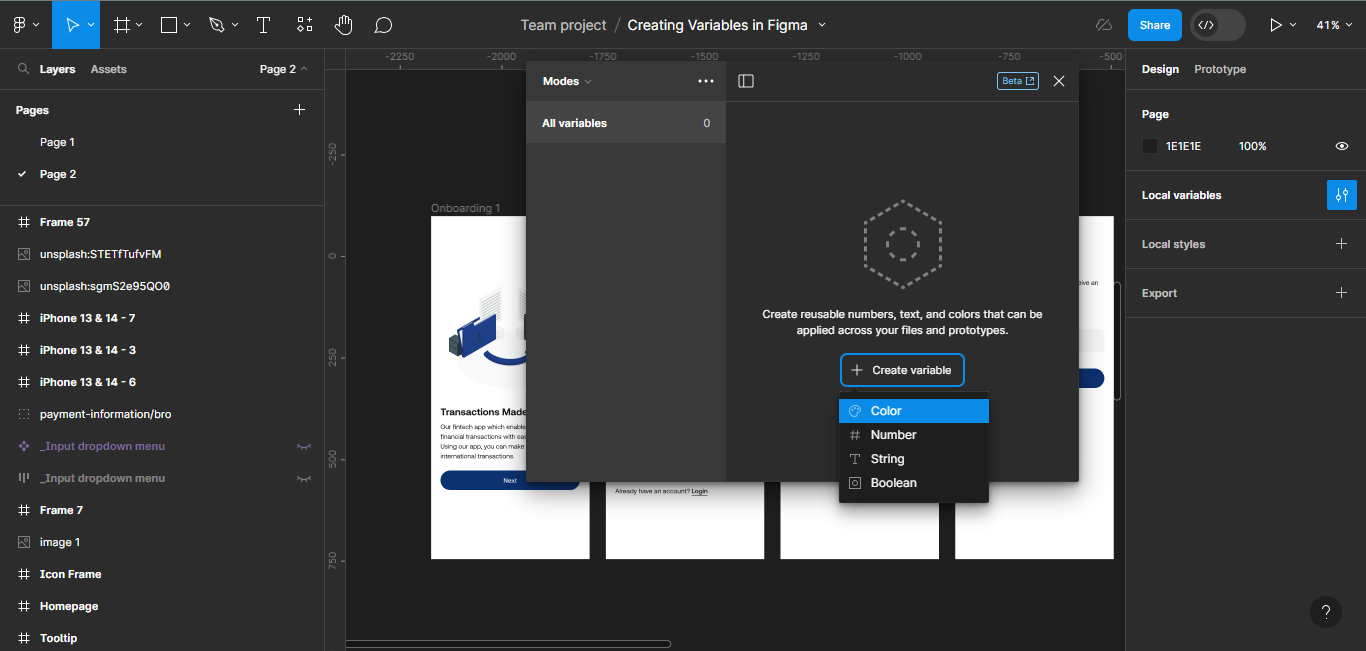
Click on create variable to create the first variable in the file.
A dropdown will appear containing the four types of variables I explained earlier. Since we're trying to create colour variables in this section, we'll choose color.
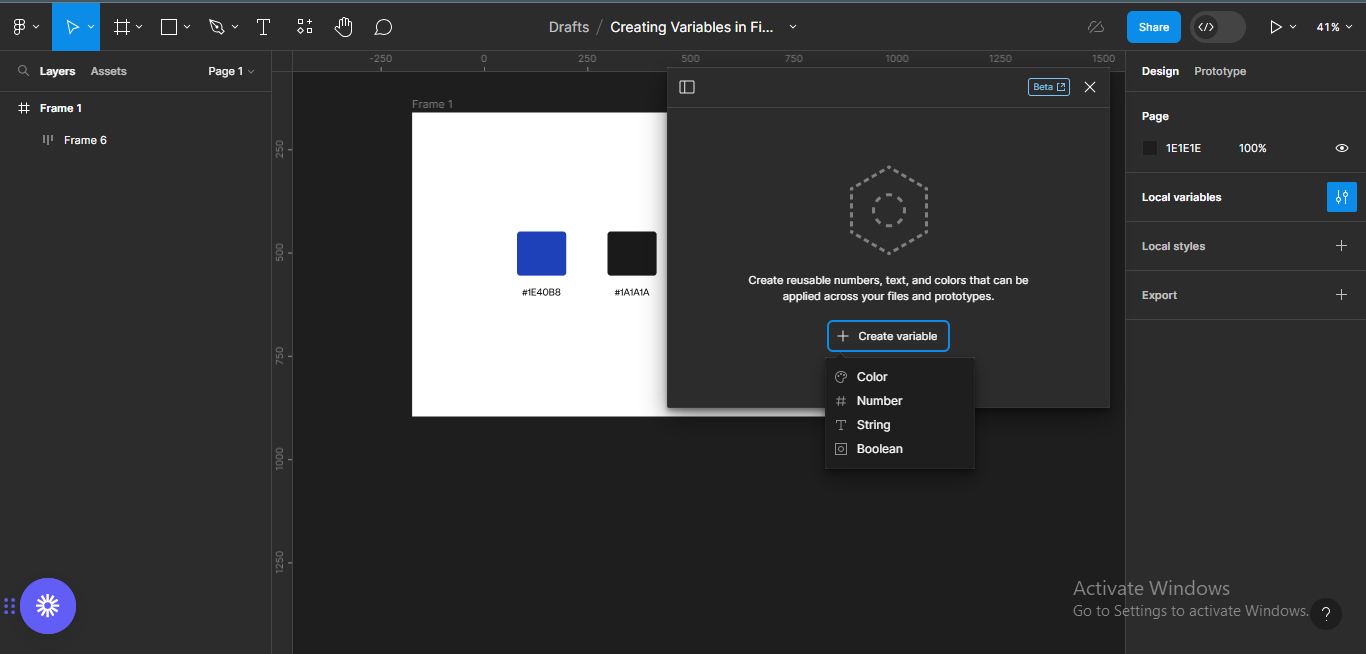 Create a colour variable
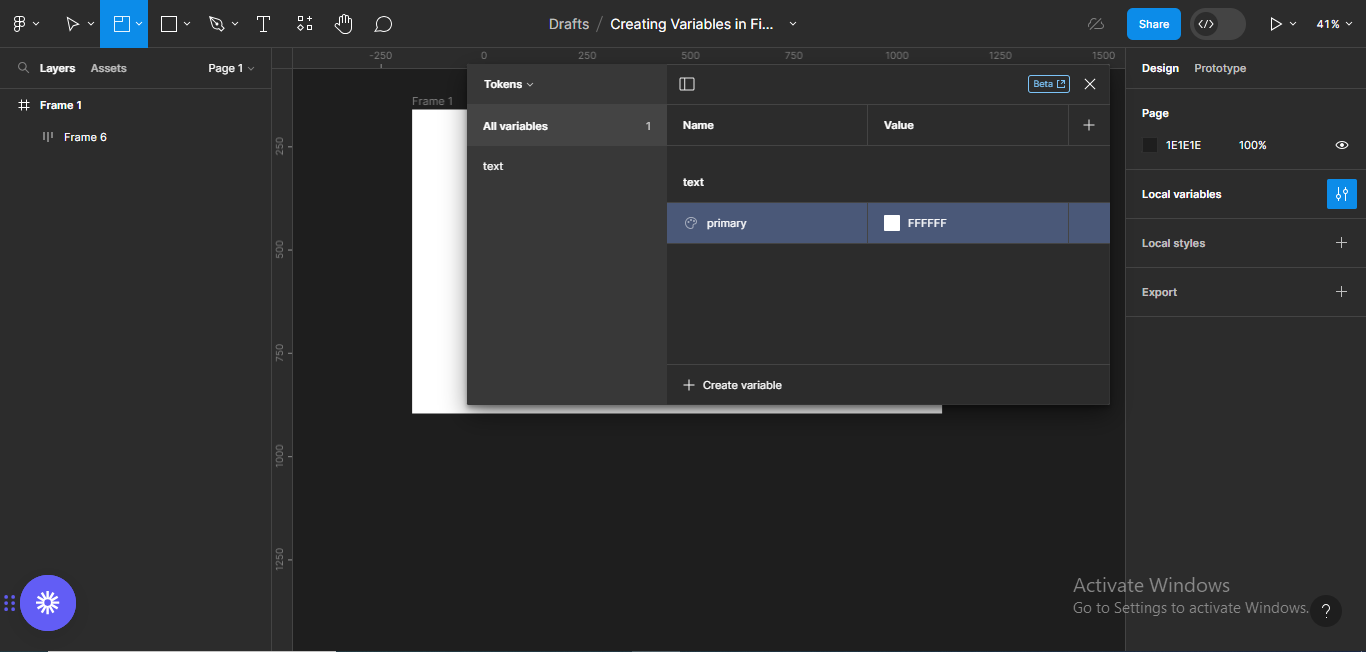
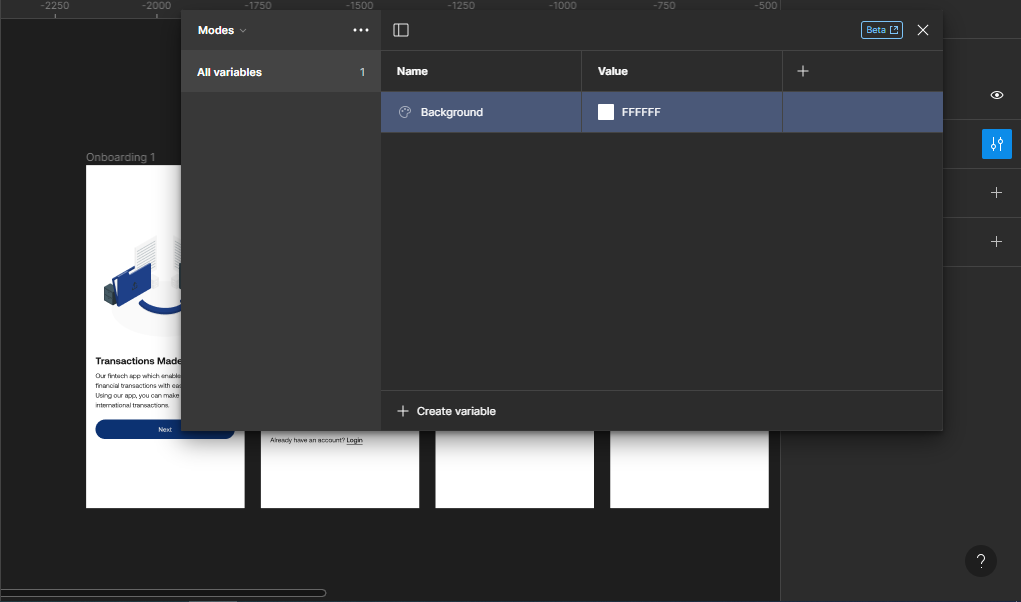
A created variable section will come up, with two columns: the title of the variable (Color), and the value of the variable (the colour code-FFFFFF).
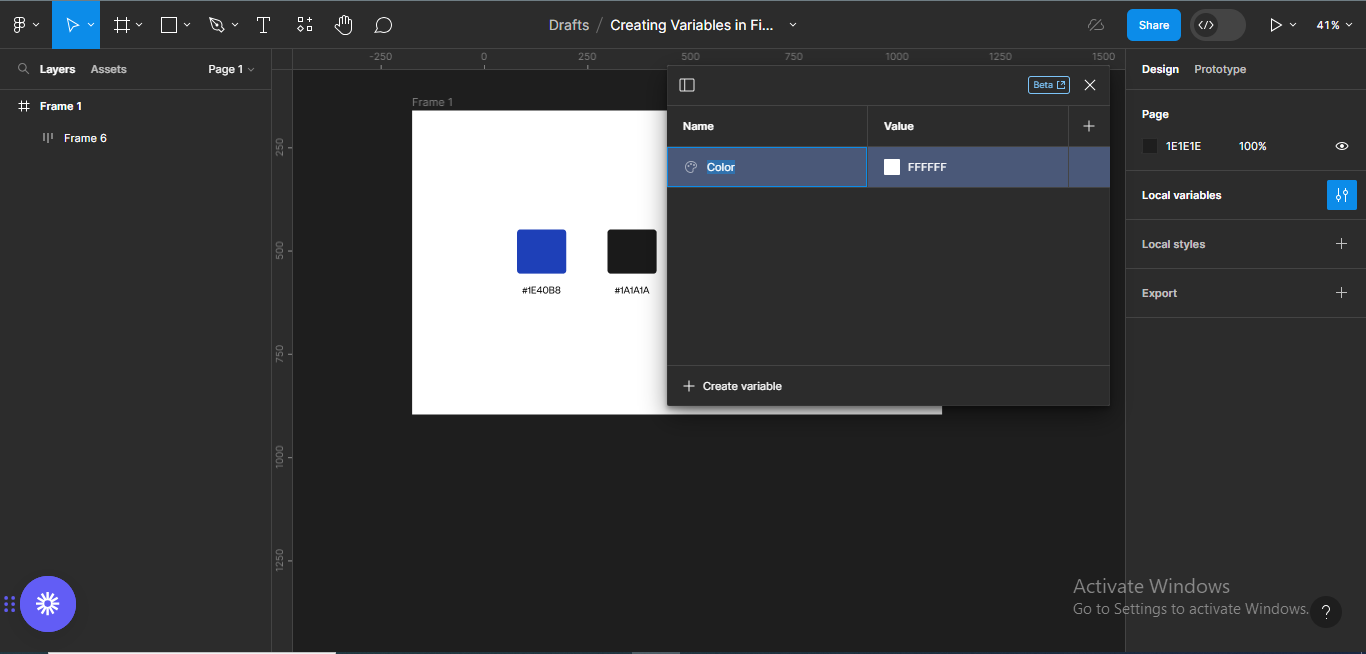 Choose colour variables
Give your new variable a name – you can use the role of the colour, primary background for instance. In the next column, type the colour code or use a colour picker.
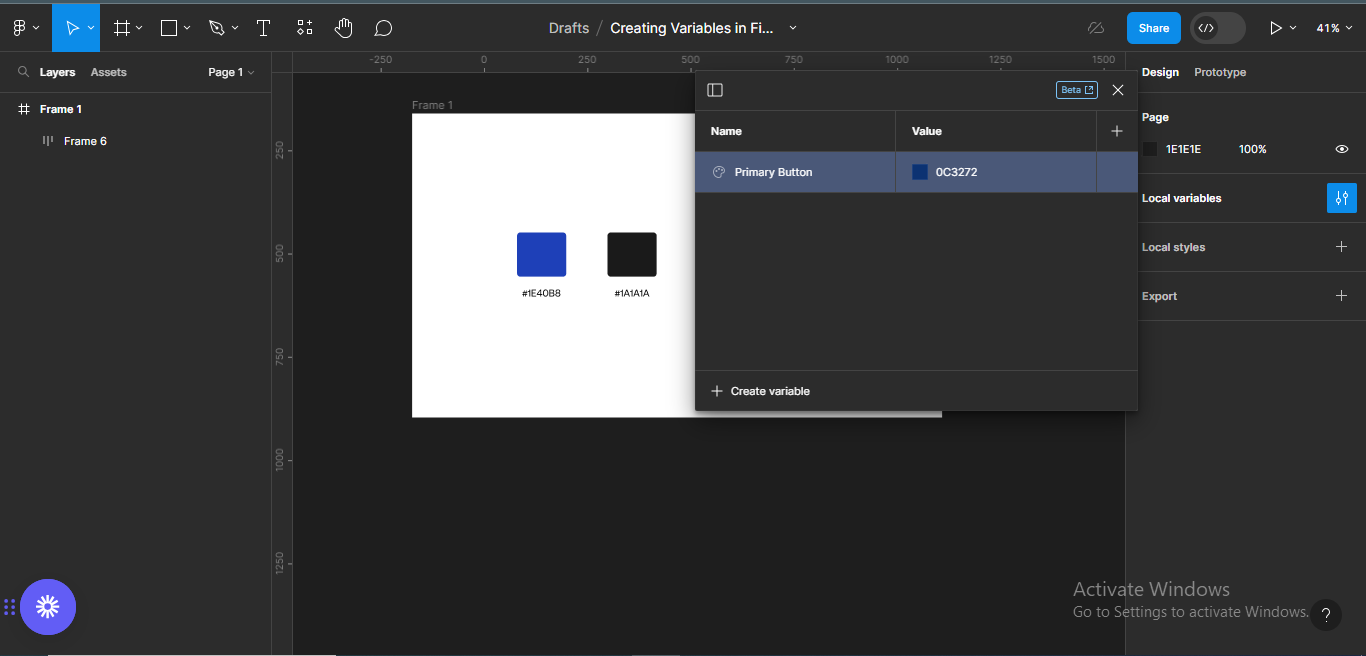 Rename variable & type in colour code
And there you go – you just created your first colour variable!
To see more editing options, hover over the variable's row. An edit variable icon will pop up.
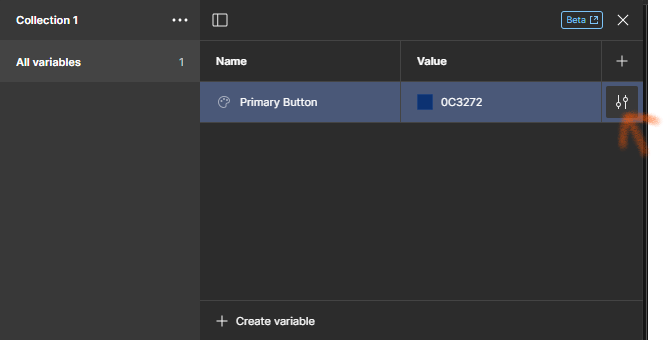 Edit variable
Click on it to edit the colour variable to your taste.
 Edit the colour variable/add a description
In the editing section, you can add a description on how to use the variable, hide from publishing, and so on.
Having done that, follow the steps above to create variables for the remaining colours in the colour palette.
 Create variables for other colours
You can also organise your variables into groups. To do this, select the colour variables you want to group (hold down SHIFT key), and right-click.
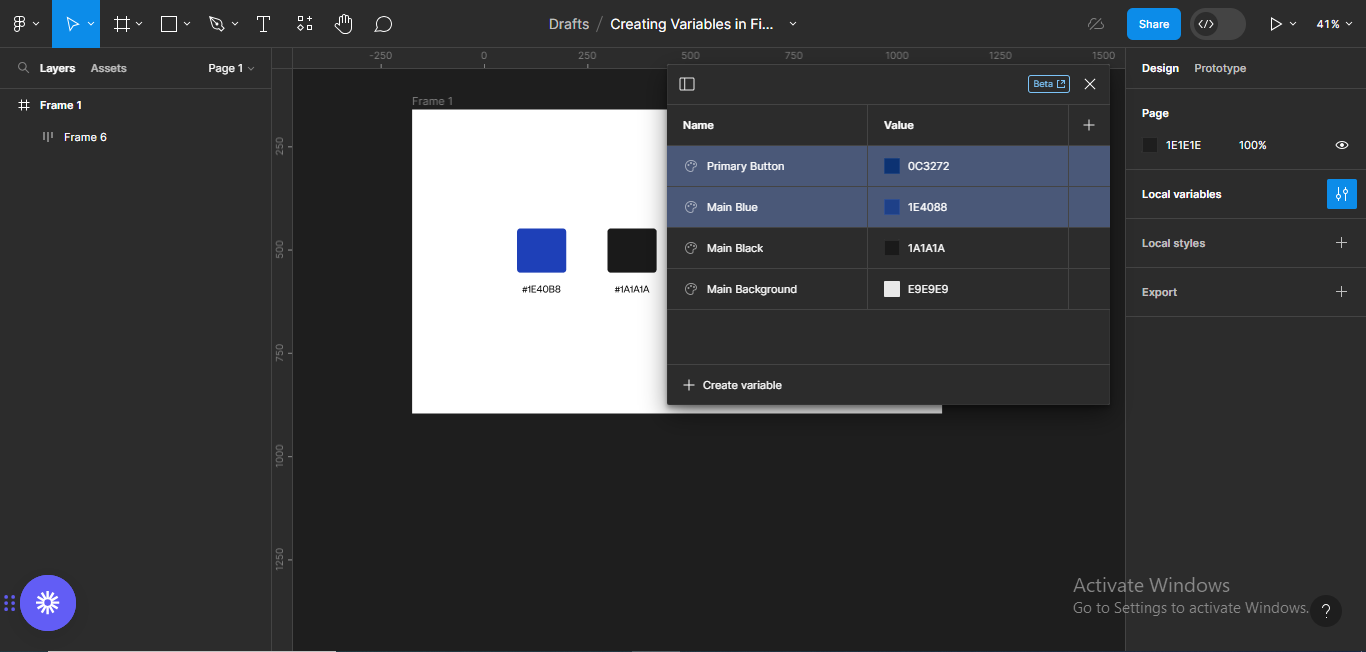 Group the colour variables
This will bring out some options:
- New group with selection
- Edit variables
- Duplicate variables
- Delete variables
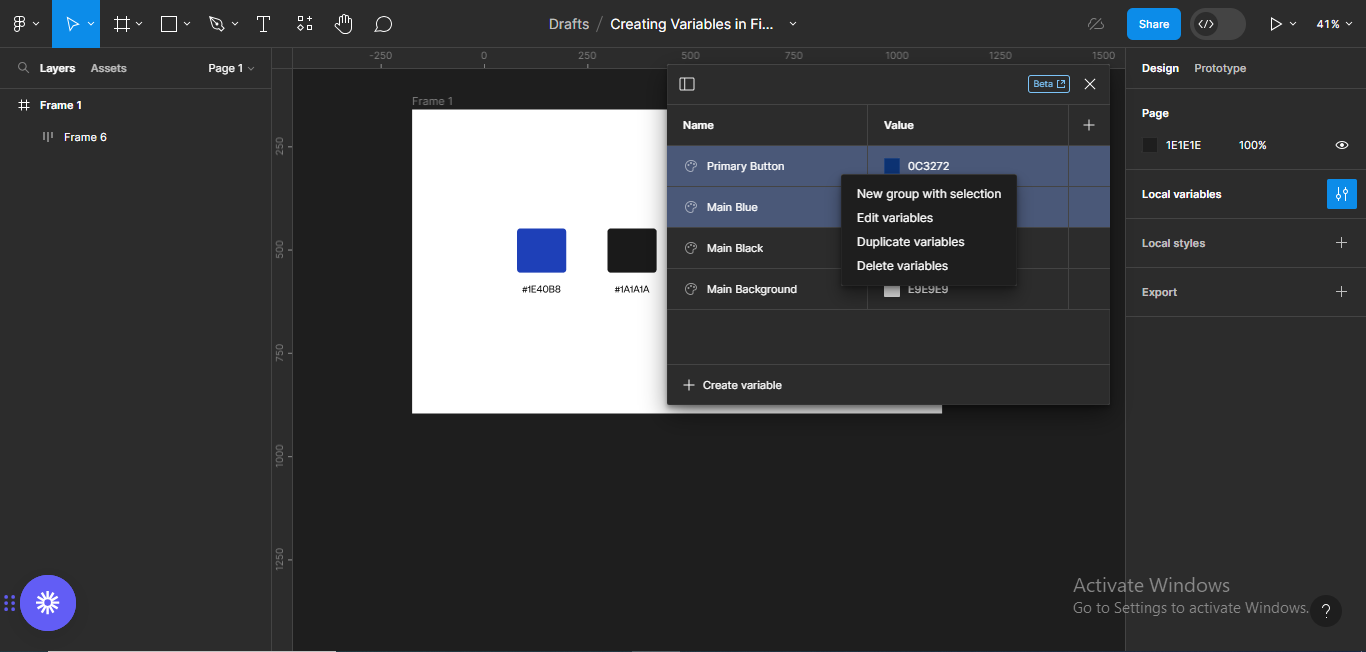 New group with selection
Choose New group with selection, double-click on the group name, and rename it to color/blue.
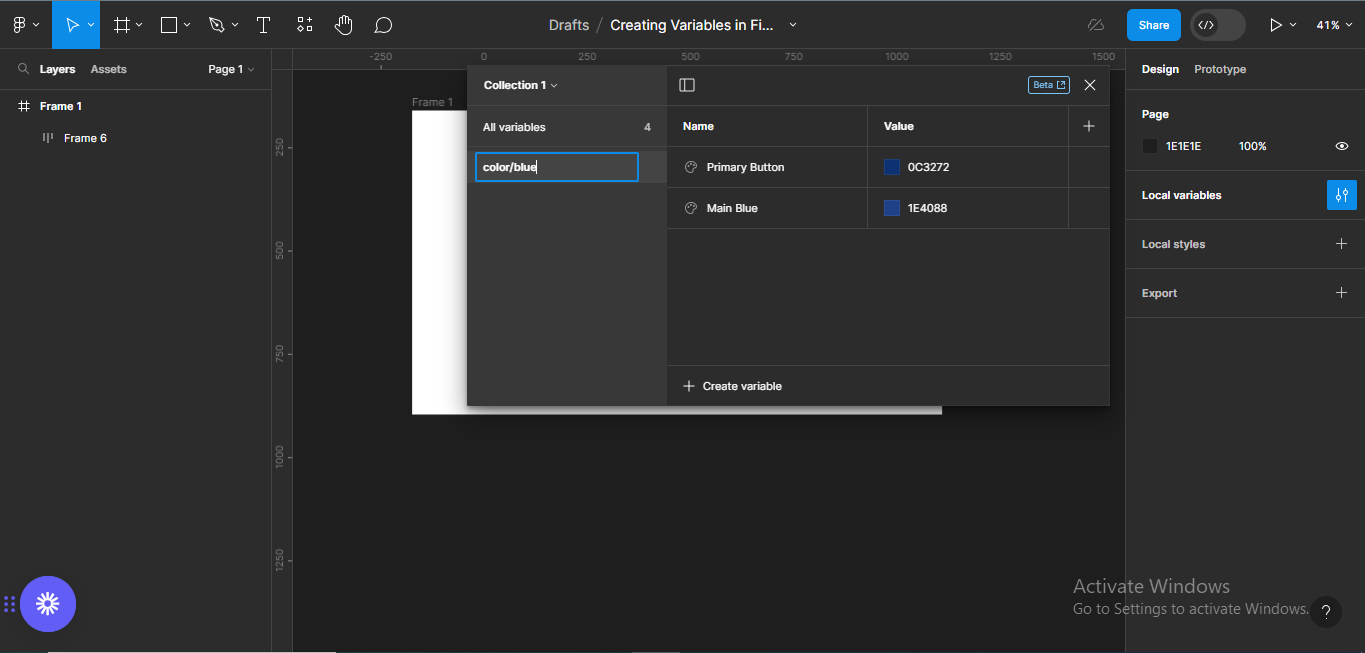 Rename group
You can group your colour variables anyway you'd like to – for example, background colours, header colours, different shades of a particular colour, and so on.
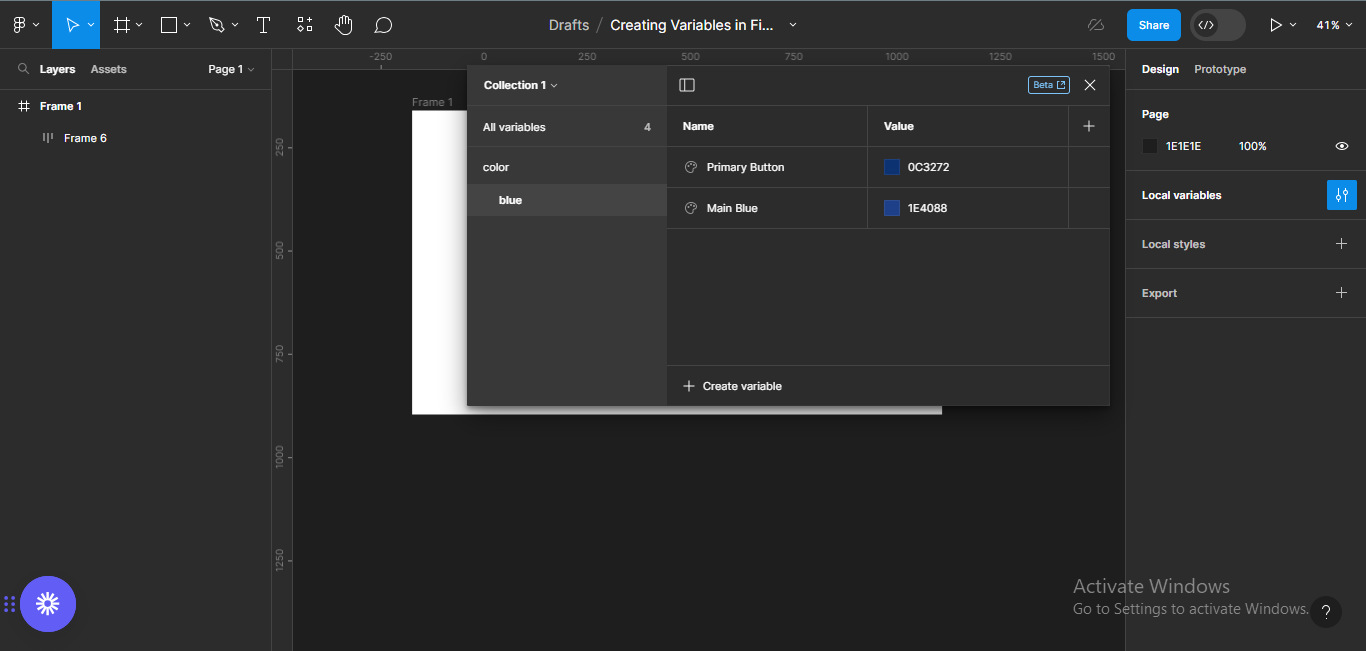 Colour blue variables grouped.
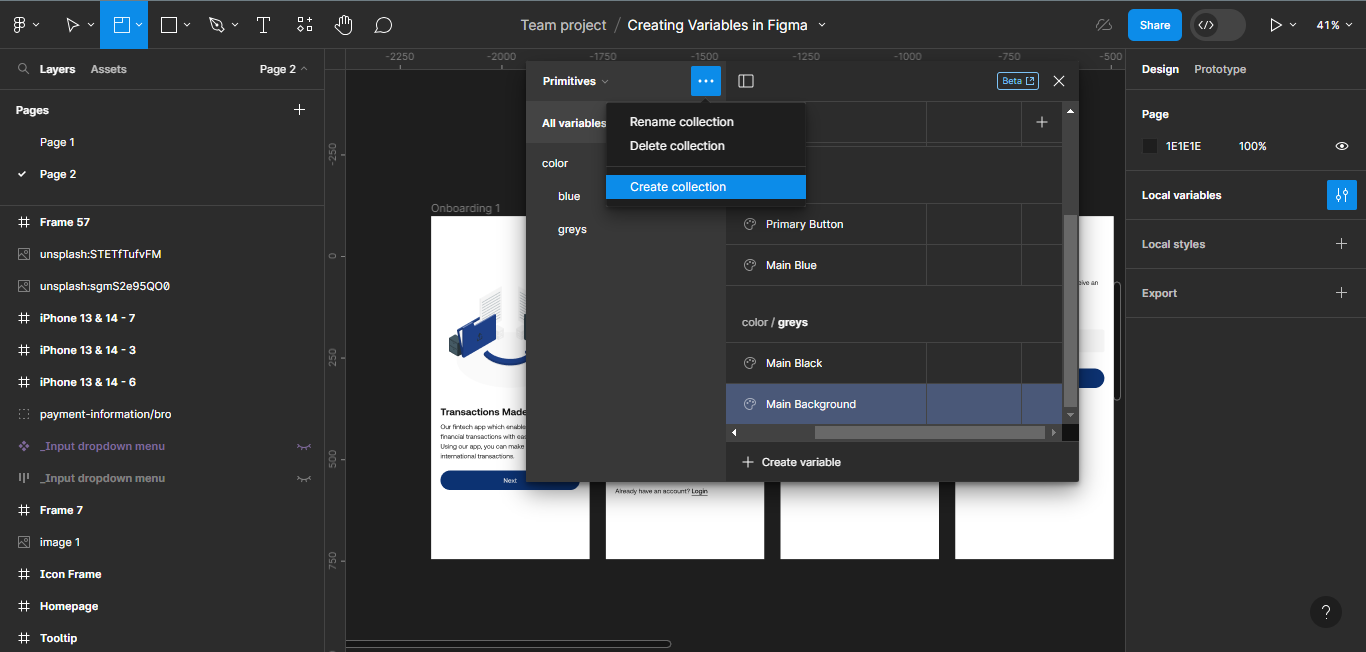
Violà! You just created a colour variable group in Figma. Click on the collection drop-down and choose rename collection.
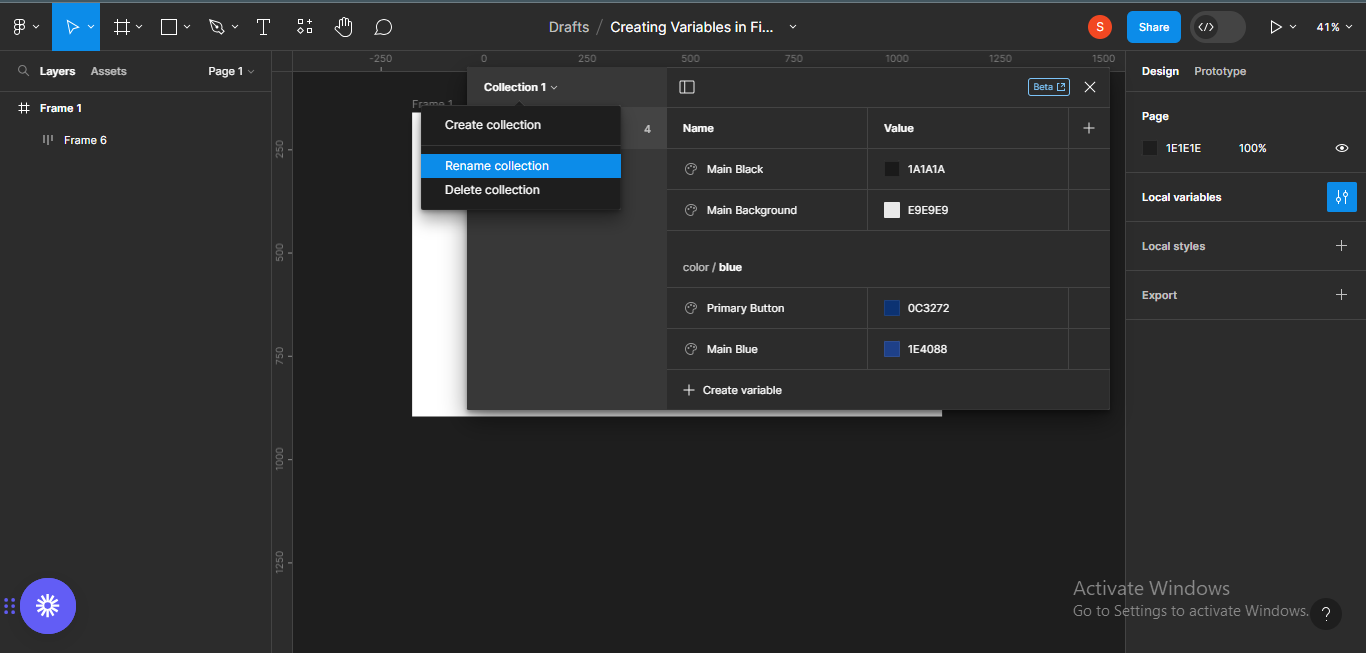 Rename collection
You can rename this collection primitives.
Primitives means basic. Also, you can decide to rename your collections or not. The choice rests on you.
 Renamed primitives collection
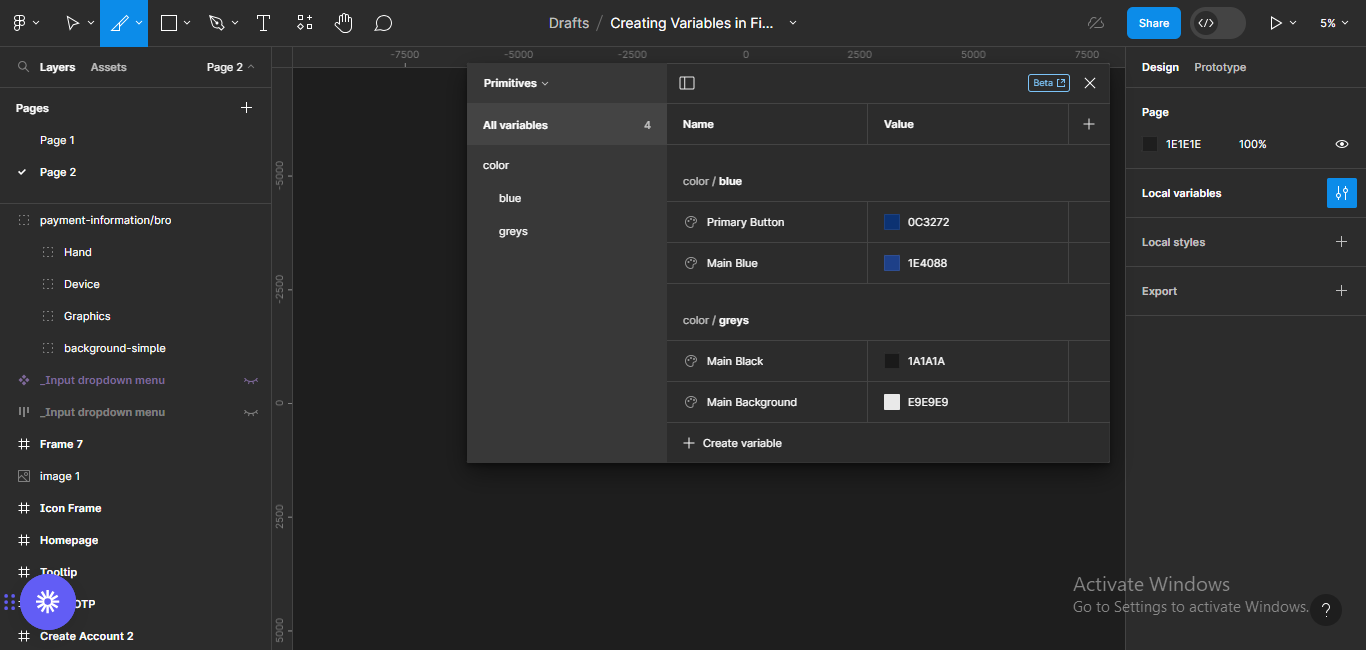
How to Create Colour Variables for Tokens
Now, we'll create colour variables for the text, surfaces (such as backgrounds), and borders we need for the project. We want to assign different functions to the colour palette (variables) we created earlier.
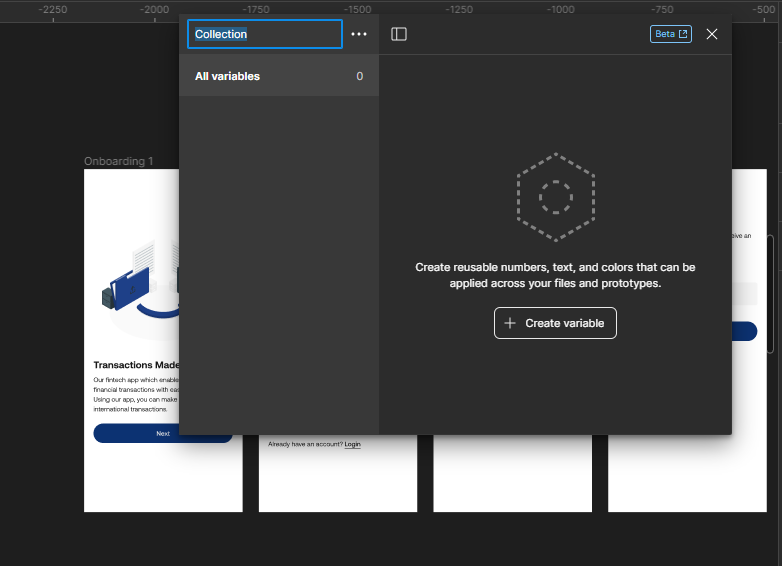
Click on local variables and create a new collection. You can name this tokens.
 New collection
Create a new colour variable and rename it "primary text".
In order to save yourself time, and group your variables as you're naming them, rename the variable as text/primary. This will automatically form a group.
 Creating and grouping text variables
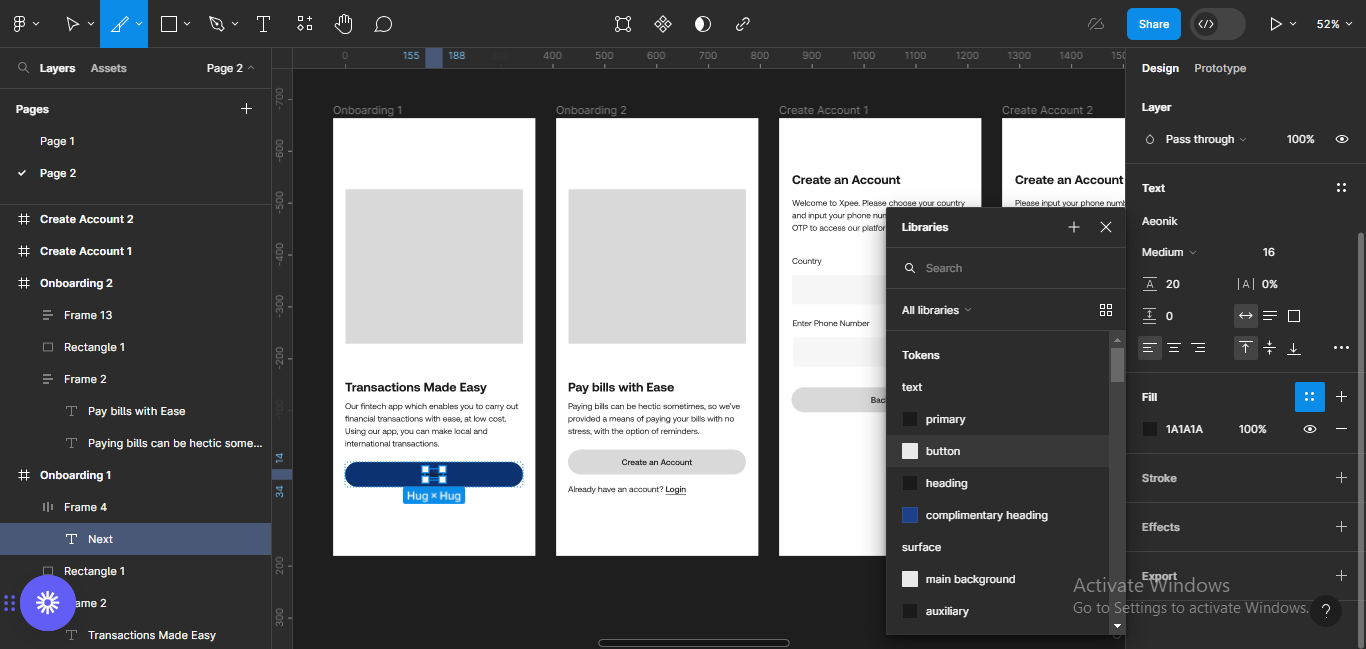
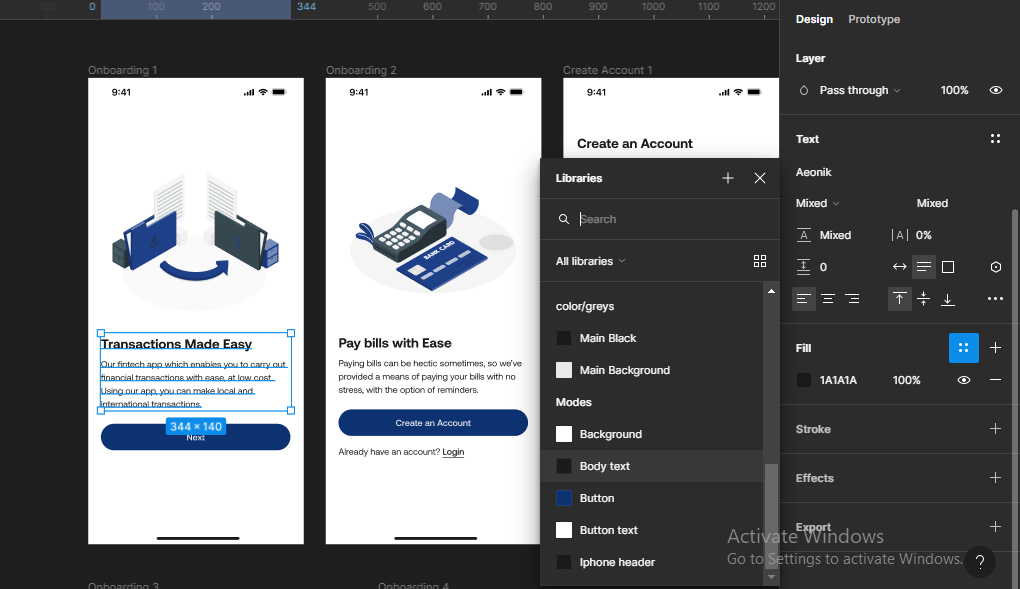
Click on the fill box and go to Libraries to see all colour variables created.
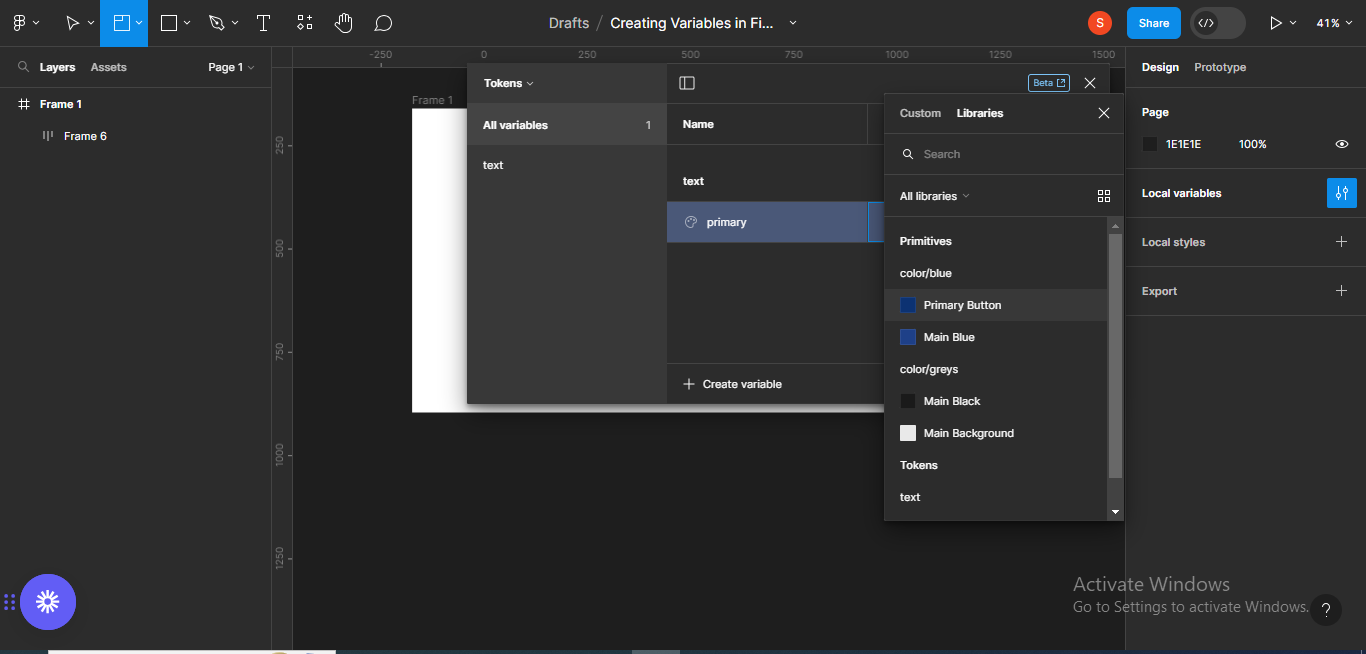 Assigning colour from libraries
We'll choose Main Black which is under color/greys.
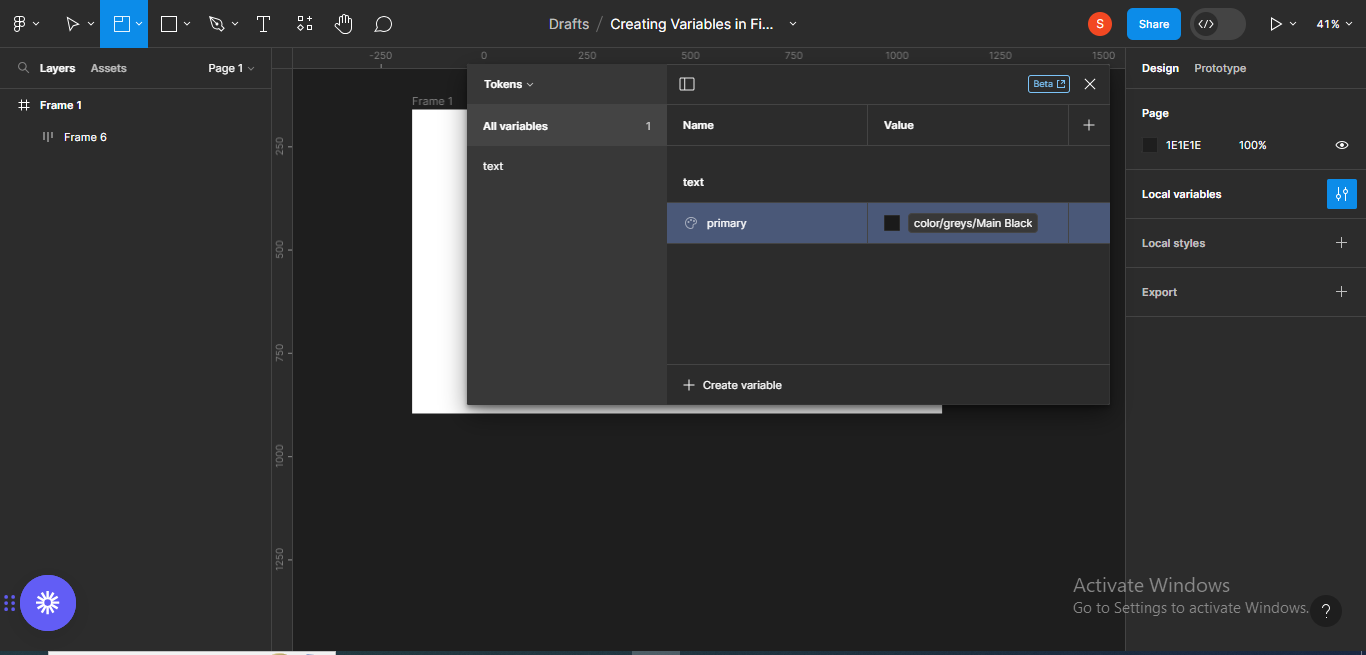 Choosing colour black
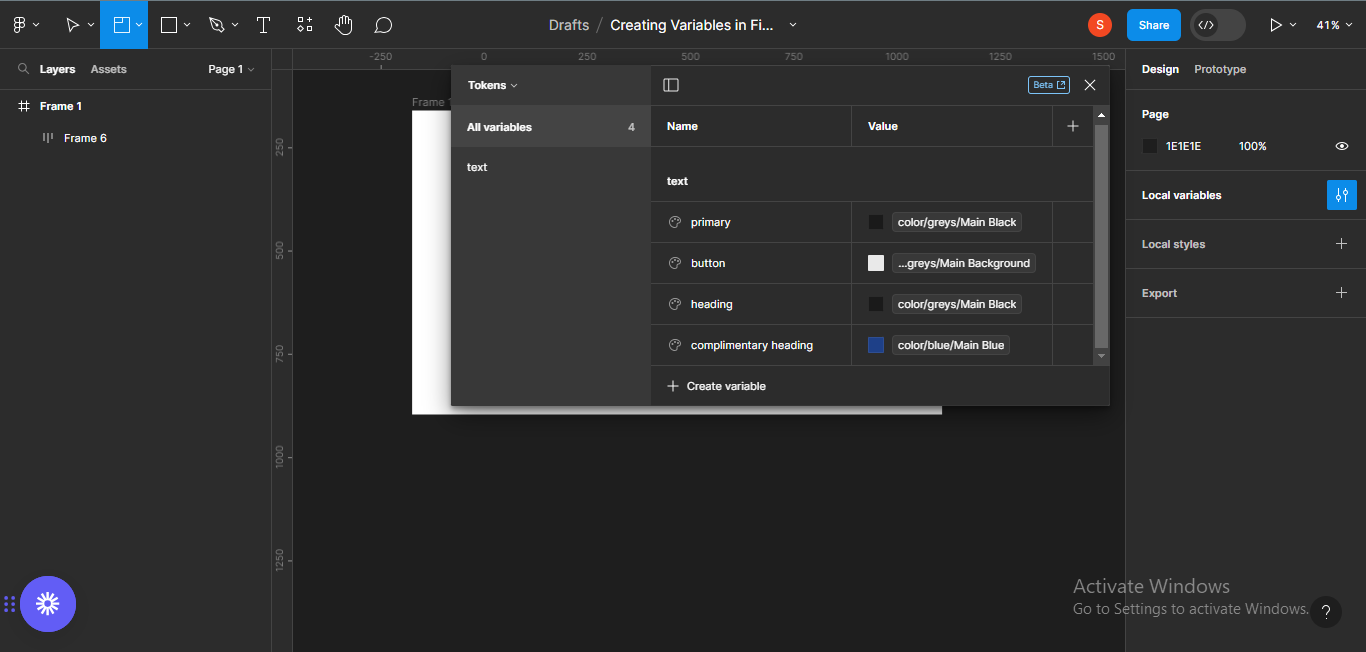
We can go ahead and assign other colour variables for different text functions, as much as we want to. Remember to add text/ before the actual name of the variable, so it'll form a group automatically.
 Assigning colour variables for text
Next, we'll create colour variables for surfaces such as backgrounds, and for borders as well.
 Colour variables for surfaces and borders
Some of the colour variables might bear the same colour code, but they have different functions, so that's totally fine. For example, the colour code for button text is the same as the colour code for main background.
How to Implement Colour Variables in Your Designs
Next, we're going to implement these colour variables in our design.
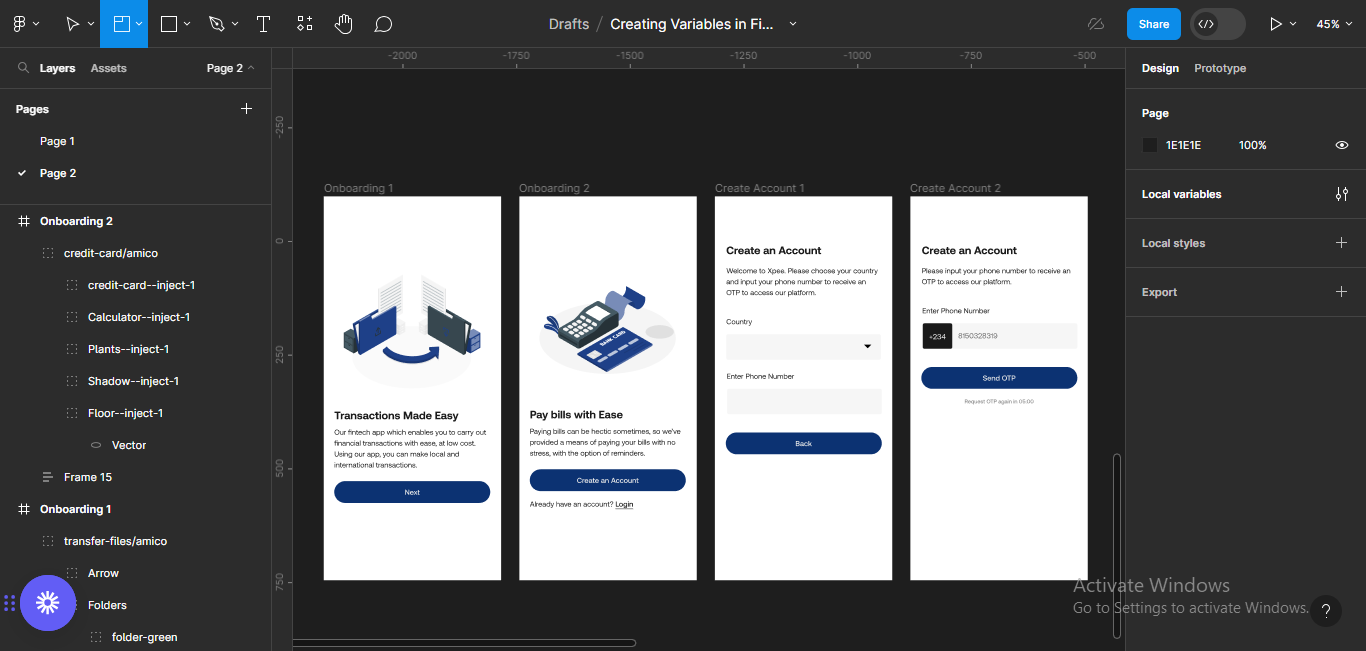
In the image below, there are four mobile wireframes with no colour and images (I created these previously).
You can read about how to create wireframes in this article: What is Wireframing? How to move from Paper Sketches to High Fidelity Wireframes.
We'll use the colour variables we've created to add colour to the buttons and text, making sure all elements are consistent.
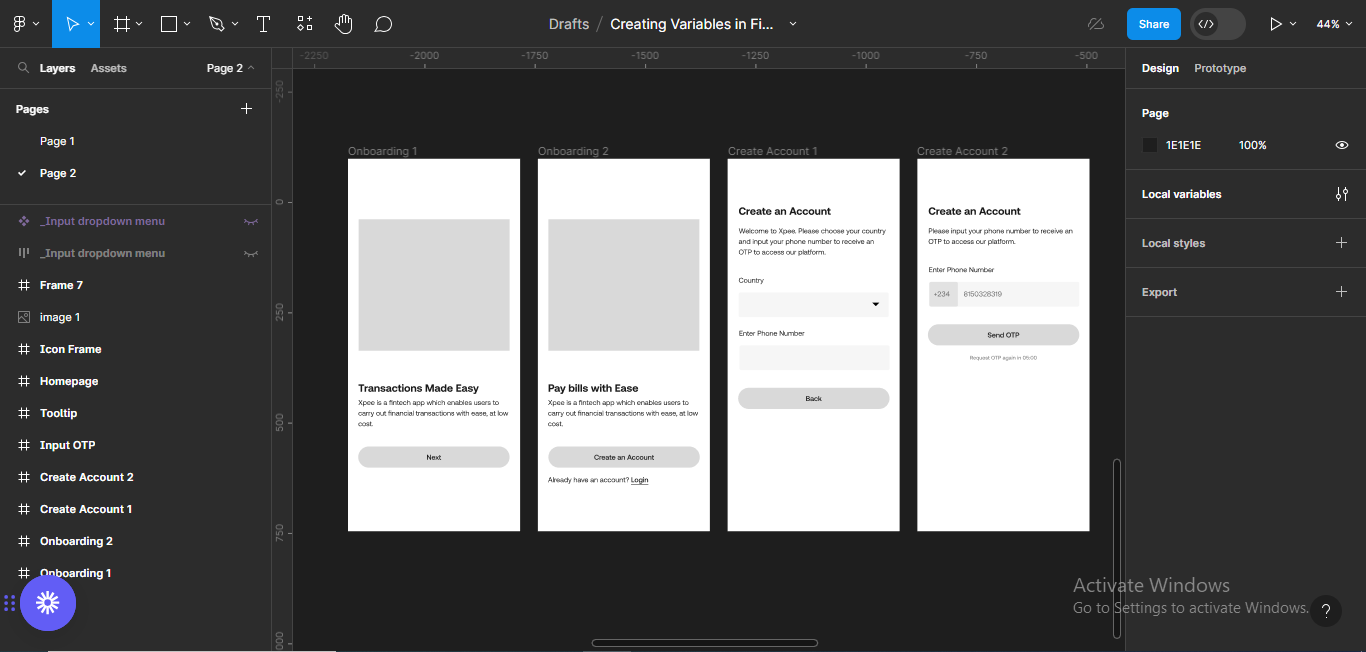 Low-fidelity wireframes
Starting with the first screen, let's add colour to the button. Click on the button, and go to to Fill on the right-hand side of your screen.
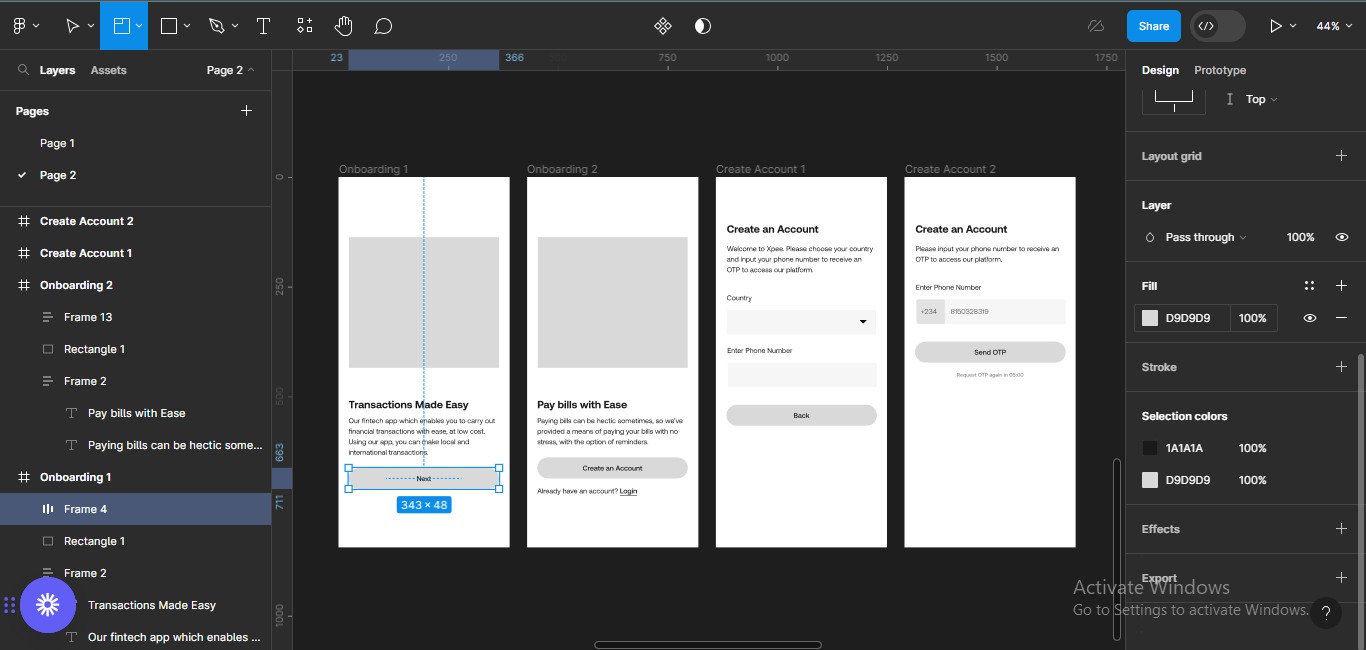 Click on button
In the Fill section, click on style (the four dot icon by the side). Selecting style will bring up a list of colours in your libraries. Select the colour you've assigned for the primary button in order to implement it.
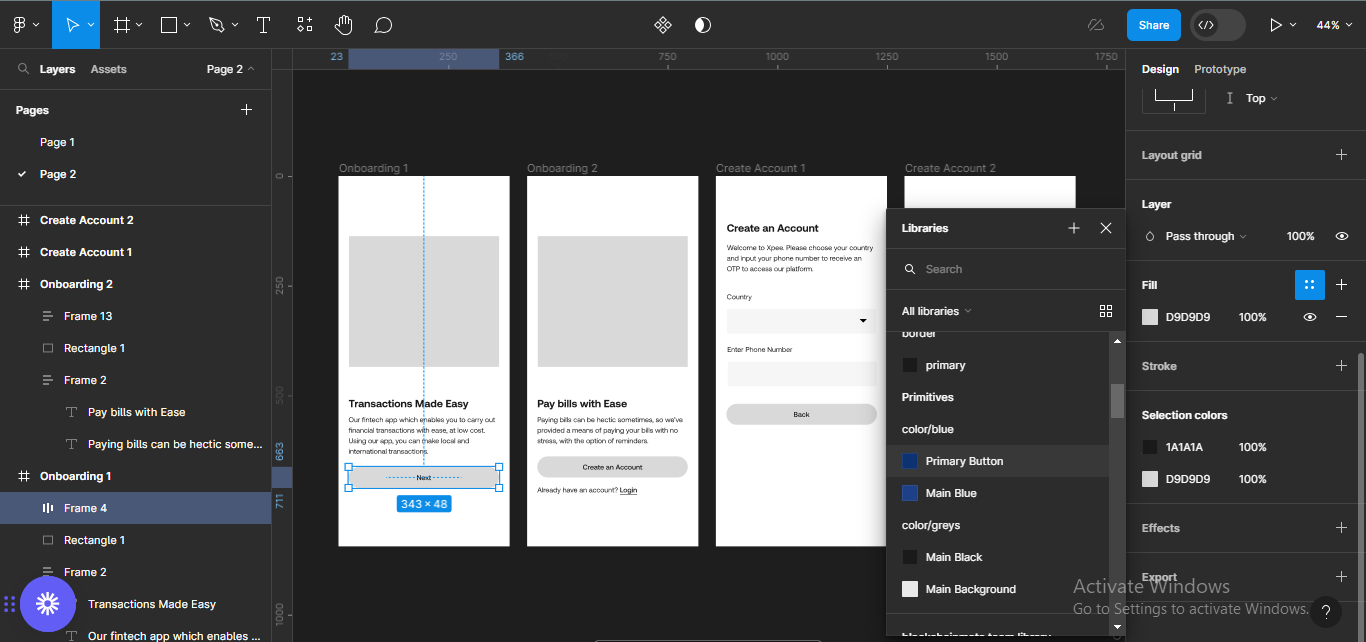 Select a fill colour from the colour variables in libraries
 Implemented button colour
Next, give the button text a white colour following the same steps.
 Implementing colour variable for button text
 Implemented button text colour
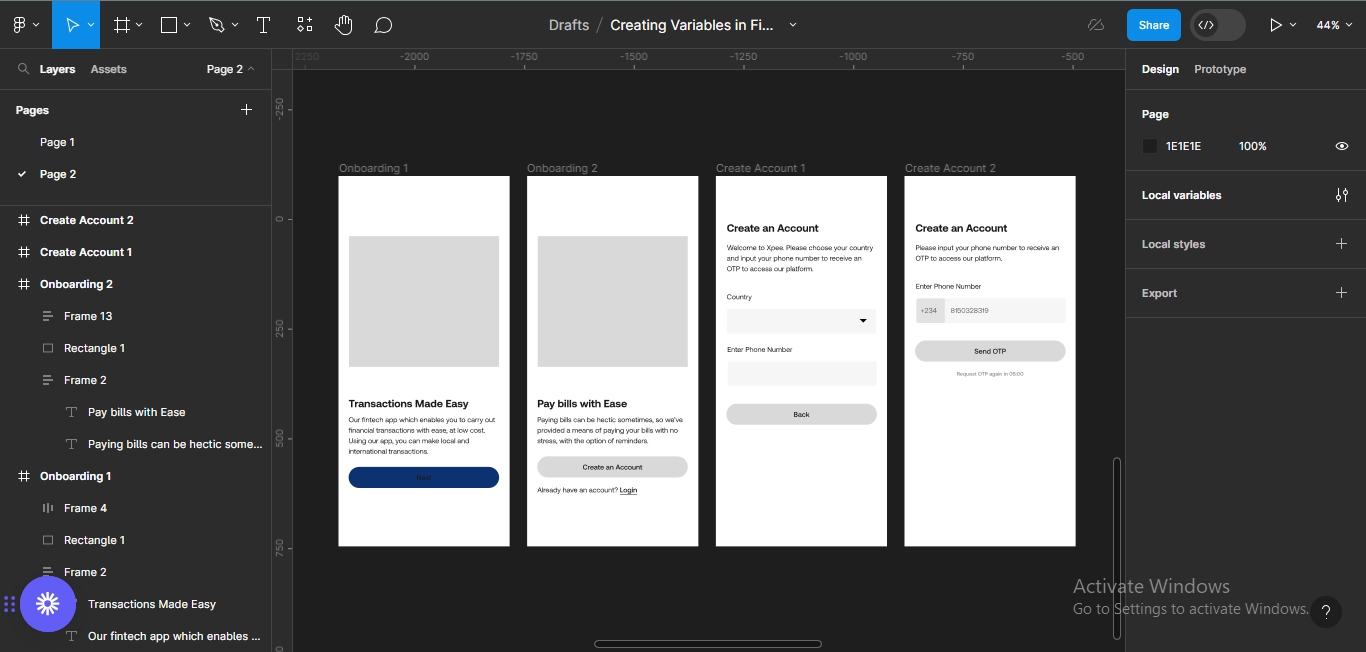
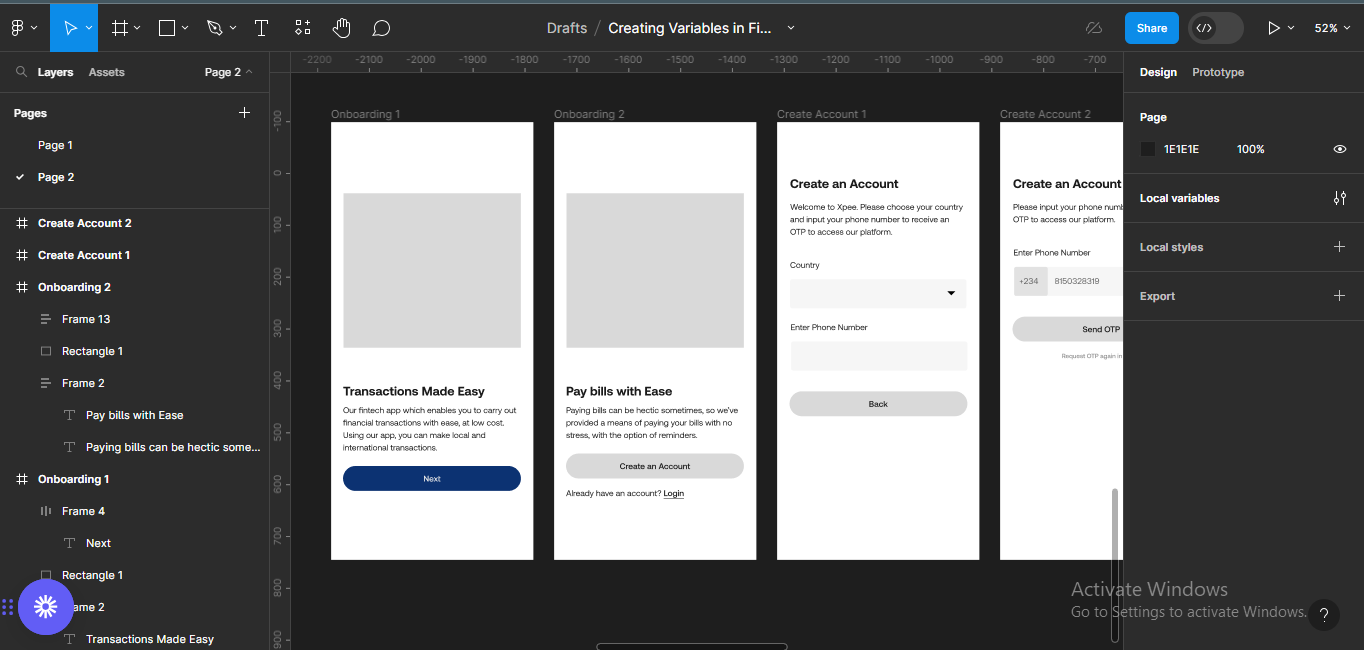
You can go ahead and do the same for the other screens, following the steps above. Don't forget to update the text and colours as well.
 Updating colour variables for other screens
You can also add some images or illustrations to complete the look.
 Adding illustrations to updated design
Note: You can get your illustrations from plugins in Figma like Storyset by Freepik, Artify Illustrations, and so on, as well as from illustration libraries like Freepik, Lapa Ninja, and others.
How to Create Different Modes with Variables
Next, we'll create different modes for our design. For instance, if you're working on a project that requires light and dark modes, instead of changing all the design elements manually to accommodate the modes, you can simply use variables to implement that.
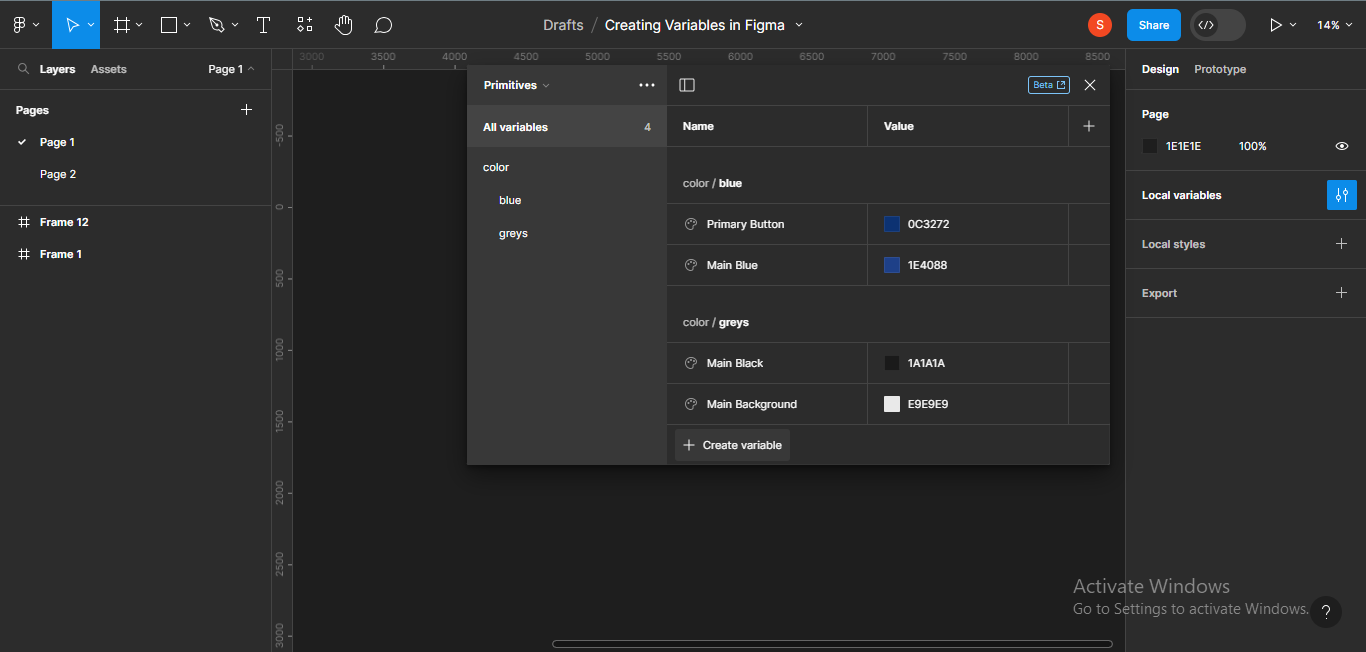
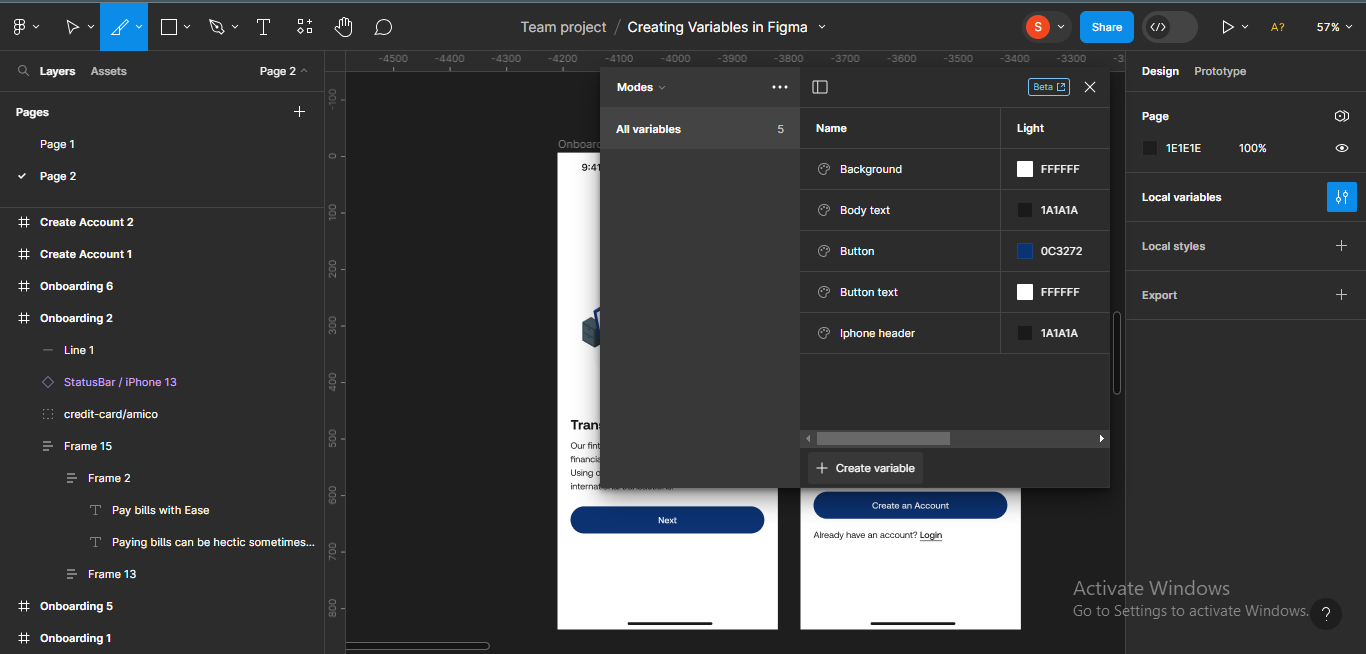
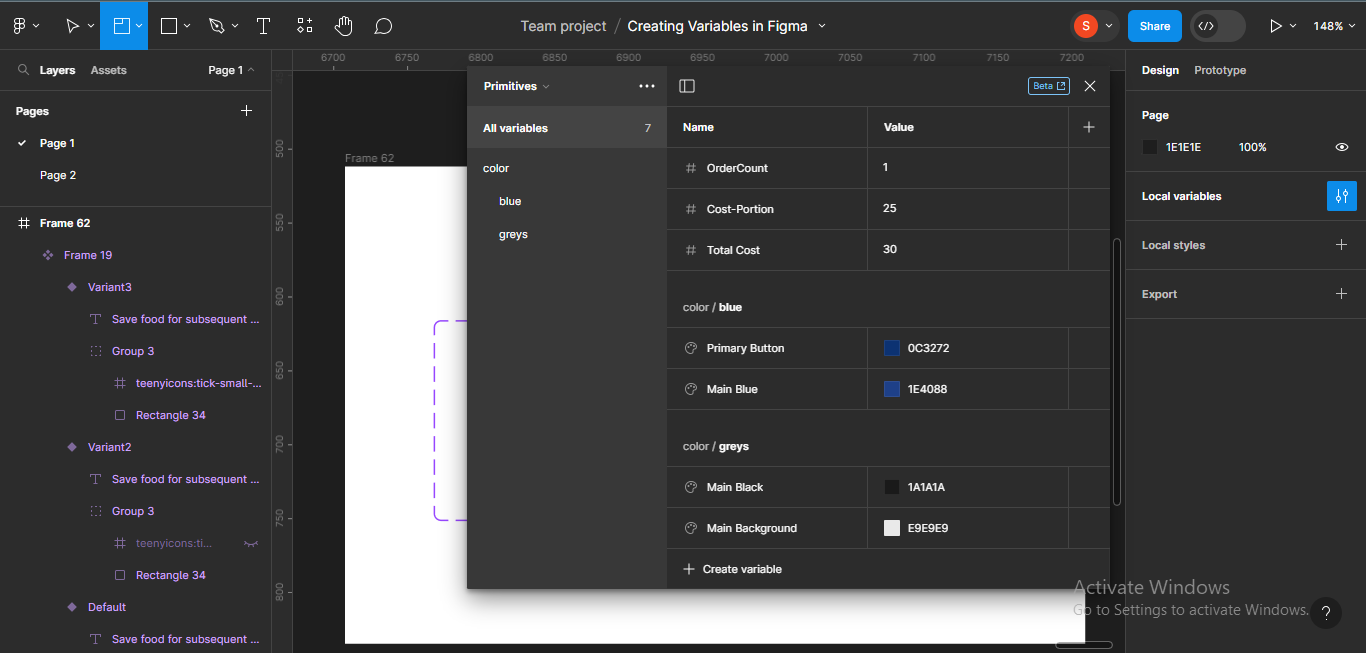
To start with, click on Local variables to create a new variable. A list of all variables in the file and their groups will come up:
color/blue:
- Primary Button
- Main Blue
color/greys:
- Main Black
- Main Background
 Opening "Local variables"
Next, I'll create a new collection so I can just focus on the modes I am about to create. To create a new collection, simply click on the menu icon on the variables header.
Note that creating a new collection isn't mandatory. It's just to help take your focus away from other variables you have already created.
 Creating a new collection
Next, I'll rename the collection to Modes. To rename a collection, simply double-click on the title, and input your preferred title.
 Renaming a collection
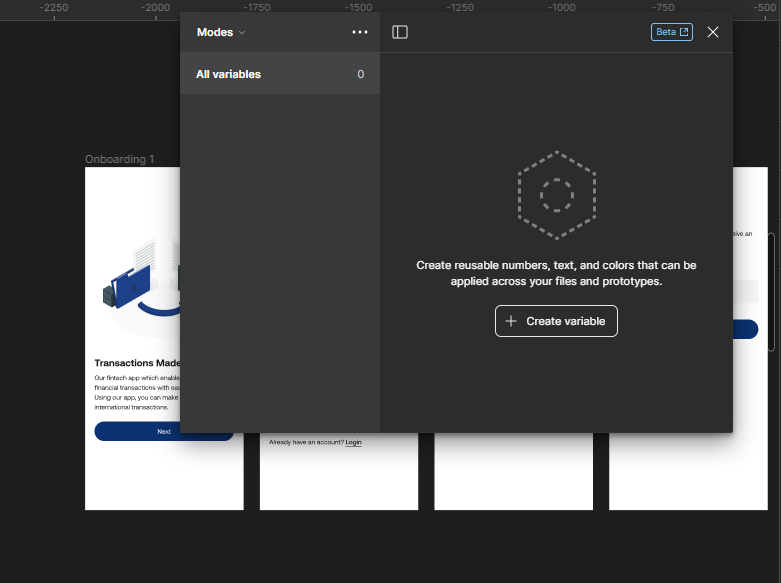 Renamed collection "Modes"
Next, click on Create variable to create a new variable. I'll choose Color because that's the variable we're working with.
 Creating a variable called Color
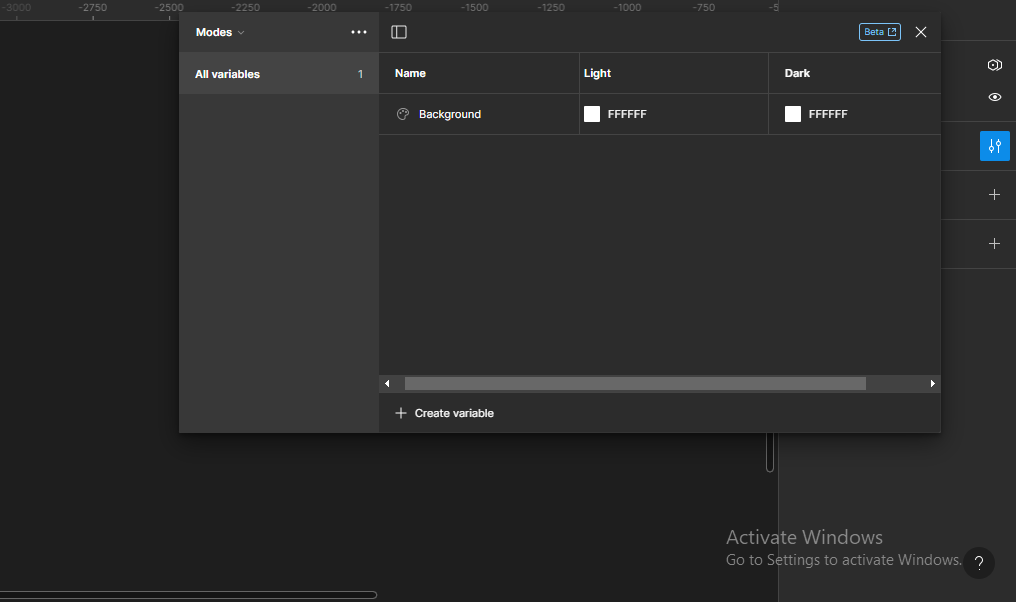
The created colour variable will come up with a default colour code: FFFFFF.
 Created color variable with default colour code: FFFFFF
Next, I'll rename the variable Background because I'm trying to set the background colours for each mode (light and dark).
 Renamed color variable: Background
Now, we've been working with only the name and value of the variables we've created, but we can add another column when we want to create modes. To do this, simply click on the plus icon on the header to add a new variable mode.
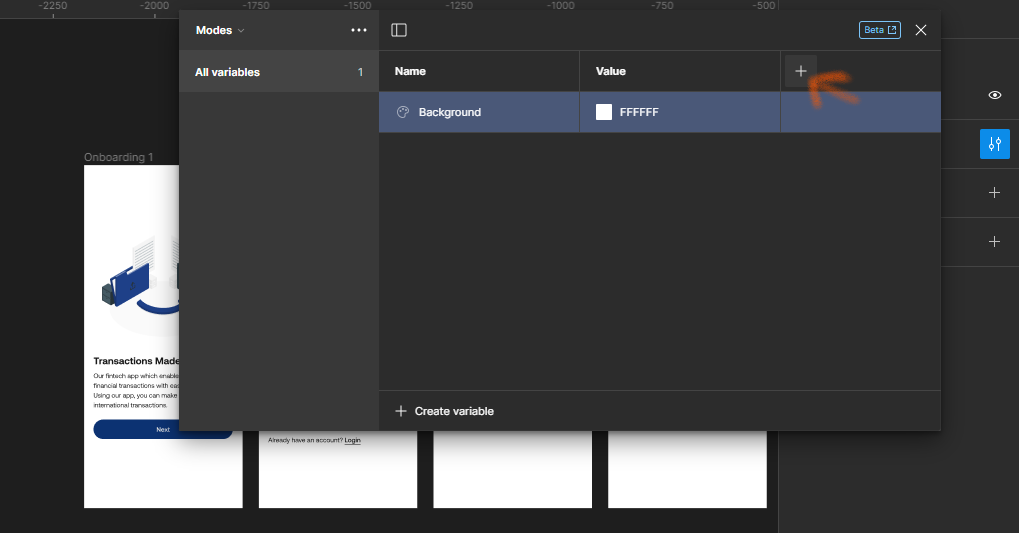 Clicking on the plus icon
The new mode will come with three columns:
- Column 1 (the title of the variable – Background)
- Mode 1 (the first value of the variable – colour code FFFFFF)
- Mode 2 (the first value of the variable – colour code FFFFFF)
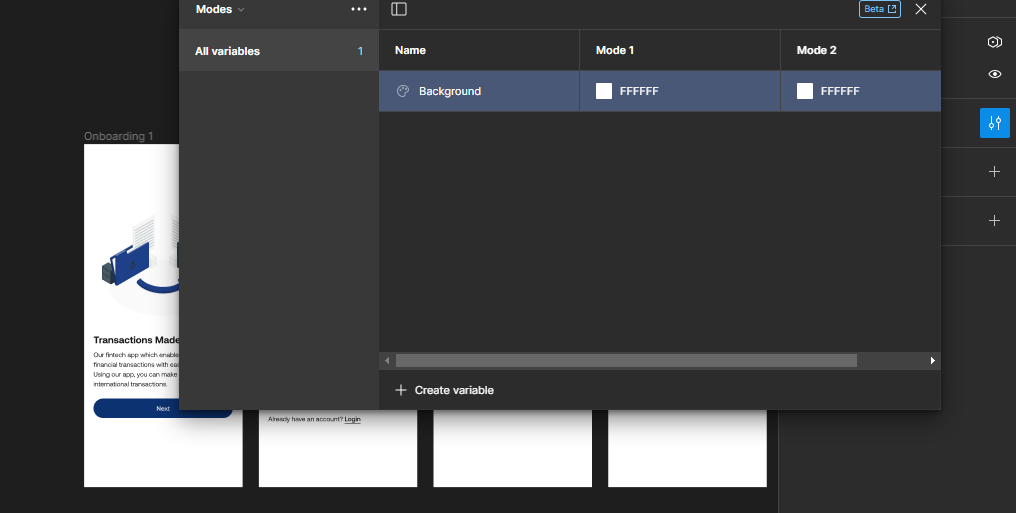 Created new mode
Next, I'll rename the modes to light and dark. To do this, simply double-click on the title and edit the name.
 Renamed modes: Light & Dark
Now, we'll assign a value to the background for dark mode. To do this, simply input the colour code/value you prefer for the background. I'll use #0C3272 as my background colour for dark mode.
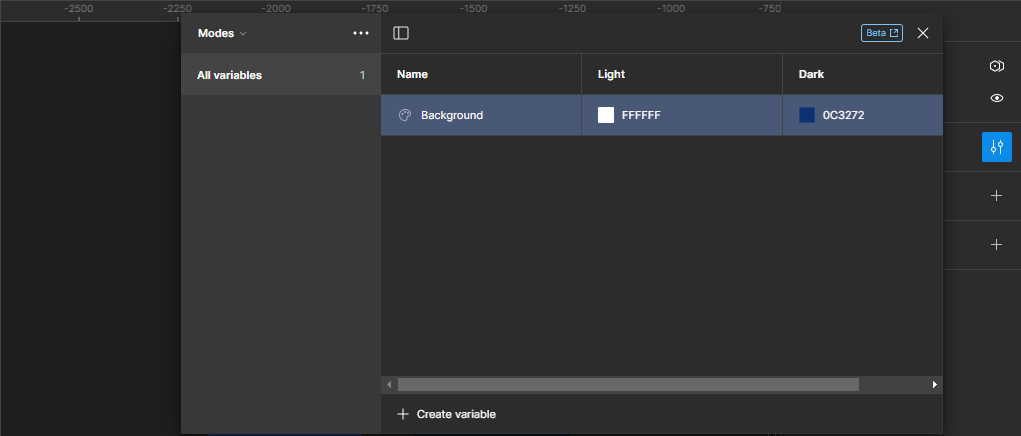 Changed value for dark mode background
Next, we'll create other colour variables for other elements like, text, button colour, button text colour, and so on for the two modes. I''ll list out the specifications to make it easier:
Light/Dark:
- Body text: 1A1A1A/FFFFFF
- Button: 0C3272/FFFFFF
- Button text: FFFFFF/0C3272
- iPhone header: 1A1A1A/FFFFFF
Next, we'll go ahead to create the variables. Just follow the steps we followed earlier to create the variables and assign values for each of the modes.
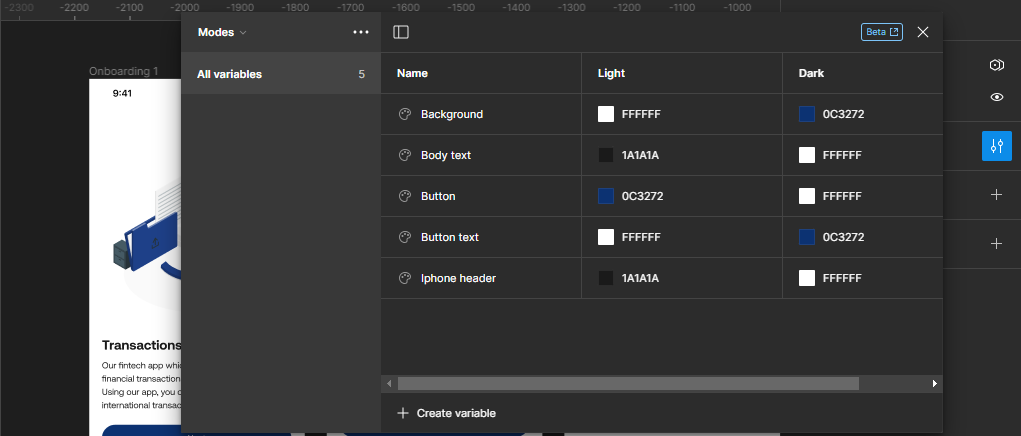 Created variables for other elements
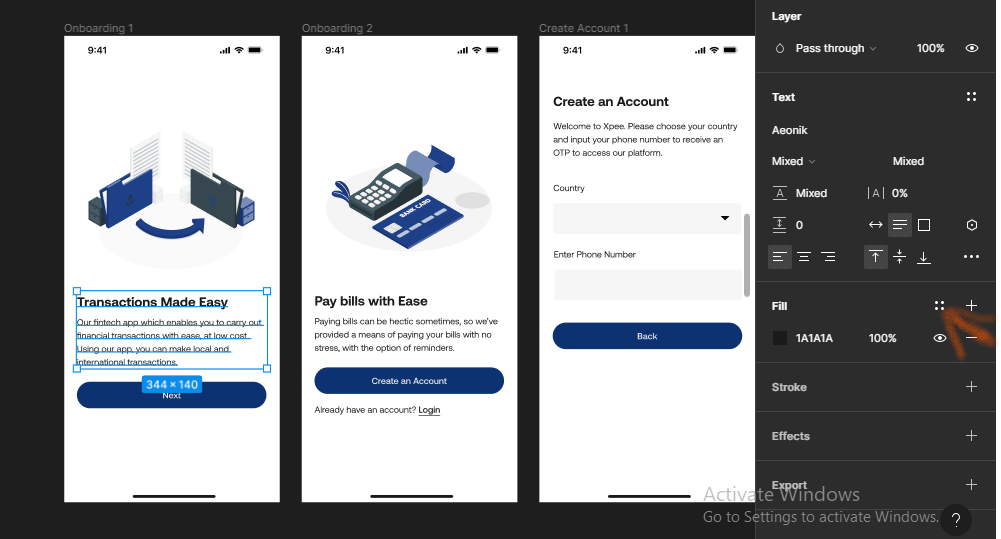
Next, we make sure the design is connected to the variables we created. To do this, simply hold the element and use Fill to tie it to the colour variable.
For the Button text for instance, select the text, and click on the style icon in Fill.
 Clicking on style icon in the "FFill" section
Next, scroll down the list that comes up, to the specific variable you want to tie the variable to (in this case Body text).
 Selecting Body text variable.
Do the same for the other elements in the design, including the background.
Note that I'll be leaving the illustrations the way they are.
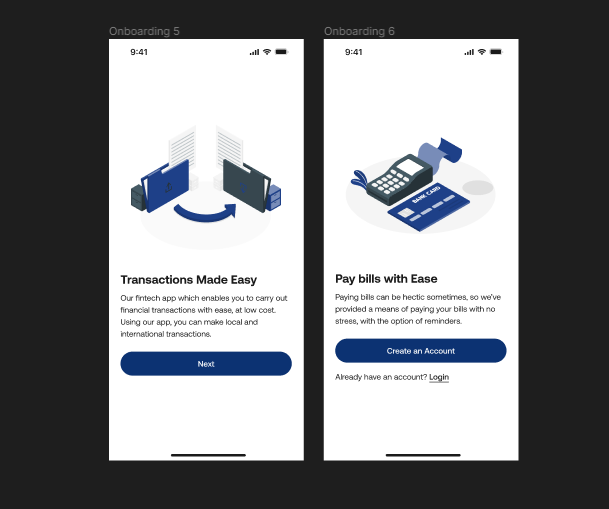 Screens connected to the variable modes.
To check if the modes actually work, click on the change variable mode icon on the Layer section on the right-hand panel of your screen.
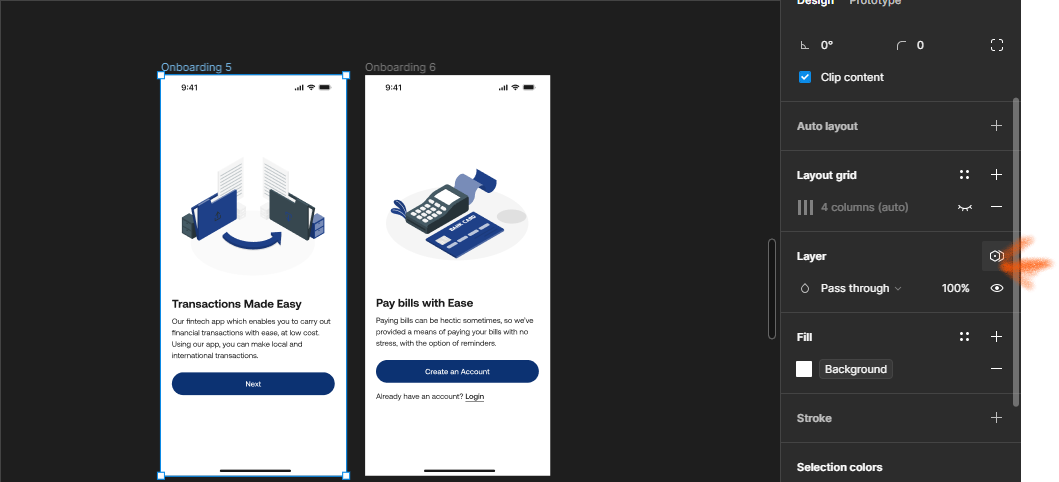 Clicking on the "change variable mode" icon
A list of all modes (Light & Dark) will come up and you can switch the screen to whatever mode you choose.
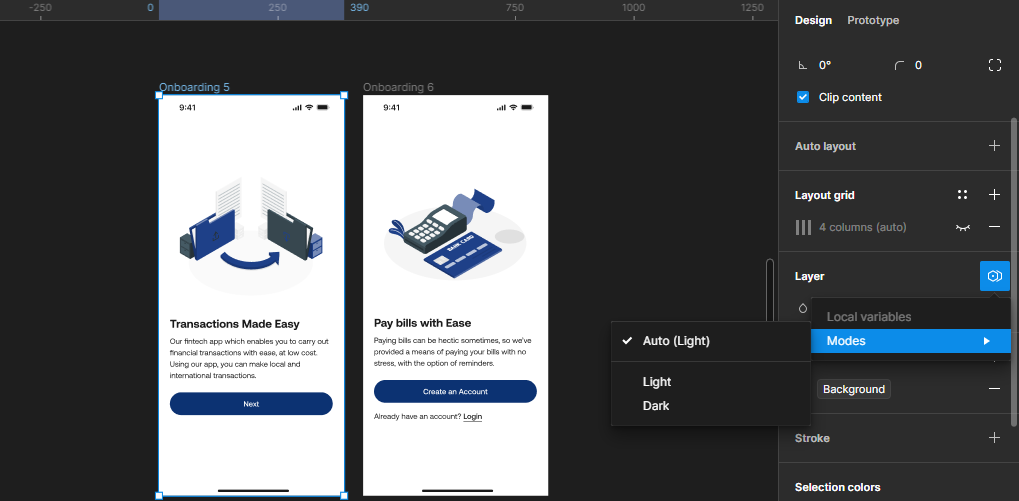 Switching modes
A section named Modes will appear on the Layer section, indicating that one of the screens is in dark mode.
 One dark mode & one light mode screen.
How to Create Number Variables in Figma
Next, I'll show you how to create number variables in Figma.
Number variables are defined by number values, and they can be applied to corner radius, width or height padding, and so on. Here are the steps to follow to create your own:
Step 1: Choose a variable
Just like we did when creating color variables, click on the local variables panel to select the kind of variable you're trying to create. Here, you'll select number.
 Choosing variable to create
 Selecting "number"
When you select number, it appears on the list of variables with a value, in this case 0.
 Number variable showing Number with a default value of 0
Now, you can rename the number variable to whatever you decide. To rename the variable, double click on number, and change it to whatever name you want.
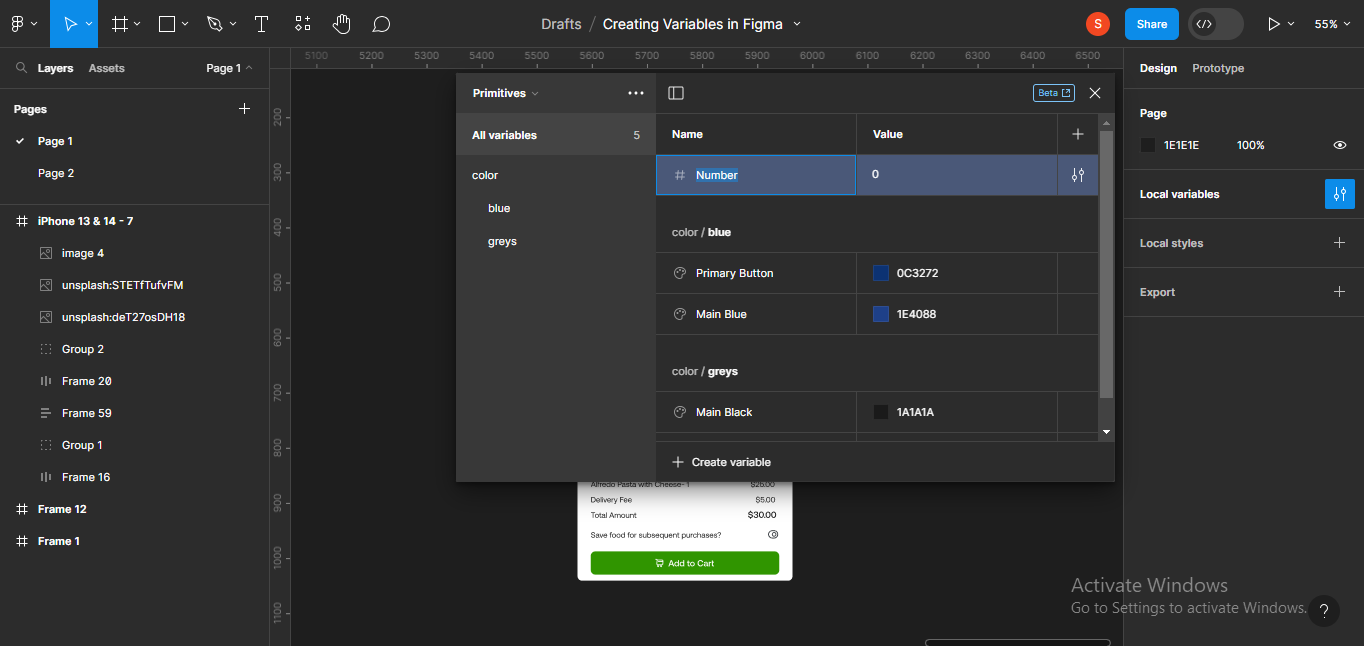 Renaming number variable
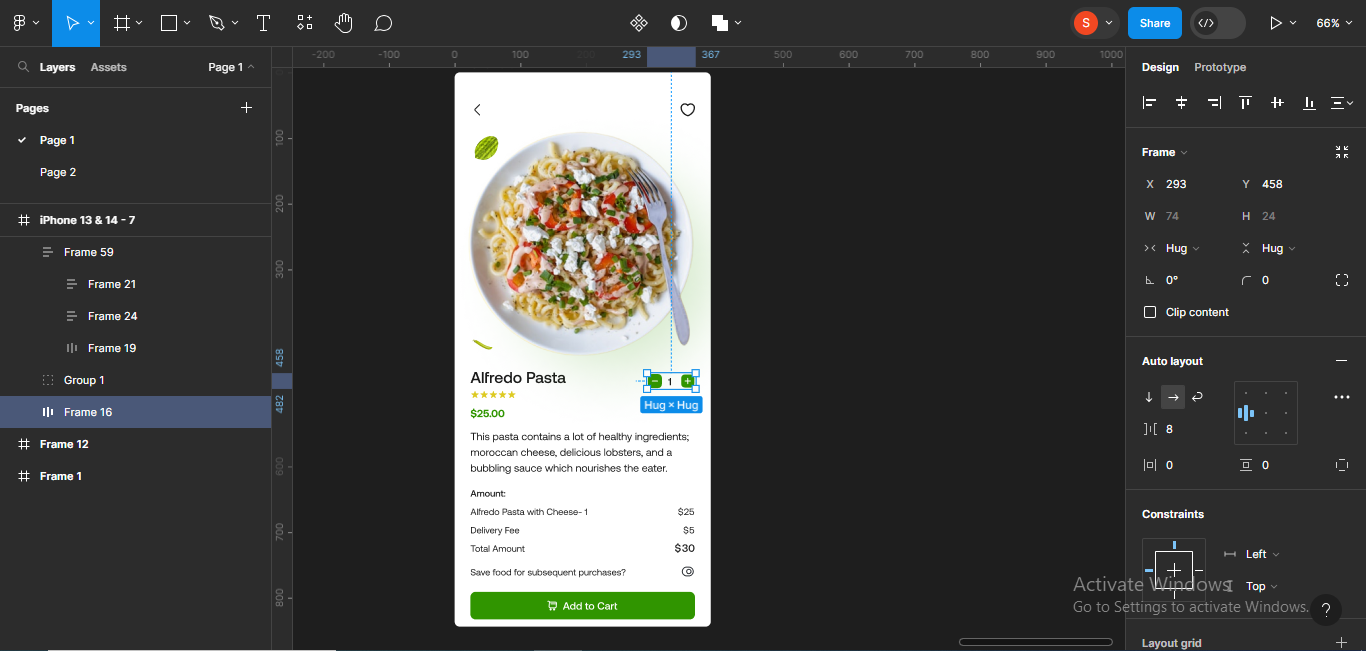
I'll rename mine to OrderCount, because I'm trying to implement a function that allows a user to increase the number of portions of food they're trying to order.
 Renamed number variable
Next, we'll set the default number value to 1.
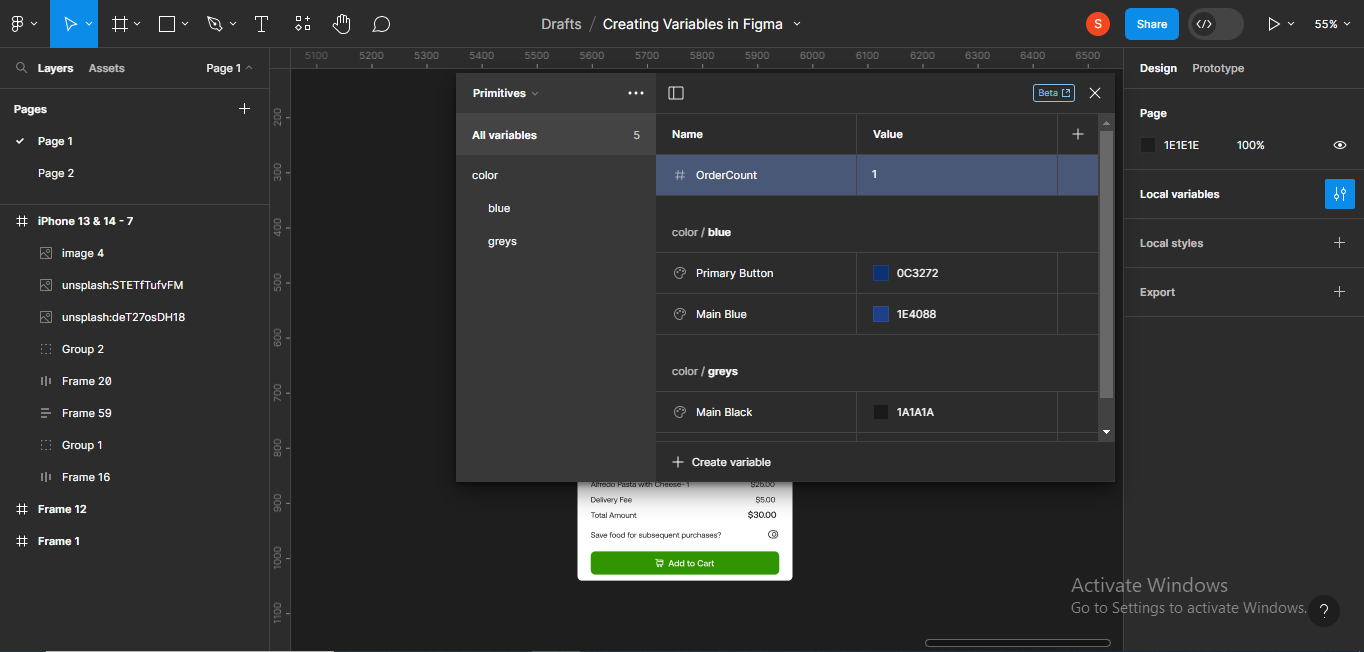 Setting default number value
Now we'll tie the number on the design to the number variable (OrderCount). To do this, click on the number in the design.
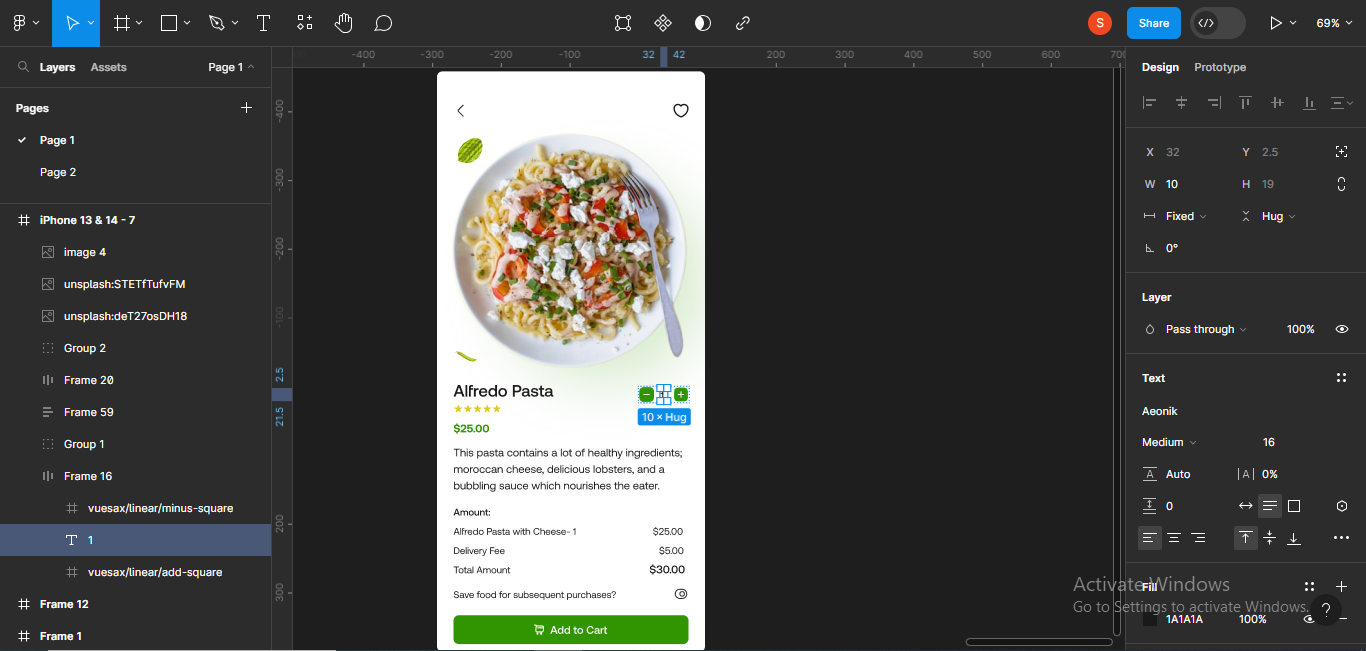 Implementing the number variable
Then go to Text on the left hand side of your screen. Click on the Apply variable icon to apply the variable.
Note: The apply variable icon will only appear on the Text section when a variable has been created.
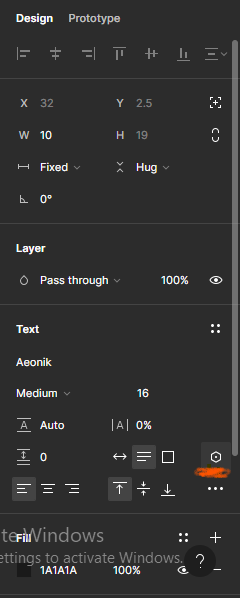 Clicking on the "appy variable" icon
Clicking on the icon will bring up a list of all number variables available in the file. Next, you'll select the variable you're trying to implement. I'll choose OrderCount.
 Selecting a number variable
When the variable has been implemented (tied to the number), it'll appear on the text section, indicating that a number variable has been implemented.
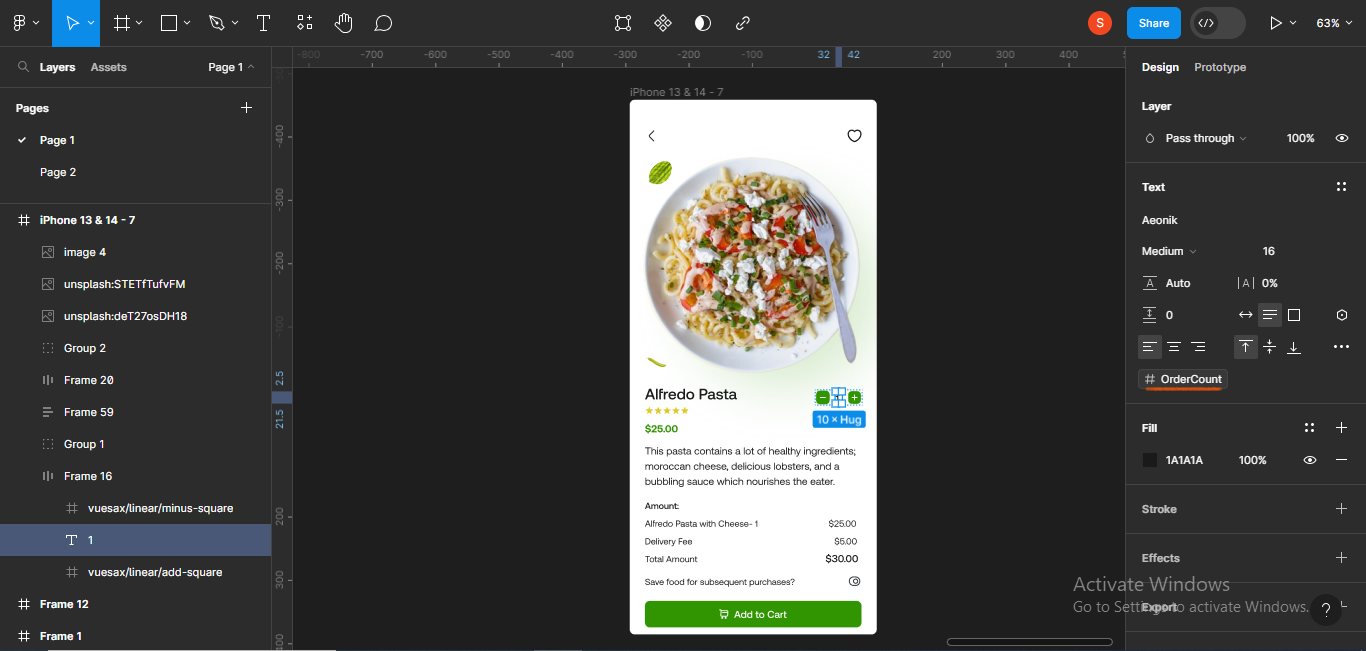 Implemented number variable
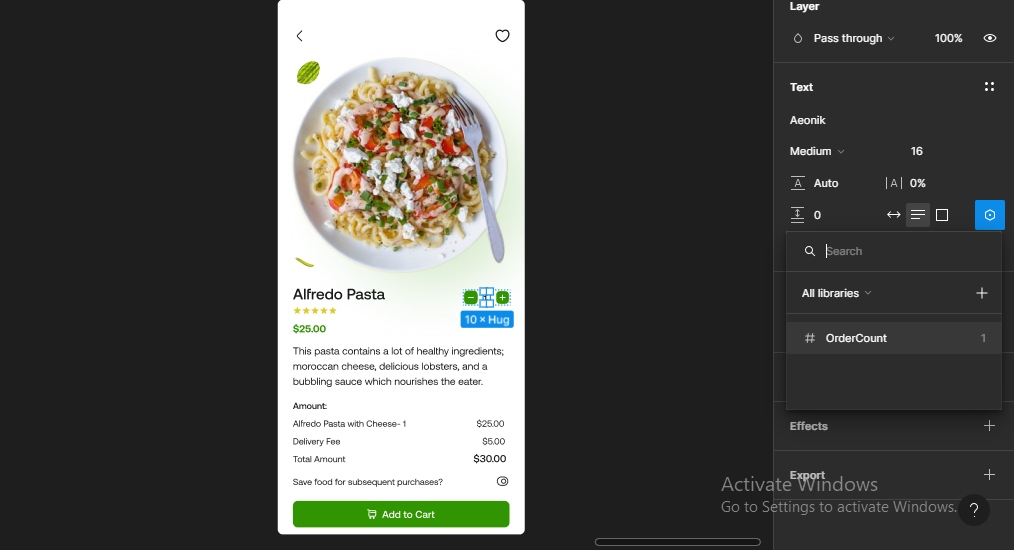
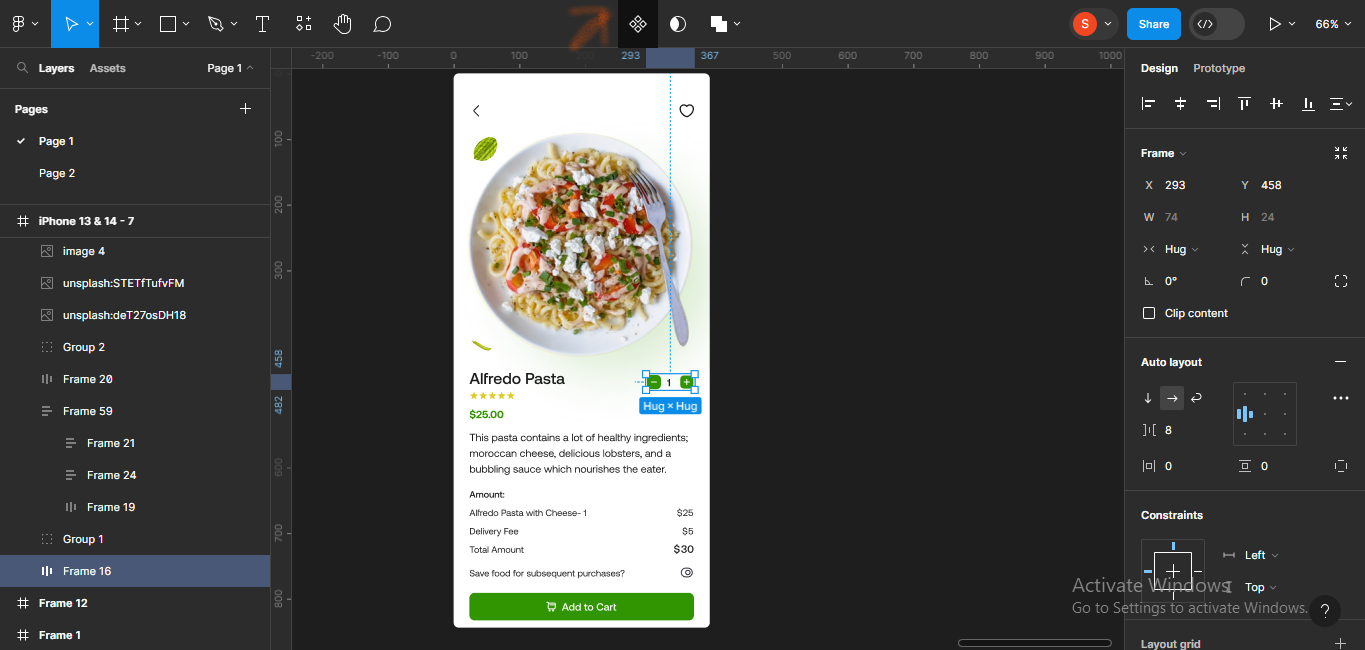
Now, we'll also need two more number variables for the other number values in the design (cost of food and total cost). This is so that these values will also change when a user increases the number of portions they're ordering.
We won't include delivery fee, because it remains the same way irrespective of the number of portions a user orders.
Next, we'll follow the same process as we did above to create number variables for these.
 Creating other number variables
Next, we'll tie the numbers in the design to their respective number variables, just as we also did earlier.
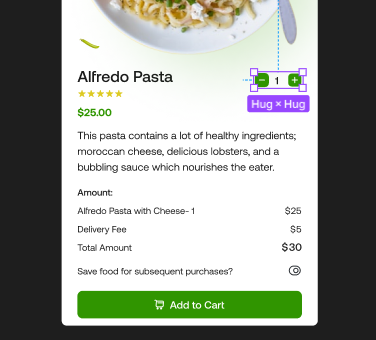
Note: In the main design, I gave the actual number (25) a different frame from the dollar sign (which is in text). This is because when creating the number variable, the dollar sign will not be attached, because it's a word, not a number.
Consequently, when I tie the number variable to the design, I'll be applying it to the frame containing the number alone.
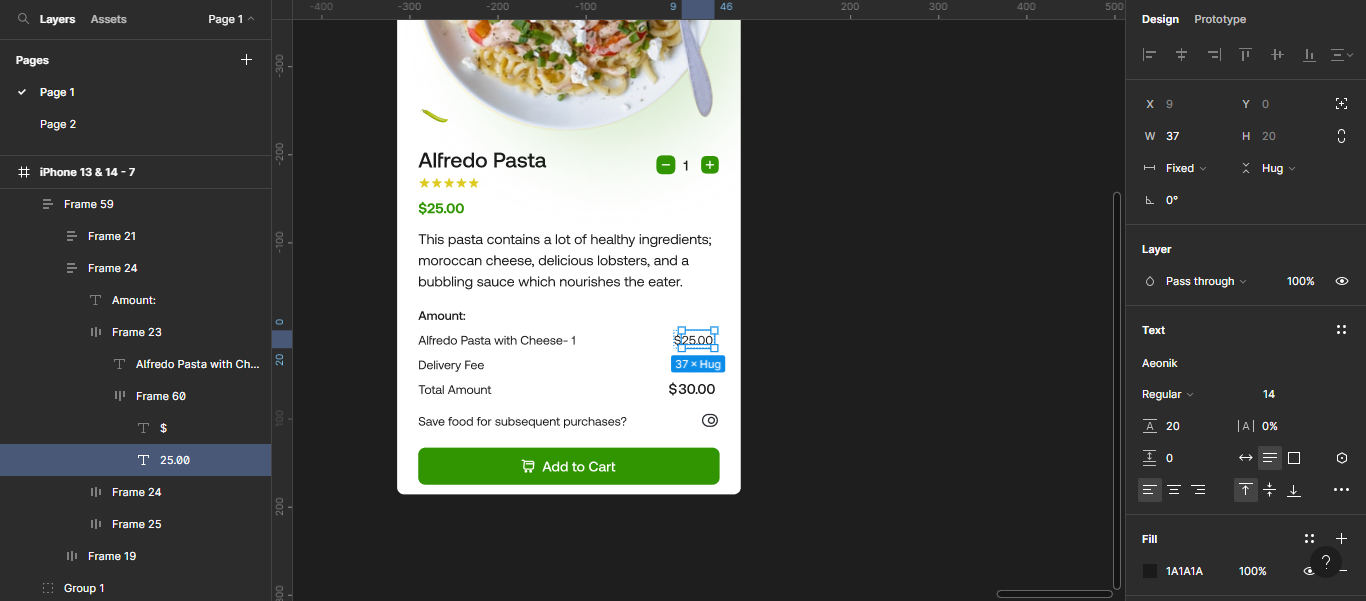 Give the number a different frame from the dollar sign
So, when I tied the first number to the number variable I created (Cost-Portion), something interesting happened. The number in the design took on the value of the variable. Instead of 25.00 which was in the screen earlier, it changed to just 25 because that's what the number variable was set to.
 Number variable changing the number in the design
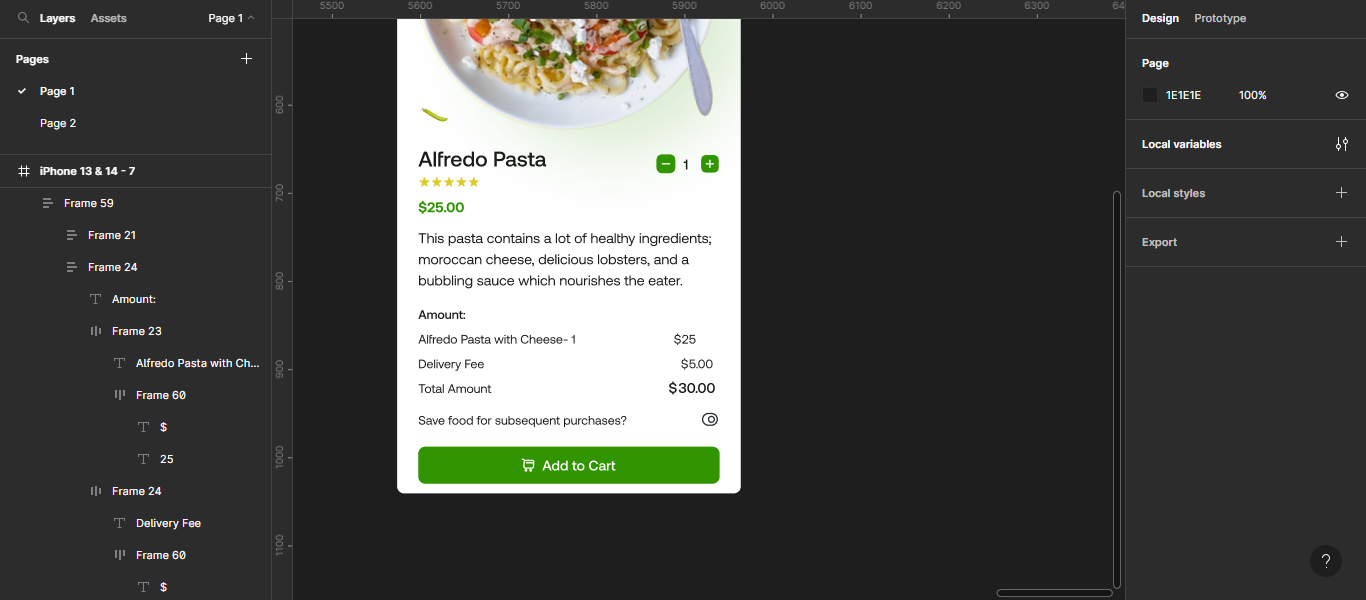
Now, to avoid any unpleasantness, I'll change the values of the other numbers, and realign them.
 Changed and realigned number values in the design
We've just created number variables for our design. In the section for advanced prototyping, we'll check to see if these number variables actually work.
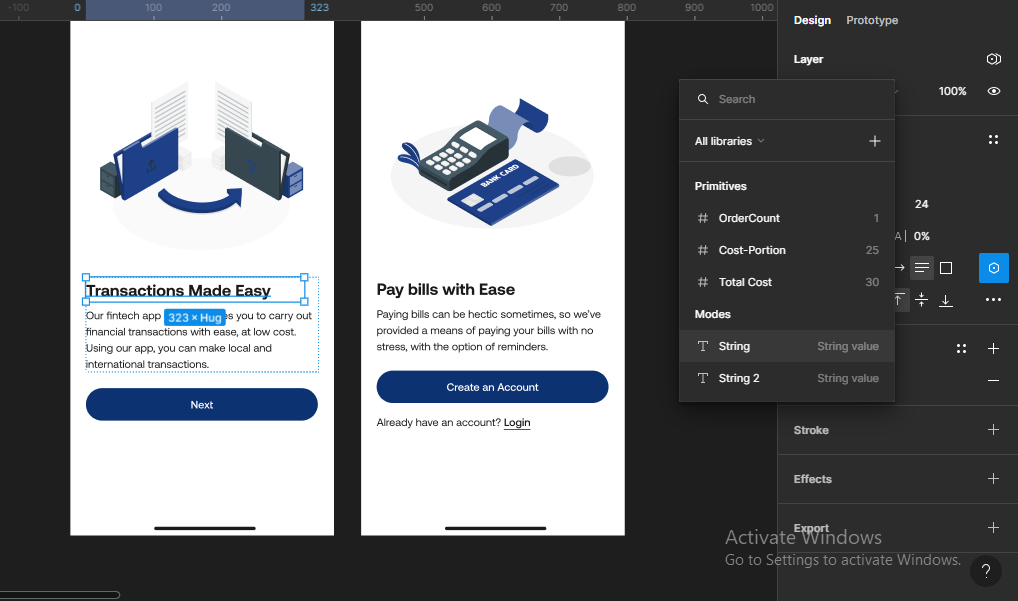
How to Create String Variables in Figma
Next, you'll learn how to create string variables in Figma.
As I wrote earlier, string variables are used for text layers and variant properties. With string variables, you can change the headings in your design, flip text on different screens, change language modes, and so on.
For this article, we'll use string variables to change the headings on the screens for each mode we created earlier (light and dark).
As usual, our first step is to click on Local variables and select the type of variable we want to create.
 Going to local variables to create a new variable
I'll choose String.
 Choosing "String" out of a list of all variables
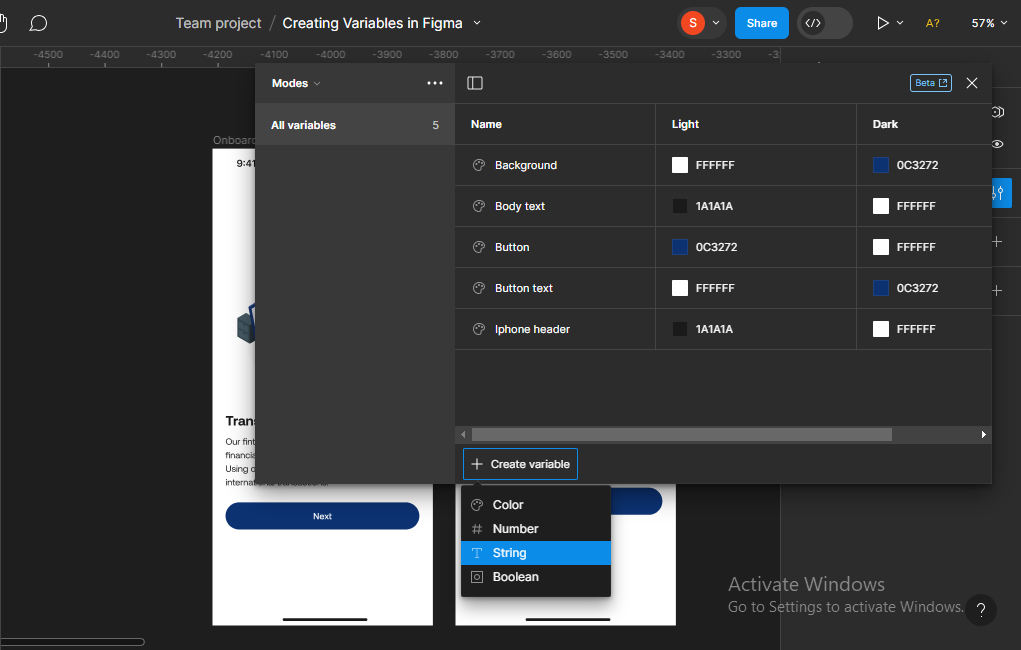
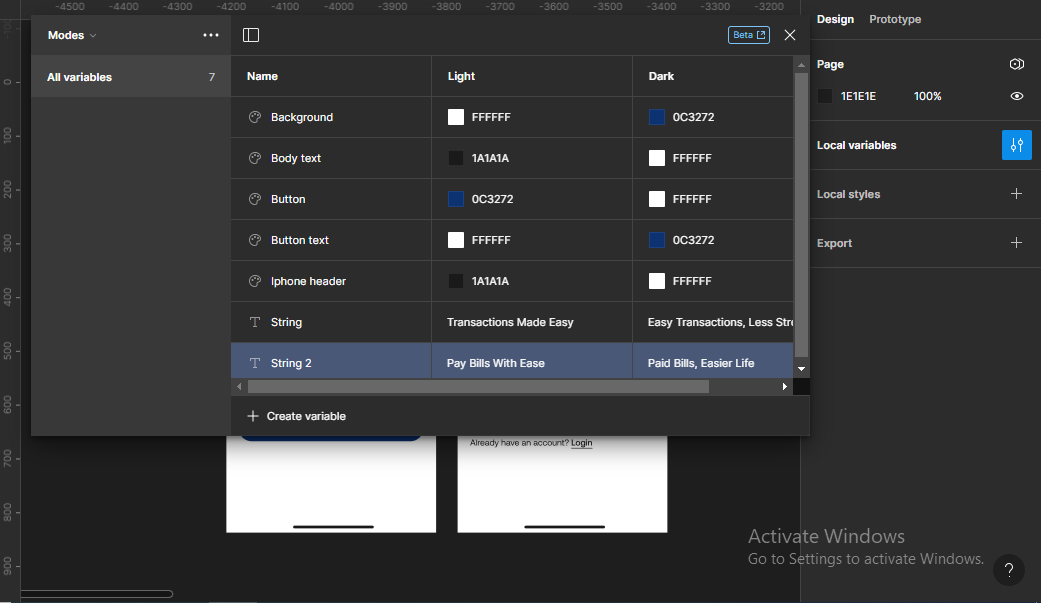
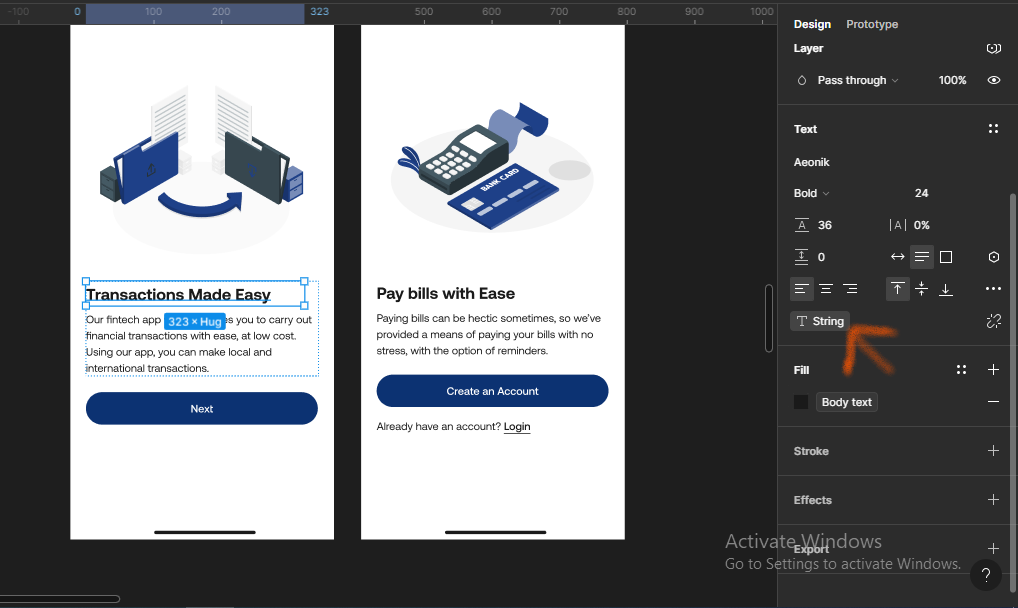
When I do that, the string variable I just created will appear on the list of variables.
 Created String variable
If you noticed, the string variable has two columns for "string value", because I created the variable in the Modes collection. Following that, let's see if we can change the headings for each mode.
Note: The string value is the actual text you're trying to change.
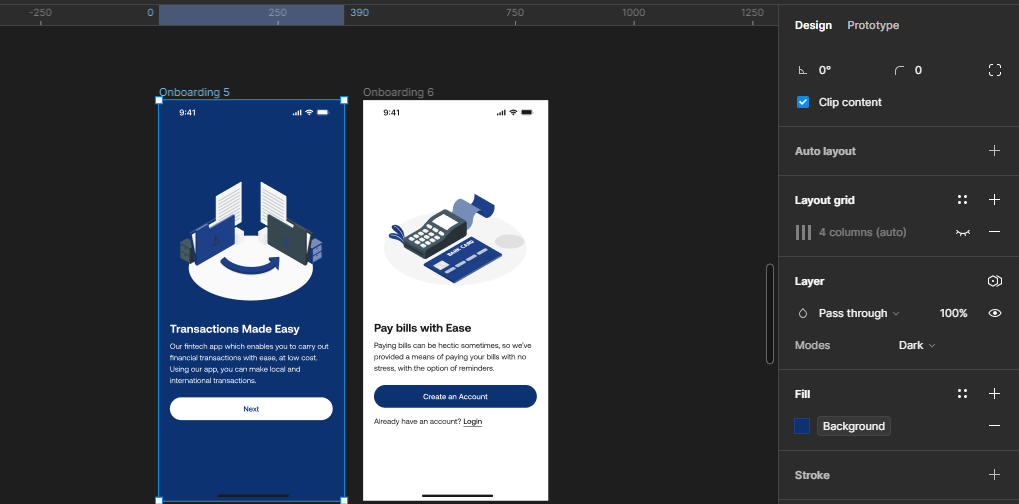
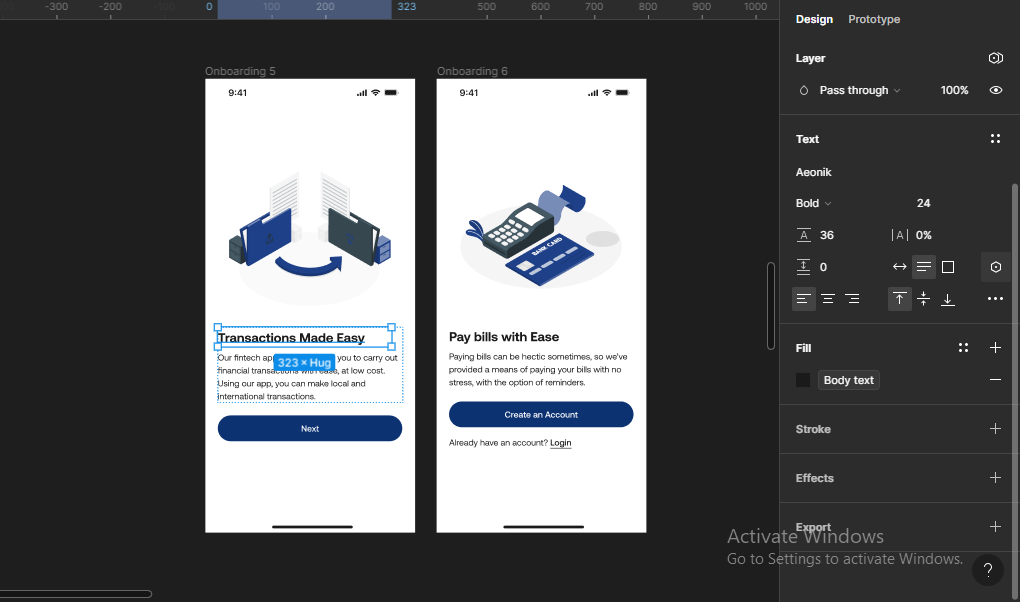
So, for the first screen whose heading is "Transactions Made Easy", I want it to change to "Easy Transactions, Less Stress" for dark mode. For the second screen whose heading is "Pay Bills with Ease", I want it to change to "Paid Bills, Easier Life" for dark mode.
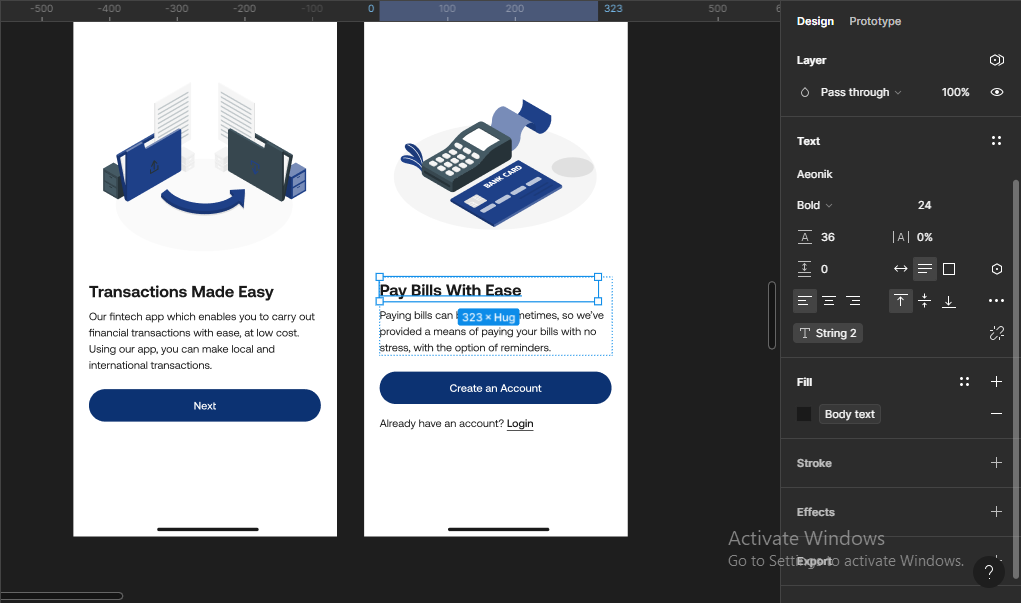
Since we're changing the headings for two different screens, we'll create another string variable.
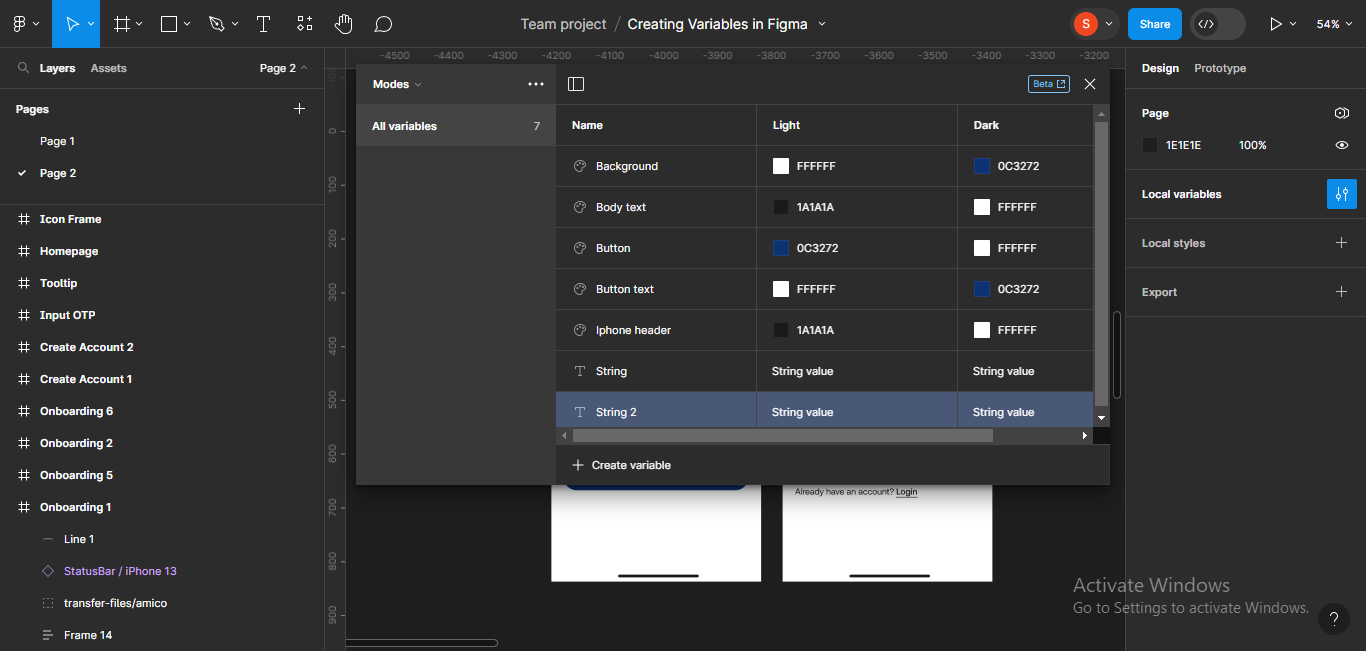 Creating another string variable
Next, we'll input the different values for the different modes. To do this, just input the different texts for the two screens in both modes.
 Inputing string value
Next, we'll tie the headings to the string variables we just created. To do this, click on the particular heading, and go to the Apply variable icon on the Text section.
 Applying string variable
Next, scroll down and choose the string you're applying it to.
 Choosing string variable
Once you're done, a string icon will come up, indicating that a string variable was applied to the text.
 Applied string variable
Do the same for the second string:
 Applying string variable to the second screen
Next, let's test to see if the string variable works. Select the screens which have the applied variable, go to Layers, and change the mode from light to dark.
 Selecting screens which have the applied variables
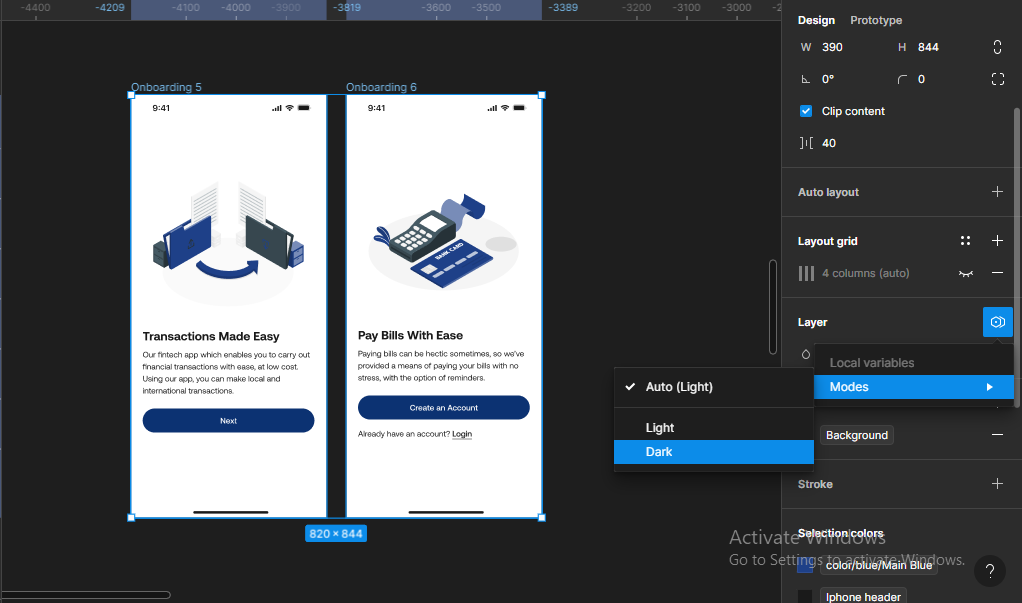 Selecting dark mode
Mine works:
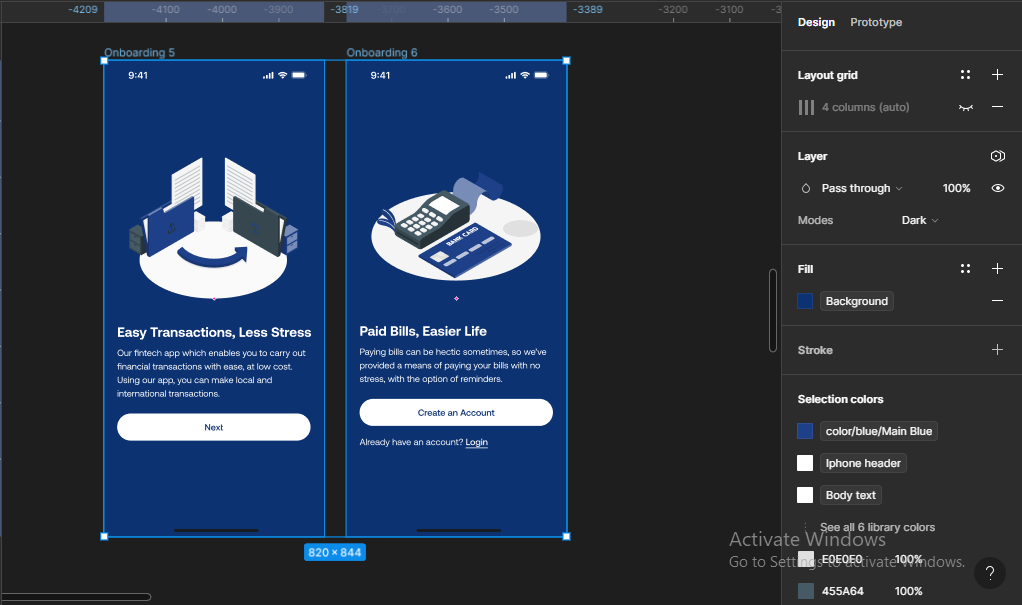 Screens changed to dark mode
How to Create Boolean Variables in Figma
Next up, we'll learn how to create Boolean variables.
Generally, boolean variables are variables that can only have two possible values – true or false. In Figma, boolean variables have the same function: they are used for variant properties or components with two values: true or false.
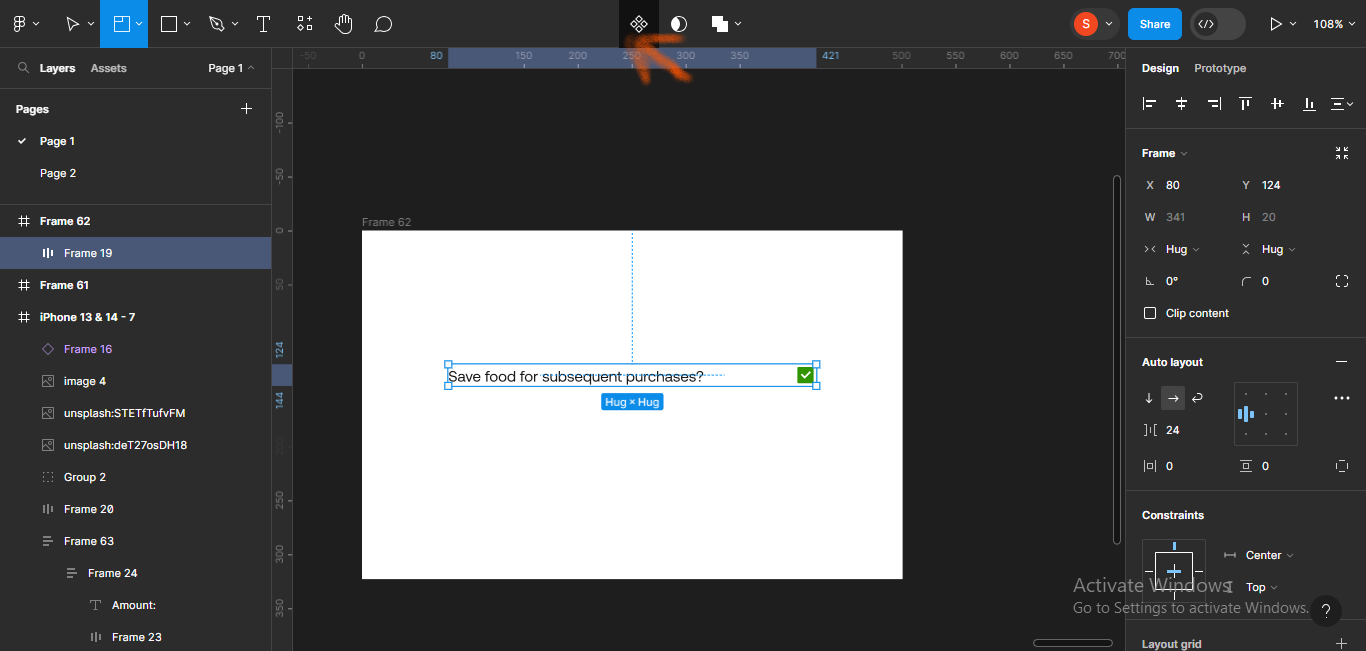
Remember the toggle in the design above?
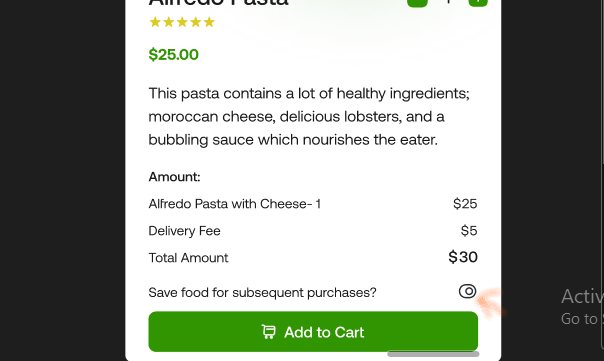 Toggle in the design used for implementing number variables
I'll change that to a checkbox and use boolean variables to make it work.
To do this, I'll copy out the component and paste it on another frame. I'll then add the checkbox (and replace it in the main design screen later).
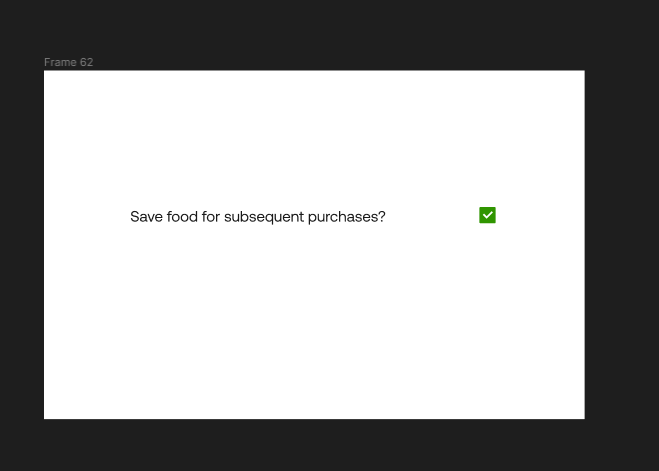 Checkbox on a blank frame.
Next, we'll make the selection a variant. To do this, double-click on the Create component icon on your Figma file header.
 Double-clicking on "create component" icon
A variant will automatically appear:
 Variant of the component
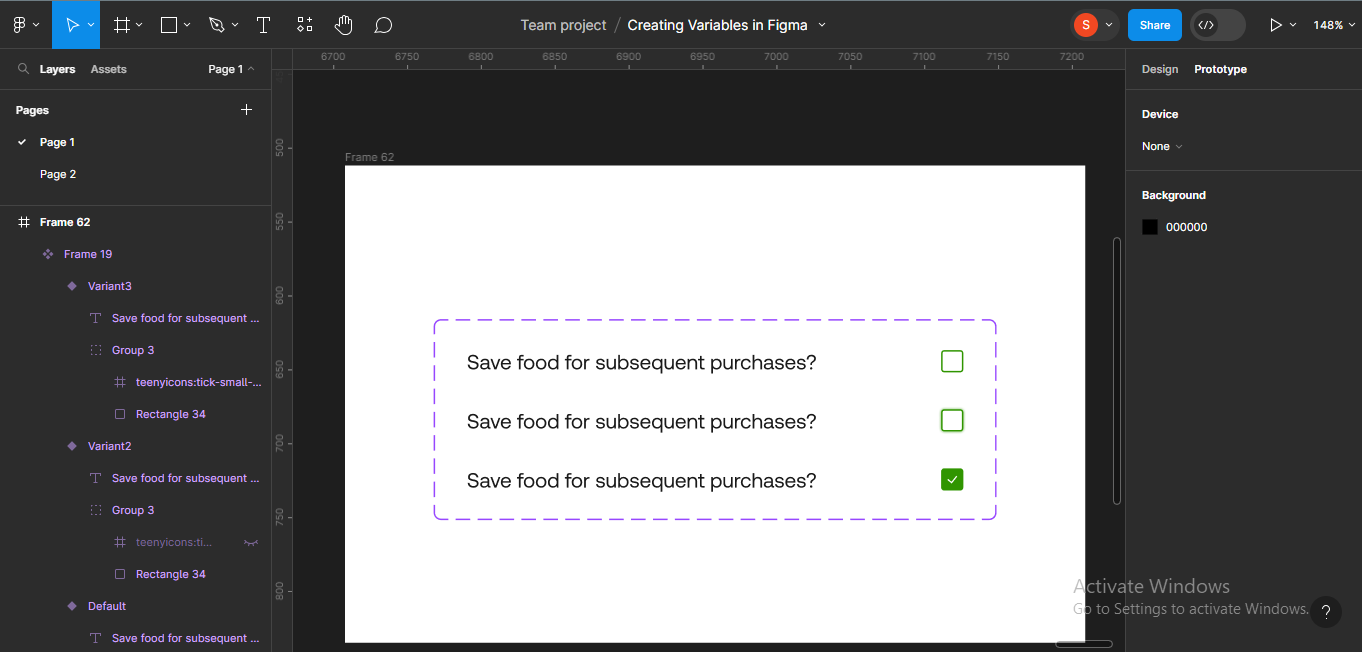
Next, I'll create different states for the checkboxes: default, hover, and filled.
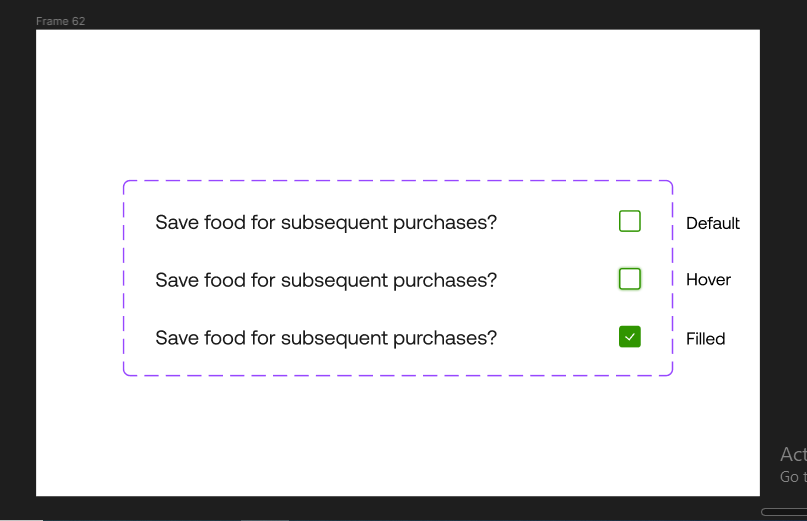 Different states for the chechboxes: Default, hover and filled.
Now, we'll create the boolean variable.
To do this, go to Local variables as usual and select Boolean.
 Opening local variables
Click on Create variable.
Next, we'll choose Boolean from the list.
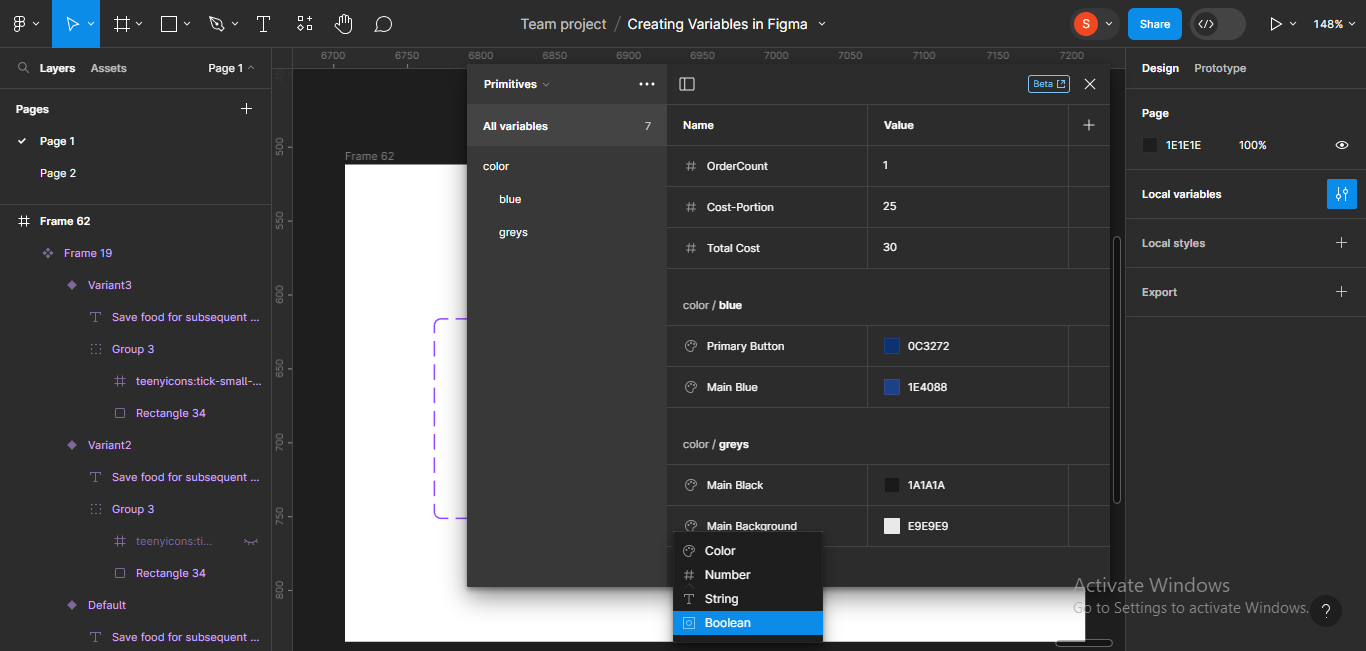 Choosing "boolean" from the list
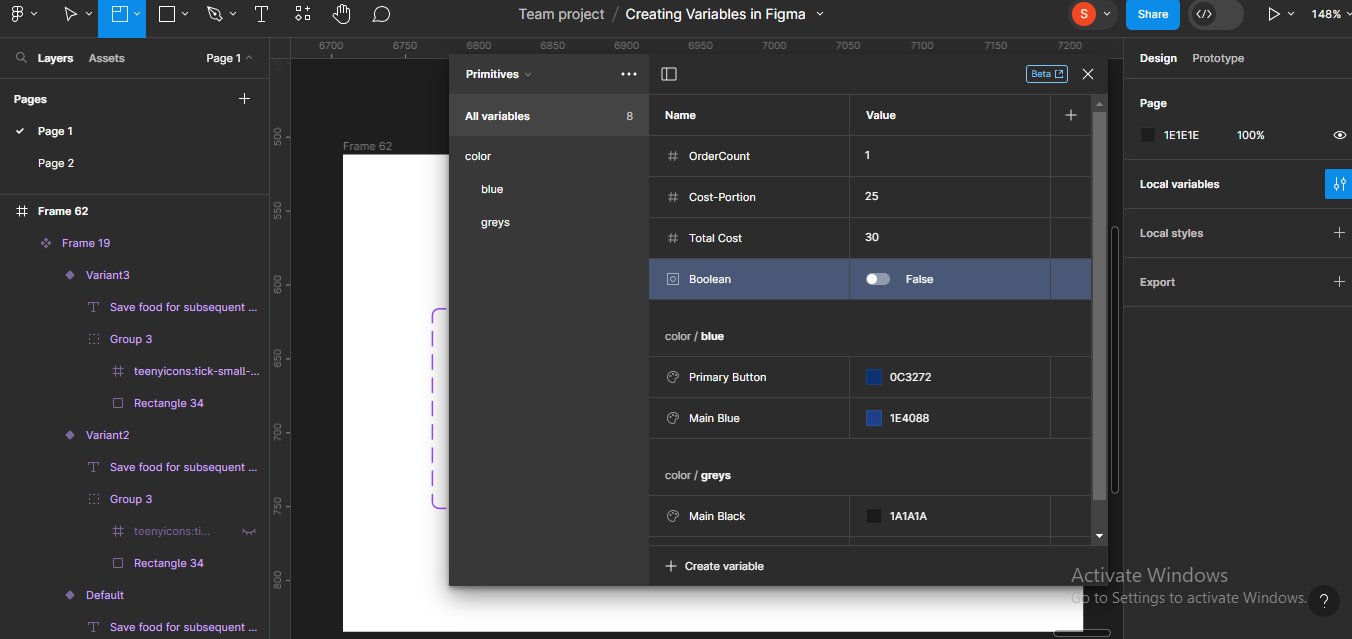 Created boolean variable
Next, we'll rename the boolean variable SaveFood since we're trying to create a function for saving a food choice for subsequent orders.
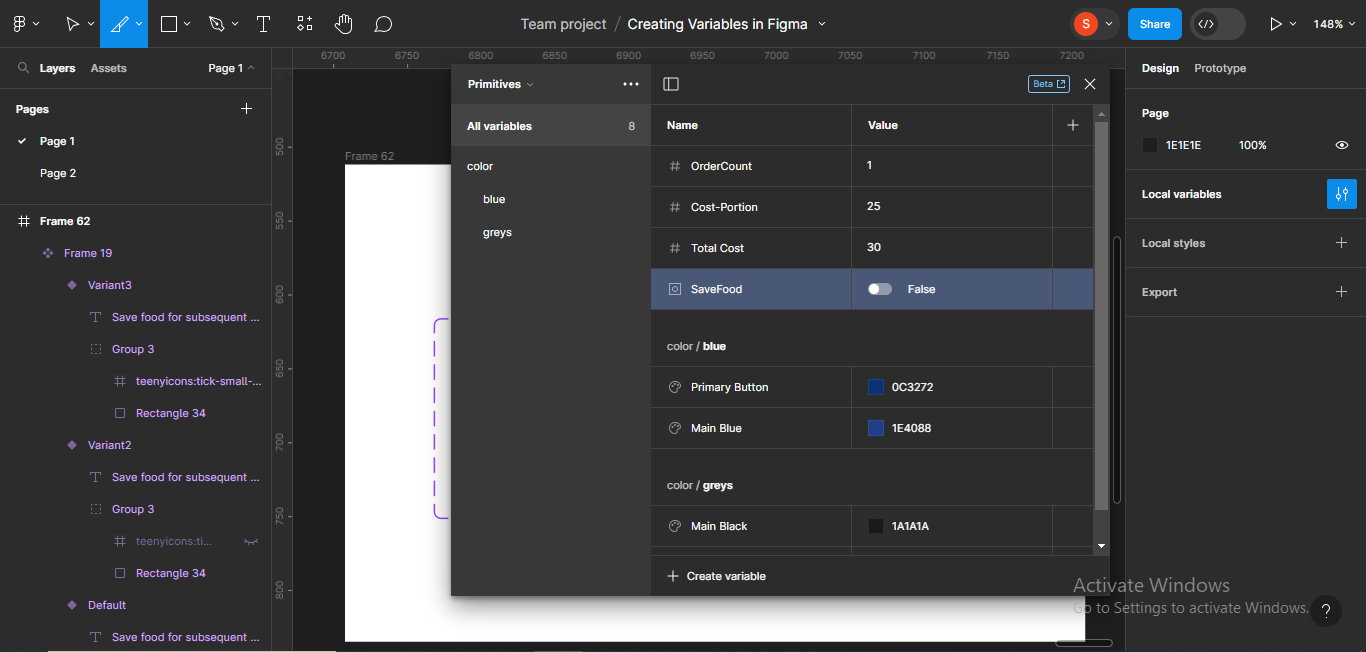 Renamied boolean variable
Next, we'll make the variable True by default. To do this, just click on the toggle icon by the side of the variable.
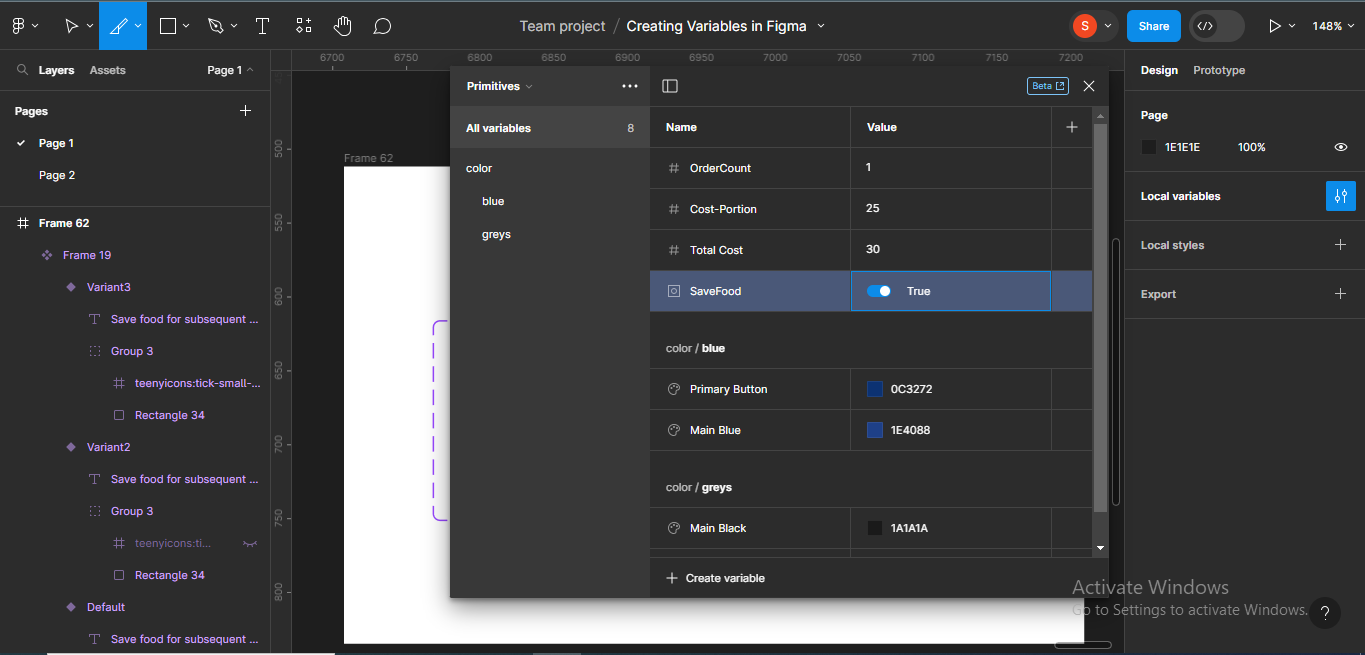
You've created a boolean variable!
We'll create an interaction for this boolean variable in the advanced prototyping section and check if it works.
How to Use Variables for Advanced Prototyping
In this section, we'll learn how to use variables for advanced prototyping in Figma, using the colour, number, string, and boolean variables we implemented earlier in the design.
N.B: You can only use advanced prototyping features on Figma if your file is on a paid team file. If you don't have a paid team version, you can apply for the Figma for Education plan. It's a way Figma helps learners and educators by giving them access to resources, and all benefits of a paid version, for free.
You can use advanced prototyping when you have a lot of screens to work on, and to simply make prototyping easier.
Advanced Prototyping with Number Variables
Starting with the number variables we created above, let's try to check if it actually works. But before we do that, we'll have to actually prototype the design.
Note that you can prototype number variables for designs where your user can increase or decrease the number of an item on the screen. Prototyping helps to show the functionality and how that particular feature would work.
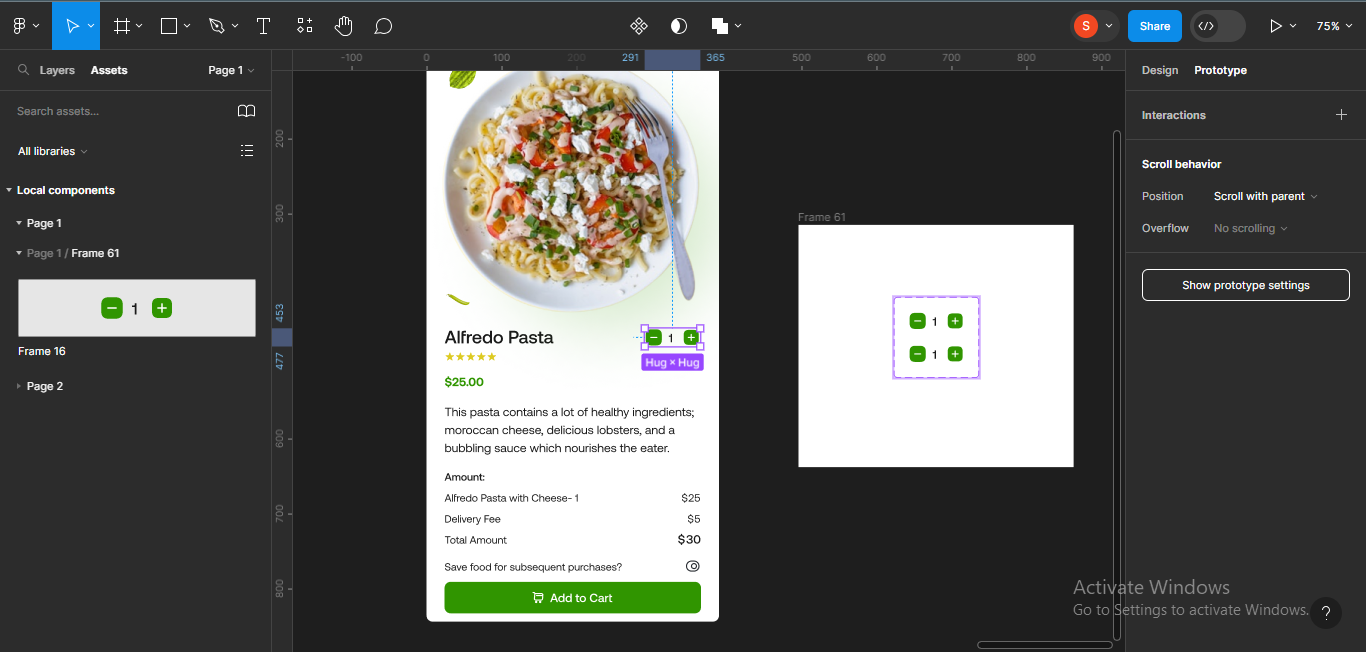
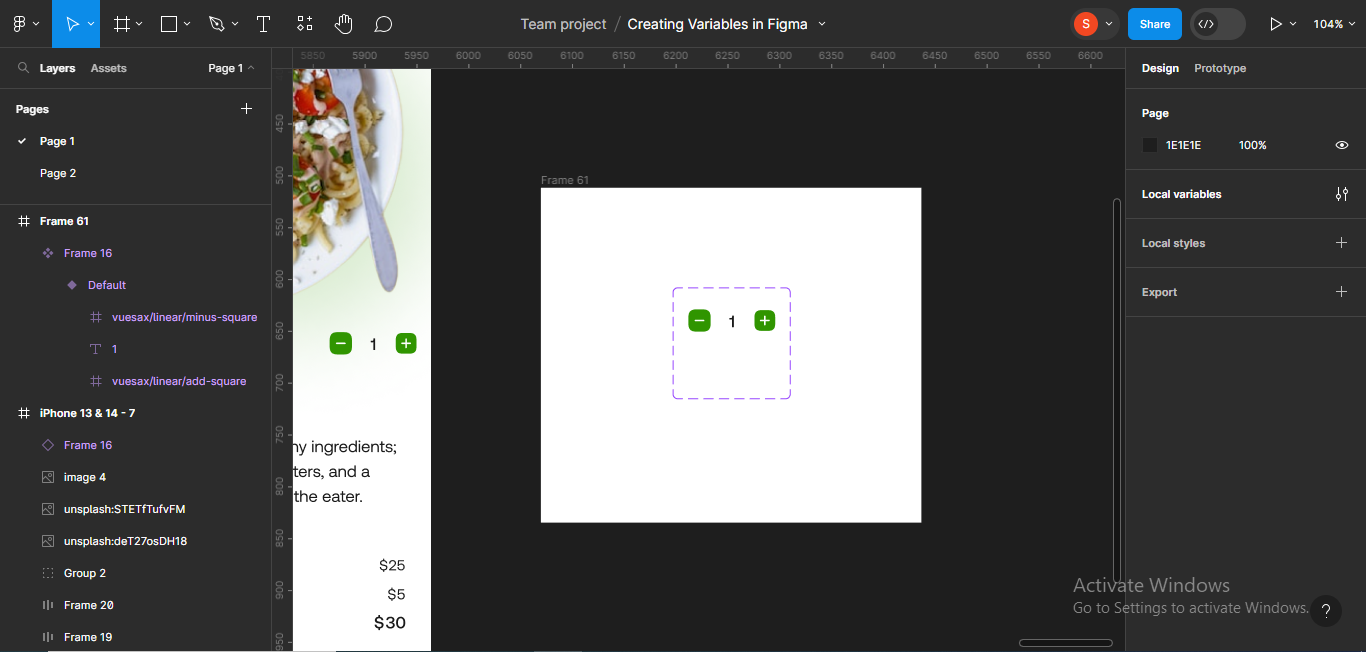
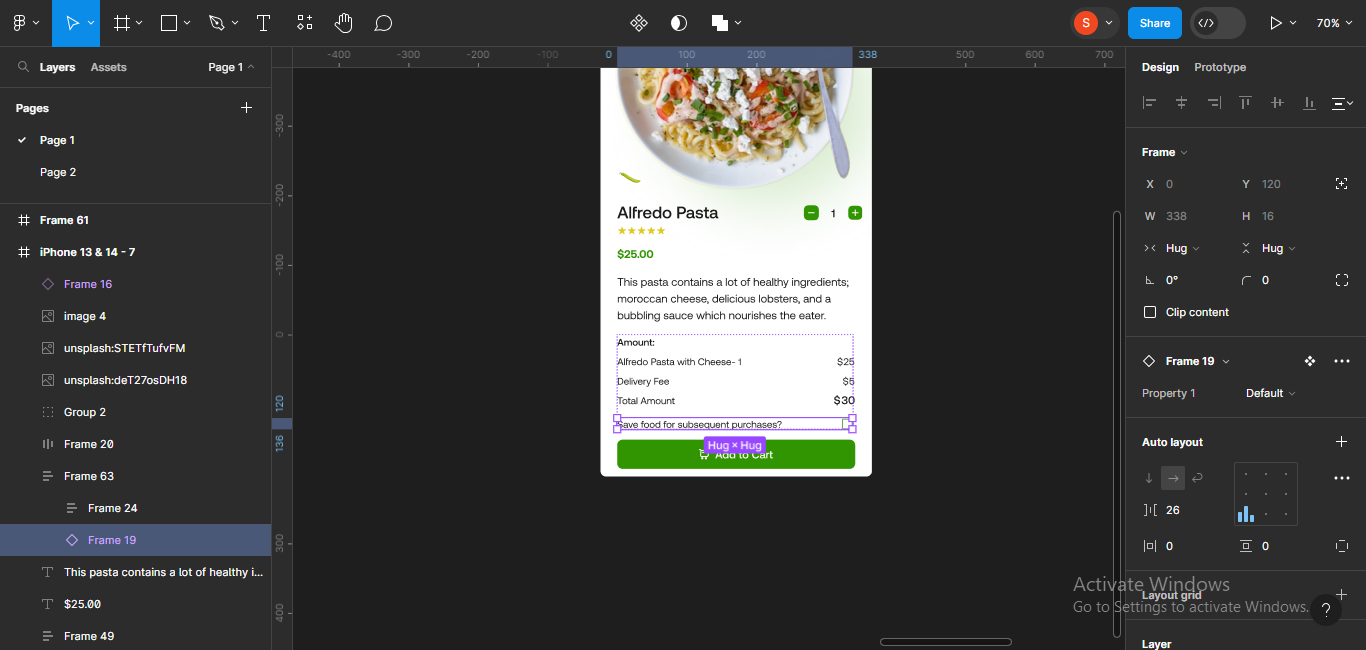
To start with, I'll make the frame where the order count is a component. To do this, select the frame, and click on the component icon on your Figma file header.
 Selecting the order count frame
 Clicking on the component icon
 The order count component
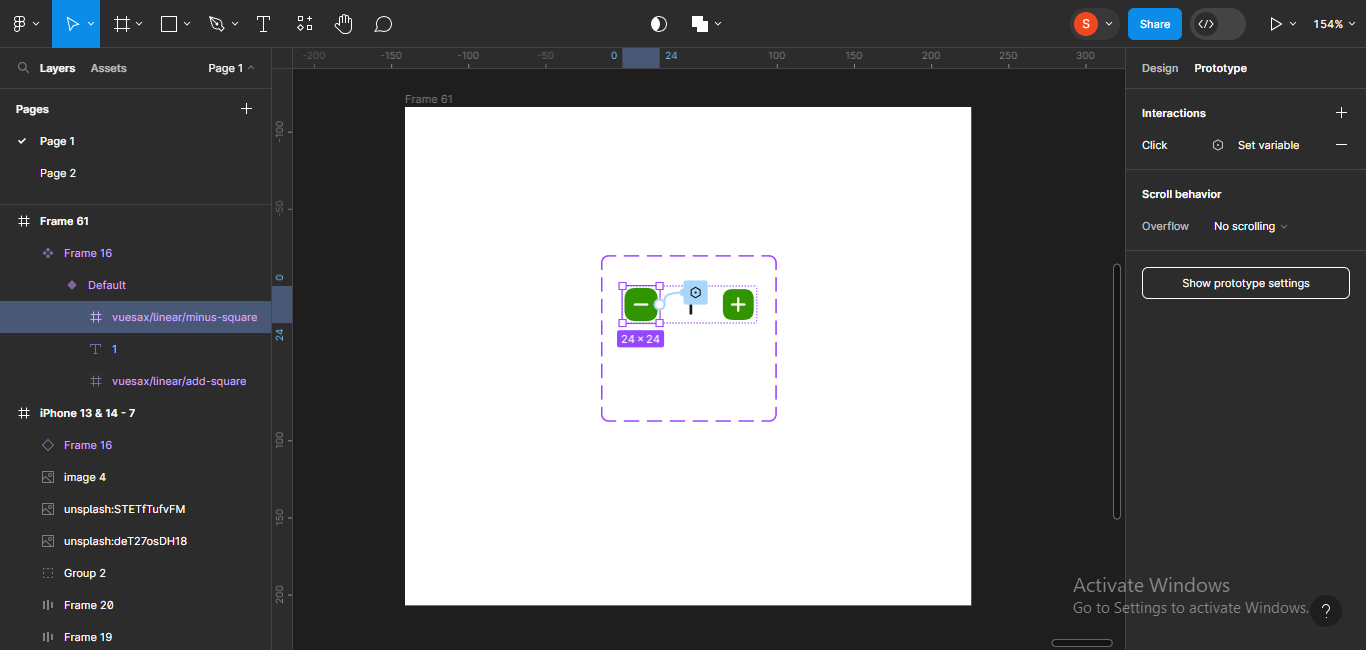
Click on the component icon again to make it a variant.
 Making the order count component a variant
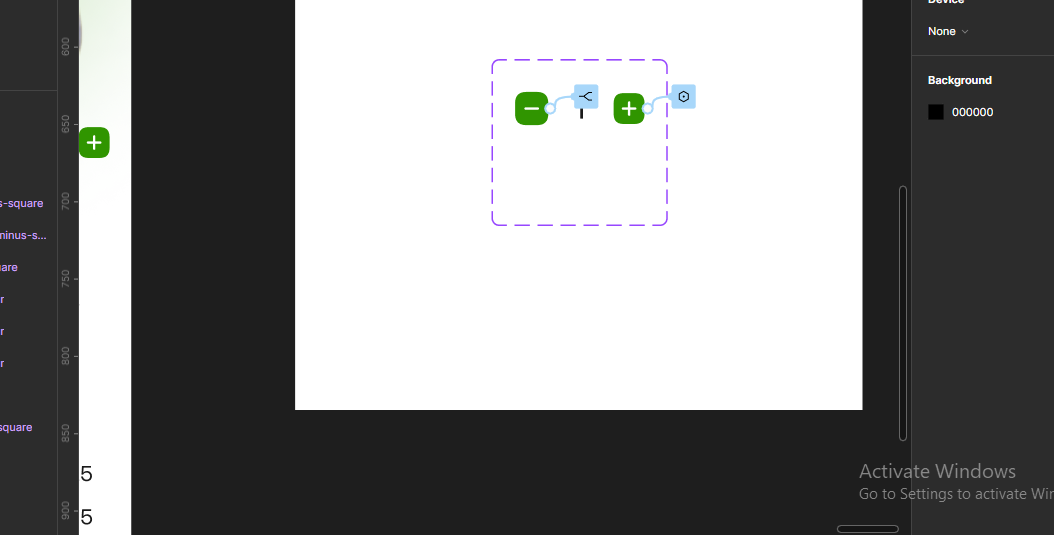
I'll make a frame outside the screen and drag the variant there, so I'll be able to work on the interactions well.
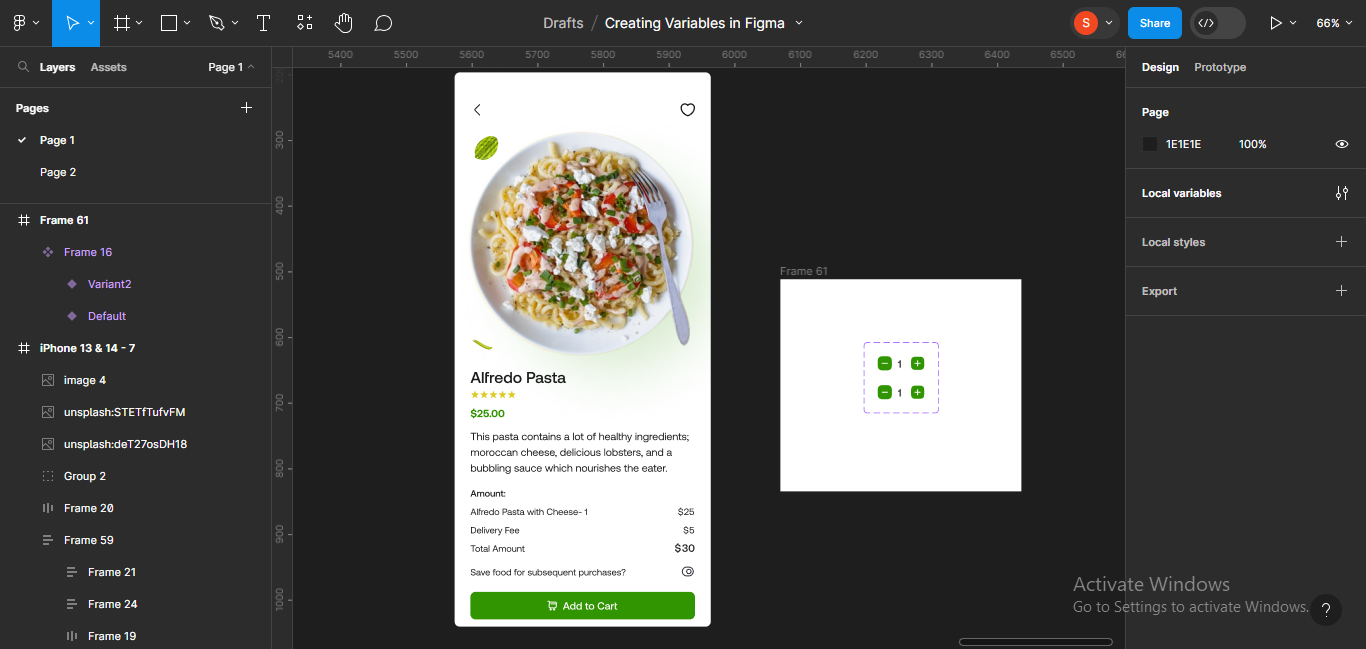 Making a frame outside the screen
Remember that we want to implement a function where the number of portions increases when the user clicks on the plus icon.
We'll start prototyping from here.
Now, click on the plus icon in the default variant and move to the prototype tab.
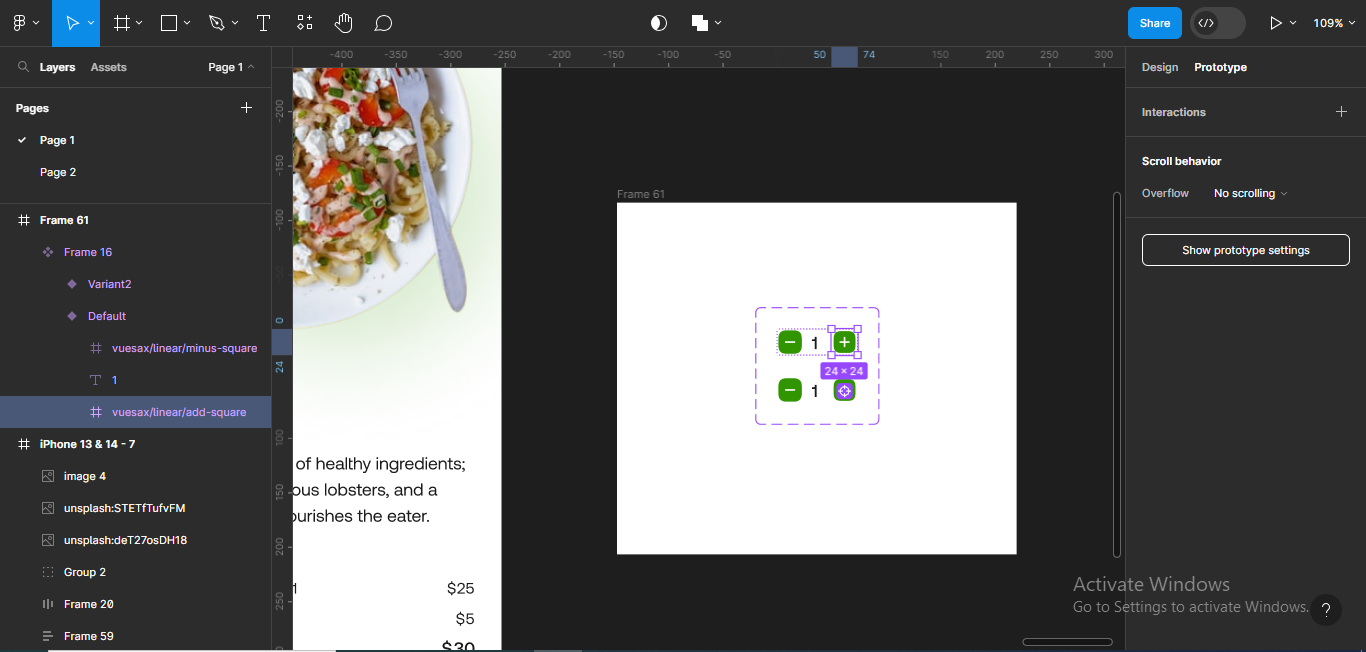 Clicking on the plus icon in the default variant
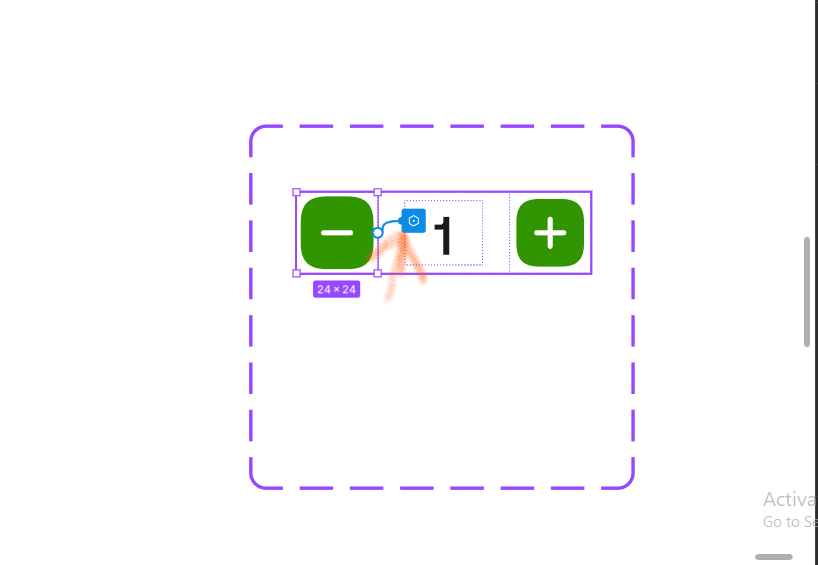
Next, click on the plus icon in the interactions area to add an interaction.
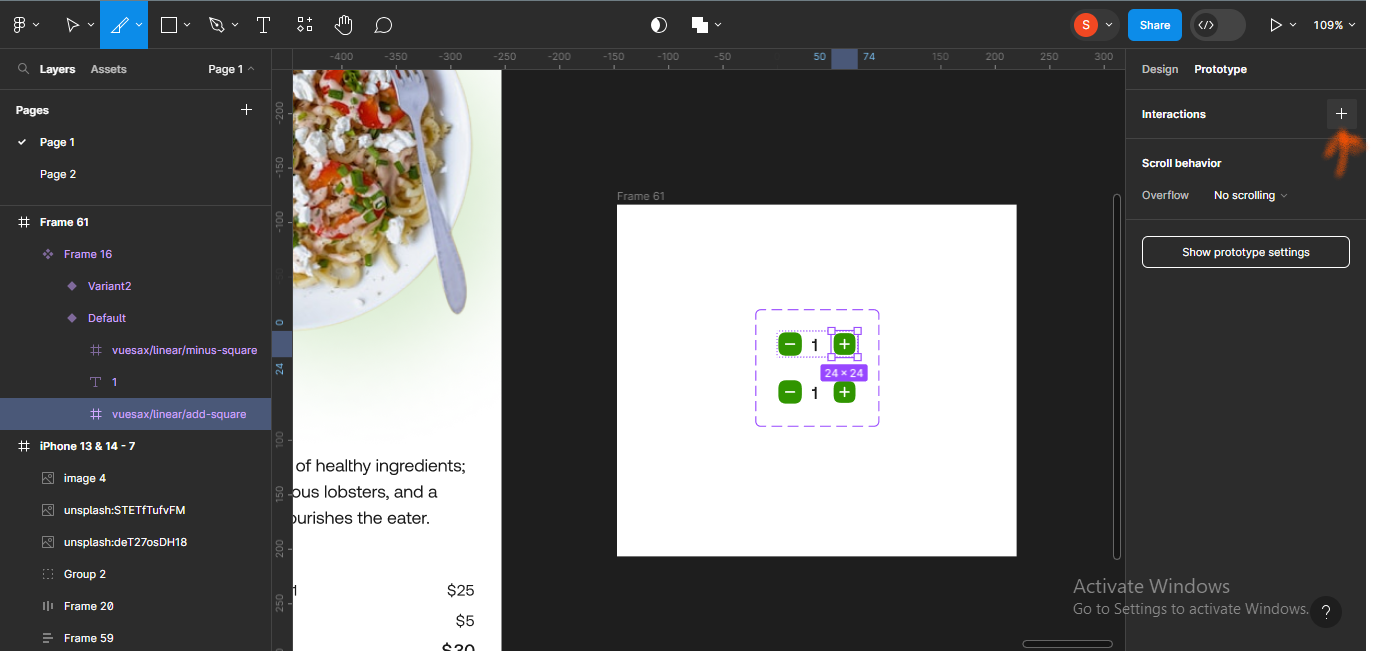 Adding an interaction
A tab will come up showing interactions. In this case, it's set to default On click, and no interaction has been added yet (None).
 Adding an interaction
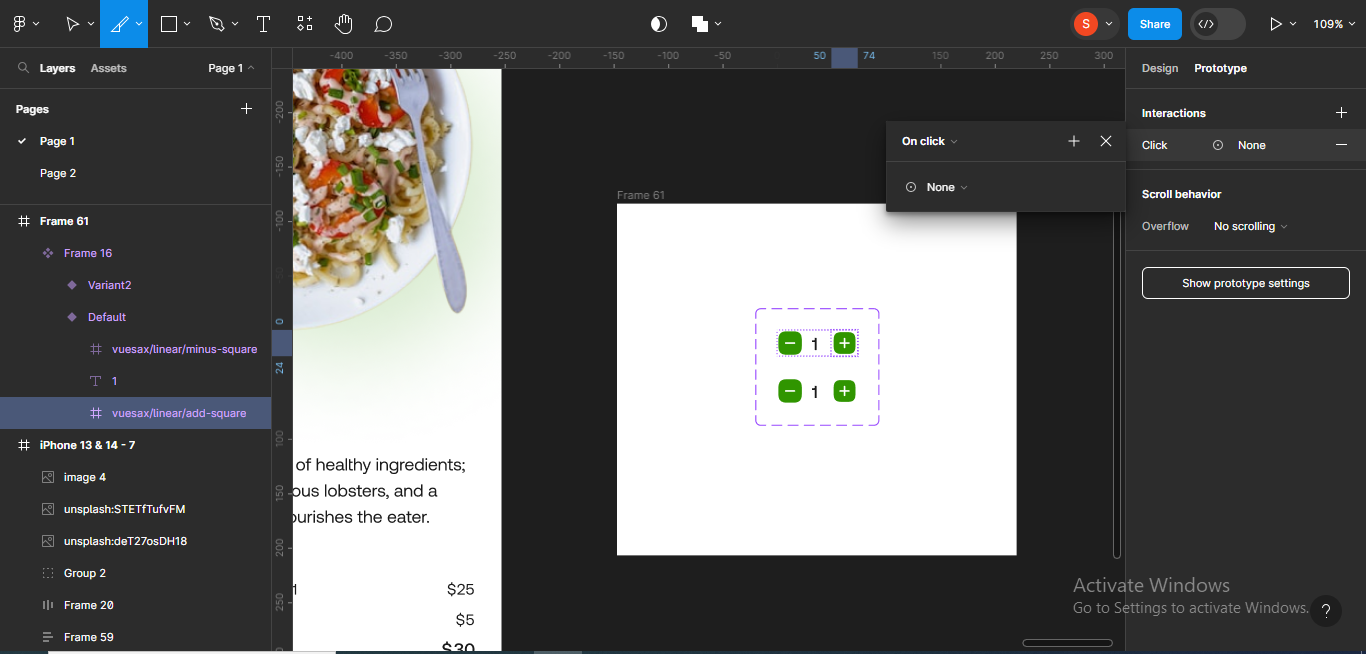
Now, click on the dropdown icon that says None.
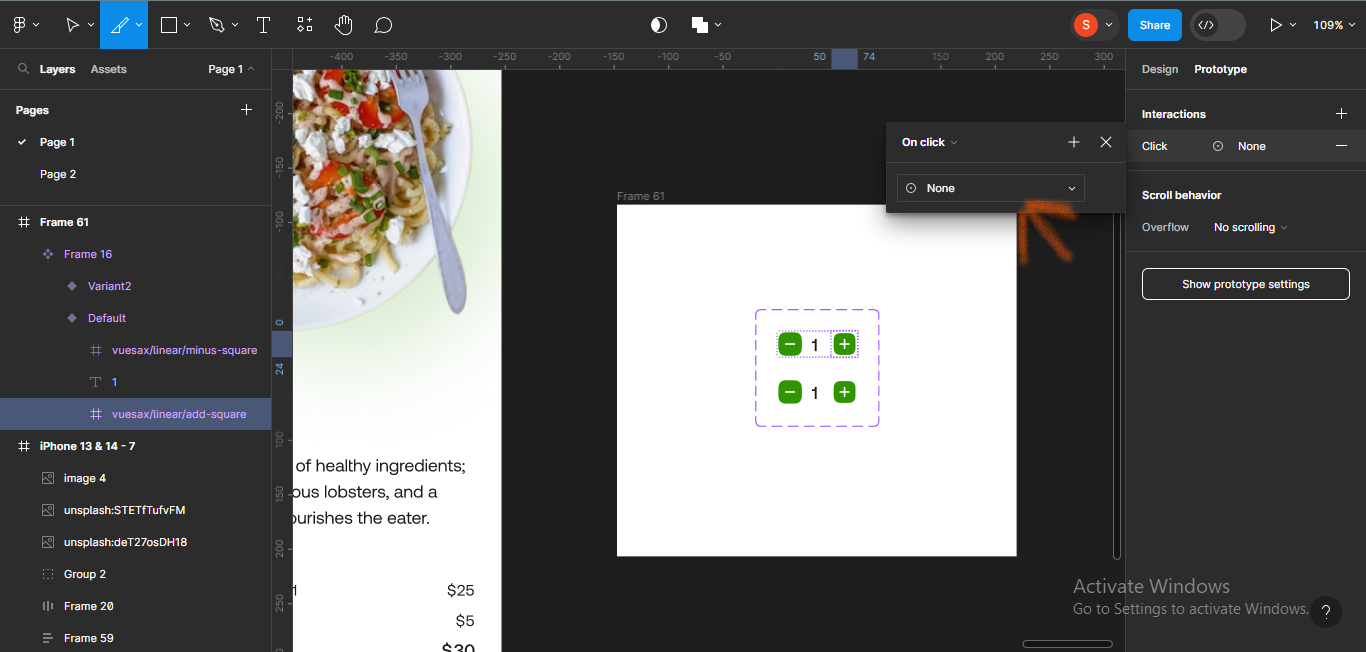 Clicking on the dropdown icon
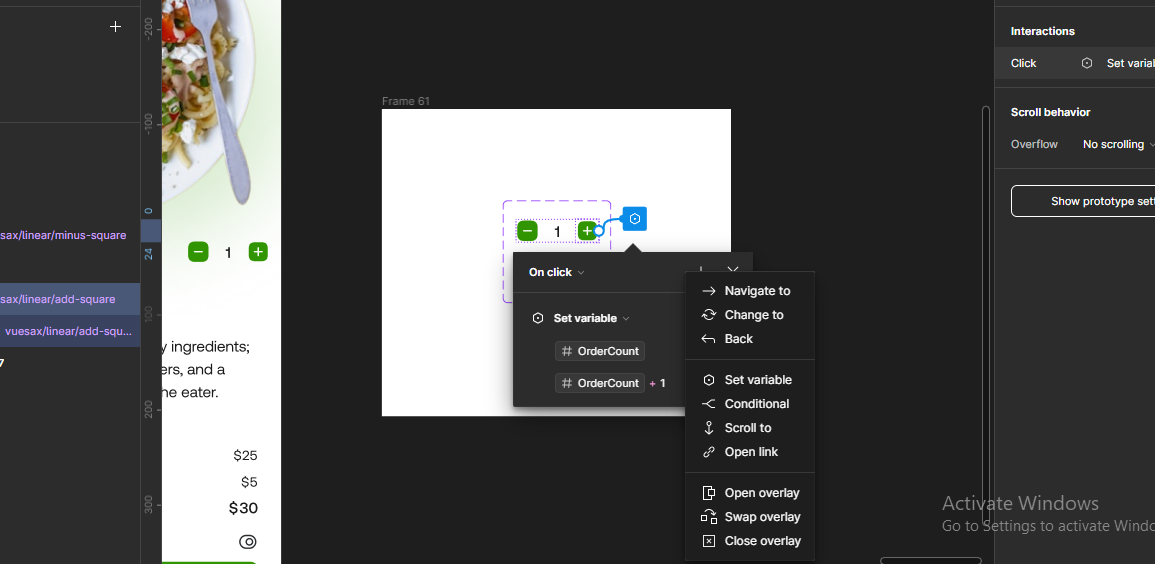
It'll bring up a list:
- Navigate to
- Change to
- Back
- Set variable
- Conditional
- Scroll to
- Open link
- Open overlay
- Swap overlay
- Close overlay
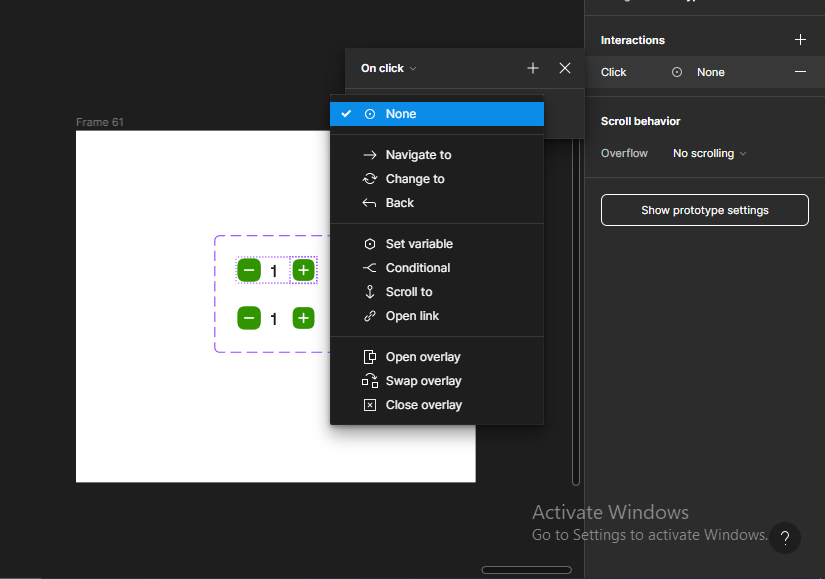 List following the dropdown
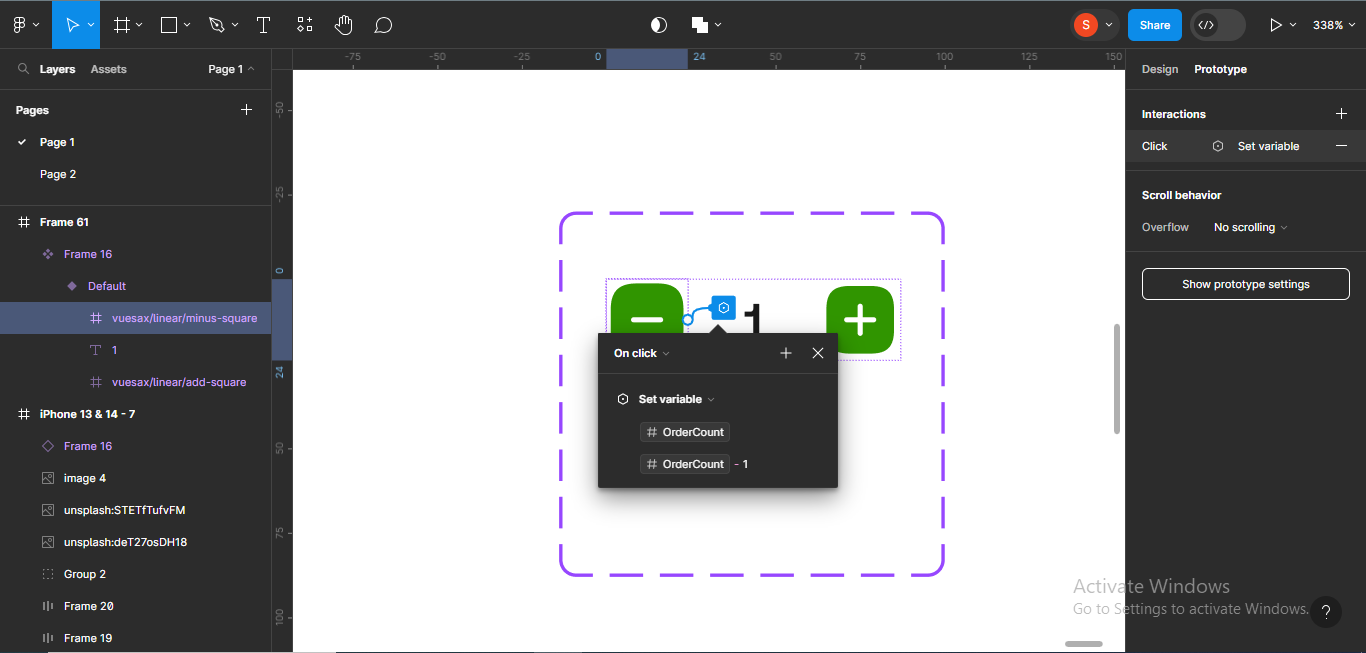
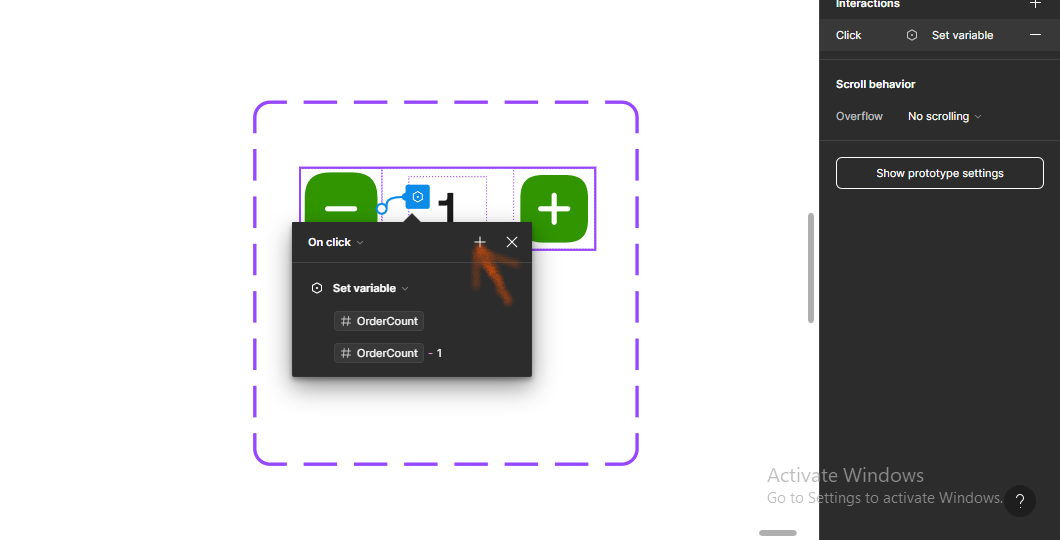
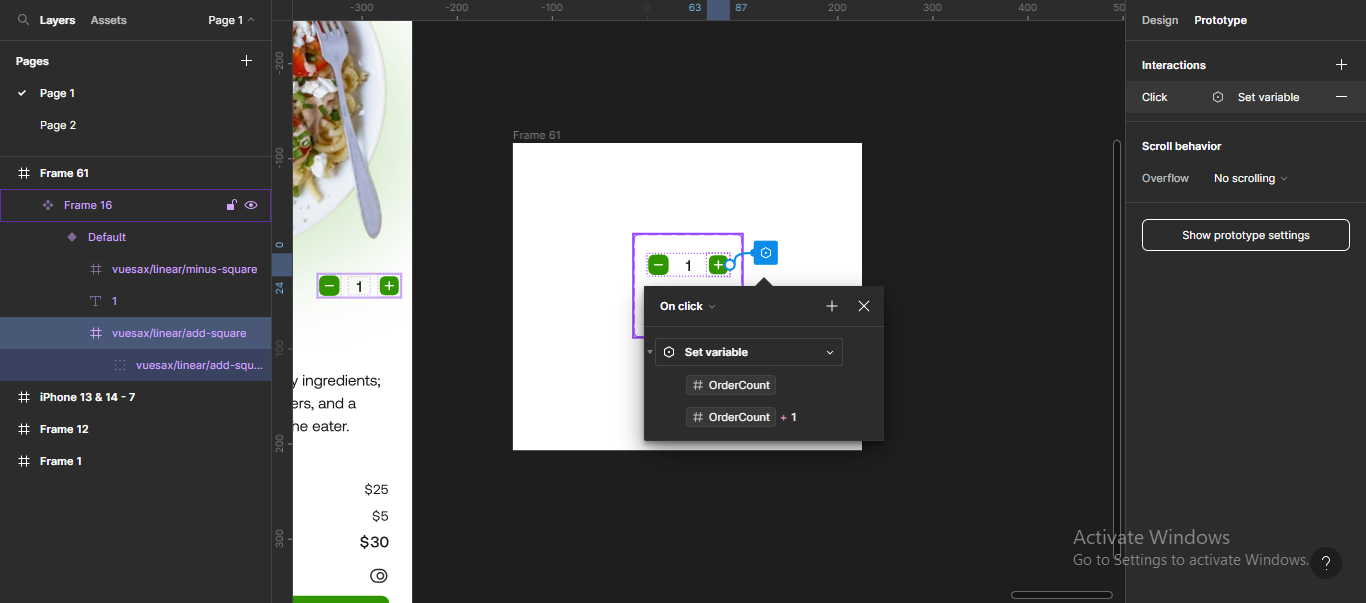
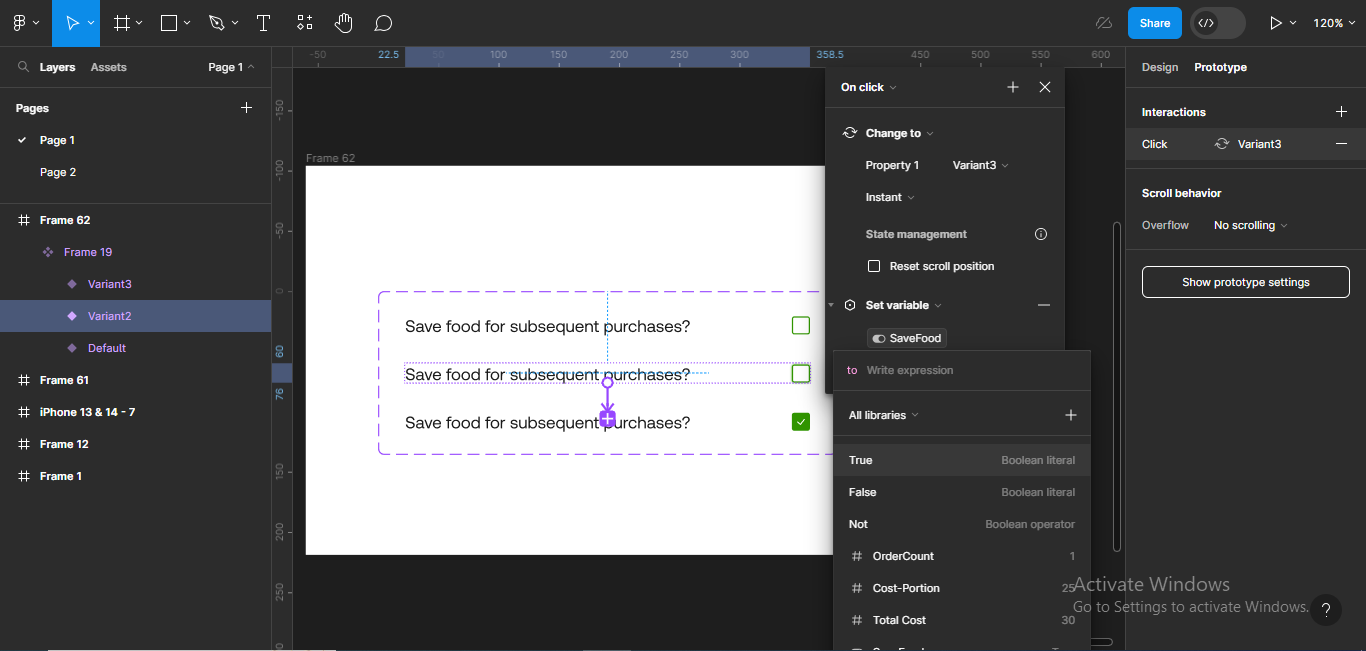
Choose Set variable.
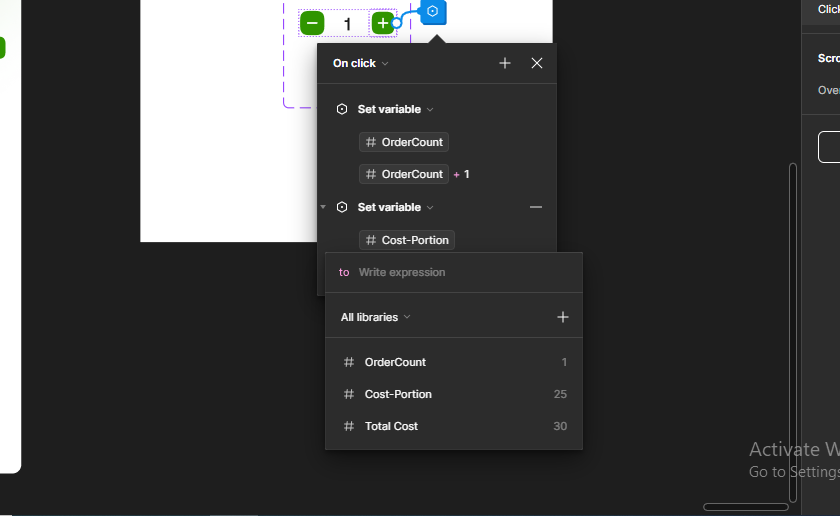
A list of all variables in the file will come up, and you can then select the particular variable you want to implement. I'll click on OrderCount.
 Choosing "set variable"
 Clicking on Order Count (the first time)
Next, I'll click on OrderCount again to write a mathematical expression, and all the available mathematical expressions will appear:
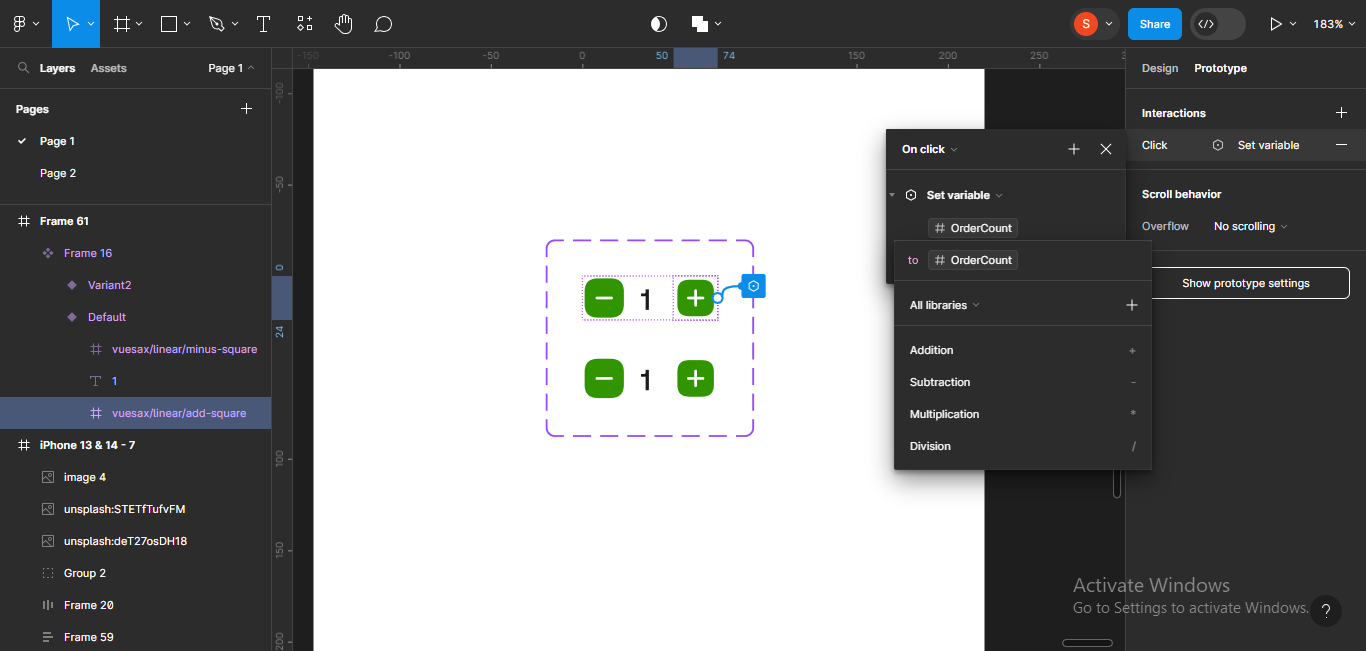 Clicking on Order Count (the second time) and showing all mathematical expressions
I'll select Addition, because that's what we're trying to do.
 Choosing the "addition" expression
You'll notice that an addition icon popped up to signify that the addition expression was given.
Next, I'll input 1 by the side of the addition icon to show that it's plus 1.
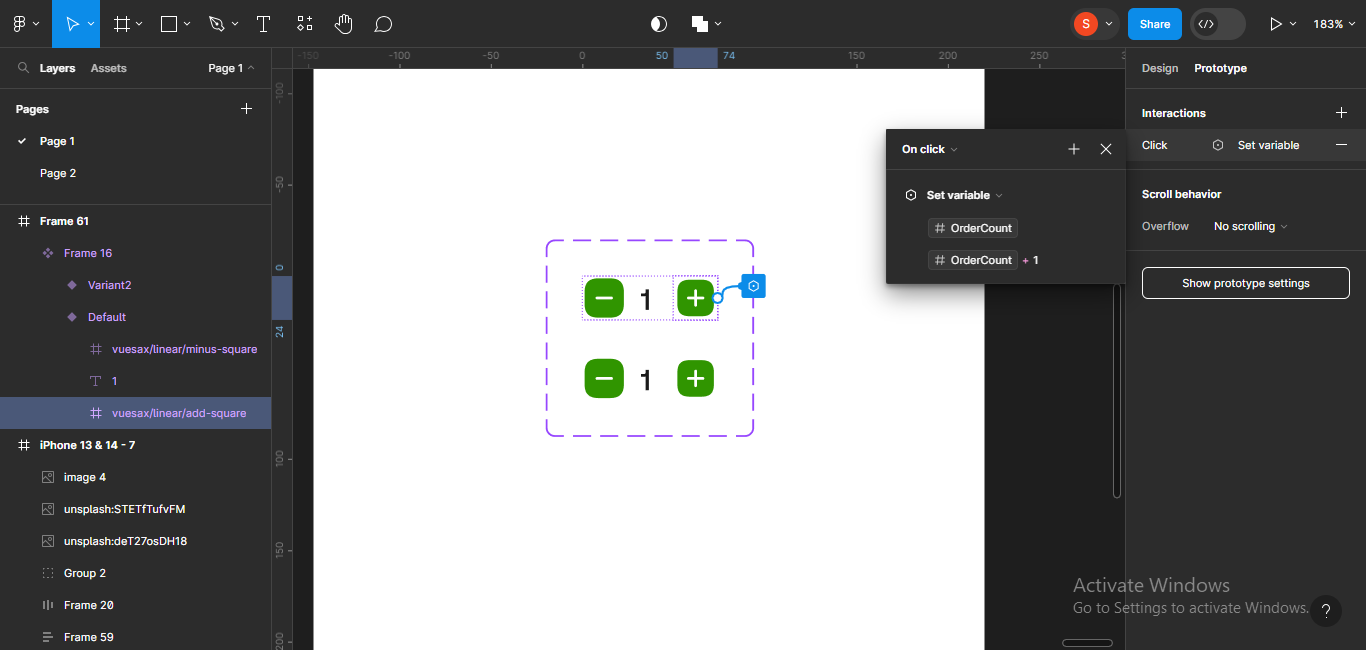 Adding number 1 to the expression
Done!
Now, we'll follow the same steps to do the same for the minus icon, making the expression subtraction instead of addition.
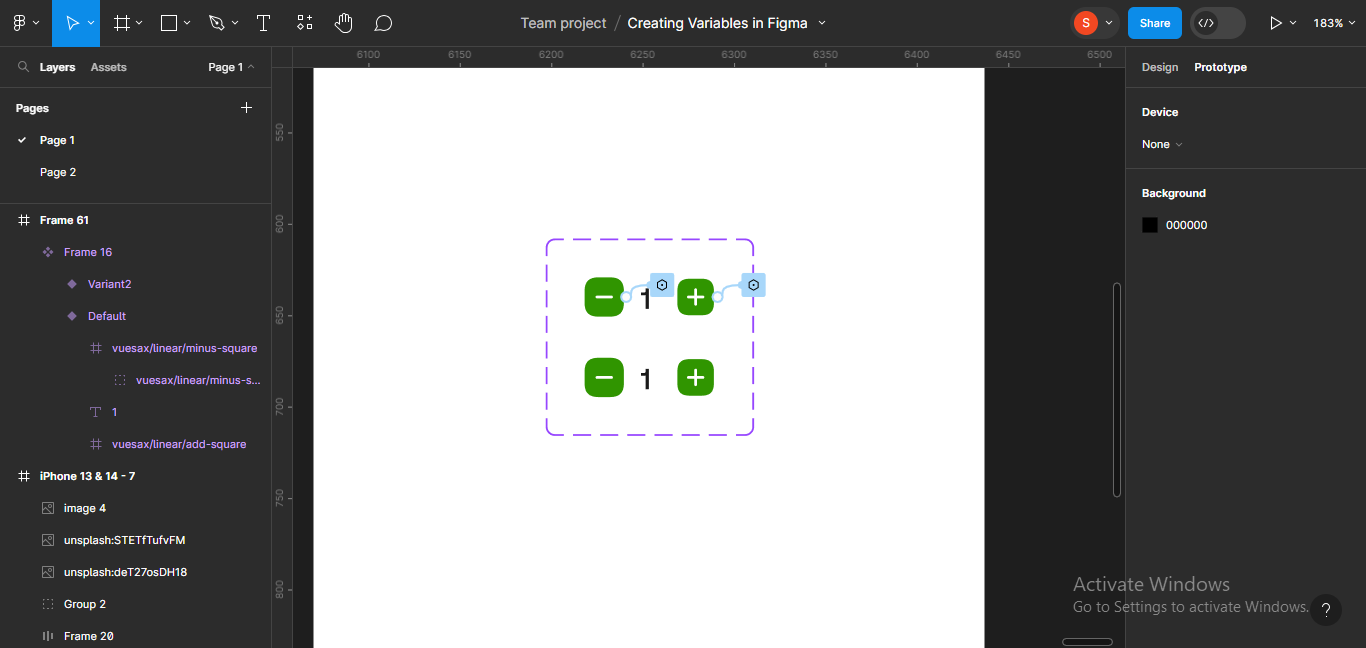 Added interactions for the minus icon
Done!
Note: We don't really need the variant we created earlier. You might only use the variant in cases where you want to create a hover state. I just wanted to show you how easy it would be to create a variant while doing this.
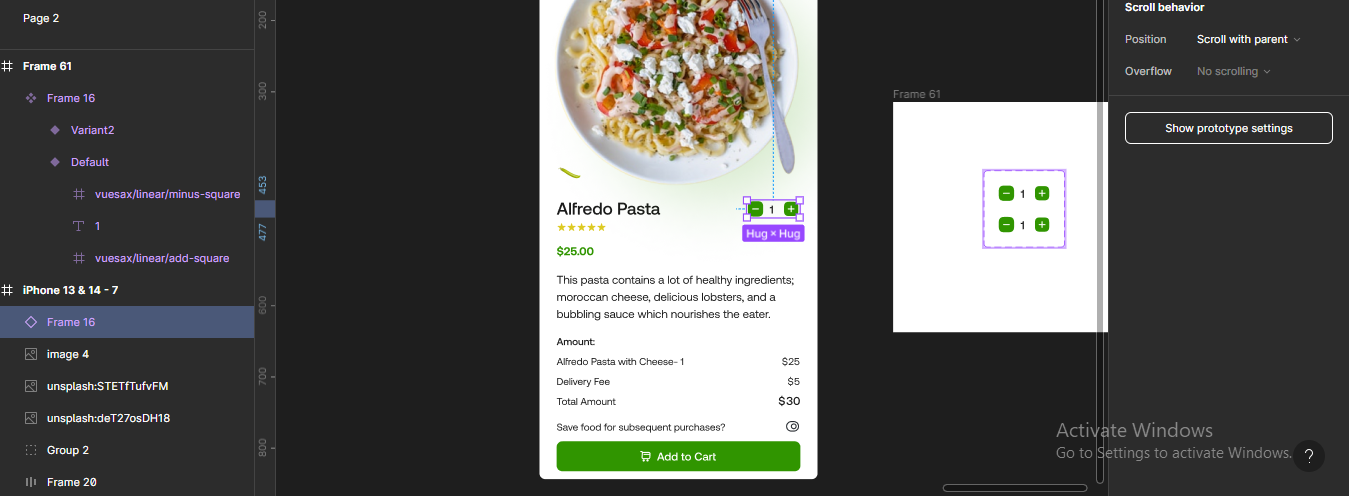
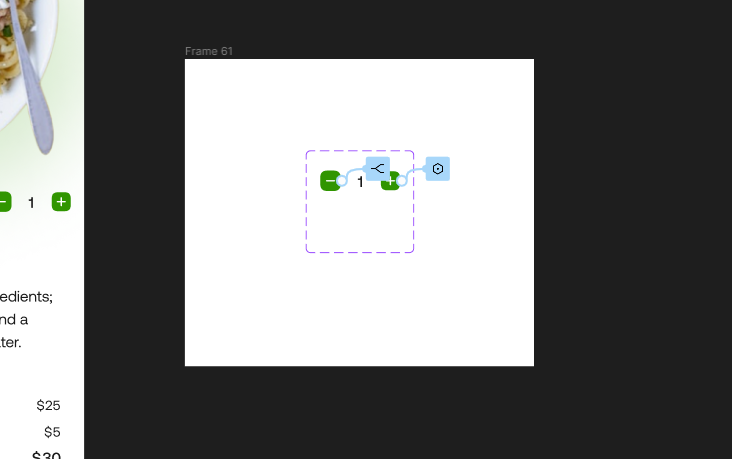
Next, we'll just copy the prototyped component and put it back in the main design.
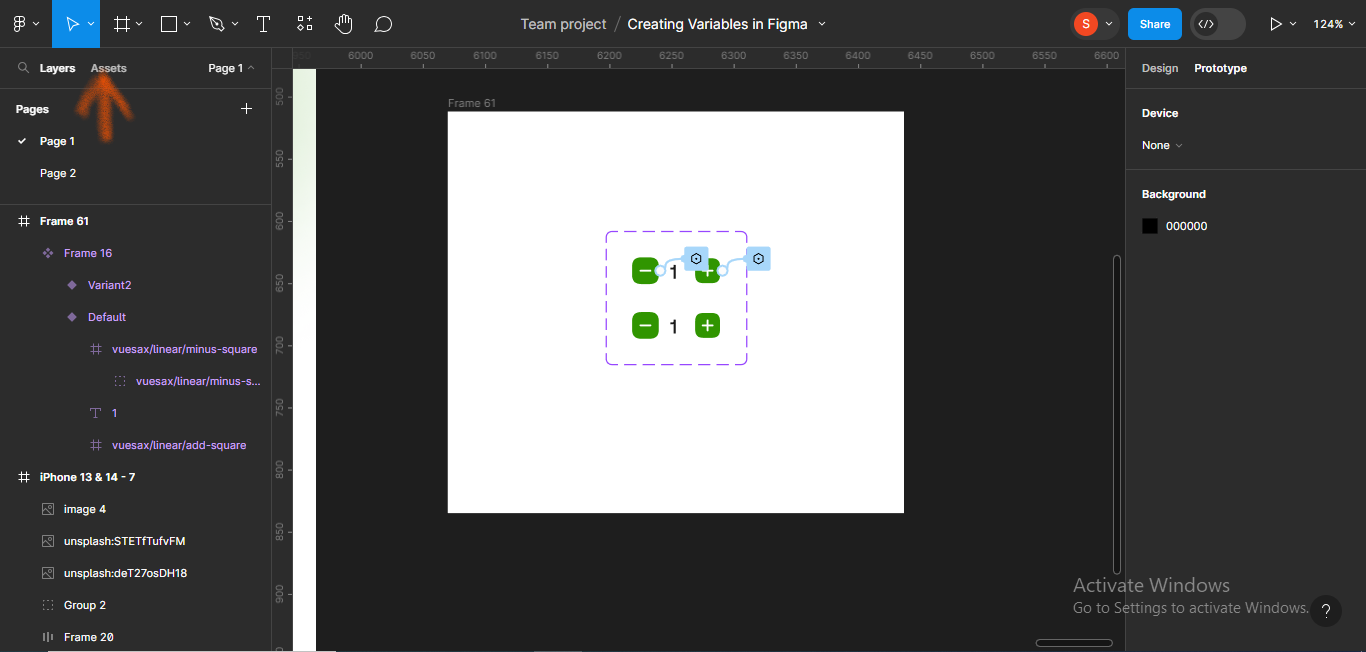 Frame containing the prototyped variable
To put the prototyped component in the main design, click on Assets at the top of the left hand panel.
This section will show all the assets in the page you're currently on.
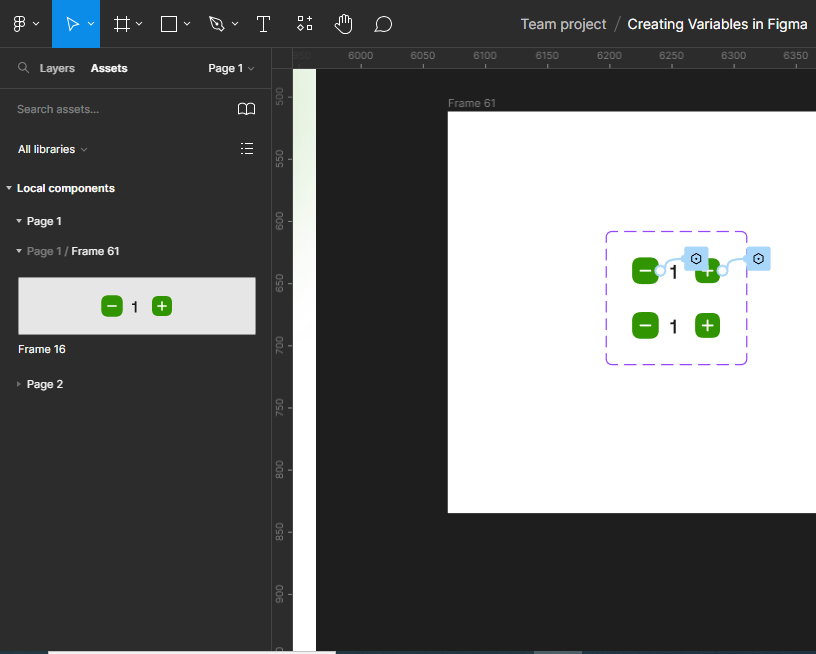 Showing all assets on the page
Next, I'll drag the frame to the design.
 Dragged asset to main design
Note: If you don't want to follow the process above to place the prototyped component in the design, simply copy the component (CTRL + C), and paste to replace the frame on the main design.
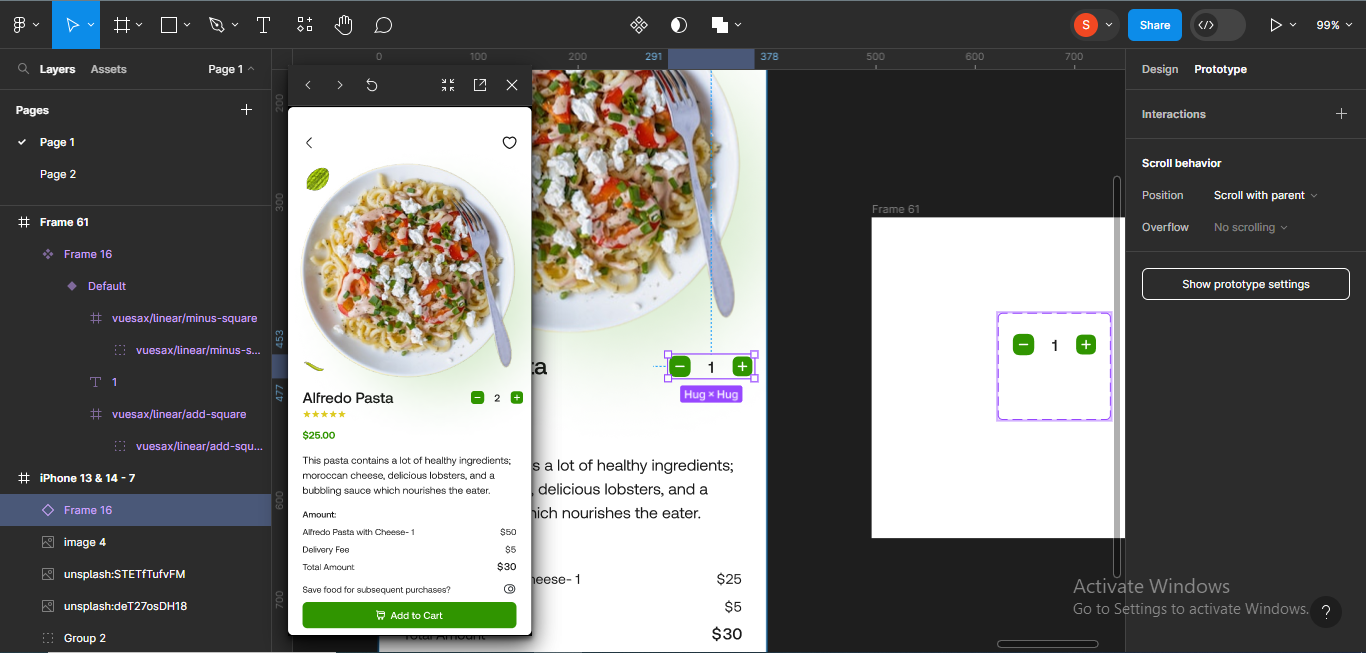
Now, let's check our prototype out. To do this, you don't need to open the prototype on another tab. You can simply click on the asset and press SHIFT + space bar.
 Clicked asset
Another frame will appear on your screen. It's interactive and you can test your prototype on it.
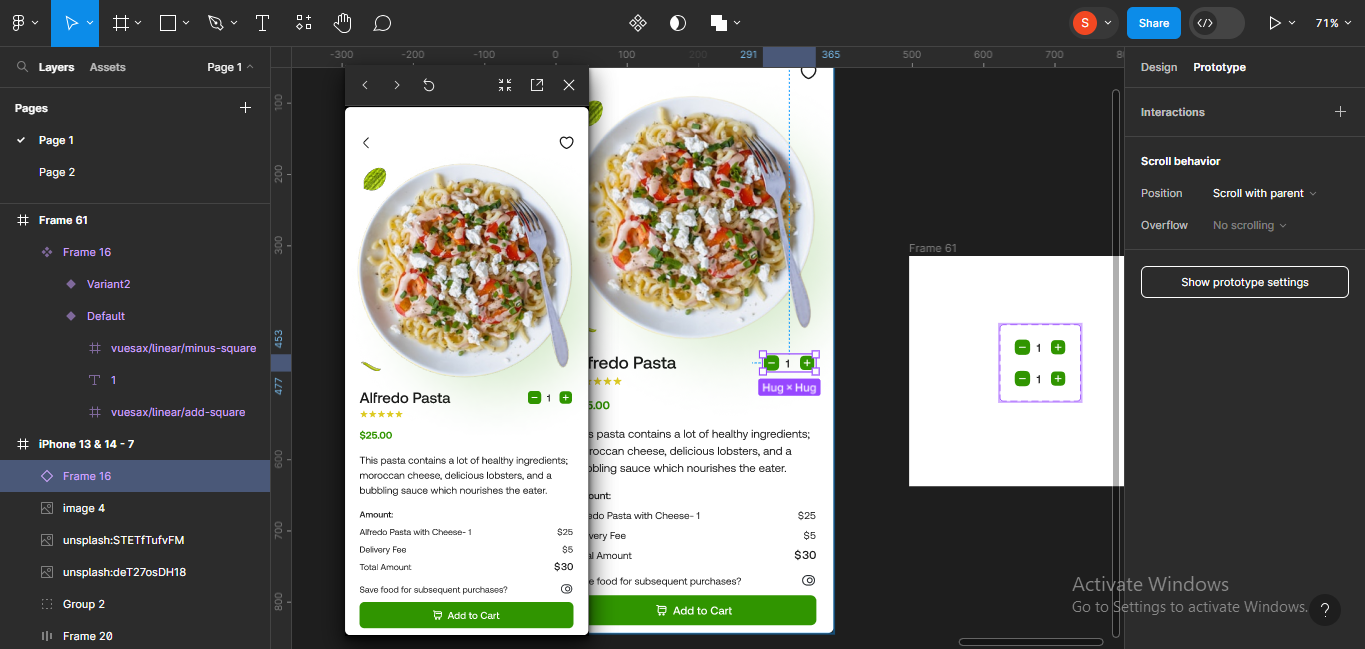 Interactive frame on your Figma screen.
Try clicking on the minus and plus icons on the frame to see if it carries out its function.
After checking the prototype, I'd like to implement some logic.
We don't want a scenario where the clicking on the minus icon continues till after 0 and now gives us a negative sign like -1 as you can see in the image below.
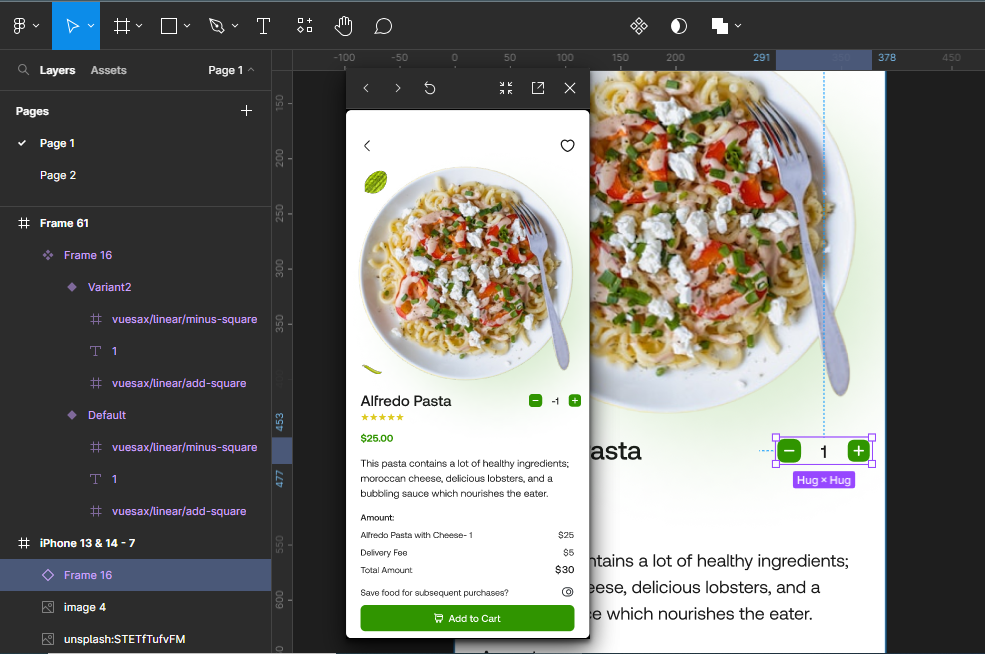 Minus icon giving us negative values
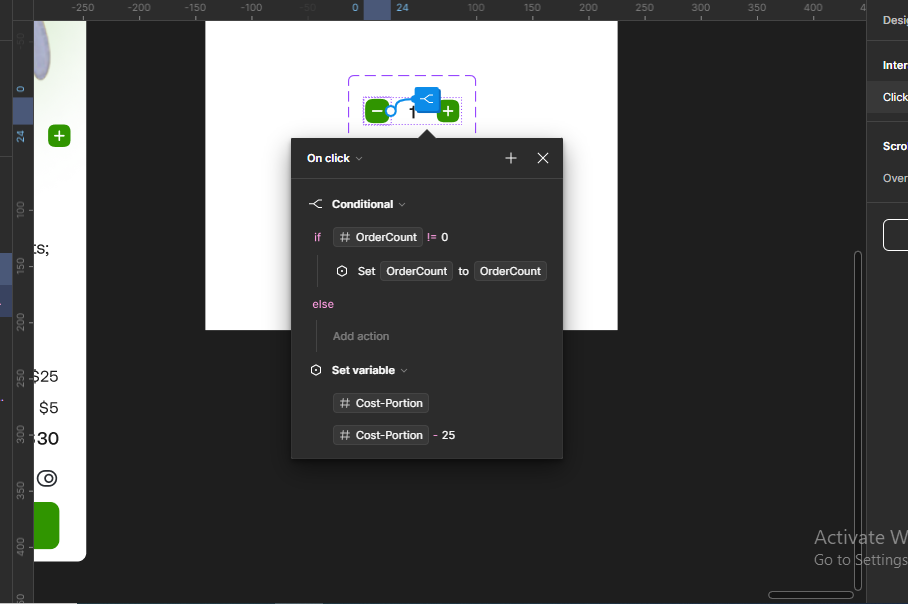
That wouldn't make sense, so we'll add a conditional.
A conditional is simply a condition that sets rules about how the interaction should work.
To do this, I'll move to the frame containing the component I made earlier.
 Frame containing prototyped component
I'll be adding the conditional to the minus icon since that's the area that would give us negative values. So, I want the values to stop at 1 since that's the least a user can order (they can't order half or 0, for example).
So, we'll just zoom into the component to add our conditional. Make sure you're on the prototype tab as well.
 Moving to prototype tab and zooming in on the prototyped component
I'll click on the variable icon by the minus frame.
 Selecting the variable icon close to the minus icon frame
This will bring up the already set interactions:
 Already made interactions on the minus frame
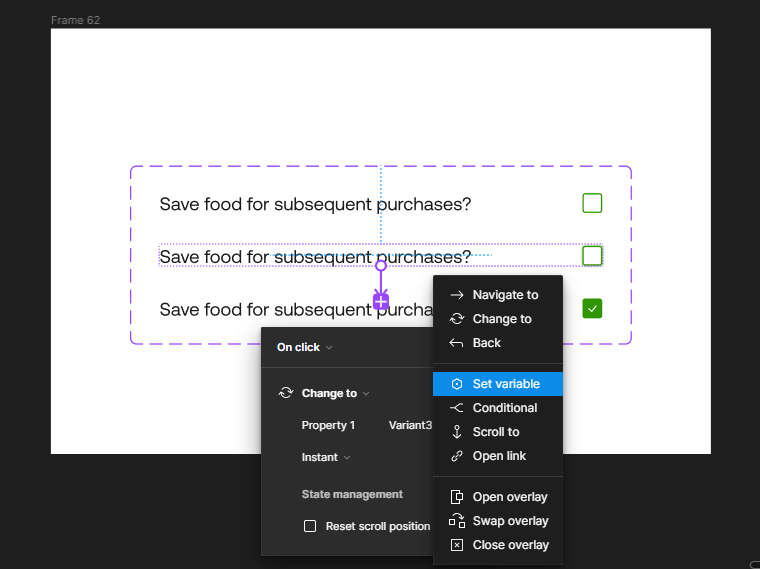
Next, I'll click on the plus icon by the 'x' on the interactions header.
 Clicking on the plus icon in the interaction header
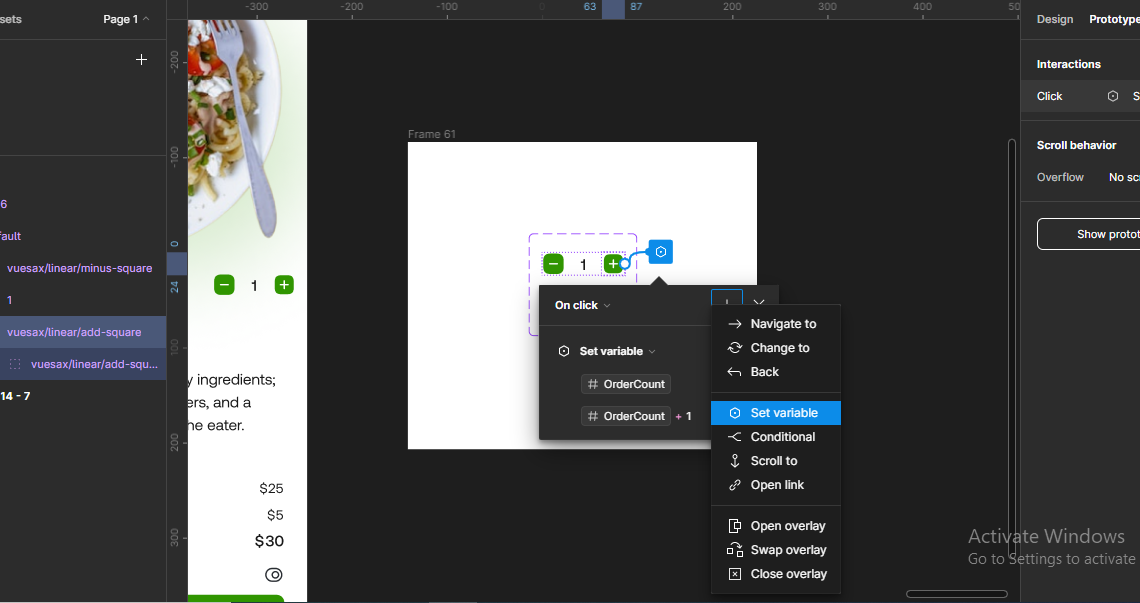
I'll choose conditional from the list of options which will appear:
- Navigate to
- Change to
- Back
- Set variable
- Conditional
- Scroll to
- Open link
- Open overlay
- Swap overlay
- Close overlay
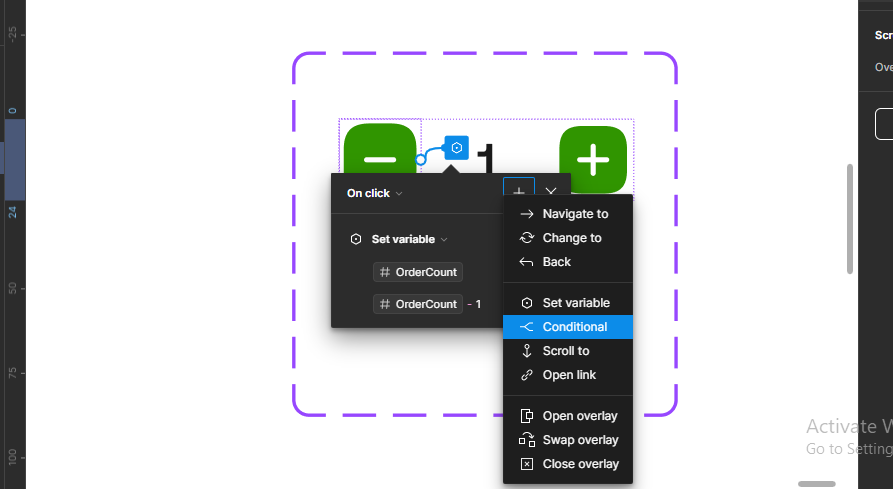 Choosing conditional from the list of options
We'll then write the condition. To do this, click on Write condition by the if else statement.
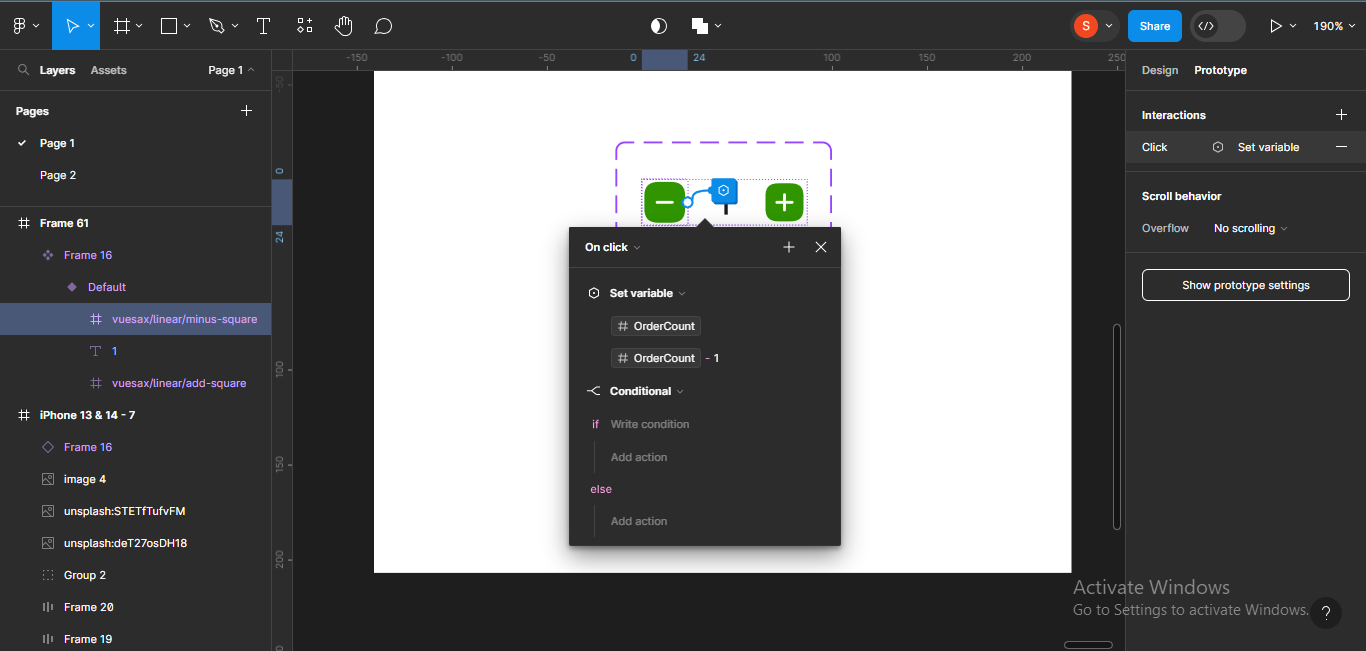 Writing a condition for the interaction
When we click on Write condition, a list of all number variables will come up. I'll choose OrderCount.
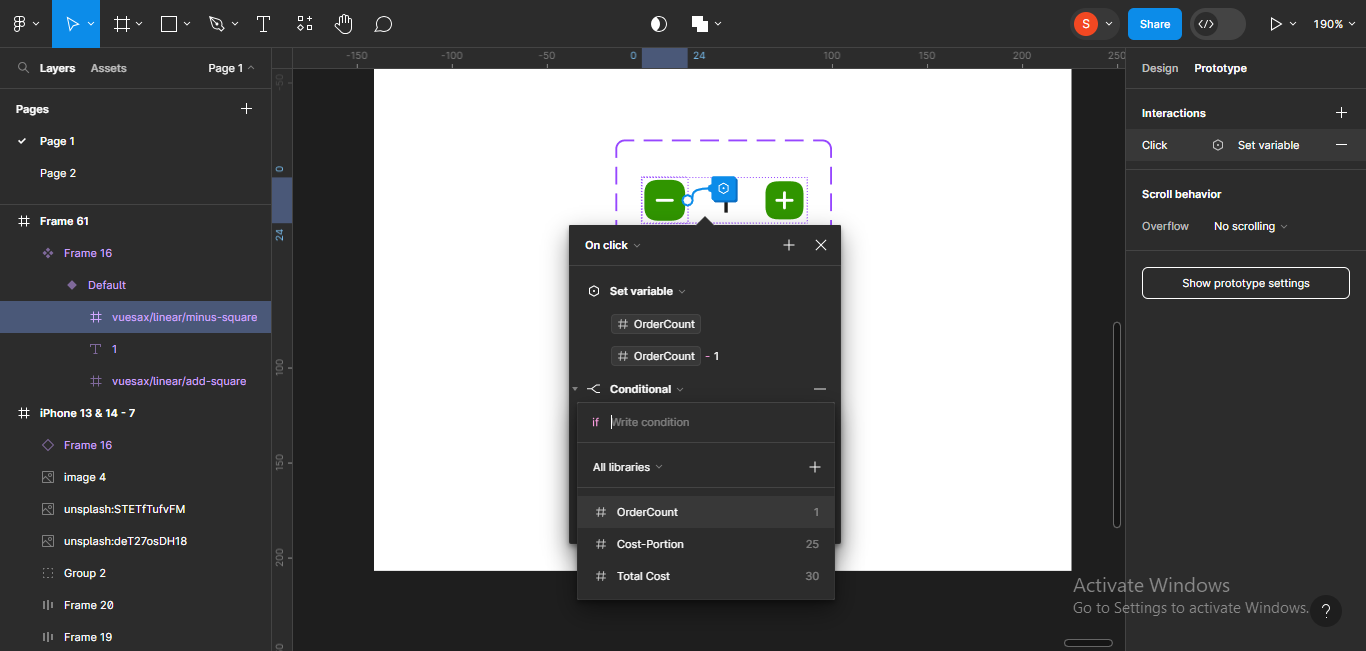 Selecting ordercount
This will bring up a list of all available conditions:
- Equal to
- Not equal to
- Greater than
- Greater than or equal to
- Less than
- Less than or equal to
I'll choose Not equal to.
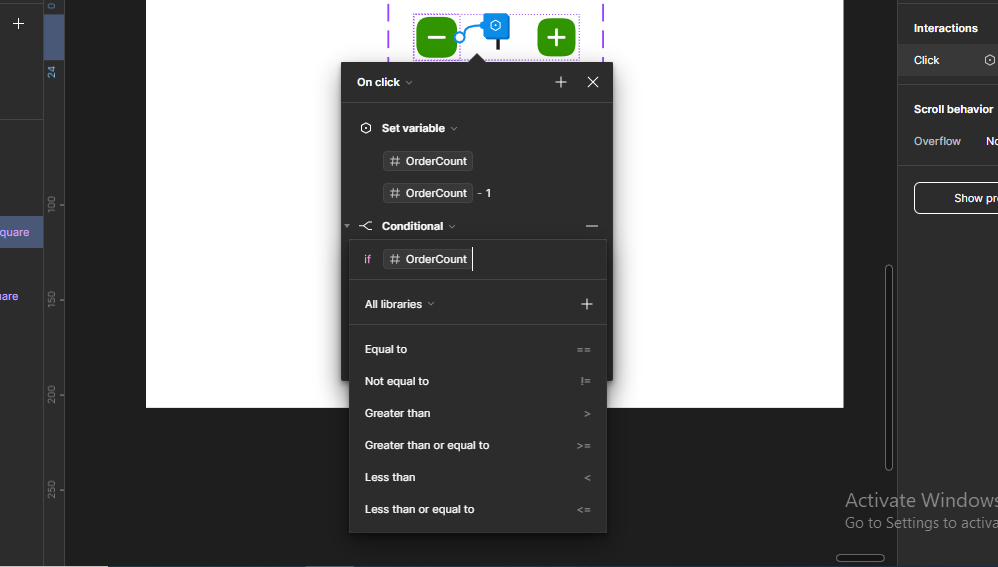 Choosing "Not equal to" condition
Next, the icon for the condition I chose will appear on the input field for writing the condition.
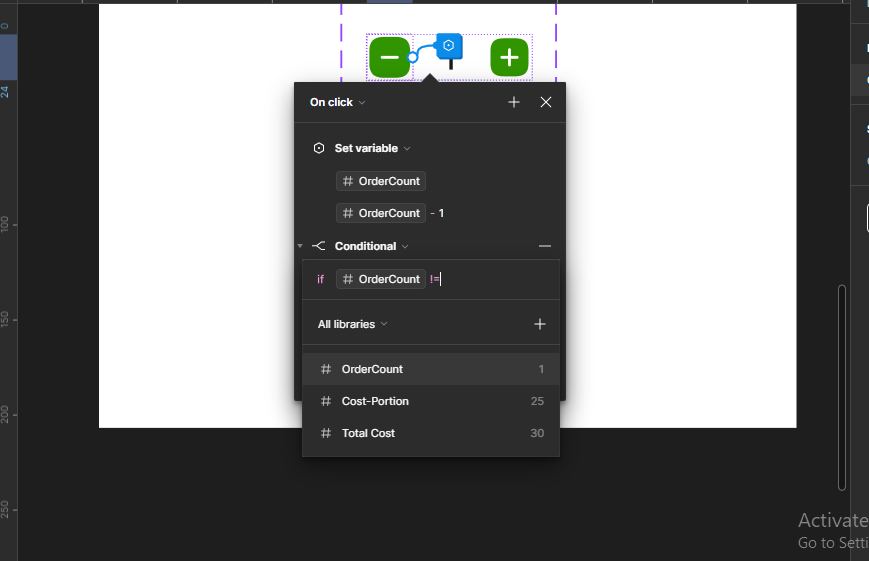 Condition appearing on the input field
Next, I'll input 0, which means the interaction is not equal to 0.
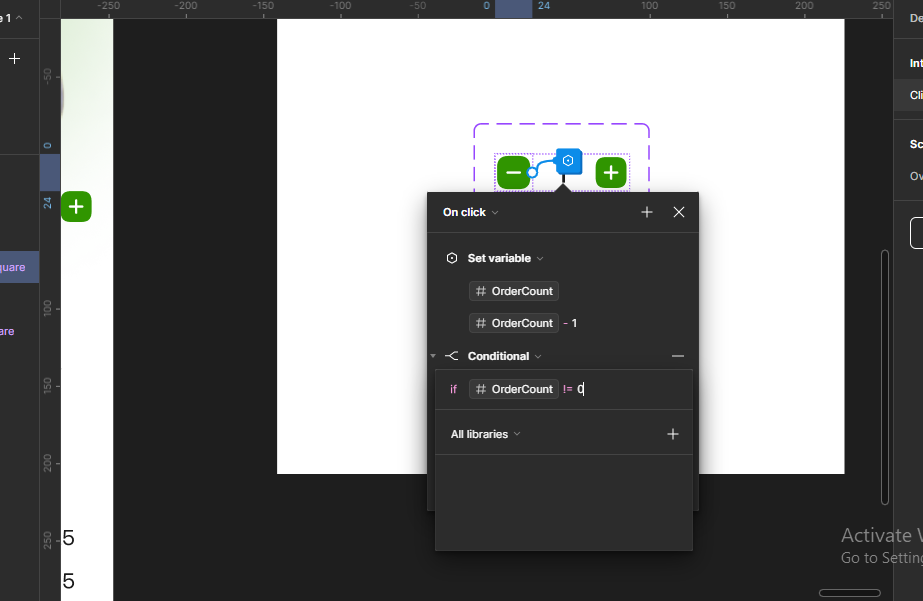 Inputing 0 (zero)
Next, I'll close the frame and try moving the Set variable section under the conditional section in the interaction. To close the Set variable section, click on the little dropdown icon.
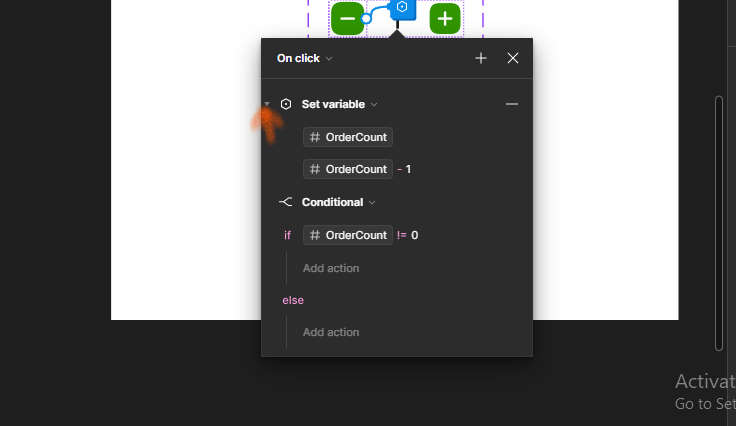 Clicking on the dropdown icon to close set variable
When you click on the little dropdown icon, the Set variable section will be minimized, allowing you move the section under the Conditional section.
 Closed set variable section
Next, I'll drag the set variable section under the conditional section. To do this, just hover on the set variable section and use your trackpad or mouse to drag it.
 Dragging set variable under conditional
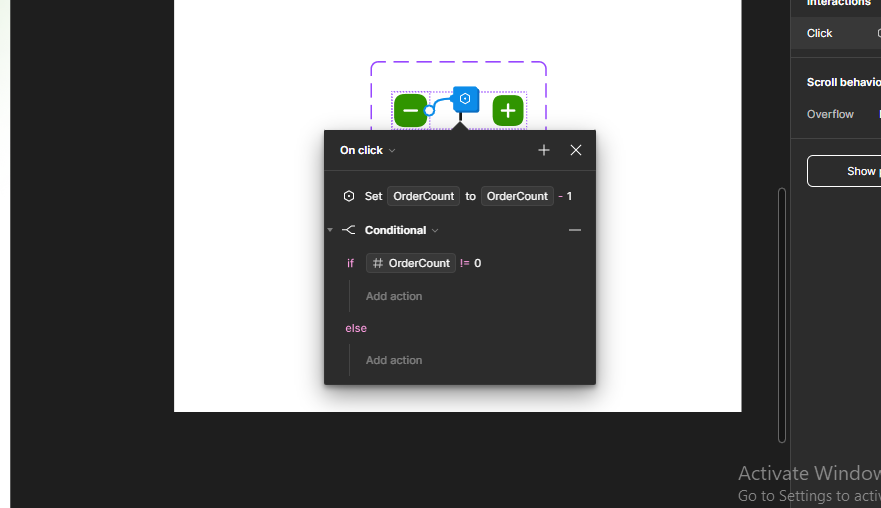
We just added a conditional to our interaction! The icon for the minus frame will change to a condition icon, showing that a conditional has been added.
 Added a conditional to minus interaction
Now, you can test this new interaction to see how it works.
Mine certainly does! It doesn't go lower than 0 anymore.
How to implement cost per portion variable
Now, we want the other number values (cost per portion and total cost) to increase in response to the number of portions a user orders.
We'll start with the Plus icon frame:
Going back to the component we've been working on...
 Frame with prototyped component
I'll click on the plus frame and go ahead to set variable.
 Opening the interactions for plus frame
I'll click on the plus icon on the interactions header.
 Clicking on the plus icon on the interactions header
Next, I'll select set variable.
 Selecting set variable
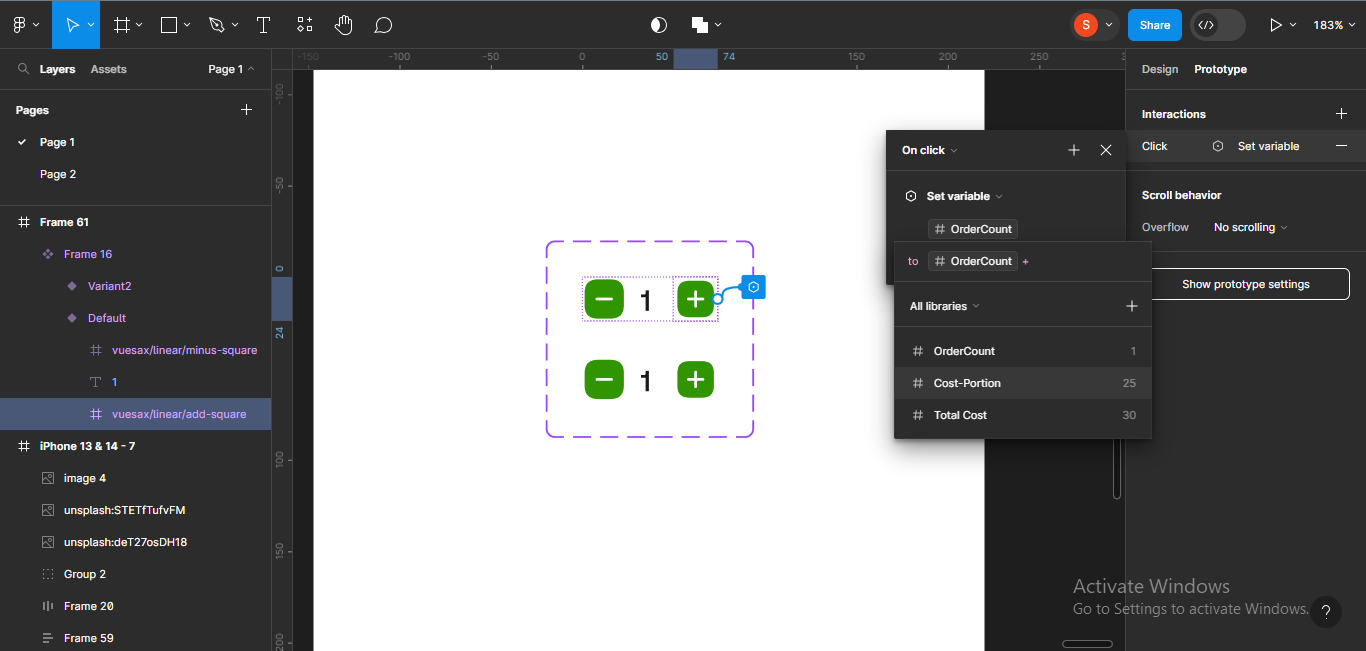
A list of all variables that have been created in the file will come up:
- The color variables for text, buttons, headings, and so on.
- Number variables – OrderCount, Cost-Portion, and so on.
 A list of all variables in the file
I'll scroll down to choose cost-portion, which is the cost per food portion a user orders.
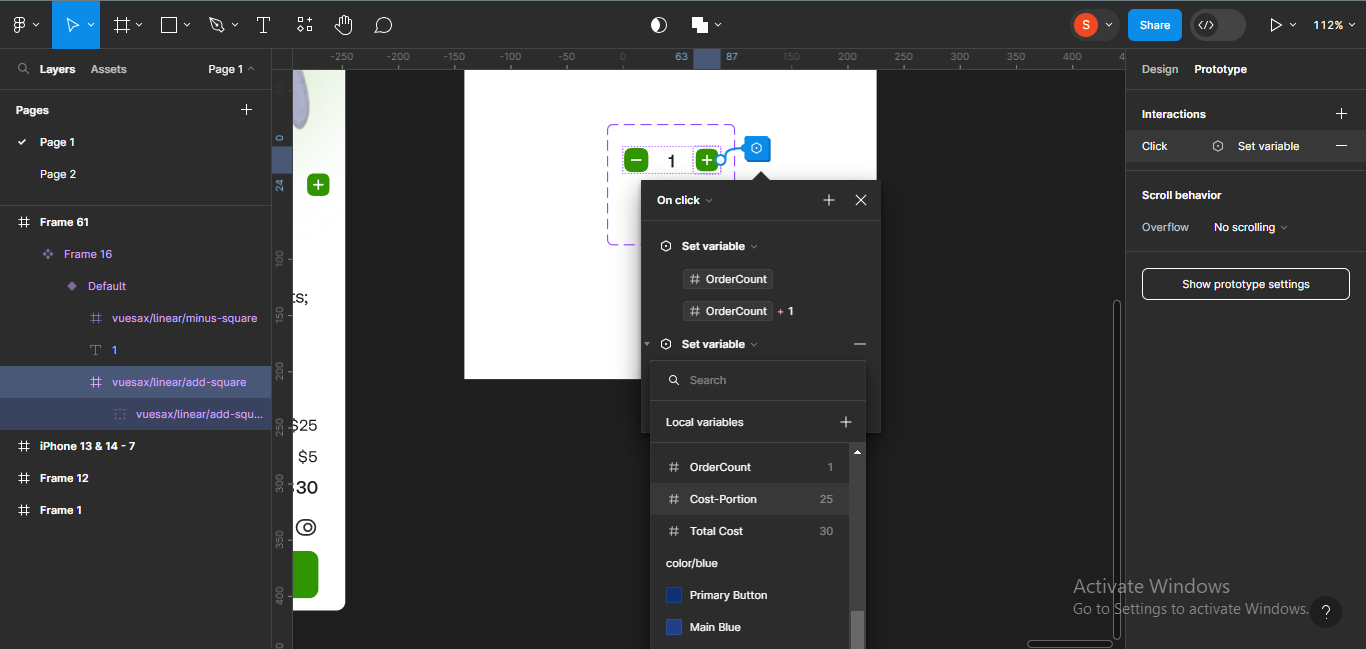 Choosing "Cost-portion" (the first time)
An input field to write an expression for the variable will come up.
 Write expression input filed
To write an expression, click on Cost-Portion again and select Addition.
 Choosing cost-portion (the second time) and selecting addition
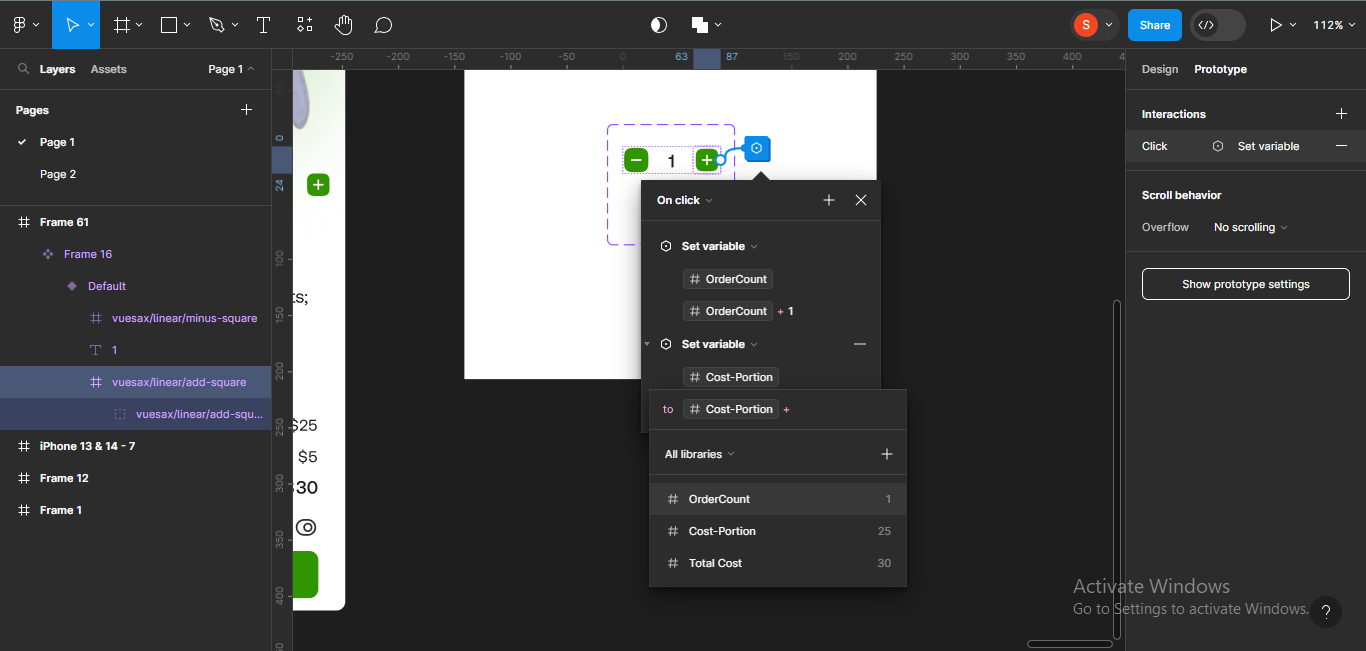 Addition icon coming up on input field
Next, I'll input 25, meaning that +25 should be added for every portion of food a user orders.
 Inputing 25
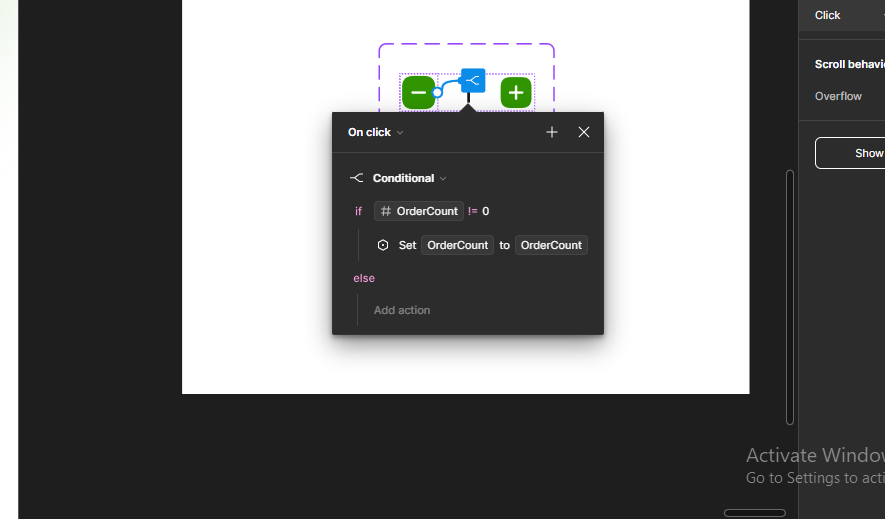
Having added the interaction for the plus frame, we'll follow the same process for the minus frame. When you're done, the Set variable section should be under the Conditional section.
 Adding interaction for the minus frame
Remember there's a conditional for the minus frame, so I'll just drag the new interaction inside the conditional.
 Dragging the new "set variable" interaction inside the conditiona;
Now, try testing the new interaction you just added. Mine certainly works!
 Testing the new interaction
Next, we still have one last variable to add (Total Cost).
Follow the steps above to recreate this interaction. Starting with the plus frame, implement the variable to make sure $25 adds when the order increases. It should show a placeholder – Total Cost + 25.
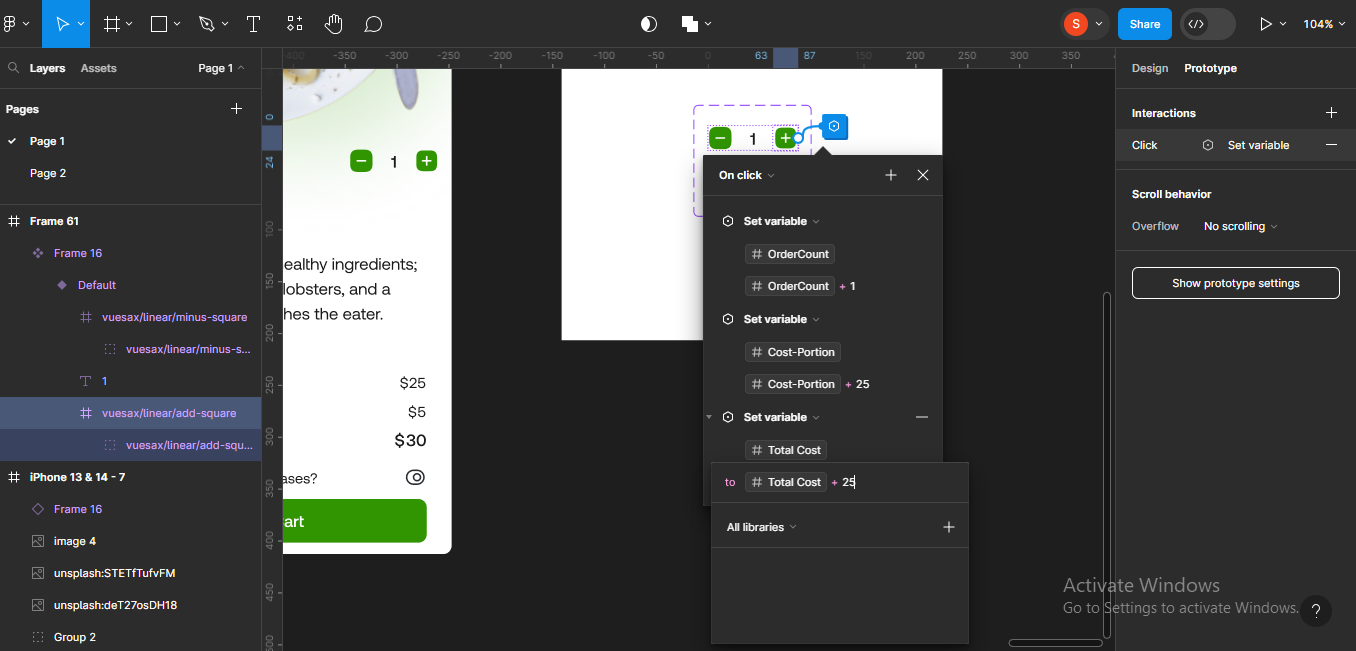 Implementing Total Cost variable
Now, do the same for the minus frame and test the interaction. Don't forget to add the new interaction inside the conditional.
Mine works!
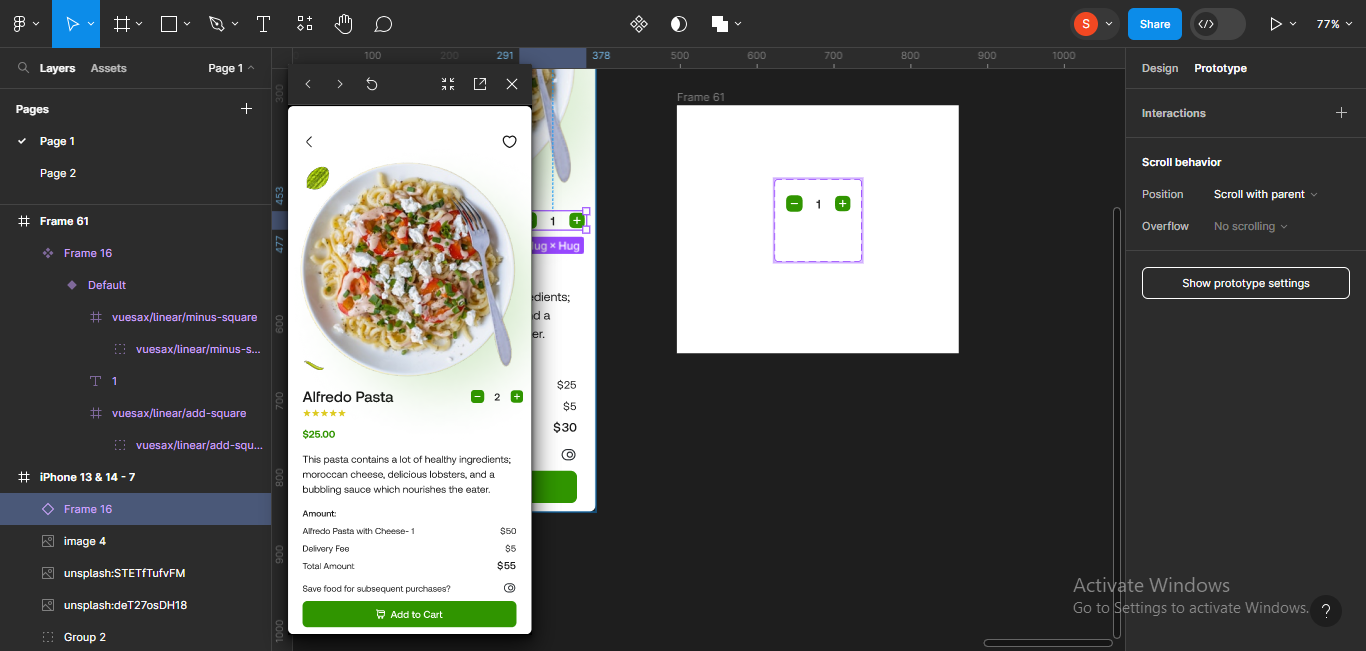 Testing the interactions
You just learnt how to implement number variables with advanced prototyping in Figma. Congrats!
Advanced Prototyping with Boolean Variables
Next, we'll create an interaction for the boolean variable we created earlier in the article.
Note that you can prototype your boolean variables in designs where you have features like checkboxes and toggles. The prototype would show how the checkbox is supposed to function.
To create the interaction, move to the prototype tab and focus on the frame containing the boolean components.
 Frame containing boolean components
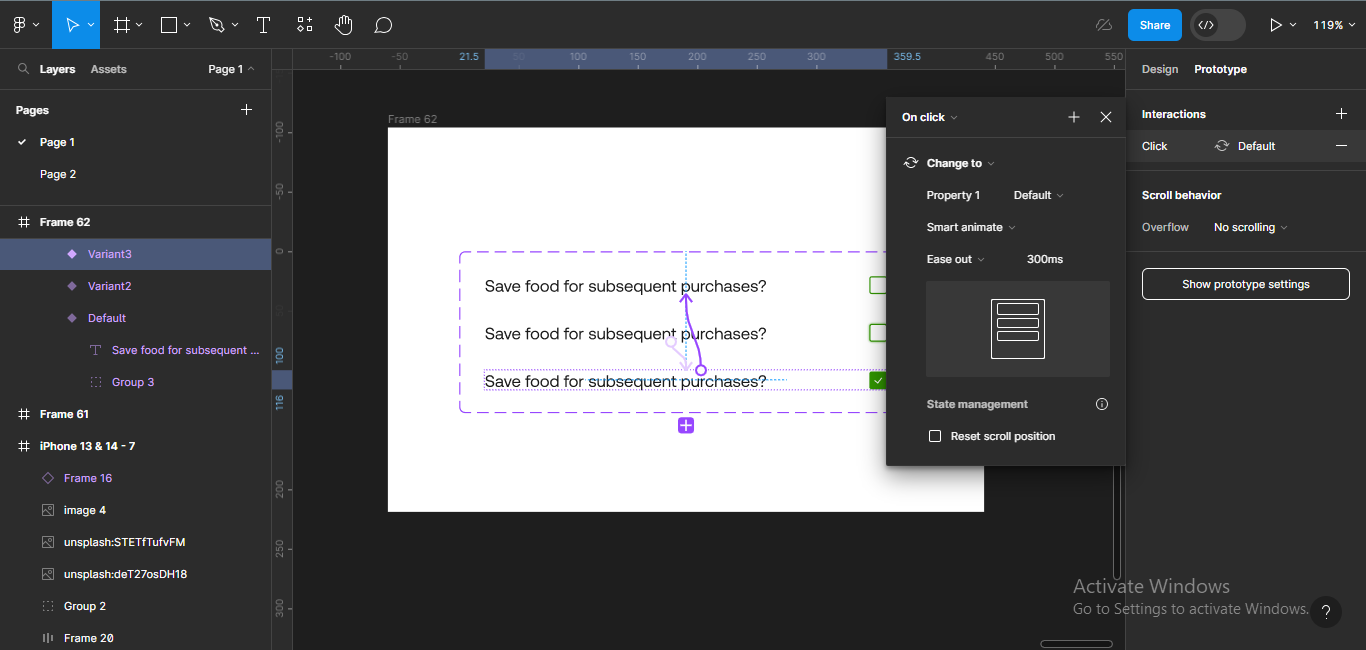
Now, our main interaction will start from the hover state because that's when a user tries to click on the checkbox. But we still need to add an action that will take the user from the default state to the hover state.
To do this, I'll just click on the first variant and drag it to the second variant.
 Connecting first variant to the second variant
I'll change On-click to While Hovering. To do this, just click on the On-click dropdown and select from the list that pops up:
- On click
- On drag
- While hovering
- While pressing
- Key/Gamepad
- Mouse enter
- Mouse leave
- Mouse down
- Mouse up
- After delay
 Clicking on the on-click dropdown
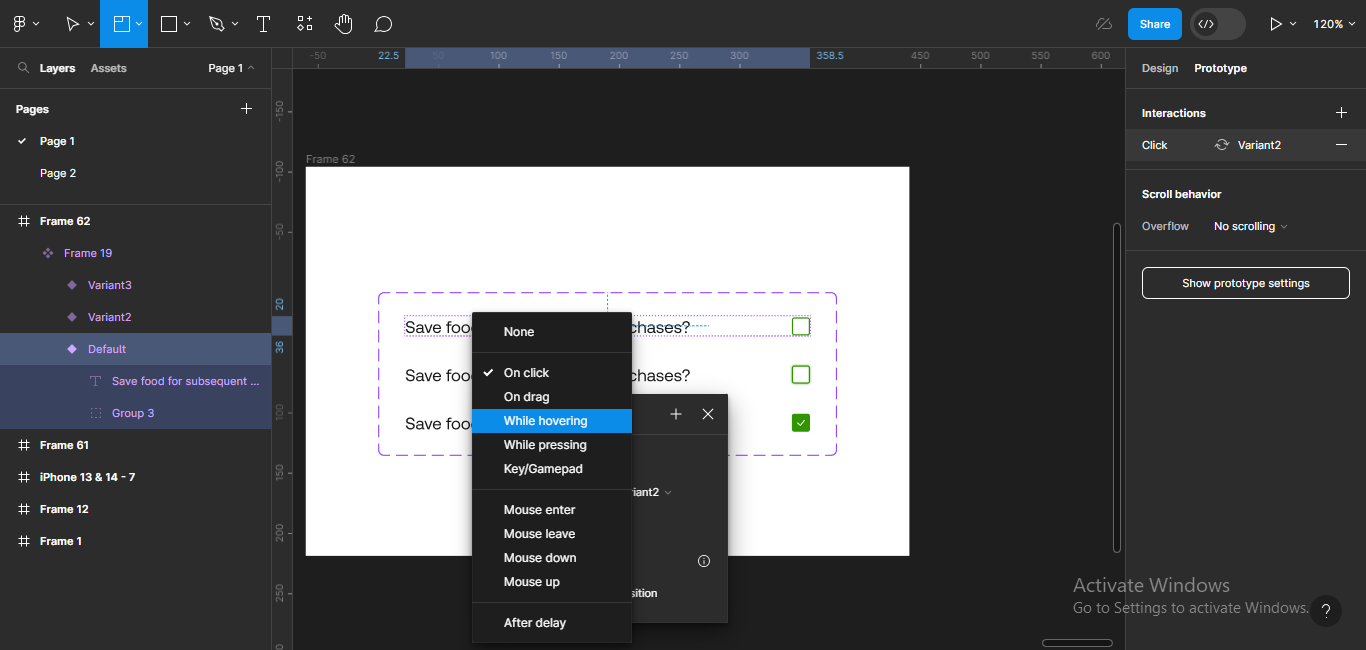 Selecting "while hovering" from the list
 Selected "while hovering"
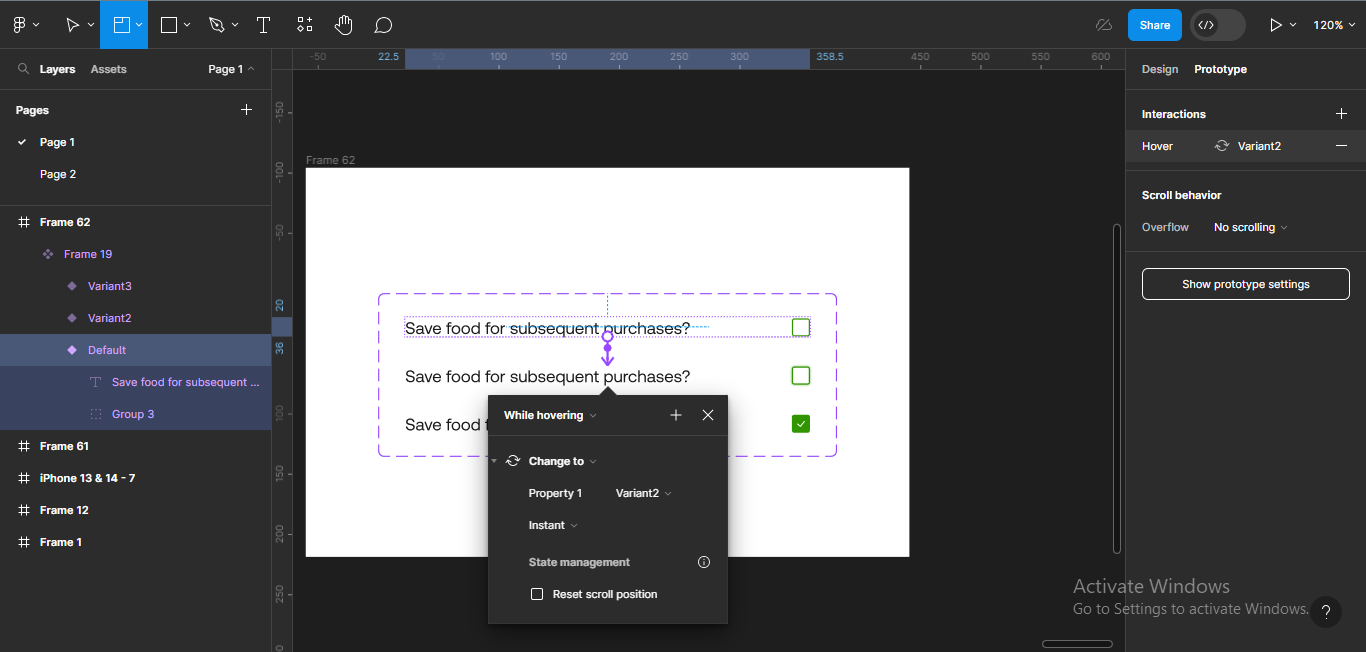
I also want to change Instant to Smart Animate, so I'll click on the dropdown icon by Instant, and select from the list that appears:
- Instant
- Dissolve
- Smart animate
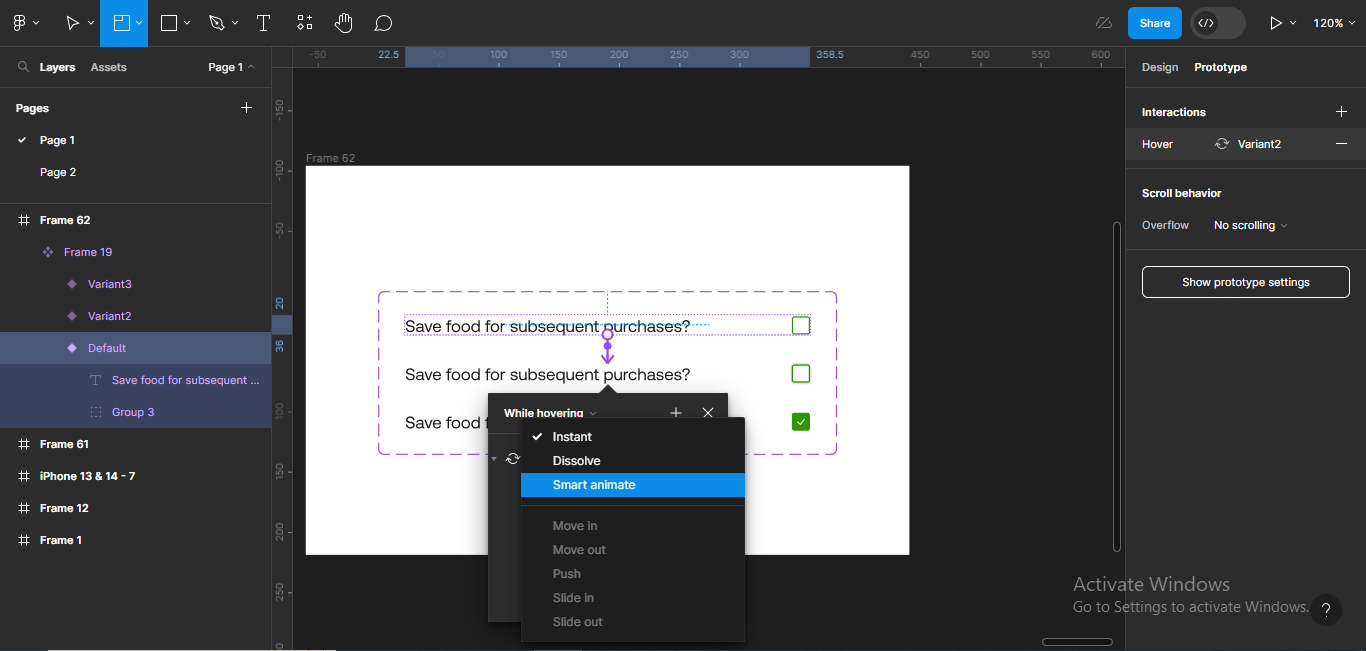 Changing "Instant" to "Smart Animate"
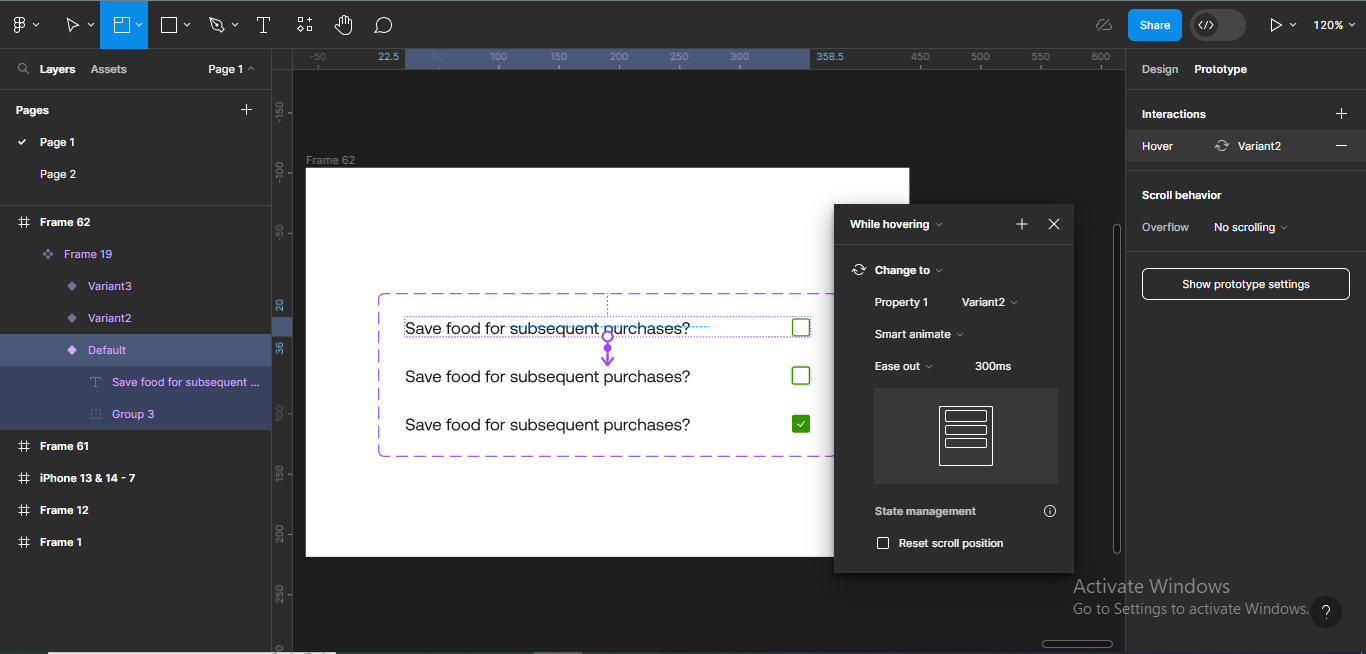 How the interaction looks
So, we're done with the first interaction and we'll get started on connecting the second variant to the third variant (Hover - Filled).
Just as we did earlier, we'll just drag the second variant to the third variant.
 Connecting the second to the third variant
 How the interaction looks
Like I said earlier, the main interaction starts from the second variant so we'll not be following the same steps we took to add the first interaction.
To continue, I'll click on the plus icon on the interaction header to add an action, and select Set variable from the list that pops up:
- Navigate to
- Change to
- Back
- Set variable
- Conditional
- Scroll to
- Open link
- Open overlay
- Swap overlay
- Close overlay
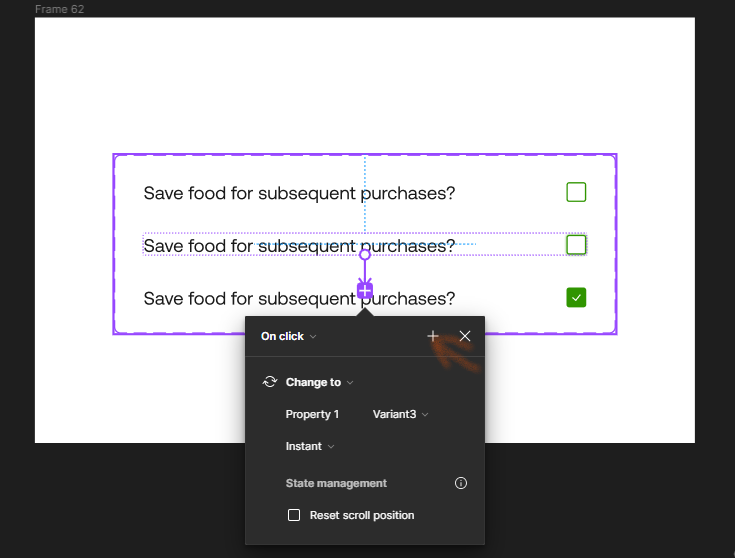 Clicking on the plus icon on the interaction
 Choosing "set variable" from the list
Next, I'll click on Pick target variable to select the boolean variable.
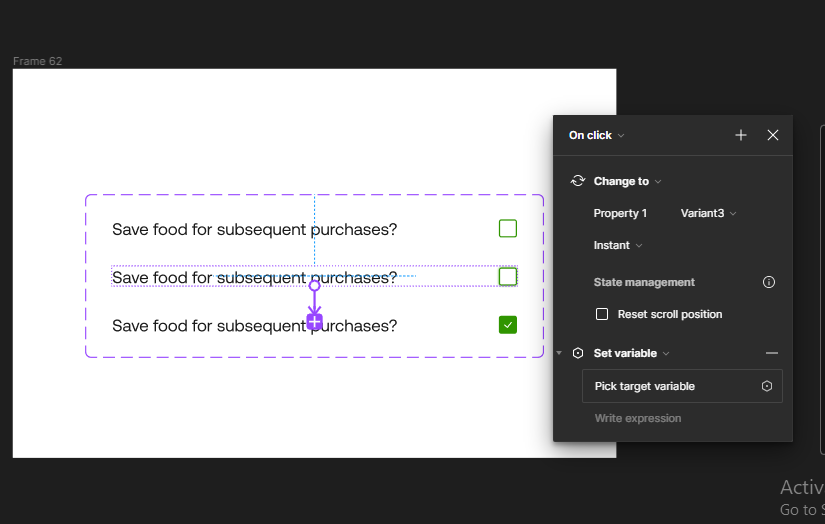 Clicking on "pick target variable"
I'll scroll down the list of variables to choose the variable I want: SaveFood.
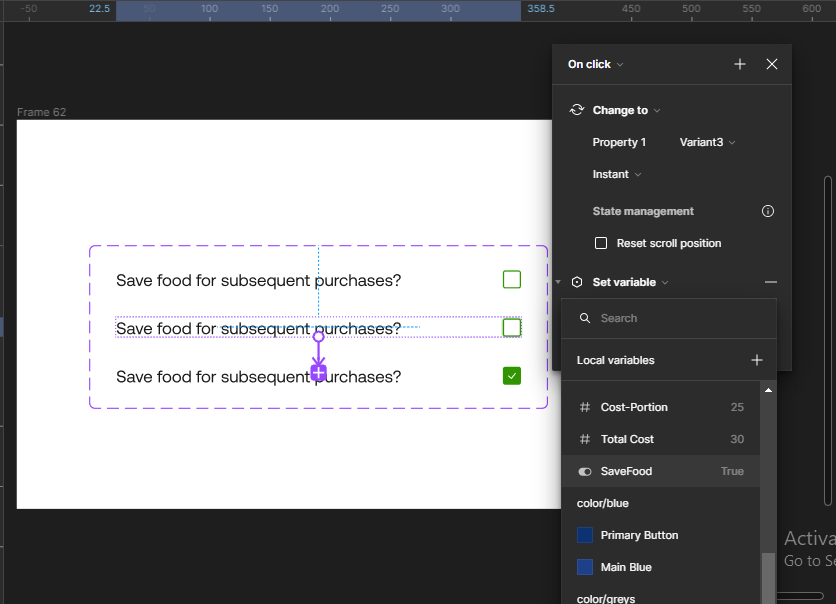 Selecting "SaveFood" variable
Now, to write the expression for this variable, we're going to say the value will be equal to true. So, I'll select True.
 Writing the expression and selecting "true"
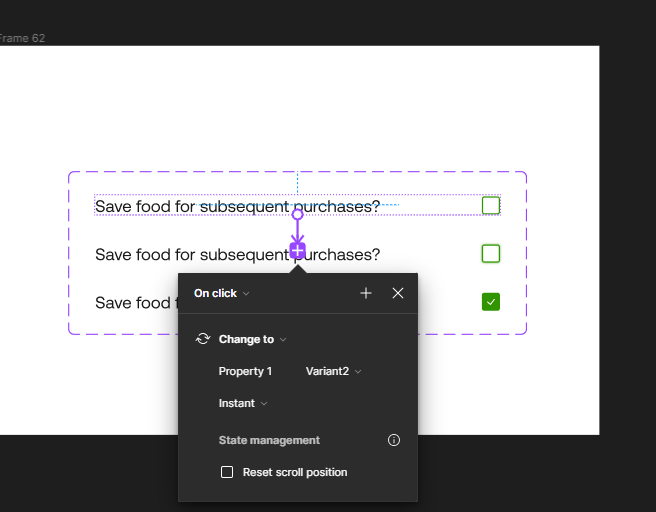
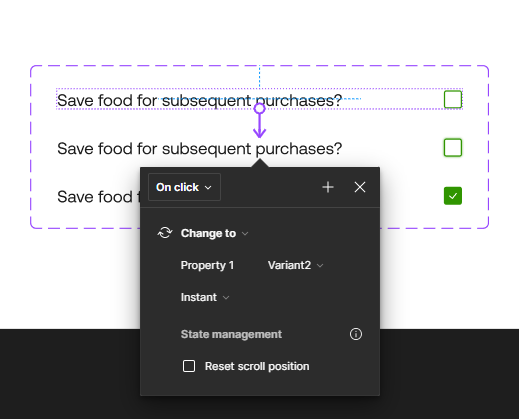
Having selected True, the expression (true) will go under the SaveFood variable, indicating that an expression was applied.
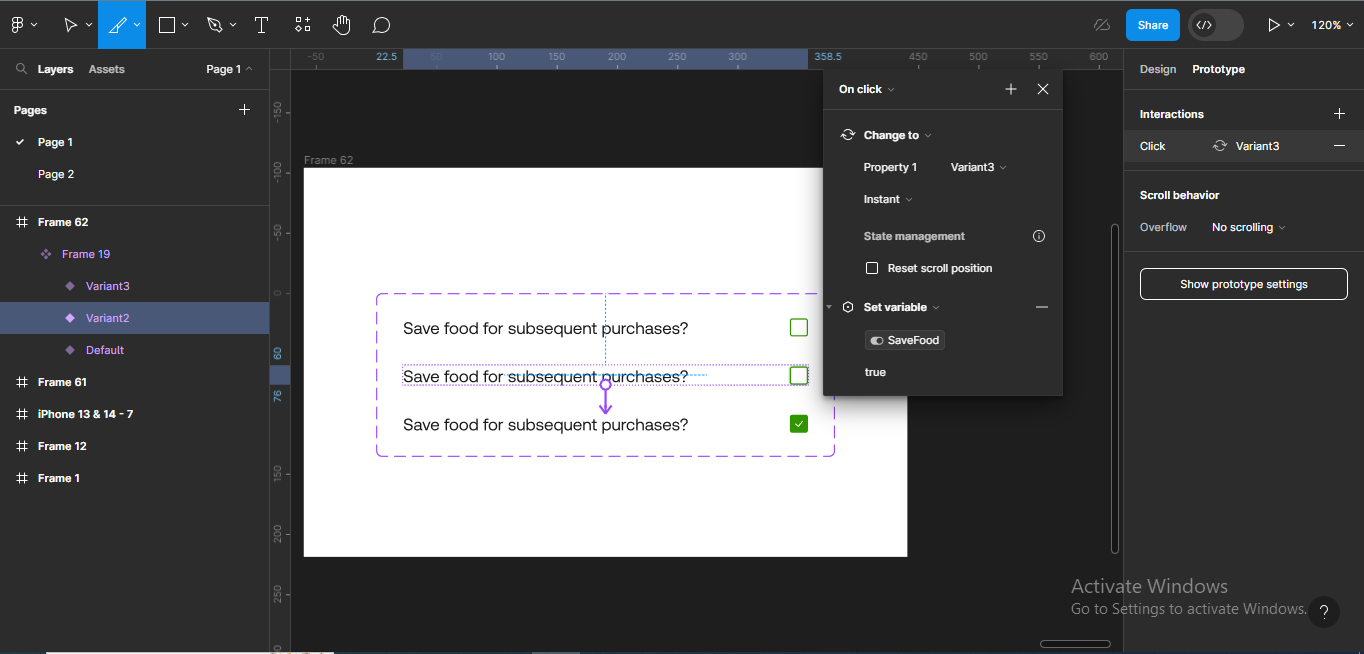 How the interaction looks
Next, we'll just copy the original component and paste it in our design so it can sync when we're checking the prototype.
 Pasting the default component in the main design
To check the prototype directly on your Figma page, click on Shift + space bar.
Mine works!

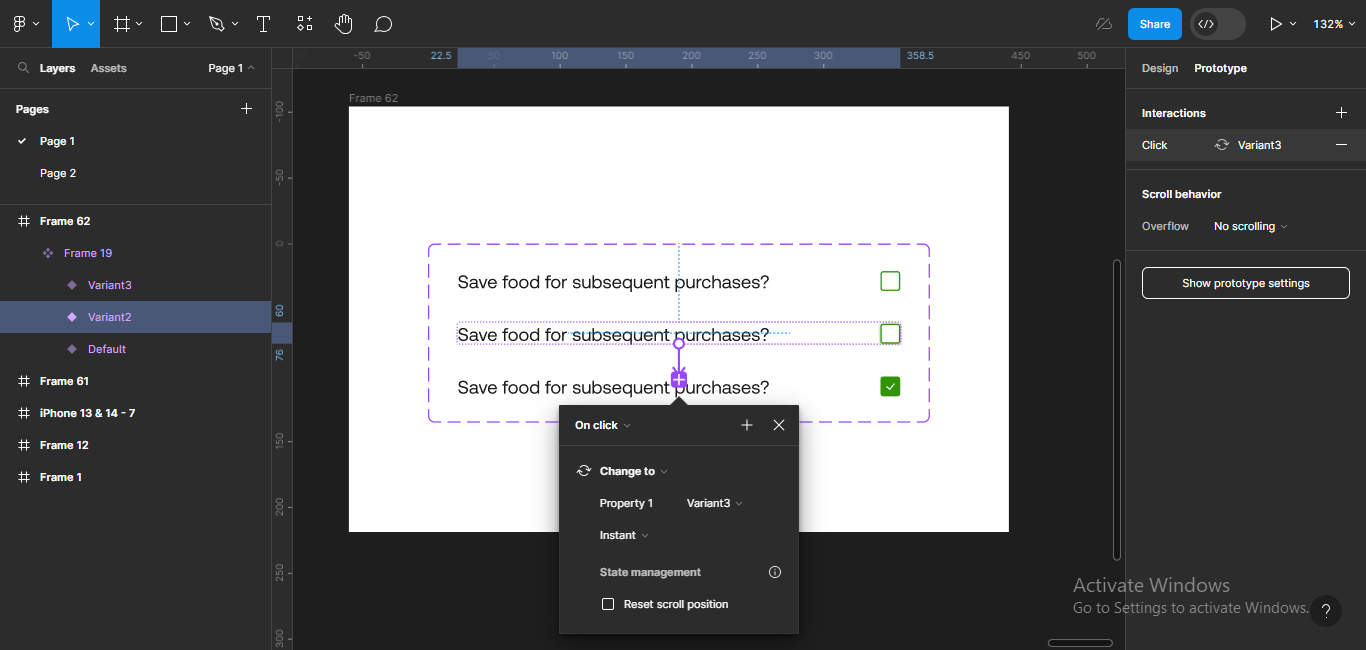
But I noticed something; I can't un-check the checkbox. No interaction was provided for that. Now, we'll quickly add that interaction so our component works perfectly.
To do this, we'll go back to our components, making sure we're in prototype mode, and drag the connection from filled all the way back to default.
 Dragging the connection from filled state to default state
Now, it's works perfectly!
How to Use Variables for Developers – Using APIs
Variables are very helpful for teams consisting of developers and/or designers.
Variables are now supported in Figma’s Plugin API—for building plugins and widgets—and in the REST API. Since variables is currently in open beta, features and functions may change as we respond to feedback. – Figma Docs
There are three documentations which contain support for variables for developers on Figma:
- For the REST API:
This API includes endpoints for querying, creating, updating, and deleting variables. – Figma docs
To be able to use this API, you must be a member of an enterprise.
- For the plugin API:
This API provides support for creating and reading variables, and binding variables to components. – Figma docs
- For the widget API: This API is connected to the plugin API. It is available to widgets by using the Plugin API the widget contains.
Widgets are interactive elements that can be used to create interactive prototypes. Widgets extend the functionality of design files and FigJam boards and are often part of the larger design system, which is a collection of reusable components.
Conclusion
Variables exist in Figma to make your designs better. They are easy to use and create, and are helpful in every design project. In order to save yourself time, make sure to incorporate variables into your design process.
The key is to practice and explore, and you'll get better as you go.
Thank you for reading this article, I hope you enjoyed it!