
I recently set up and configured Windows Terminal for my local development environment. In this article, I will walk you through the steps to configure your own Terminal.
If you have not done so already, you can download Windows Terminal from the Microsoft Store if you are on Windows 10. Windows Terminal is not available on earlier versions of Windows.
How to Configure your PowerShell Selections
 Image demonstrating the multi-tab functionality offered by Windows Terminal
One of the greatest benefits of Windows Terminal is the ability to use multiple shells in the same screen, switching between tabs to access different shells.
Once you have installed the application, open the terminal and select the v symbol at the top (next to the open tab). You should see a list of available terminals, but we will ignore those for now.
From the dropdown, select the "Settings" option and the settings.json file should open in your default text editor.
There are quite a few properties in here. The first one you will need to look at is the profiles property. The profiles property contains all of your terminal selection options - the nested defaults property contains default settings for all profiles, and the list property contains your terminal profiles.
We are going to focus on the list property, which should currently contain values similar to this:
    [
        {
            "guid": "{61c54bbd-c2c6-5271-96e7-009a87ff44bf}",
            "name": "Windows PowerShell",
            "commandline": "powershell.exe",
            "hidden": false
        },
        {
            "guid": "{0caa0dad-35be-5f56-a8ff-afceeeaa6101}",
            "name": "cmd",
            "commandline": "cmd.exe",
            "hidden": false
        }
    ],
The list property is an array of objects and determines which terminal executables can be loaded via Windows Terminal. In this example, the options available are Windows PowerShell and the CMD prompt.
Here is a breakdown of the properties in these objects:
guid: This is a Globally Unique Identifier and is used exclusively for thedefaultProfilesetting (which we will cover later).name: This is the name that displays in the dropdown when you open a new tab in the Windows Terminal.commandline: This is the executable that loads when you open a tab with this profile.hidden: This option is a Boolean and determines whether the profile appears in the new tab dropdown. If you are not using a terminal often, set this totrueto keep it from displaying in the dropdown. This allows you to preserve the profile settings while keeping your dropdown list to just the terminals you need.
 Image depicting the dropdown menu, showing two terminals enabled: Ubuntu-20.04 and Git Bash
Custom PowerShell Window Terminal Configuration Example
These default options may be all you need, depending on your development environment. I do most of my work in Windows Subsystems for Linux (WSL 2) and occasionally use Git Bash, so I have a couple of extra options.
      {
        "guid": "{07b52e3e-de2c-5db4-bd2d-ba144ed6c273}",
        "hidden": false,
        "name": "Ubuntu-20.04",
        "source": "Windows.Terminal.Wsl",
        "startingDirectory": "//wsl$/Ubuntu-20.04/home/nhcarrigan",
      },
      {
        "guid": "{00000000-0000-0000-ba54-000000000002}",
        "commandline": "%PROGRAMFILES%/git/usr/bin/bash.exe -i -l",
        "icon": "%PROGRAMFILES%/Git/mingw64/share/git/git-for-windows.ico",
        "name": "Git Bash",
        "startingDirectory": "%USERPROFILE%",
      },
You might see some new properties in here.
source: This property is generated automatically when Windows Terminal detects and generates a profile for a new terminal executable. You should not add this when you manually construct a profile.icon: This property is used to select which.icoicon file is used next to the name in the new tab dropdown.startingDirectory: This is the file path Windows Terminal will point to when you load a new tab with this profile.
How to Construct a Custom Profile in PowerShell
The profile settings for Git Bash were not automatically generated by Windows Terminal, and I had to construct them manually. If you need to do the same, here is how you can do this.
First, you will need to generate a guid value. These take the format of {00000000-0000-0000-0000-000000000000}. You can generate one in Windows PowerShell by running [guid]::NewGuid(), or in WSL by running uuidgen.
Next, define the path to the executable in the commandline property. The %PROGRAMFILES% value points to your "Program Files" directory and will account for the difference between the path for 32-bit and 64-bit applications.
If your installation is located in your user directory instead, you can use the %USERPROFILE% value. The -i -l flags are used to ensure Windows Terminal will load your .bashrc file correctly.
The icon property can be omitted, but if you want the icon to appear next to the terminal name you will need to add the file path to that icon file here.
The name property is required, and determines the display name in the dropdown selector. Here I use "Git Bash", so I know which terminal this option opens.
Finally, the startingDirectory should be set to the default filepath location you would like the terminal to target when it opens. I set mine to %USERPROFILE%, which points the terminal to my Windows user directory on load. This way I can quickly access my "documents" folder or other folders.
How to Set your Default Profile in PowerShell Windows Terminal
Now if you scroll back to the top of your settings.json file you should see a defaultProfile property. This option accepts a guid value, which should match one of the guid values in your list array. Windows Terminal will load a tab with this profile when you start it.
In my case, the bulk of my work is done in WSL so I've set my defaultProfile to that guid:
"defaultProfile": "{07b52e3e-de2c-5db4-bd2d-ba144ed6c273}",
Now when I open my Windows Terminal application, a WSL instance is spawned.
 Screenshot depicting a Windows Terminal instance, with a single tab titled "Ubuntu-20.04". "nhcarrigan @ DESKTOP-049HSUK ~" is displayed in the terminal screen.
How to Design your Color Scheme in PowerShell Windows Terminal

Now that you have set up your terminal applications, we can focus on styling the text to make it pretty.
Below your profiles property in the settings.json, you should see a schemes property. schemes contains an array of color scheme objects, which look something like this:
{
    "name" : "Campbell",

    "cursorColor": "#FFFFFF",
    "selectionBackground": "#FFFFFF",

    "background" : "#0C0C0C",
    "foreground" : "#CCCCCC",

    "black" : "#0C0C0C",
    "blue" : "#0037DA",
    "cyan" : "#3A96DD",
    "green" : "#13A10E",
    "purple" : "#881798",
    "red" : "#C50F1F",
    "white" : "#CCCCCC",
    "yellow" : "#C19C00",
    "brightBlack" : "#767676",
    "brightBlue" : "#3B78FF",
    "brightCyan" : "#61D6D6",
    "brightGreen" : "#16C60C",
    "brightPurple" : "#B4009E",
    "brightRed" : "#E74856",
    "brightWhite" : "#F2F2F2",
    "brightYellow" : "#F9F1A5"
},
If you have used tools like the chalk package on npm, you may recognize some of these color values (purple here is magenta in chalk.) The other keys do the following:
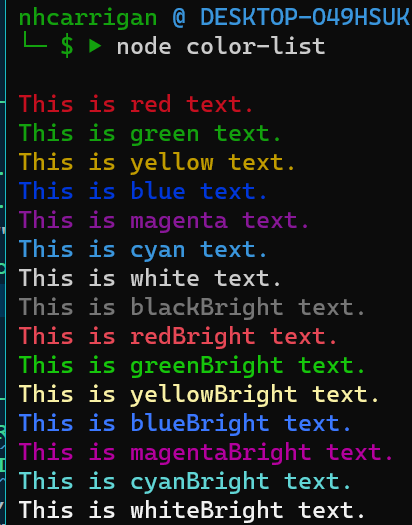 Image depicting the resulting colors from the default theme above.
name: This is used to link the color scheme to one of the profiles we created earlier.cursorColor: This determines the color of your text cursor.selectionBackground: This determines the background color of highlighted text.background: This determines the background color for your terminal.foreground: This determines the foreground color for your terminal. With my current configuration, I haven't seen any distinguishable difference when modifying this value.
The color properties determine how each color value sent by a terminal command (such as console.log) are displayed.
The settings I use for my color profile are:
    {
      "name": "Duotone Dark",
      "black": "#1f1d27",
      "red": "#d9393e",
      "green": "#2dcd73",
      "yellow": "#d9b76e",
      "blue": "#2488ff",
      "purple": "#de8d40",
      "cyan": "#6ad7d9",
      "white": "#b7a1ff",
      "brightBlack": "#353147",
      "brightRed": "#d9393e",
      "brightGreen": "#2dcd73",
      "brightYellow": "#d9b76e",
      "brightBlue": "#2488ff",
      "brightPurple": "#de8d40",
      "brightCyan": "#6ad7d9",
      "brightWhite": "#dfd1ed",
      "background": "#1f1d27",
      "foreground": "#b7a1ff"
    },
I encourage you to play with these values until you find a color set that fits your preferences.
 Image depicting the resulting colors from my theme settings.
How to Link Your Color Scheme to a Profile
Now that you have defined your color settings, you need to link those settings to a terminal profile. You could apply the settings to the defaults object within the profiles property, which will apply them to all of your terminals. I prefer to configure different color settings for different terminals, so I can quickly identify when I am in the correct window.
Let's apply this to our WSL profile. Add a colorScheme key to your profile object, and give it a value that matches your scheme's name. You should now have something like this:
      {
        "guid": "{07b52e3e-de2c-5db4-bd2d-ba144ed6c273}",
        "hidden": false,
        "name": "Ubuntu-20.04",
        "source": "Windows.Terminal.Wsl",
        "startingDirectory": "//wsl$/Ubuntu-20.04/home/nhcarrigan",
        "colorScheme": "Duotone Dark",
      }
If you reload your Windows Terminal, you should see your new colors take effect.
How to Configure Additional Appearance Settings
My full WSL profile object has a few extra settings:
      {
        "guid": "{07b52e3e-de2c-5db4-bd2d-ba144ed6c273}",
        "hidden": false,
        "name": "Ubuntu-20.04",
        "source": "Windows.Terminal.Wsl",
        "startingDirectory": "//wsl$/Ubuntu-20.04/home/nhcarrigan",
        "colorScheme": "Duotone Dark",
        "useAcrylic": true,
        "acrylicOpacity": 0.5,
        "fontFace": "PxPlus IBM VGA8",
        "fontSize": 16,
        "experimental.retroTerminalEffect": true
      },
You can tweak these settings to your preference as well.
useAcrylicwill enable the Windows 10 transparency effect on the terminal background- If the transparency effect is enabled,
acrylicOpacitywill determine how strong the transparency effect is. The lower the number, the higher the transparency. fontFacewill select which font is used for the terminal. Note that you need to have the font installed on your computer. I use the PxPlus IBM VGA8 font, and downloaded the.ttffile which Windows can install.fontSizewill determine the size of the font (inpt).- The
experimental.retroTerminalEffectis my favorite setting. This simulates "scan lines" on your terminal, much like old CRT monitors.
Here's what my final setup looks like:
 Image depicting the final result of the theme settings.
Any of these appearance settings can be passed in to the defaultSettings option instead to apply them to all of your profiles globally.
    "defaultSettings":
    {
        "useAcrylic": true,
        "acrylicOpacity": 0.1,
        "fontFace": "Cascadia Code",
        "fontSize": 10
    },
How to Configure Additional Settings in PowerShell Windows Terminal
There are a few additional settings that are worth your time to consider.
After the schemes property, you should see an actions property. This contains an array of keyboard shortcut settings.
By default, Windows Terminal assigns the copy and paste commands to Ctrl+Shift+C and Ctrl+Shift+V respectively. You can bind these to the default Ctrl+C and Ctrl+V with these settings:
    { "command": { "action": "copy", "singleLine": false }, "keys": "ctrl+c" },
    { "command": "paste", "keys": "ctrl+v" },
The singleLine option set to false preserves line breaks in the copied text.
Likely near the top of your settings.json file, there are two properties which also affect the behavior of copying text from your terminal:
copyOnSelectdefaults tofalse. When set to true, highlighting text in the terminal with your mouse will copy it to your clipboard.copyFormattingdefaults tofalse. When set to true, text formatting will also be copied (otherwise, the content is copied as plain text).
Copying text from your terminal is generally safe, but pasting text into your terminal can be dangerous. Windows Terminal comes with a couple of protections to help avoid the risks:
largePasteWarningdefaults totrueand may not be present in yoursettings.jsonfile. This setting triggers a dialogue box when you attempt to paste more than 5KB of content.multiLinePasteWarningdefaults to true and may not be present in yoursettings.jsonfile. This setting triggers a dialogue box when you attempt to paste text content that contains line breaks (a common tactic for clipboard hijacking attacks is to force commands to run on paste with newline characters).
I strongly recommend leaving these protections in place.
Additional Resources
Congratulations! You have now set up and configured your own Windows Terminal setup.
For additional customization options that you did not read about in this article, visit the Windows Terminal Customization Documentation.
For a large selection of color schemes, available as downloadable JSON files, check out Windows Terminal Themes. This is where I got my settings from, which I tweaked a little to my personal taste.
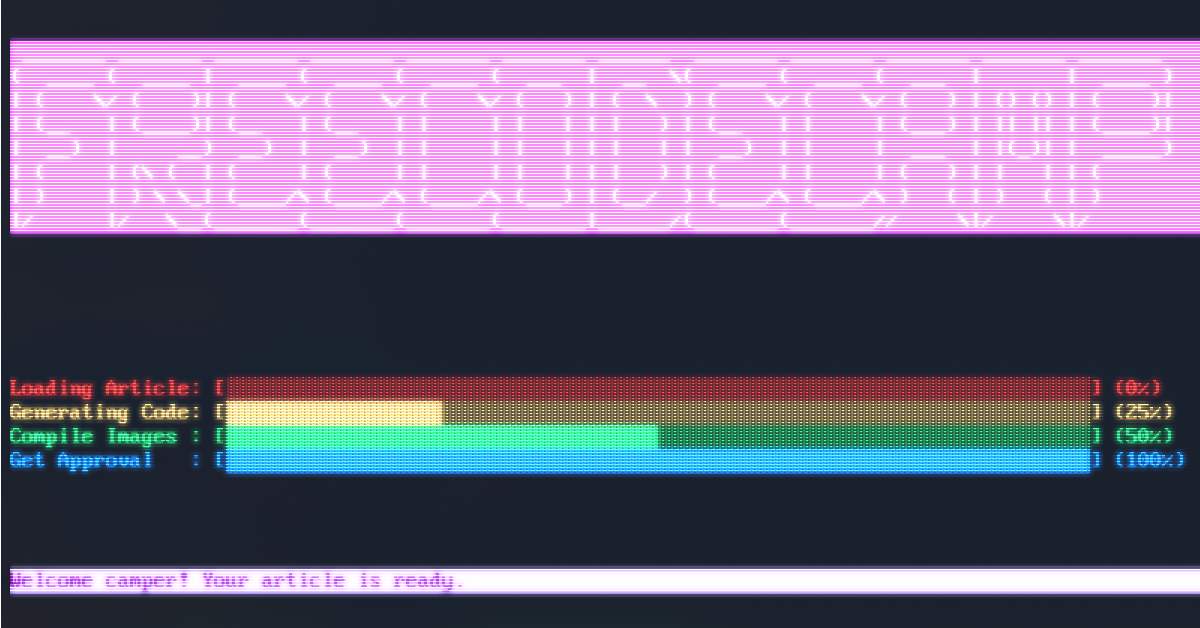
 The image which started it all - a demonstration screenshot of my email blast tool.
Happy coding.