
By Jérémy Bardon
This is part of my “React for beginners” series on introducing React, its core features and best practices to follow. More articles are coming!
If you know how to display a React component — that’s great. Now, let’s give our components their own data.
Disclaimer: This article focuses on React’s built-in state. Note that component state and Redux are not incompatible, as their purpose is different.
In my opinion, component state is specific to the component scope (for form completion). Besides, Redux state helps with sharing the same state among many components.
Do I need a state?
To learn states, let’s create a Question component. It will display a yes/no question and ask for an answer.
class Question extends React.Component {
constructor(props) { // Init props and state
super(props);
this.state = { answered: false };
this.answerQuestion = this.answerQuestion.bind(this);
}
answerQuestion({target}){ // State update (user answers to the question)
let answer = target.value === 'true' ? true : false;
this.setState({ answered: true, answer });
}
render() { // Component template in JSX
if(this.state.answered) {
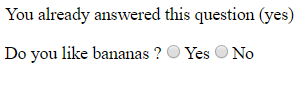
return <p>You already answered this question ({this.state.answer ? 'yes' : 'no'})</p>
}
return (
<p>
<span>{this.props.label}</span>
<label><input type="radio" name="answer" value="true" onChange={this.answerQuestion}/>Yes</label>
<label><input type="radio" name="answer" value="false" onChange={this.answerQuestion}/>No</label>
</p>
);
}
}
Our Questioncomponent contains only three functions:
_constructor_for initialization (props and state),_answerQuestion_is a callback triggered when the user answersrenderthat you probably already know — it outputs the component’s template.
This component has two distinct states. The question is not answered, or the question has an answer.
Props are only used for the question label, and besides, the state’s purpose is far more interesting.
The state is the component memory which remembers if the question has an answer. If so, it also knows the answer.
Transform state into props
Using a state in a component is easy. You have to initialize the state and call setStatefunction whenever you want to update its content.
Imagine being a component. If your state changed, your reaction would be to check if you have to update your display.
That’s how it works. React calls shouldComponentUpdatebefore calling render (see the documentation). This second function will generate the next Virtual DOM state (my last article talks about it).
class Survey extends React.Component {
  // Somewhere in constructor function
  this.state = {
    questions: [ 'Do you like bananas ?', 'Are you a developer ?' ]
  };
  // Somewhere in render function
  this.state.questions.map(question => <Question label={question}/>)
}
Components get props from other components. If those props change, then the component will update.
Actually, you already know how it works — but let’s take the example of a Survey containing some Question.
The Survey contains question labels in its state and gives it to Question as a property.
When the Survey updates its state (calls setState), the render function triggers. If so, it sends a request for Question rendering (details in React doc).
Adopt container pattern
Decoupling the view and the rest of the code has always been a big concern among developers. That’s why most of the design patterns used in frameworks extend from the MVC pattern.
If you use React with Redux, you already know the container pattern. Actually, it’s a built-in Redux feature through the connect function.
/*
  Question and QuestionContainer are both regular React components
  QuestionContainer renders a single Question component
  and provides access to redux stuff through props
*/
const QuestionContainer =
  connect(mapStateToProps, mapDispatchToProps)(Question);
It’s time to split the Question component into two components.
Question will be responsible for rendering props. This kind of component is called either functional, presentational, or a dumb component.
QuestionContainer will deal with state management.
const Question = (props) =>
  <p>
    <span>{props.label}</span>
    <label><input type="radio" name="answer" value="true" onChange={props.answerQuestion}/>Yes</label>
    <label><input type="radio" name="answer" value="false" onChange={props.answerQuestion}/>No</label>
  </p>

class QuestionContainer extends React.Component {
  constructor(props) {
    super(props);
    this.state = { answered: false };
    this.answerQuestion = this.answerQuestion.bind(this);
  }
  answerQuestion({target}){
    let answer = target.value === 'true' ? true : false;
    this.setState({ answered: true, answer });
  }
  render() {
    if(props.answered) {
      return <p>You already answered this question (props.answer ? 'yes' : 'no'})</p>
    }
    // Here is the trick
    return <Question label={this.props.label} answerQuestion={this.answerQuestion}/>
  }
}
For comparison with the MVC design pattern, Question is a View and QuestionContainer is a Controller.
Other components which need Questionwill now use QuestionContainer instead of Question. This consideration is quite accepted in the community.
Be careful about setState anti-pattern
Using this setState is pretty straightforward.
Pass the next state as the first and only parameter. It will update current state properties with the new passed values.
// Very bad pratice: do not use this.state and this.props in setState !
this.setState({ answered: !this.state.answered, answer });

// With quite big states: the tempatation becomes bigger
// Here keep the current state and add answer property
this.setState({ ...this.state, answer });
To sum up, don’t use this.stateand this.propsinside setState calls.
Those variables may not have the values you expect. React optimizes state changes. It squashes multiples changes into one for performance issues (before Virtual DOM optimizations).
// Note the () notation around the object which makes the JS engine
// evaluate as an expression and not as the arrow function block
this.setState((prevState, props)
              => ({ ...prevState, answer}));
You should prefer the other form of setState. Provide a function as the only parameter and use prop and state parameters (see the documentation).
The complete survey component
In this article, we’ve covered the main state usages in React. You can find the complete code for the Survey component in the following Codepen.
That was all about states. You’ve encountered components, props, and states, and now you have the beginner kit to play with React.
I hope you enjoyed reading this article and learned a lot of things!
If you found this article useful, please click on the ? button a few times to make others find the article and to show your support! ?
Don’t forget to follow me to get notified of my upcoming articles ?
This is part of my “React for beginners” series on introducing React, its core features and best practices to follow.
Check out my Other Articles
➥ JavaScript
- How to Improve Your JavaScript Skills by Writing Your Own Web Development Framework ?
- Common Mistakes to Avoid While Working with Vue.js